
Custom Region Types – Add, Manage, And Use Custom Region Types
Region Types give enterprise businesses a flexible way to classify and organize territories within their last mile route optimization workflows. By defining custom Region Types – such as sales territories, market segments, or service zones – you can structure your Regions Database in a way that reflects your unique operational needs. This guide walks you through how to add and manage custom Region Types, and how to apply them when building your regional hierarchy.
Table of Contents
Add Custom Region Types – Access The Add Region Type Editor
When adding a new Region to your Regions Database, you are required to complete the mandatory “Region Type” field by selecting from a pre-established list of types, such as city/municipality, state, or market segment.
However, if none of the available types meet your needs, you can create custom Region Types. To access the “Add Region Type” editor, you have two options:
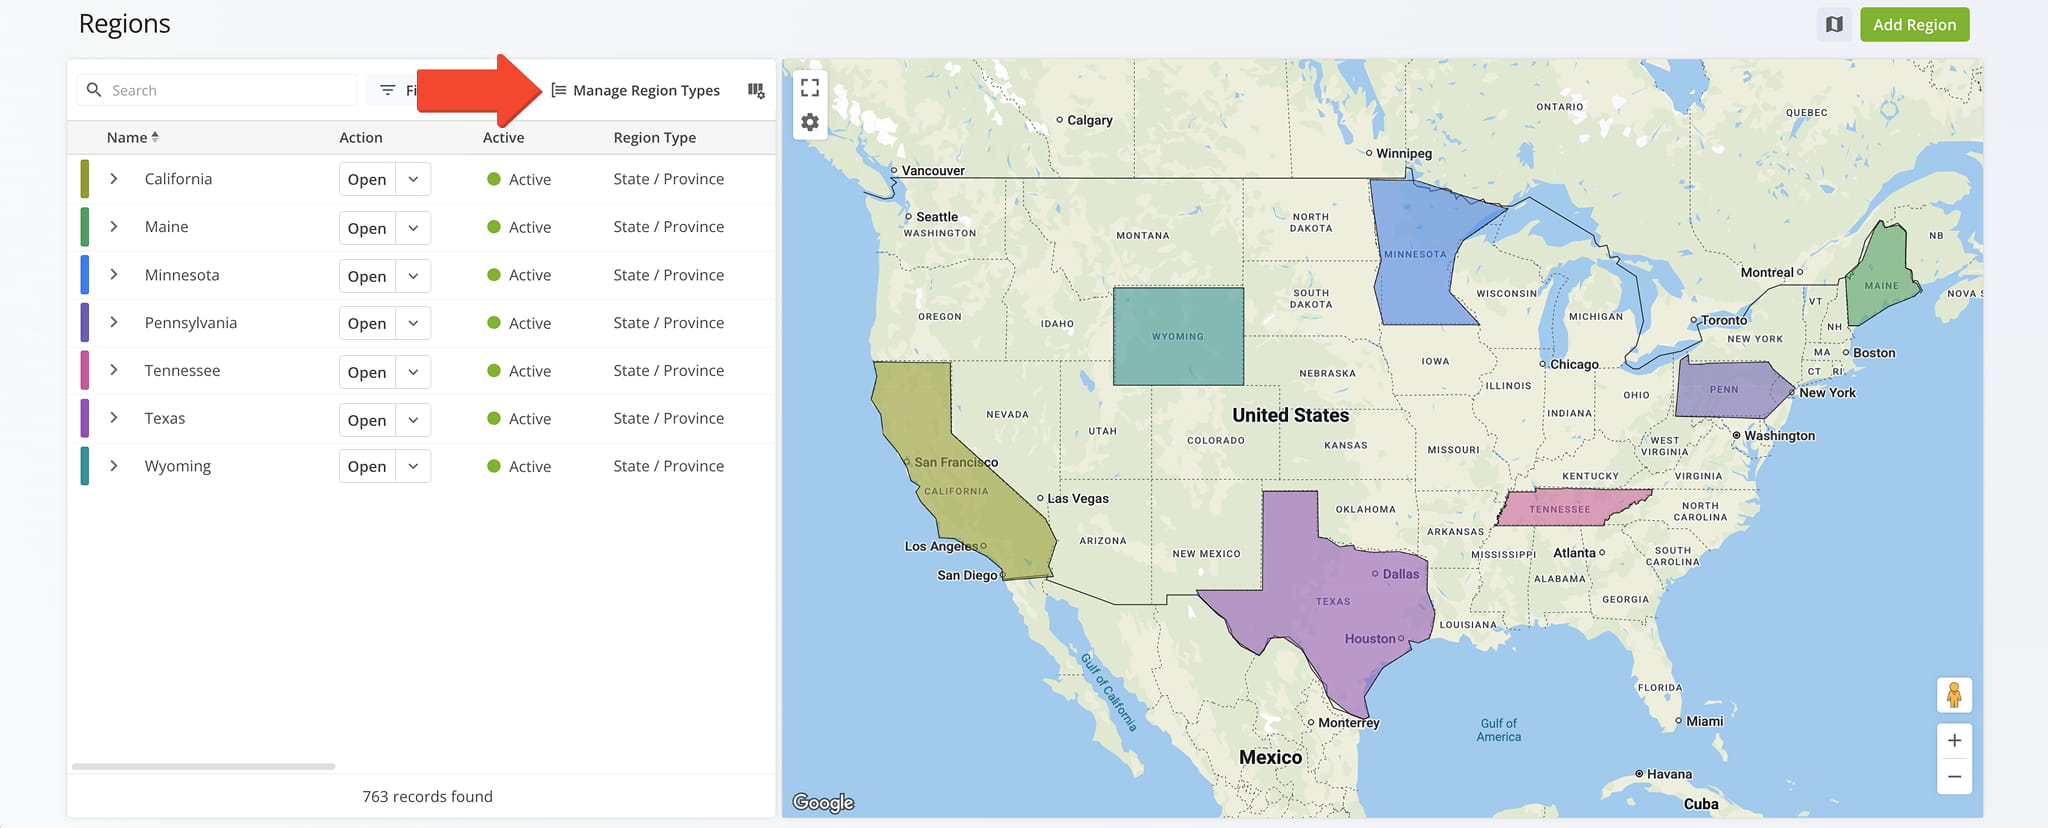
1. From the Regions page, click the “Manage Region Types” button in the upper-right corner.
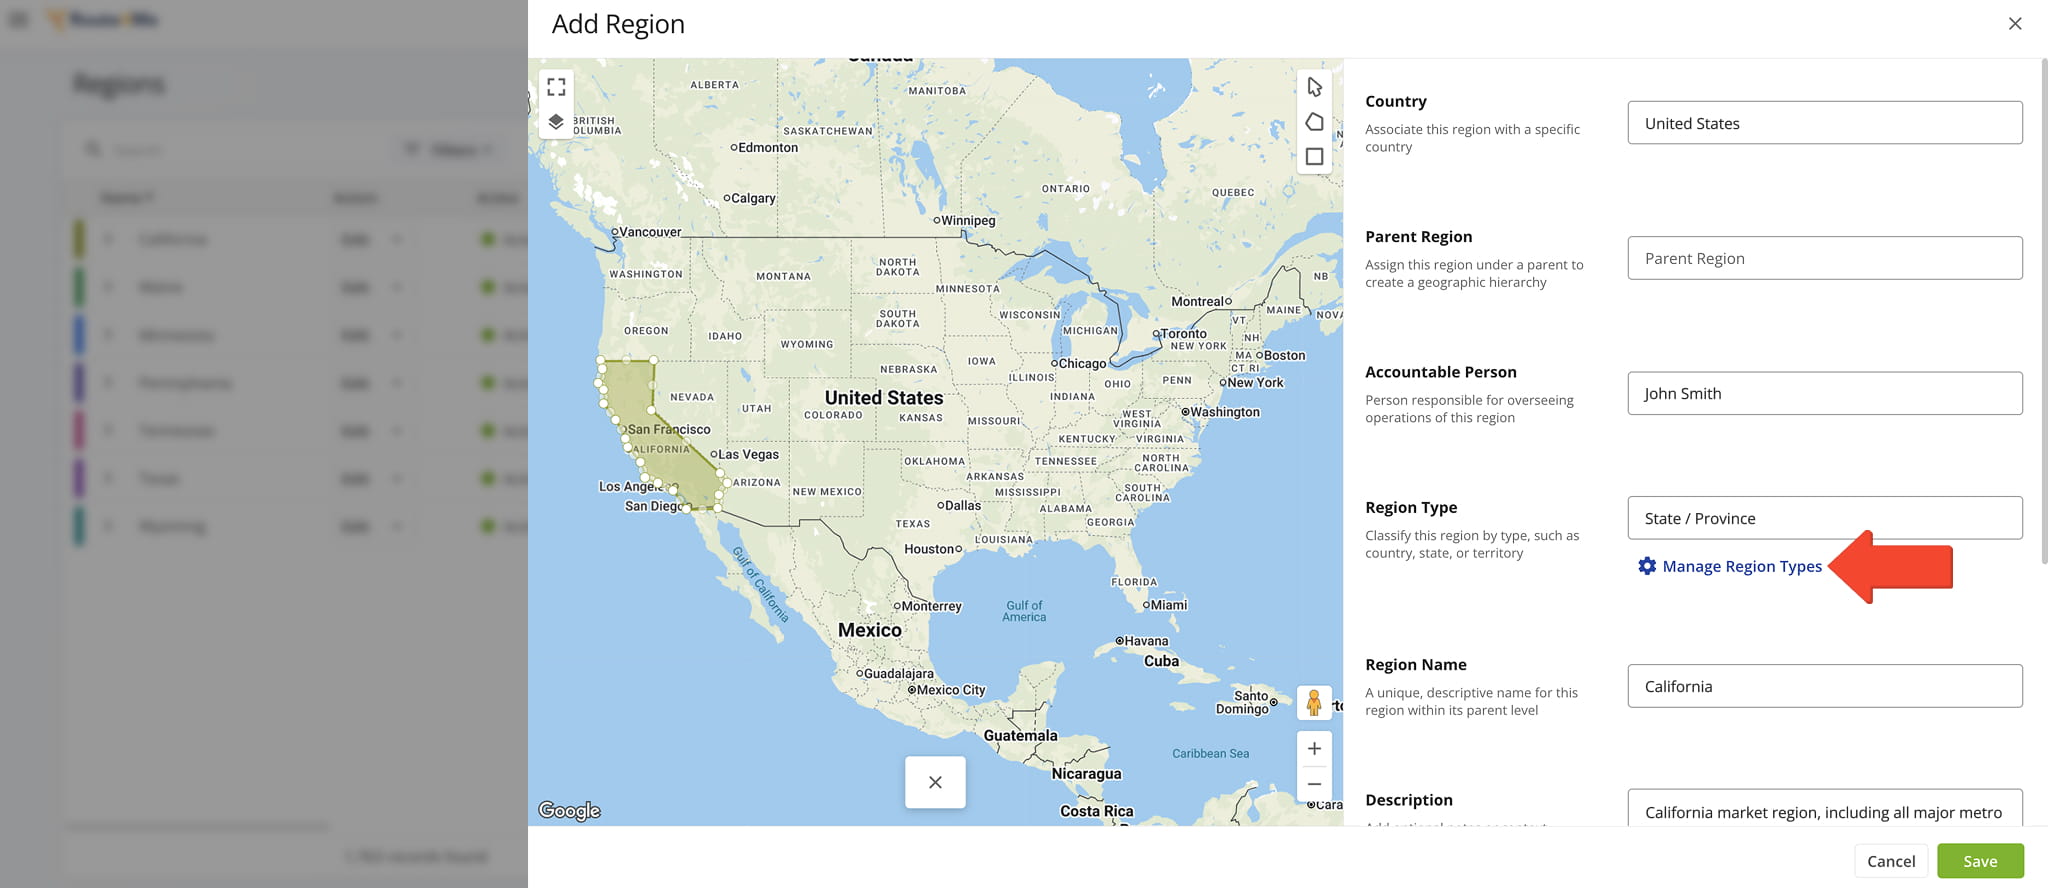
2. From the “Add Region” editor, click the “Manage Region Types” button located beneath the “Region Type” field.
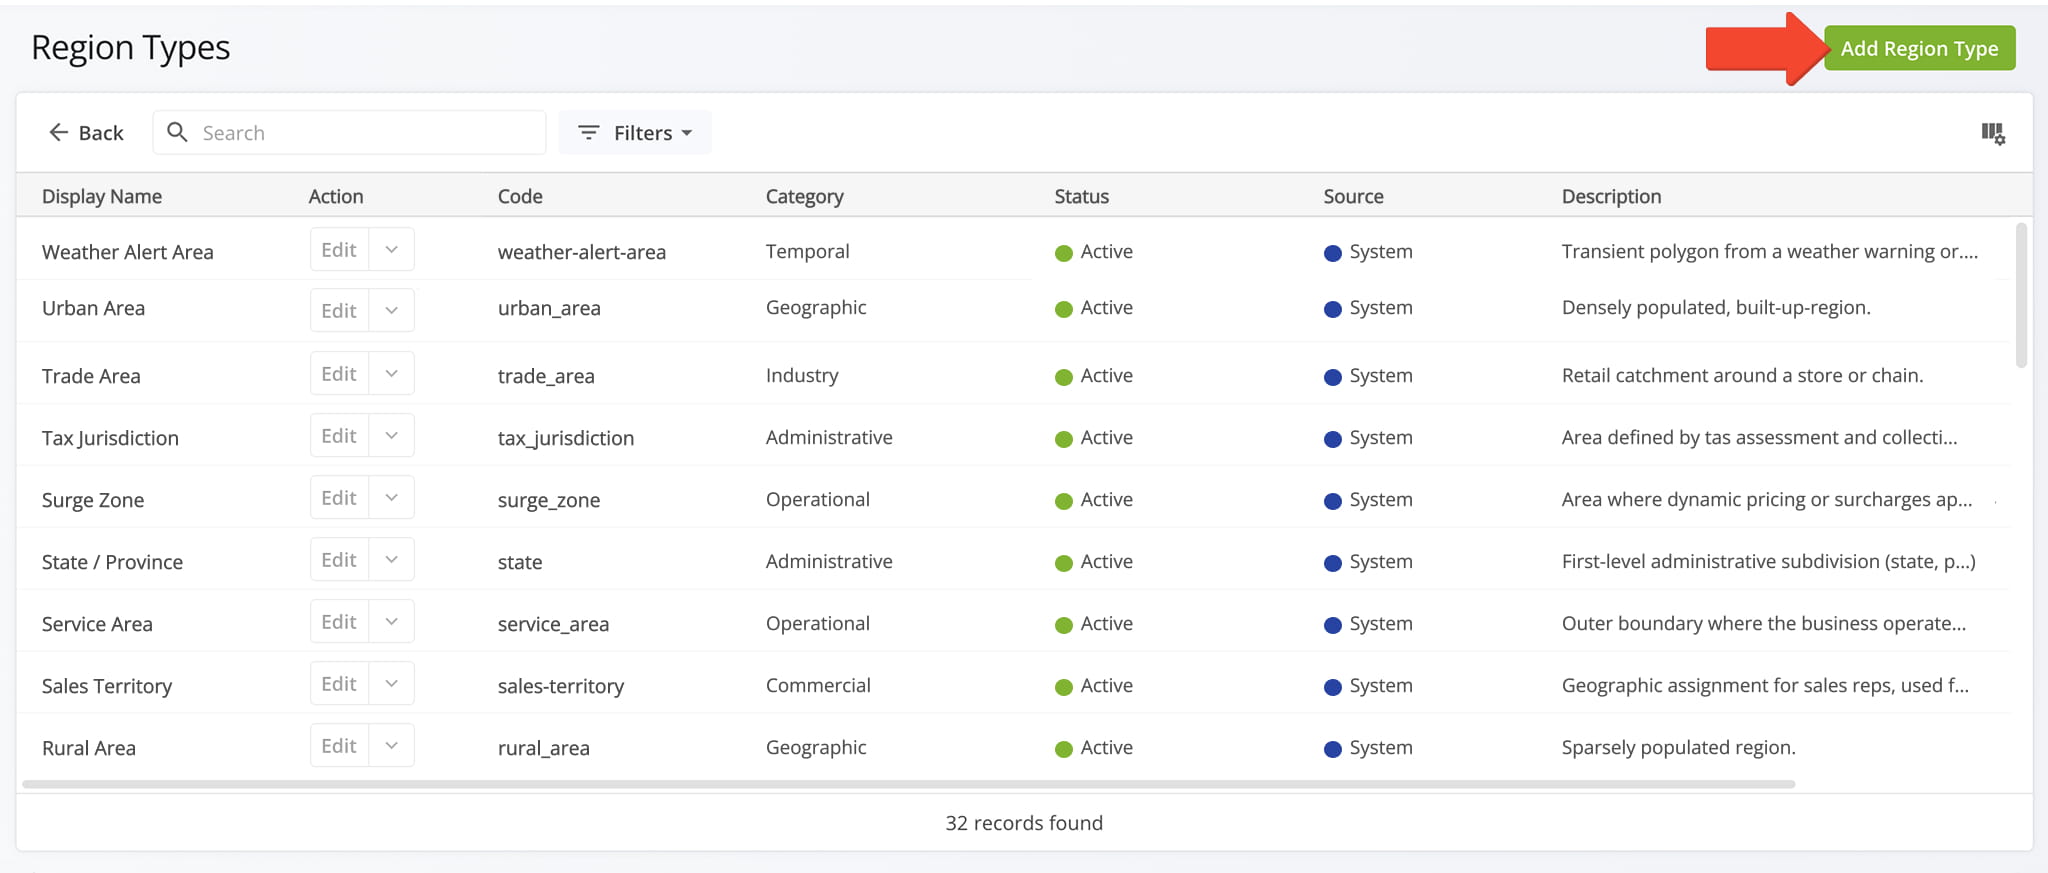
Both options redirect you to the Region Types page, where you can click the “Add Region Type” button in the upper-right corner to open the editor.
Complete all fields – described in the table below – then click “Save” to create your new Region Type. It will automatically appear in your Region Type database and be available for immediate use.
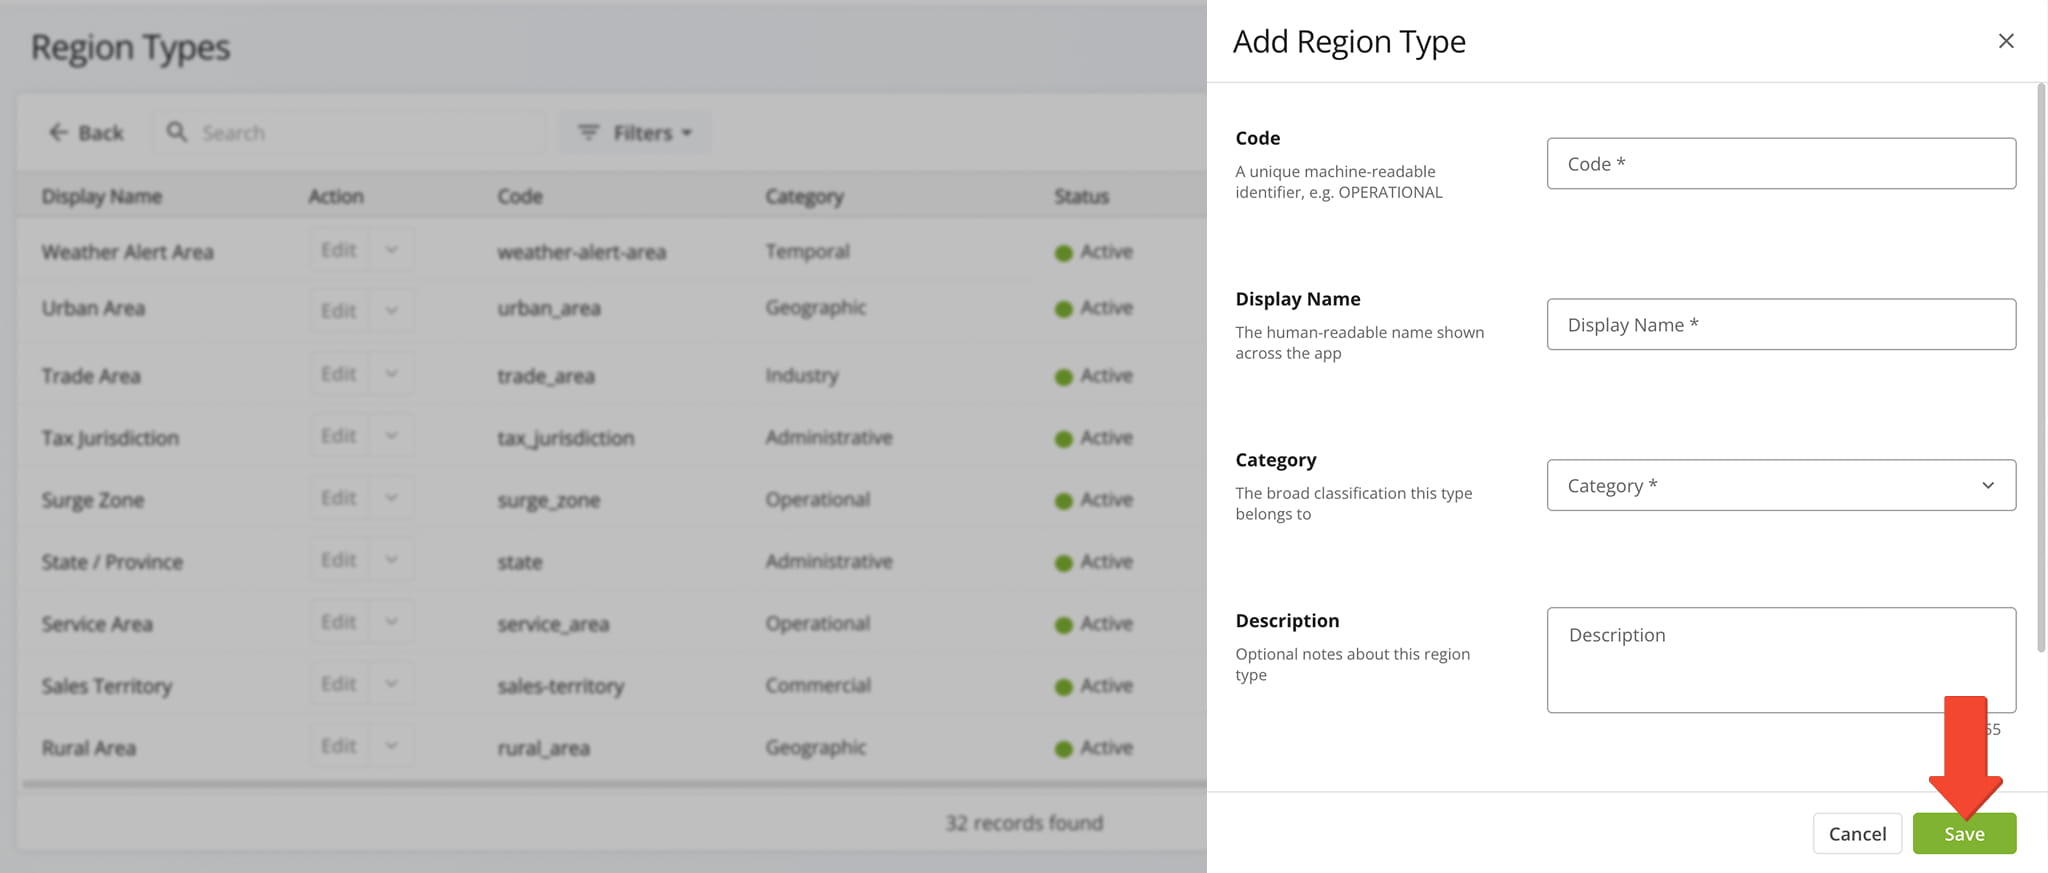
Region Type Fields
Manage Region Types – Edit And Delete Region Types
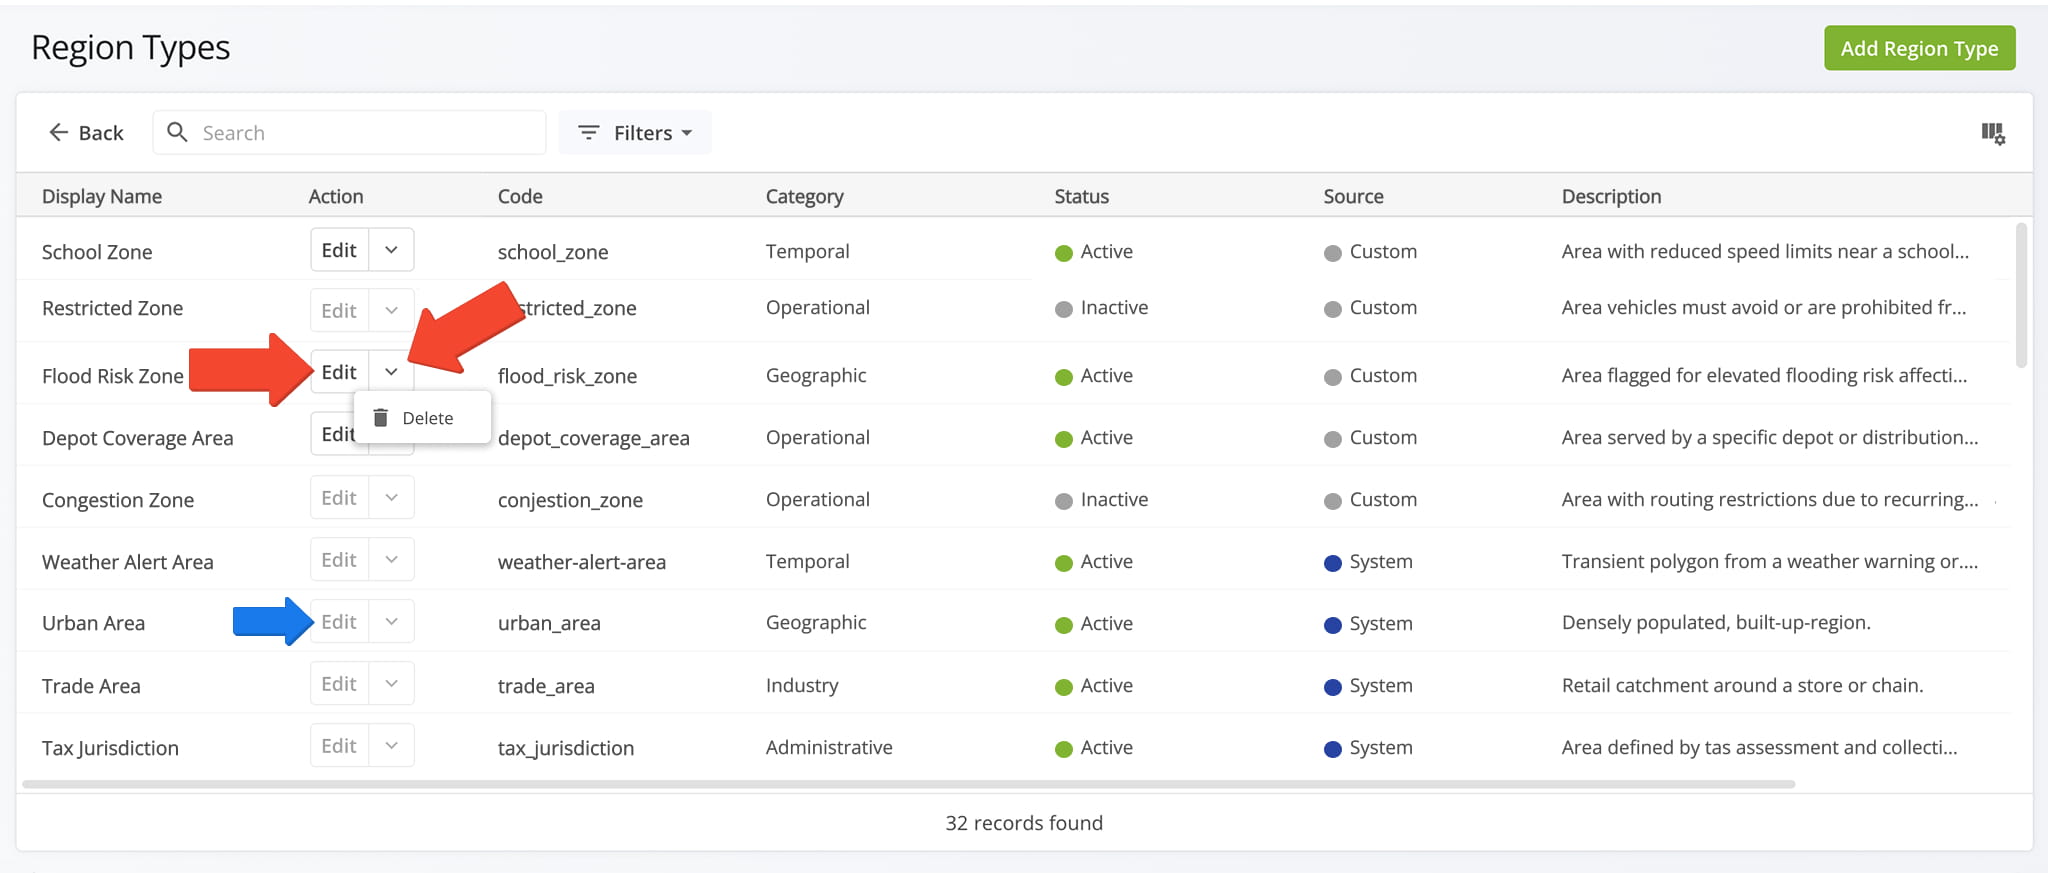
The Region Types page lists all Region Types available in your account, including both system-wide and custom types. System-wide Region Types cannot be edited or deleted. Their edit and delete options are inaccessible by design.
Only active, custom Region Types can be edited or deleted. To edit a Region Type, click the “Edit” button next to it. To delete, click the Downward Arrow button and select “Delete“. NOTE: These options are not available for inactive custom Region Types.
You can also customize the data displayed in the data table by clicking the Column Icon in the upper-right corner. Select which data columns appear and drag them into your preferred order. All available data columns are described in the table below.
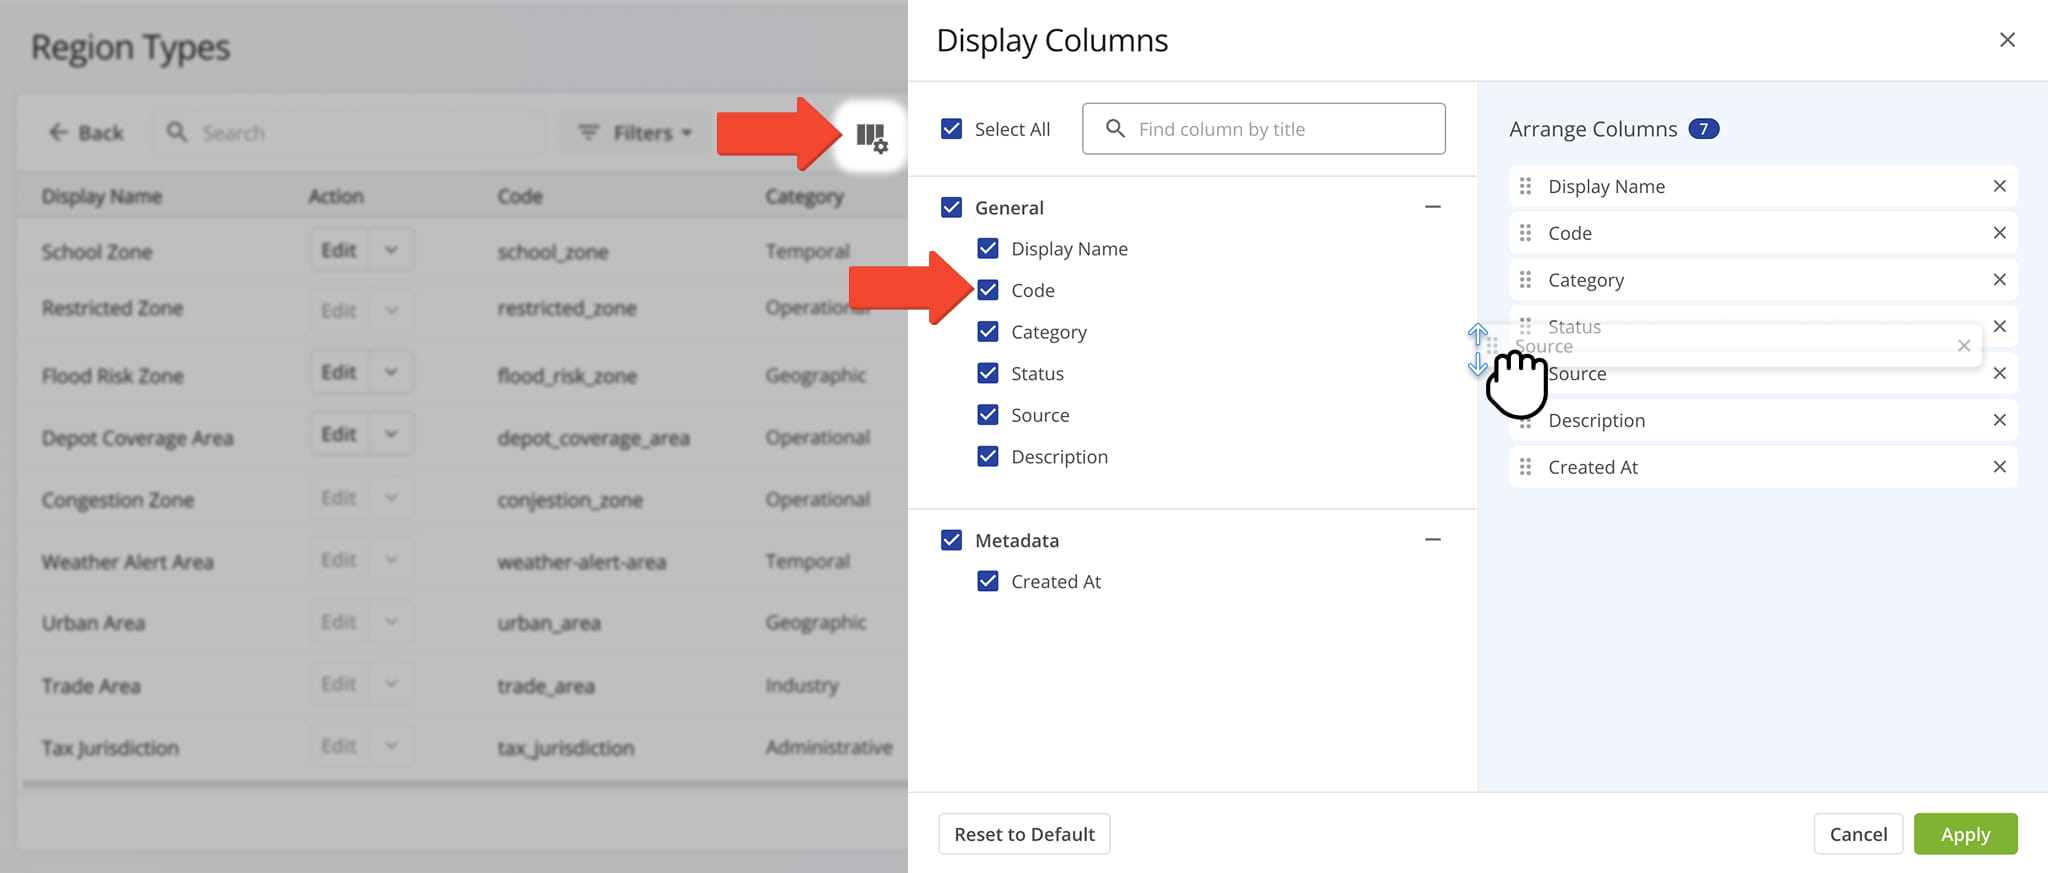
Data Columns
Use Region Types – Apply Custom Types When Creating Regions
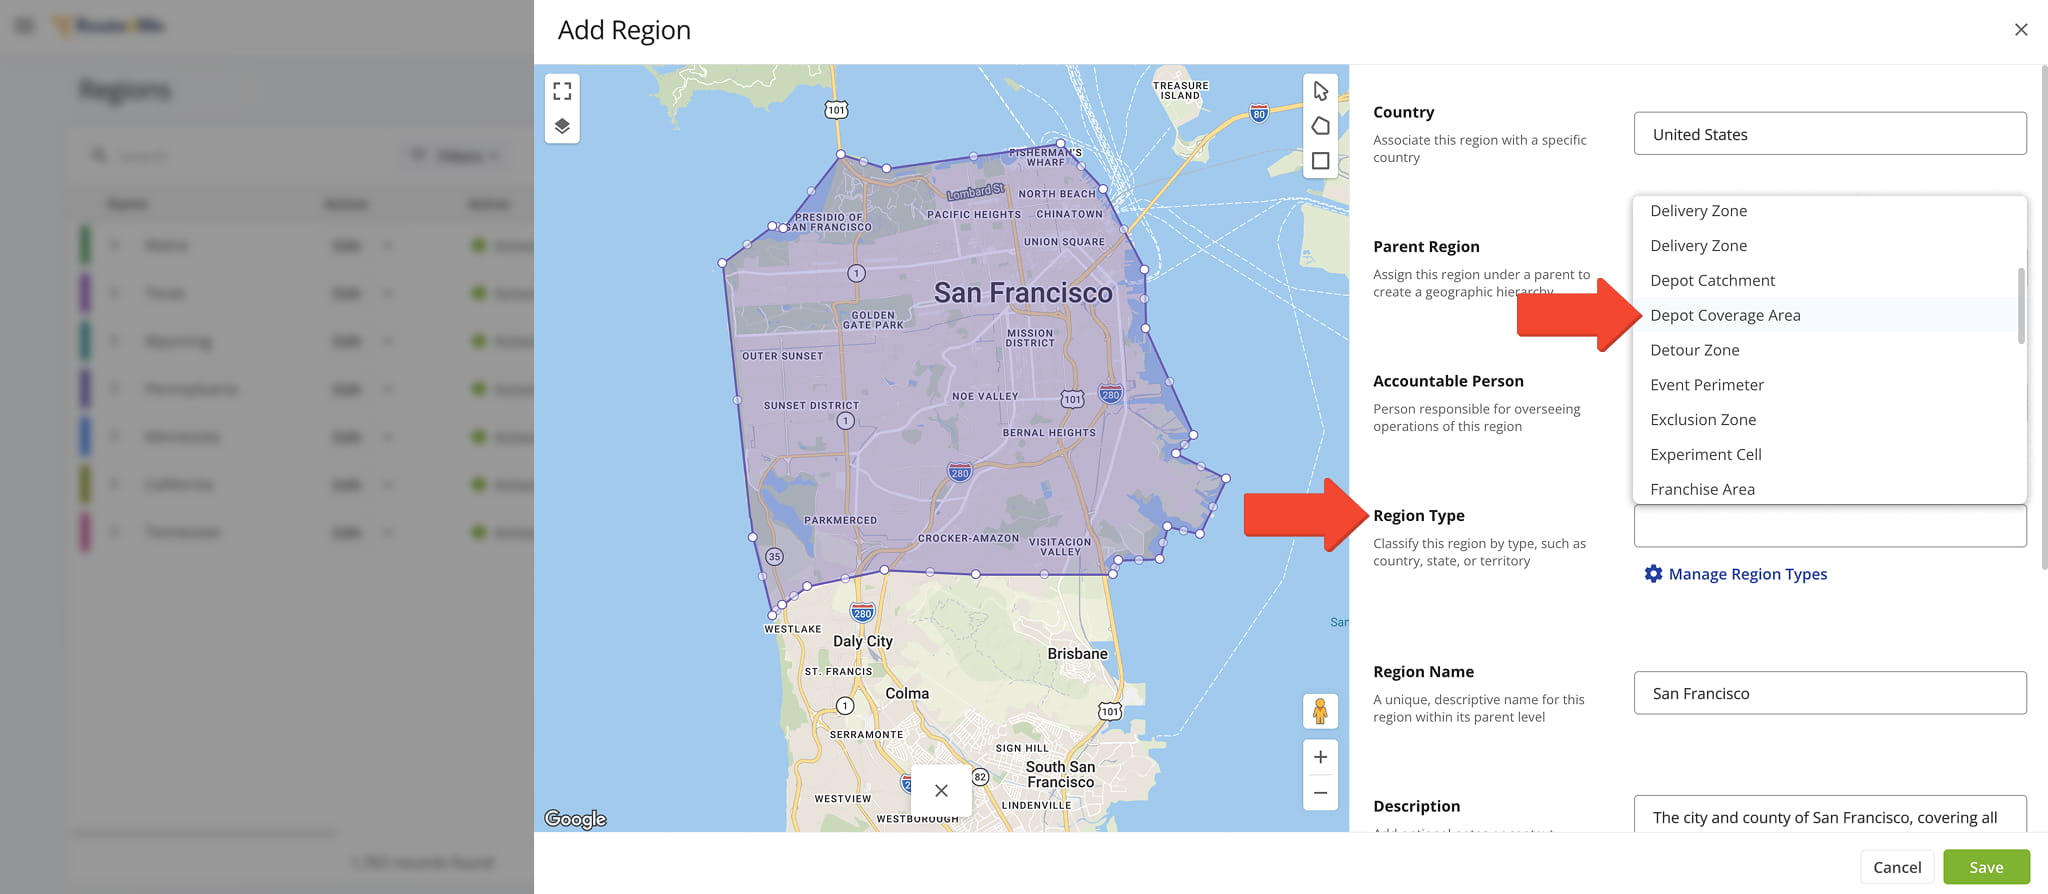
Once created, your custom Region Type is immediately available when adding a new Region. In the “Add Region” editor, click the “Region Type” field. Your newly created Region Type will appear in the list, ready for use.
NOTE: Learn more about adding and managing regions.
Visit Route4Me's Marketplace to Check out Associated Modules:
- Operations
Custom Data Add-On
- Operations
Advanced Team Management Add-On
About author: Daniel Archer

