
Assignment Board – Edit And Assign Routes To Users And Vehicles
The Assignment Dashboard is a centralized hub that streamlines how you manage routes and Field Team members, simplifying how you view and assign routes to Drivers and Vehicles for more efficient planning. This guide walks you through the Assignment Dashboard’s main features, showing you how to assign routes, view User and Vehicle assignments, and make modifications. By following this guide, you can optimize your route management process and enhance overall operational efficiency.
Table of Contents
Assignment Dashboard Overview – See Routes Assigned To Users And Vehicles
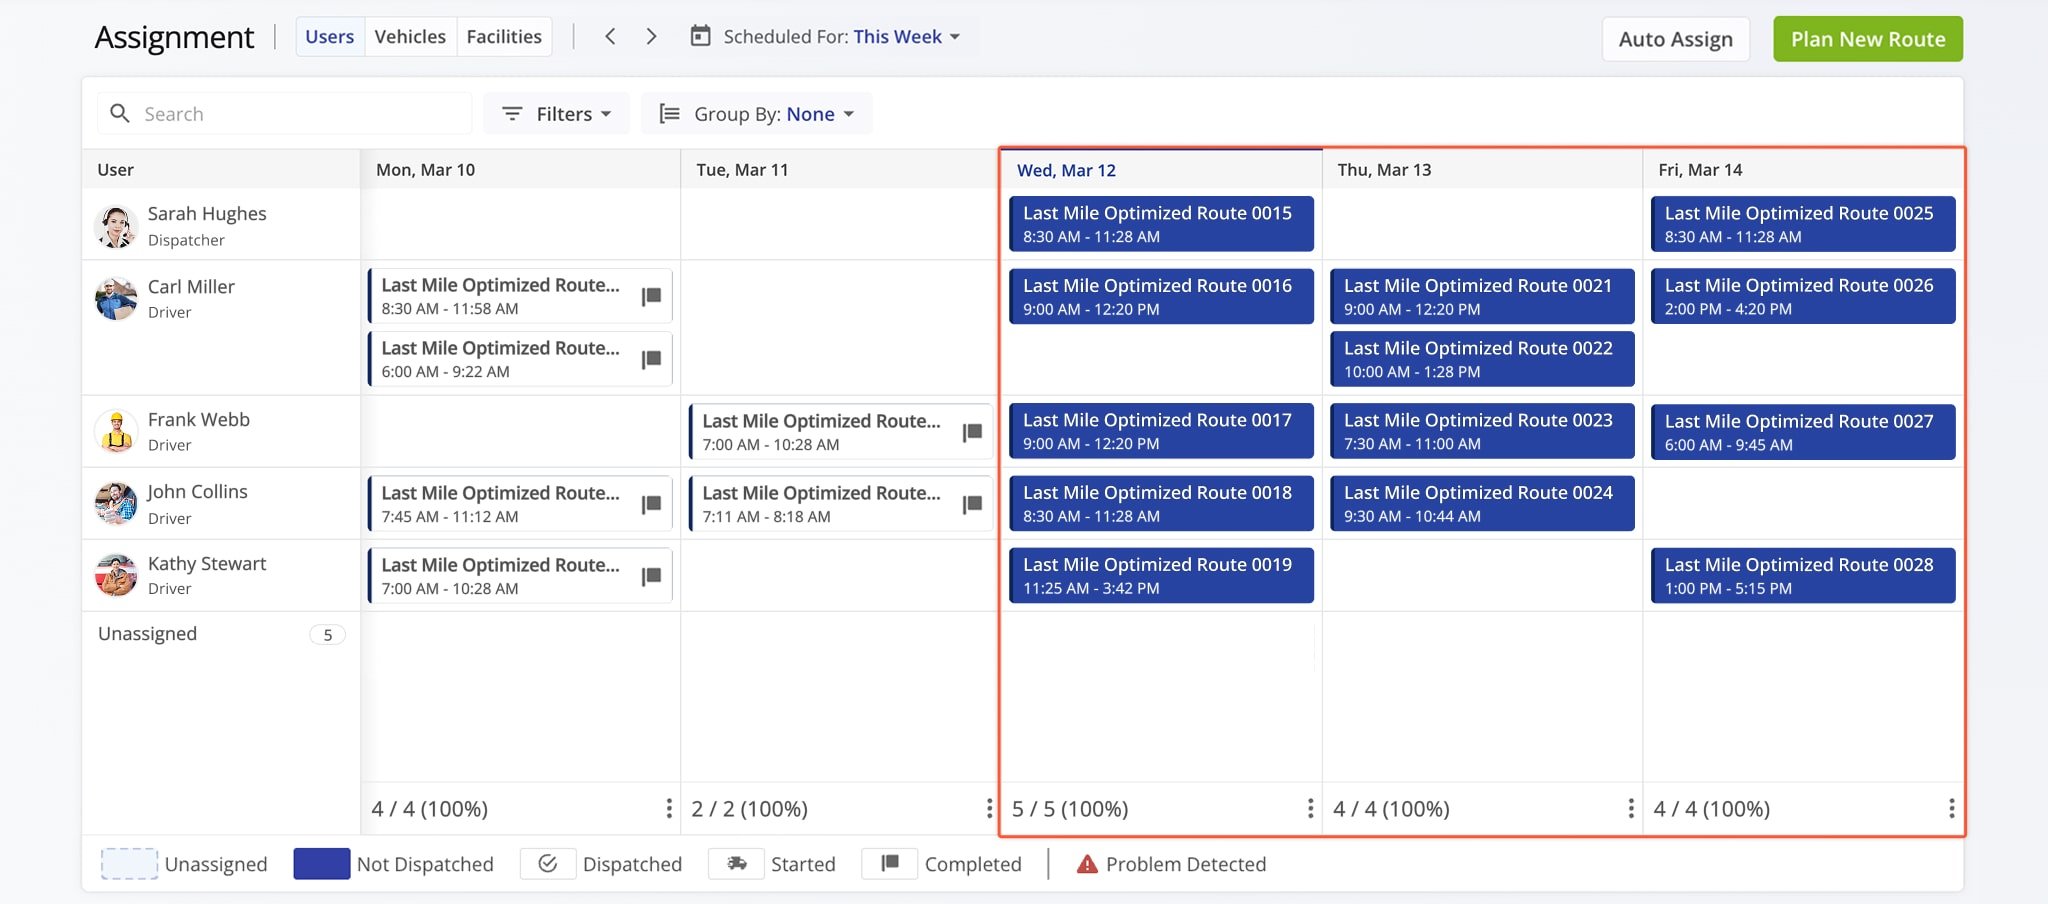
The Assignment Dashboard displays planned and scheduled routes, sorted by scheduled start date and time, and assigned entity (User, Vehicle, and Facility). The current date is automatically highlighted, helping you prioritize dispatch based on schedule.
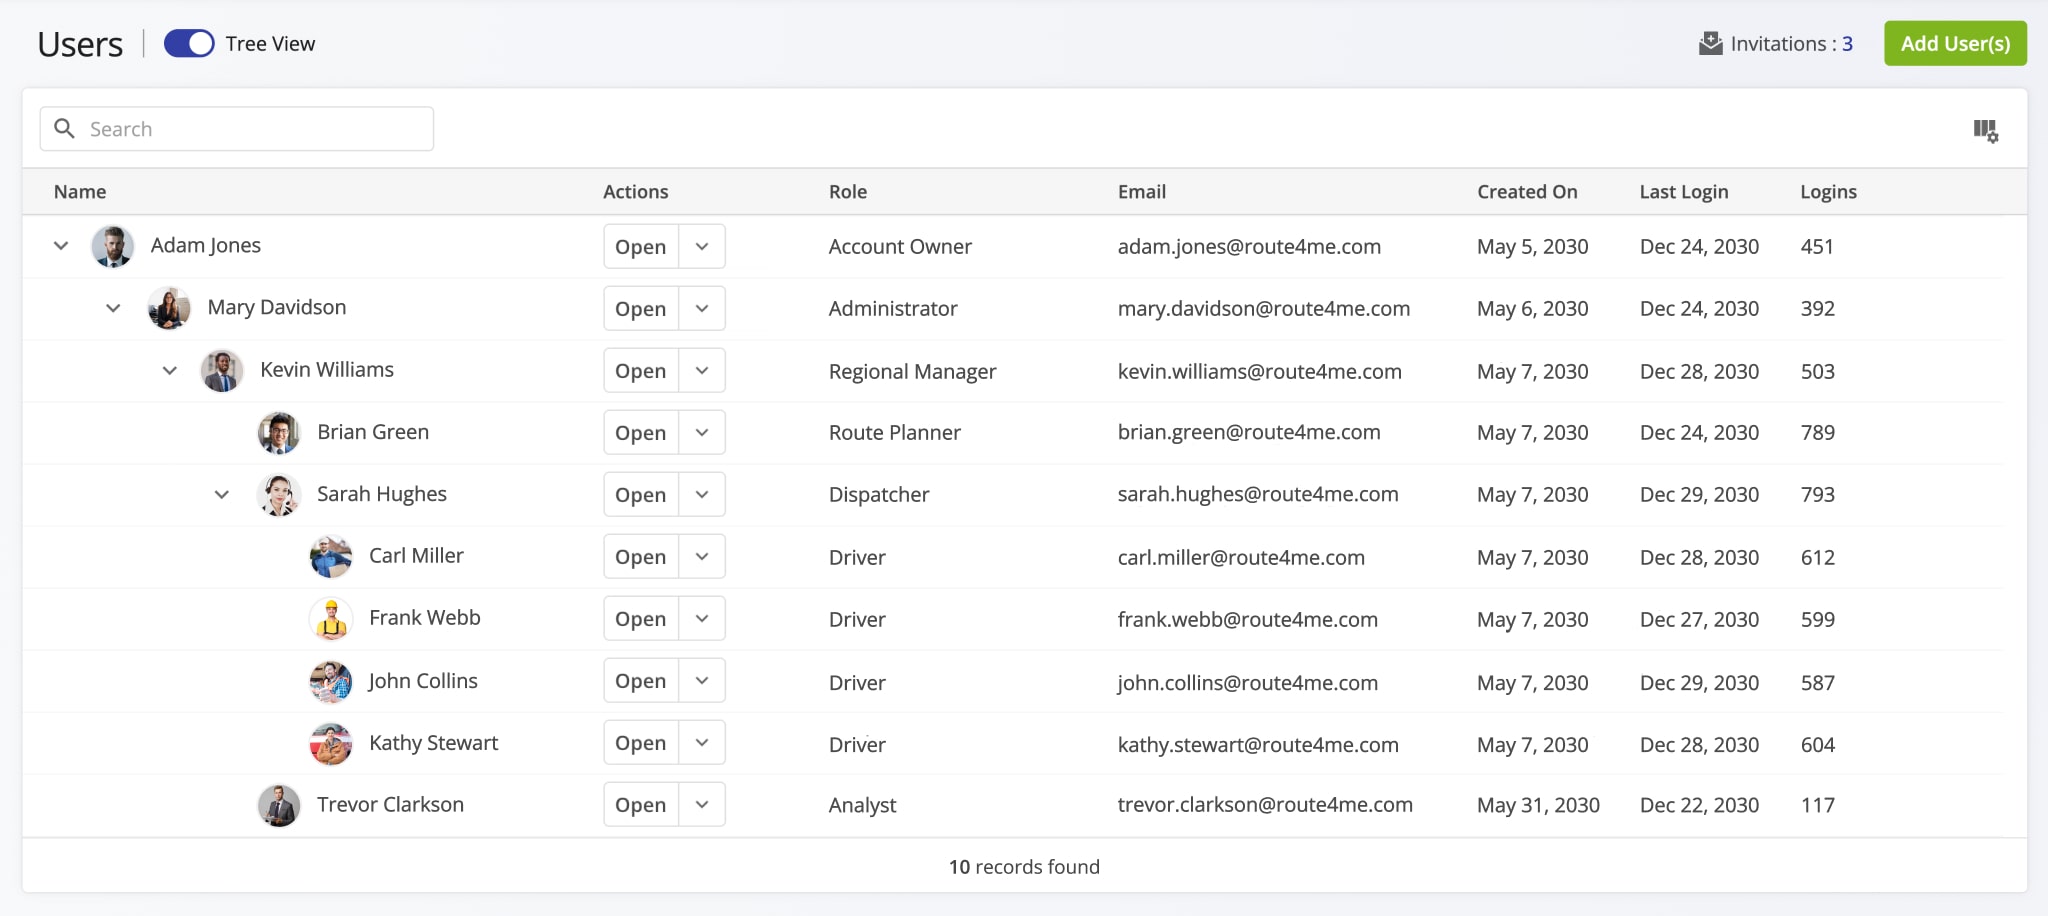
The left-most column lists all Users. Their corresponding assigned routes appear in chronological order on the dashboard, with routes scheduled earlier listed above later ones.
Open Your Assignment Dashboard

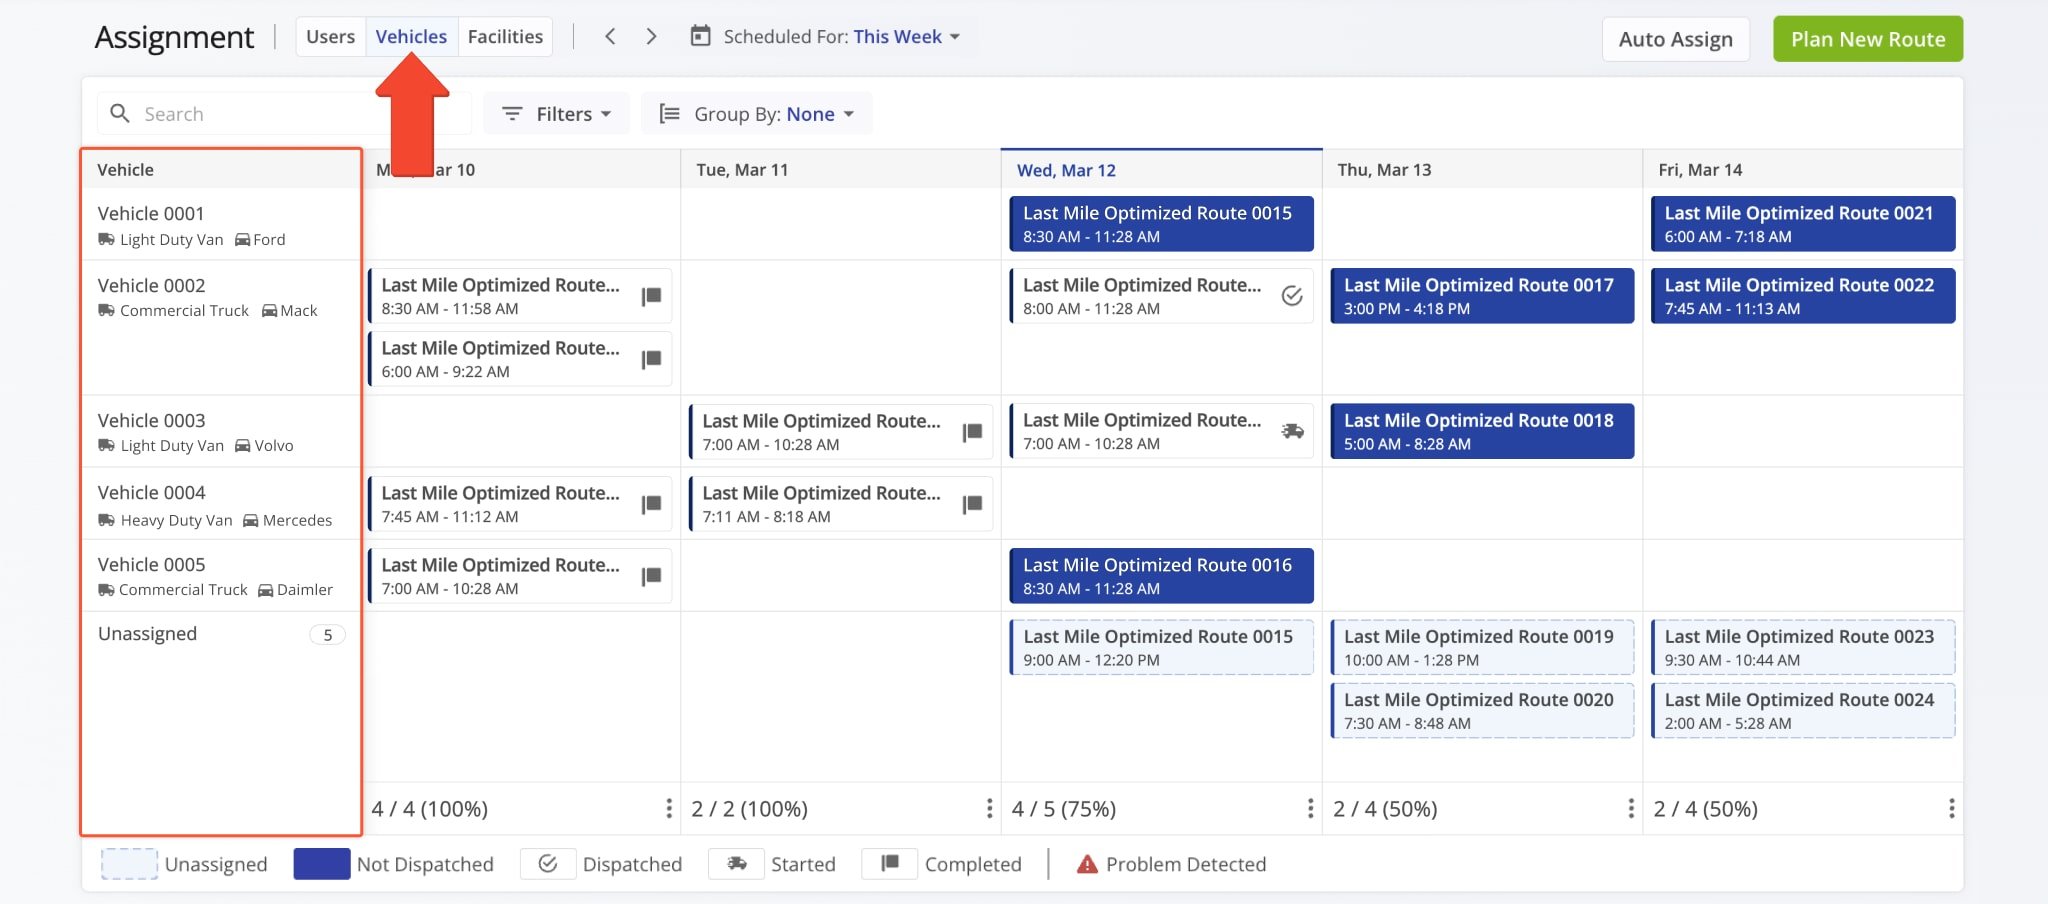
To see routes assigned to your Fleet Vehicles, click the “Vehicles” button at the top of the dashboard. Your Vehicles will appear in the left-hand column, with their assigned routes sorted by date, just like in the “Users” section.
NOTE: Learn more about assigning vehicles to routes.
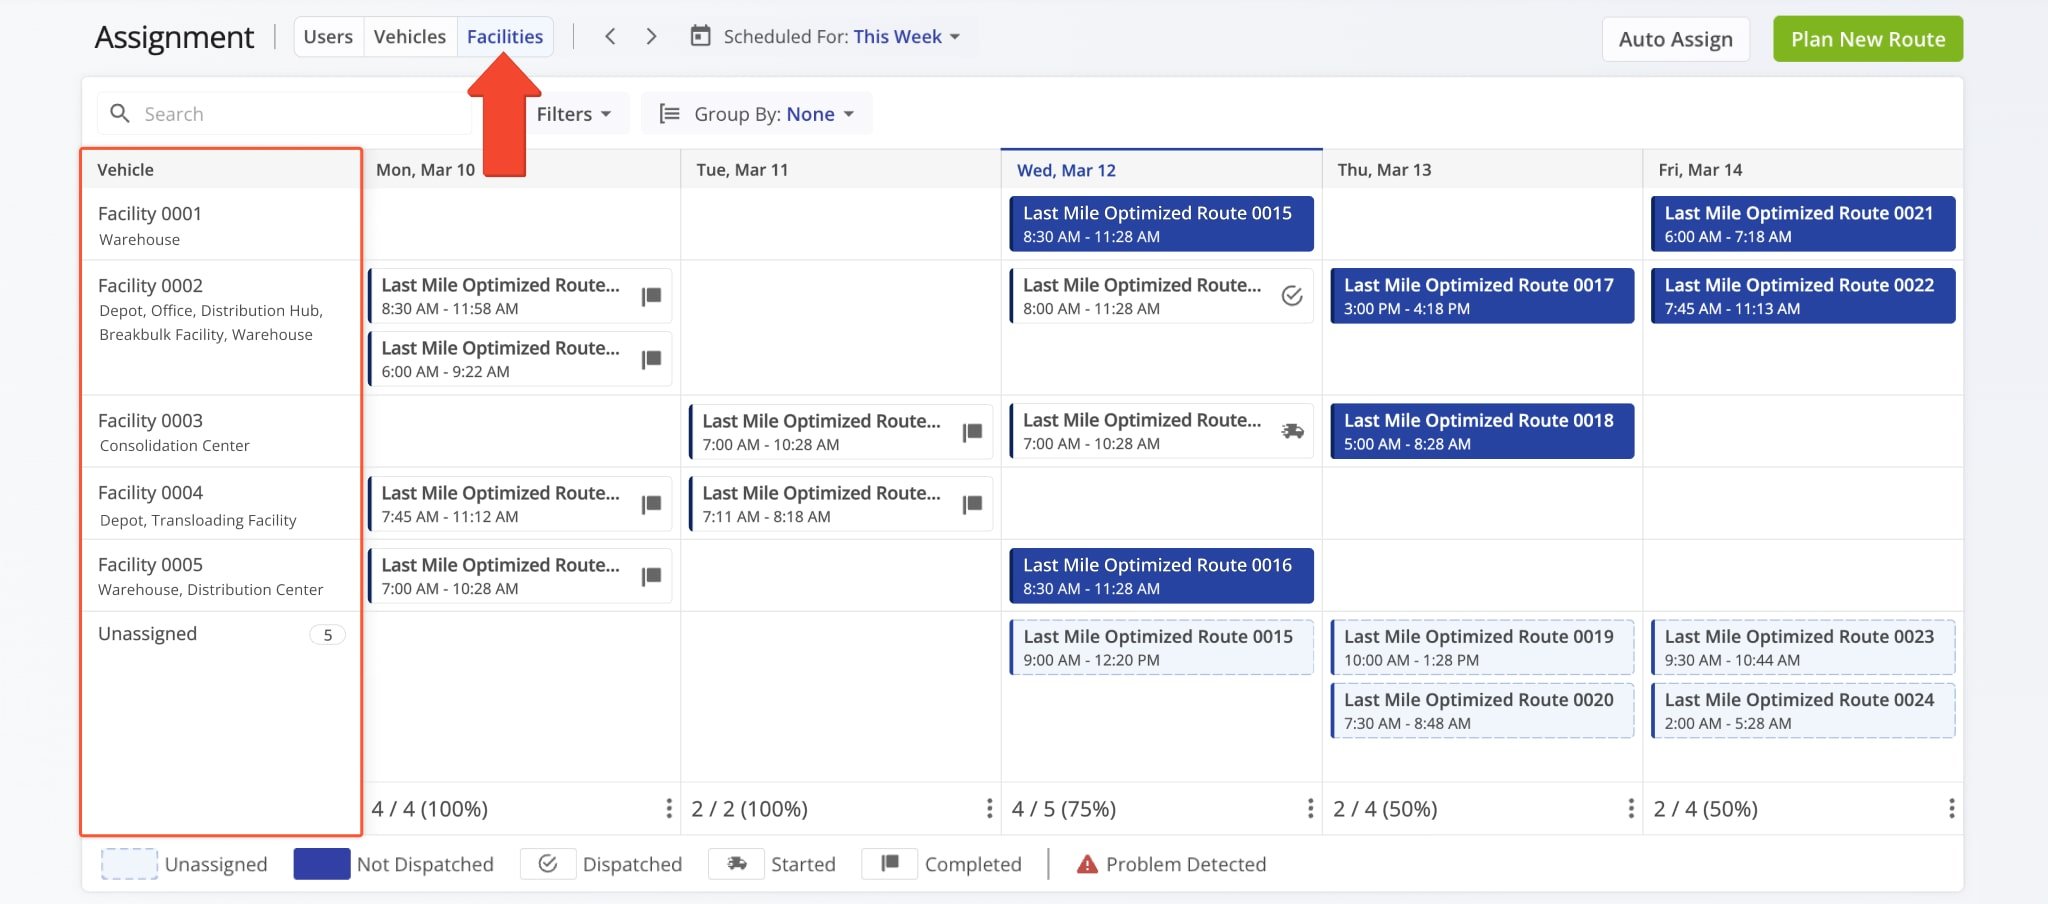
To see routes associated with your Facilities, click the “Facilities” button at the top of the dashboard. Facilities will appear in the left-hand column, with their assigned routes sorted by date, just like in the “Users” and “Vehicles” sections.
When new Vehicles, Users, or Facilities are added to your Route4Me account, they’ll automatically appear in the Assignment Dashboard. In the case of Users, only those linked to your position in the User Hierarchy will be shown.
NOTE: Learn more about User Types and Account-Level Permissions.
Customize Assignment Dashboard – Use Date Range, Filters And Grouping Settings
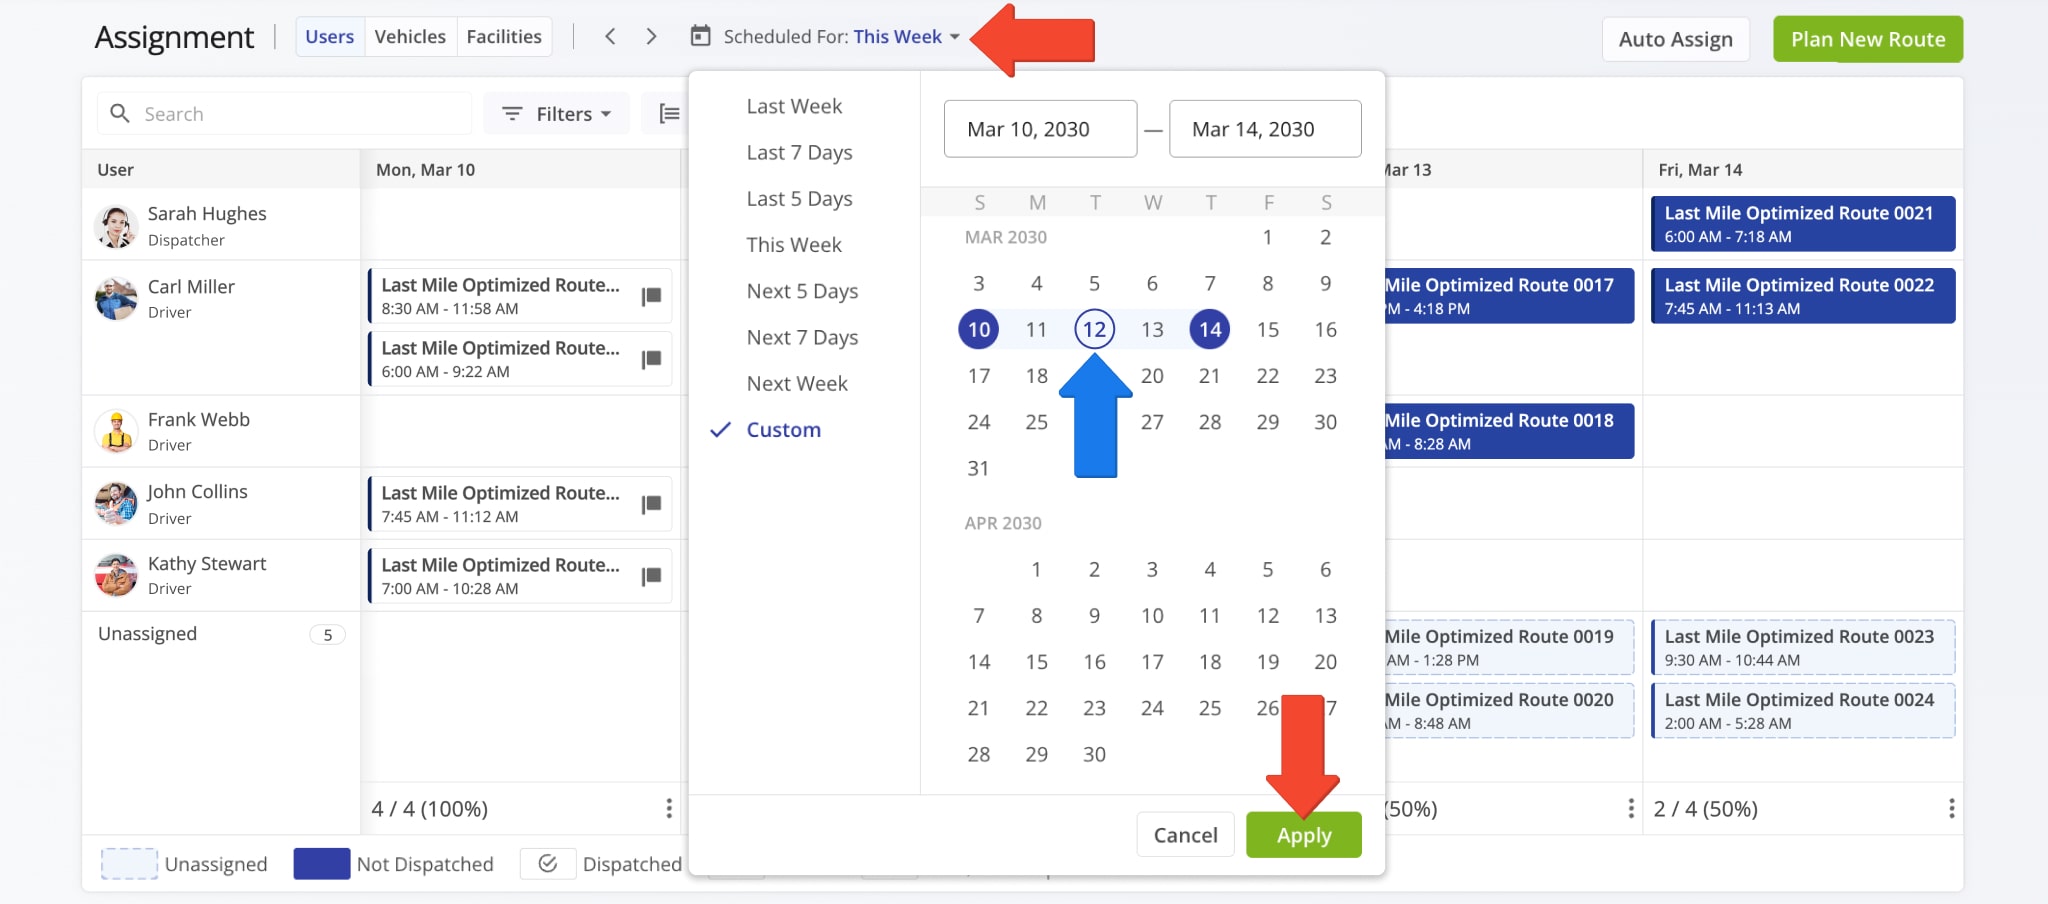
The Assignment Dashboard makes it easy to find information relevant to your needs. To filter routes by their scheduled date, click “Scheduled For“, select a time frame (up to seven days), and click “Apply“.
For convenience, the current date is always highlighted if it’s within the selected date range.
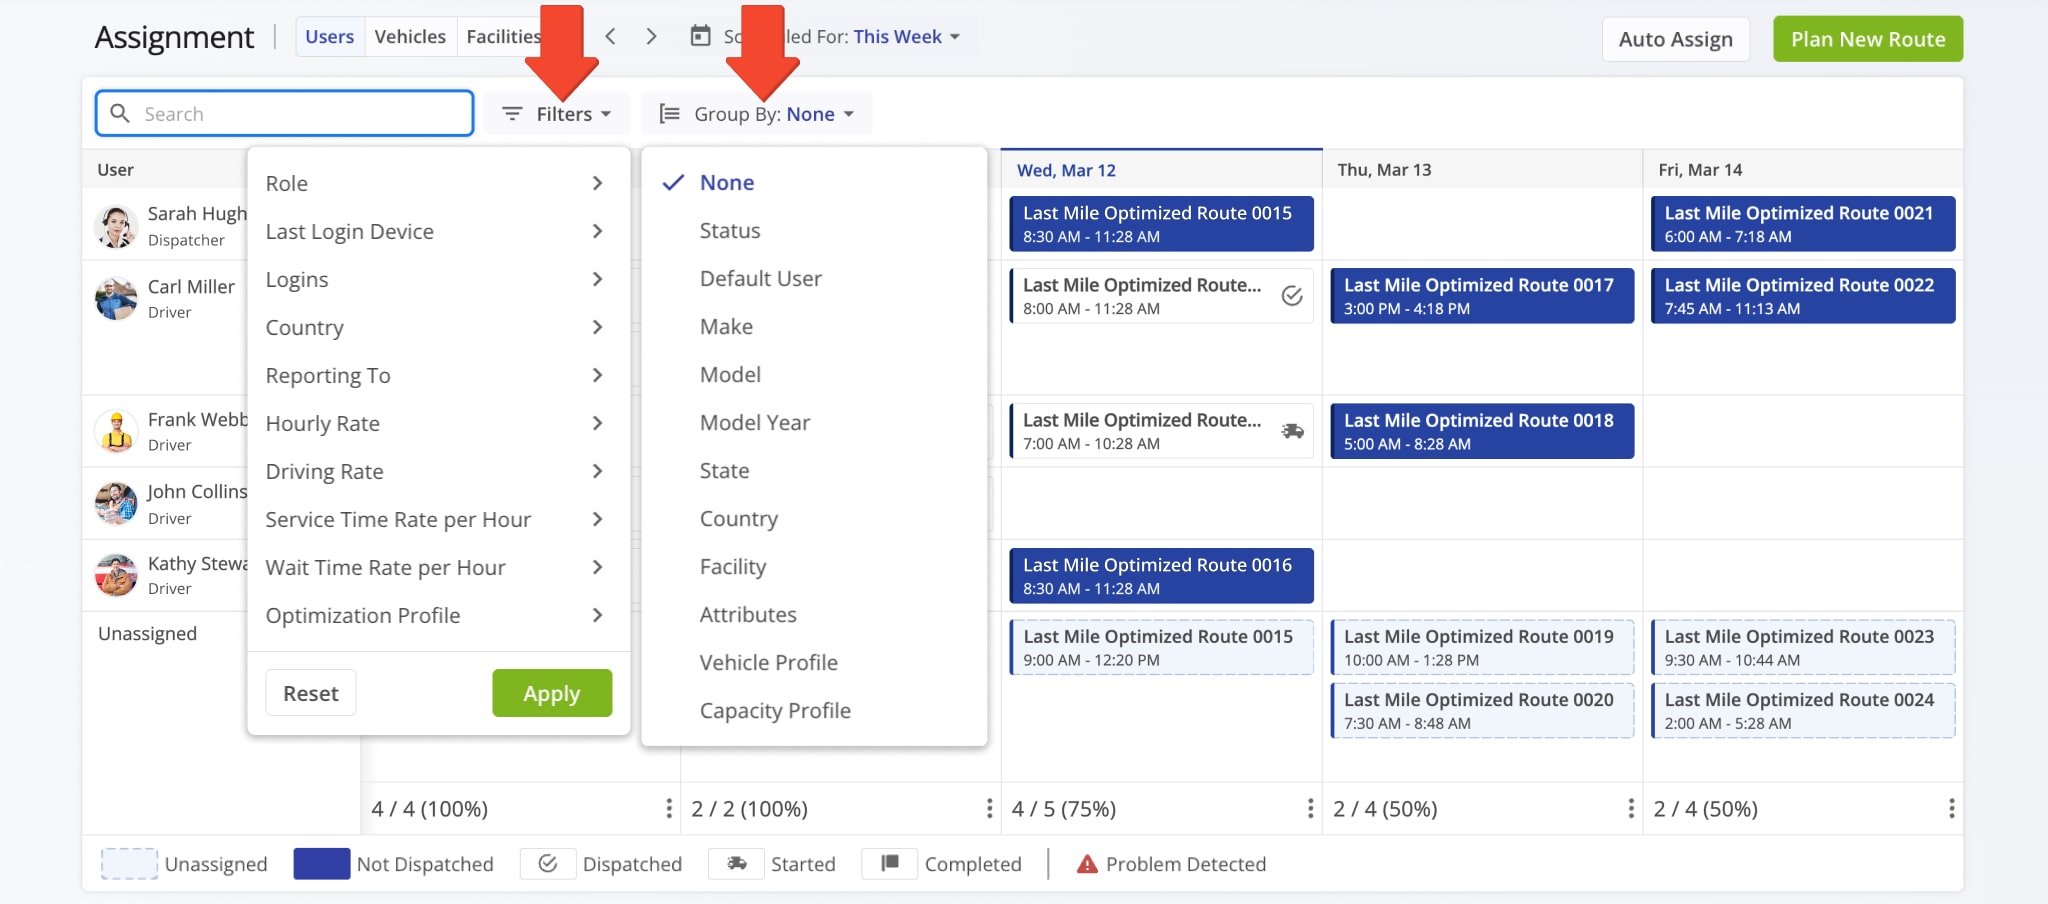
Use custom filters to display only Users, Vehicle, and Facilities with specific characteristics. Simply click “Filters” and enable your preferred settings.
You can also group Users, Vehicles and Facilities using the “Group by” button. To locate specific Users, Vehicles, or Facilities, type their names into the search bar at the top left. All supported filter options are listed in the table below.
Filter Options
Assign Routes To Users And Vehicles From Your Assignment Dashboard
Along the bottom of the Assignment Dashboard, the “Unassigned” section displays routes that haven’t been assigned. To assign or reassign a route, simply drag and drop it to the desired User, Vehicle, or Facility.
You can also click a position on the dashboard and enter the route name to assign it without dragging. Whether you drag and drop or click, all associated parameters update automatically, with no further action required on your end.
NOTE: Learn more about assigning Users to routes.

Automatically Assign Routes With Smart Auto-Assign Functionality
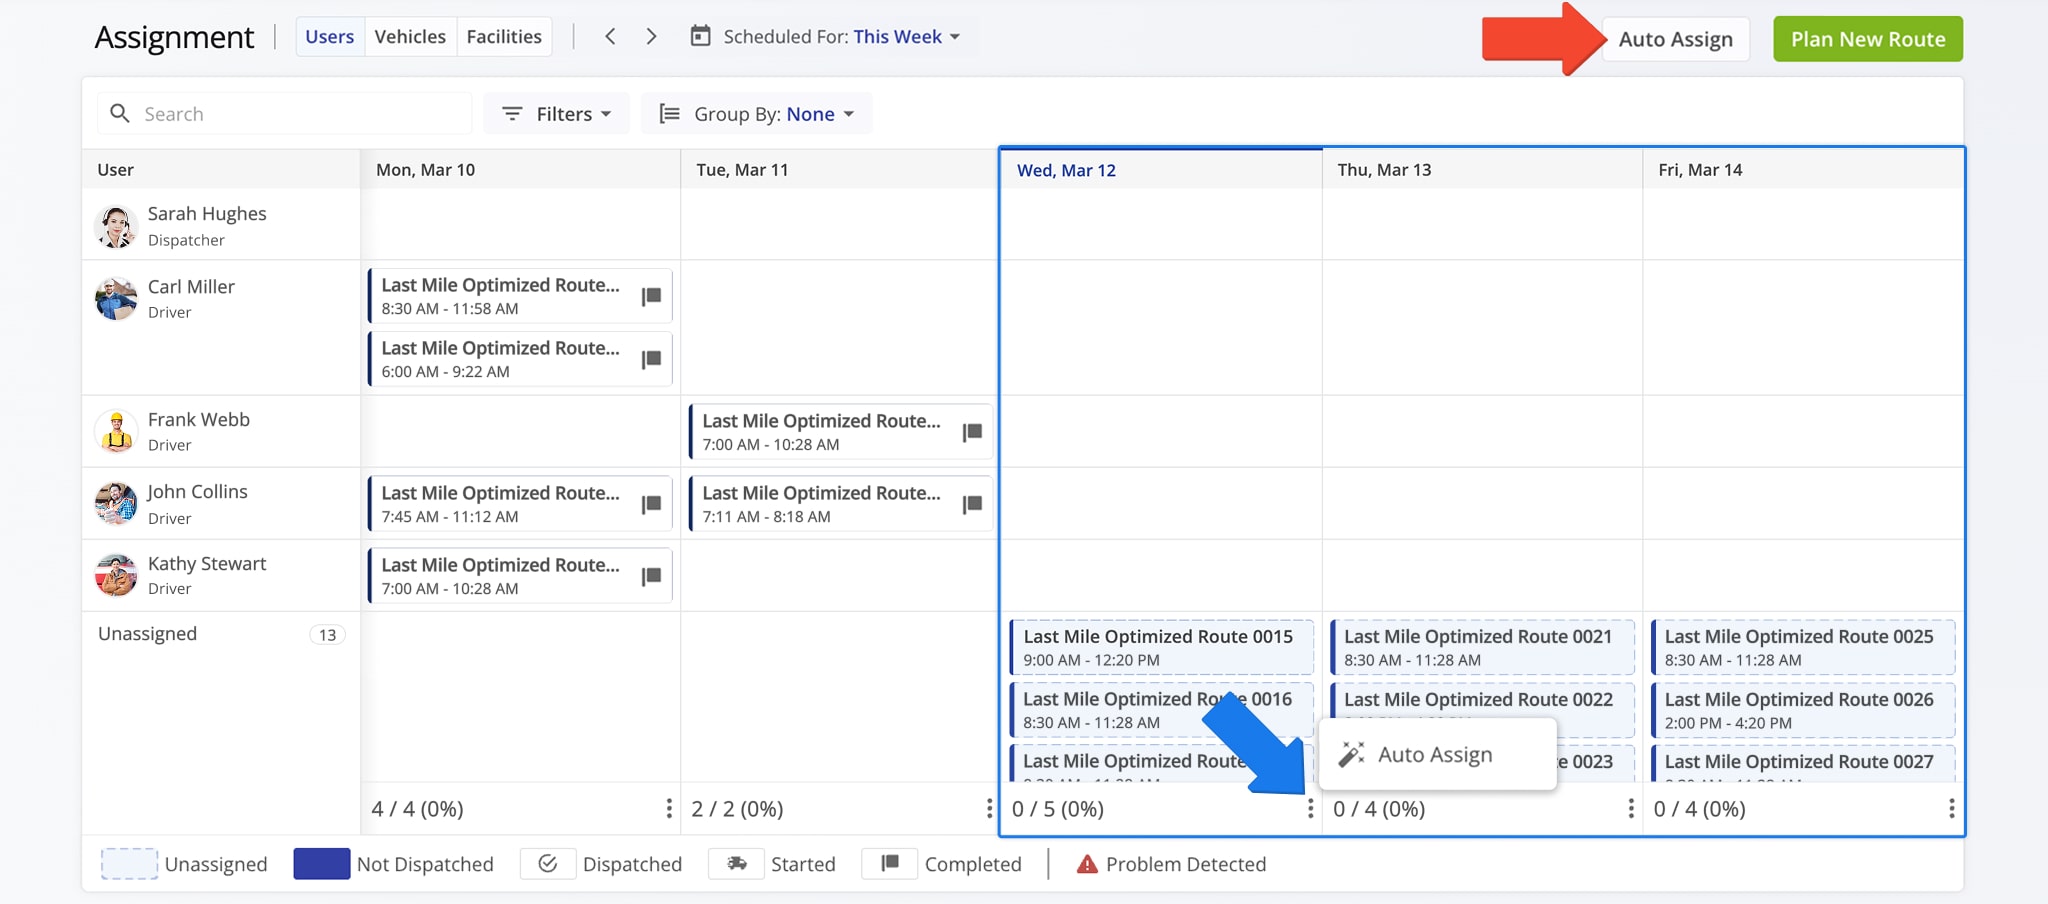
To make assigning routes to Users as seamless as possible, the Assignment Dashboard also supports smart Auto Assign. To automatically assign routes to users, first click the “Auto Assign” in the top-right of the Assignment Dashboard.
You can click the Three-dot Icon at the bottom of a date and click “Auto Assign” to assign only routes scheduled for that date.
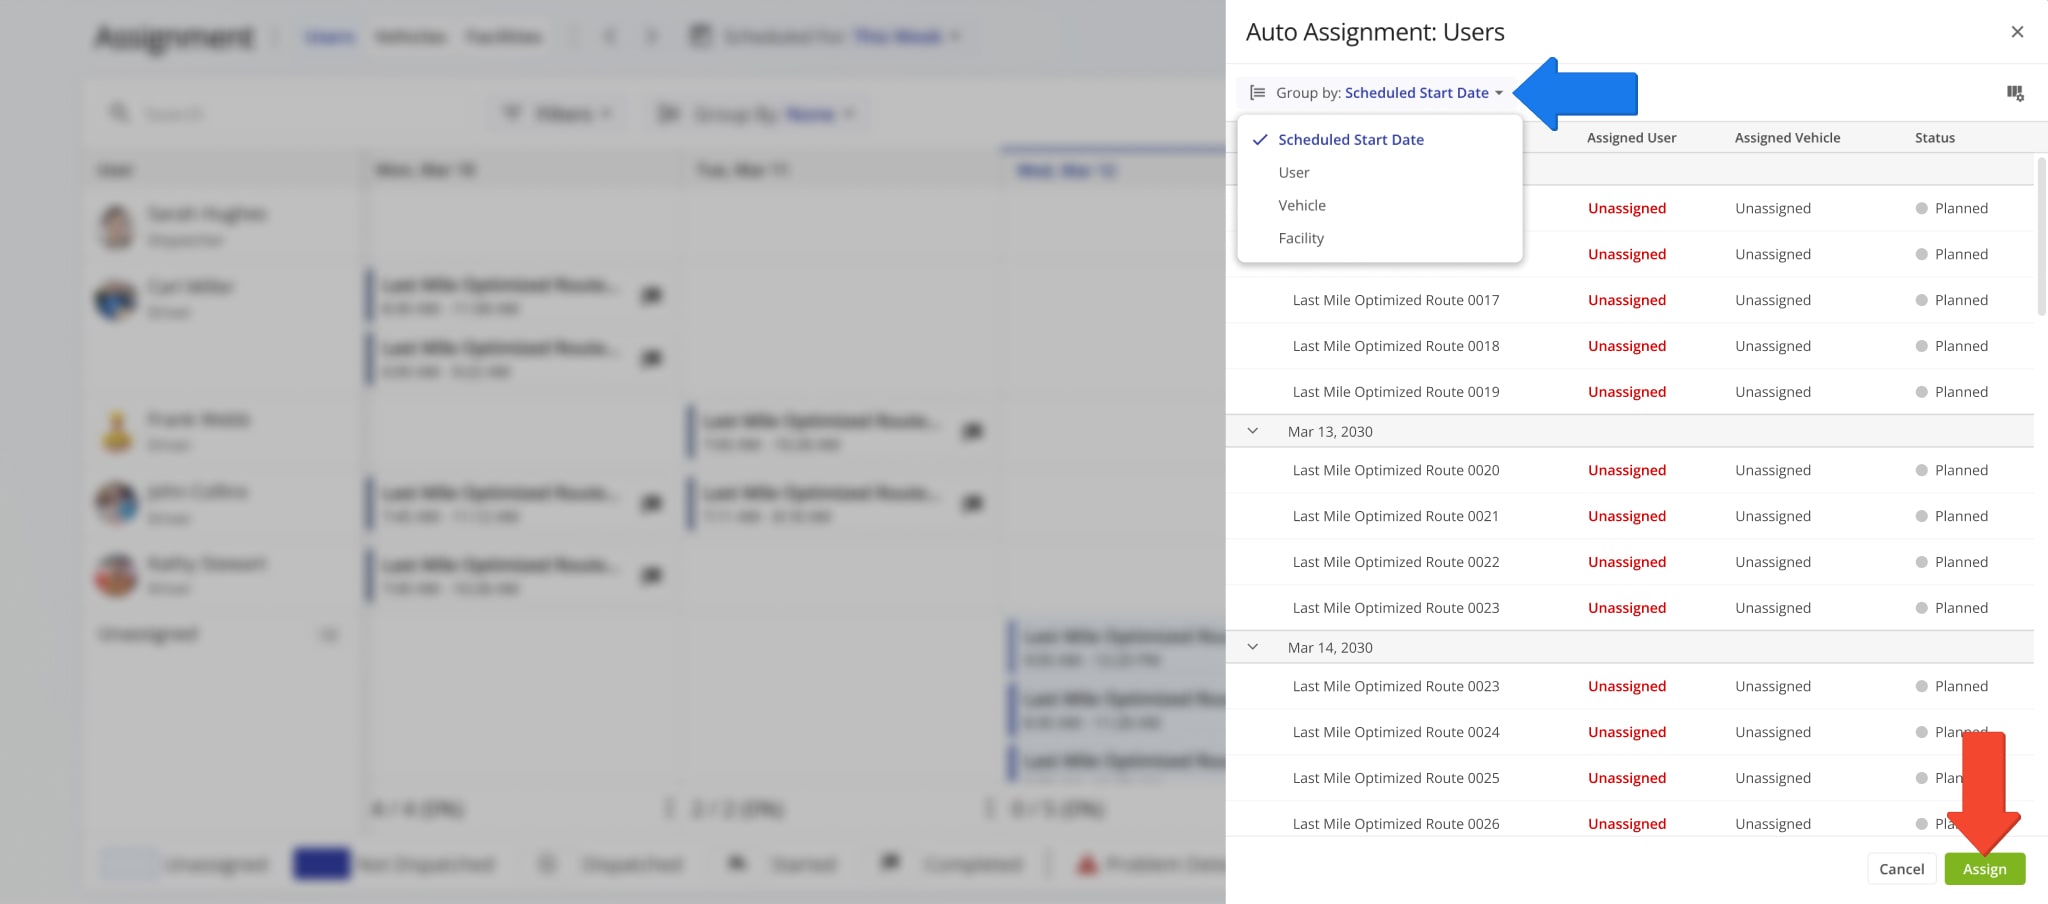
On the “Auto Assignment” panel, you’ll see a list of routes and their date such as their current status, assignment, and more. By default, routes are grouped by their Scheduled Start Date. Click the “Group by” button to change the current grouping mode.
When you’ve confirmed your route data, simply click “Assign“.
NOTE: Make sure you’ve selected the correct tab (Users, Vehicles, Facilities) you want to Auto Assign routes from.
Route4Me will automatically assign Users to routes to optimize workload, minimize downtime, and ensure the correct User is assigned to each route to maximize efficiency.
Customize Route Data Table On Auto-Assign Interface
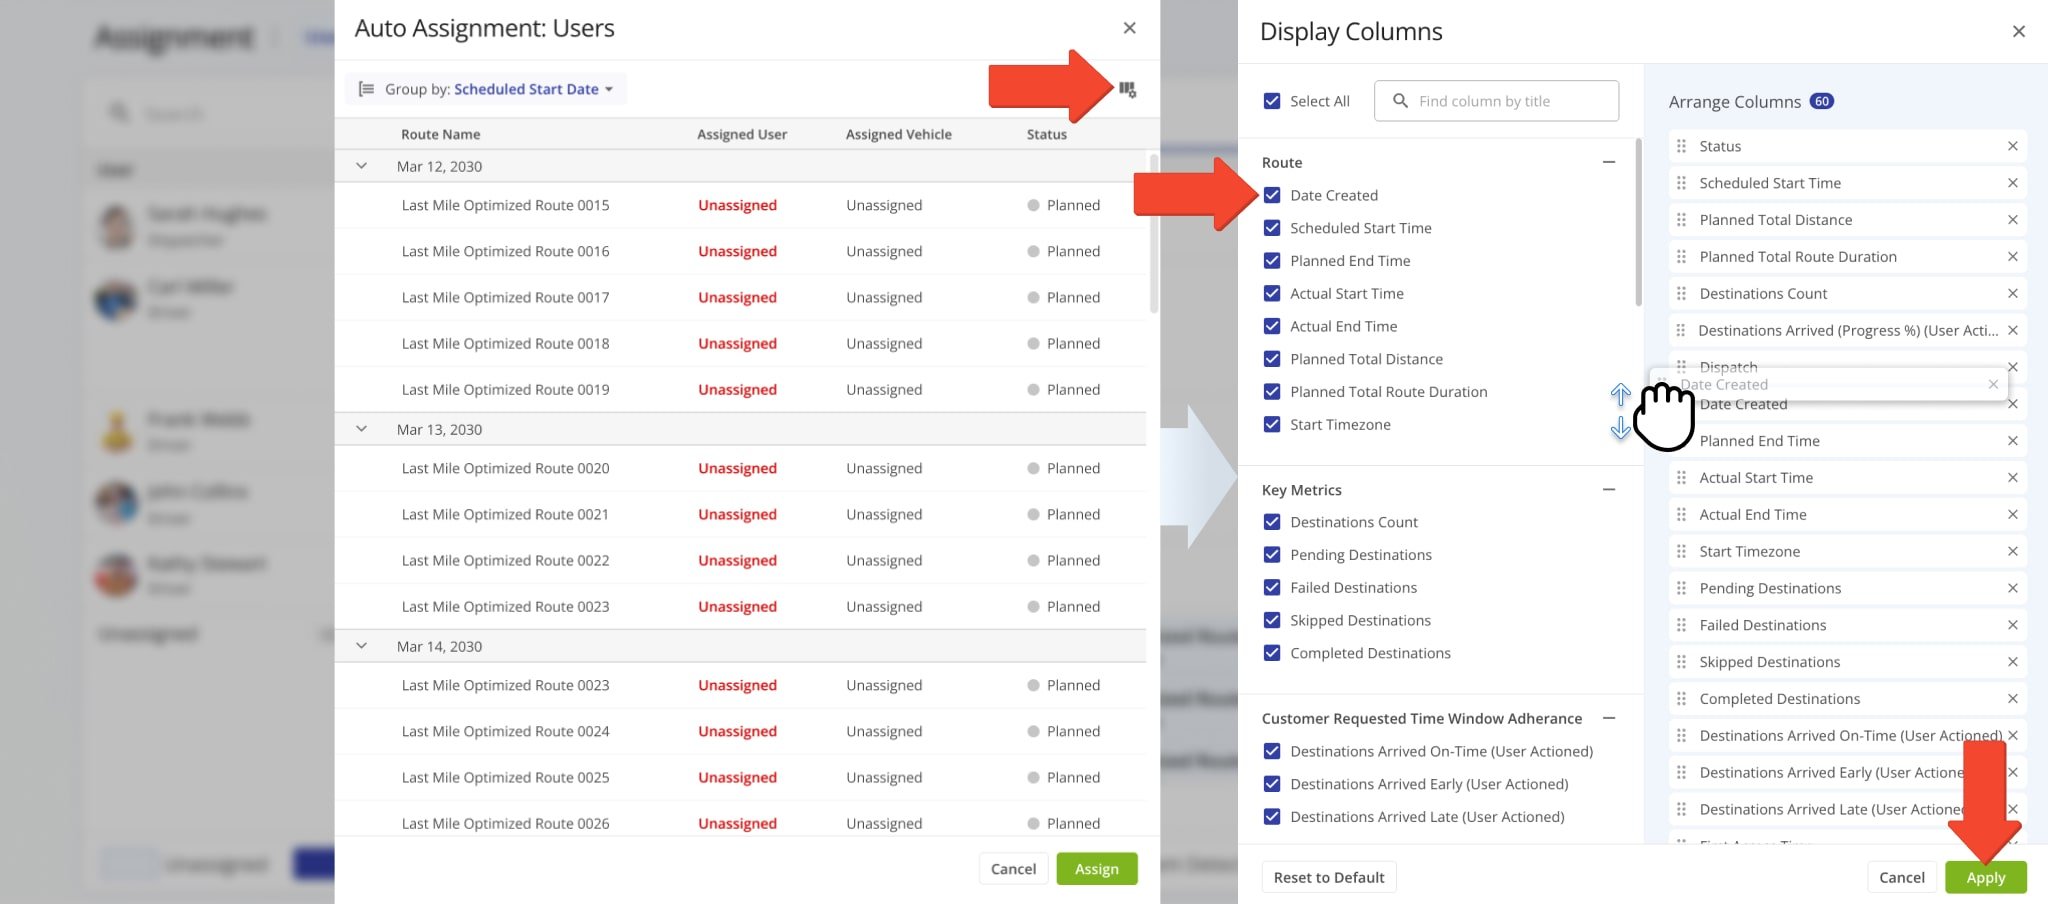
Route4Me enables you to customize the route data shown on the “Auto Assignment” panel, providing full transparency into route metrics and streamlining decision-making.
After you’ve opened the Auto Assign interface, simply click the Display Columns button in the top-right. Then, enable data columns by checking the boxes next to them. On the right, under “Arrange Columns”, you can drag columns names to re-arrange the route data table. Click “Apply” to save your changes.
Manage And Edit Routes From Your Assignment Dashboard
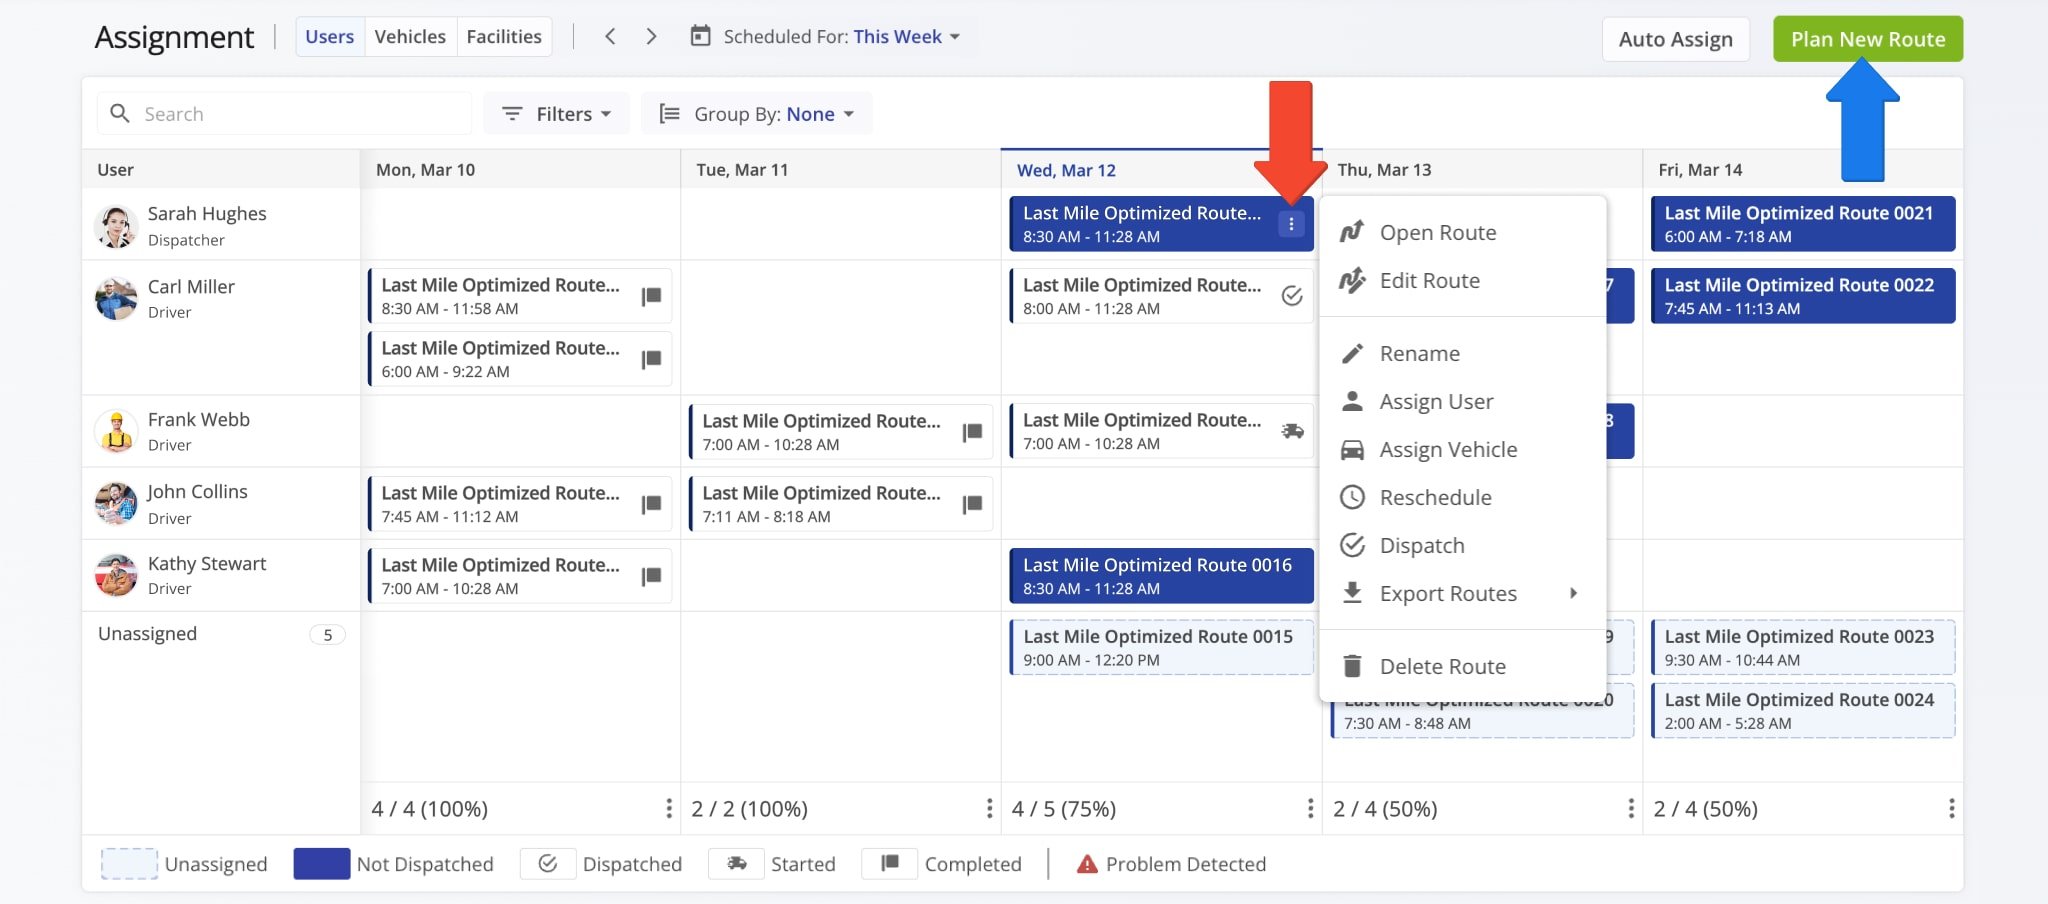
You can easily modify routes from the Assignment Dashboard by right-clicking the Three-dot Icon next to a route. A menu will appear with editing options and other actions. See the table below for a full list.
NOTE: You can plan new routes directly from the dashboard by clicking the “New Route” button.
Three-Dot Icon Menu Options
Visit Route4Me's Marketplace to Check out Associated Modules:
- Operations
Audit Logging and Activity Stream
- Operations
Custom Data Add-On
- Operations
Advanced Team Management Add-On
About author: Kristian Andreev

