
Complete Workflows & Mandatory Tasks To Collect Proof Of Service
With Route4Me’s mobile Route Driver App, you can add statuses to destinations and attach proof of delivery (POD), proof of visit (POV), and proof of service (POS) to complete orders, maintain route compliance, and finish routes. In this guide, you can learn how to complete mandatory and optional driver workflows and tasks like capturing customer signatures, taking photos, recording videos and audio, selecting release codes, and more.
Table of Contents
Set Destination Statuses And Collect Proof Of Service, Visit And Delivery
To collect proof of visit and delivery, first start route navigation and arrive at a Destination. The app will automatically expand the navigation panel to show the “Arrived” button. Tap it to proceed.
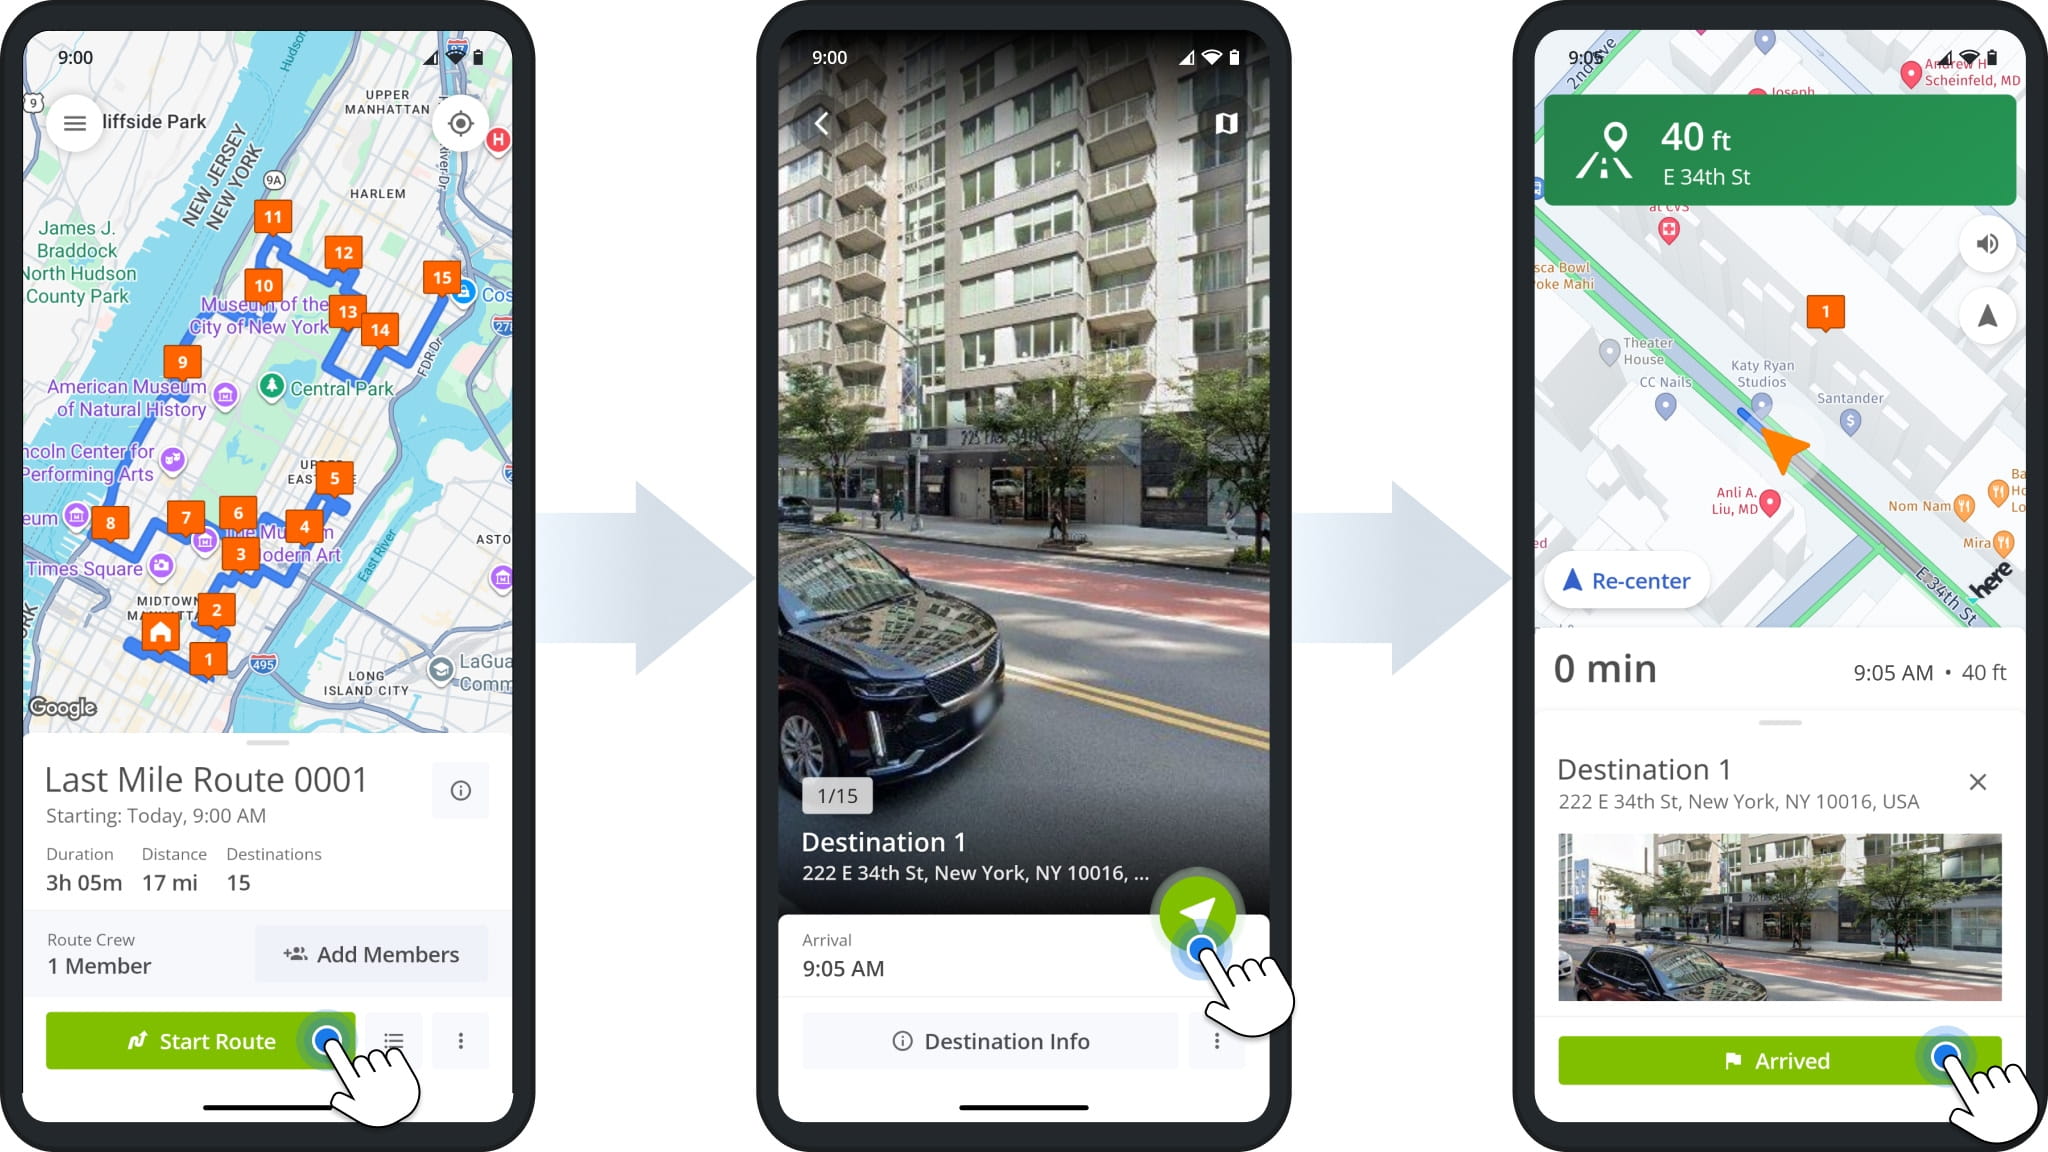
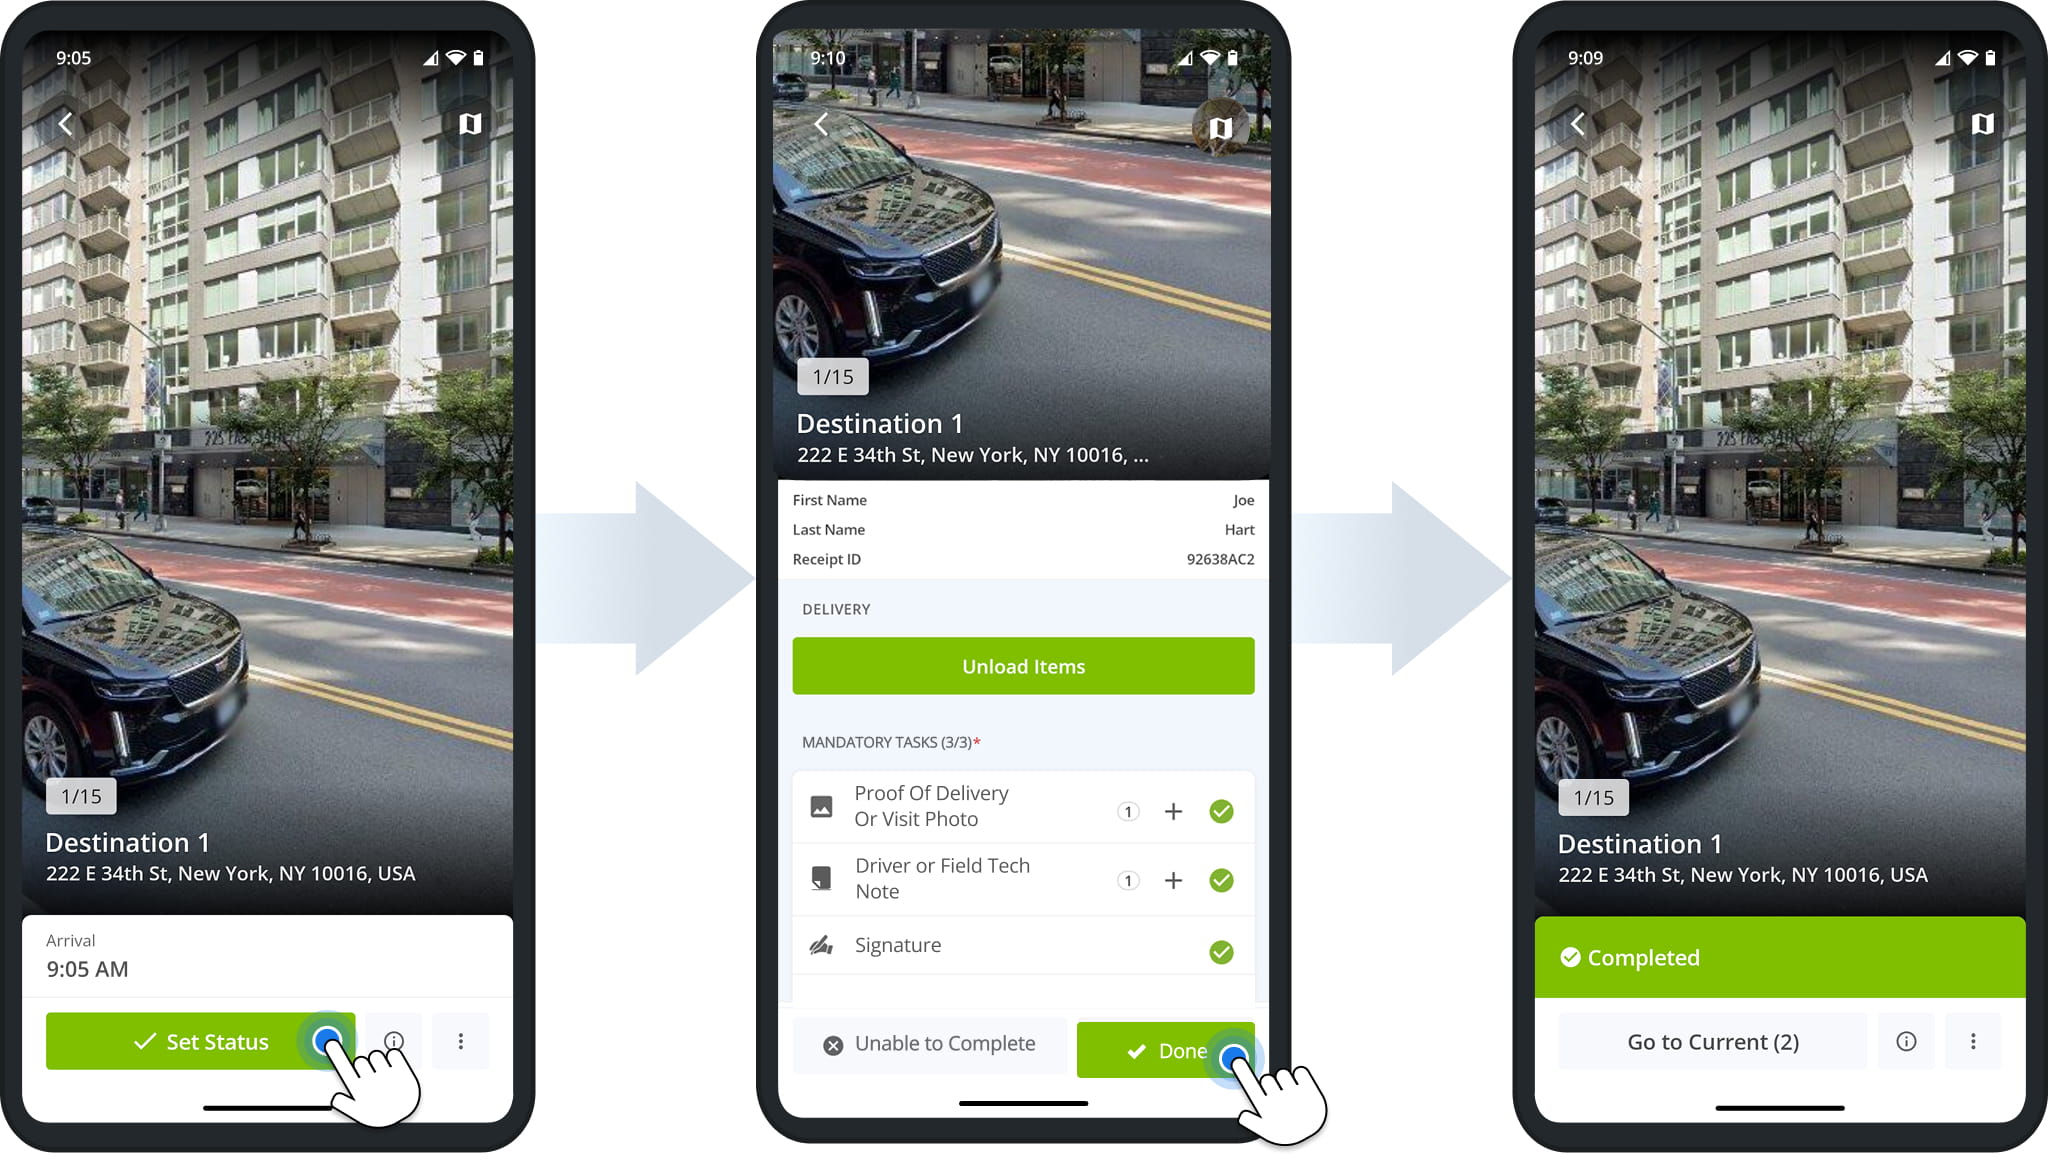
After you confirm your arrival, the Destination will automatically open. Tap the “Set Status” button to access the list of mandatory and optional workflow tasks. Tap on a task and follow the on-screen instructions to complete it.
When finished, tap “Done“, and the Destination’s status will change to “Completed“.
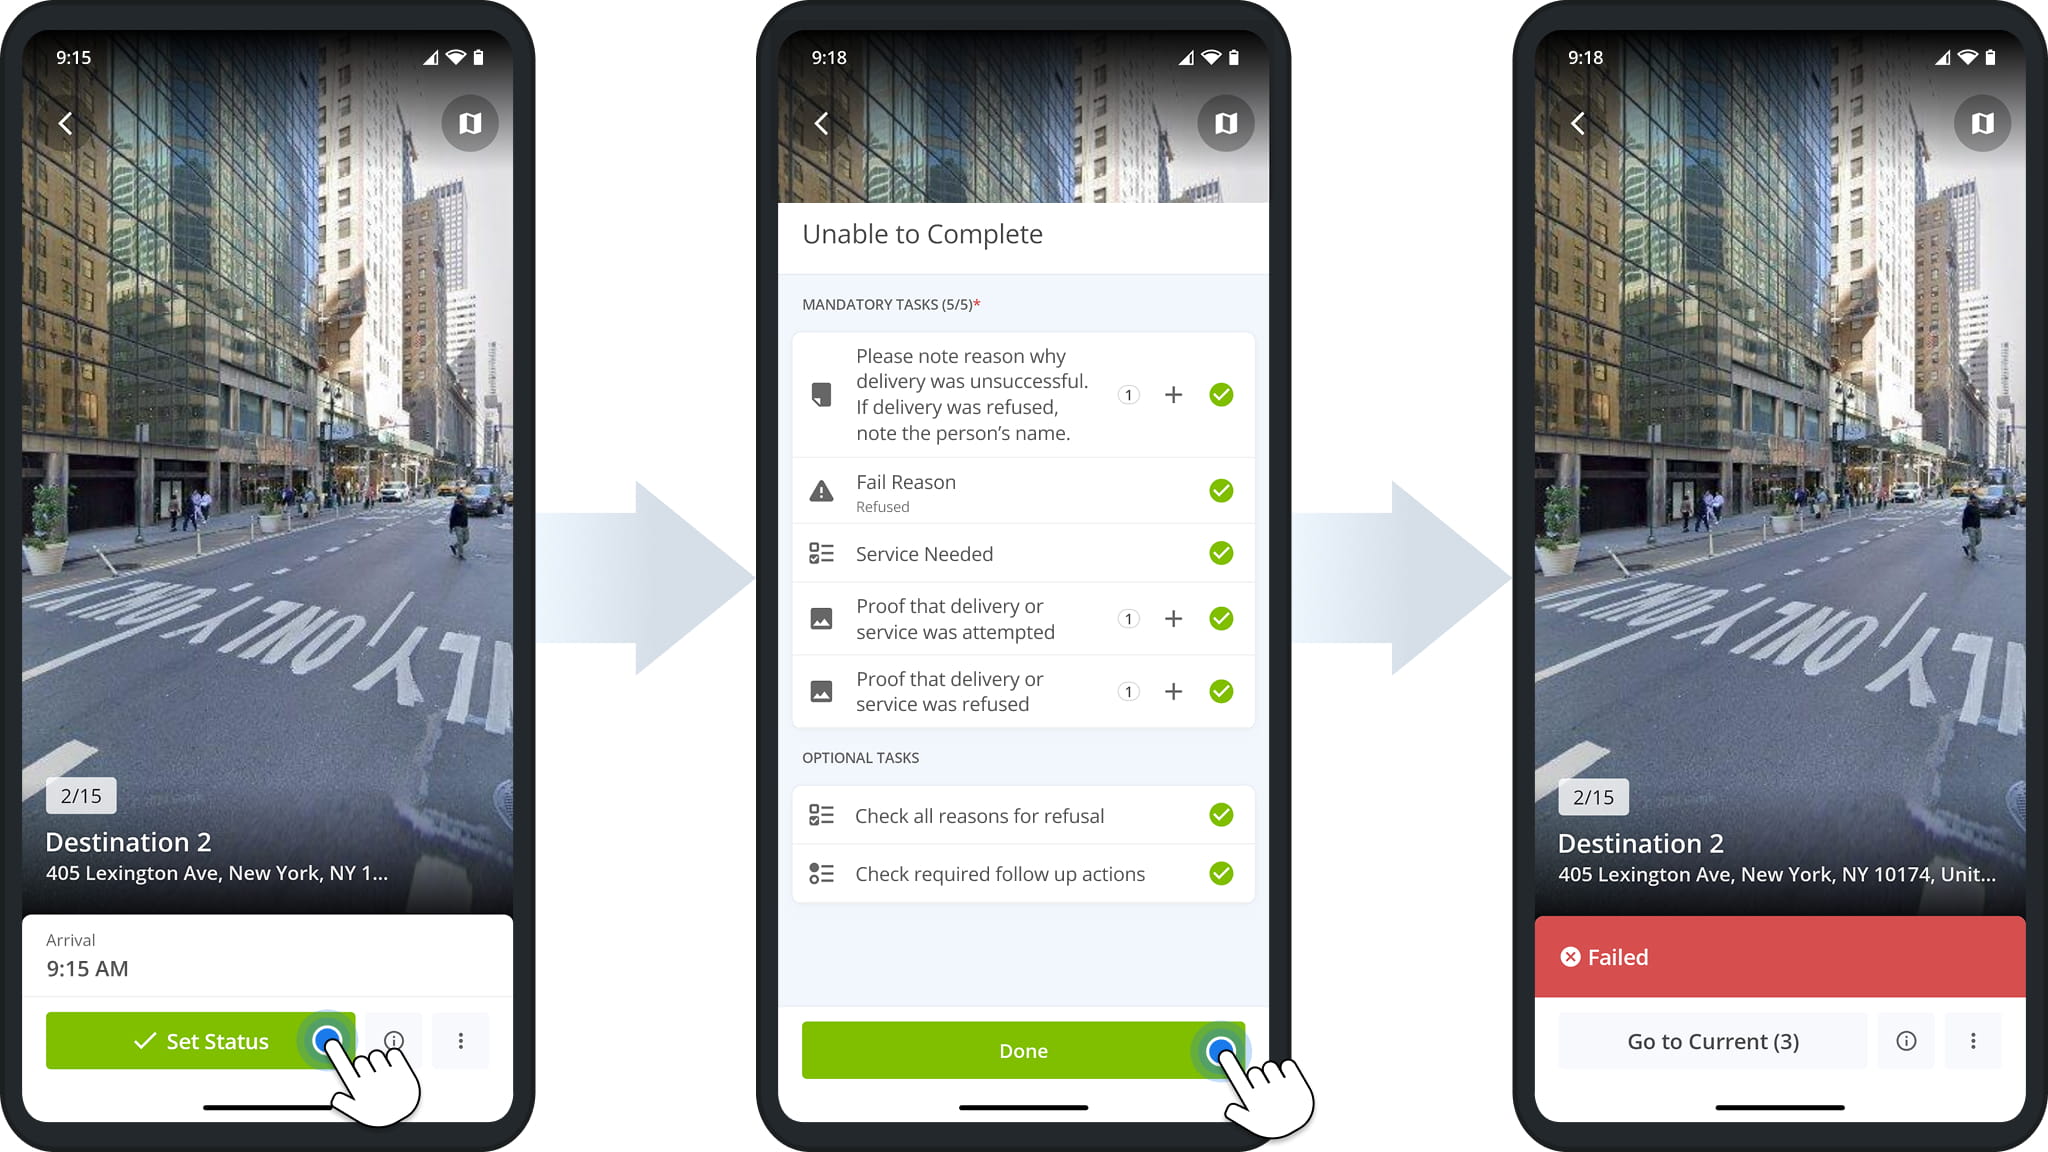
The process for marking a Destination as “Failed” is the same as the one described above.
Tap “Set Status” after arriving at a Destination, then tap “Unable to Complete” and complete all mandatory and optional tasks. Tap “Done” when finished. The Destination’s status will change to “Failed“, and you can continue the route.
How To Complete Proof Of Service, Visit And Delivery Tasks
To complete proof of visit workflows, simply follow the instructions shown in the app after opening a mandatory or optional task. NOTE: Mandatory tasks must be completed to assign a status to a Destination.
Workflow tasks can involve capturing media such as photos or videos, scanning order barcodes, collecting customer information, selecting release codes, etc. You can find examples of all workflow tasks below.
Tap a task to open it. Completed tasks are marked with a green check mark, and once all mandatory tasks are complete, you can tap “Done” to complete the Destination.
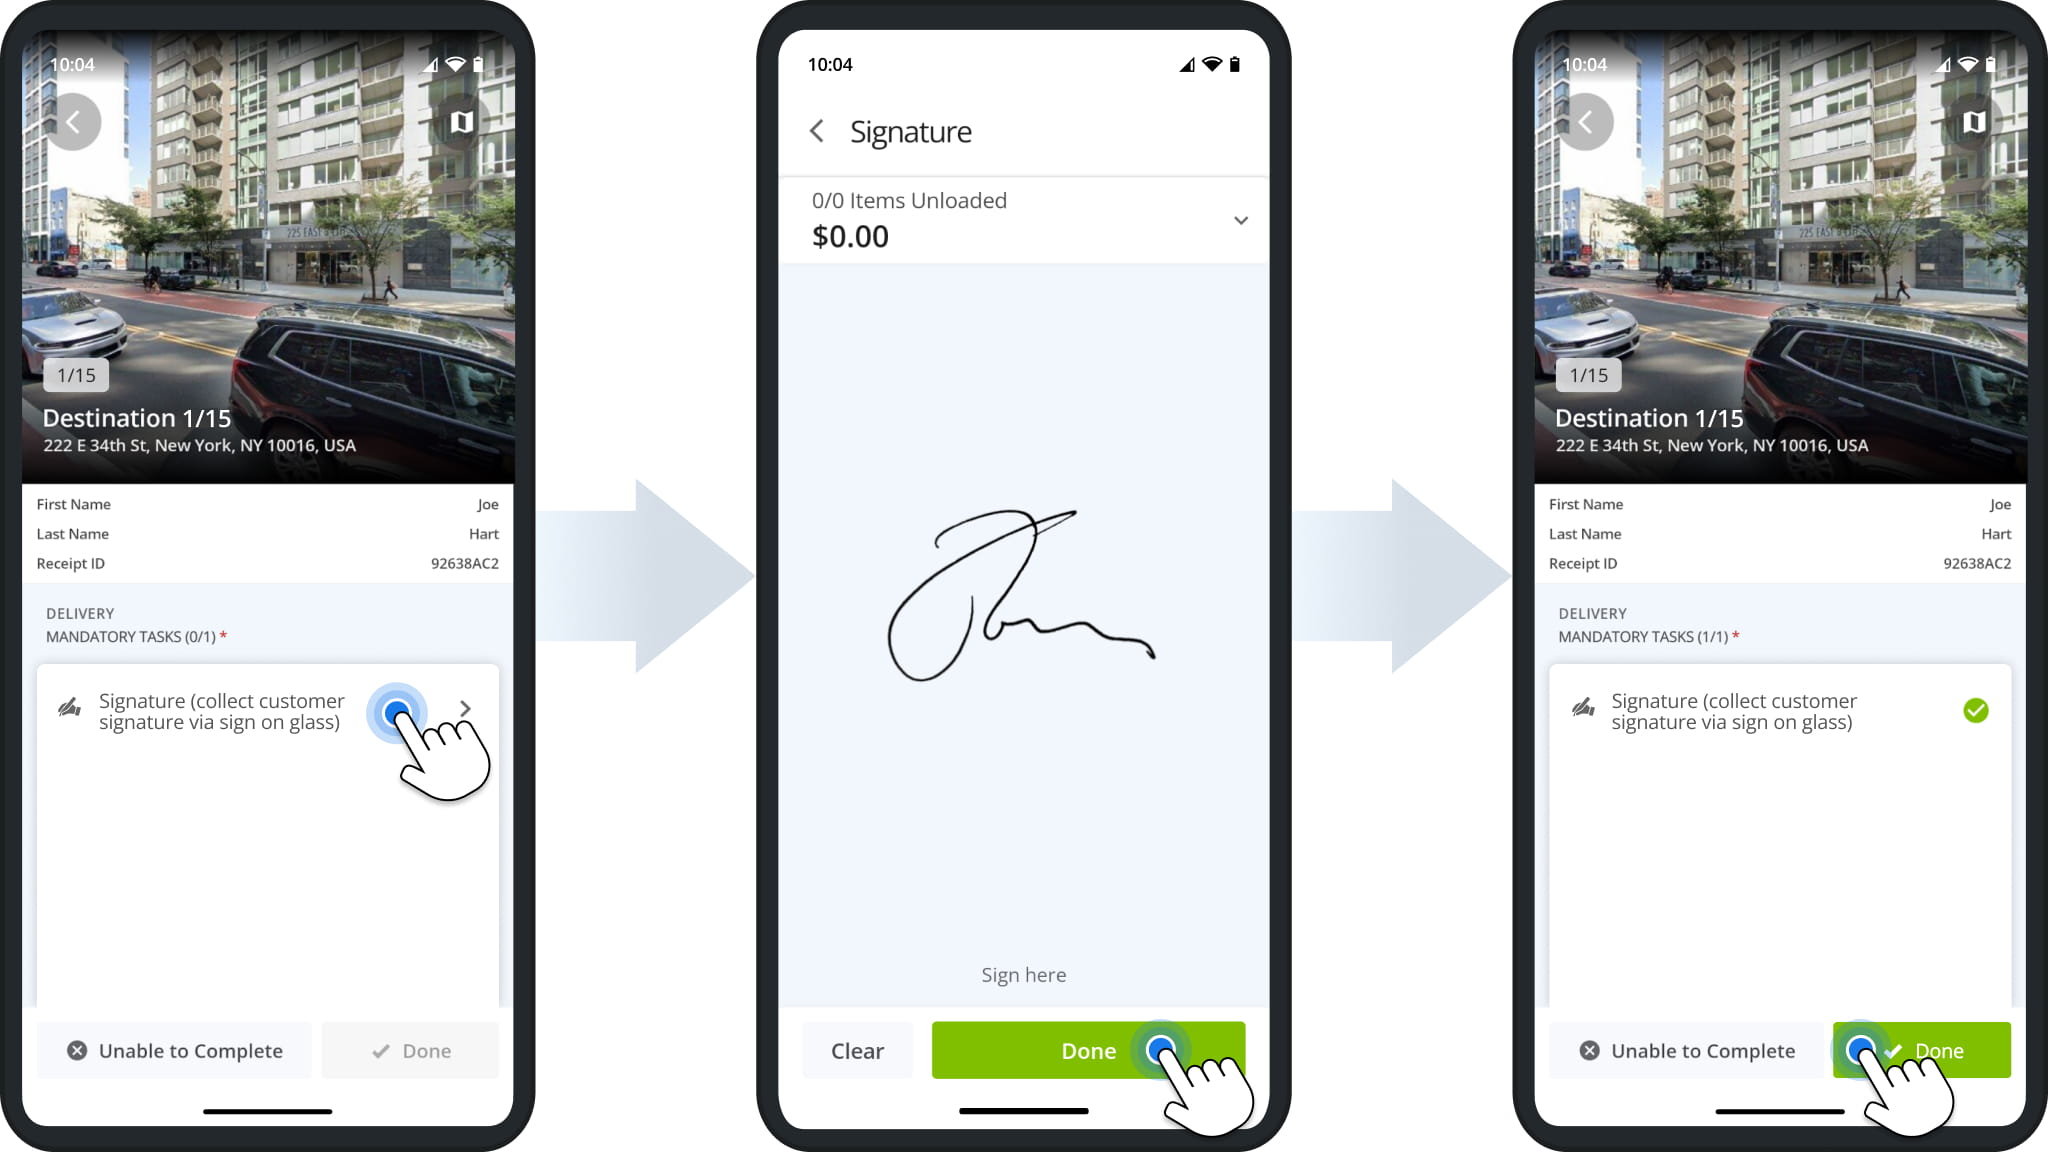
Collect Customer E-Signatures On Your Device
Signature tasks let you collect the customer’s signature on your device.
Tap the task and have the customer sign in the “Sign here” area. Tap “Clear” to start over, or “Done” to save the signature. If items were unloaded at the Destination, the top of the screen shows how many there were and their total value.
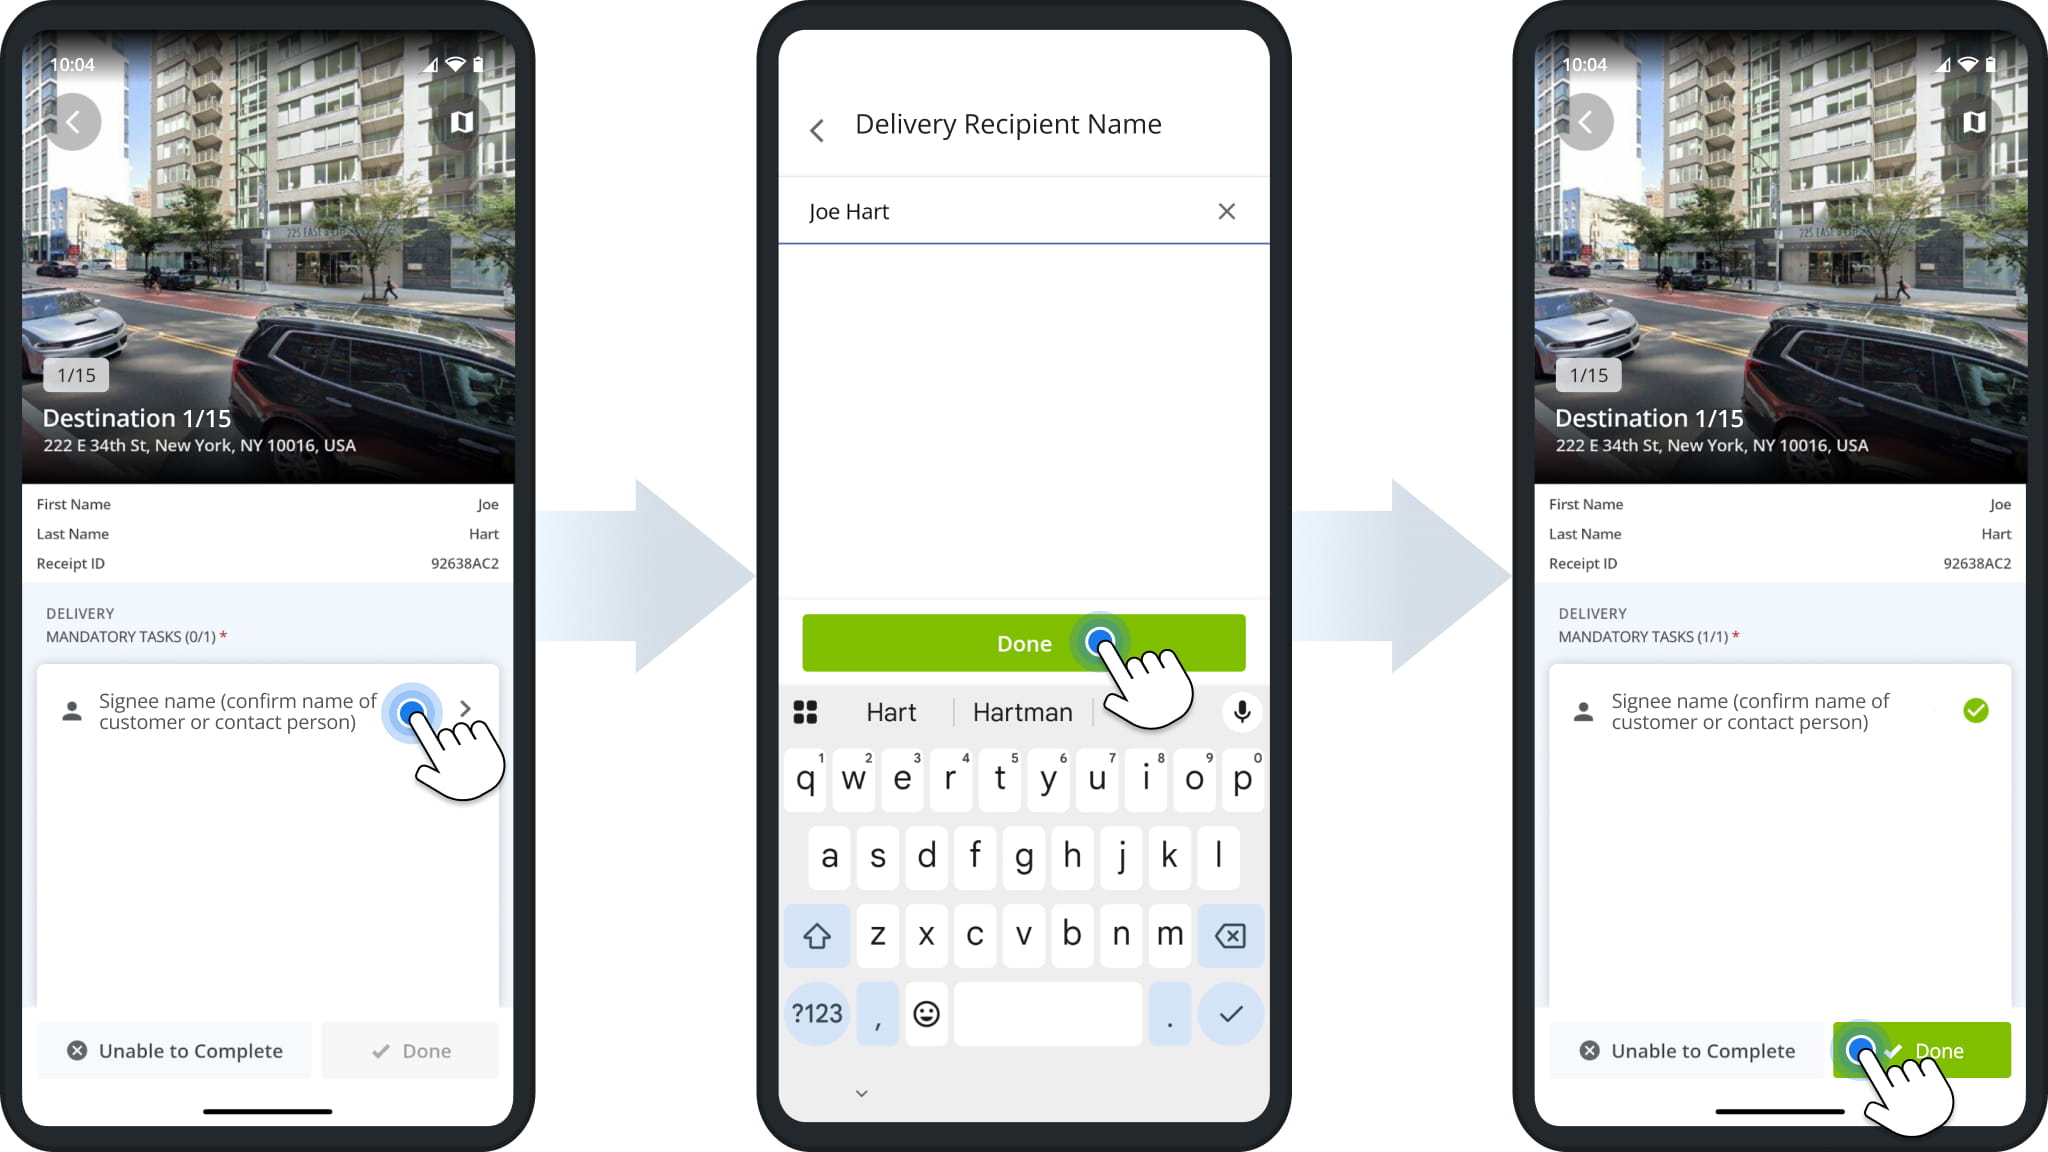
Confirm Signee Names For Completed Orders
Signee name tasks confirm who received the order. Tap the task, enter the name of the customer or contact, and tap “Done”.
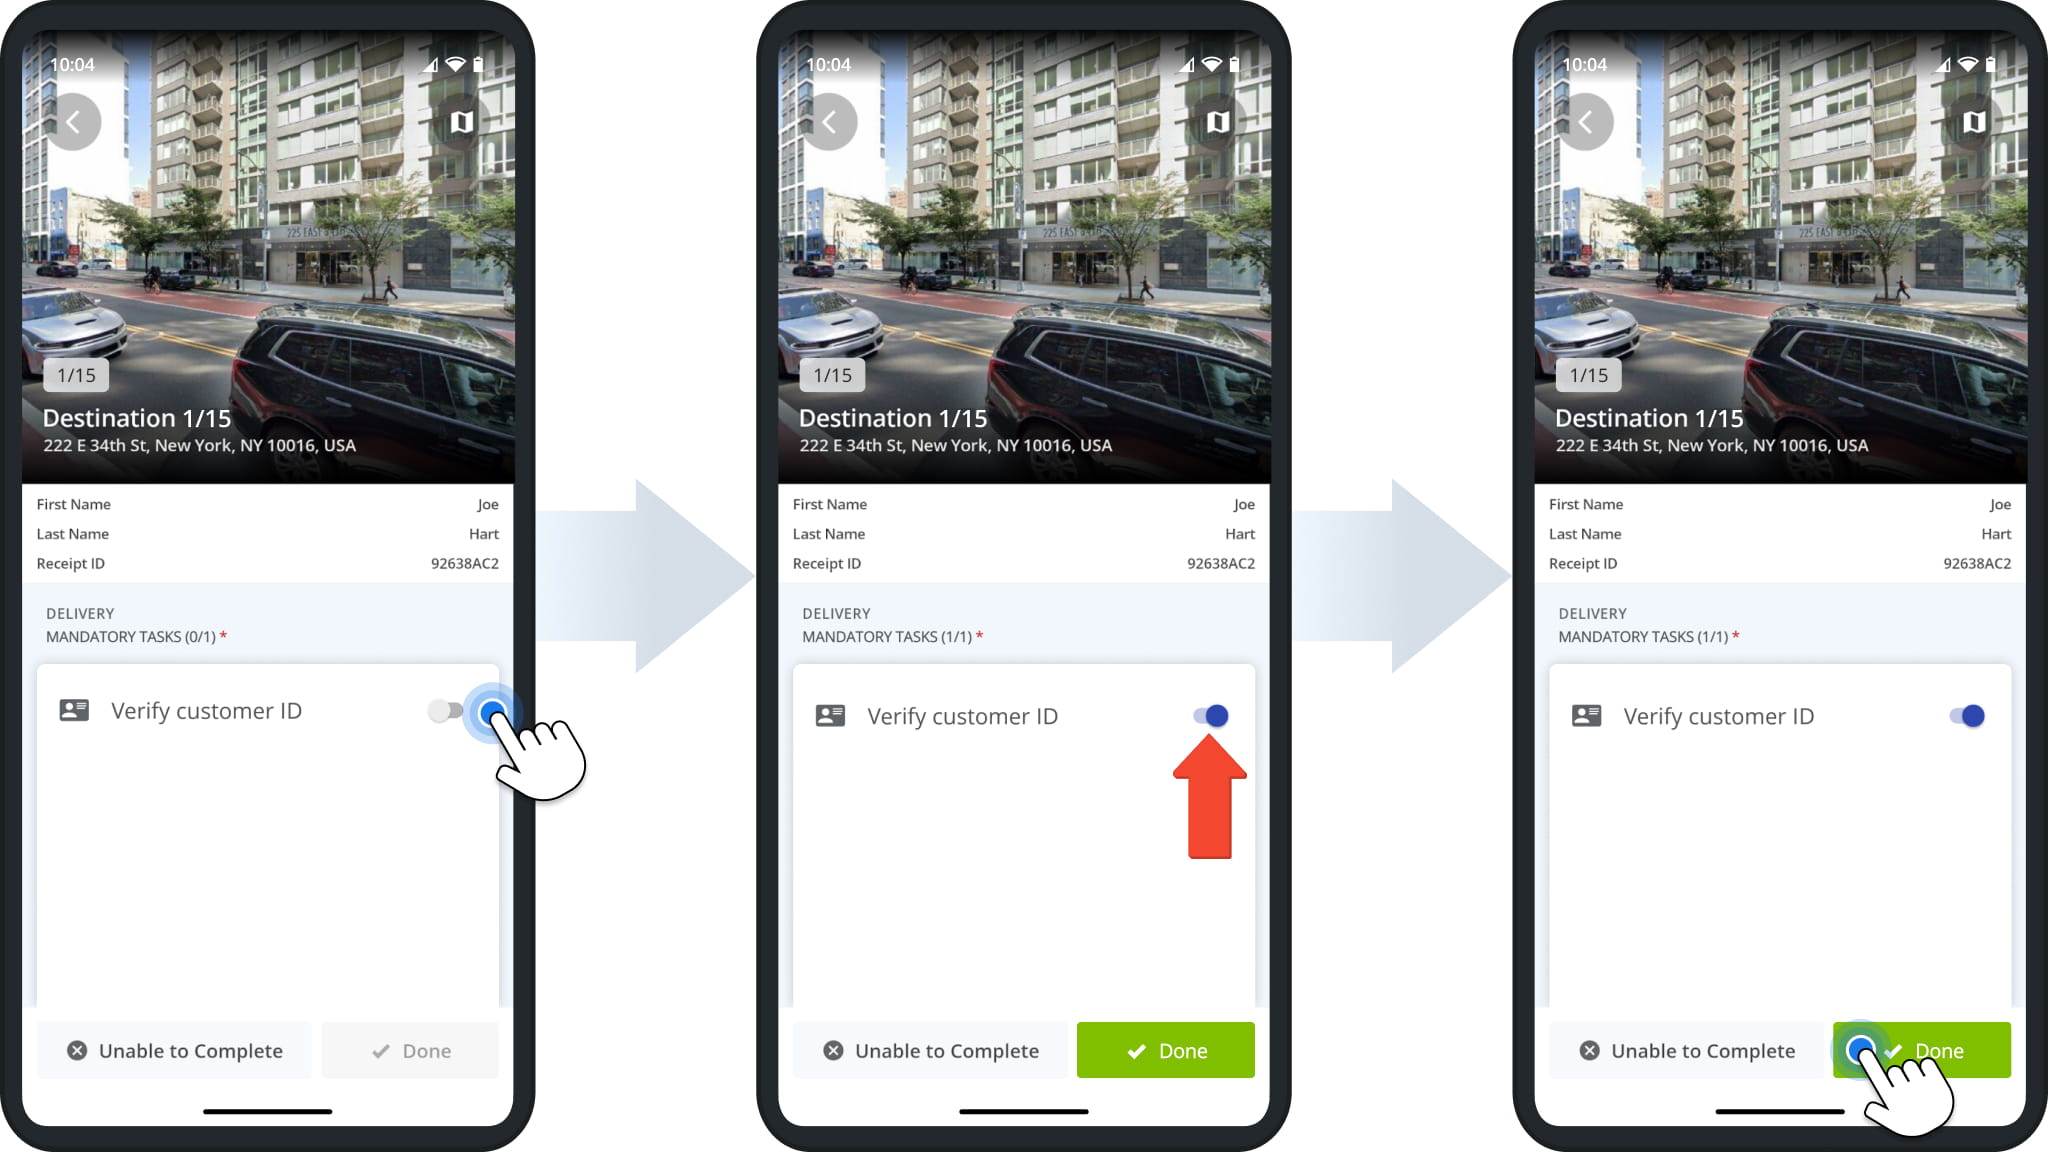
Verify Customer ID Before To Complete Visits
Verify ID tasks confirm that you checked the recipient’s ID. After checking the customer’s ID, tap the toggle next to the task to mark it as complete. This task doesn’t open a separate screen.
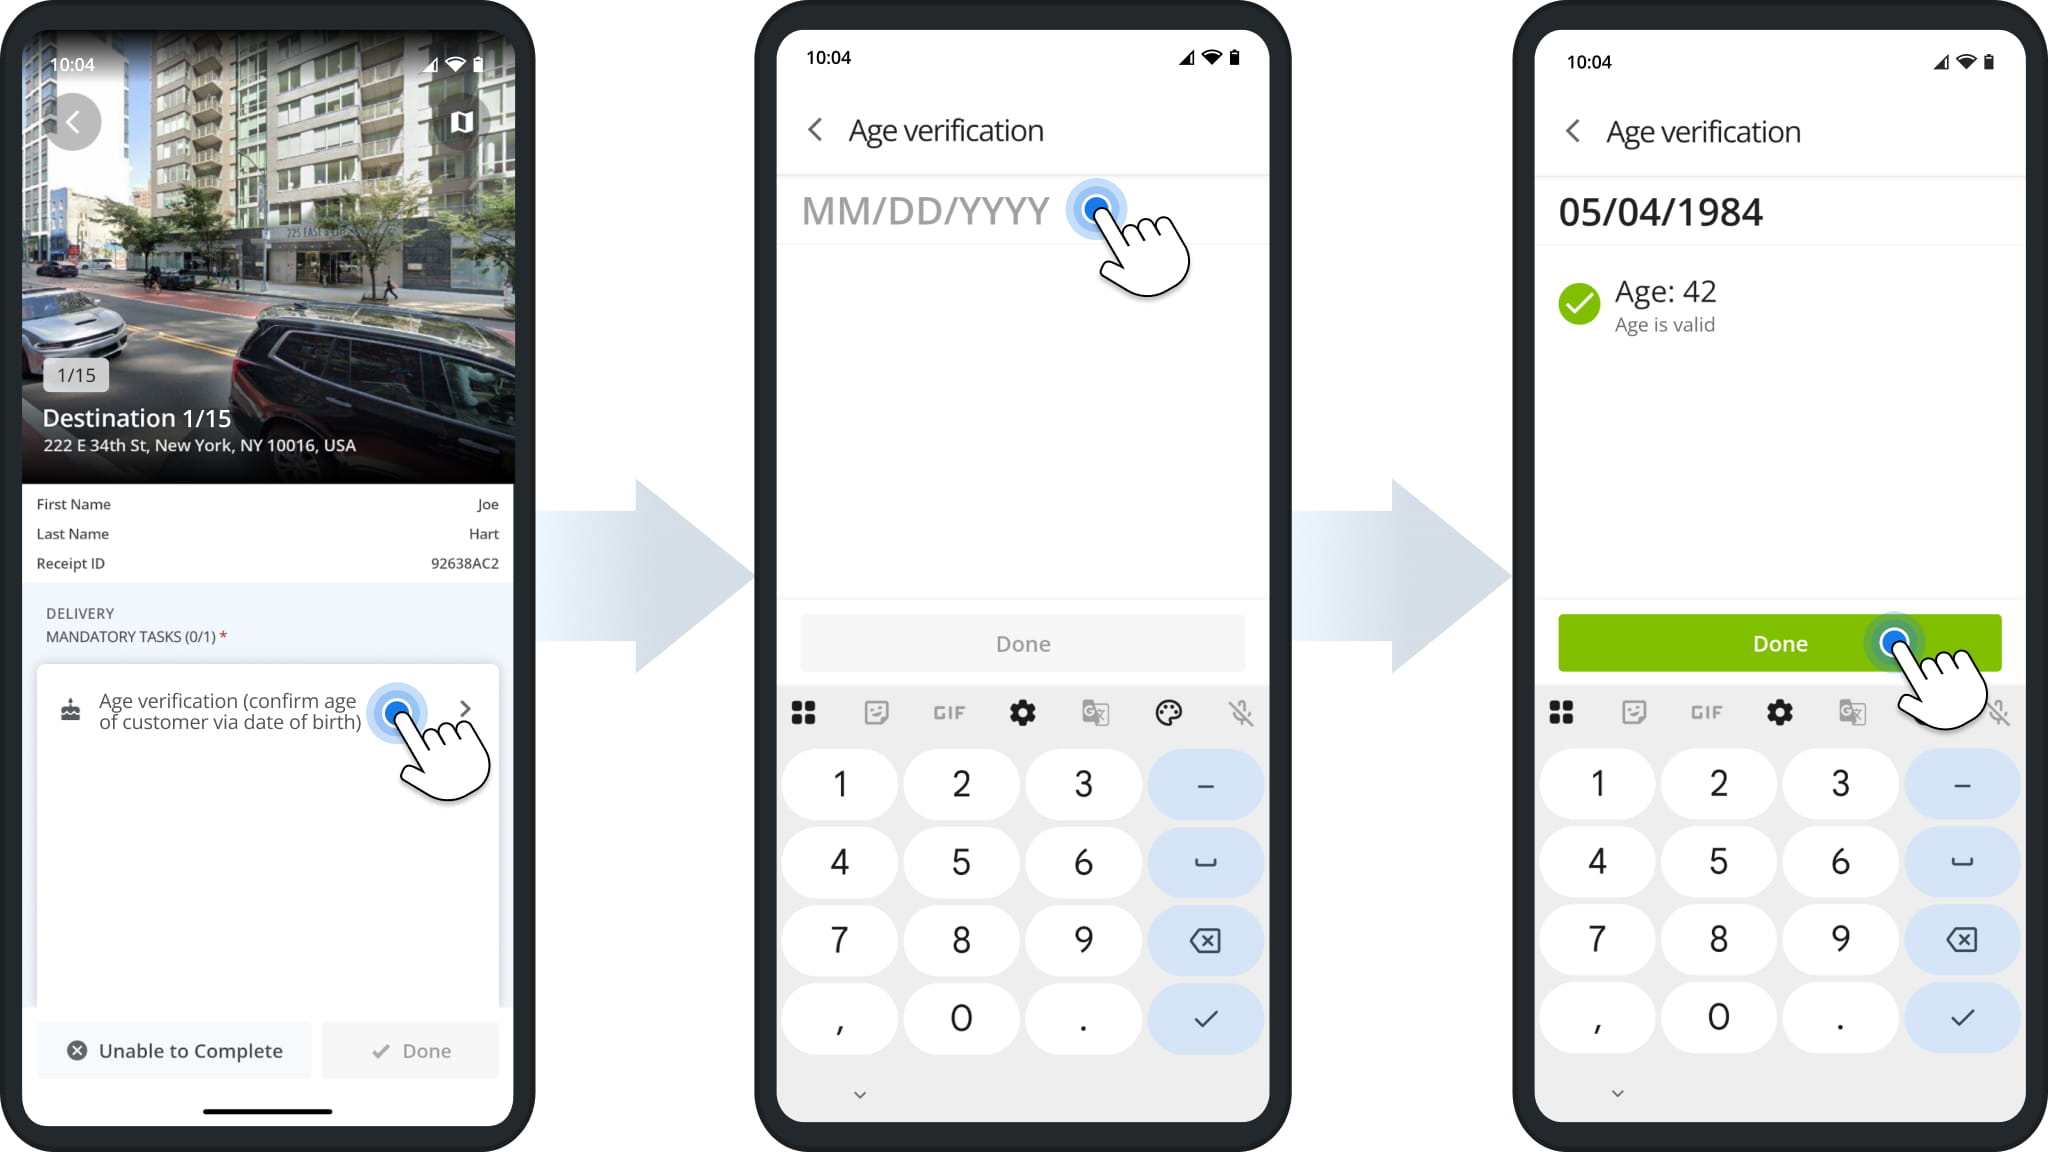
Verify Customer Age With Their Date Of Birth
Age verification tasks confirm the customer’s age before you complete the order.
Tap the task and enter a date of birth in the MM/DD/YYYY format. The app validates the age automatically. Tap “Done” to finalize.
Verify Customer Reference Numbers At Destinations
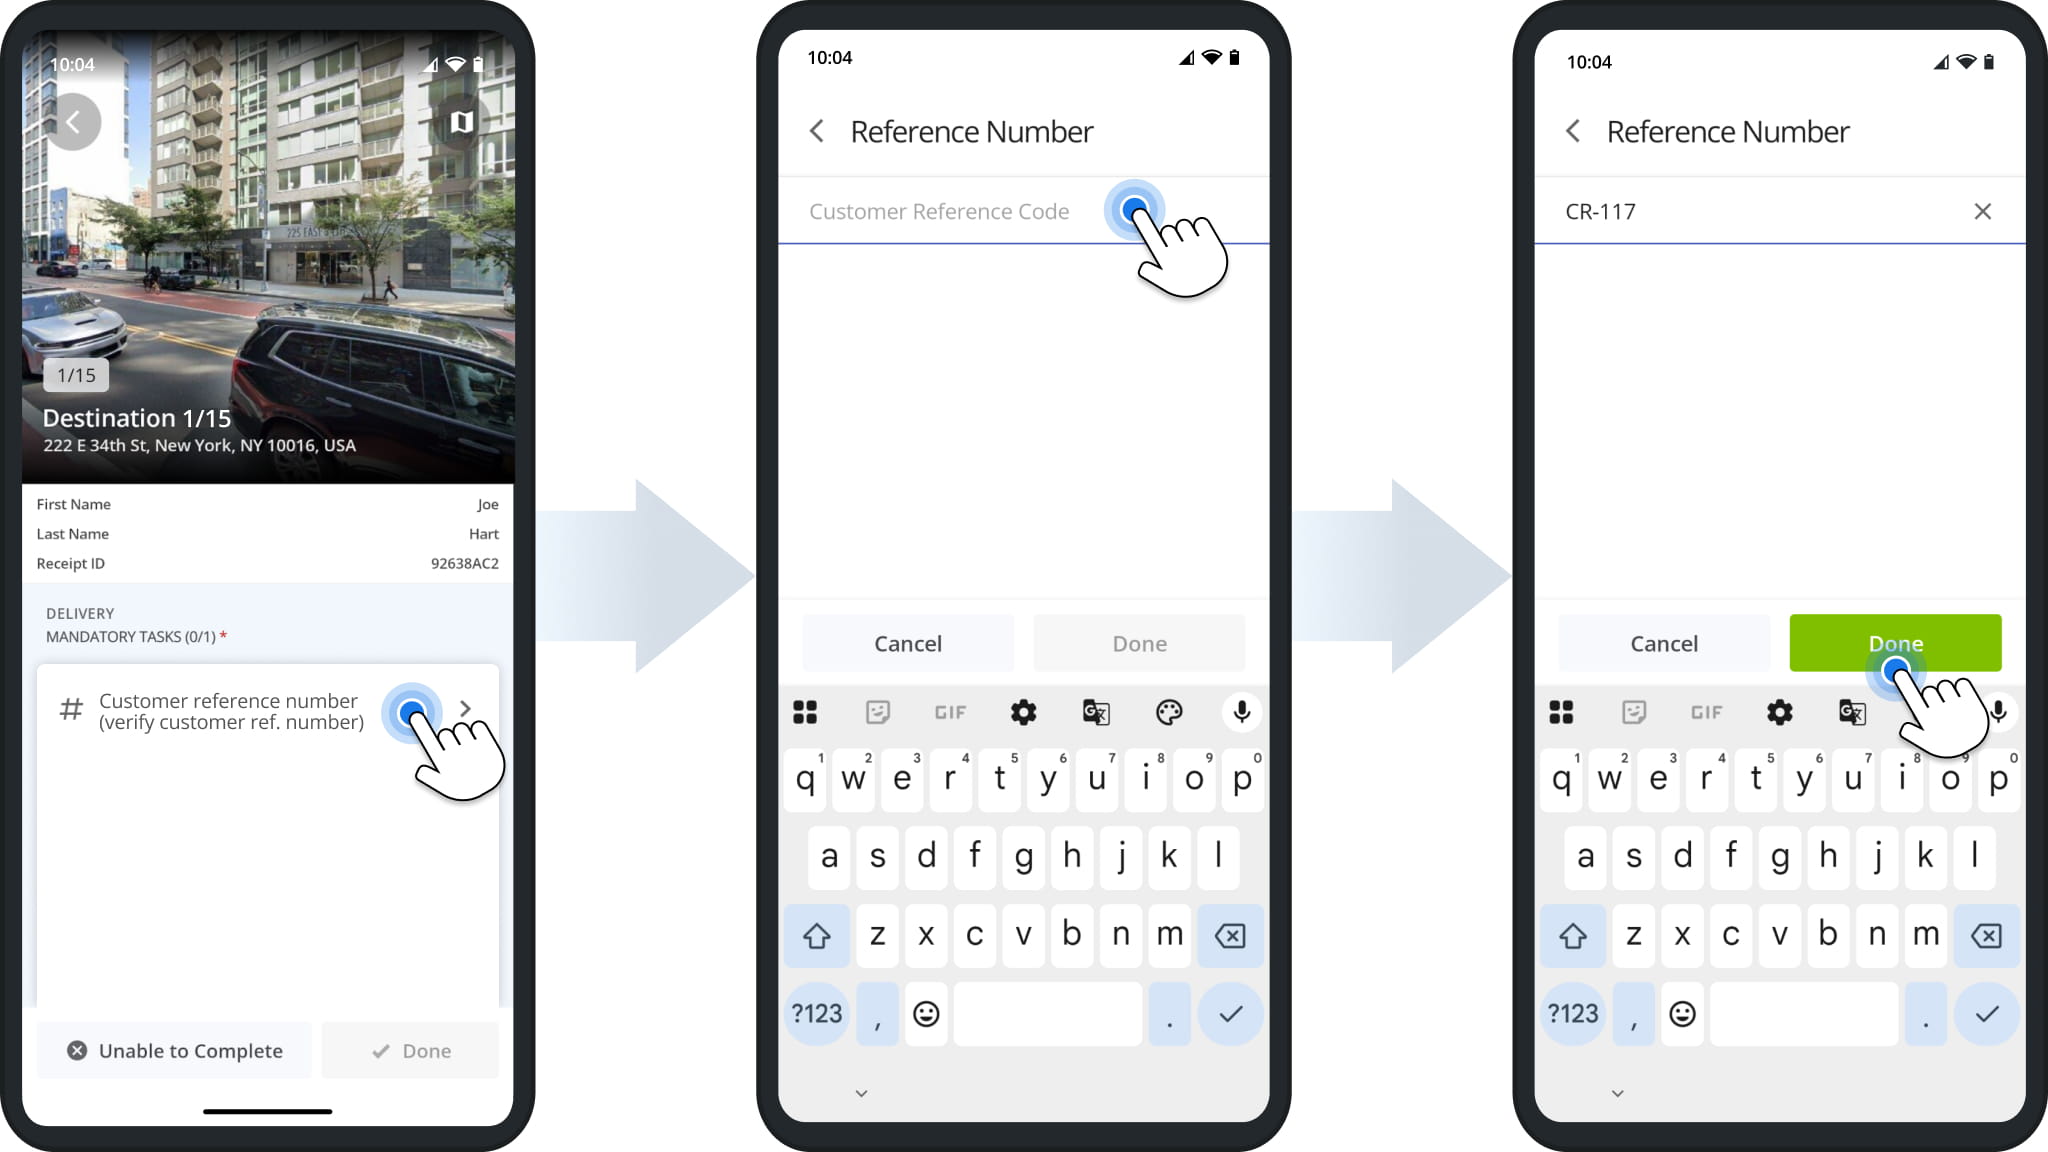
Customer reference number tasks confirm the reference number associated with the customer.
Tap the task, enter the customer’s reference code, and tap “Done”. To go back without saving, tap “Cancel”.
Take Photos As Proof Of Delivery Or Visit
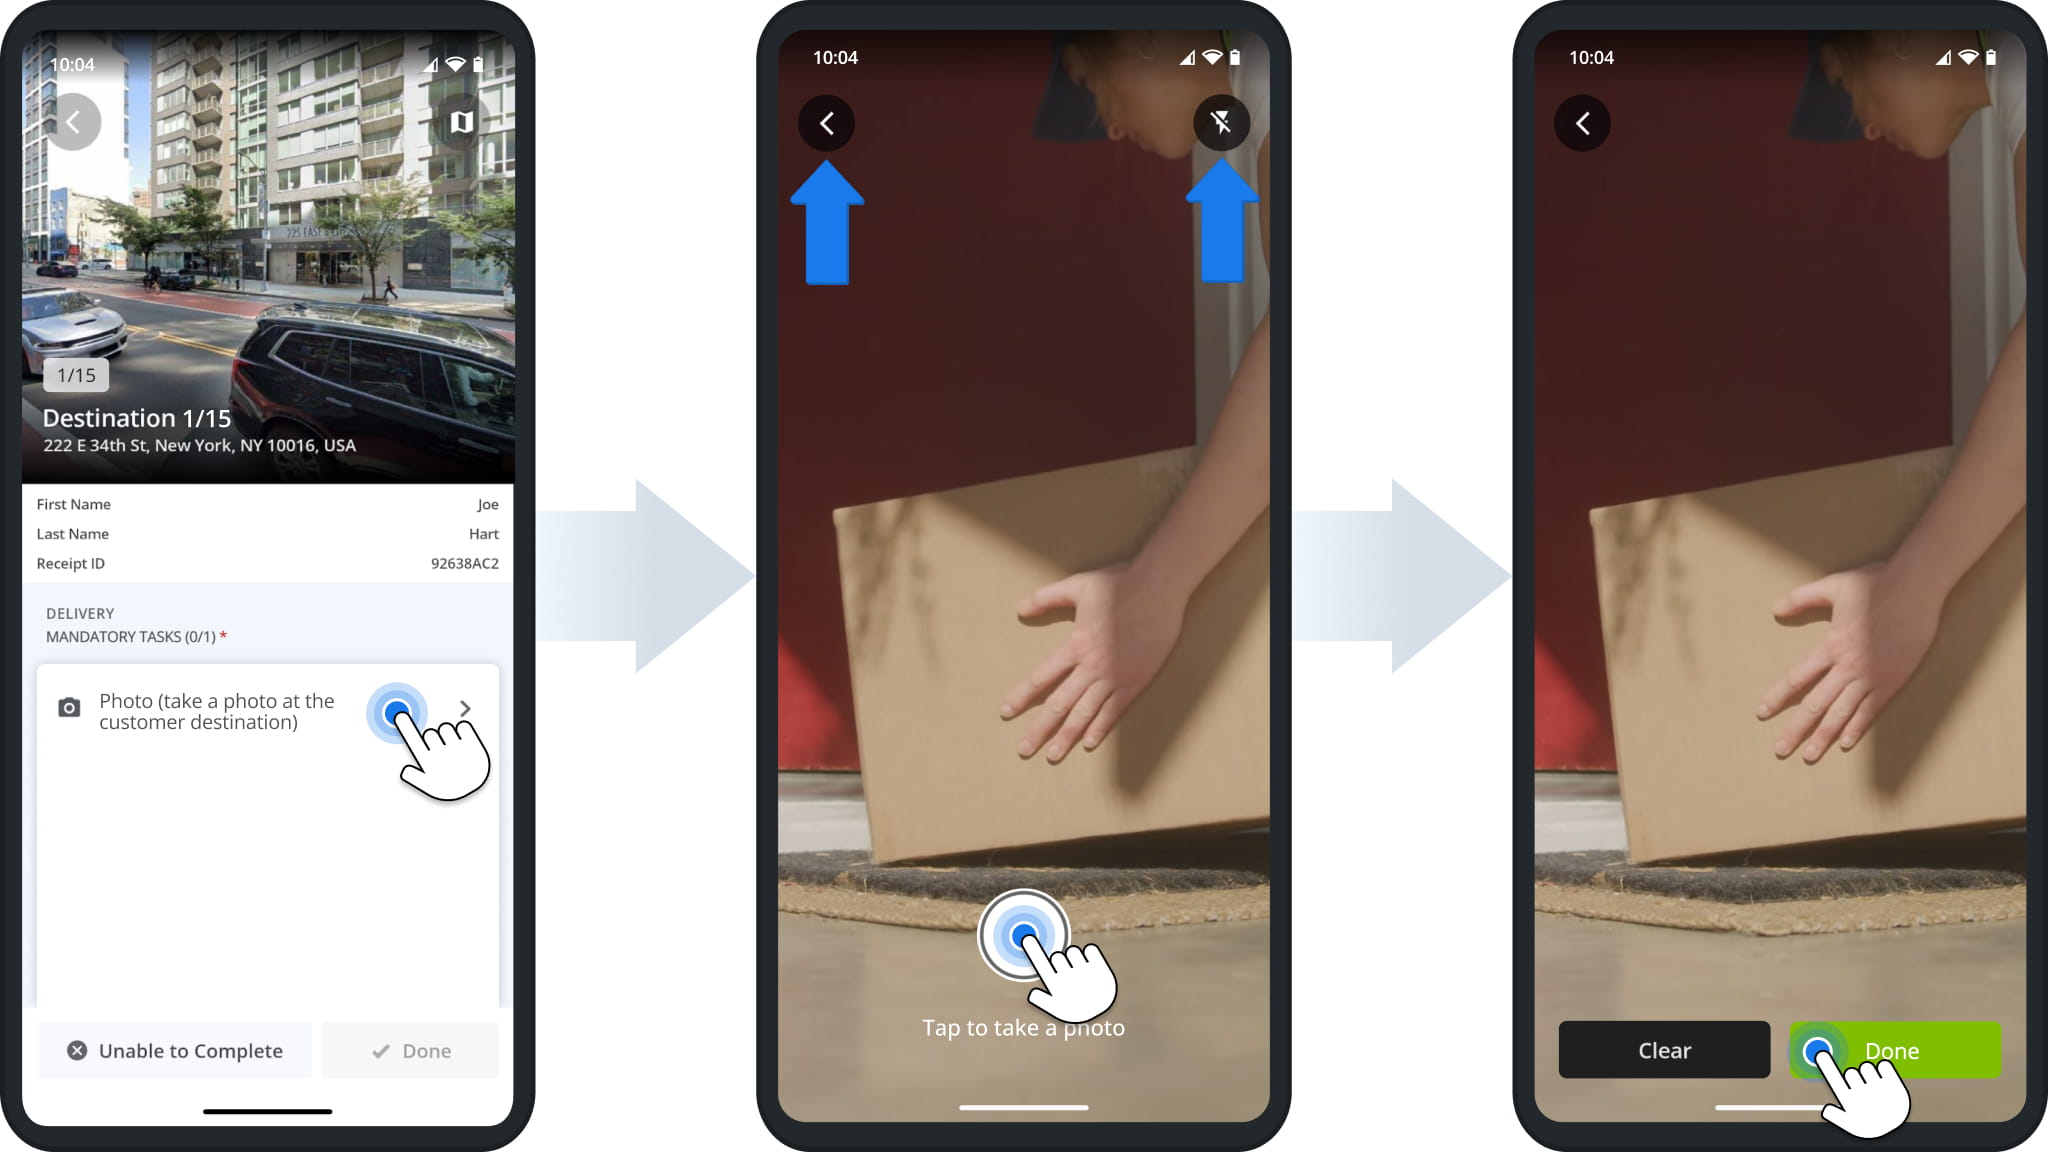
Photo tasks let you capture photo proof of delivery or visit with your device’s camera.
Tap the task to open the camera, then tap the Shutter Button to take a photo. Tap the Flash Icon to turn the flash on or off, or the Back Arrow to go back. Tap “Clear” to retake the photo, or “Done” to attach it to the Destination.
Record Videos As Proof Of Delivery Or Visit
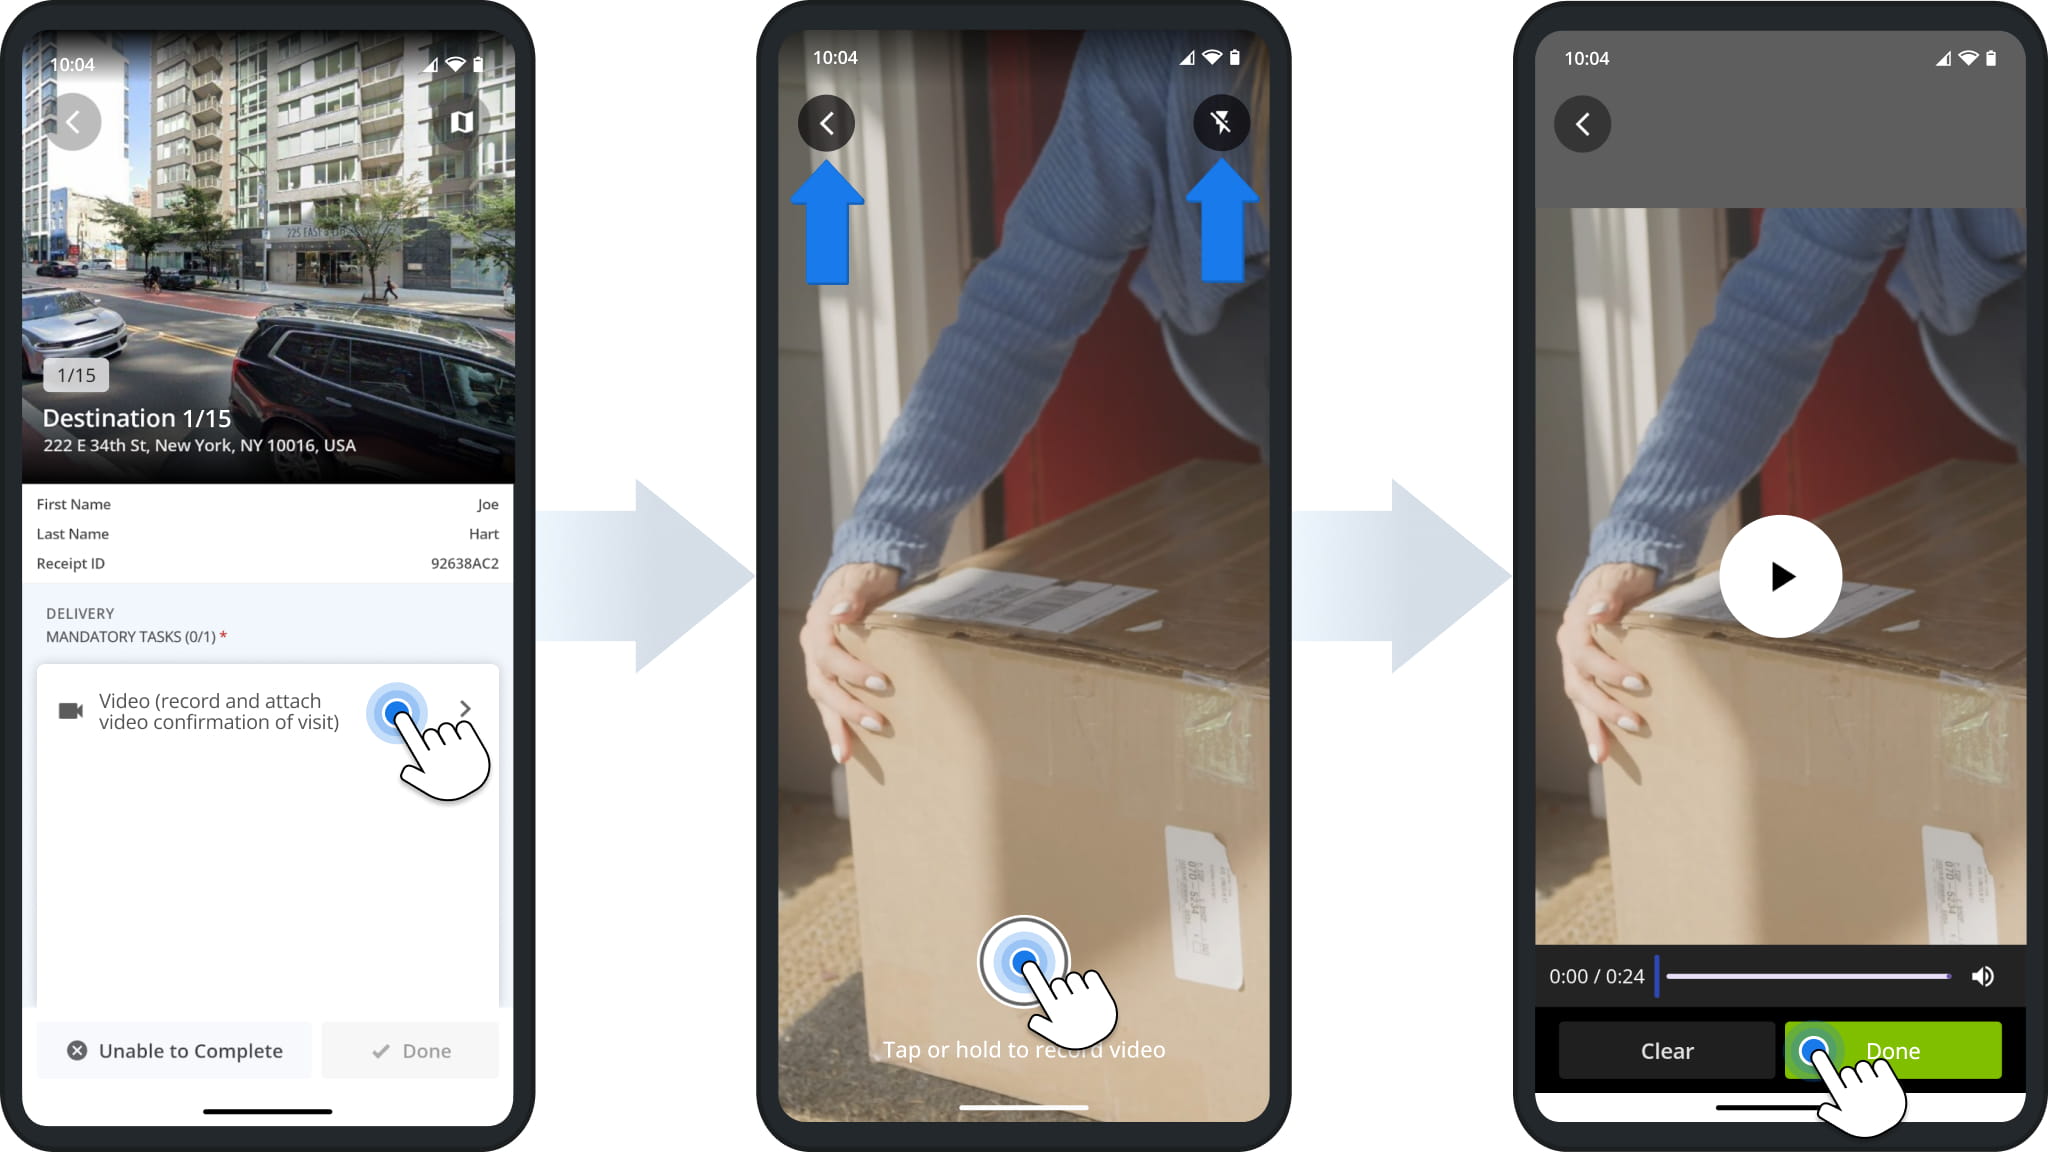
Video tasks let you record video proof of delivery or visit. Tap the task to open the camera, then tap or hold the Record Button to record a video. Use the Flash Icon to turn the flash on or off.
After recording, you can play the video back to check it. Tap “Clear” to record it again, or “Done” to attach it to the Destination.
Record Audio To Confirm Destination Visits
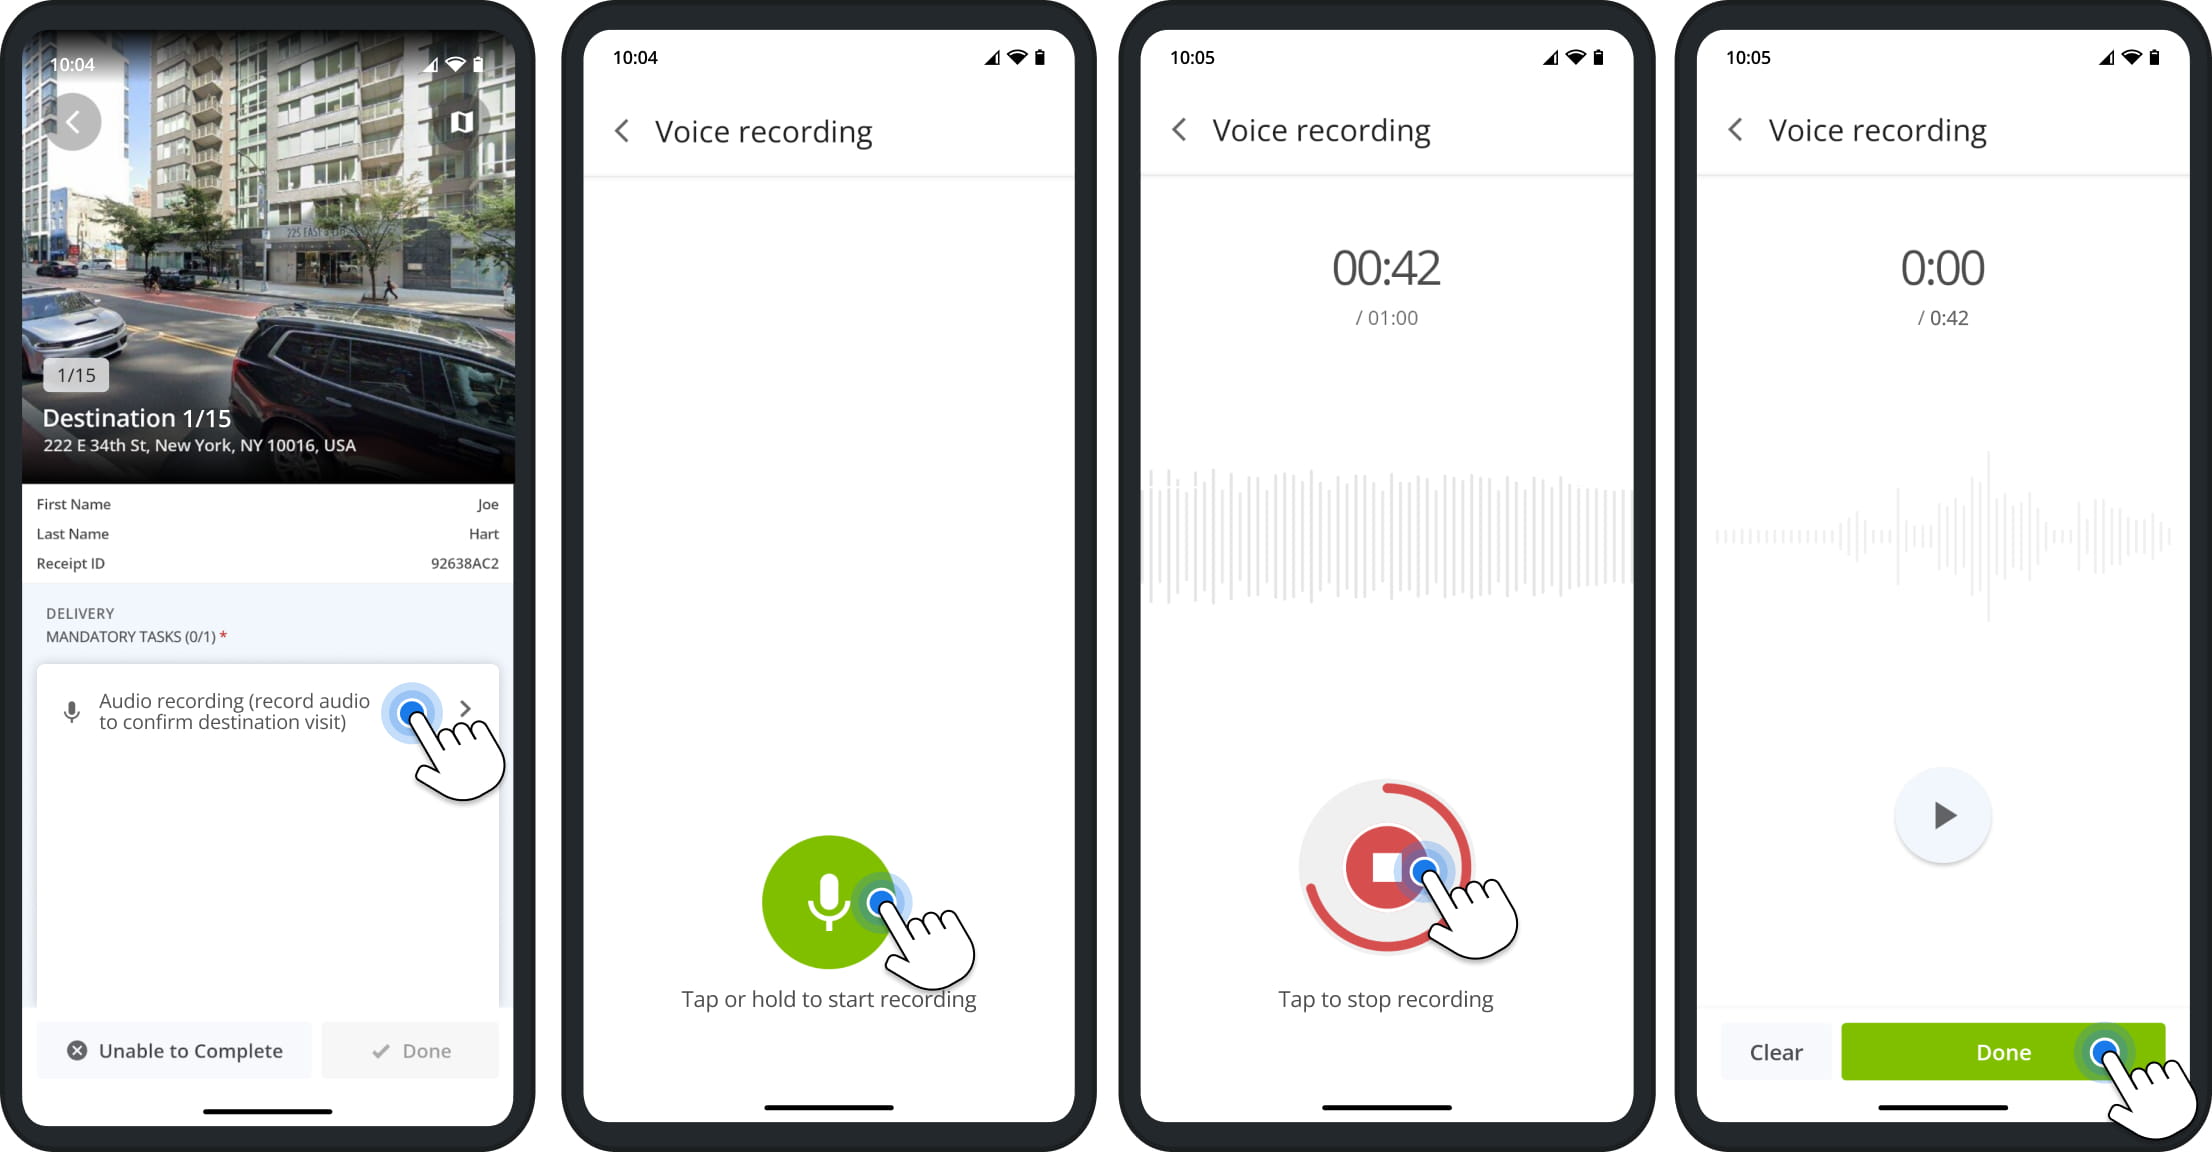
Audio recording tasks let you record a voice note to confirm a Destination visit.
Tap the task, then tap or hold the Microphone Button to start recording. The timer shows the recording length and the maximum allowed length. Tap the Stop Button to finish. Tap “Clear” to record it again, or “Done” to attach it.
Scan Order Label Codes And Barcodes
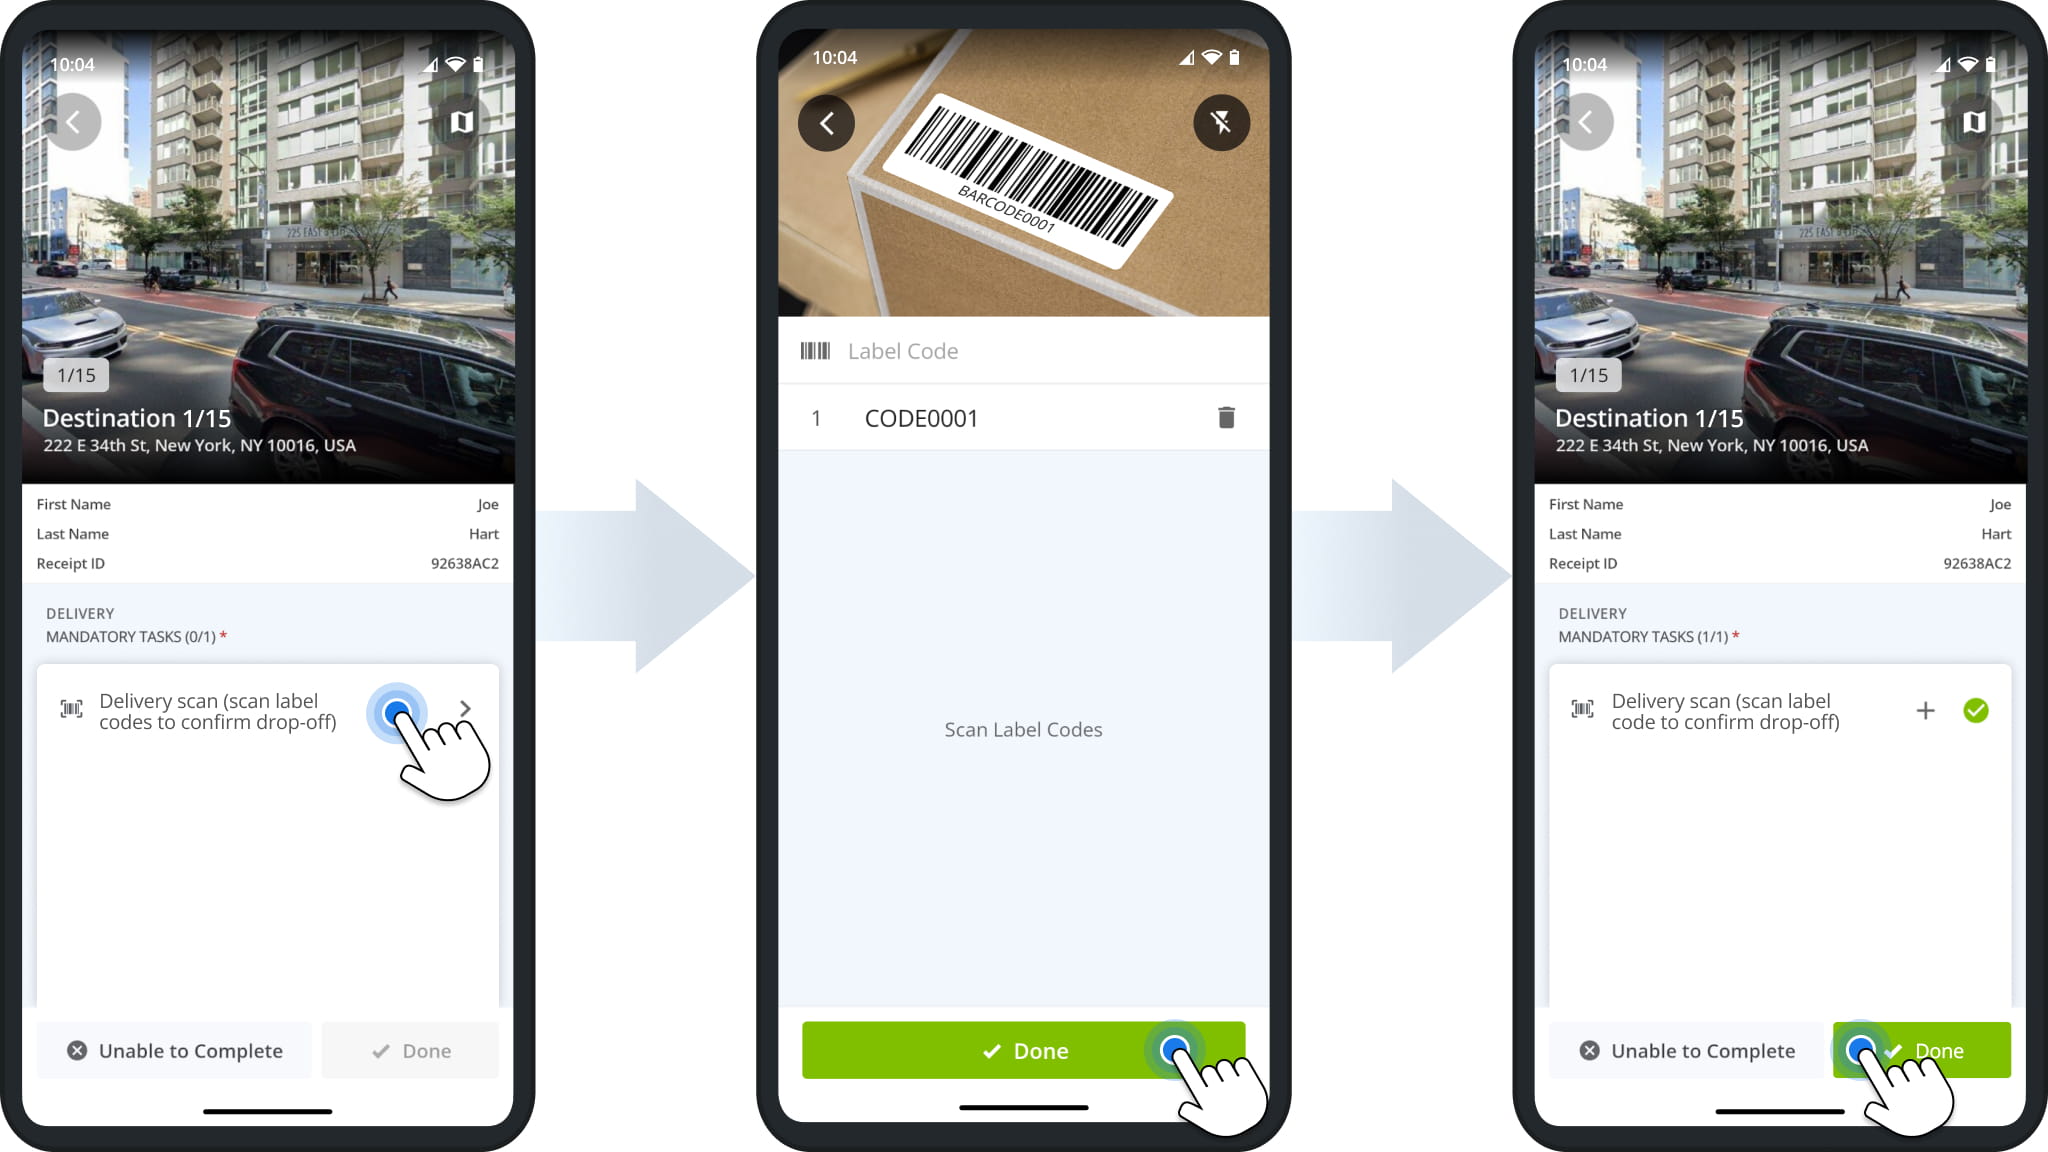
Delivery Scan, Pick-Up Scan, and Scan Label Code tasks all work the same way. You scan order labels and barcodes to confirm drop-offs, pick-ups, and other order details. Tap the scan task to open the camera and point it at the barcode label.
Scanned codes are listed below the camera view, and you can tap the Delete Icon to remove one. If your camera isn’t available, you can type the code into the “Label Code” field. Tap “Done” when finished.
Select Release Codes And Failed Codes
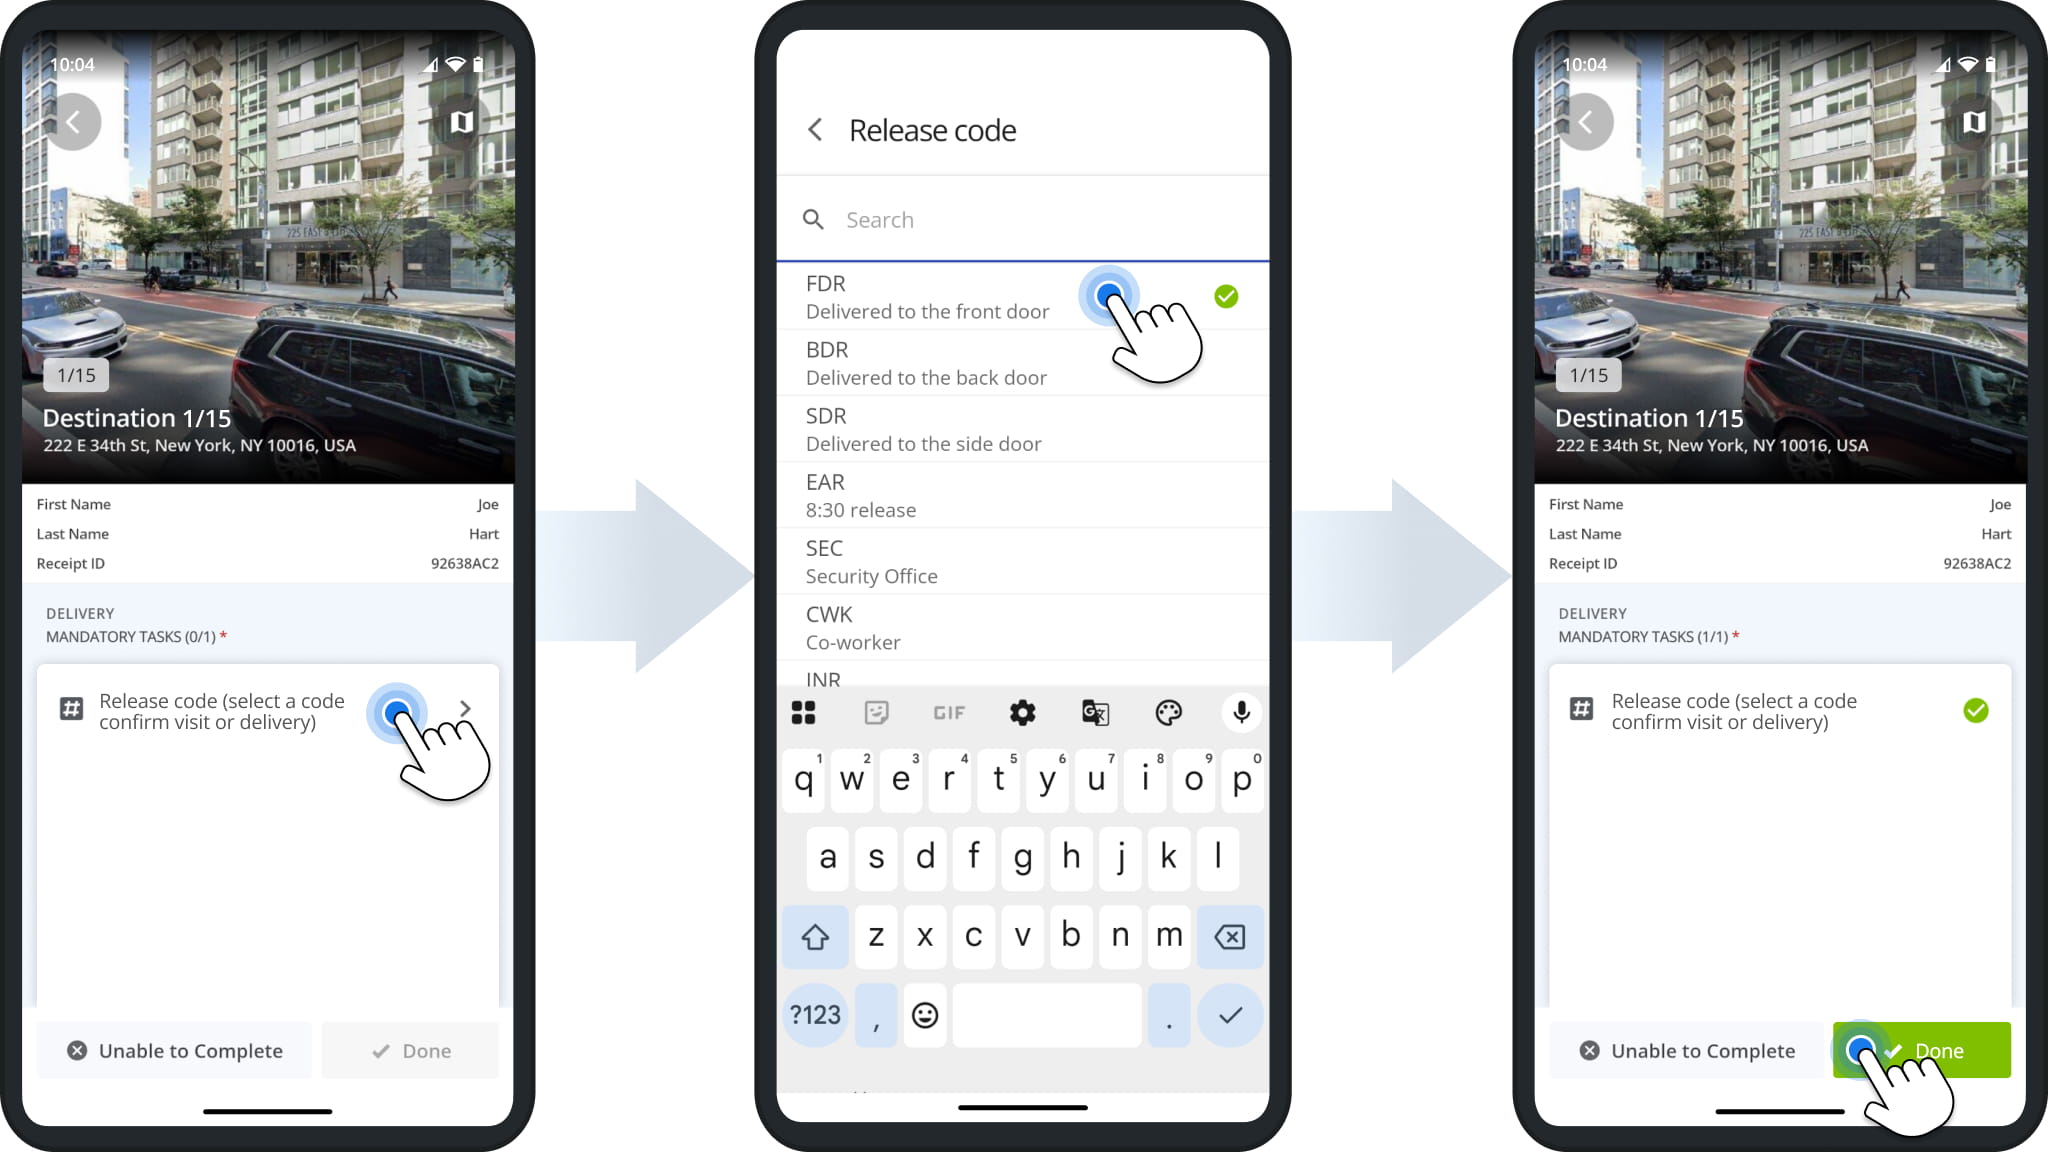
Release code tasks let you record how and where an order was delivered. When a Destination visit is unsuccessful, Failed Code tasks work the same way and record why. The table below lists the default Release and Failed Codes.
Tap the task, then tap a code from the list or search for one. Tap “Done” to confirm.
Release Codes & Failed Codes
Input Numbers, Units And Values At Destinations
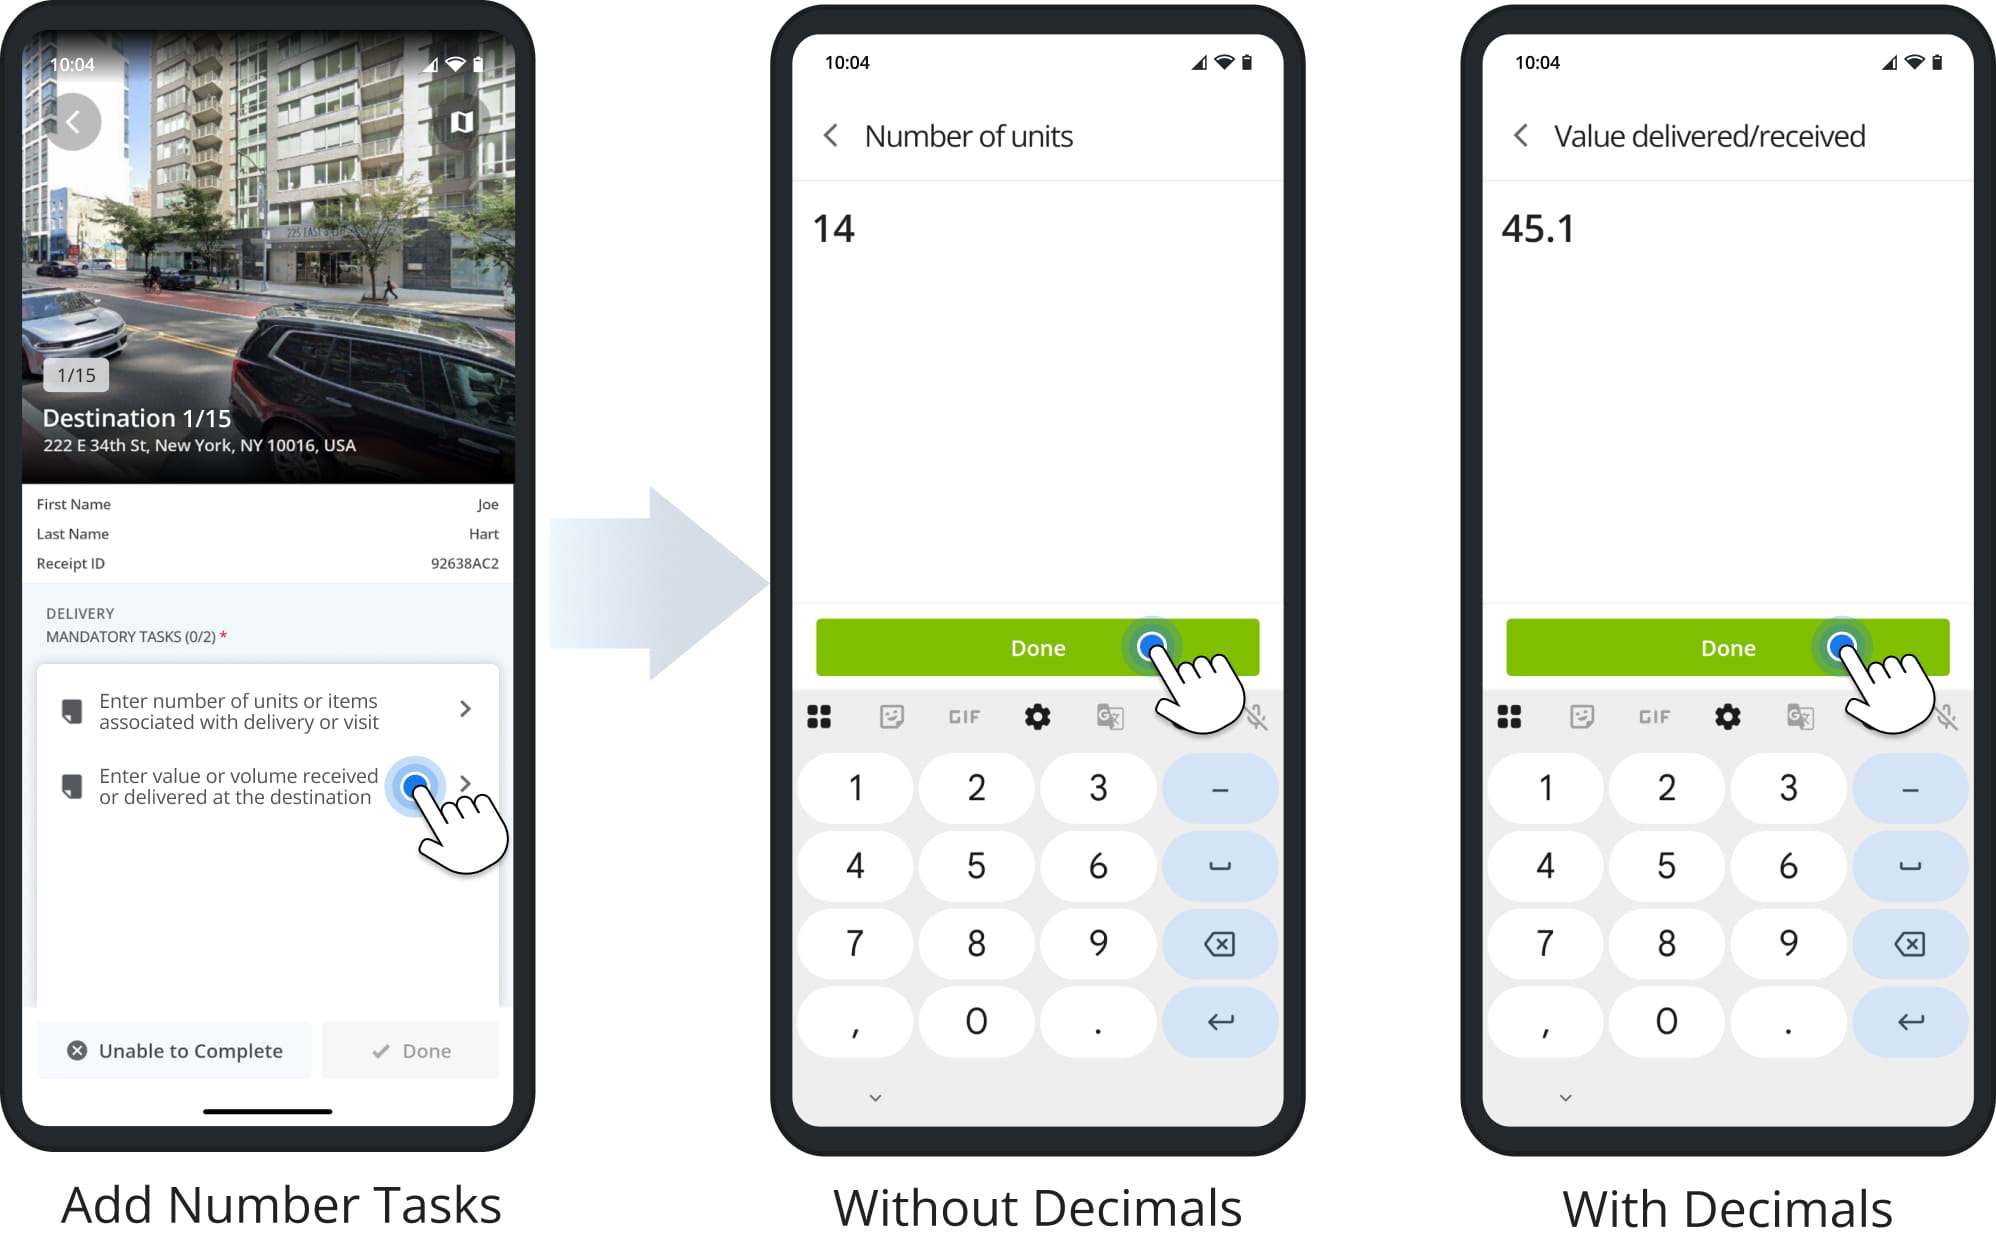
Number tasks let you record quantities and values, such as the number of units delivered or the volume received. Depending on the task, you can enter only whole numbers, or numbers with decimals.
Tap the task, enter the number with your device’s keypad, and tap “Done”.
Answer Questions About Destination Visits
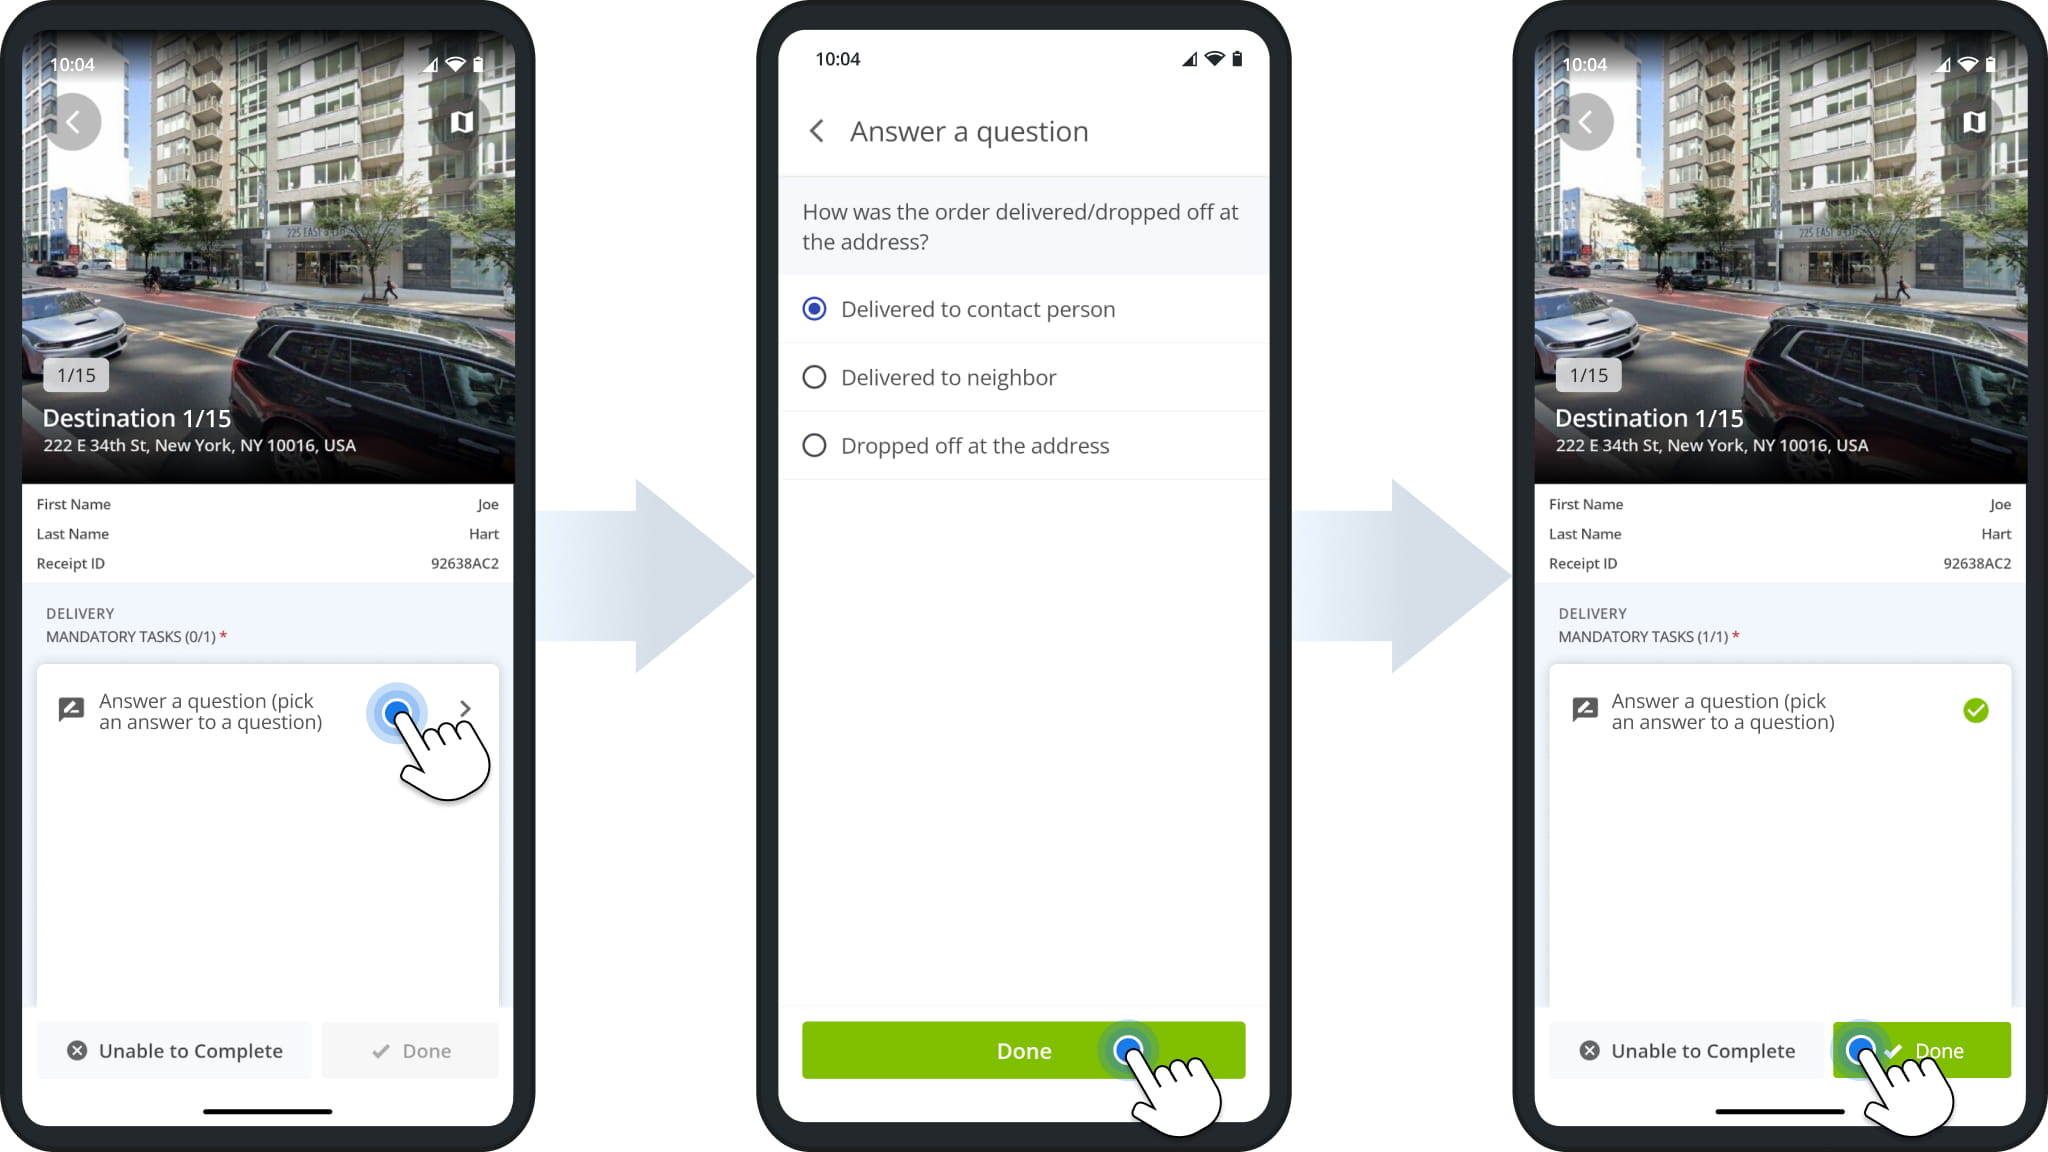
Question tasks ask you to answer a question about the visit. Depending on the question, you may need to pick one option, check multiple boxes, or type a short answer.
Tap the task, select an answer, and tap “Done”.
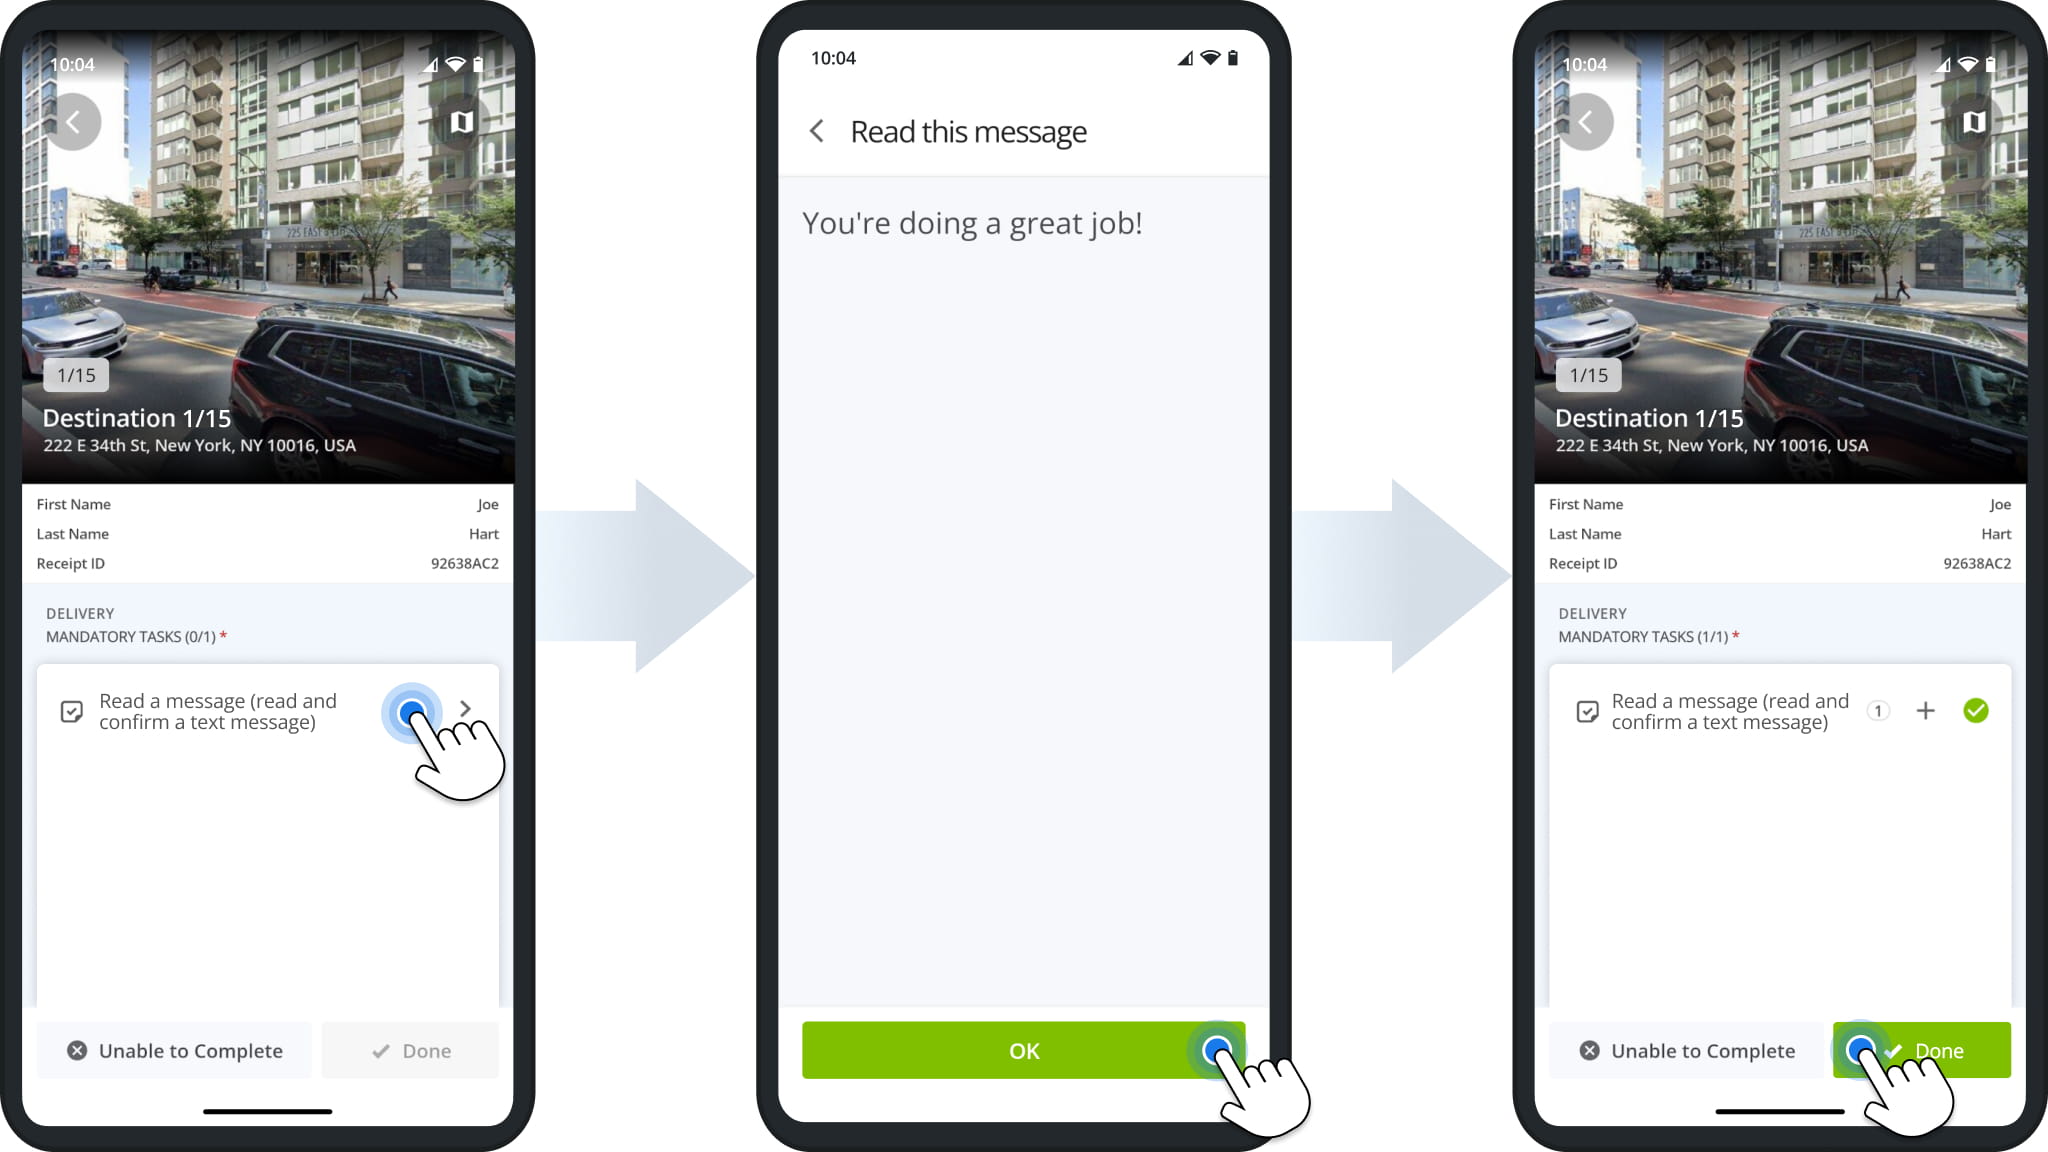
Read And Confirm Messages From Your Organization
Read message tasks show a message from your organization. Tap the task, read the message, and tap “OK” to confirm.
Add Text Notes To Destination Visits
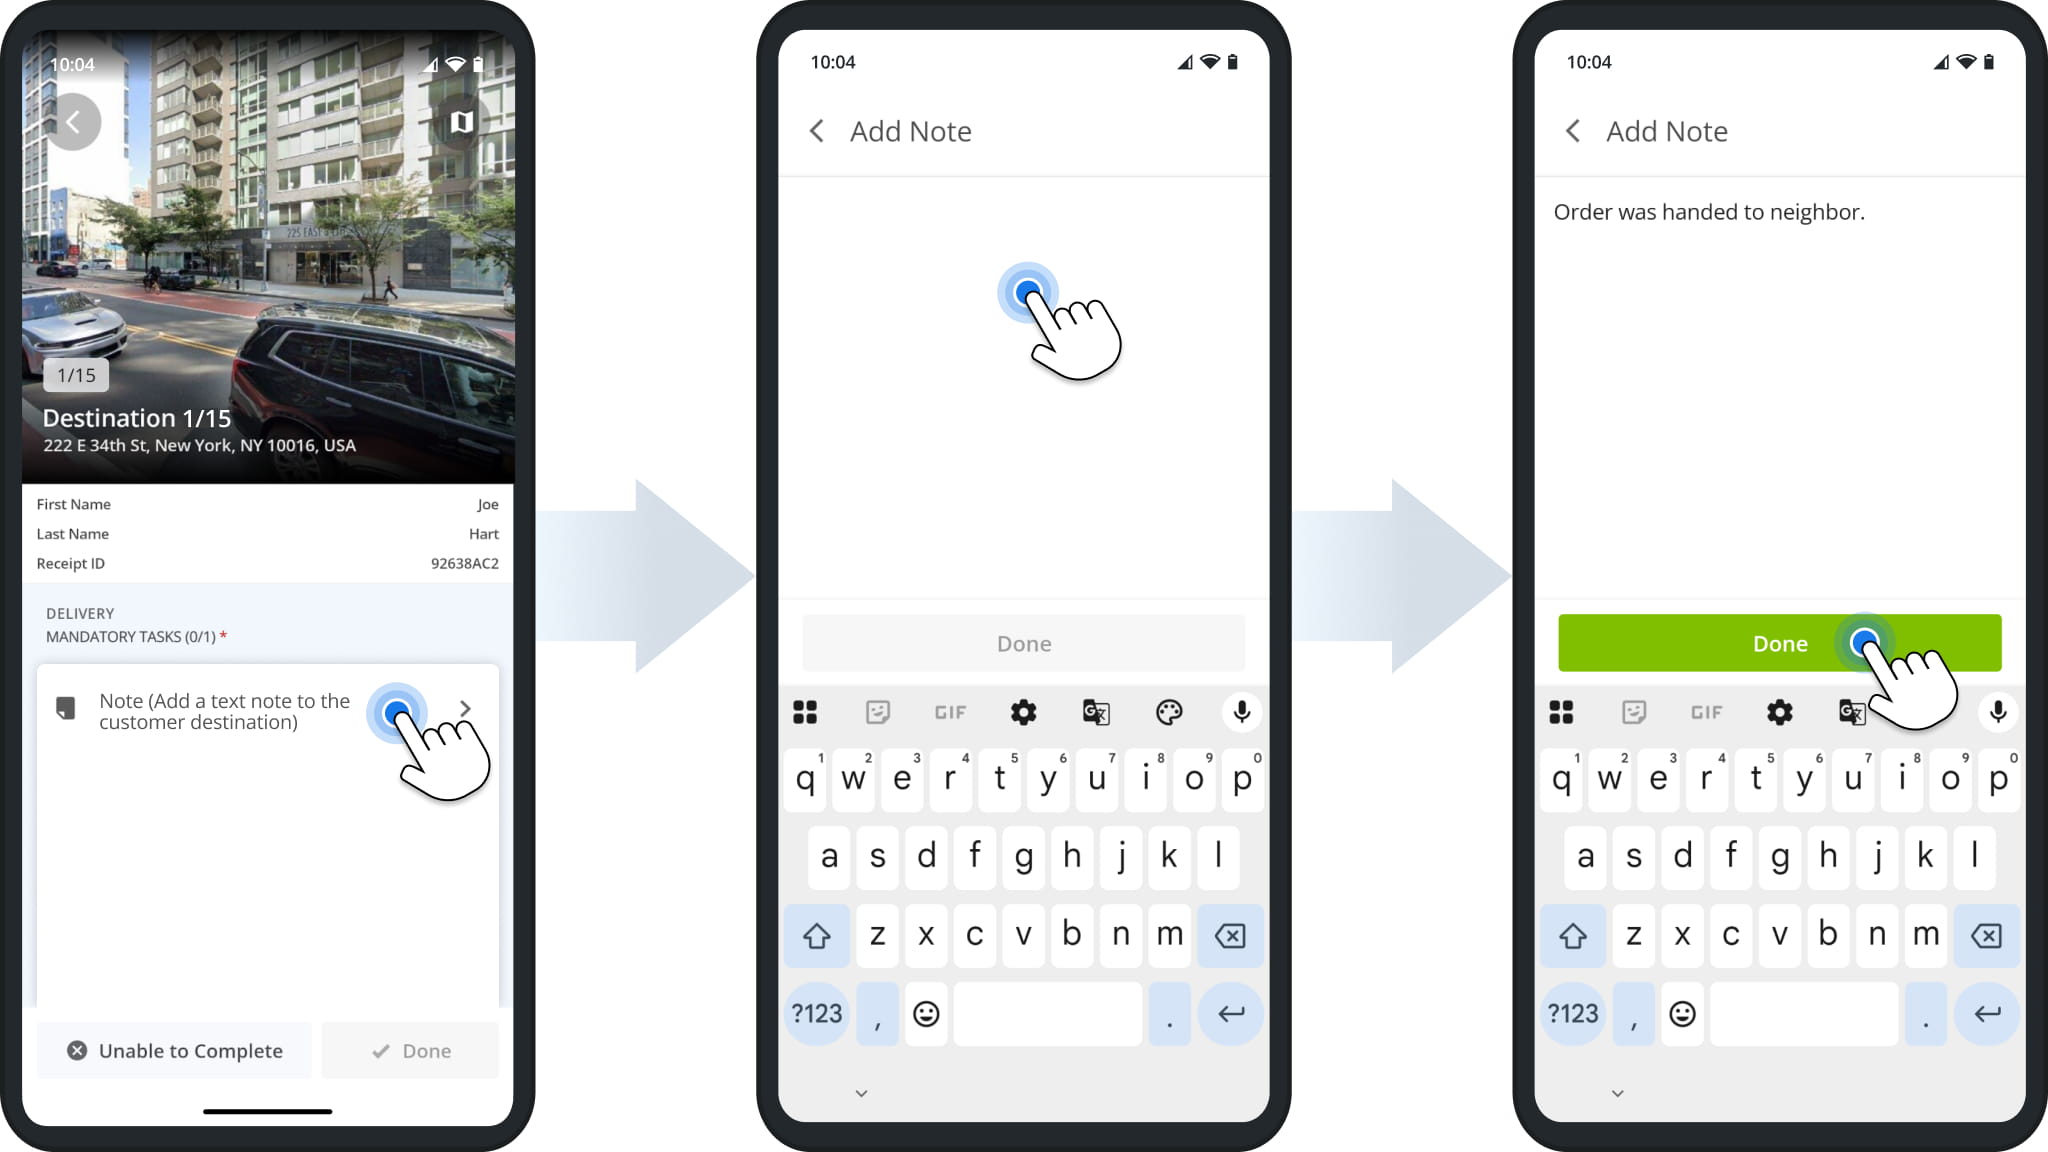
Note tasks let you add a text note to the Destination, such as where you left the order. Tap the task, type your note (up to 1,000 characters), and tap “Done”.
Add Receipt Notes For Customers
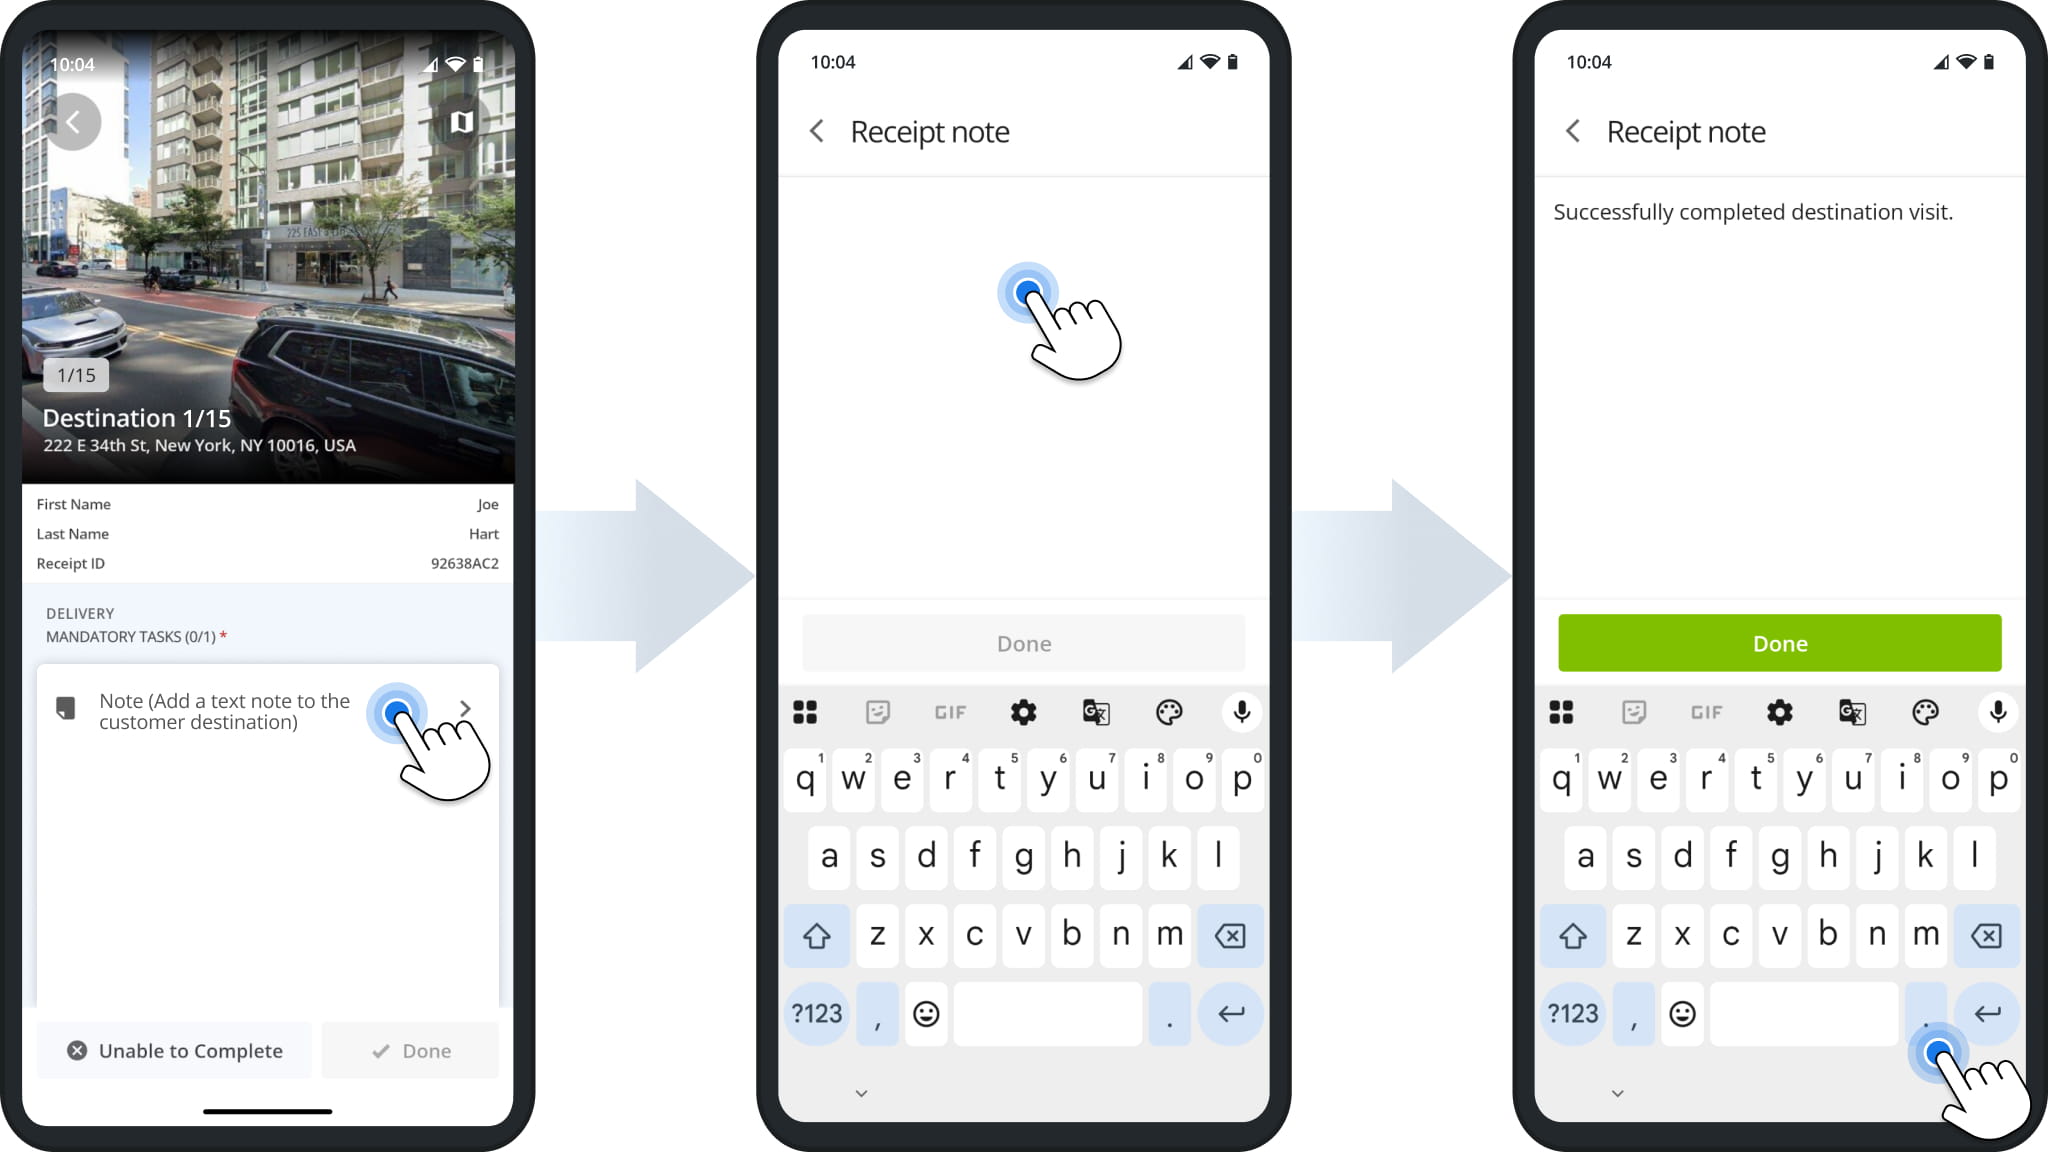
Receipt note tasks let you issue a note for the customer at the Destination. Tap the task, type the note, and tap “Done”.
Add Custom Notes And Attachments To Route Destinations
Depending on your user permissions and organization settings, you may also be able to add Custom Notes to Destinations.
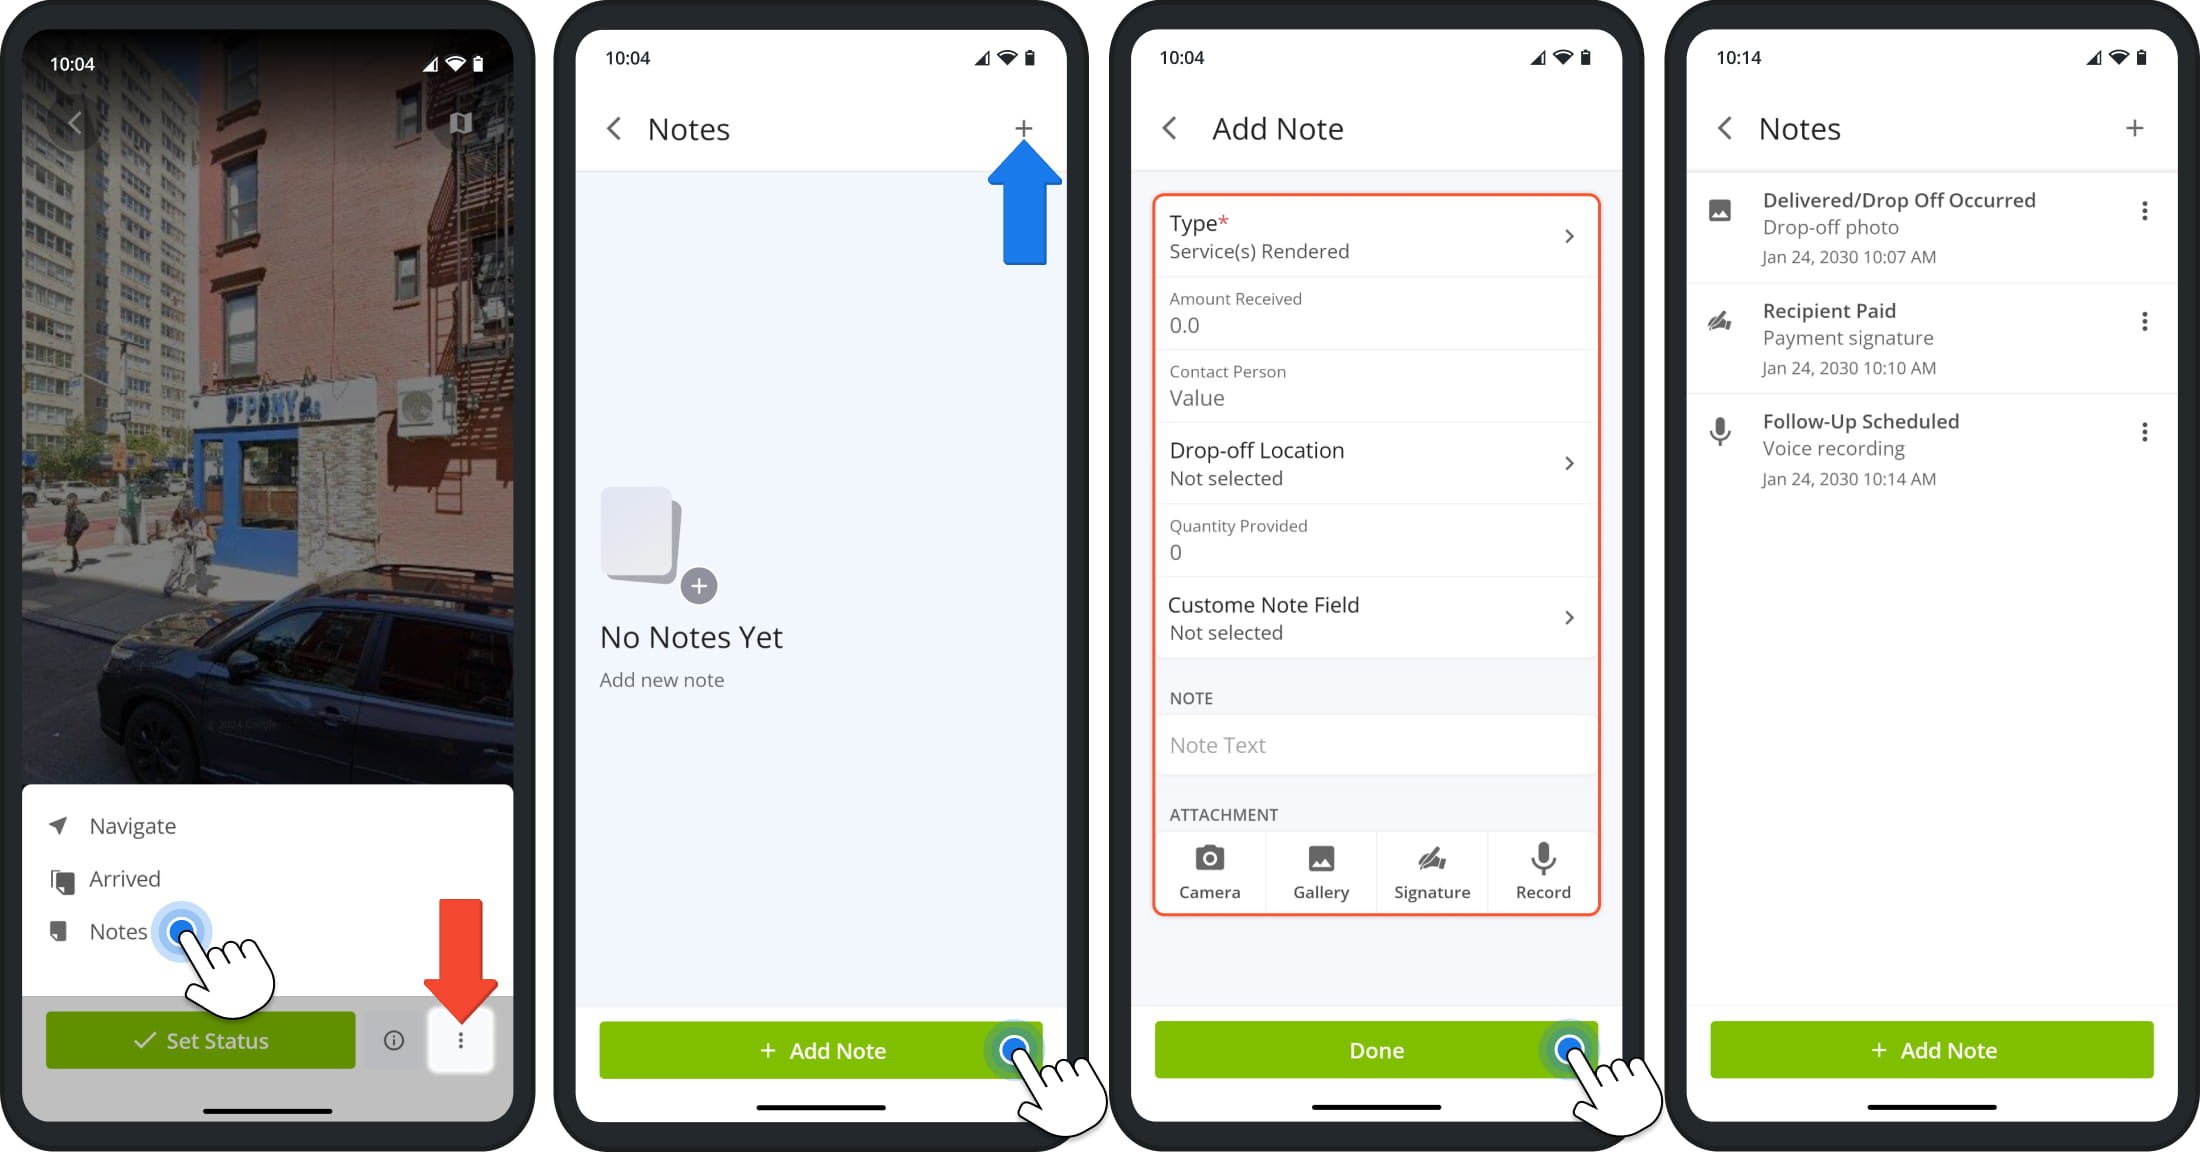
To add a Custom Note, open a Destination, tap the Three-dot Button in the bottom-right, and select “Notes”. Then, tap “+ Add Note” or the Plus Icon in the top-right. Select the note “Type” (required) and fill out the note fields set up by your organization.
You can also type a note in the “Note Text” field and add attachments using the buttons at the bottom. Tap “Done” to save the note. Saved notes are listed on the Notes screen with their type, attachment, and the date and time they were added.
Visit Route4Me's Marketplace to Check out Associated Modules:
- Operations
Custom Data Add-On
- Operations
Advanced Team Management Add-On
About author: Kristian Andreev

