
Routes Page Timeline – Visualize, Monitor & Analyze Route Sequences
The Routes Timeline on the Routes Page gives enterprise teams a clear visual overview of stop order and scheduled times for each route. It helps teams monitor performance, identify conflicts, and optimize last-mile routing so operations run smoothly across all routes. Similar to the Route Editor Timeline, it’s a powerful tool for better route planning and performance optimization.
Table of Contents
Routes Timeline – Open, Navigate And Explore Routes
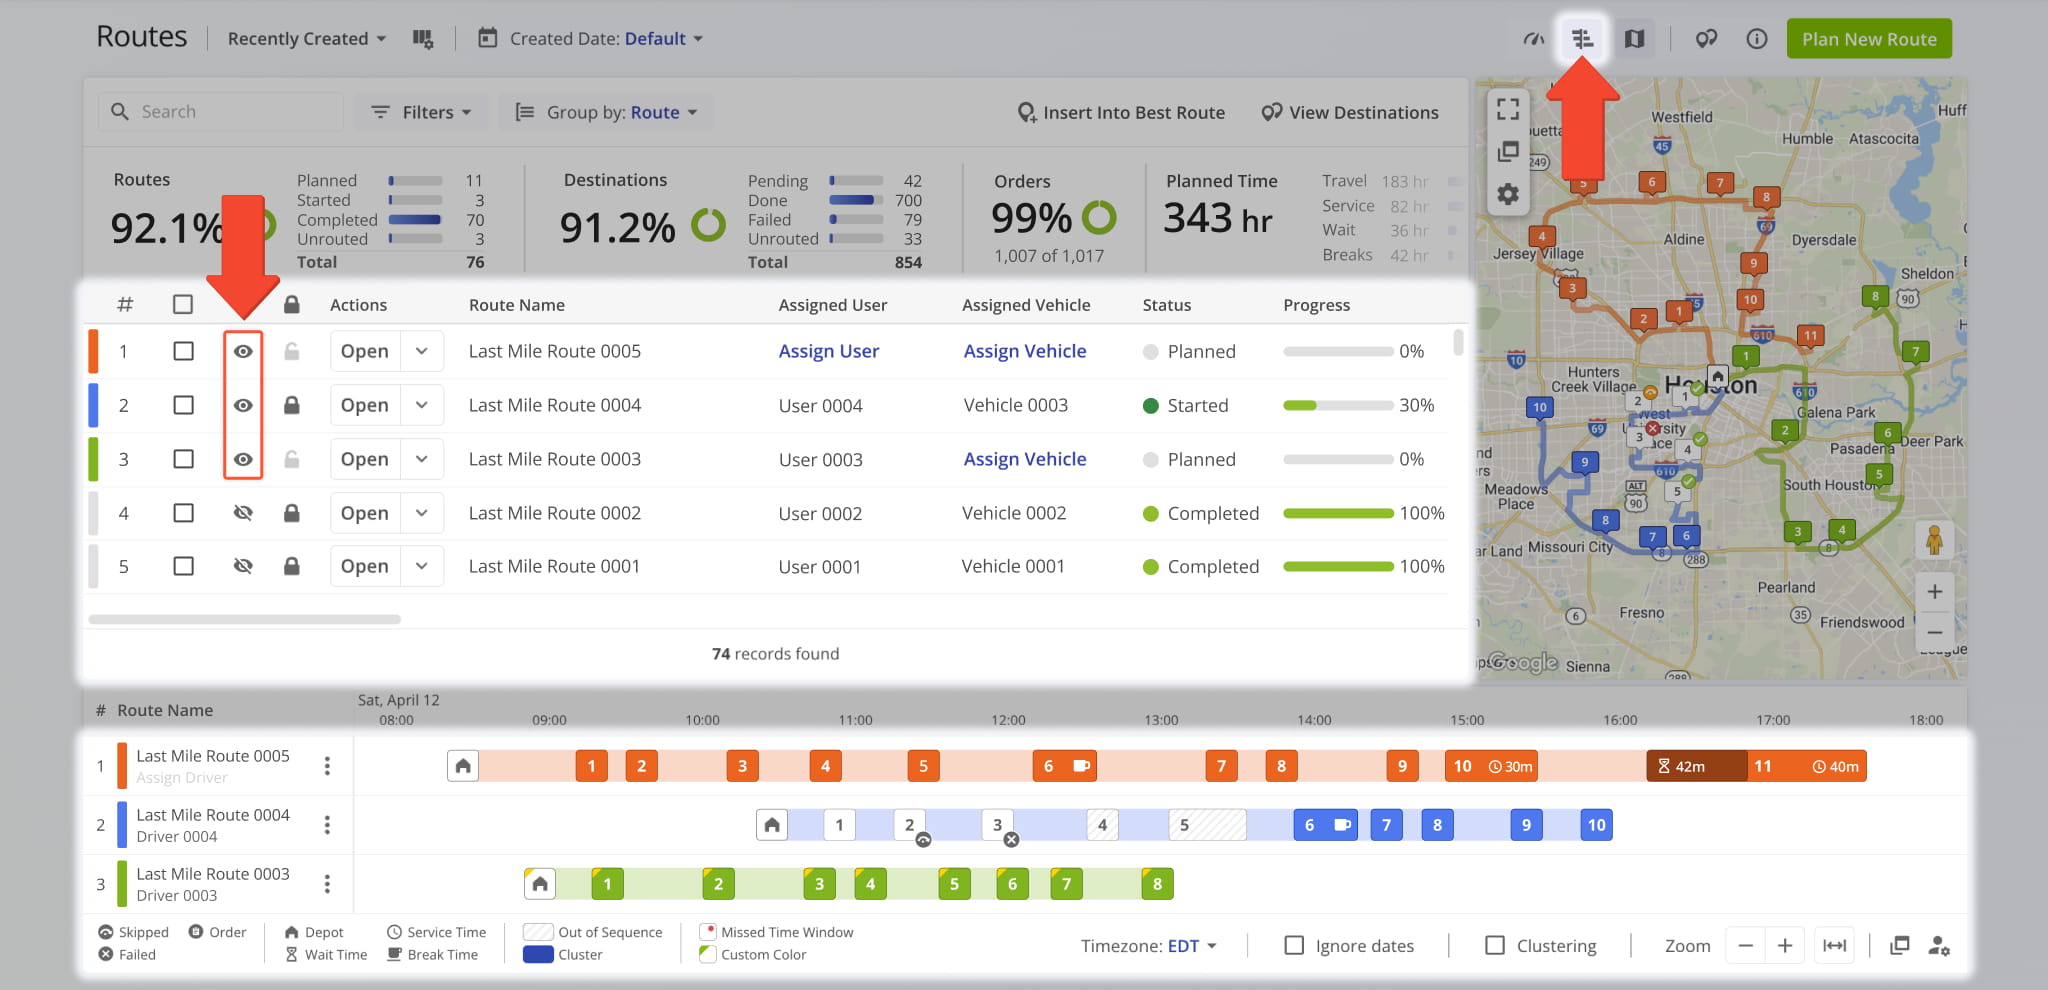
Open your Routes Page by going to “Dynamic Routing” > “Routes” from the Navigation Menu. Then, click the Timeline Button in the top-right to open the Timeline. To display routes on the Timeline, click the Eye icon next to them.
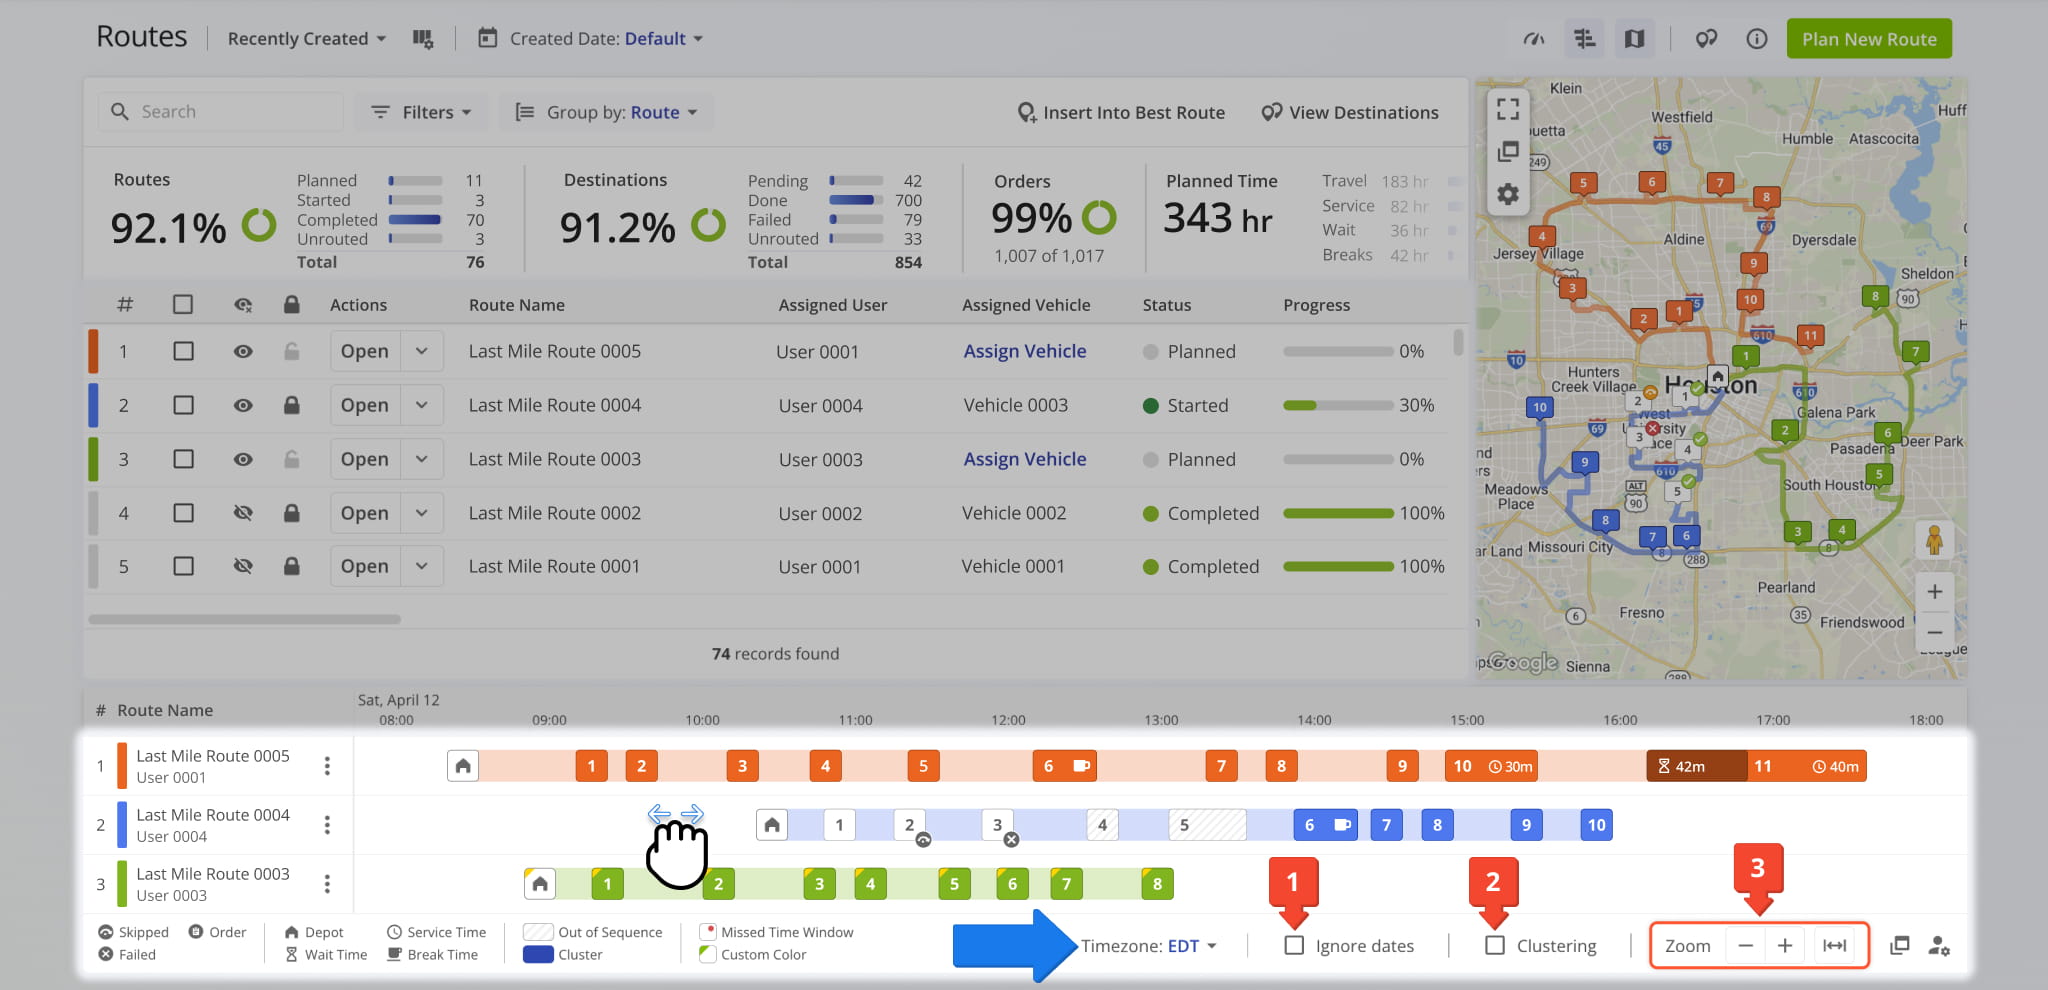
You can drag, scroll, or zoom to navigate the Timeline. Additionally, you can use the controls on the right side to:
- Check “Ignore Dates” to view routes from multiple dates together.
- Check “Clustering” to group destinations from high-density routes for easier viewing.
- Use the “+” and “–” buttons to zoom or click the Fit All Button to show all route destinations in the visible area.
The “Timezone” field lets you adjust the Timeline’s time zone settings. By default, Route4Me uses your account time zone or local time if available.
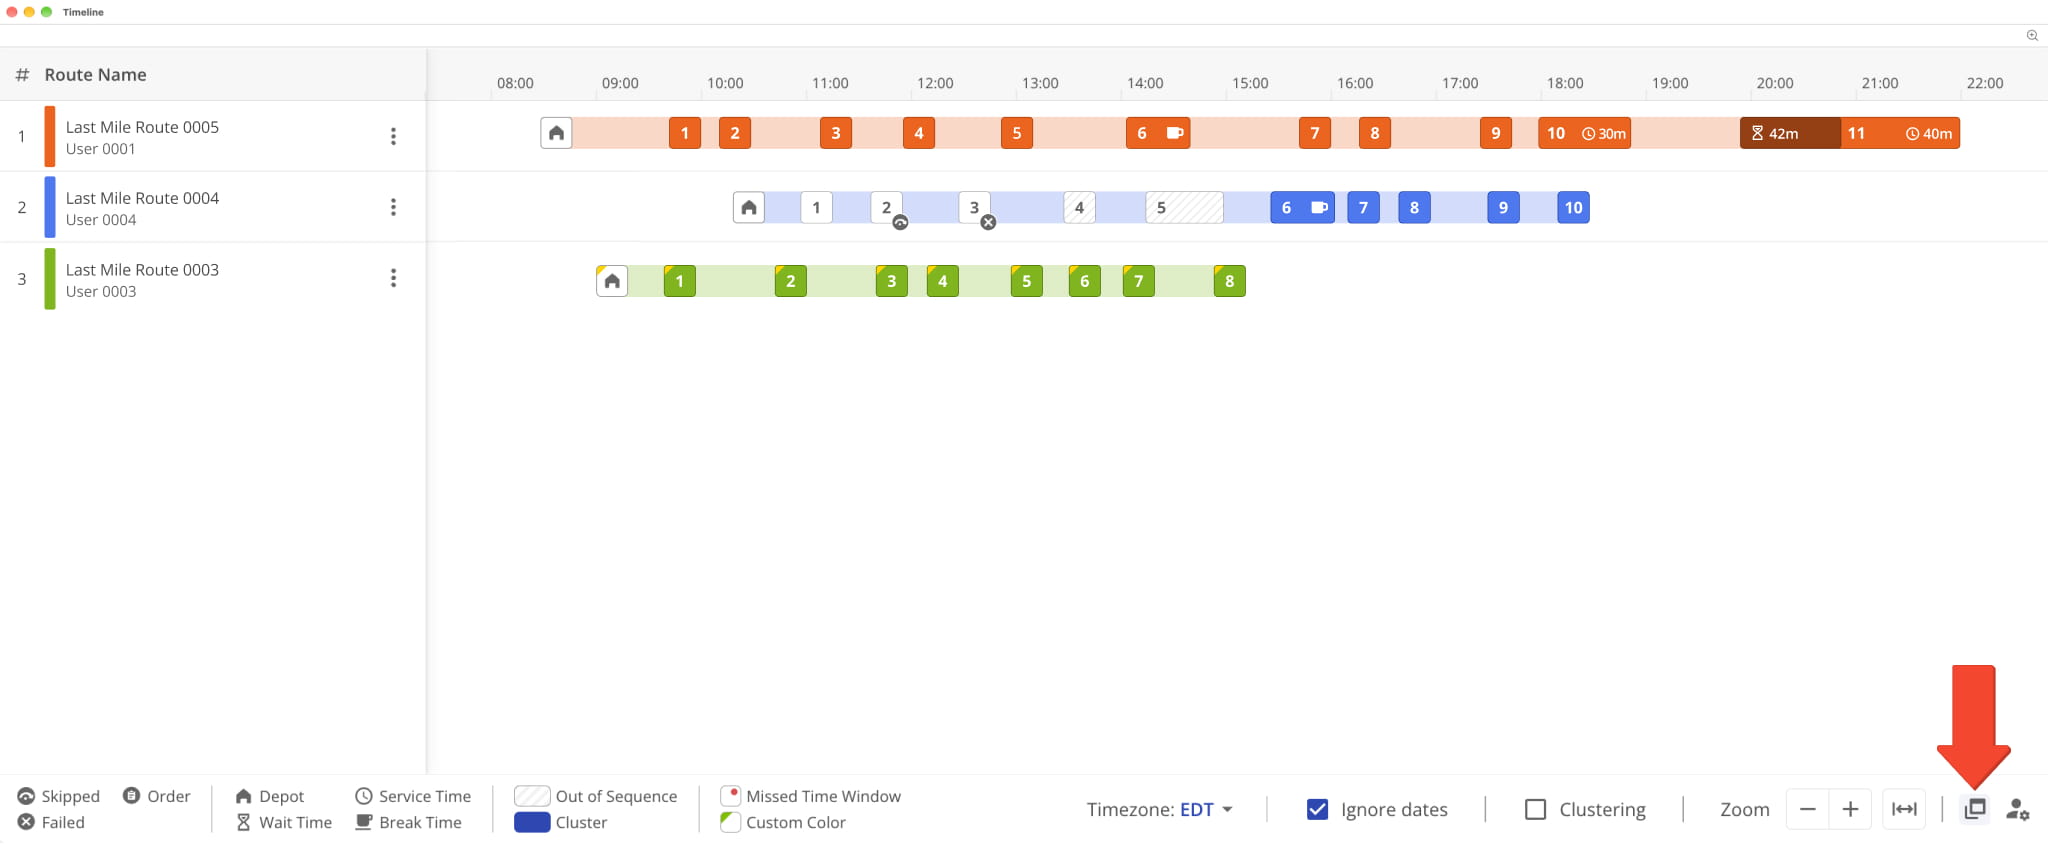
To create a larger workspace, click the New Window button in the bottom-right corner to open the Timeline in a separate window. All controls and options work the same as they do on the Routes Page.
Timeline Settings – Customize Routes Timeline Fields
You can customize the route data and functionality of the Routes Timeline in the “Timeline Settings” panel. Select the Settings button in the bottom-right corner to access these options:
- Under the Route Name: Select which entities or resources associated with each route appear under the route name.
- Metrics: Enable up to three metrics to be displayed next to route names in a dedicated metrics column.
- Show on Stops: Enable Destination Details to show as labels above Destinations in the Timeline.
NOTE: Labels are hidden when many destinations are visible. Zoom in to see them. - Drag and Drop (Review Move Impact): Show a confirmation window when moving Destinations on the Timeline.
See the table below for a full list of options available in the “Timeline Settings” panel.
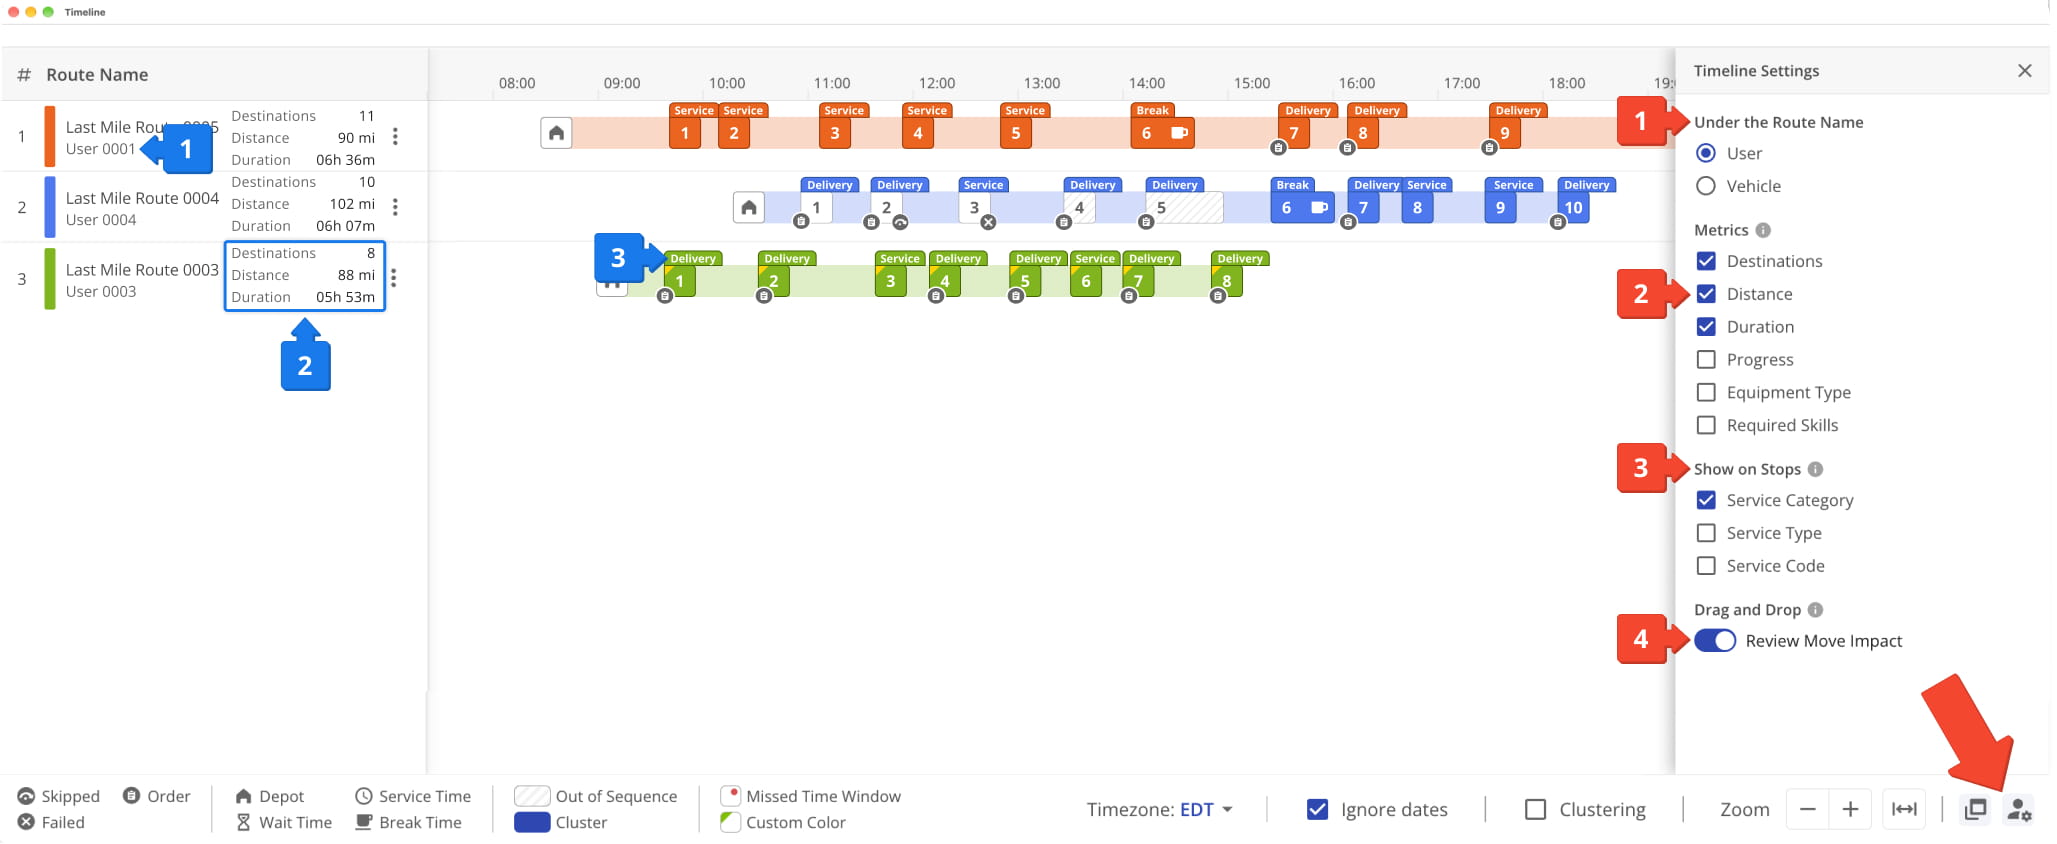
Routes Timeline Settings
Timeline View – Monitor, Inspect, And Analyze Routes And Stops
The Timeline shows your selected routes and updates automatically as filters or searches are applied. Hover over any route or Destination to view its key details. The table below summarizes all Destination Details available in the Timeline.
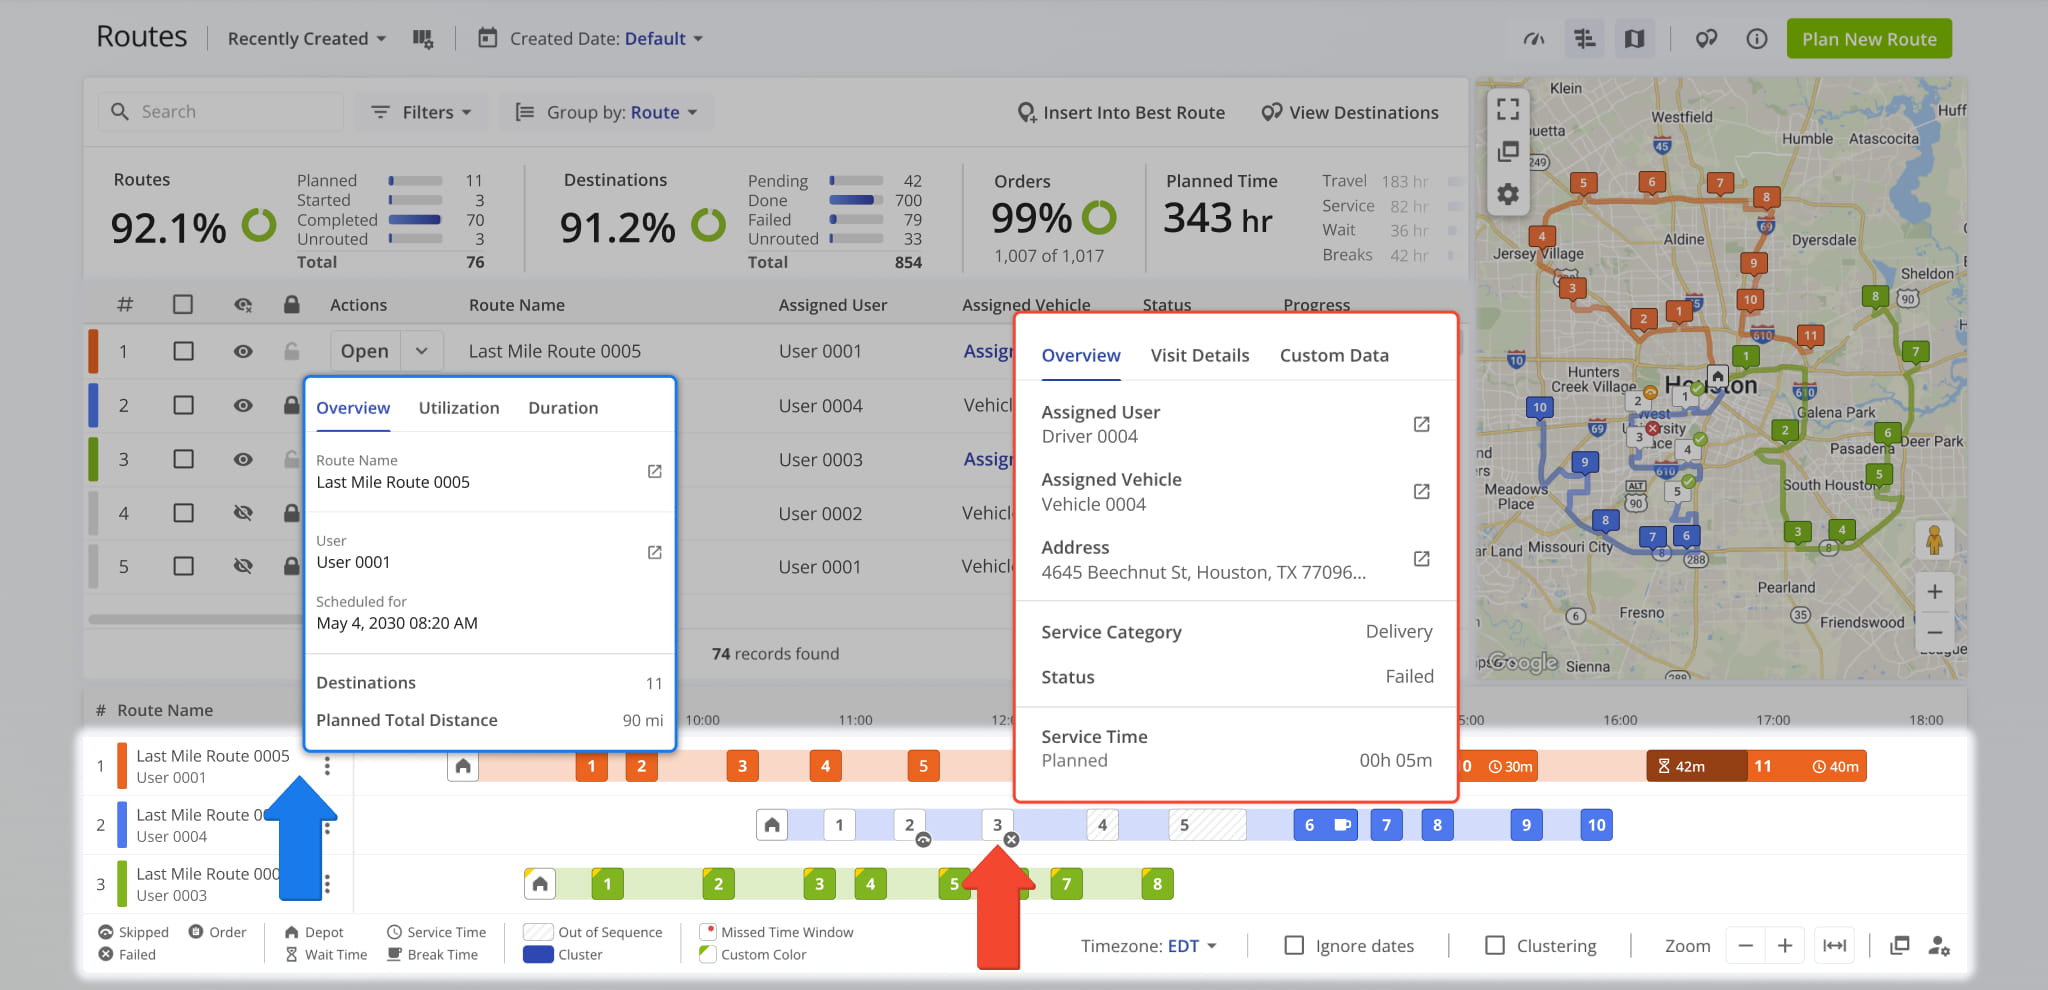
Routes Page - Destination Details
The Timeline’s visual layout helps teams quickly identify scheduling gaps, overlaps, and other issues across routes and destinations, providing early insight into potential operational conflicts.
Icons and color coding displayed directly on Destinations in the Timeline highlight important stop-level details such as skipped or failed destinations, wait times, service durations, and other routing events.
The table below explains what each Icon and color coding represents so you can quickly interpret activity at a glance.
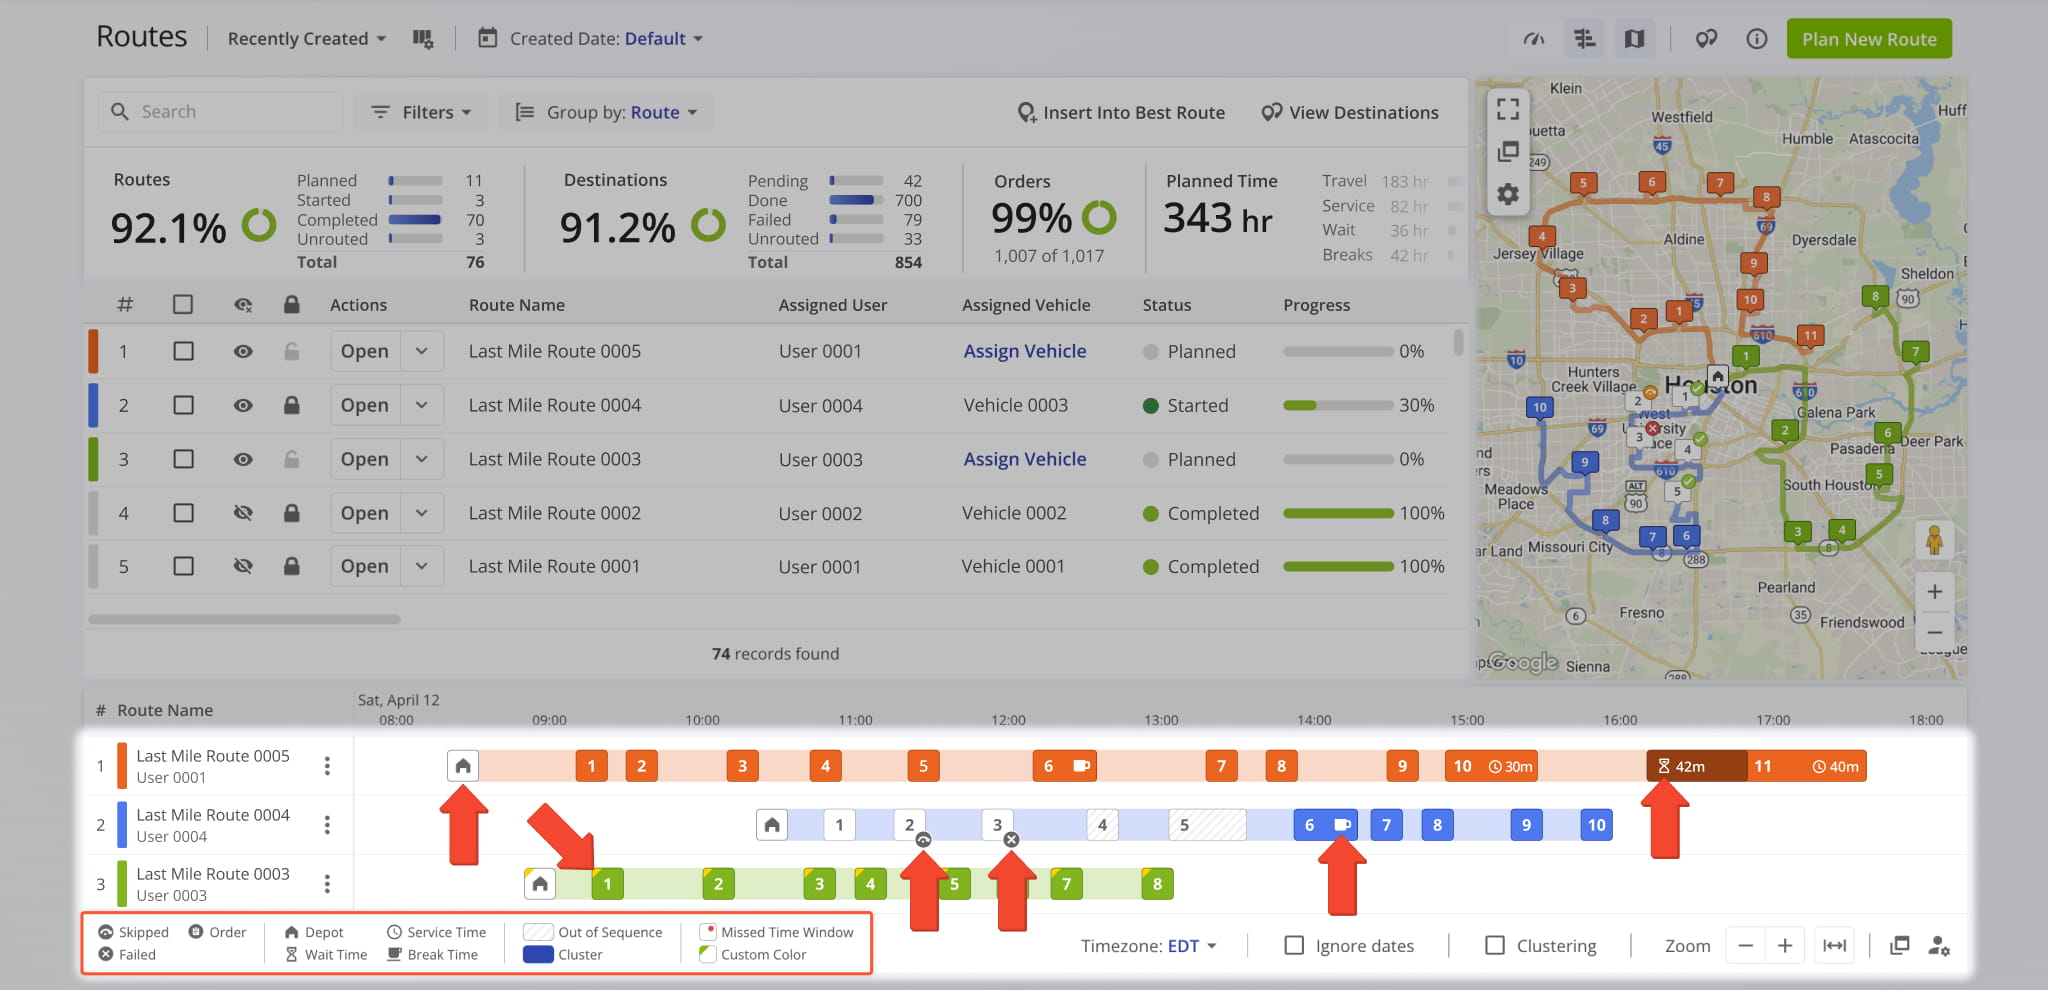
Routes Timeline - Legend & Icons
Manage Routes And Destinations On The Timeline
Destinations can be reordered or moved between routes using drag-and-drop. This allows you to quickly adjust stop sequences or rebalance routes without leaving the Timeline.
NOTE: After making adjustments, Route4Me recommends re-optimizing routes to ensure the most efficient stop sequence.
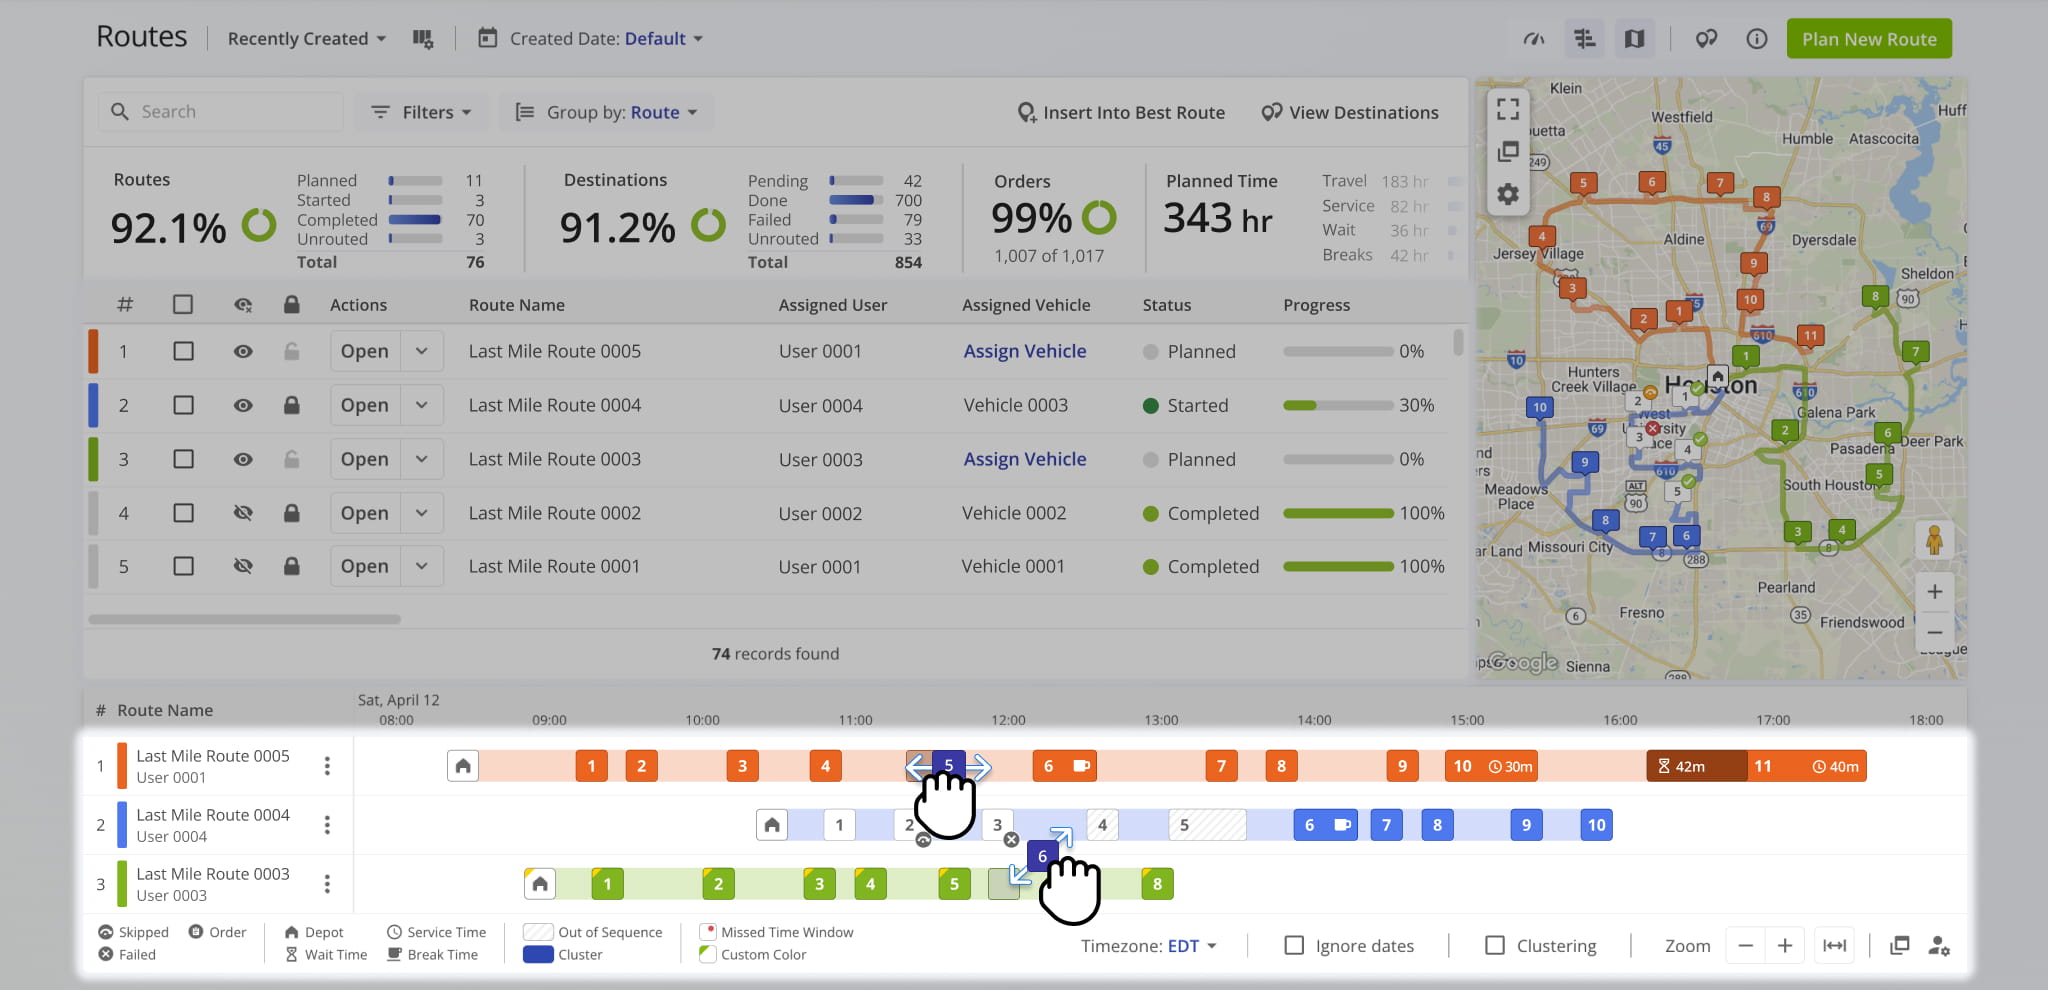
You can access route management and destination management actions from the Timeline. Right-click a route or a destination to access their actions menus. To access a route’s actions menu, you can also click the Three-dot Icon next to it.
The tables below outline all available actions for routes and destinations.
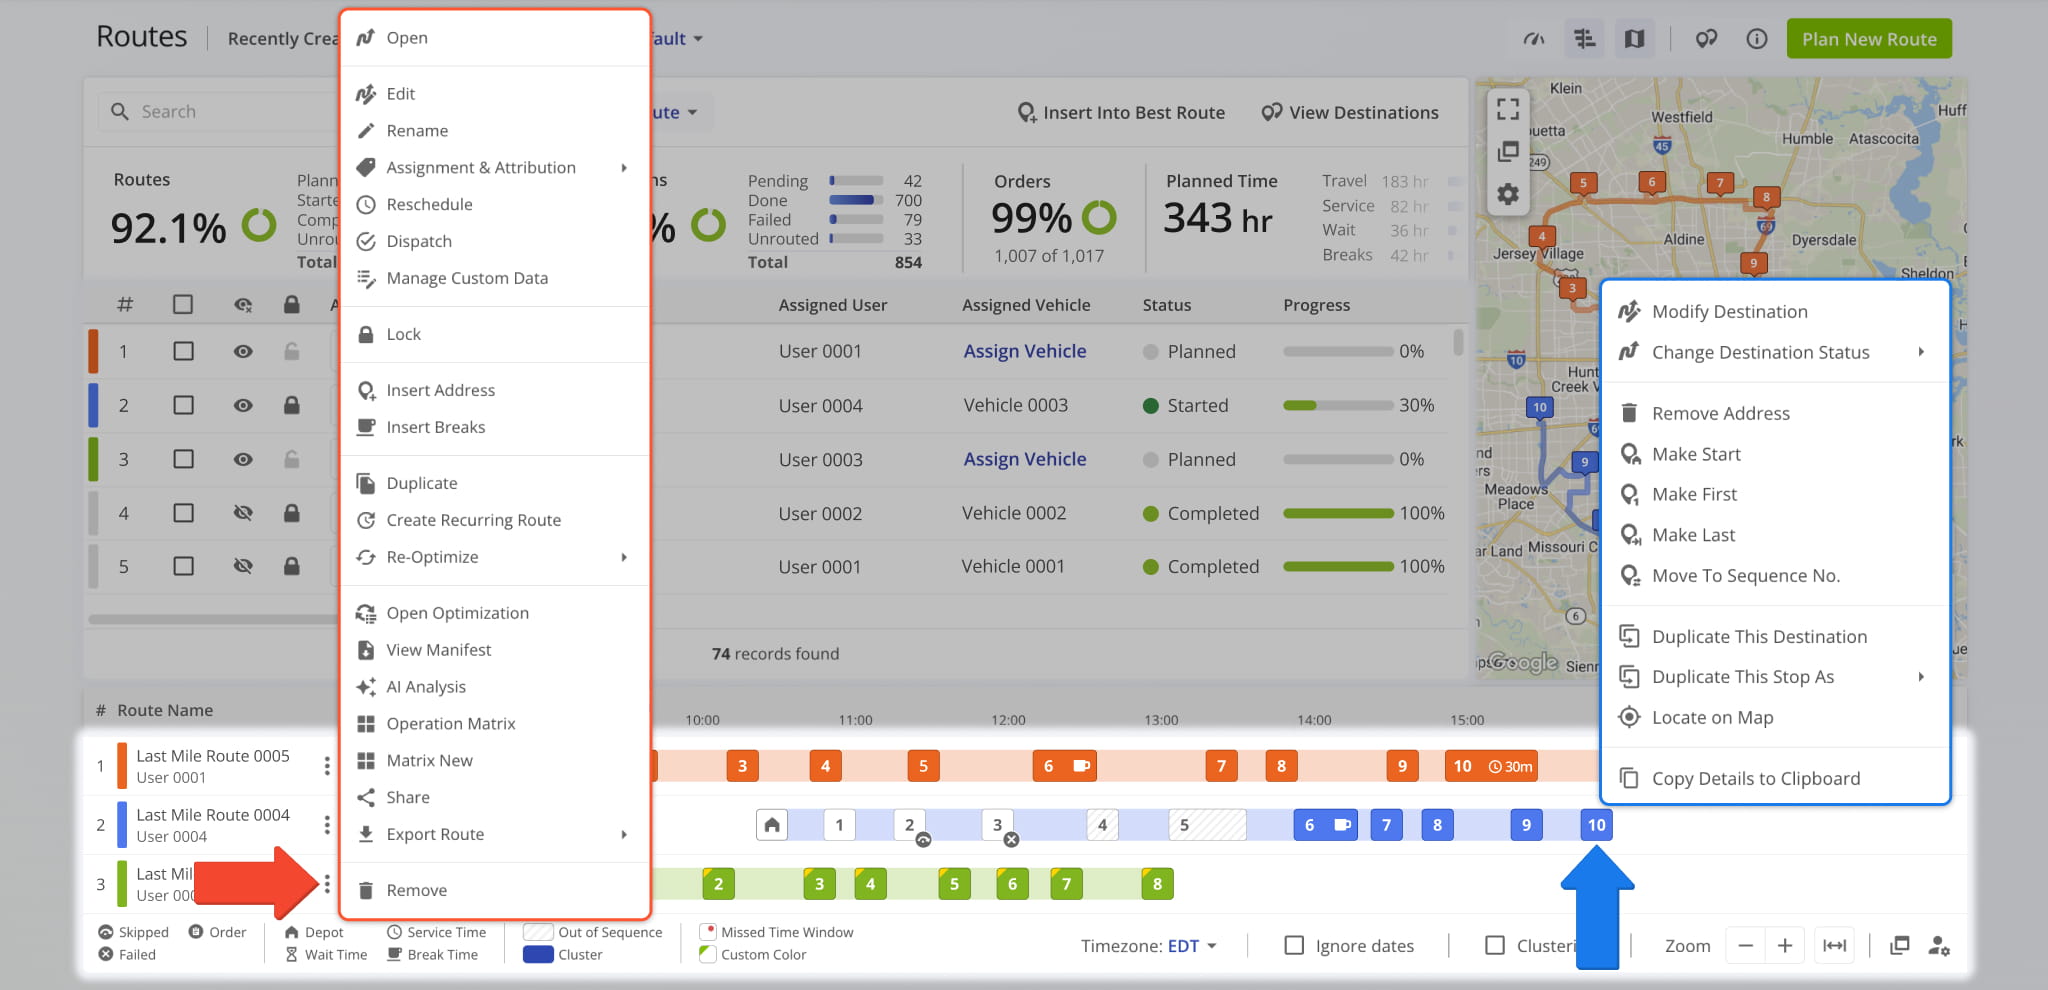
Route Management Actions
Routes Page - Destination Management Actions
Drag And Drop Orders And Locations Into Routes
From the Routes Map Sidebar, you can drag and drop Destinations into planned routes. The “Destinations” tab shows unvisited Destinations which you can drag into place onto an open route in the Routes Timeline.
These options help you optimize route sequencing and manage stops efficiently from a single screen. Learn more about inserting Destinations into planned routes.
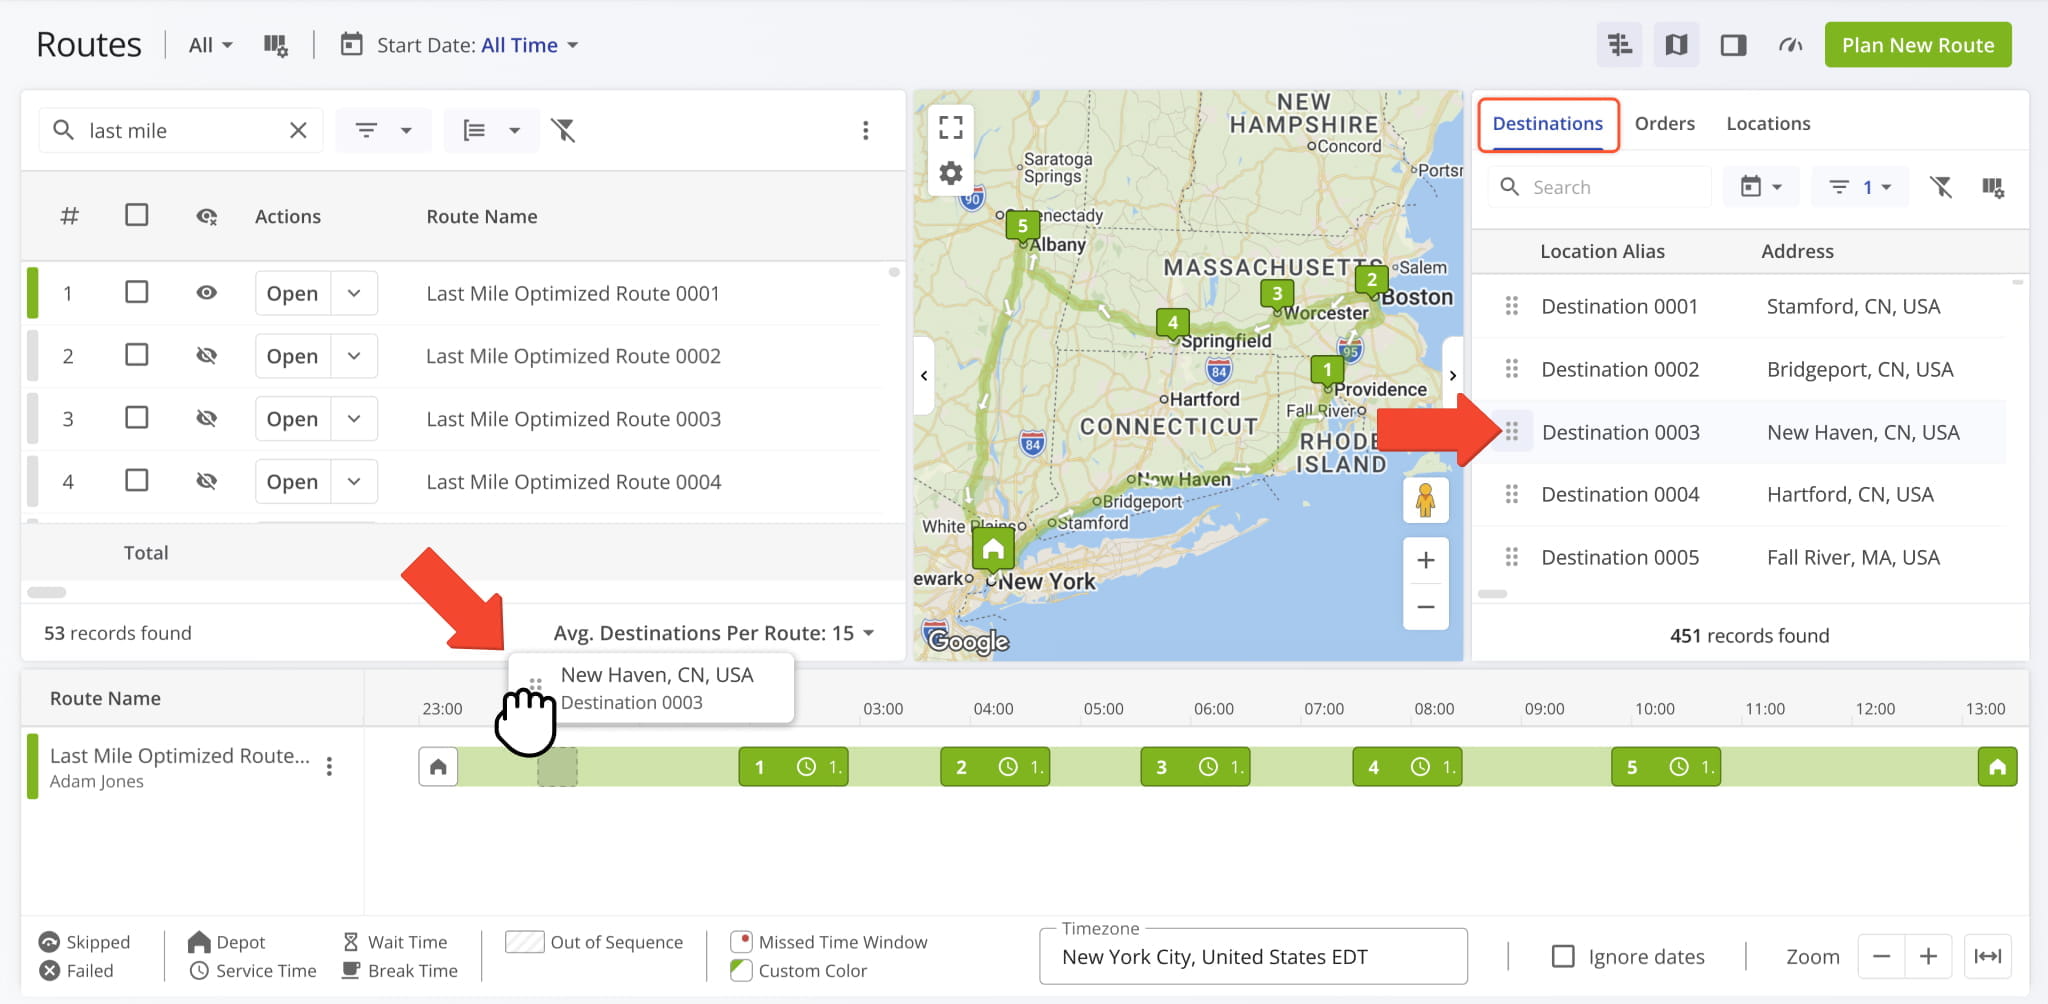
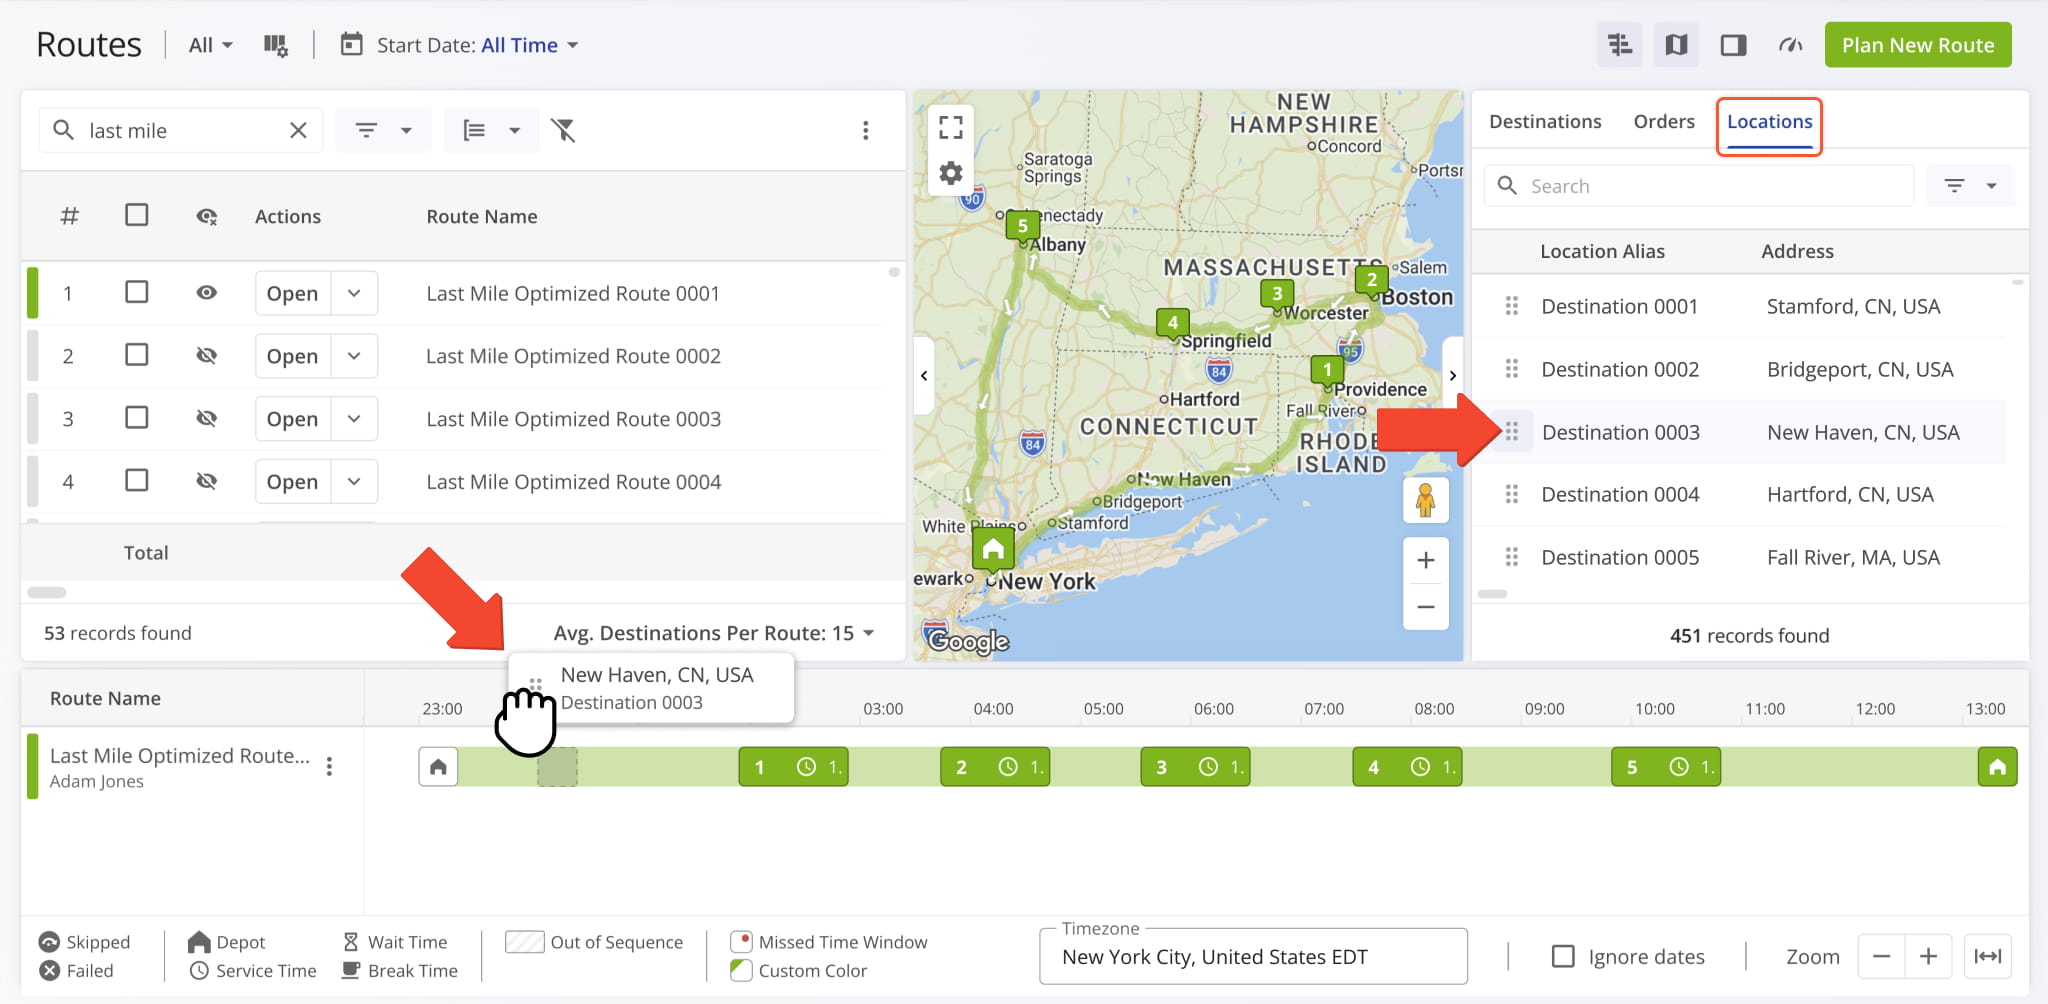
You can also drag and drop Orders and Locations into routes from the Routes Map into the Routes Timeline. This method provides a quick and intuitive way of adding individual Orders and Locations to specific routes.
Visit Route4Me's Marketplace to Check out Various Modules and Add-Ons:
- Route Optimization
Time Windows
- Operations
Advanced Team Management Add-On
About author: Daniel Archer

