
Route Editor Timeline – Monitor, Replay, And Edit Routes In Real Time
The Route Editor timeline gives you a visual, time-based view of a single route, showing every stop in sequence alongside planned and actual activity. Use it to monitor a dispatched route in real time, review how it unfolded, and make quick adjustments to keep your last mile route optimization on track. Similar to the route timeline on the Route page, it gives you a detailed, stop-by-stop view of your route’s timing.
Table of Contents
Route Editor Timeline Overview – Timeline Controls And Navigation
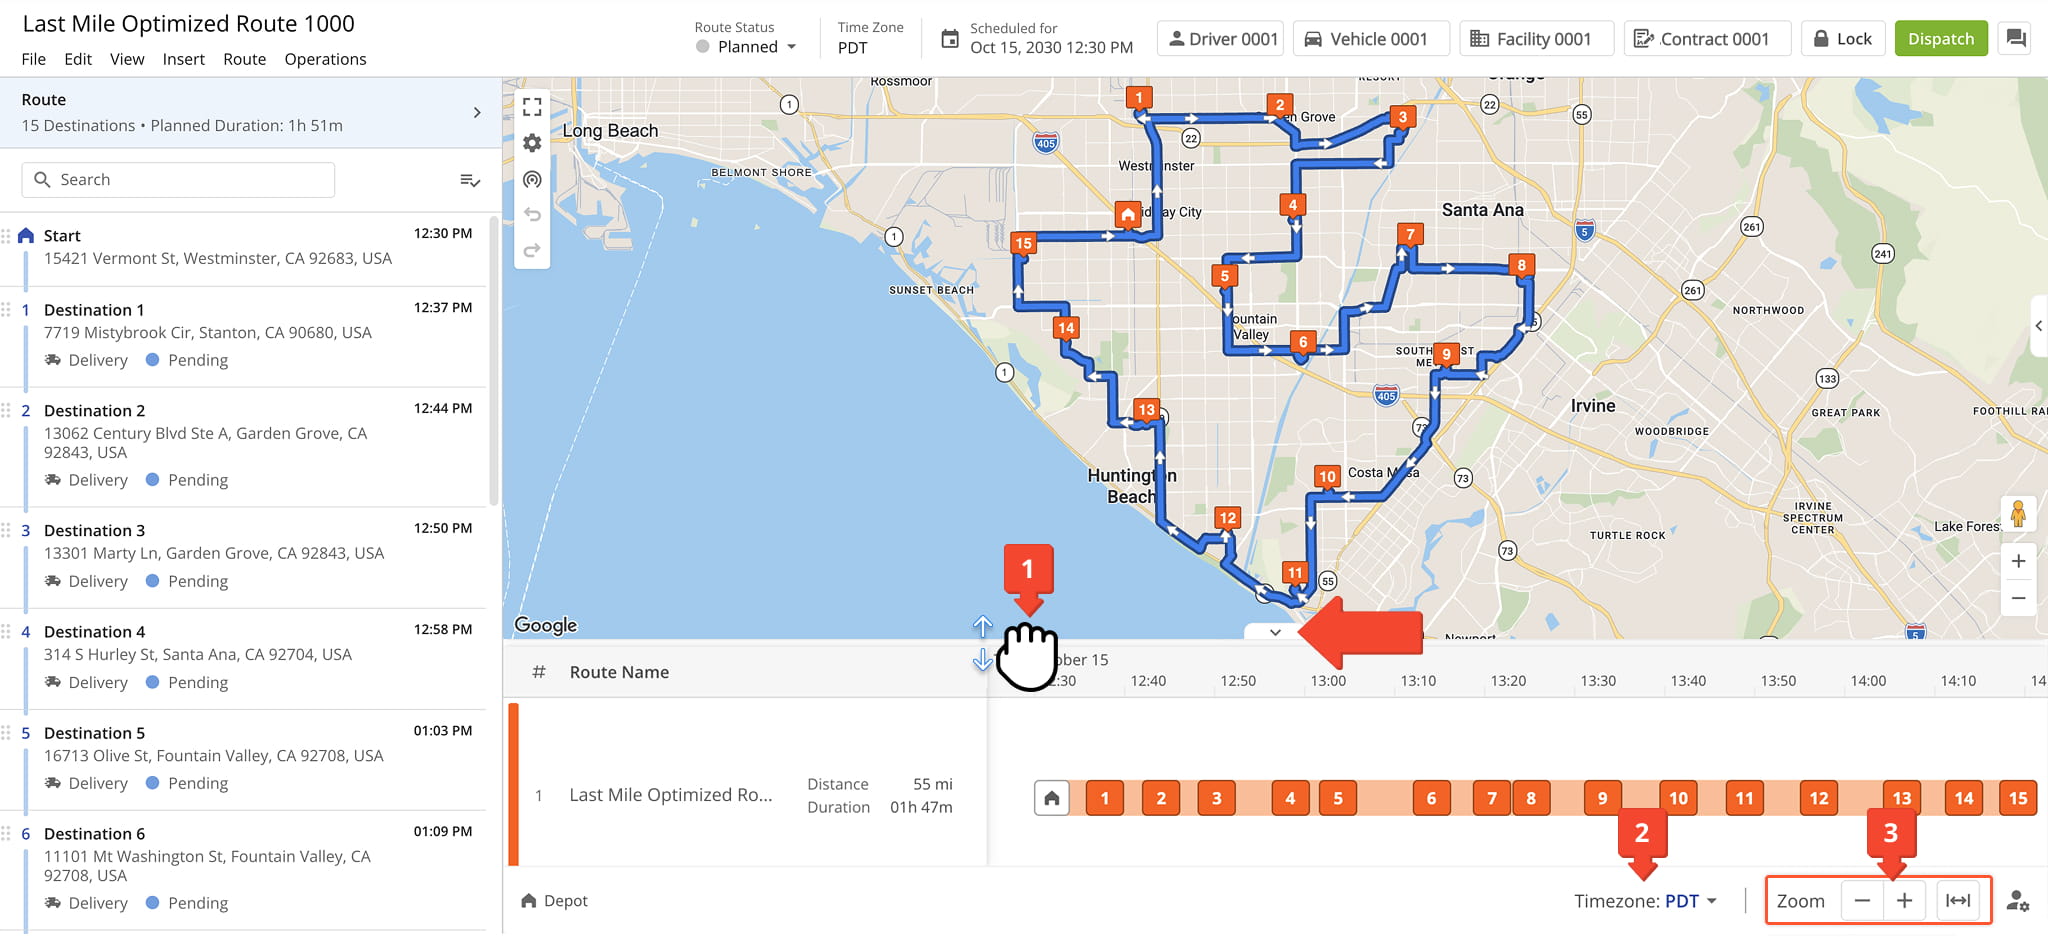
To open the Route Editor timeline, drag the arrow button at the bottom of the page upward. Once opened you can:
- Drag the timeline up or down to expand or collapse it.
- Click the Timezone button to adjust the time zone.
NOTE: By default, Route4Me uses your account time zone or local time if available. - Use the zoom controls to zoom in, zoom out, or fit all destinations on the timeline so they are all visible.
Timeline Settings – Customize Route Timeline Details And Presets
You can also select the Timeline Settings button to customize the details that appear on the Timeline and adjust how it functions, tailoring it to your workflow. See the table below for more information about each available field.
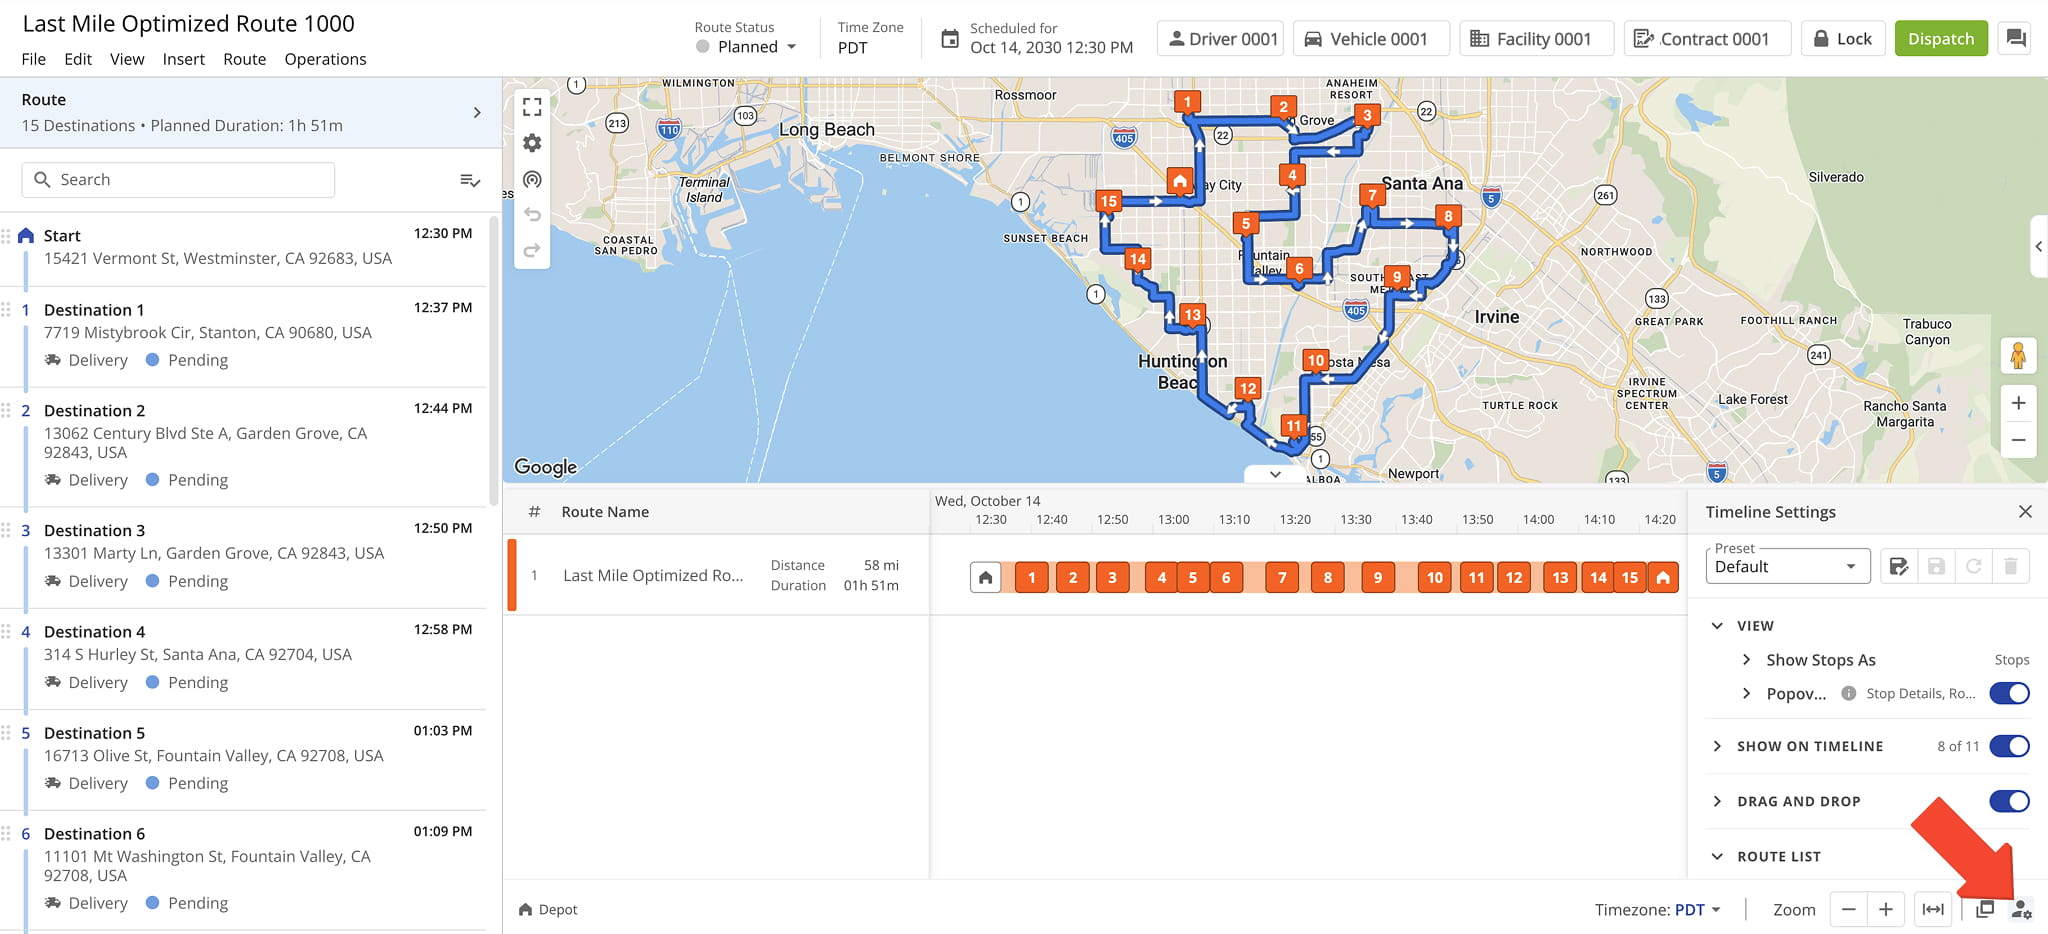
Timeline Settings
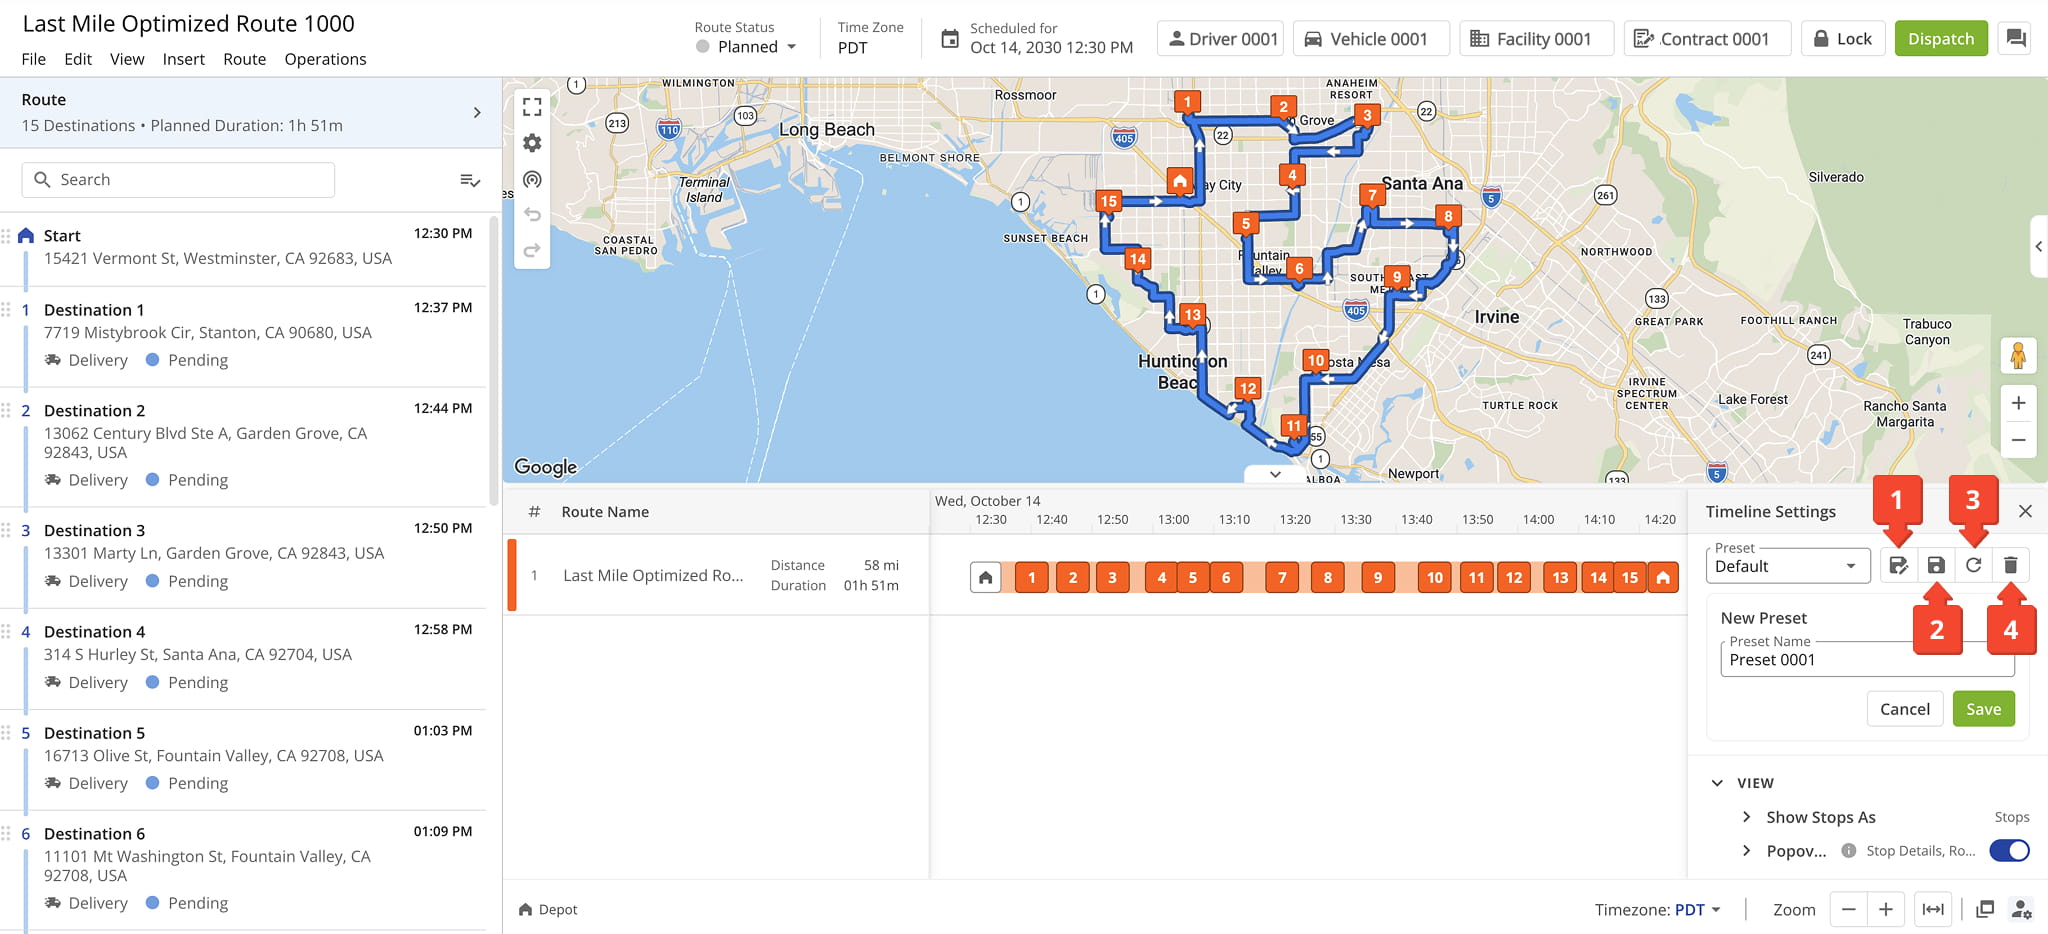
After customizing the fields you want to appear on the Timeline, you can save your selections as a preset and give it a name:
- To save changes as a new preset, select the Create Preset Icon (floppy disk with pencil).
- To save changes you make to an existing preset, select the Update Preset Icon (floppy disk without pencil).
- To undo changes you’ve made to a preset, select the Undo Icon (circular arrow).
- To delete a preset, select the Delete Icon (trash can).
Timeline View – Track Route Progress And Driver Activity
Route And Destination Details – View Route And Stop Information
To see detailed information about a route, as described in the table below, hover over the route name on the Timeline.
Likewise, to see information about a destination, hover over any destination on the timeline. The information shown is described in the table below.
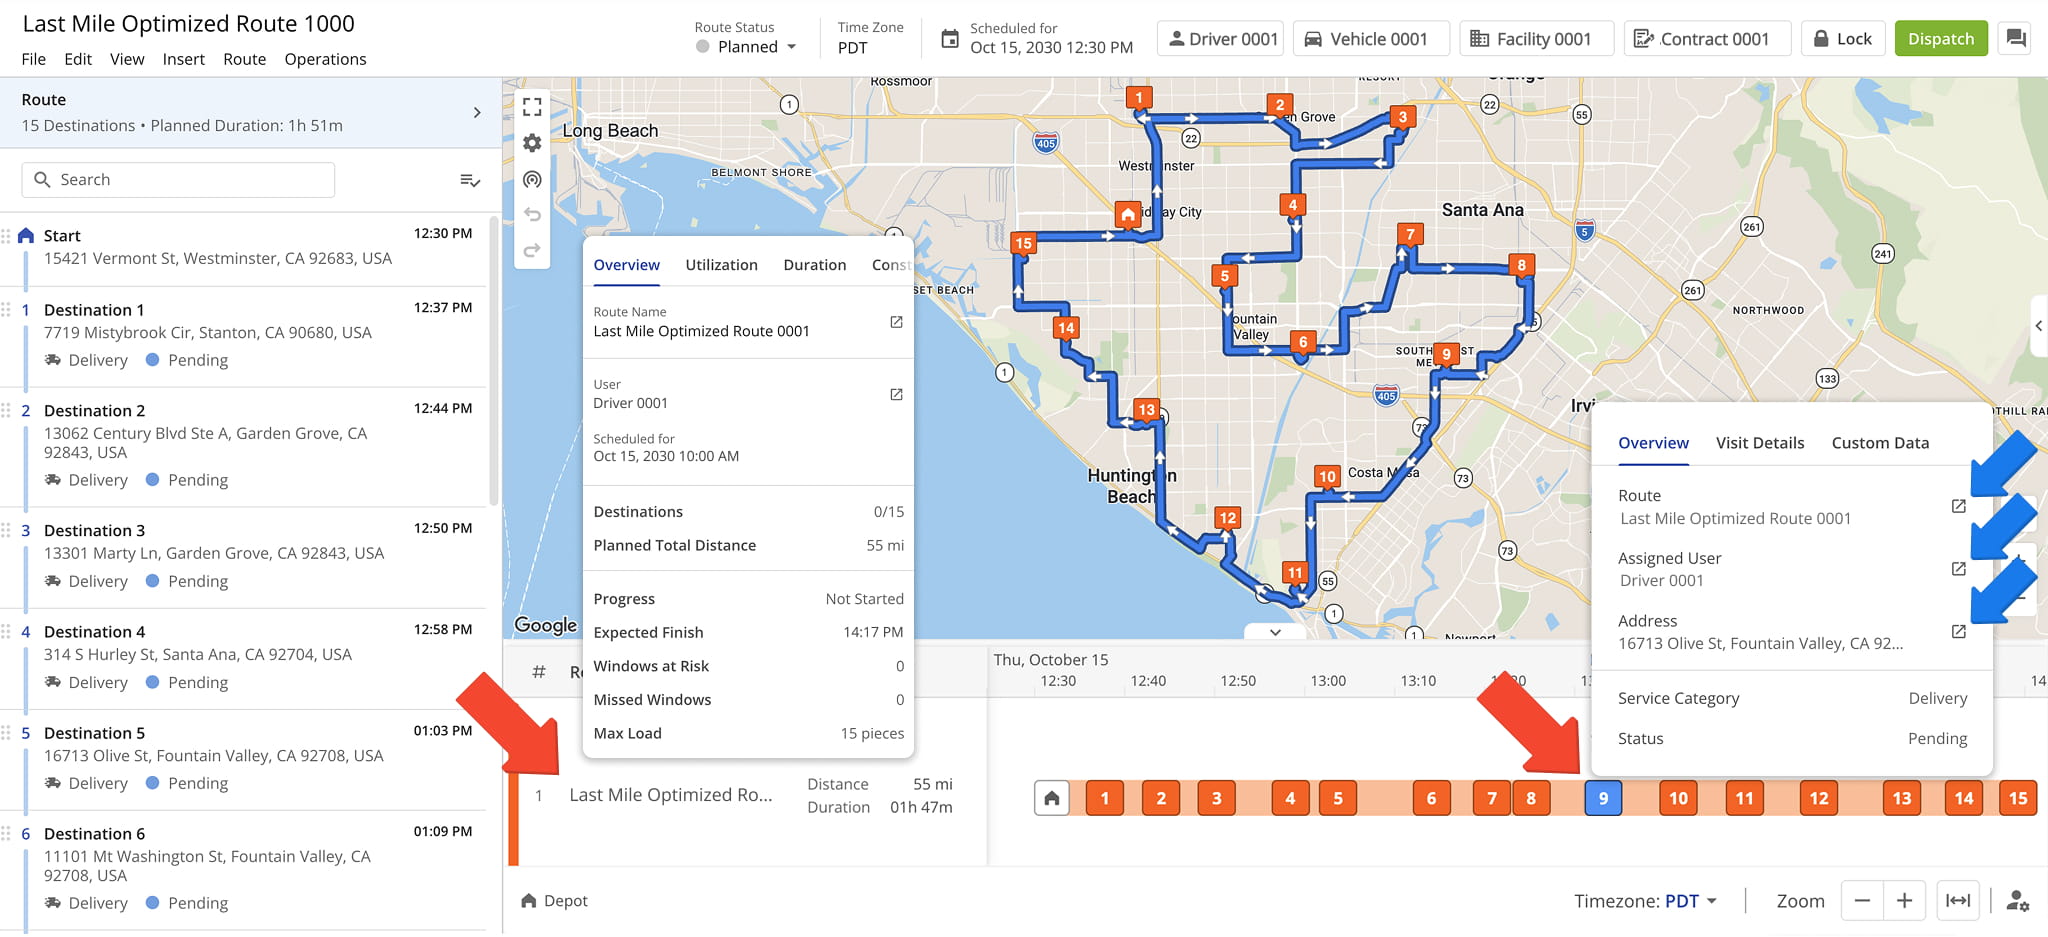
Route Details
Destination Details
Destination Icons And Color Coding – Interpret Stop Status At A Glance
Once a route has been dispatched, all routing activity is automatically synced to the Route Editor. This enables you to follow along in real time as the driver uses the Route4Me mobile app to complete stops, collect proof of delivery, and more.
Icons and color coding appear directly on destinations in the Timeline to highlight important stop-level details, such as skipped or failed destinations, out-of-sequence visits, and other routing events. See the table below for further details.
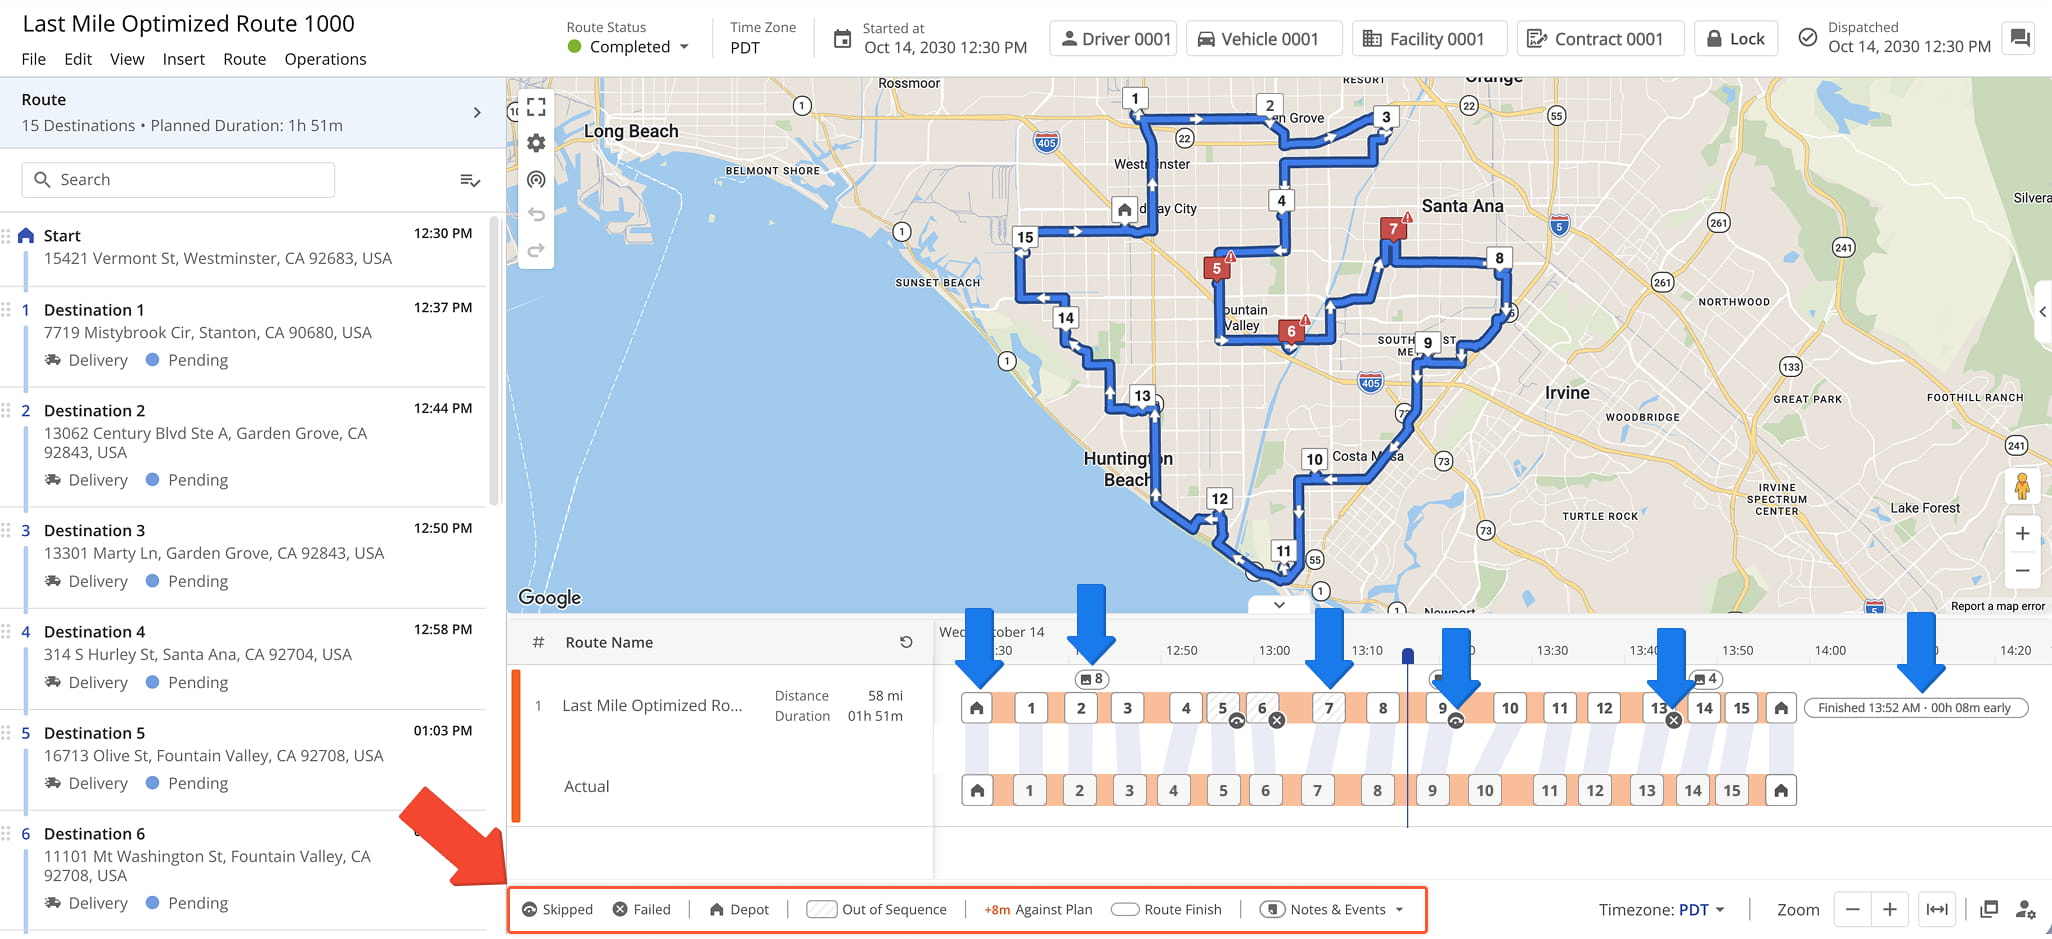
Routes Timeline - Legend & Icons
Planned Vs. Actual Route Details – Track How Stops Shifted From The Route Plan
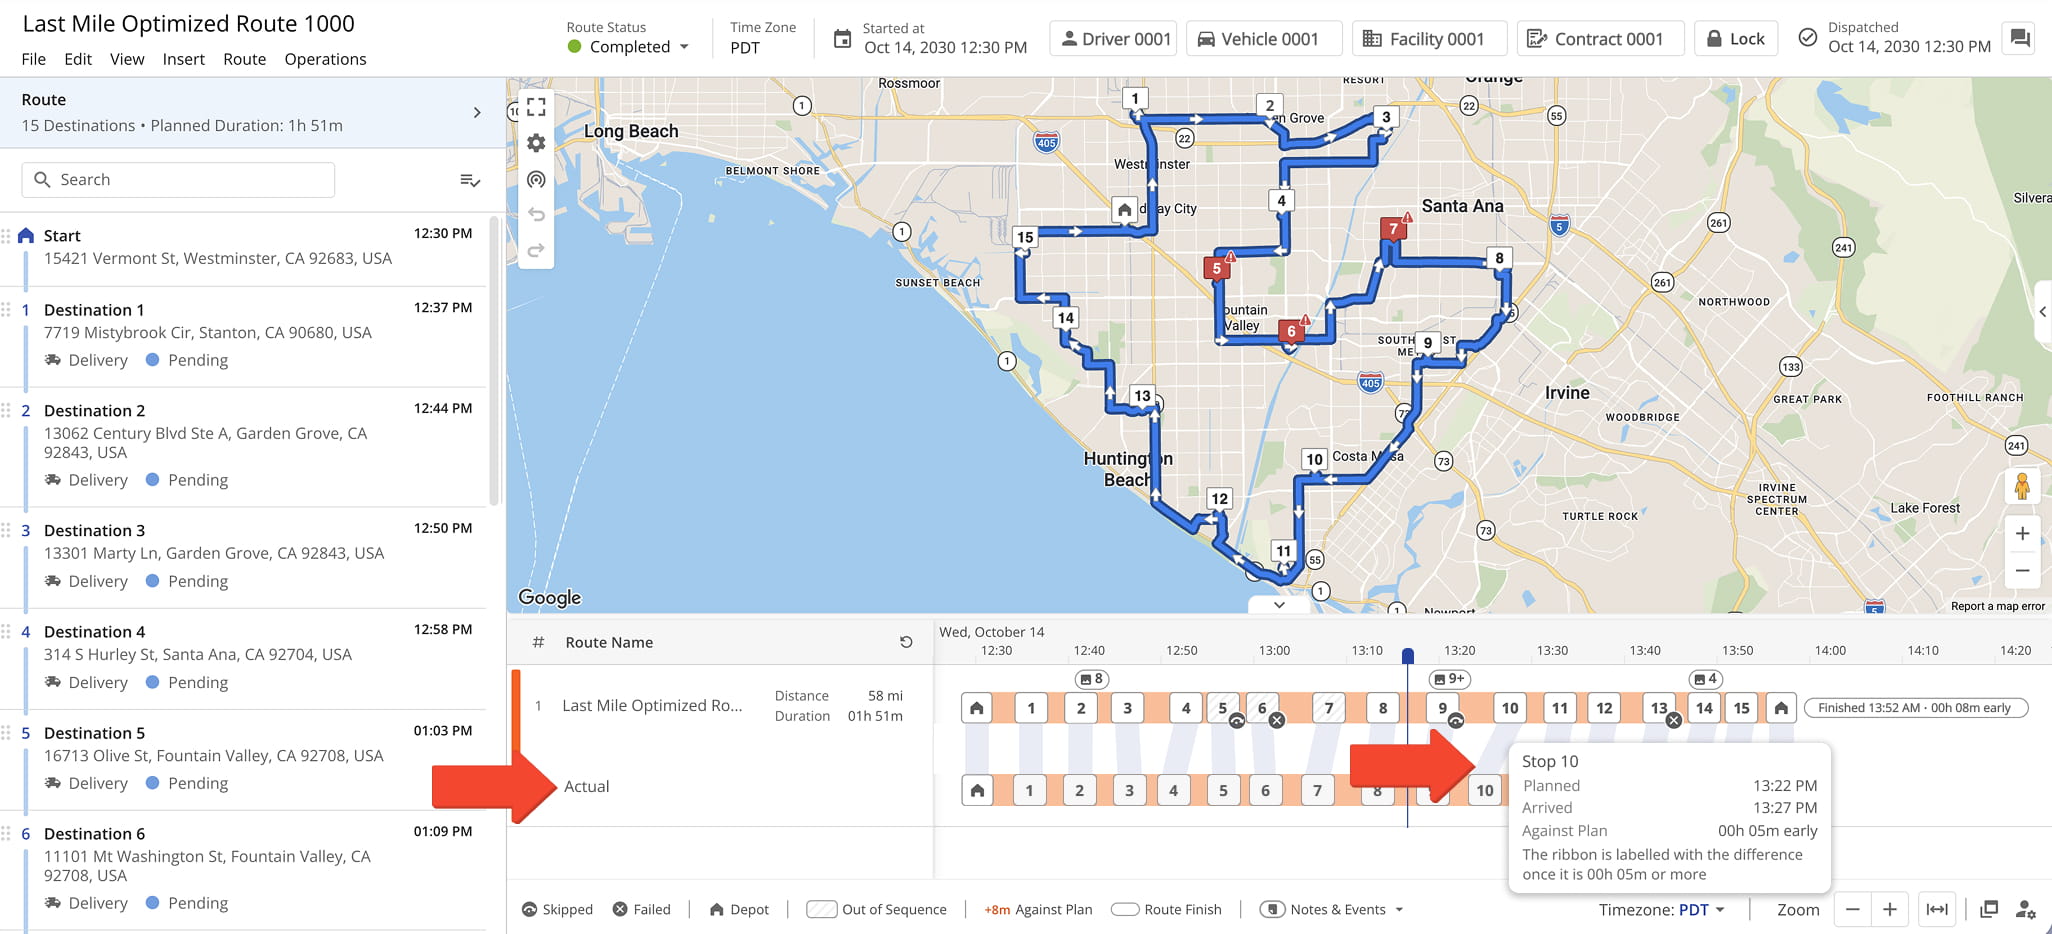
Once a route has been dispatched, the timeline shows two rows: the planned route on top and the actual route directly beneath it, labeled “Actual”. This lets you compare when destinations were planned to be visited versus when they were actually visited.
A silver ribbon connects each destination in the planned row to the same destination in the actual row, showing how far each stop shifted from the plan. To see more details, hover over the ribbon.
Route Replay Options – Replay A Full Or Partial Route From The Timeline
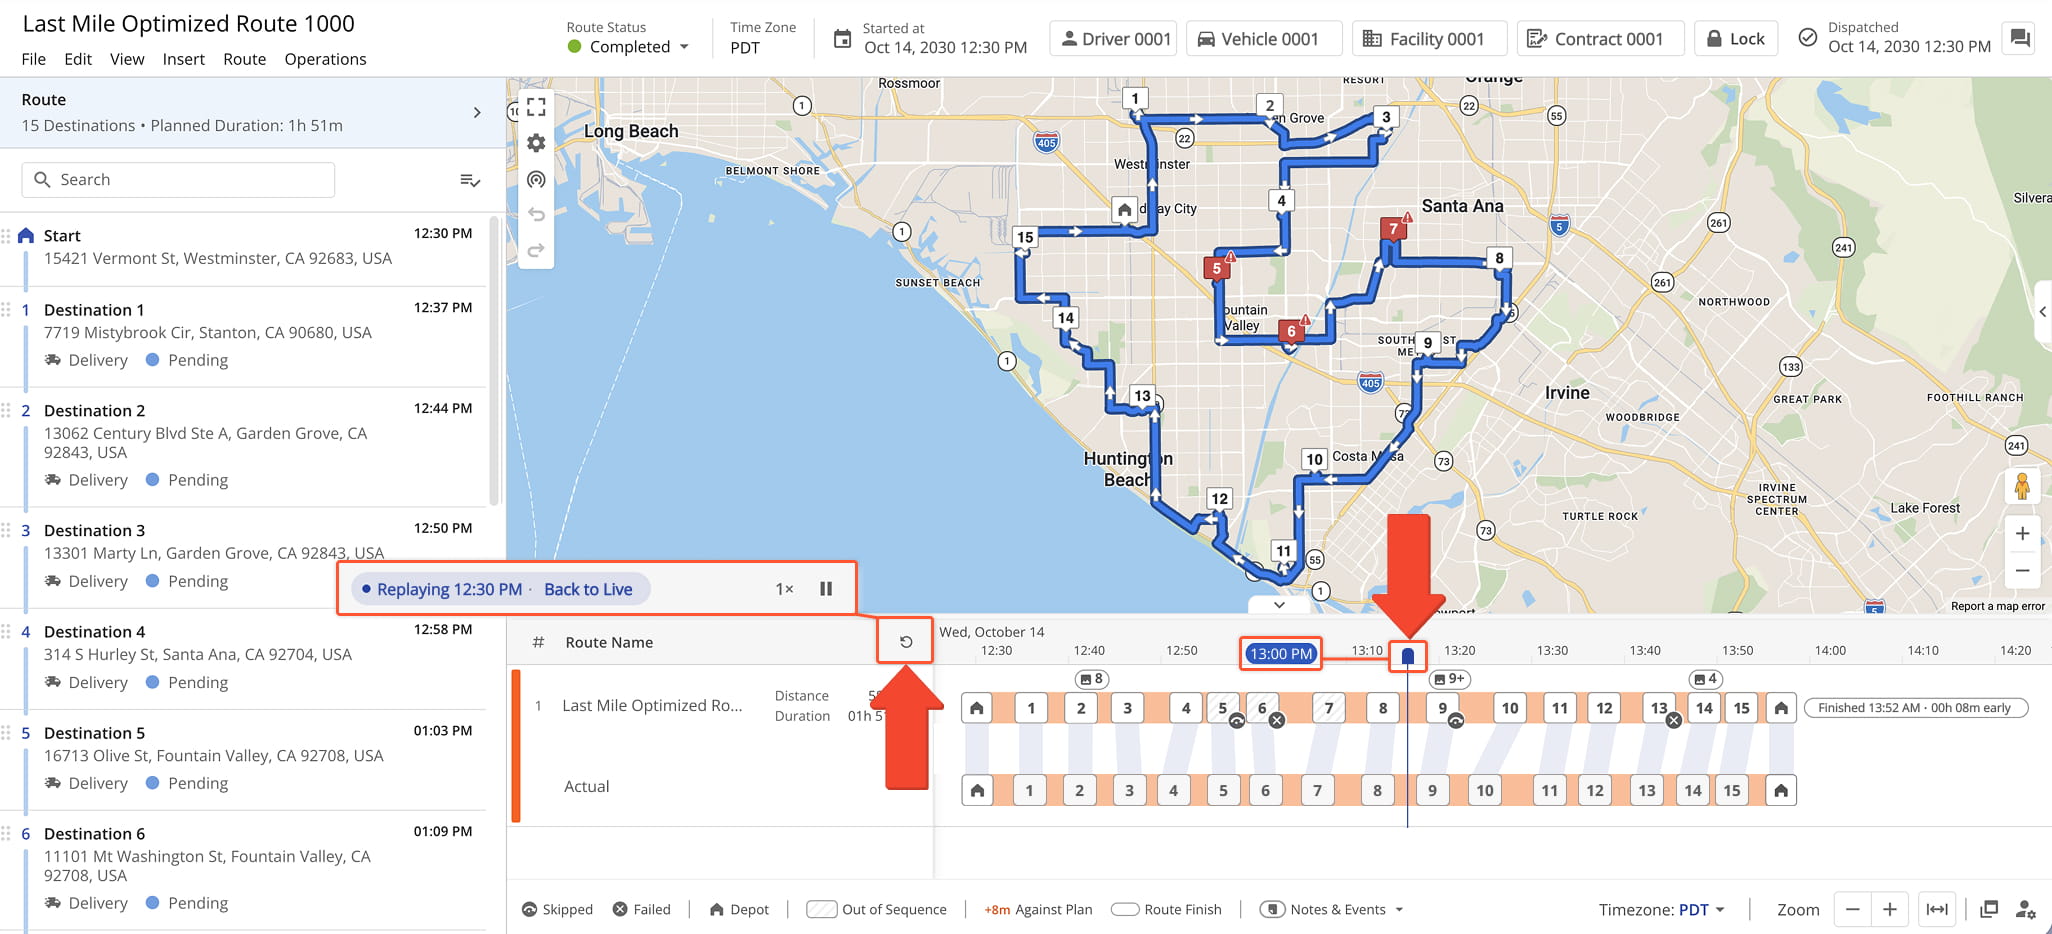
You can replay a route from the Timeline to review how it unfolded, useful for verifying driver activity and investigating delays.
- To replay the entire route, select the Replay Icon (a circular arrow) next to the Route Name header. The route plays from start to finish.
- To replay part of the route, drag the blue line on the timeline to the point where you want the replay to begin.
Manage Destinations On The Timeline – Reorder Stops And Edit Destinations
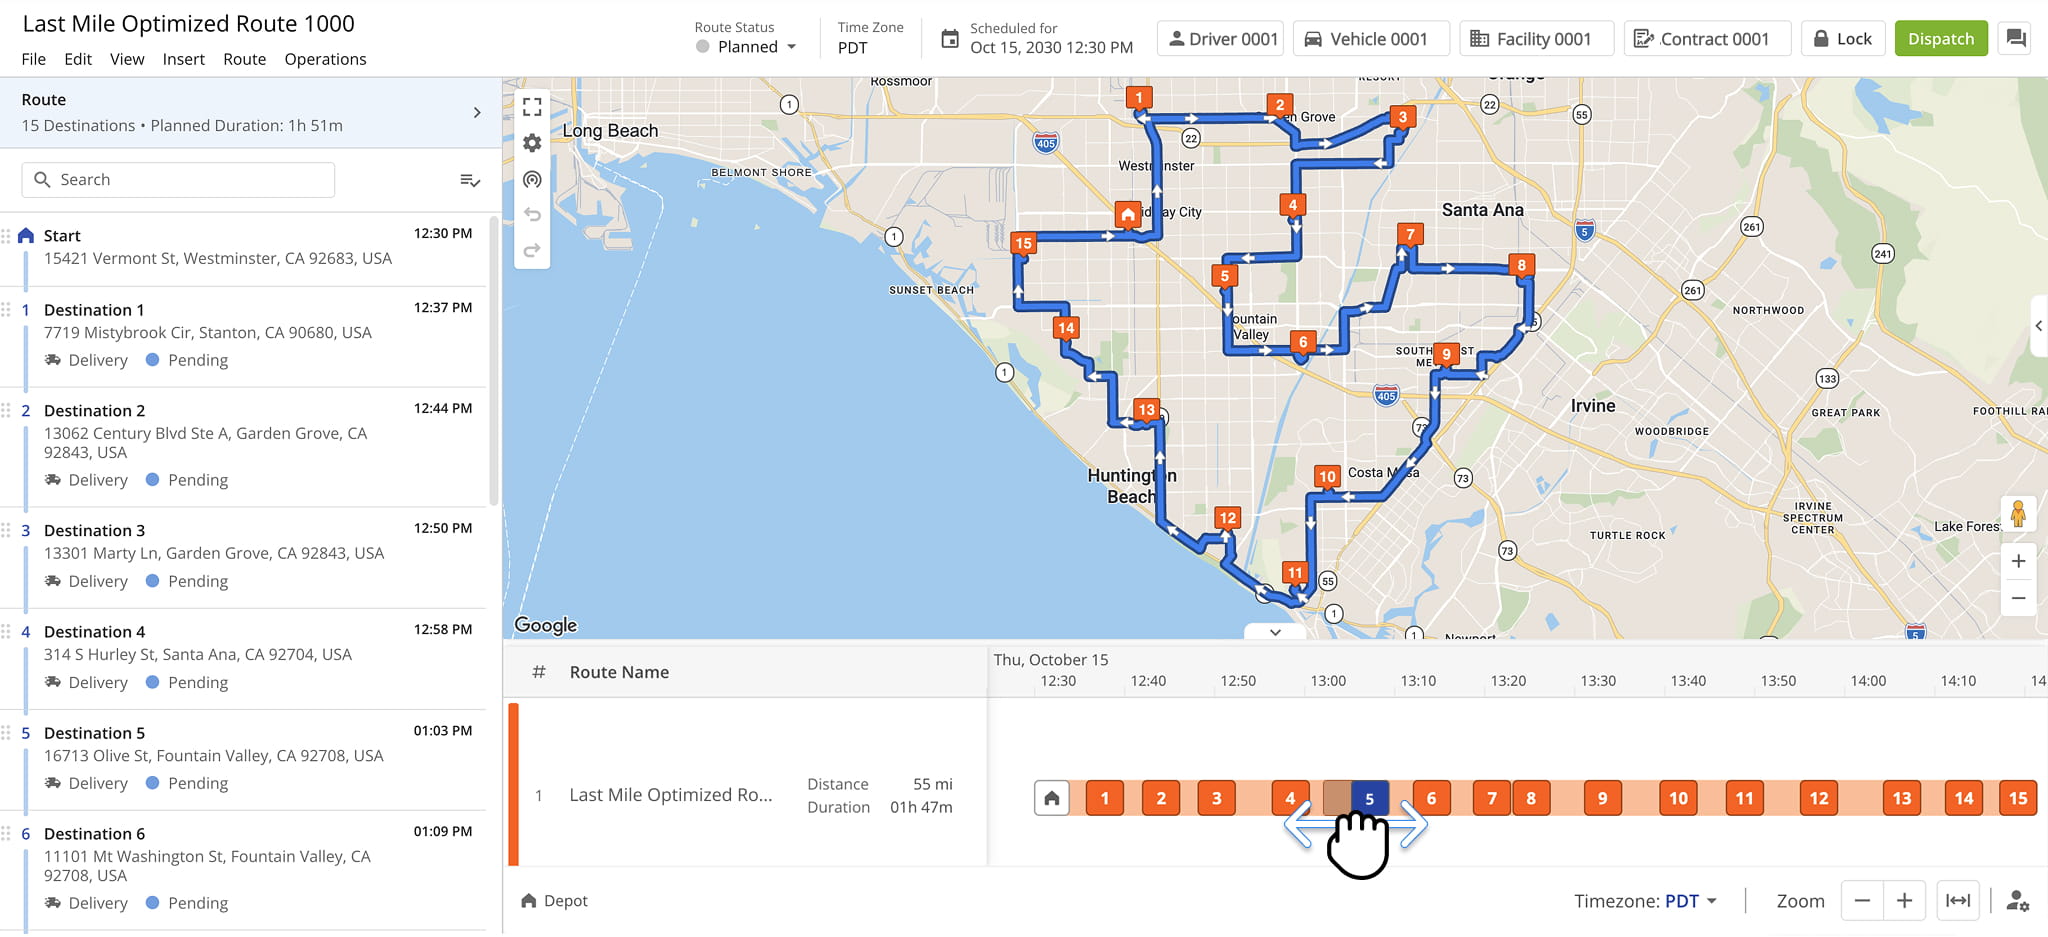
You can reorder destinations on the timeline using drag-and-drop. This lets you adjust the stop sequence quickly without leaving the timeline. Your changes are automatically reflected in both the Route List and Route Map.
NOTE: After making adjustments, Route4Me recommends re-optimizing the route to ensure the most efficient stop sequence.
You can also manage destinations directly from the timeline to make quick edits on the spot. Right-click a destination to open the action menu, described in the table below.
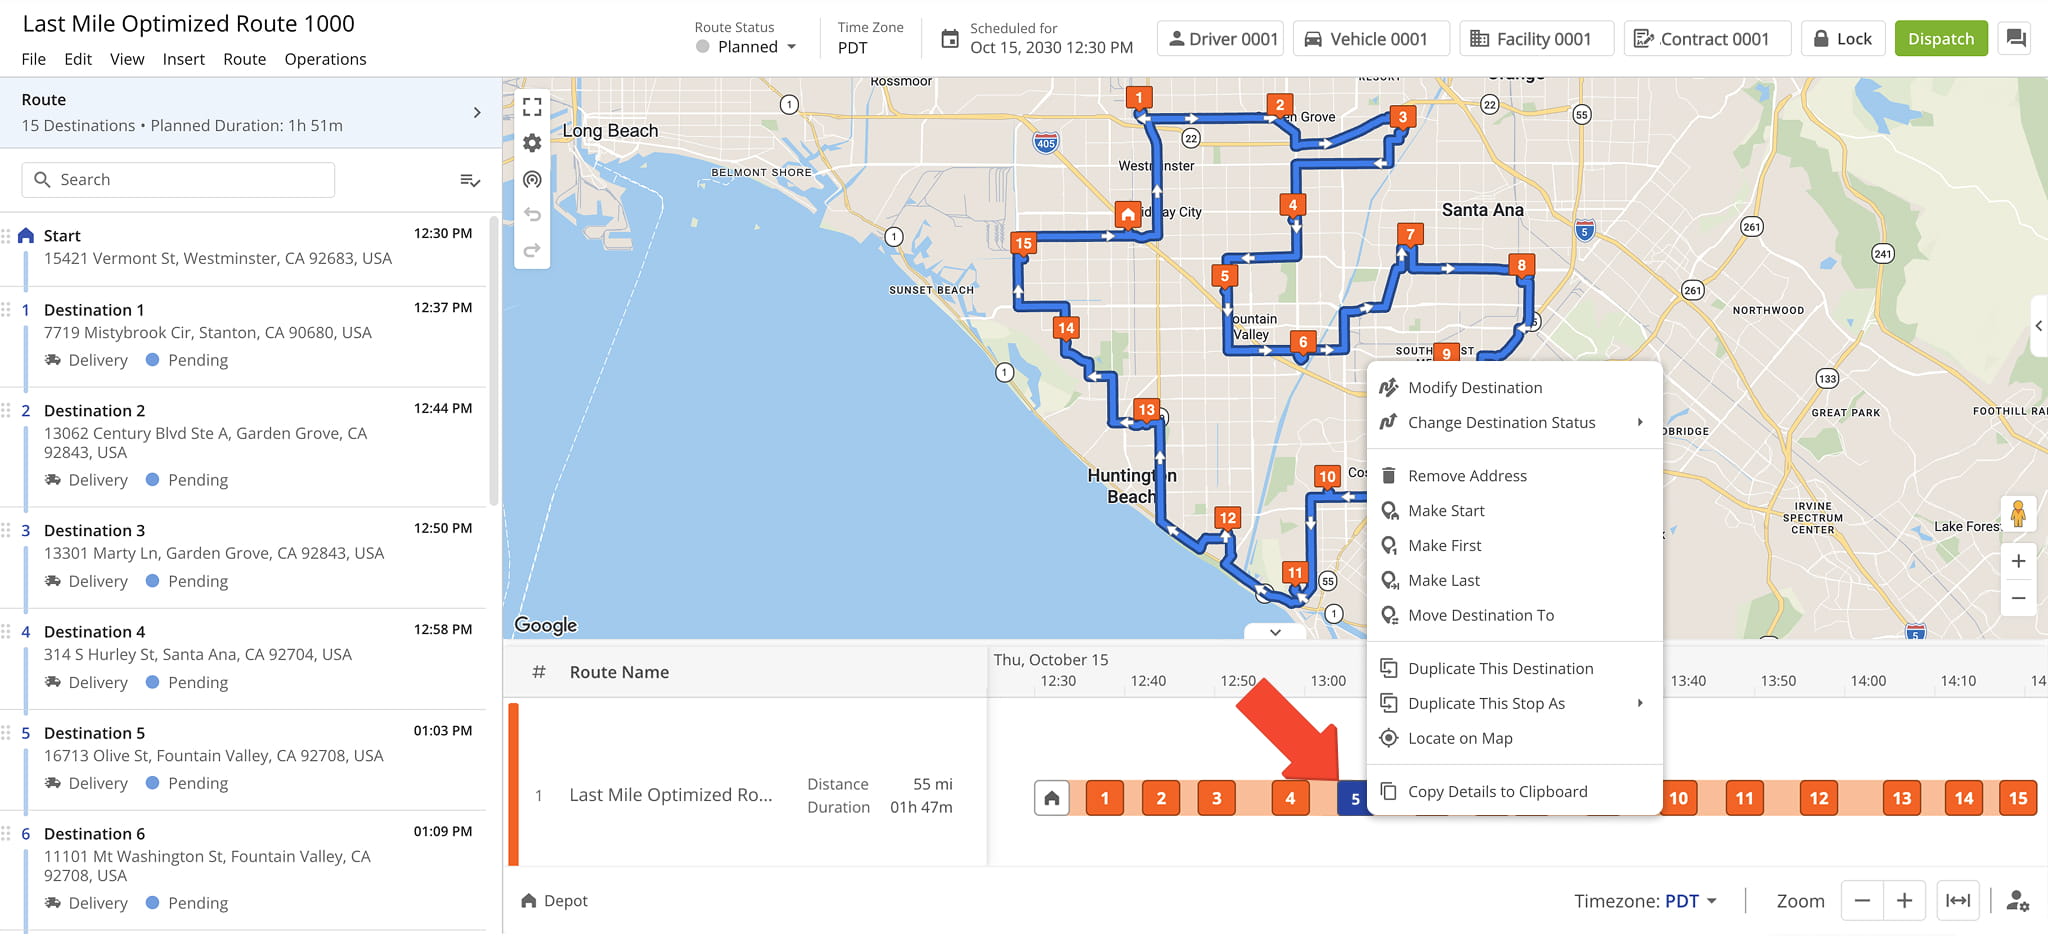
Destination Actions Menu
Visit Route4Me's Marketplace to Check out Various Modules and Add-Ons:
- Route Optimization
Time Windows
- Operations
Advanced Team Management Add-On
About author: Daniel Archer

