
Drag And Drop Destinations – Add, Reorder, And Move Between Routes
Route4Me’s drag-and-drop and destination insertion tools give enterprise businesses a fast, flexible way to fine-tune routes without rebuilding them. Whether you’re adjusting a single route or coordinating stops across your fleet, you can drag and drop destinations to add them to a route, reorder them, or move them between routes. This control is essential to effective last mile route optimization, helping you adapt to real-time changes like delayed stops, shifting priorities, or workload imbalances.
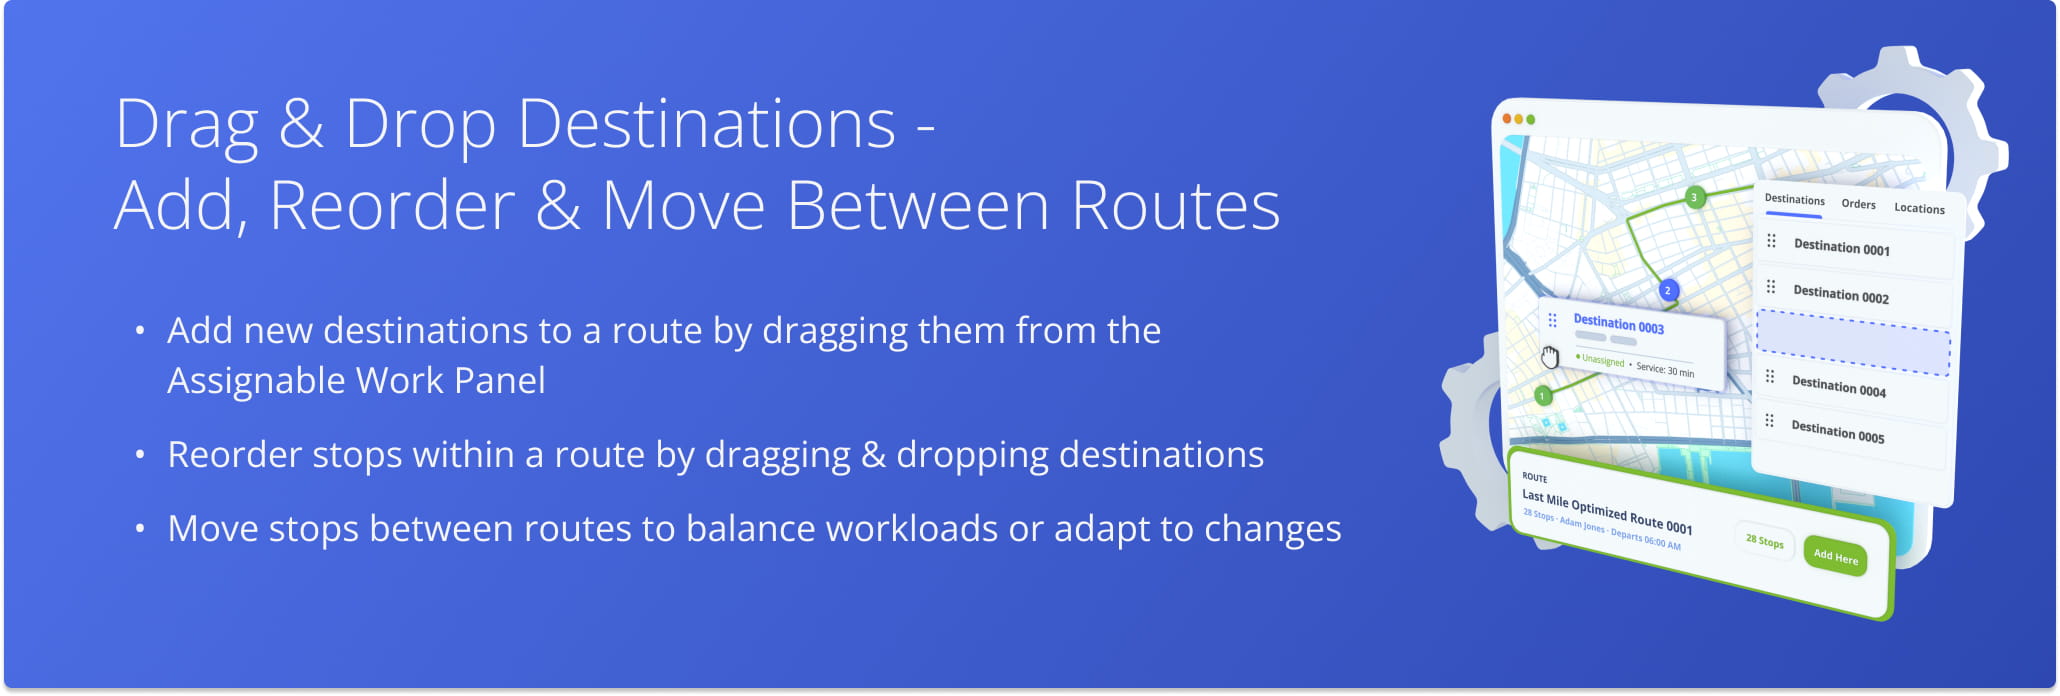
Table of Contents
Assignable Work Panel – Drag And Drop New Destinations
Drag And Drop Destination Onto Routes List – Add Destination To Route
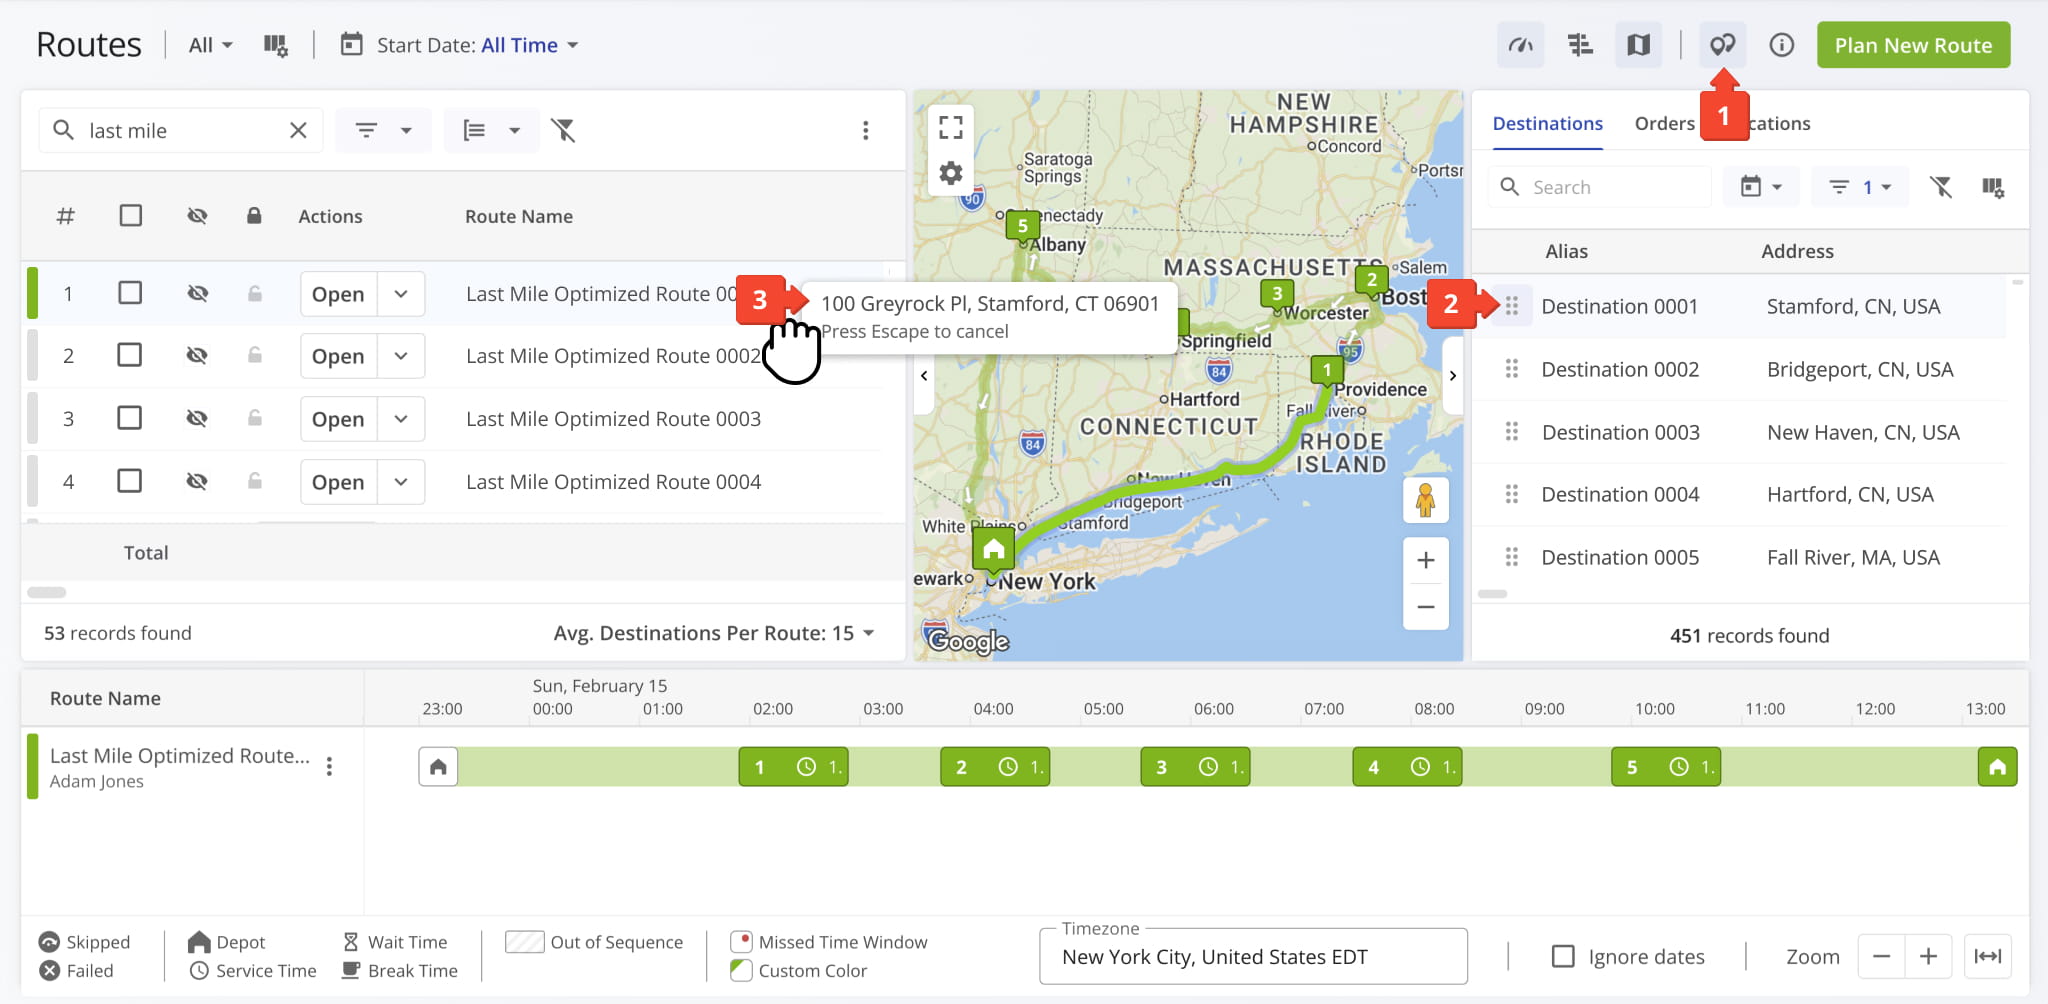
To drag and drop a destination from the Assignable Work Panel to a route in the Routes List:
- Click the Destination Icon to open the panel.
- Select the destination you want to add to a route.
- Drag the destination to the preferred route in the Routes List.
Once inserted, Route4Me will automatically update the route with the new destination. This works for upcoming routes as well as ones already in progress, though a few limitations apply once a route has started.
NOTE: New destinations can only be added to the unvisited portion of an in-progress route. Add new destinations to the end of the route or, if you add them elsewhere, re-optimize the remaining stops to keep the route efficient.
Drag And Drop Destination Onto Routes Map – Drop Destination Into Route
To drag and drop a destination from the Assignable Work Panel to a route in the Routes Map:
- Click the Destination Icon to open the panel.
- Select the destination you want to add to a route.
- Drag the destination to the preferred route on the Routes Map.
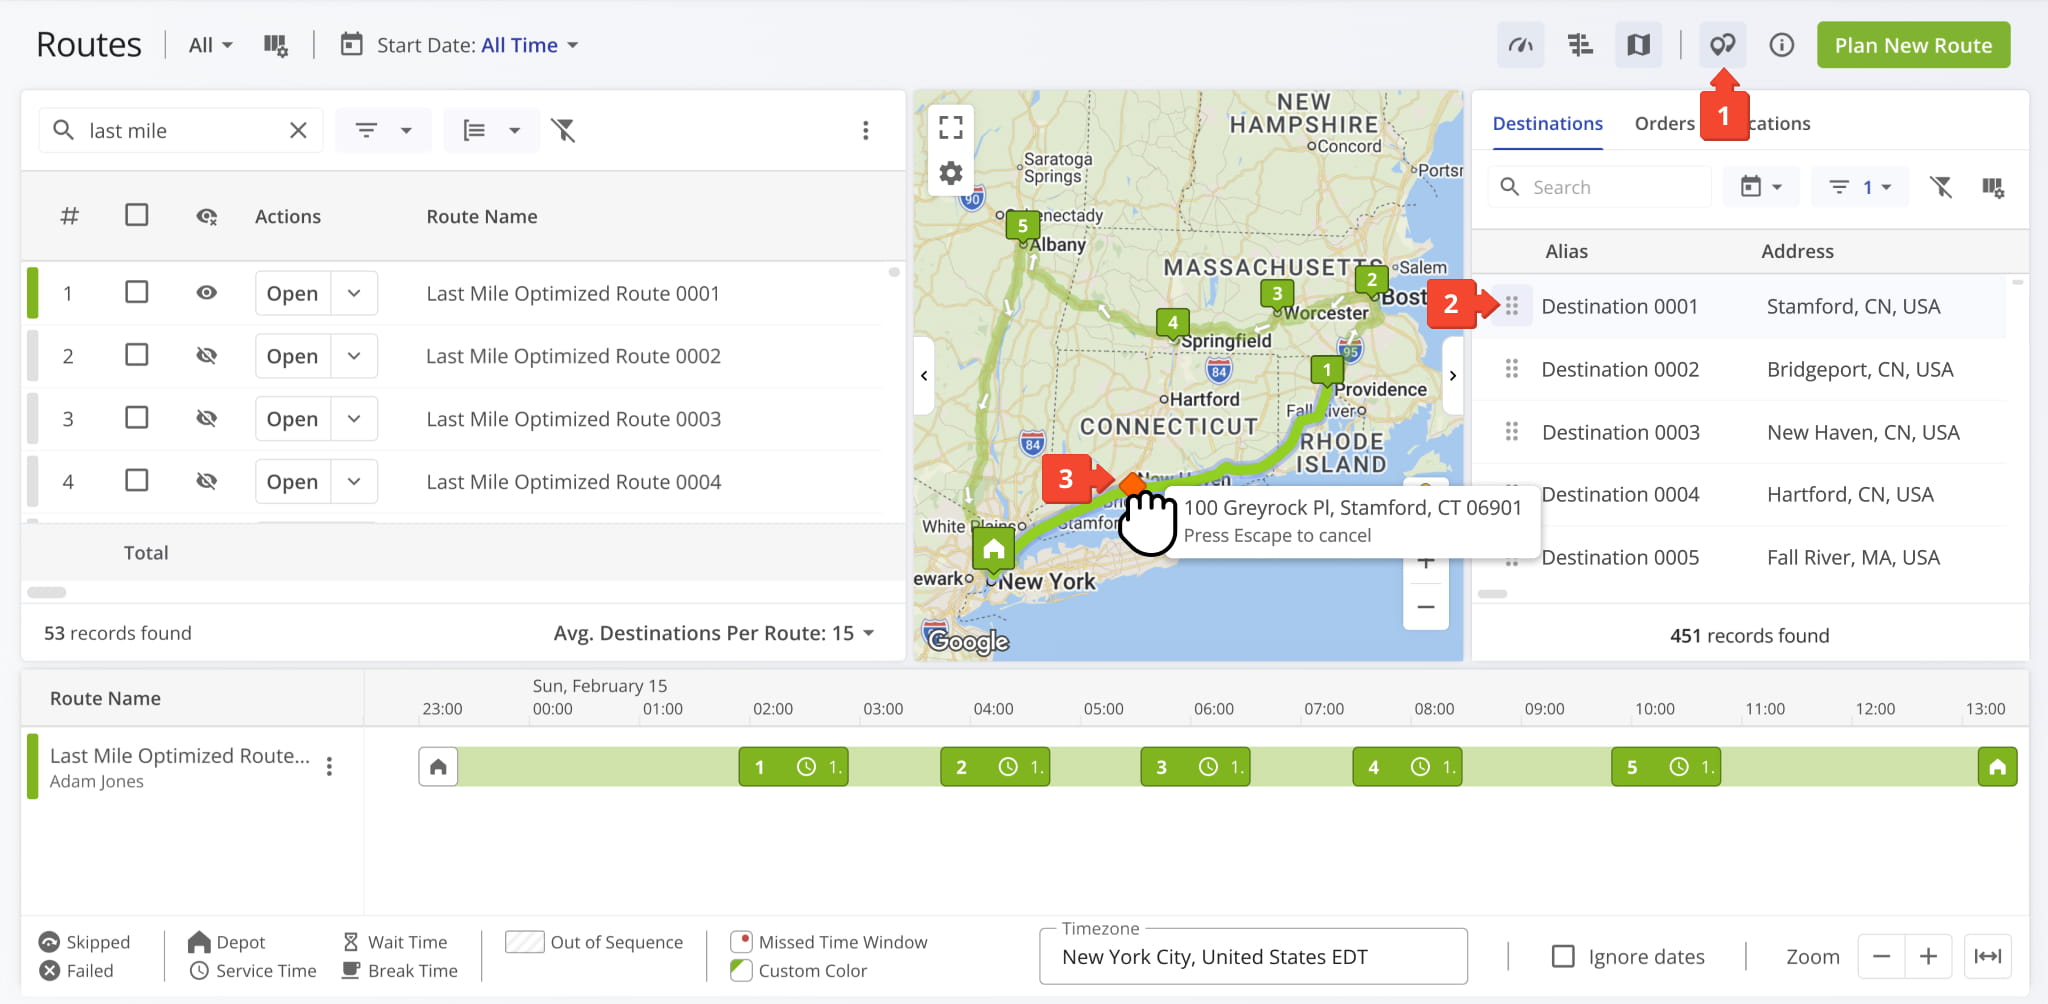
Once added, Route4Me updates the Routes Map to show the new destination along the route path.
NOTE: If the route is in progress, new destinations can only be added to the unvisited portion of the route. Completed stops can’t be changed. Re-optimize the remaining stops to keep the route efficient.
Drag And Drop Destination Onto Routes Timeline – Schedule Destination
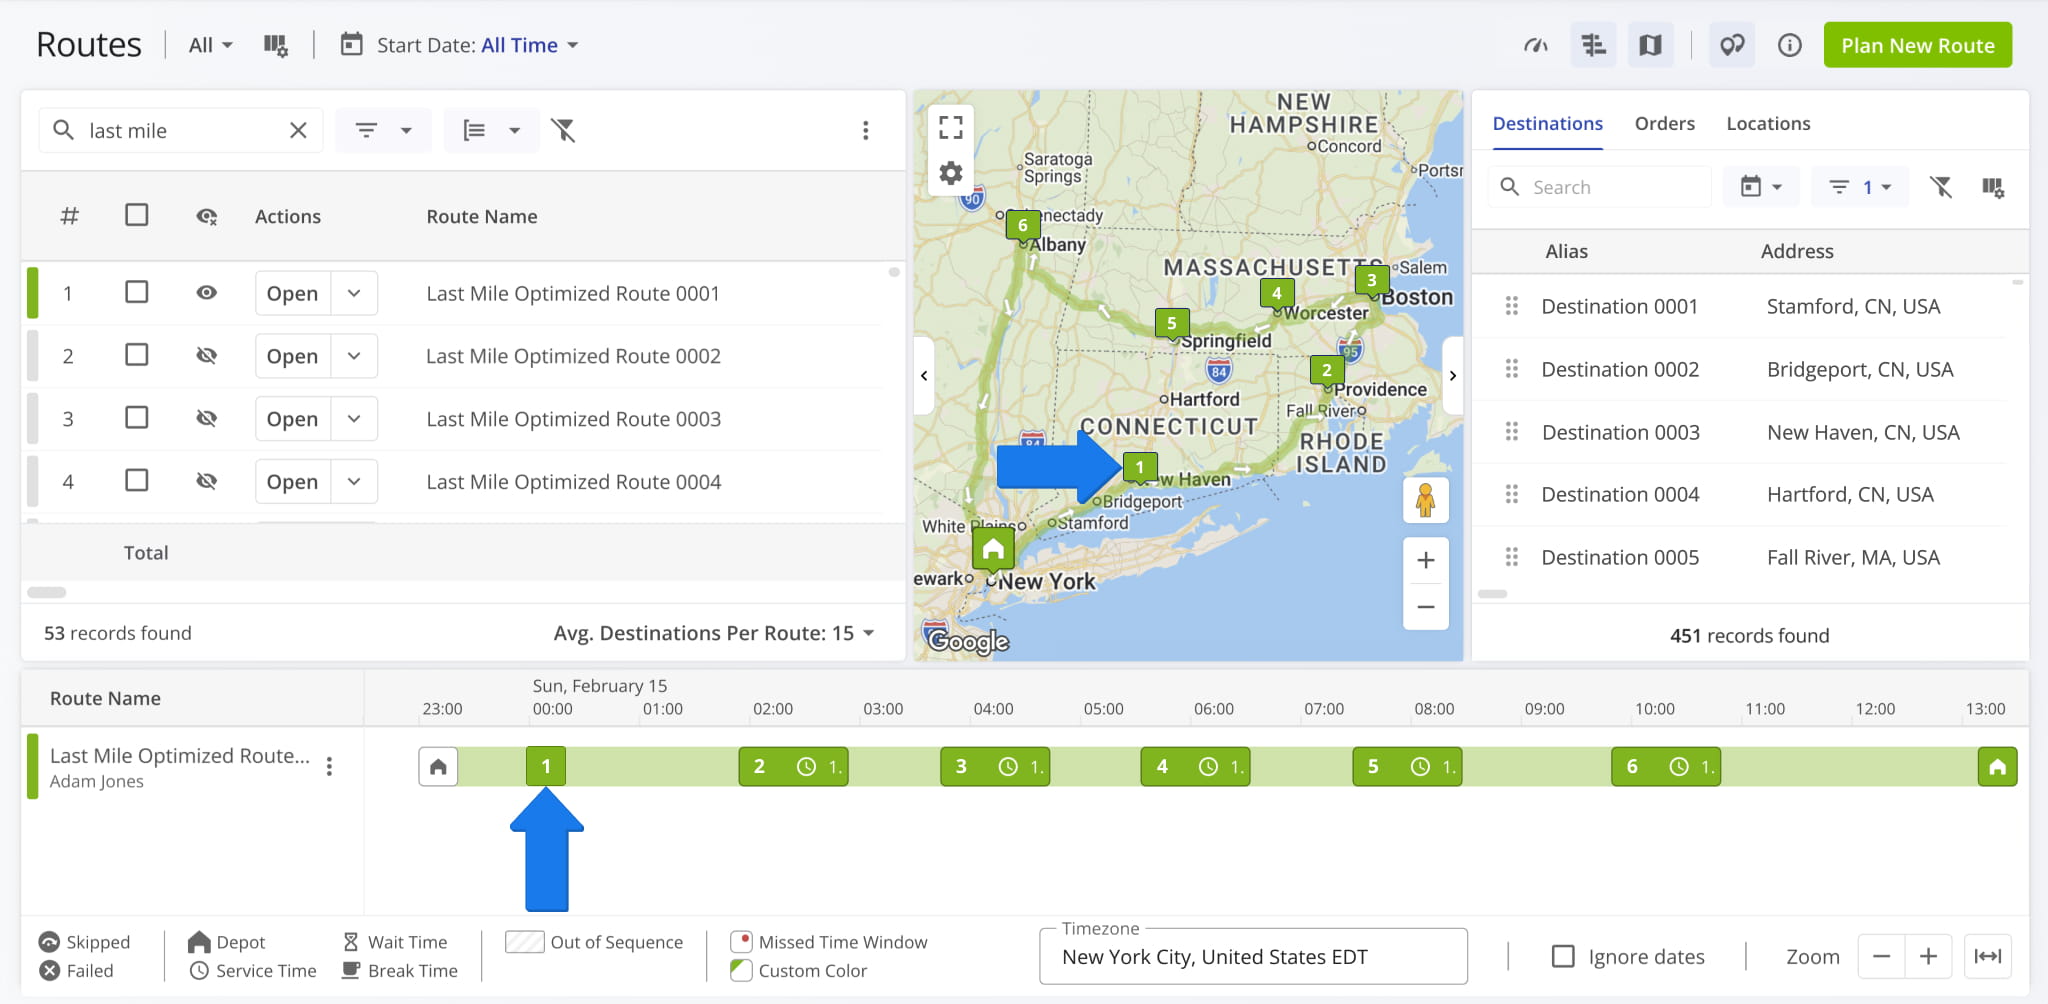
To drag and drop a destination from the Assignable Work Panel to a route in the Routes Timeline:
- Click the Destination Icon to open the panel.
- Select the destination you want to add to a route.
- Drag the destination to the preferred route on the Routes Timeline.
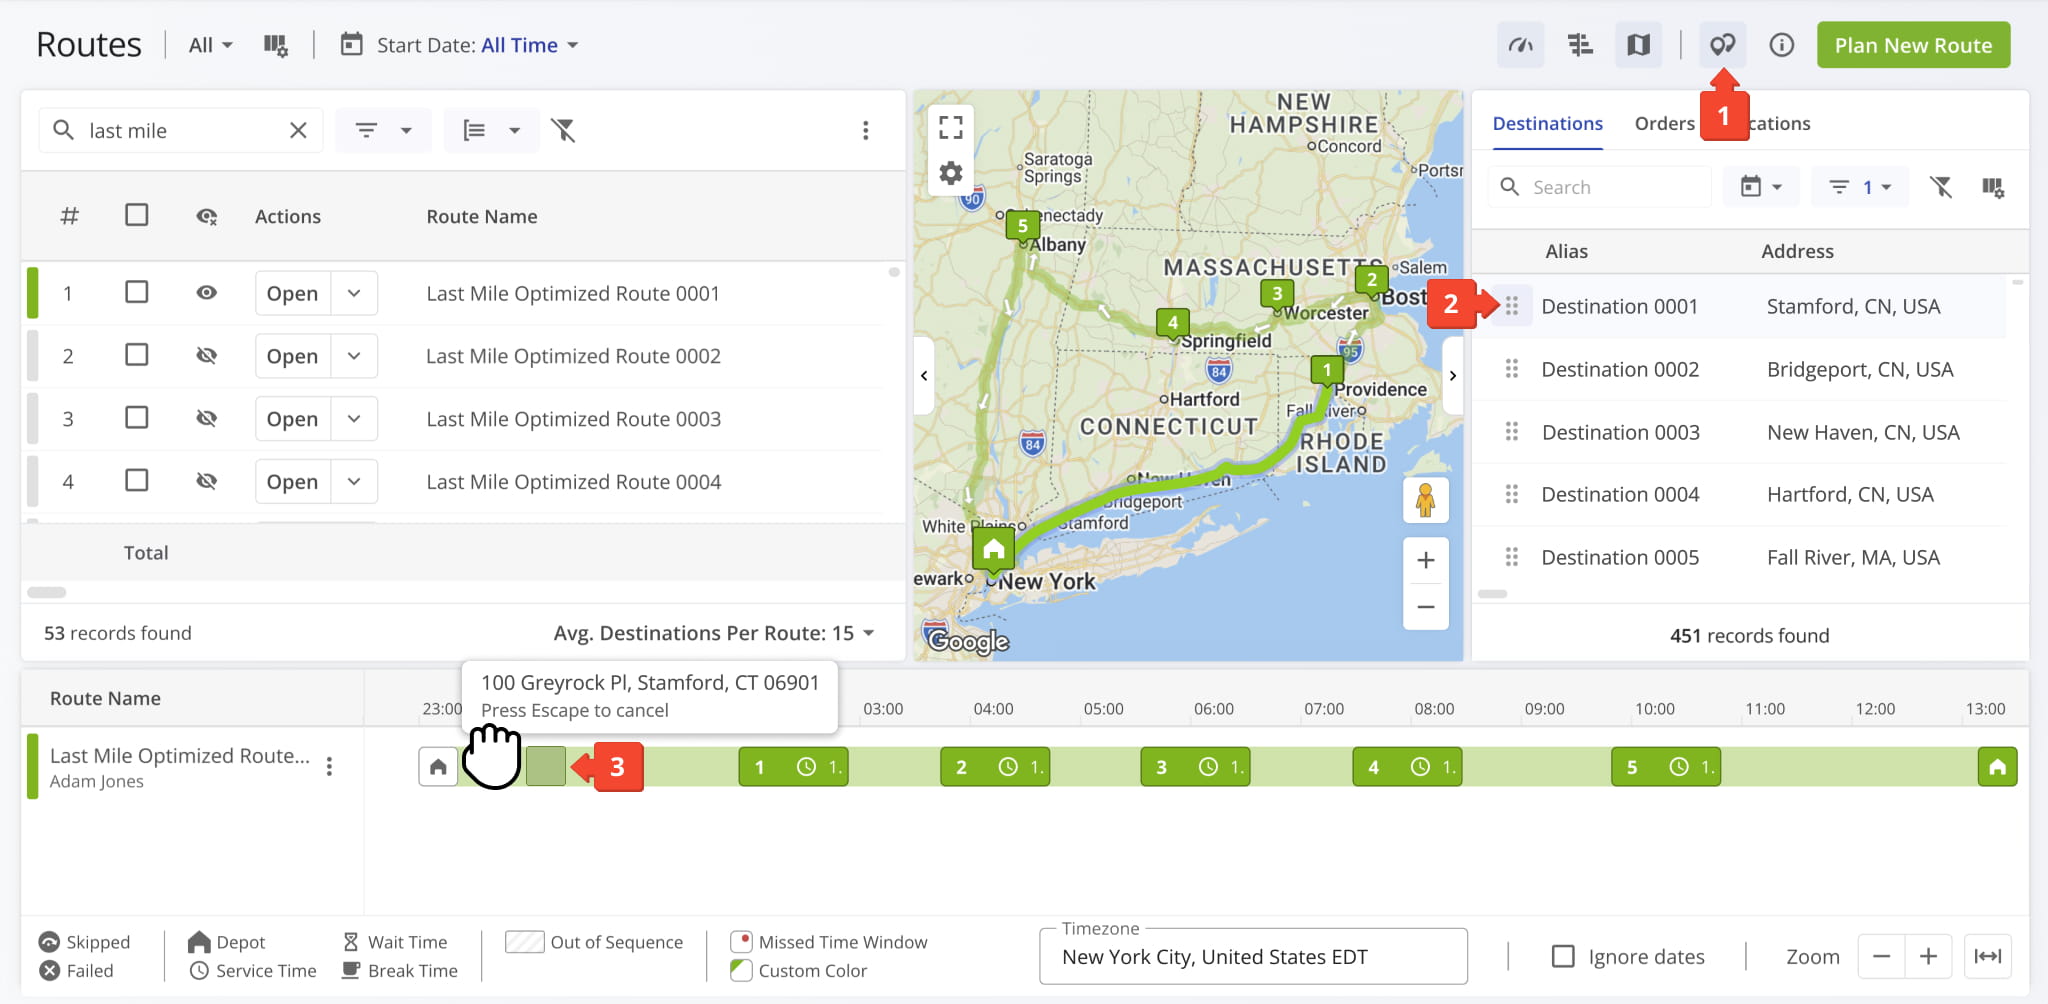
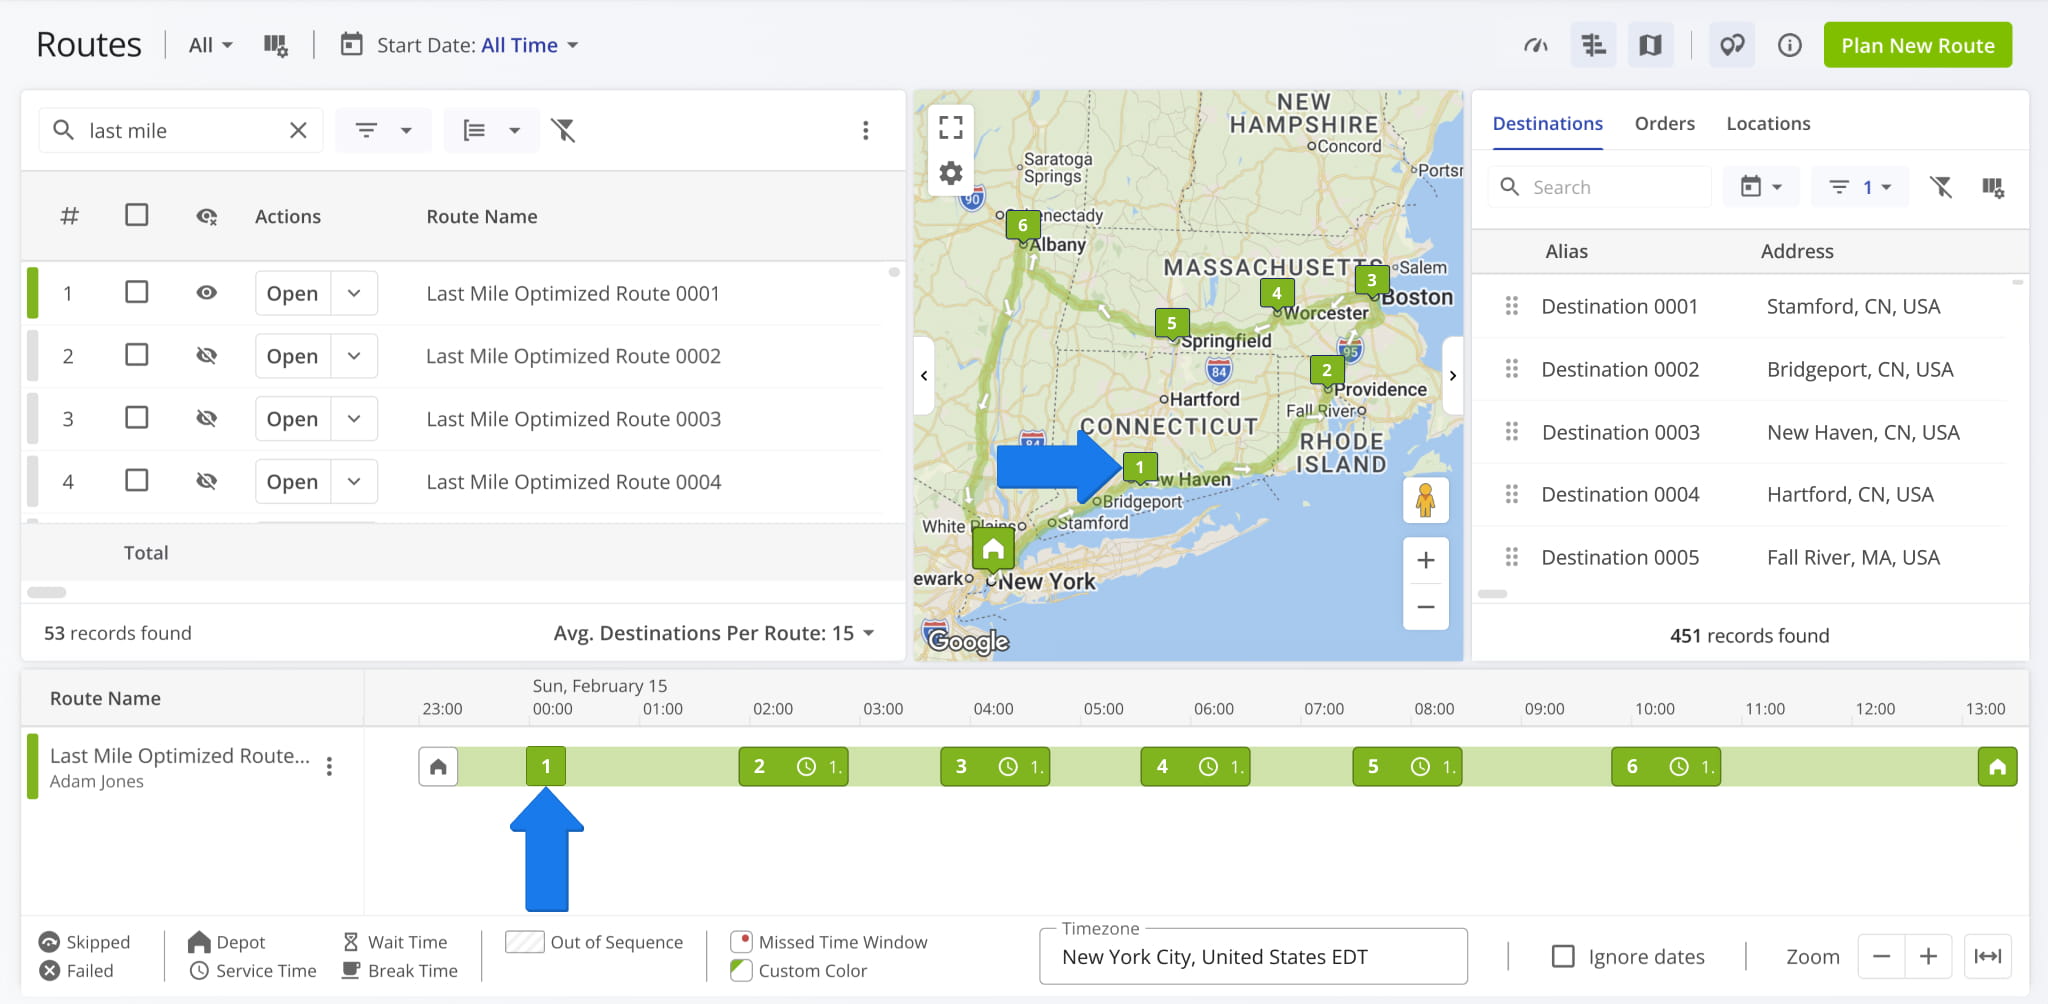
Once added, Route4Me updates the Routes Timeline to show the new destination along the route path.
NOTE: If the route is in progress, new destinations can only be added to the unvisited portion of the route. Completed stops can’t be changed. Re-optimize the remaining stops to keep the route efficient.
Routes Page – Reorder Destinations Within The Same Route
From The Routes Timeline – Drag And Drop Destination Scheduling
You can reorder stops using the Routes Timeline on your Routes Page, accessible from “Dynamic Routing” > “Routes” in the Navigation Menu. From the Routes Page:
- Click the Timeline Icon in the top-right corner to open it.
- To show a route on the Timeline, click the Eye Icon beside it.
- To reorder a destination, drag it to a new position on the Timeline.
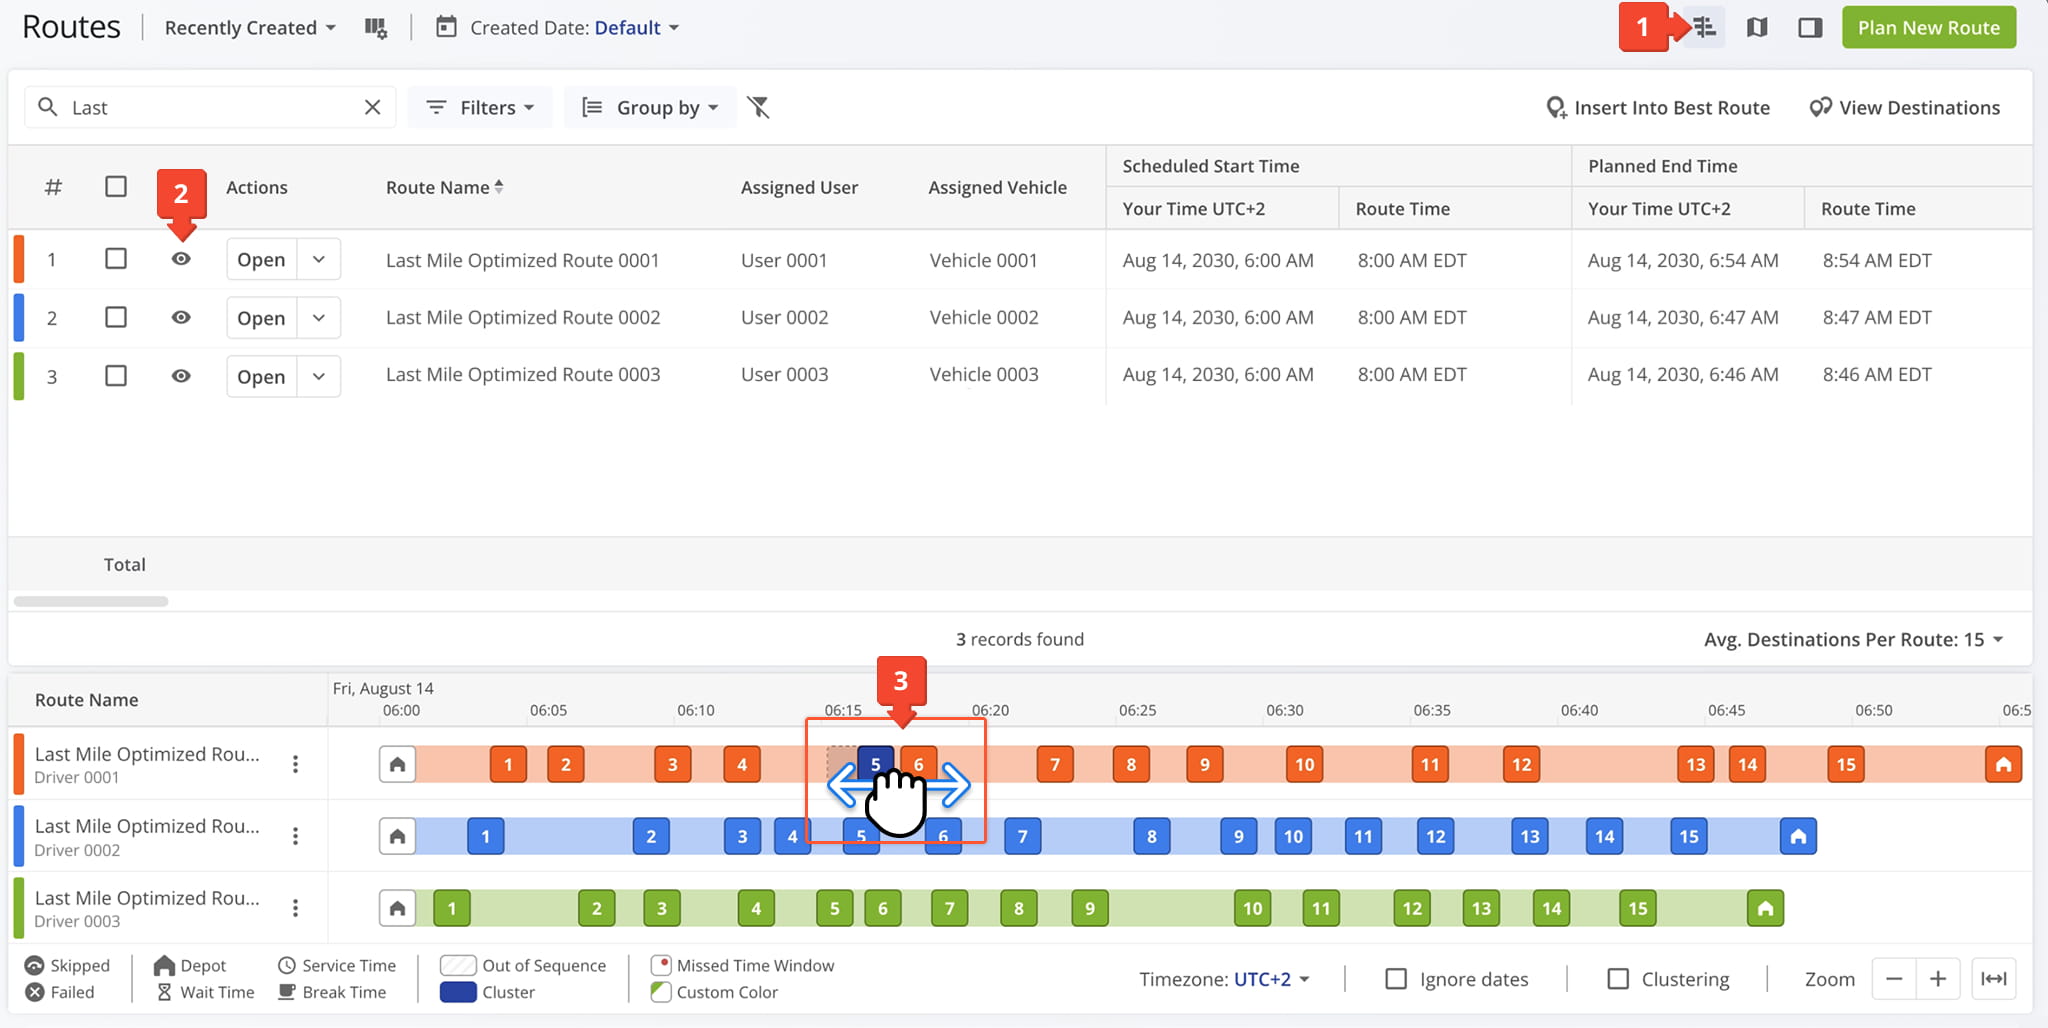
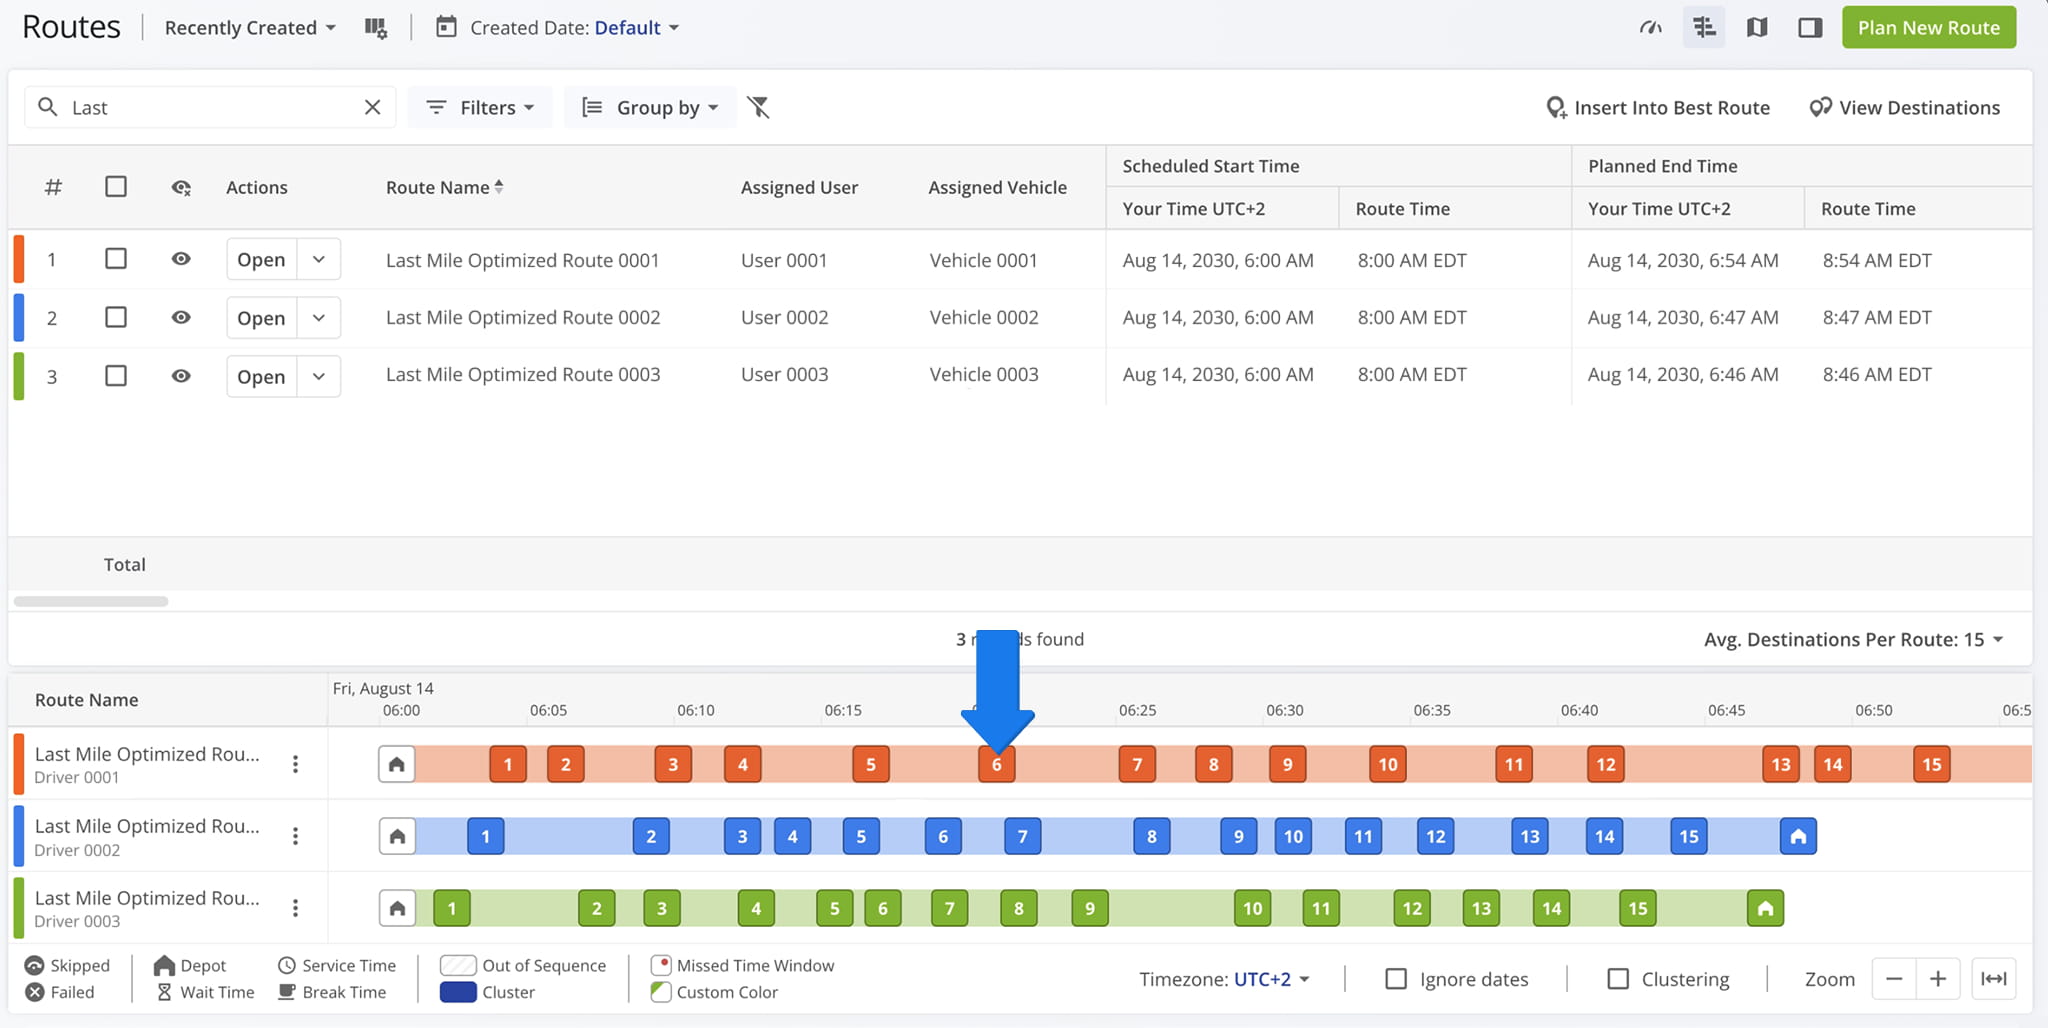
The Timeline will update to show the destination in its new position, reflecting the updated stop sequence for that route.
From The Routes Map – Visual Route Re-sequencing
You can also reorder stops via the Routes Map on your Routes Page. Click the Map Icon in the top-right corner to open the map. Then, to show a Route on the Map, click the Eye Icon beside it.
To re-sequence a destination, drag the Destination Icon to a new position on the map. To move a destination to a different address, hold the Shift key while dragging.
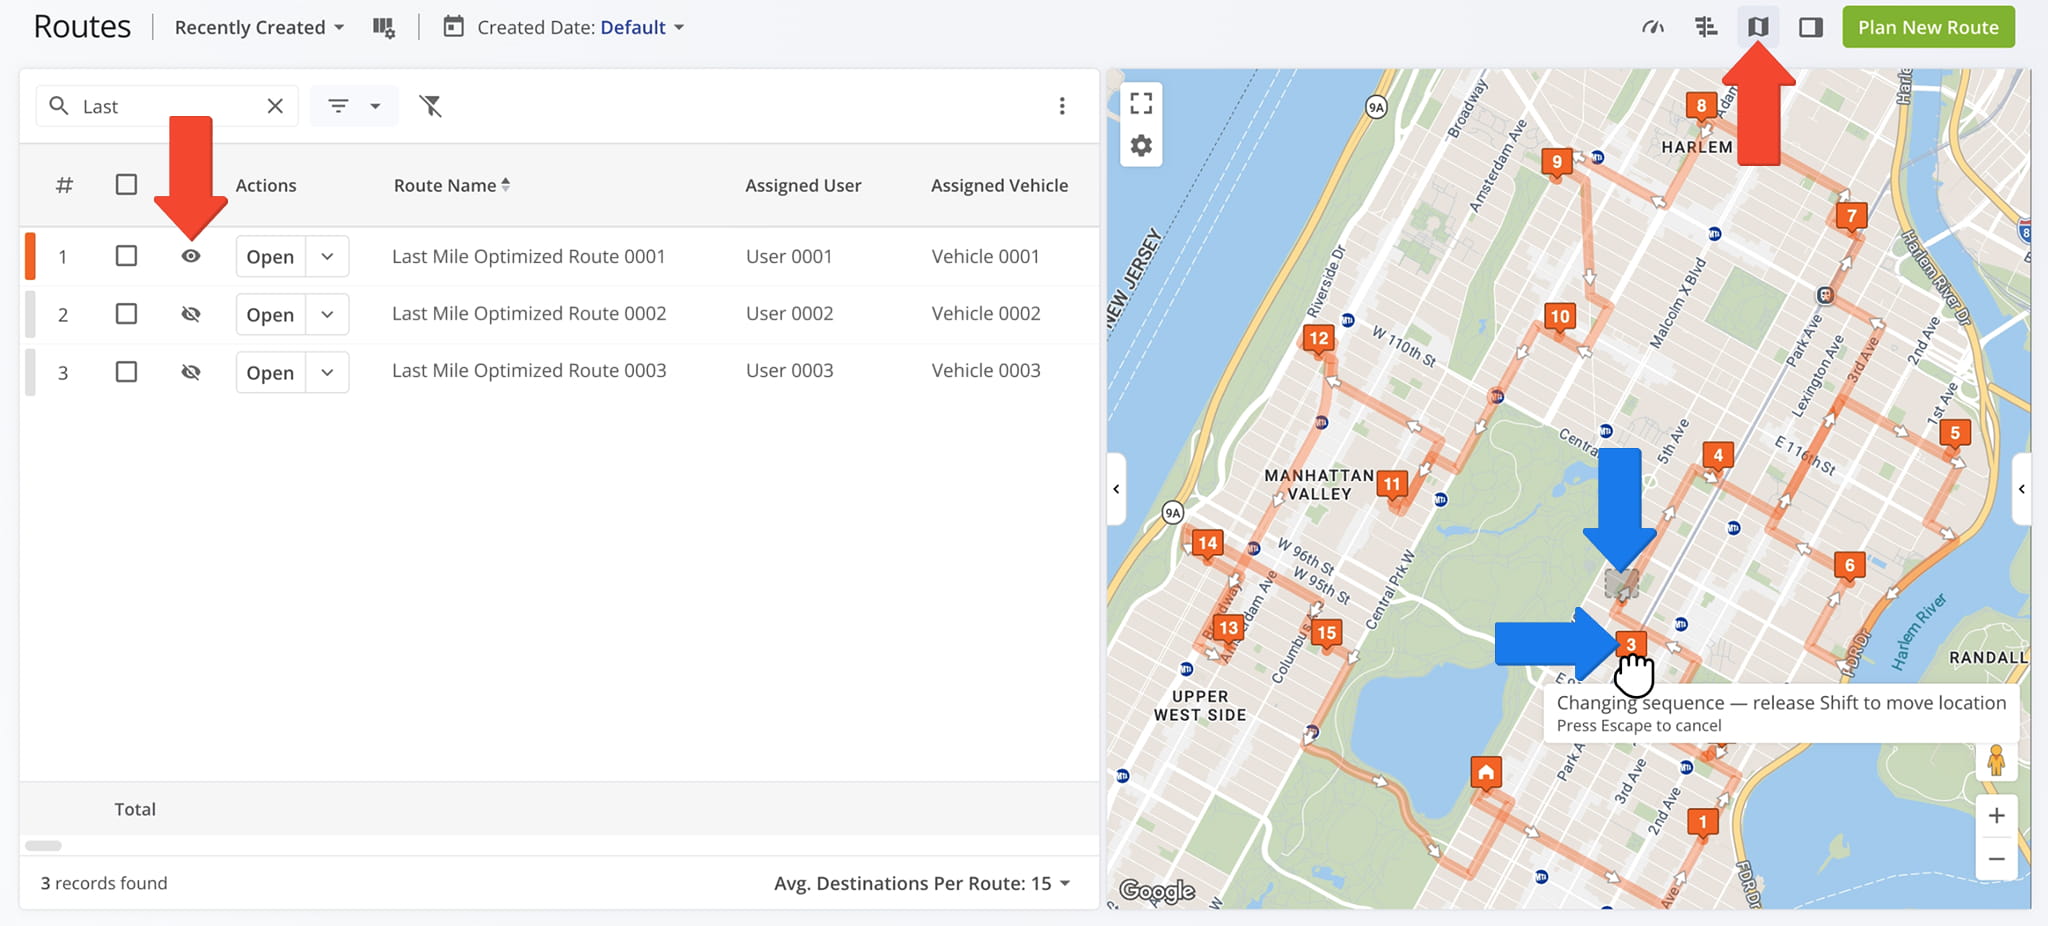
After releasing the Shift key, the Map will update to show the destination in its new position along the route path, with the sequence reordered accordingly.
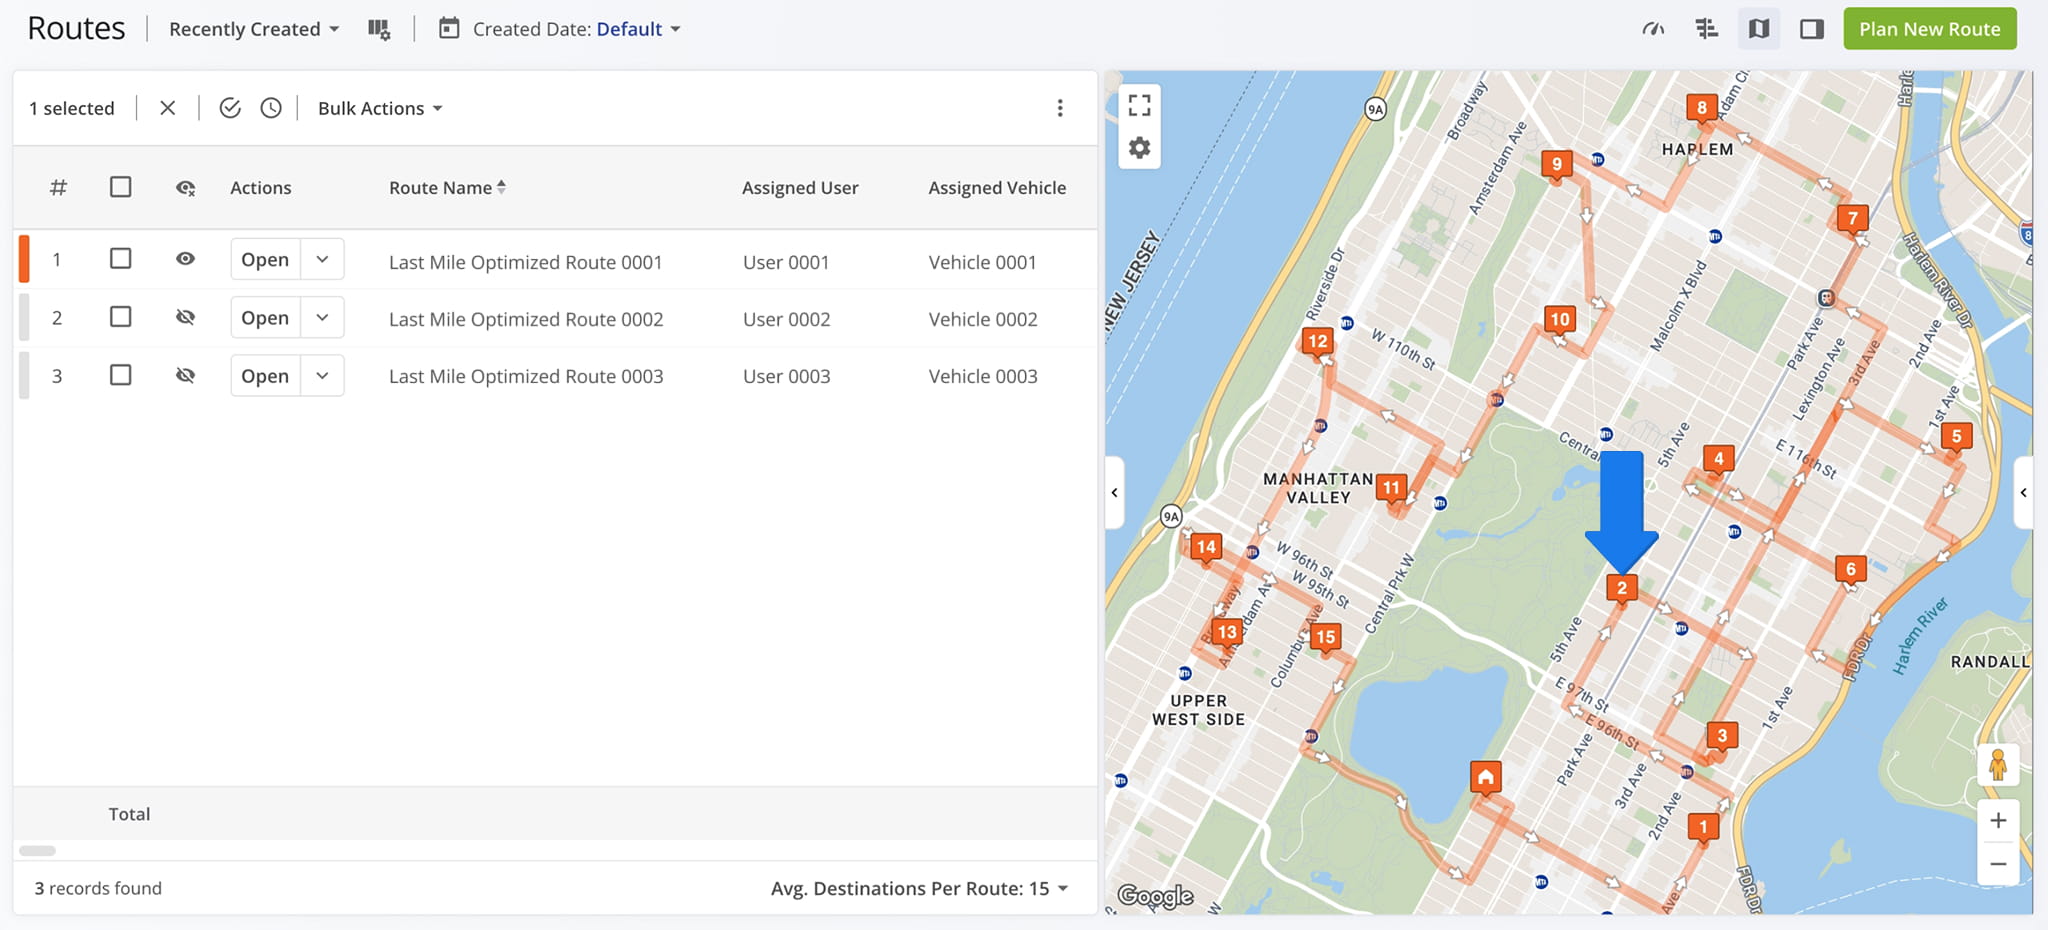
Alternatively, from your Destinations List, you can drag and drop stops on to the Map:
- Open the Map’s right-side Panel
- Drag and drop a destination from the list onto the route path to reposition it in the sequence.
The Map will automatically update to show the destination in its new position along the route.
Routes List – Move Destinations Between Routes
From The Routes Timeline – Modifying A Stop’s Route Assignment
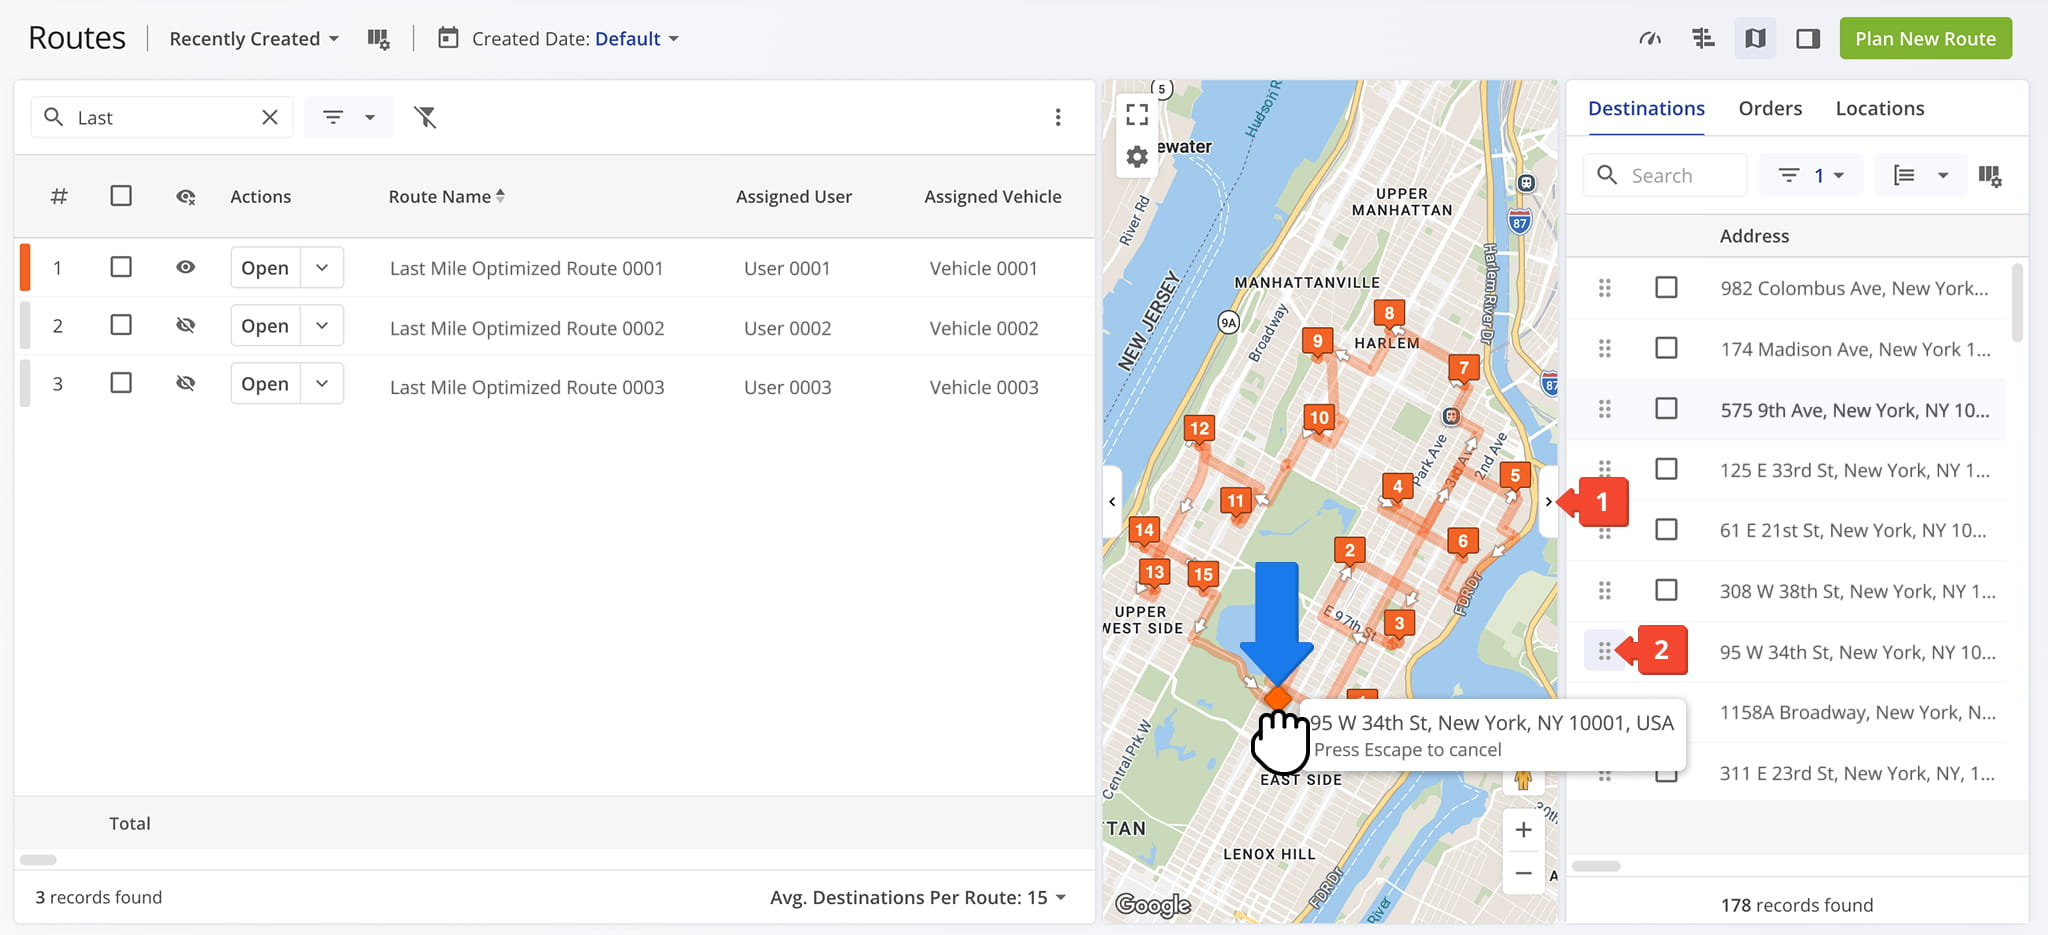
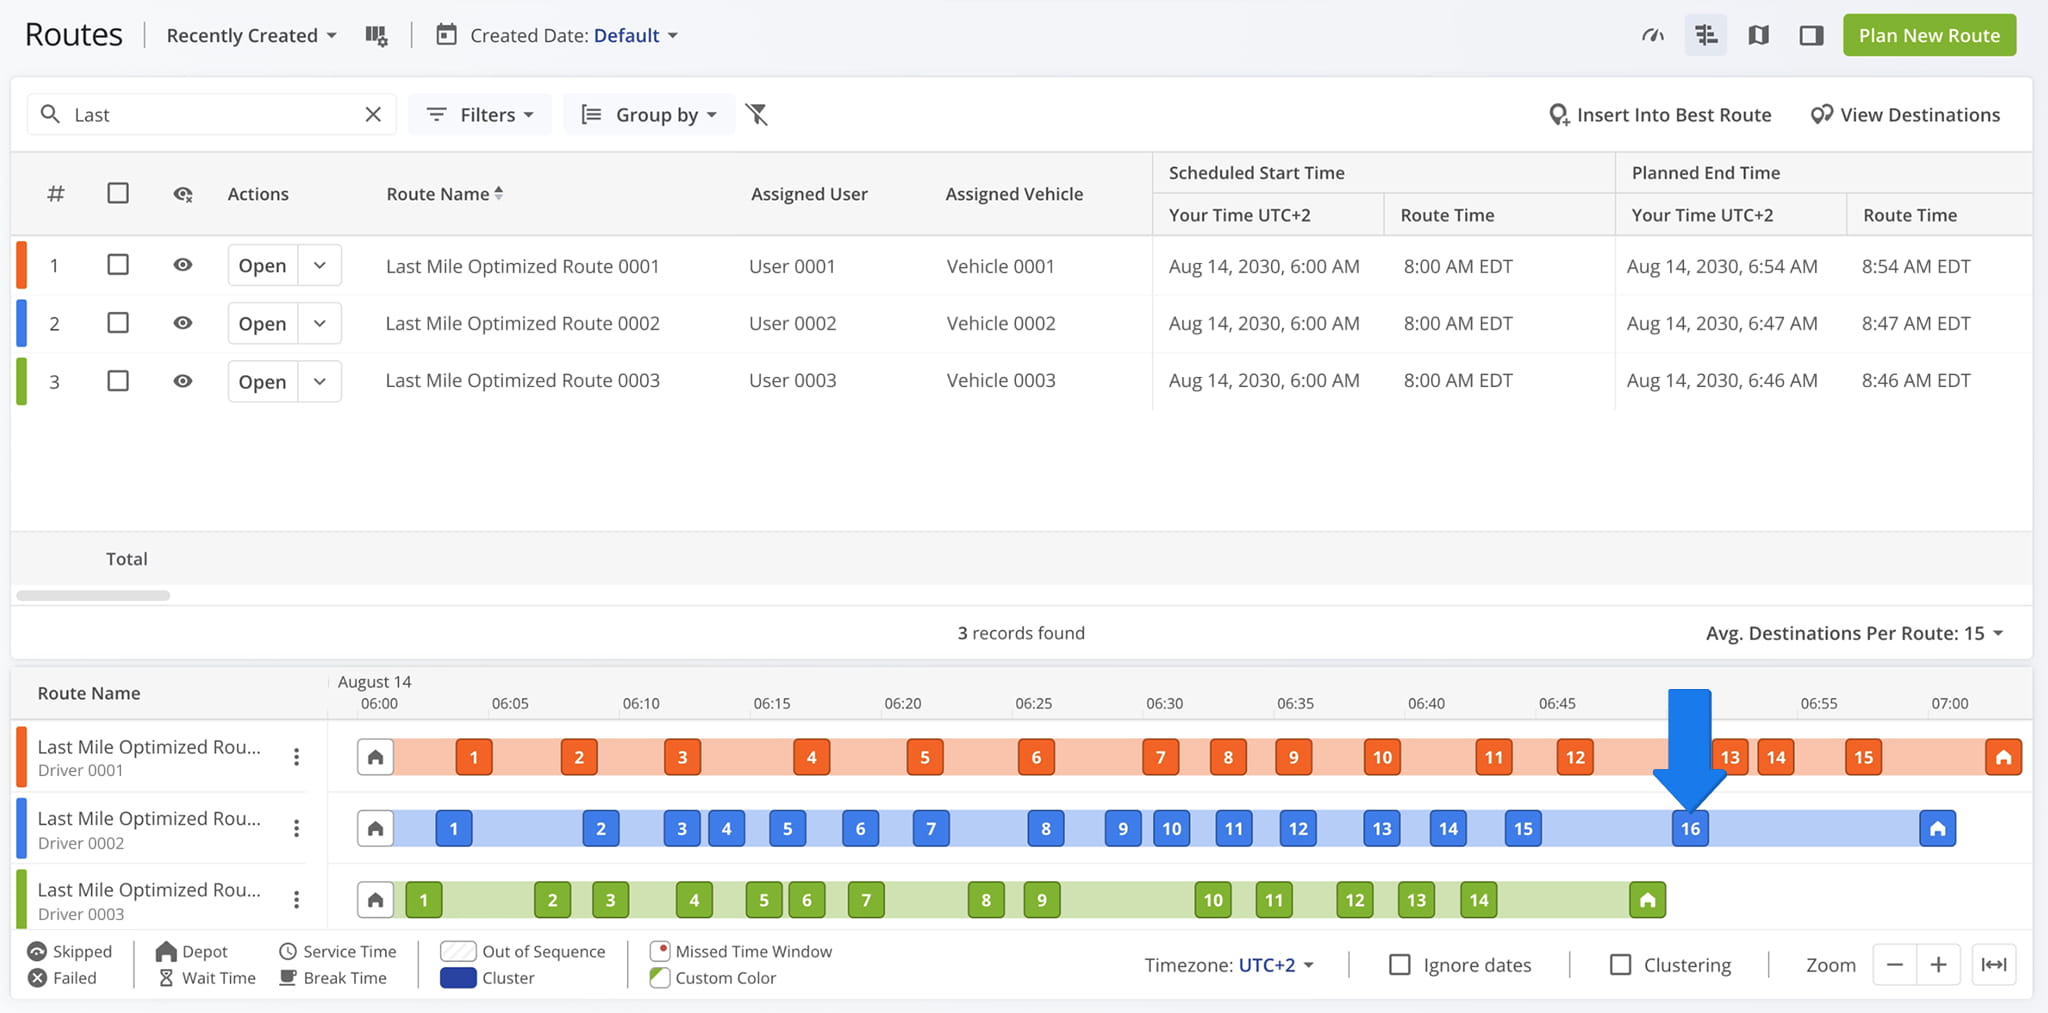
You can move stops between routes by dragging a destination onto another route in the Routes Timeline:
- Click the Timeline Icon to open the Timeline.
- Click the Eye Icon next to the routes you want to show.
- Once your routes are visible, drag the destination onto the target route and position it within the planned sequence.
NOTE: If a stop can’t be moved due to optimization constraints, check the box next to the affected route(s) and select “Unlink Routes from Optimization” from “Bulk Actions“.
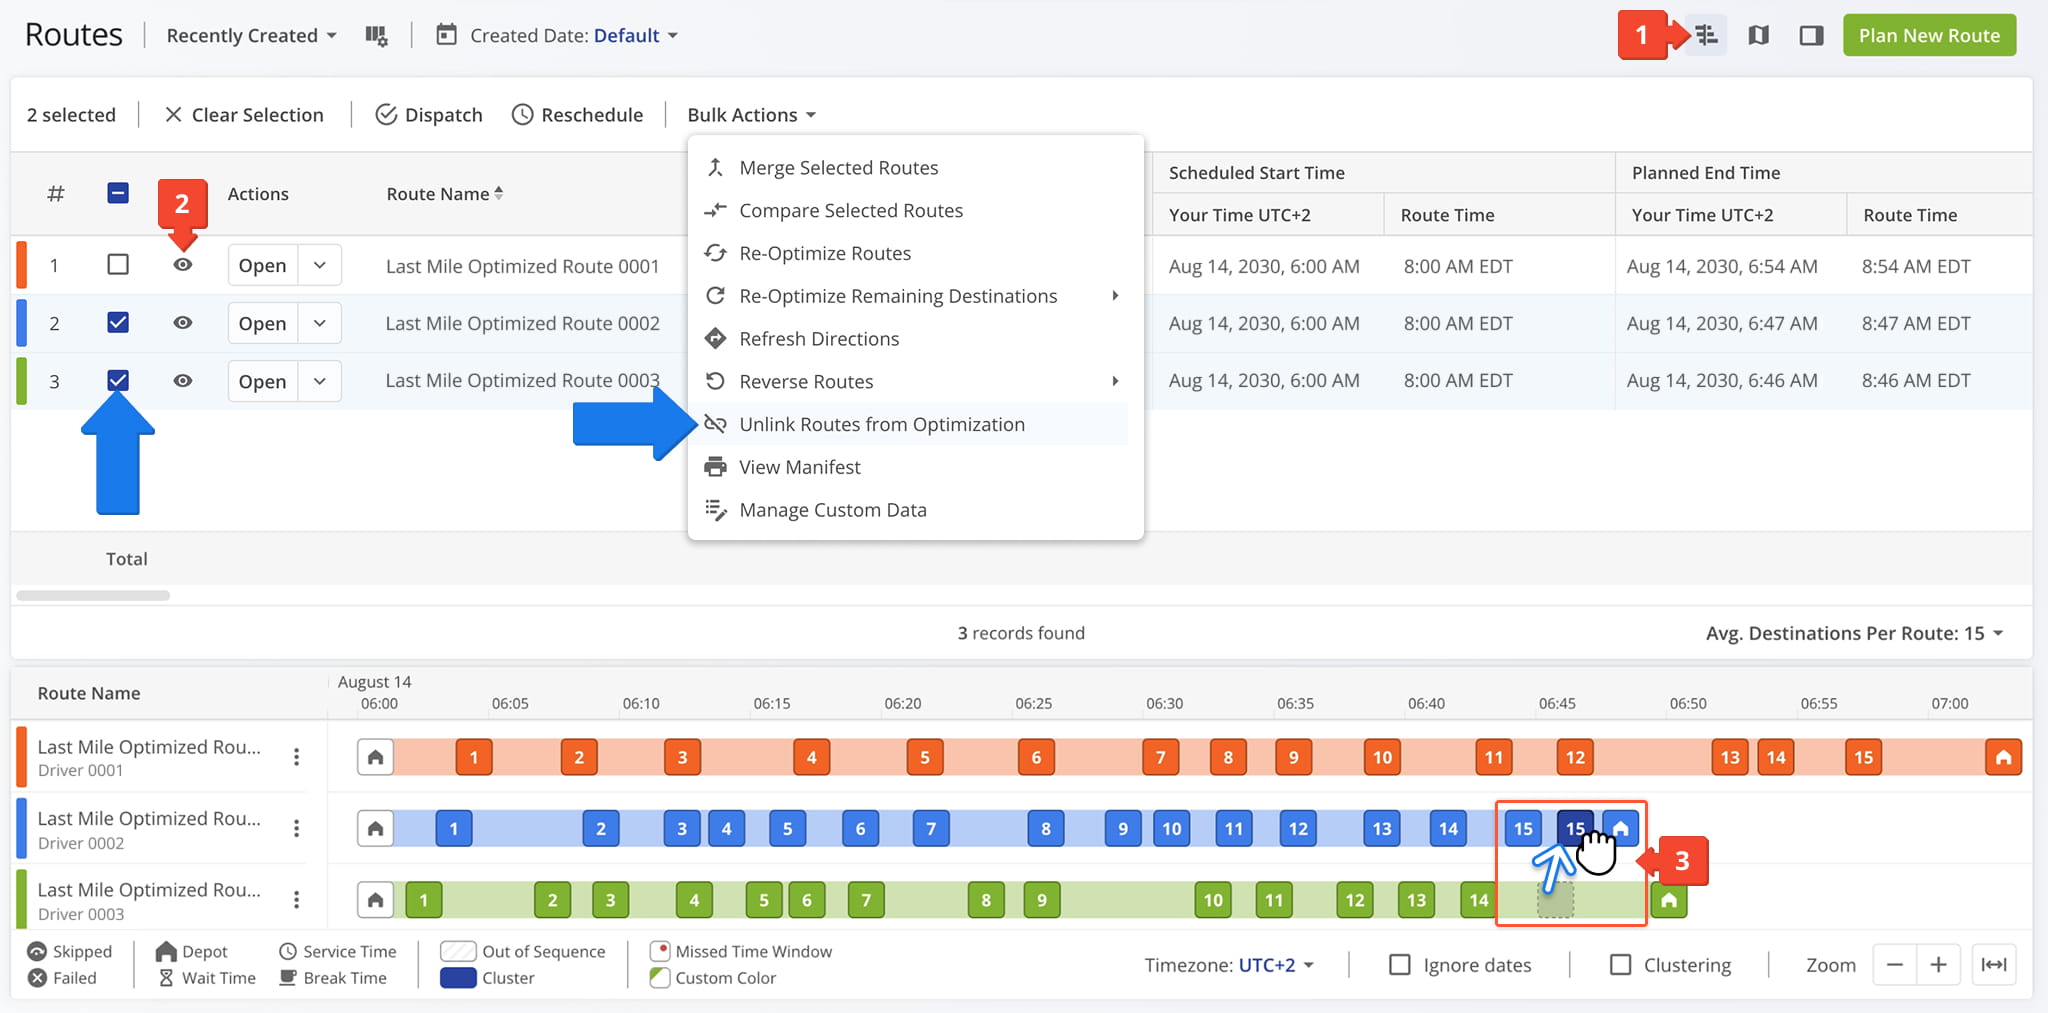
The moved destination will appear on the Timeline within its new route, positioned exactly where you dropped it in the sequence.
From The Routes Map – Reassigning Stops Via Map View
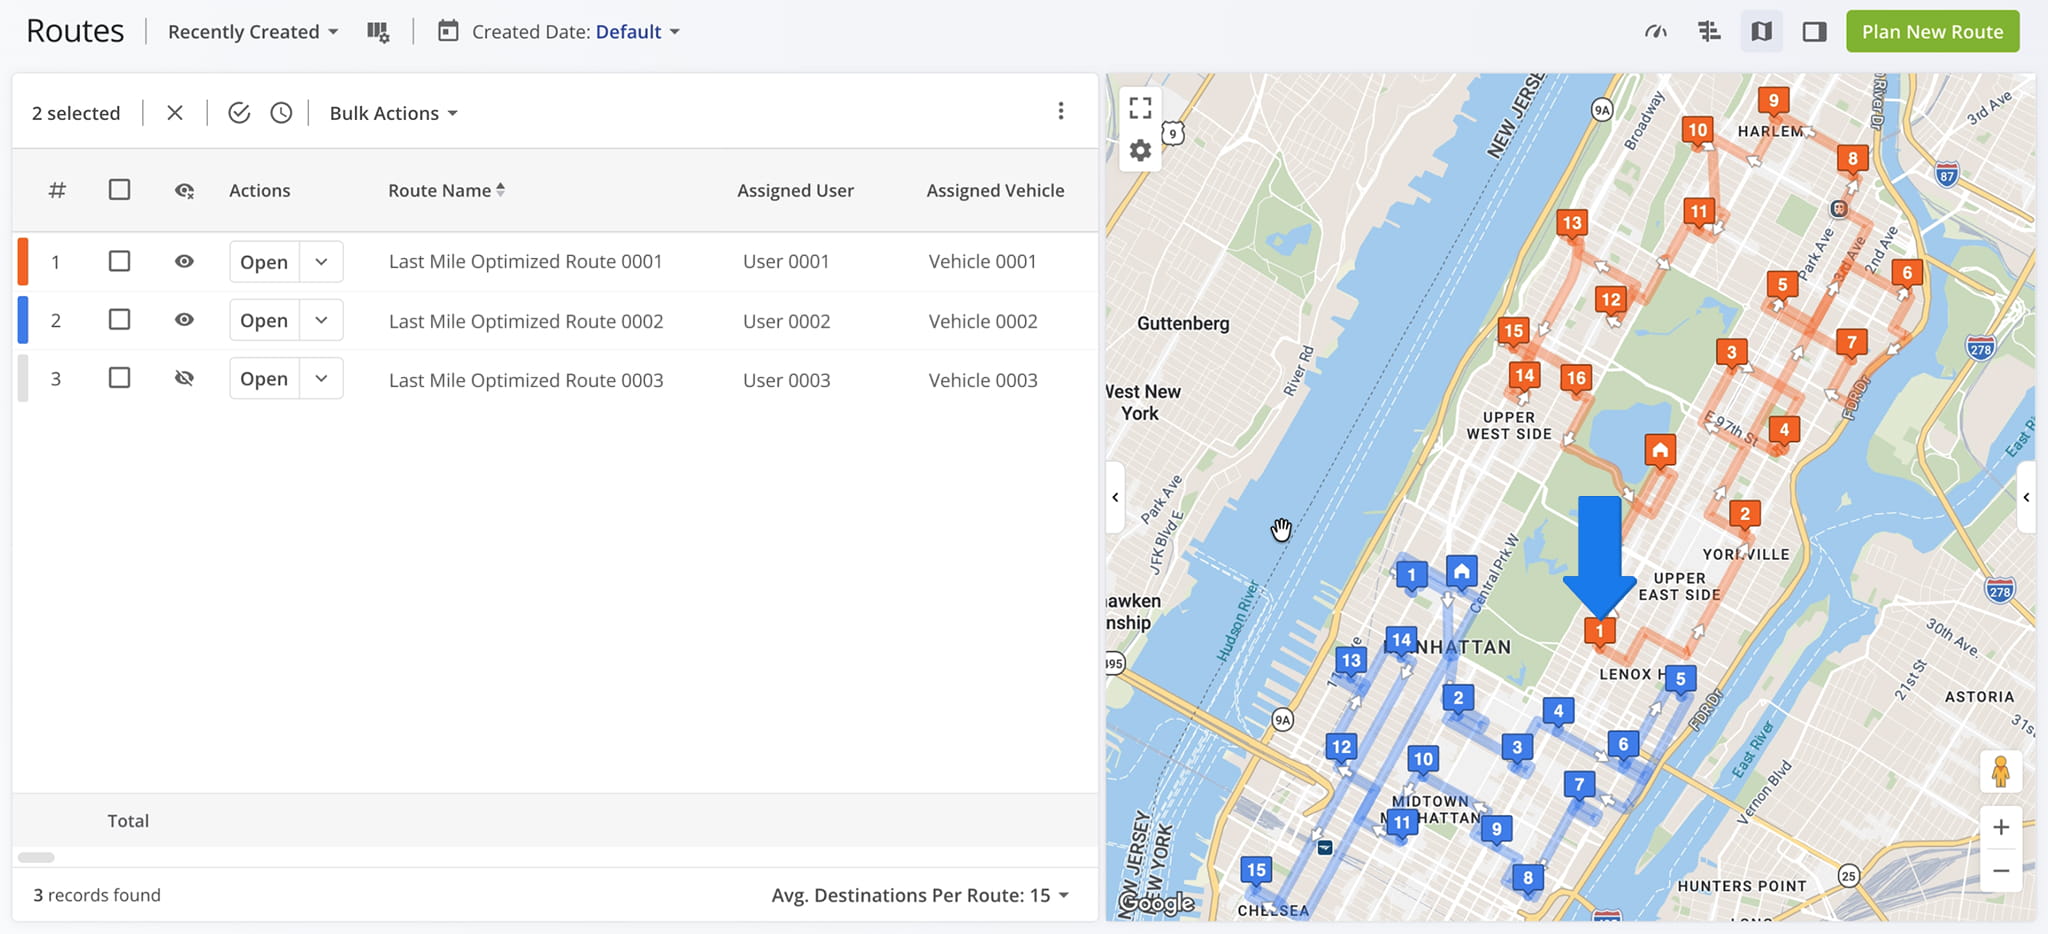
To move destinations between routes using the Routes Map, first click the Map Icon, then click the Eye Icon next to the routes you want to show.
Click and drag the Destination Pin to a different route to reassign it. To move a destination to a different address, hold the Shift key while dragging.
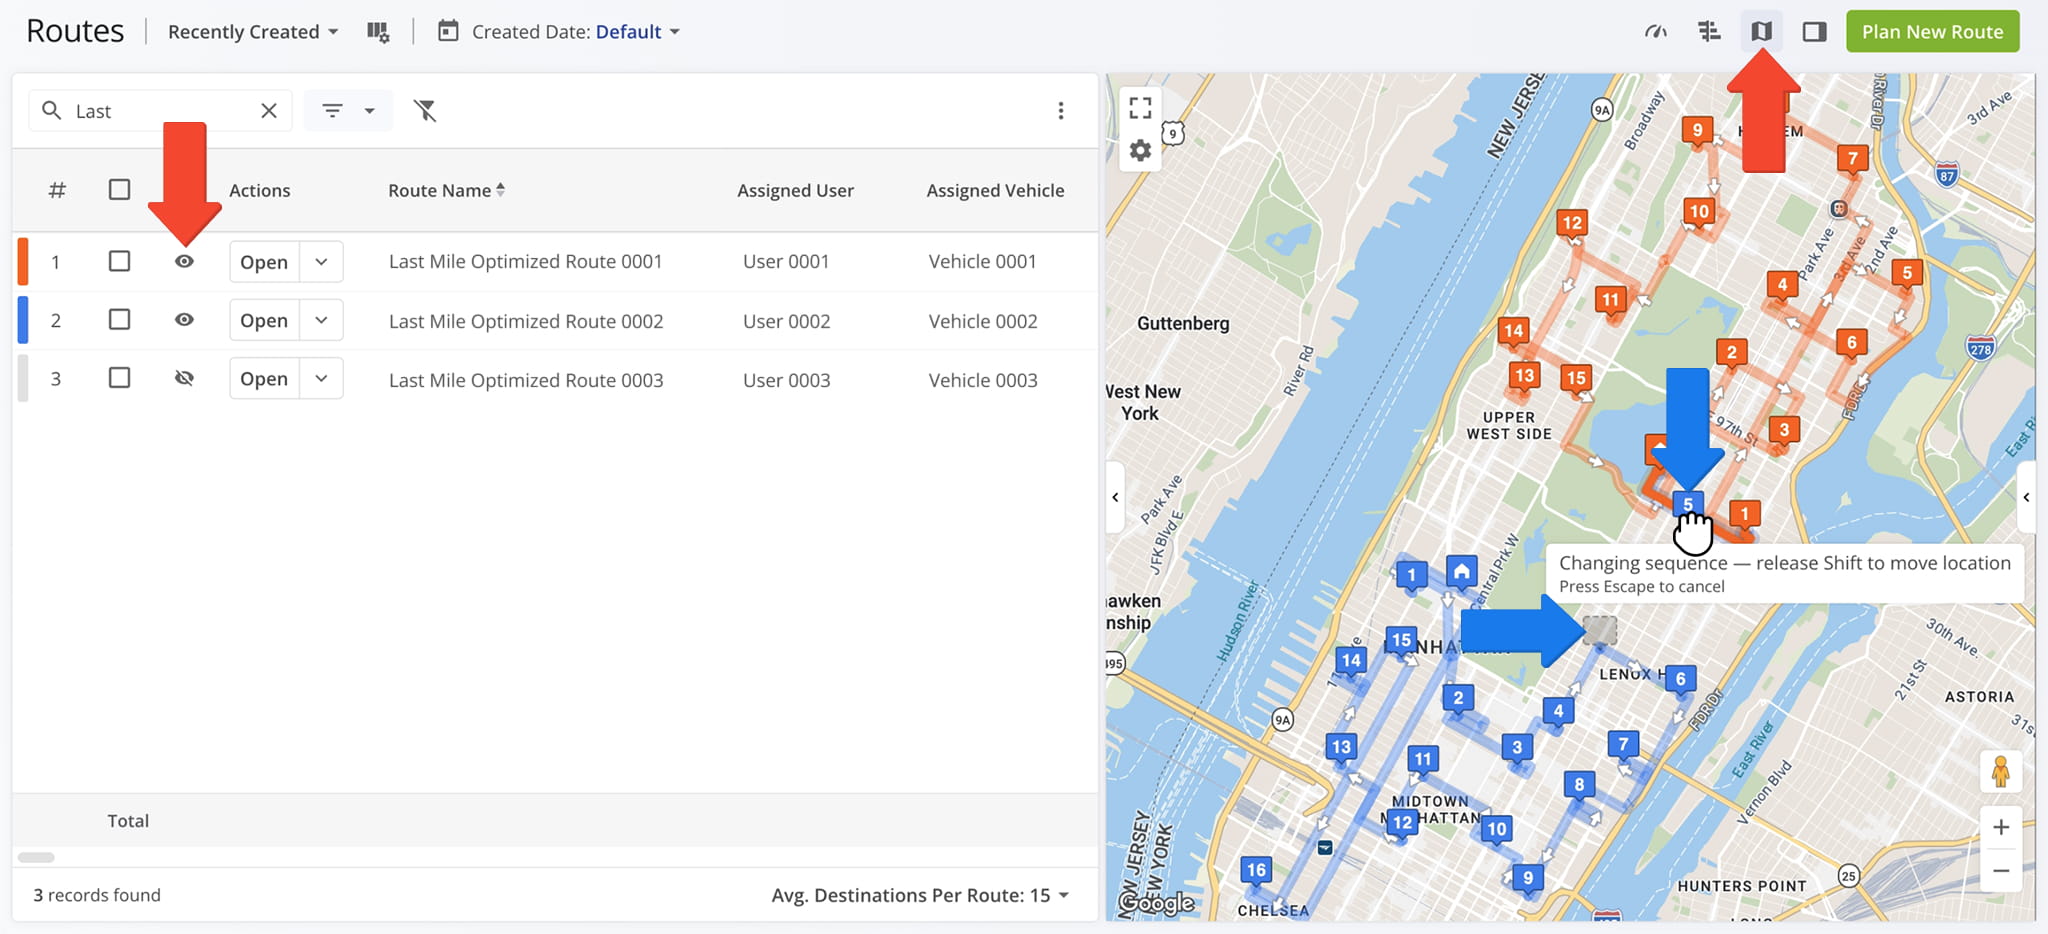
Once moved, the destination will automatically appear on the new route, with the Map updating to reflect the change.
Route Editor – Drag And Drop Destinations Within The Same Route
From The Destinations List – Reordering Stops By List View
You can rearrange route destinations using the Routes Editor. To do this from the Destinations List, drag a destination and drop it into the desired position within the route sequence.
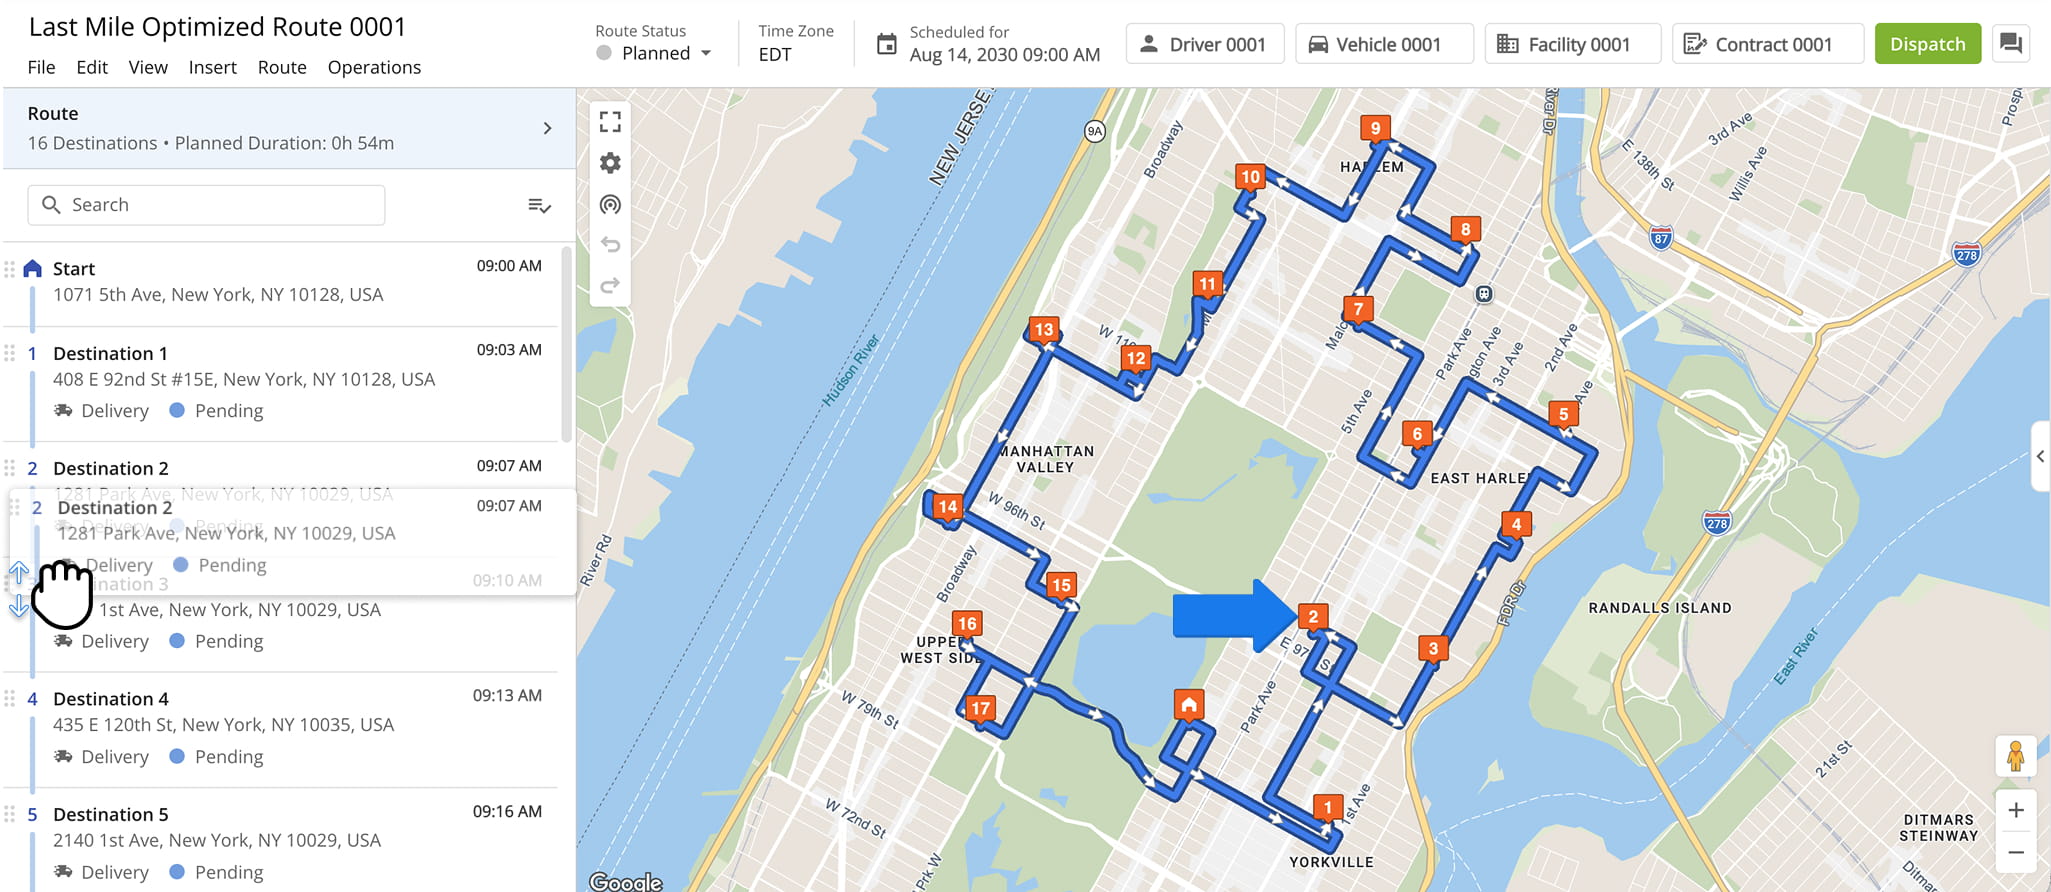
Once adjusted, the new sequence will be reflected on the Route Map, with the destination shown in its updated position along the route.
NOTE: Destinations can still be re-sequenced after a route is underway. But completed stops cannot be relocated and pending stops cannot be shifted back into the portion of the route that’s already been completed.
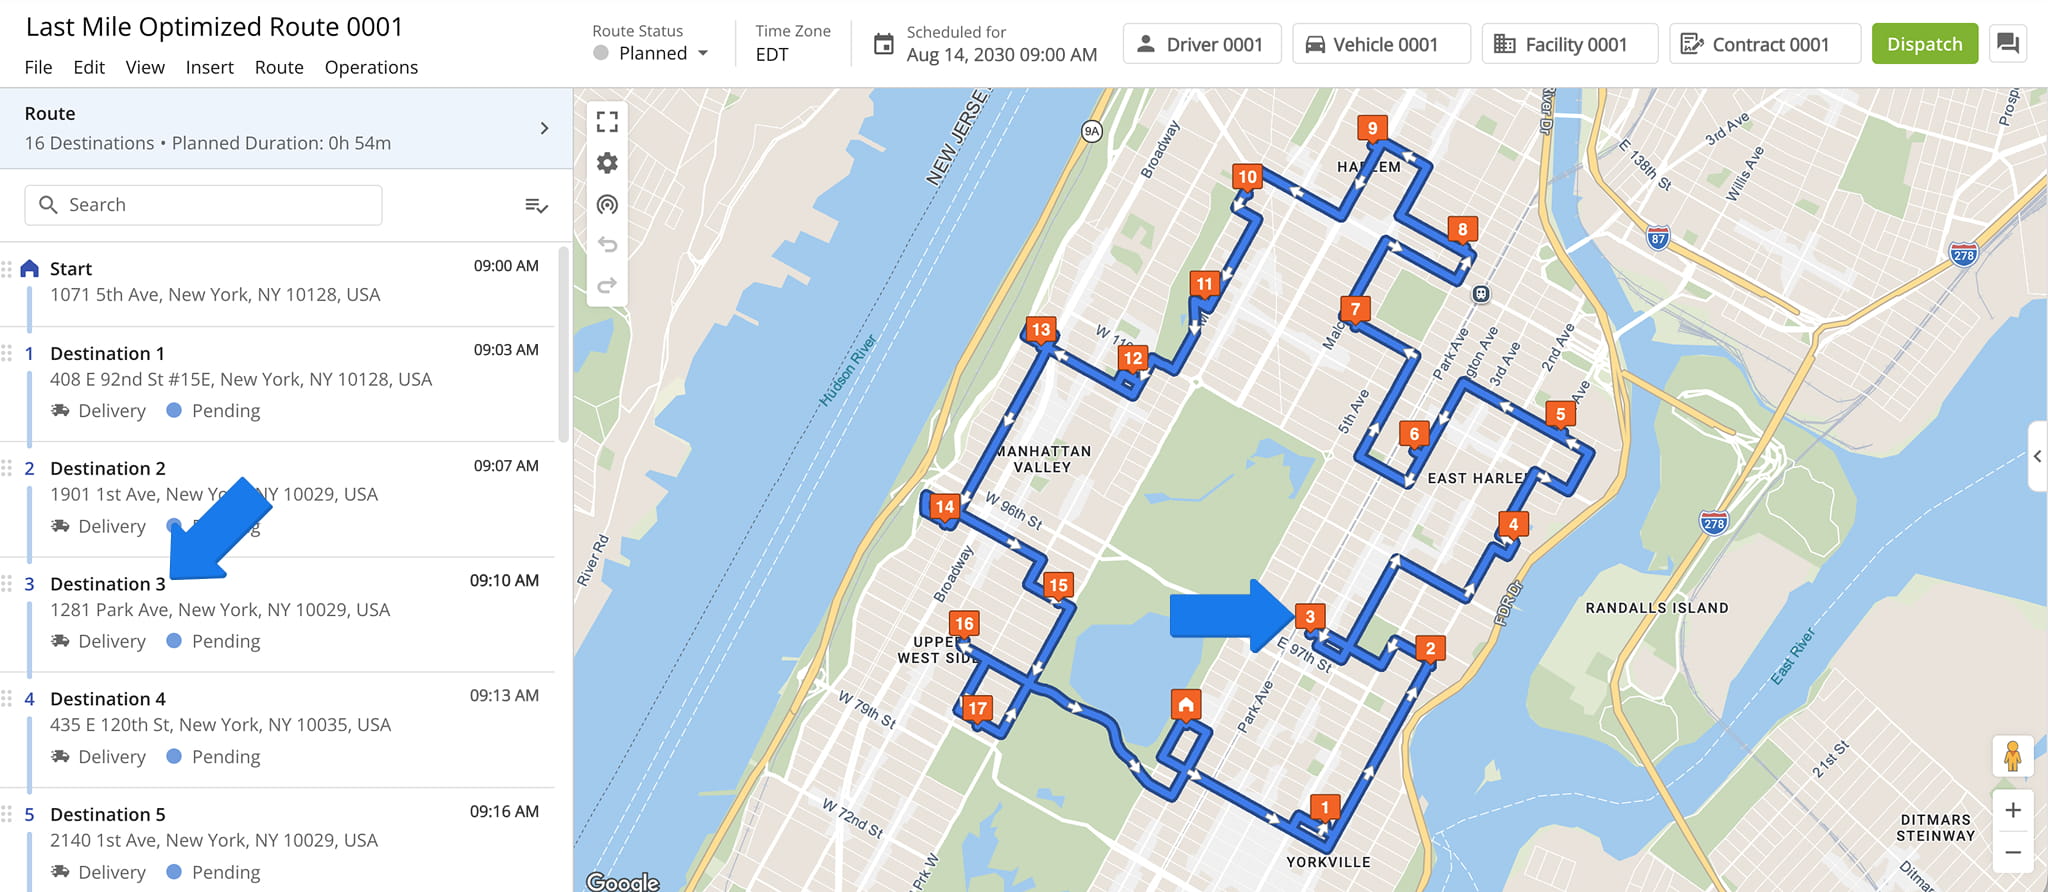
From The Route Map – Drag And Drop To Re-sequence Stops
Destinations can also be re-sequenced from the Route Editor’s Route Map, but dragging here works differently than in the Destinations List: it can either reorder a destination or move it to a new location.
Drag a destination on the map to reorder it within the route. To move a destination to a new address, hold the Shift key while dragging.
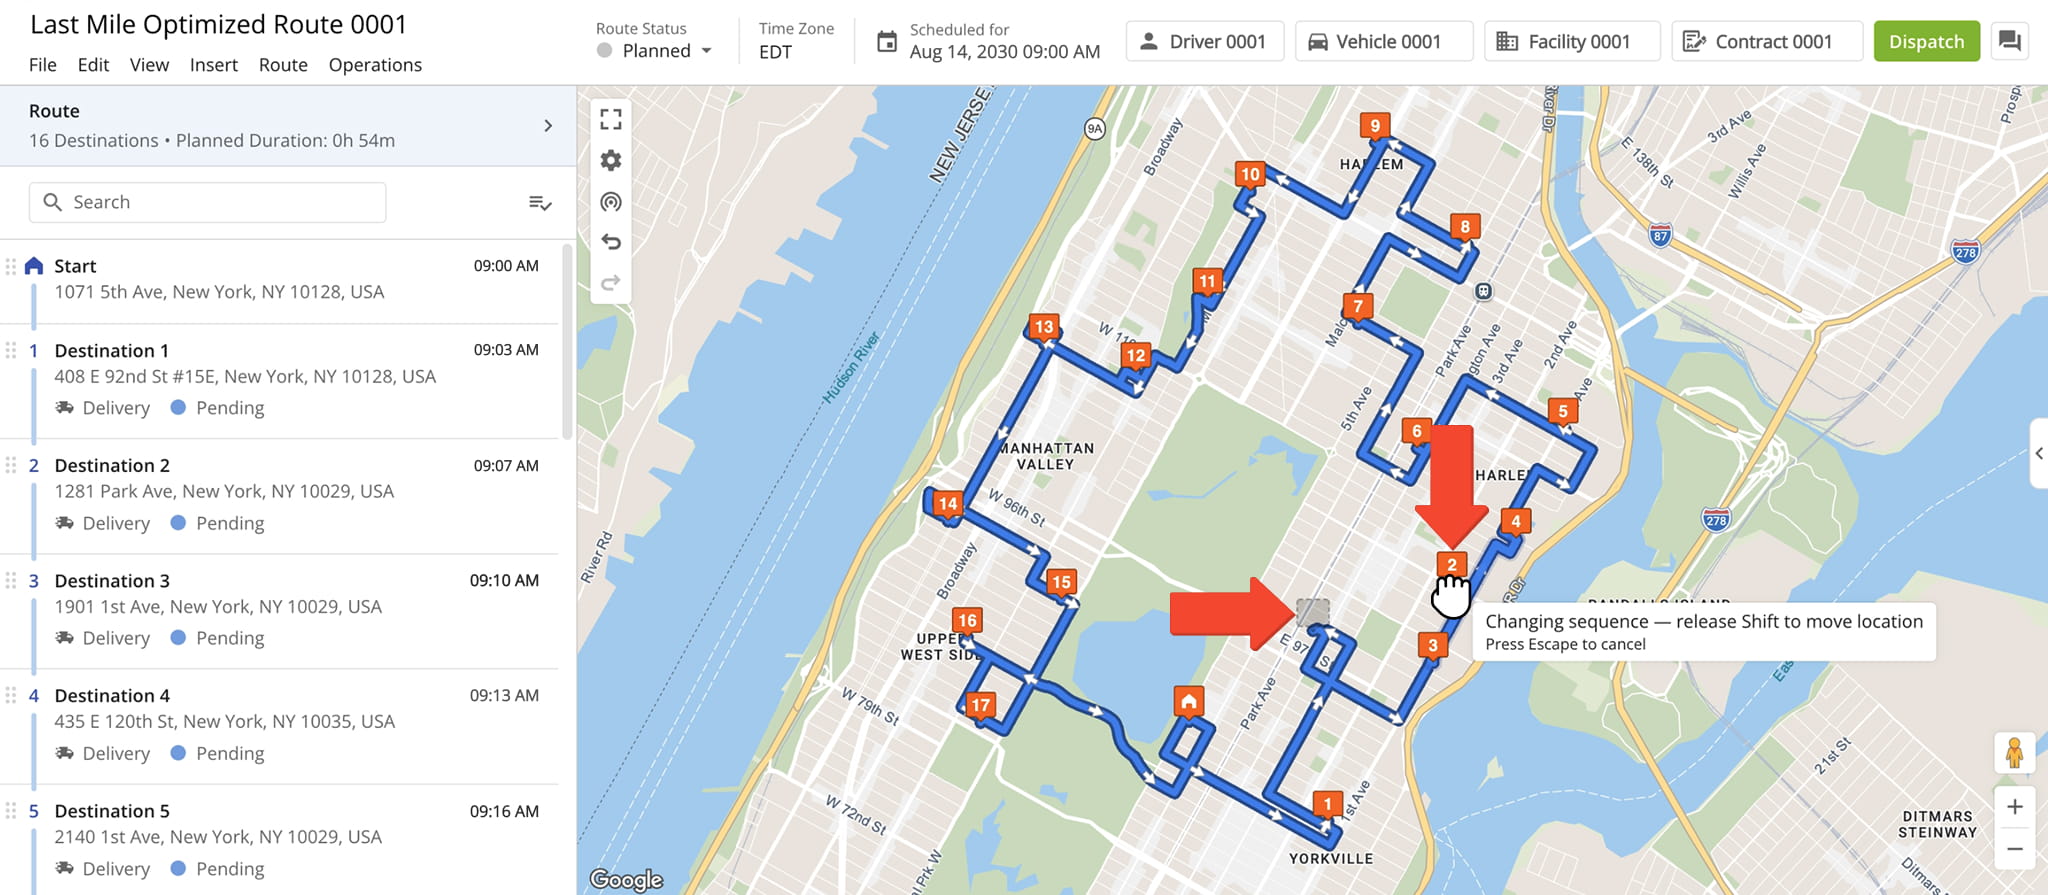
The map will automatically update to show the destination in its new position along the route.
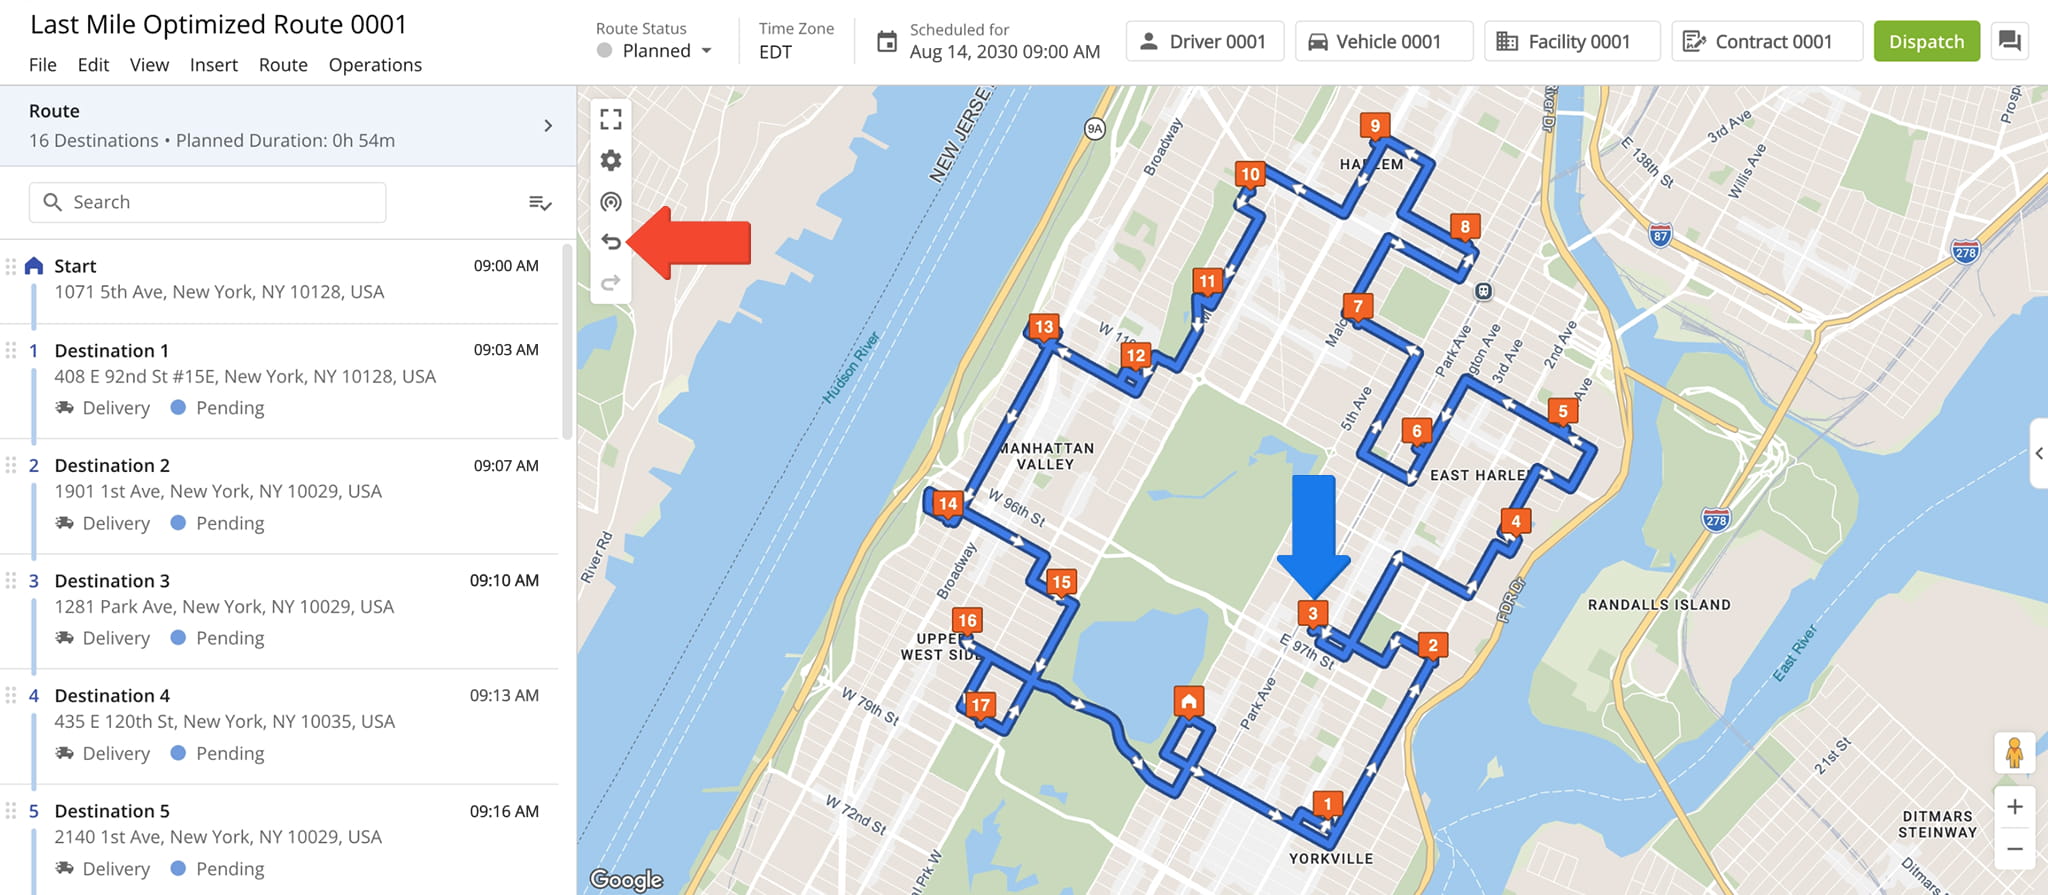
If you unintentionally change a destination’s address, click the Undo Icon in the Actions Menu (top-left of the map) to reverse it right away. Once you’re done, re-optimize the route so the directions stay efficient.
NOTE: Undo history clears when the tab is closed or refreshed. Once you leave the page, the change can’t be undone. We recommend duplicating the route before editing.
Re-Optimize Routes After Making Changes – Route Optimization Tip
After reordering or moving destinations using any of the methods above, you can re-optimize your routes to ensure directions and timing stay accurate.
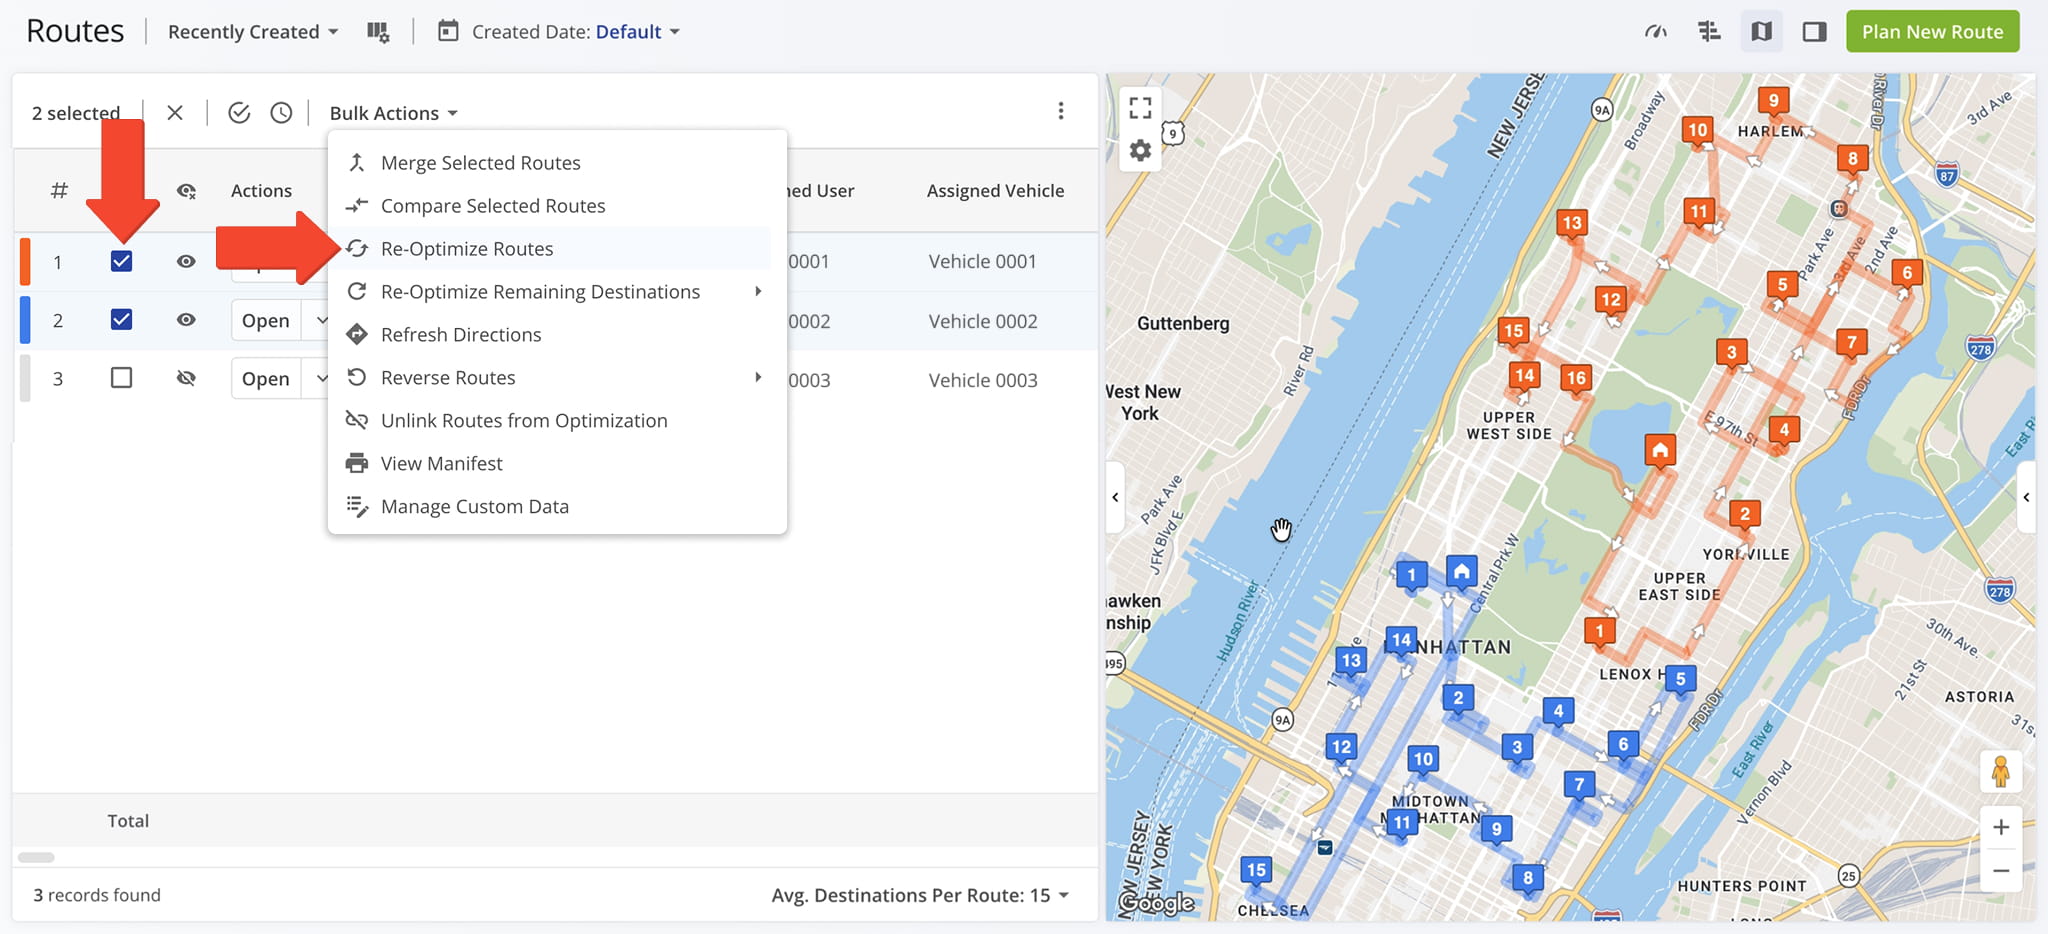
From the Route Editor, select “Route” from the top menu, then choose “Re-Optimize This Route“. From the Routes Page, check the box next to the route and select “Re-Optimize Routes” from the “Bulk Actions” menu.
For routes already in progress, select “Re-Optimize Remaining Destinations” instead, which updates only unvisited stops without affecting those already completed. NOTE: Learn more about re-optimizing routes and destinations.
Visit Route4Me's Marketplace to Check out Various Modules and Add-Ons:
- Route Optimization
Time Windows
- Operations
Advanced Team Management Add-On
About author: Daniel Archer

