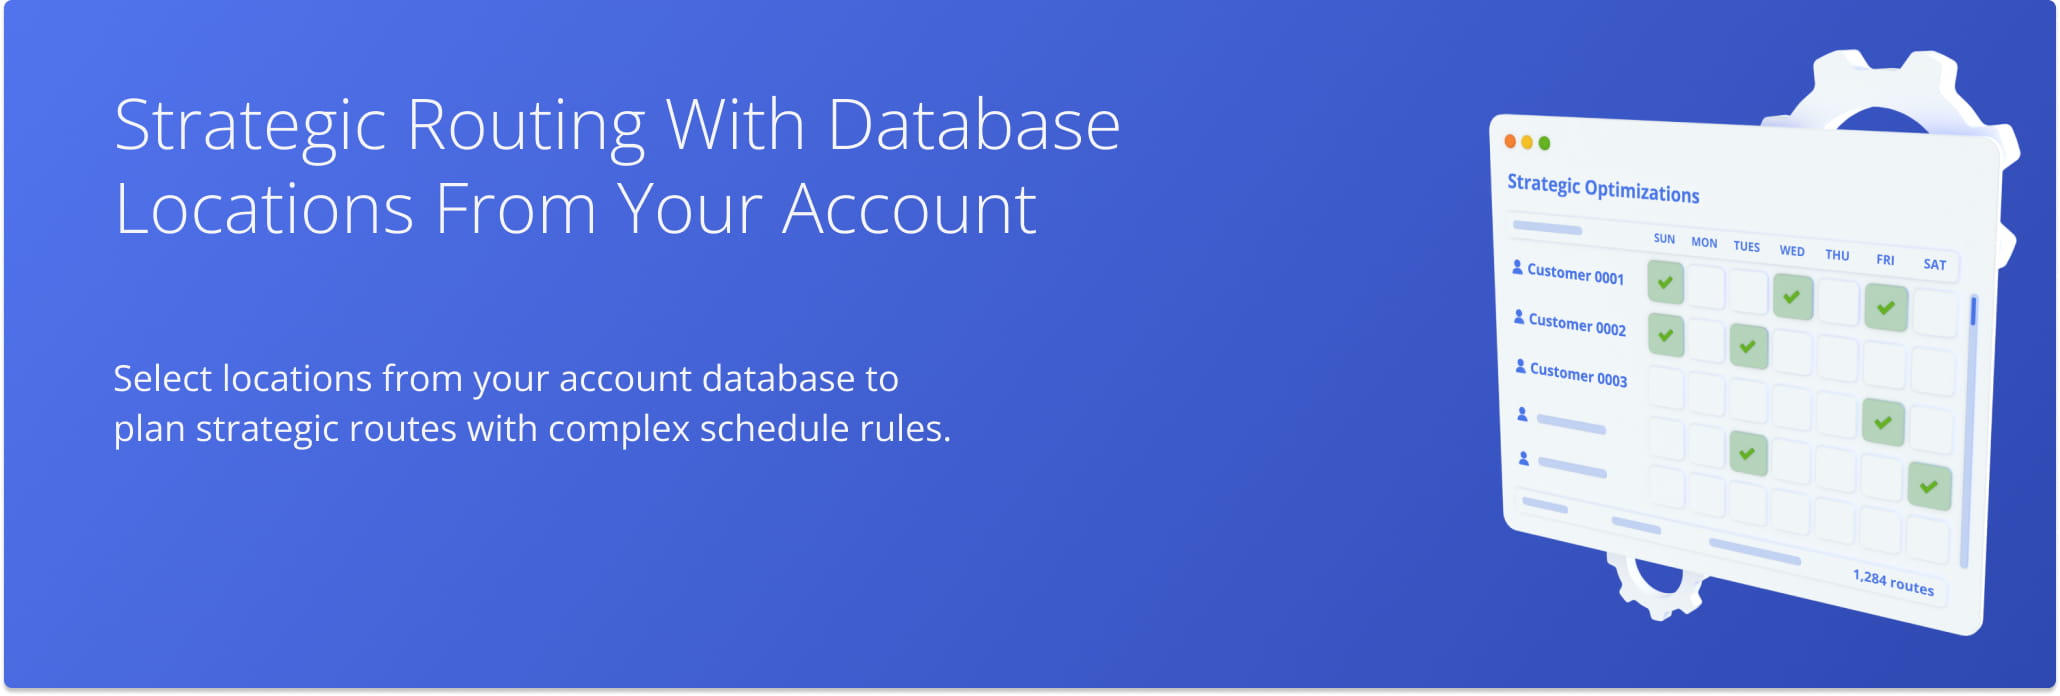
Select Database Locations For Strategic Routing And Optimization
Route4Me’s Strategic Routing simplifies route planning with complex schedules over long planning periods. You add locations and schedules, configure optimization settings, and Route4Me’s enterprise routing engine automatically plans and optimizes Strategic Scenarios and routes according to your preferences. In this guide, you’ll learn how to create new Strategic Optimizations by selecting Locations and adding schedule rules.
NOTE: Strategic Optimization Routes are draft routes that can’t be assigned, started, and completed until they’ve been synced.
Table of Contents
Location Database Overview – Account Locations In Strategic Planner
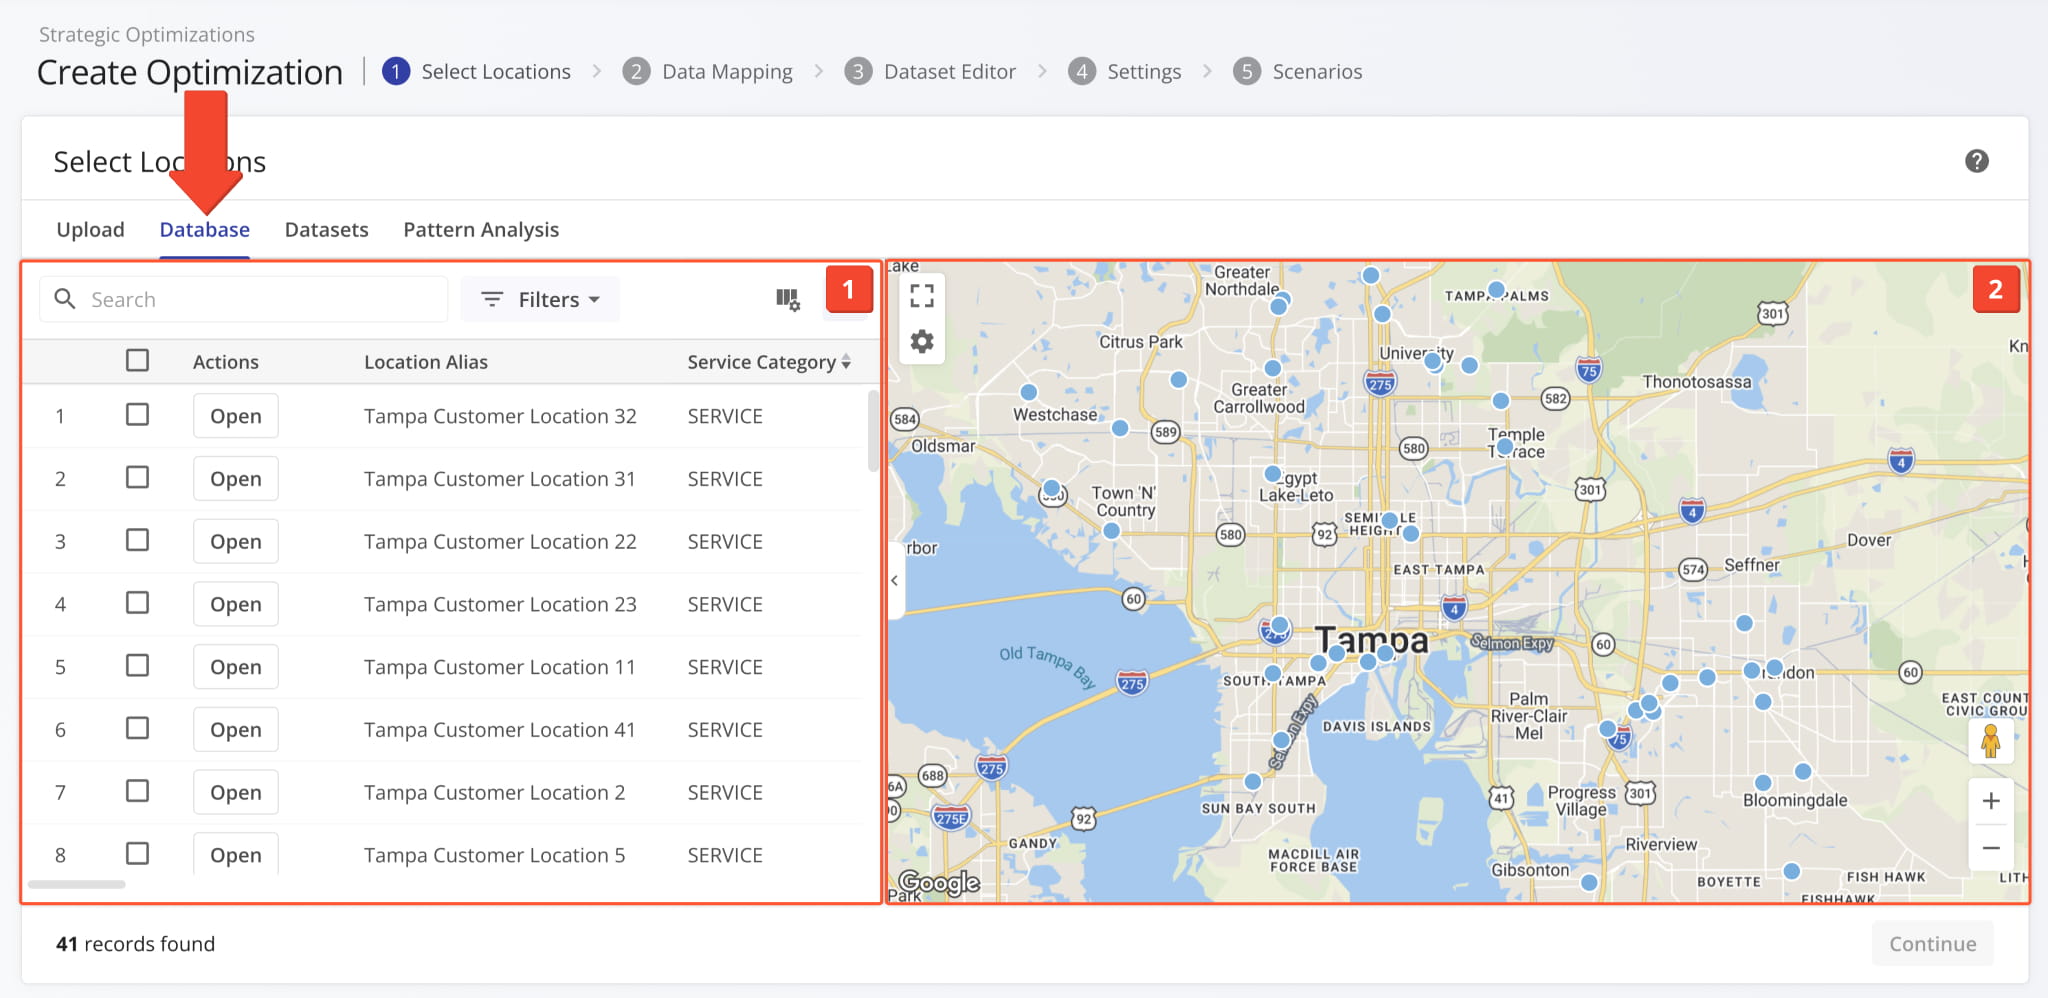
To start creating Strategic Optimizations, open the Navigation Menu and select “Strategic Routing” > “Plan New Scenarios“. Then, go to the “Database” tab where you’ll see the following interface sections:
- Locations List: Customizable data table showing Customer Locations from your account.
- Locations Map: Customizable map showing the filtered Locations from the Locations List.
Create New Strategic Optimization
NOTE: The Locations List shows Locations for use in Strategic Routing. To manage Locations, use the Locations Page instead.
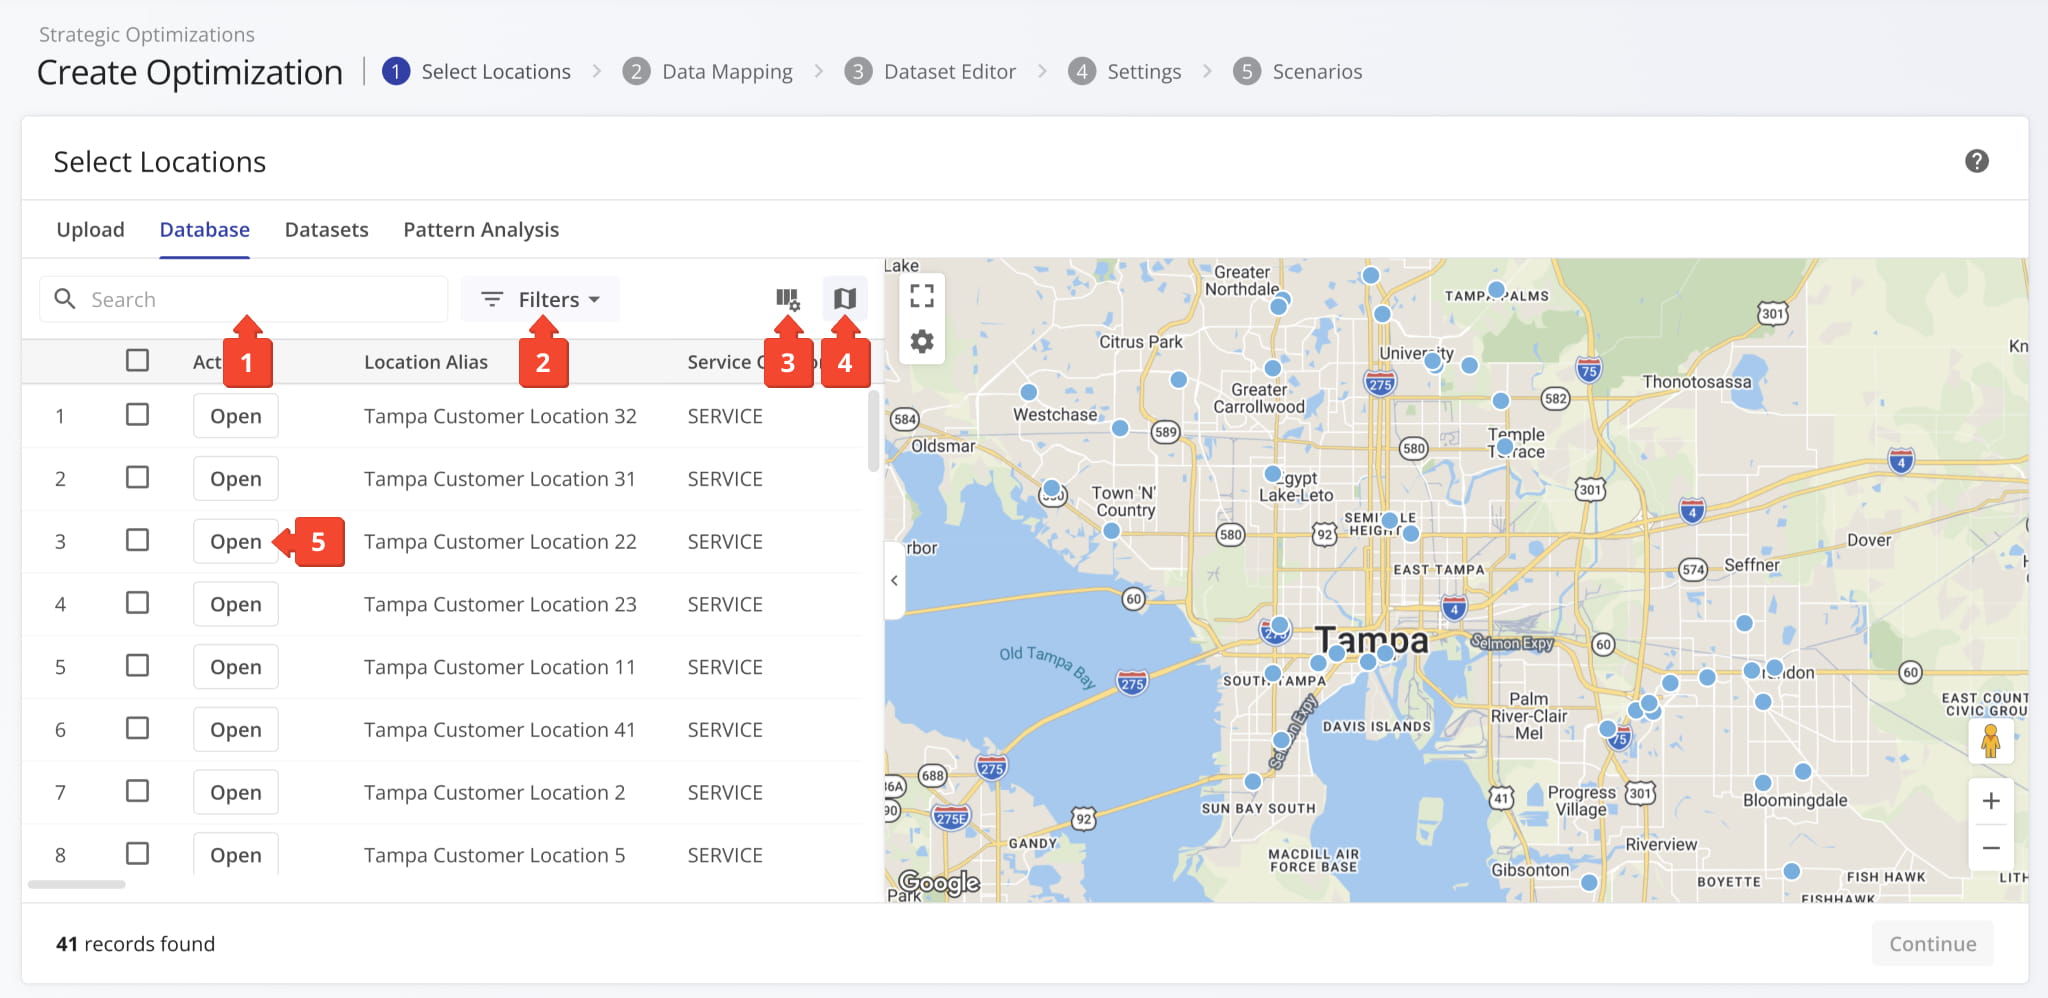
To easily find the Locations most relevant to your needs, you can use the following features in the Locations List:
- Find Locations by name using the “Search” field.
- Use customizable filters to show Locations that match your settings.
- Customize data columns by clicking the Display Columns button.
- Toggle the Locations Map by clicking the Map Button.
- Open Location Snapshots from the strategic planner by clicking “Open” next to Locations.
The Locations Map can be customized in the following ways:
- Click the Gear Icon to customize map settings for Location display and enable Map Layers.
- Hover over Locations on the map to quickly reference their associated details and data.
- Use the map controls in the bottom-right to go into Street View or zoom in and out on the map.

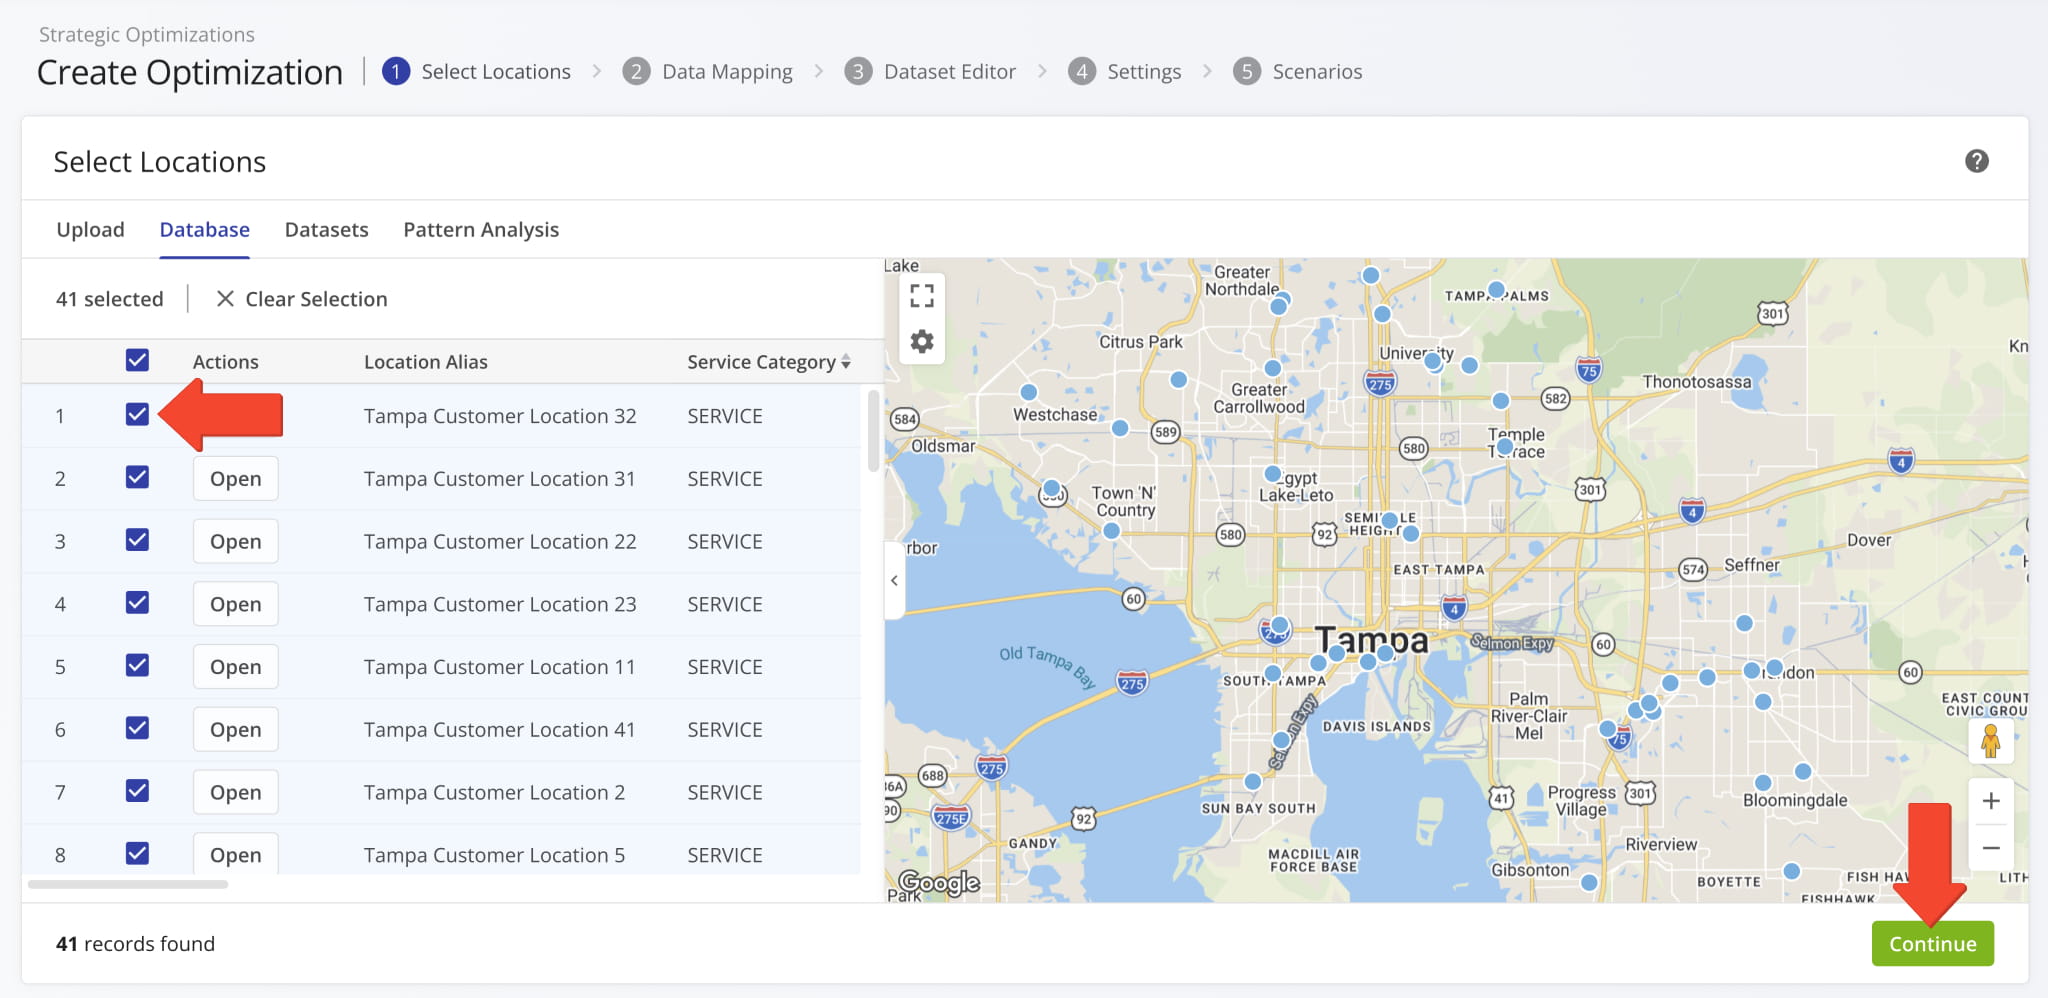
Select Locations To Add Them To Your Strategic Routing Dataset
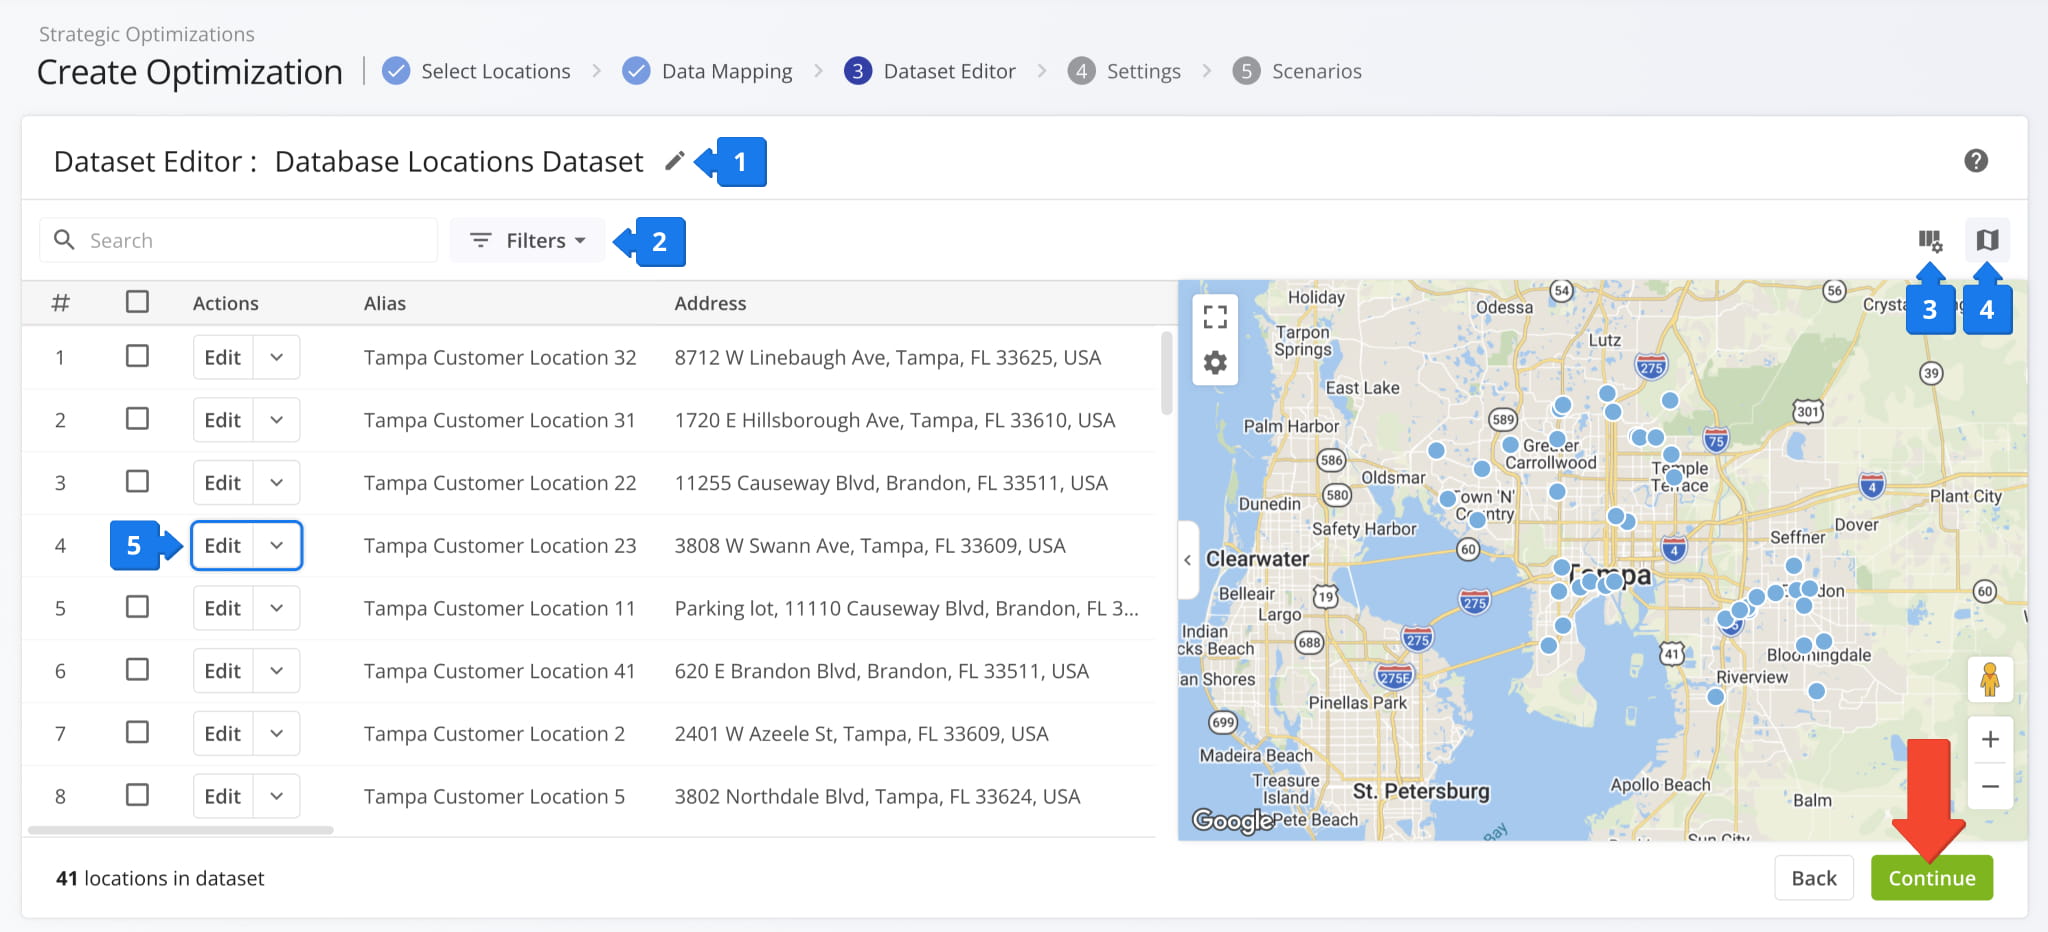
To select Locations for Strategic Routing, check the boxes next to them and click “Continue” to add them to your Strategic Routing Dataset. NOTE: A dataset is comprised of Locations and associated schedule rules. You can configure schedules in the next step.
Once you’ve selected Locations, they get added to a new Strategic Routing Dataset. In the “Dataset Editor“, you can:
- Rename the dataset.
- Use customizable filters to show Locations that match your needs.
- Customize data columns by clicking the Display Columns button.
- Toggle the Locations Map by clicking the Map Button.
- Edit or remove Locations from the dataset.
If your account Locations already have the correct schedule settings, click “Continue” to proceed to the next step. Otherwise, you can edit the dataset to add schedule settings to Locations.
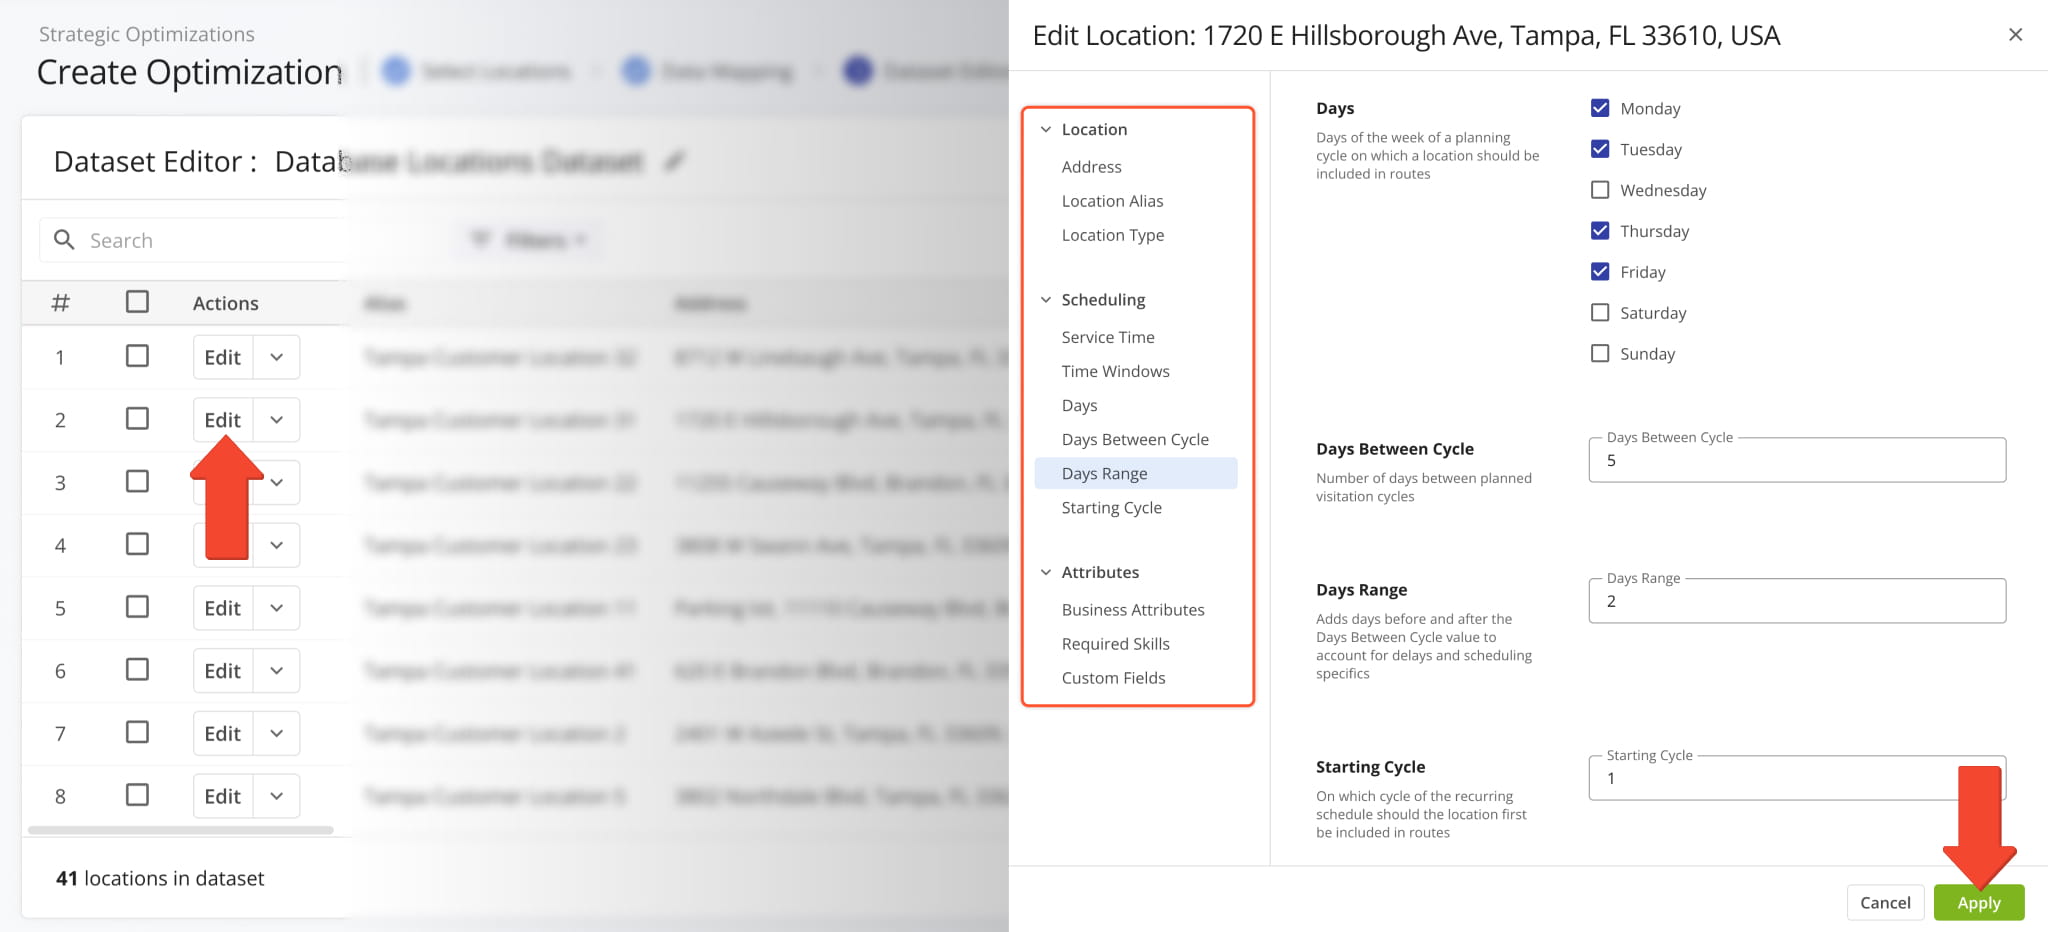
Set Location Schedule Rules With Dataset Settings
Click “Edit” next to a Location in a dataset to adjust its Strategic Routing settings. You can use Dataset Location Settings to add schedule rules when selecting database Locations without associated schedules. Click “Apply” to save your changes.
Learn more about adding schedules to locations and working with Strategic Routing Datasets.
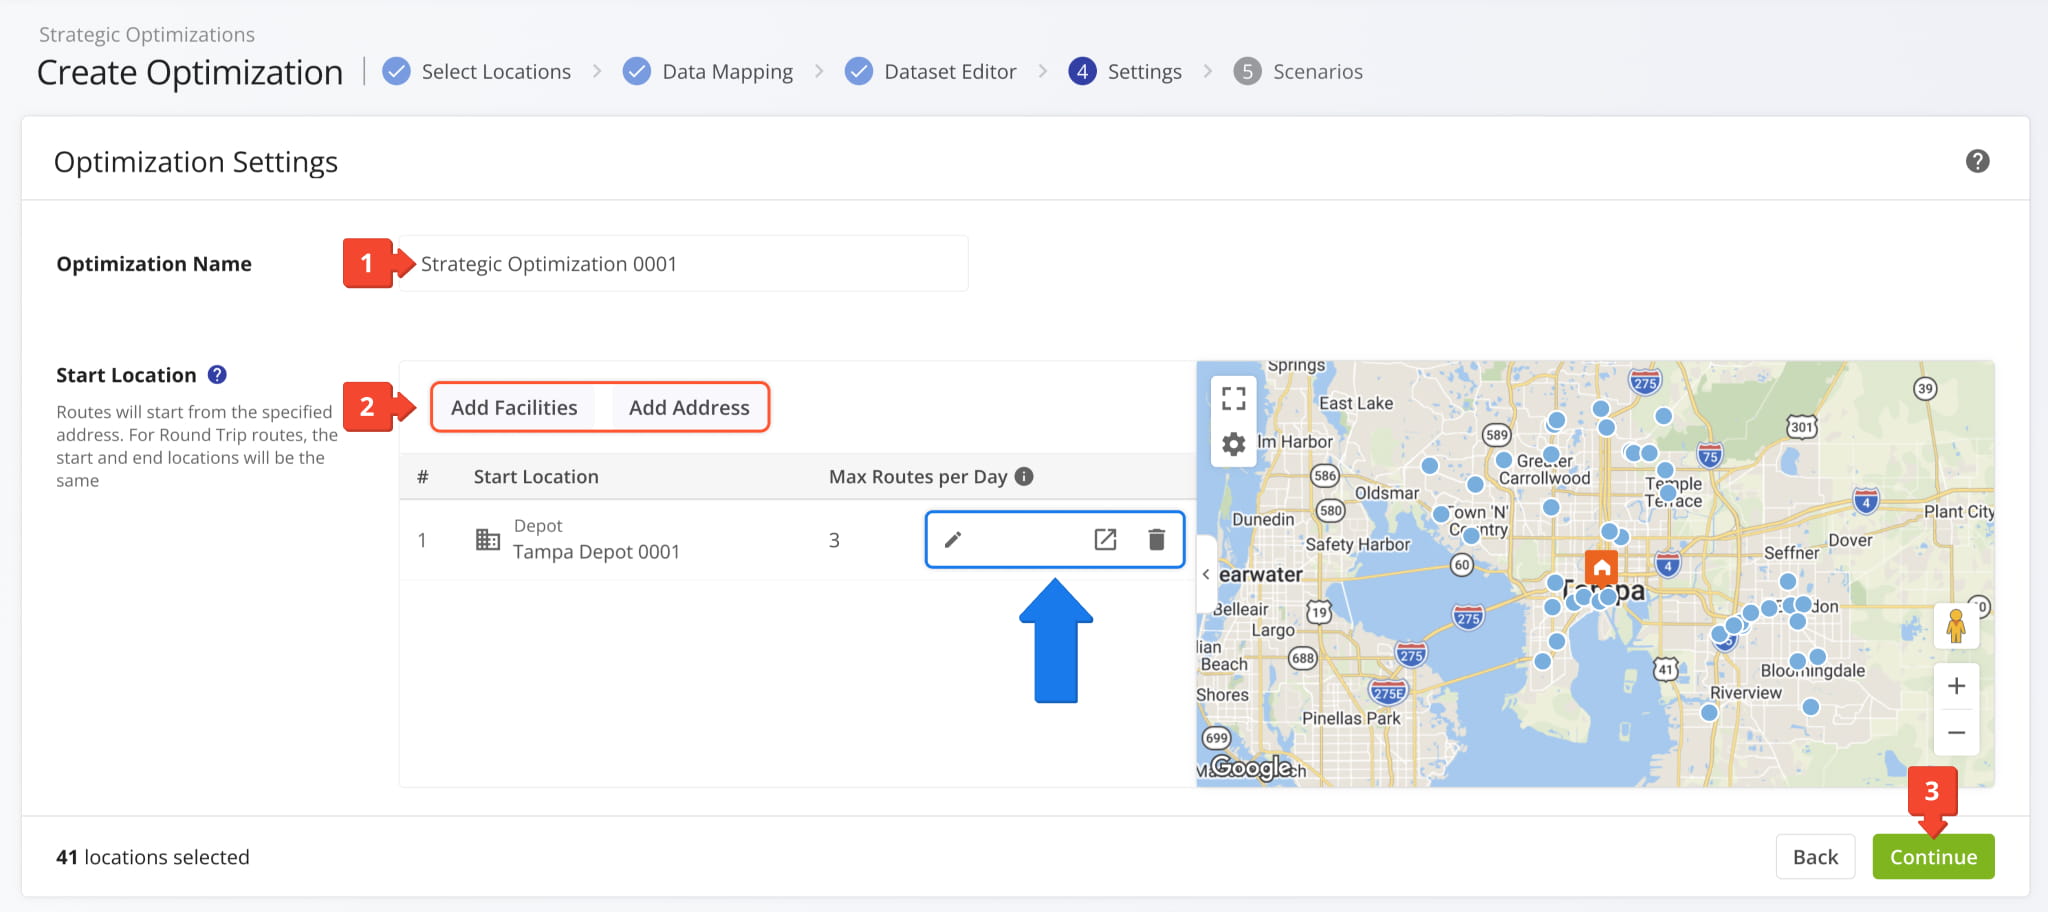
Select Start Locations For Strategic Route Optimization
Finalizing your dataset takes you to the “Settings” section. Follow these steps to proceed:
- Input a name for your Strategic Optimization in the “Optimization Name” field.
- Select route start locations (depots) for the Strategic Optimization.
The “Add Facilities” button lets you select from your Company Facilities, while “Add Address” allows manual address input. - Click “Continue” to finalize optimization settings and proceed to configure Strategic Scenarios.
You can also use the buttons next to start locations you’ve added to set a “Max Routes per Day” limit, open corresponding Facility Snapshots, or remove start locations you don’t need.
Configure Strategic Scenarios And Optimization Settings
Once you’ve uploaded your data and set departure addresses, you can configure Scenario Settings. The “Configuration” window will automatically open with the “Wizard” tab selected and is divided into the following main sections:
- Strategic Scenarios List: The scenarios included in the Strategic Optimization. You can select Scenarios, add or remove them, and export and import them as JSON code.
- Scenario Settings: Scheduling and optimization settings for the selected scenario.
Each Scenario represents a distinct collection of settings. When you’re done setting up Scenarios, click “Create“.

Route4Me will automatically use your data and Scenario Settings to create the most optimal draft routes according to your preferences. The Strategic Scenarios and their respective routes will be grouped into a new Strategic Optimization.

Open And Manage Strategic Optimizations
The new Strategic Optimization will open with the “AI Summary” tab selected. You’ll see an automatically generated high-level overview and performance report. It compares draft routes to evaluate Scenario performance and provide suggestions.
From an open Strategic Optimization, you can review its AI Summary, check routing trends, manage Strategic Scenarios and Locations, etc. Learn more about Strategic Optimization Management.

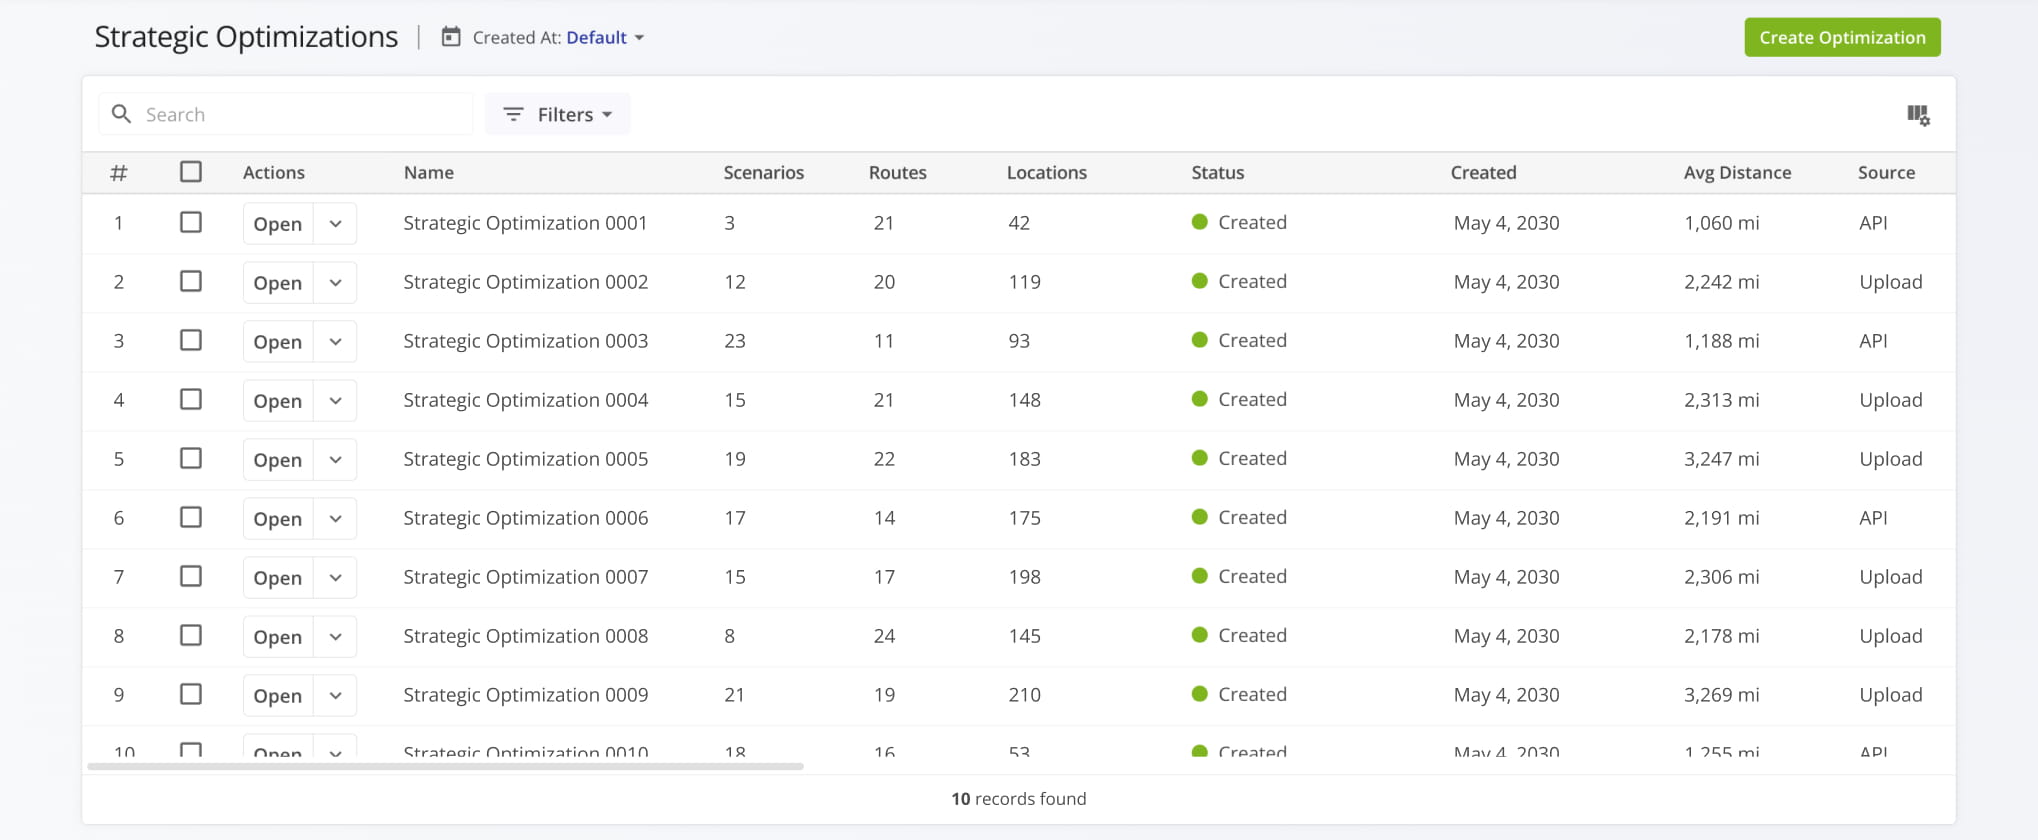
To access and manage your Strategic Optimizations, go to “Strategic Routing” > “Scenarios” in the Navigation Menu. Your “Strategic Optimization” page is where you can find Strategic Scenarios grouped into Strategic Optimizations.
Open Your Strategic Optimizations
Visit Route4Me's Marketplace to Check out Associated Modules:
- Operations
Audit Logging and Activity Stream
- Operations
Custom Data Add-On
- Operations
Advanced Team Management Add-On
About author: Kristian Andreev
Kristian is a Technical Writer at Route4Me. With over a decade of experience in writing and localization, he's an expert at communicating complex technical data in a clear, concise, and user-friendly way. Passionate about bridging the gap between engineers and users, he specializes in creating documentation to streamline onboarding, enhance product usability, and support global teams on the path to success.