
Locations – Add And Edit Customer Locations
Your Locations page is a centralized hub for managing and organizing all your Customer Locations. From here, you can add, edit, and insert Locations, filter and group them, and plan optimized routes. This guide will show you how to manage your Locations and use them effectively for route planning and operational management.
Table of Contents
Add Locations – Create Detailed Customer Address Location Profiles
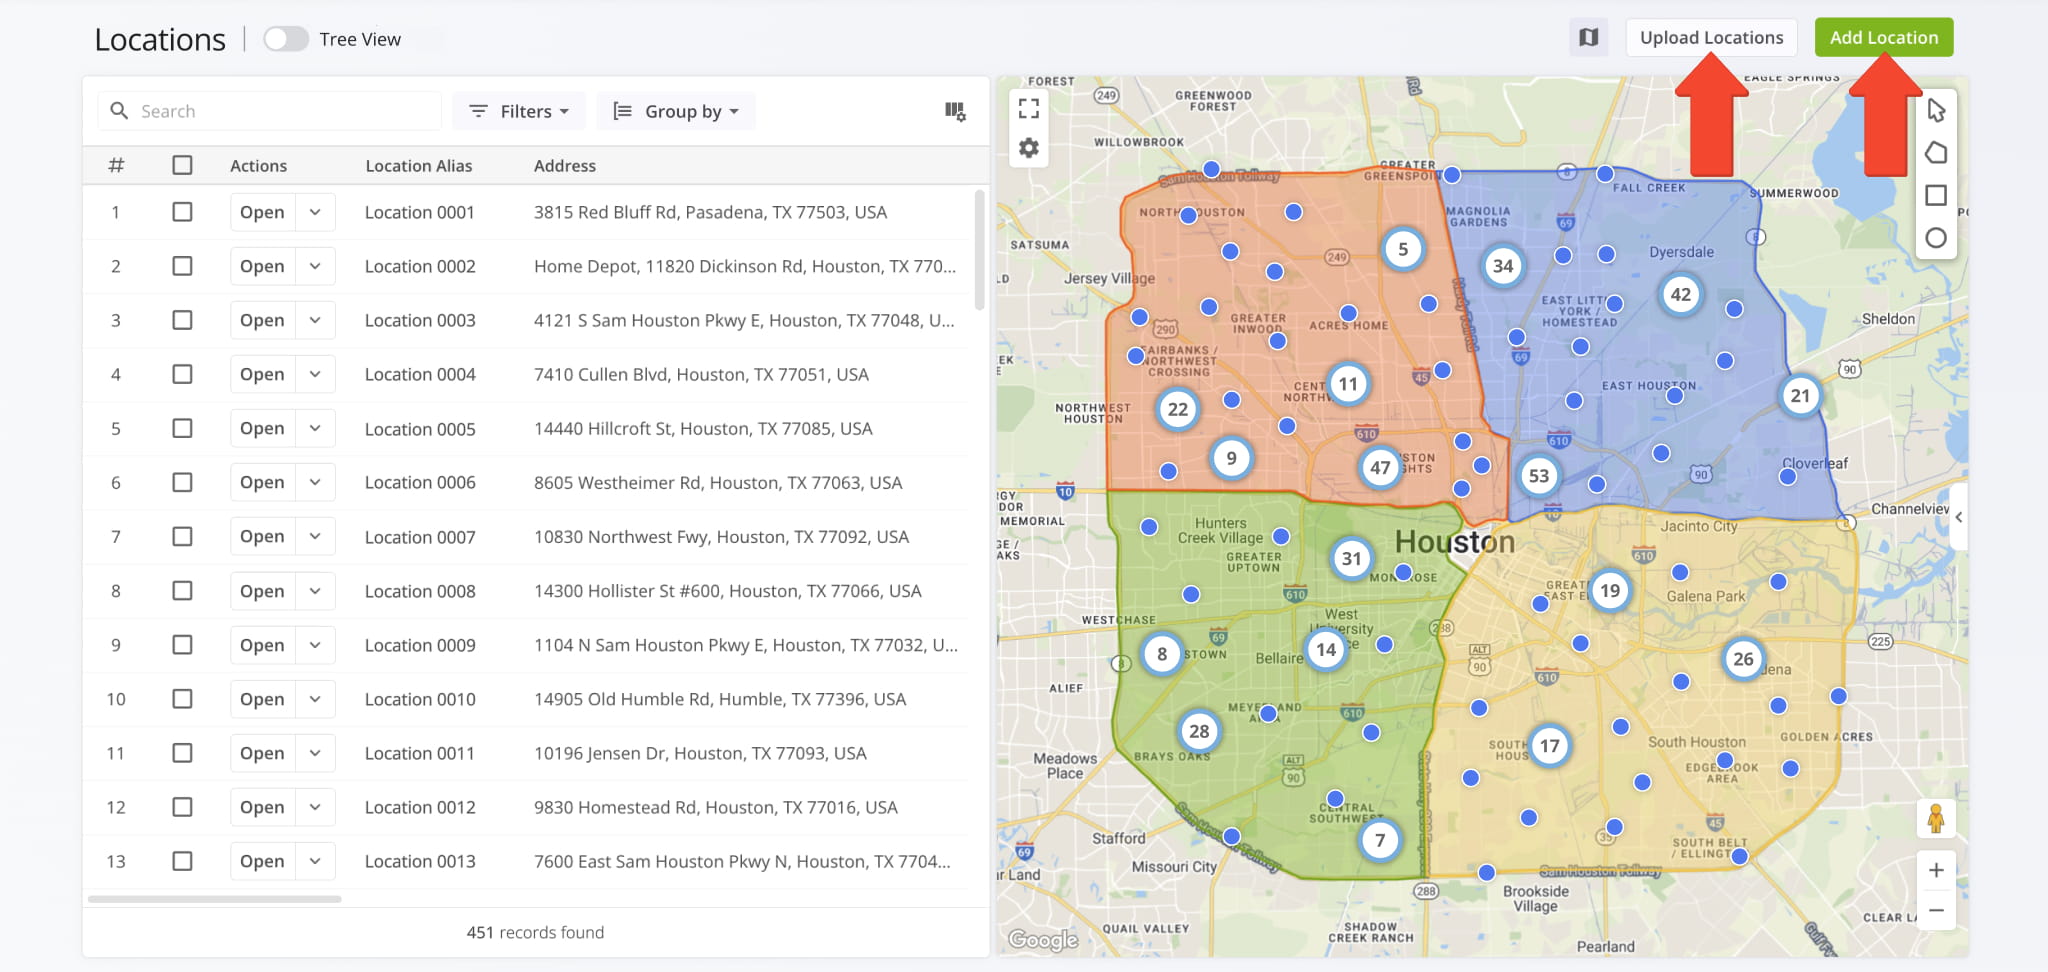
To open your Locations page, go to “Database” > “Locations” in the Navigation Menu. Here, you’ll see all of your Customer Locations and their associated data.
To create a new Location, click the “Add Location” button. To add multiple Locations via spreadsheet, click the “Upload Locations” button. Learn more about Route4Me’s spreadsheet formatting requirements.
In the “Add Location” panel, enter into each field the requested data. To finalize, click the “Add Location” button. See the table below for details on each data field.
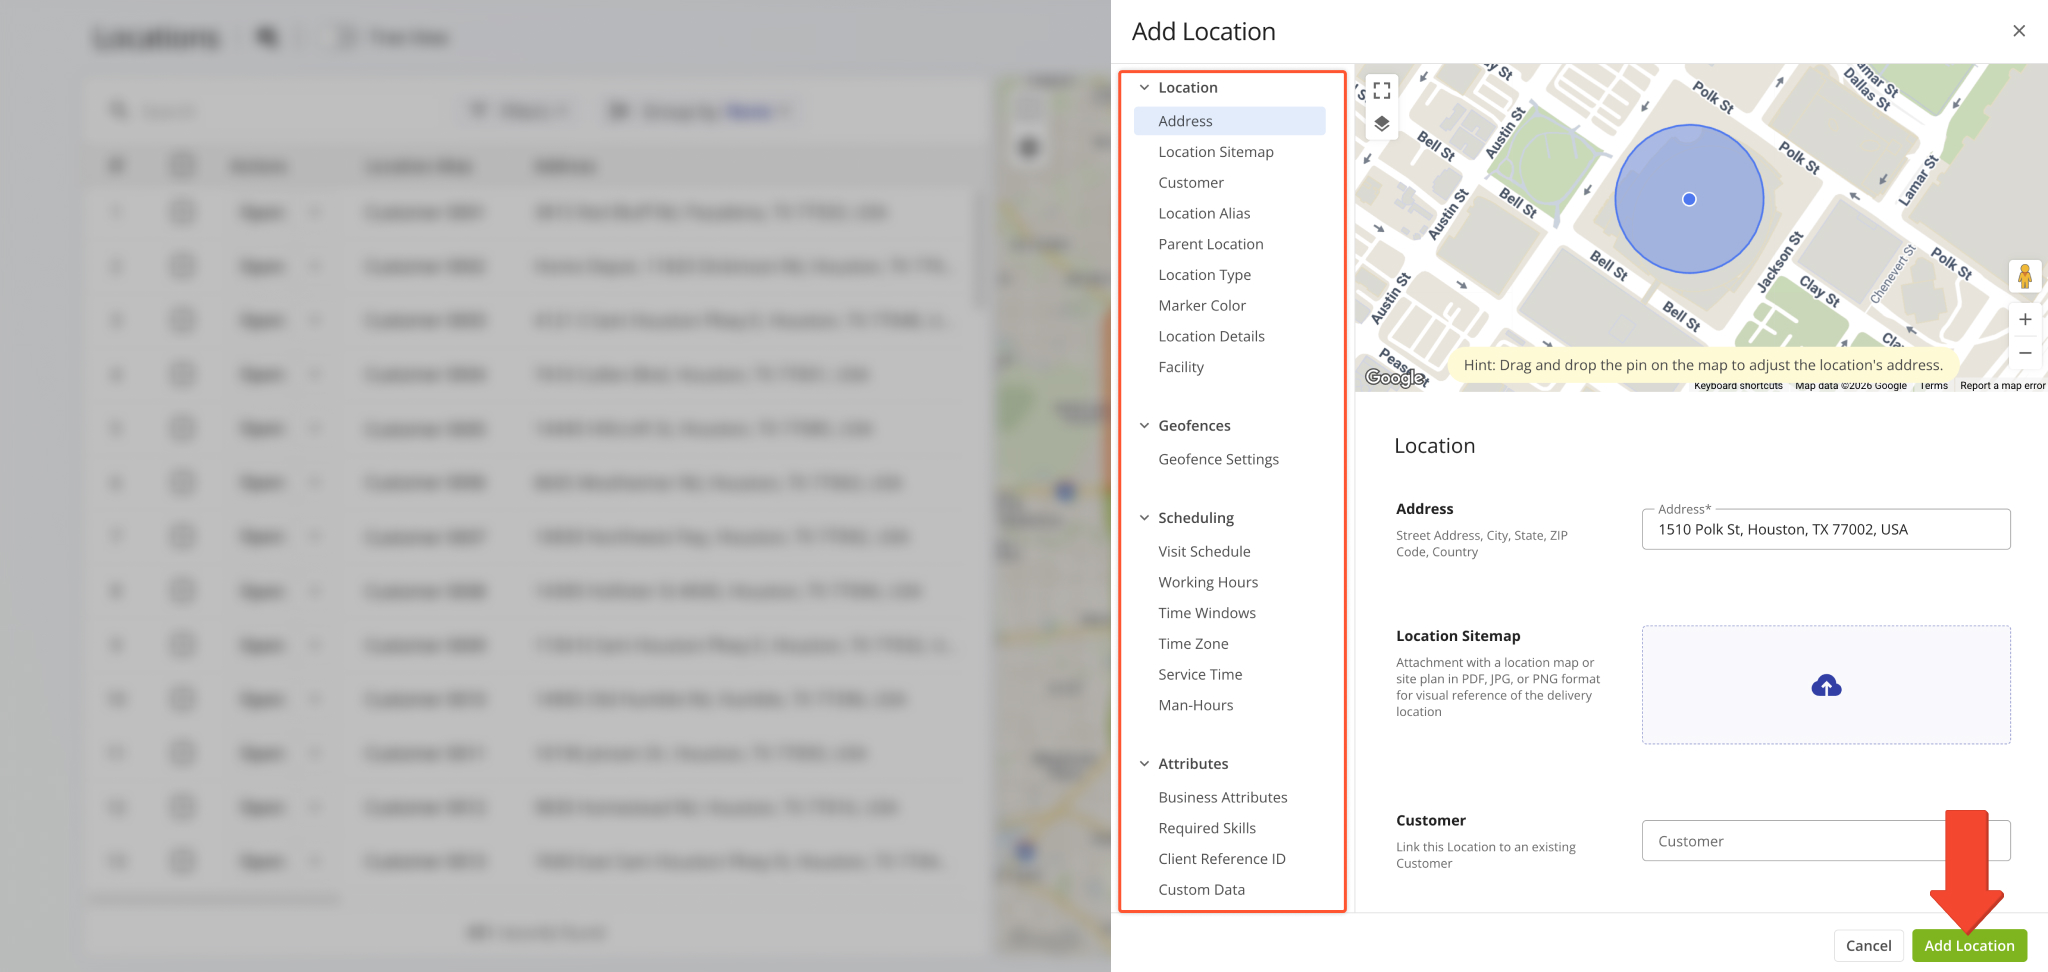
Add Location Data Fields
Location Geofences – Automatic GPS Arrival And Departure Detection Zones
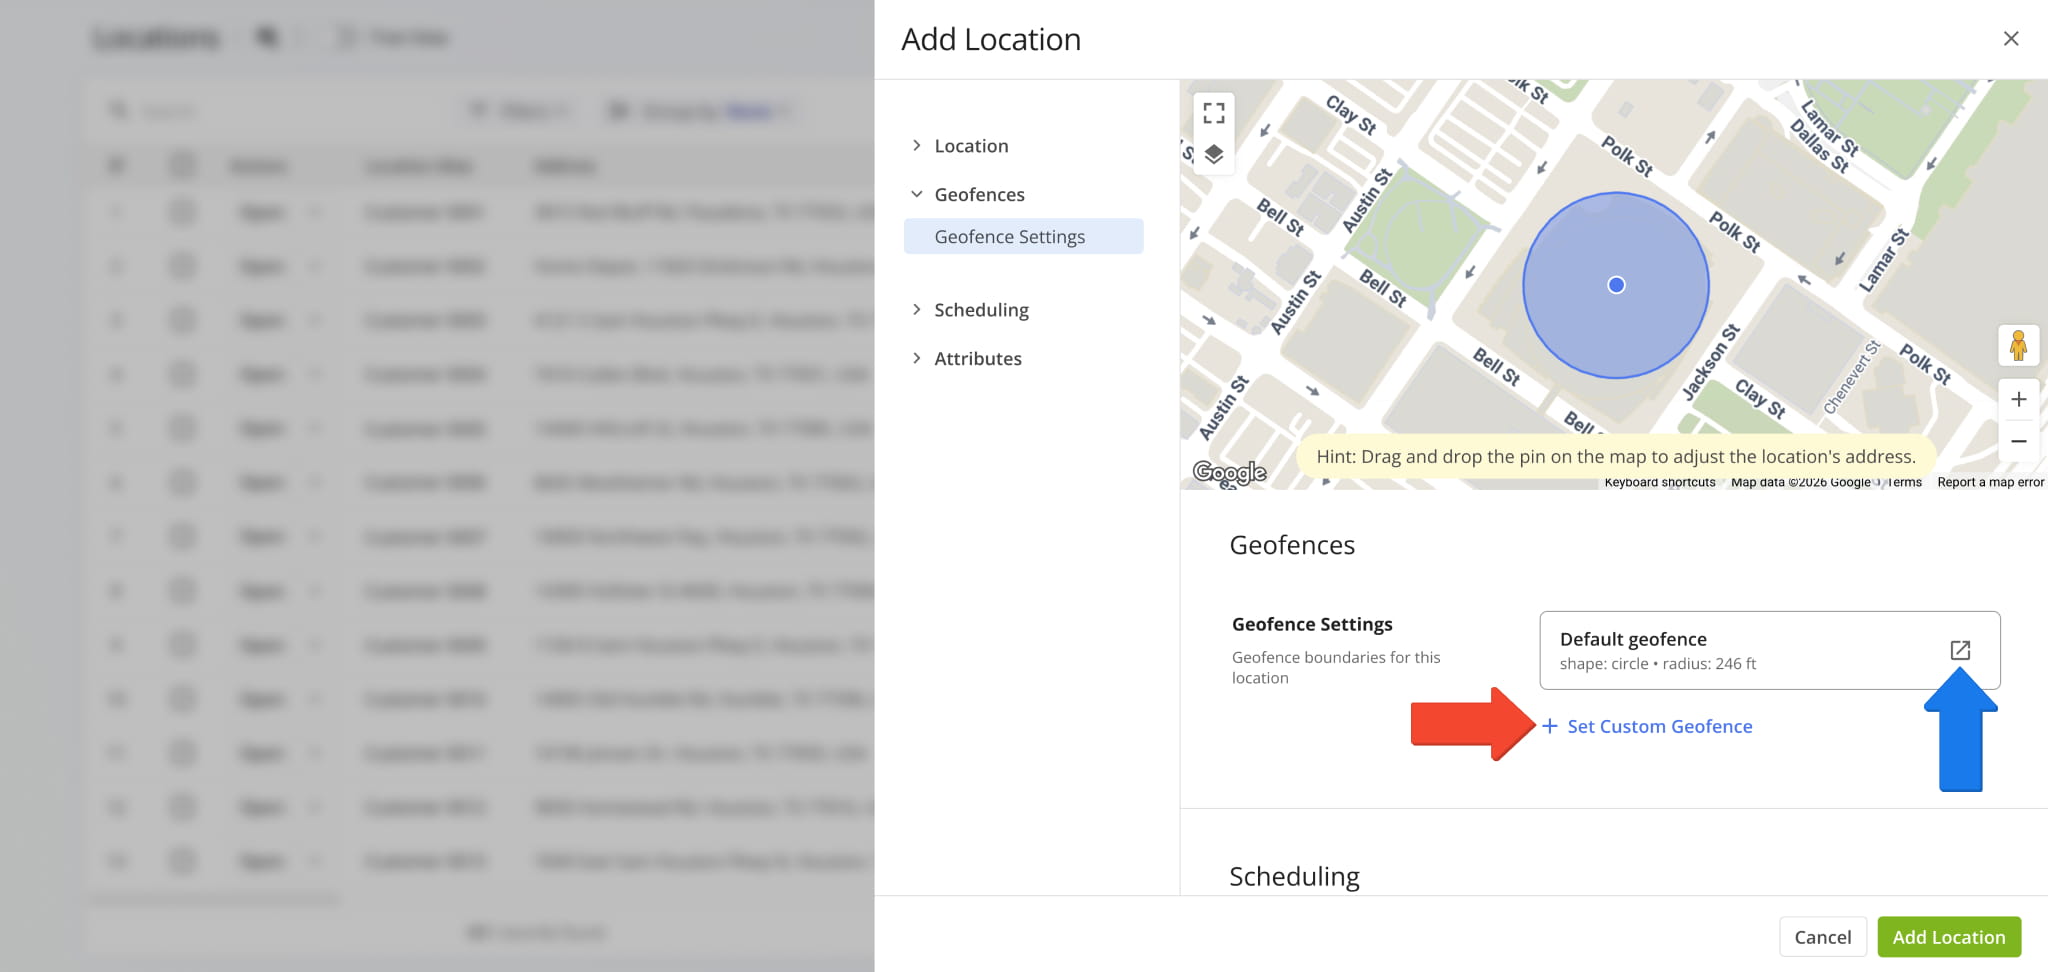
In the “Geofences Settings” section, you can see how your default account geofences look in relation to a Location and create custom geofences if needed. For example, at Locations with detached parking, default geofences may not extend far enough.
If you have geofences enabled on your account, you can click the Open Icon to go to your Geofence Settings. Learn more about creating Custom Location Geofences.
Customize Address Locations Data – Modify Display Columns
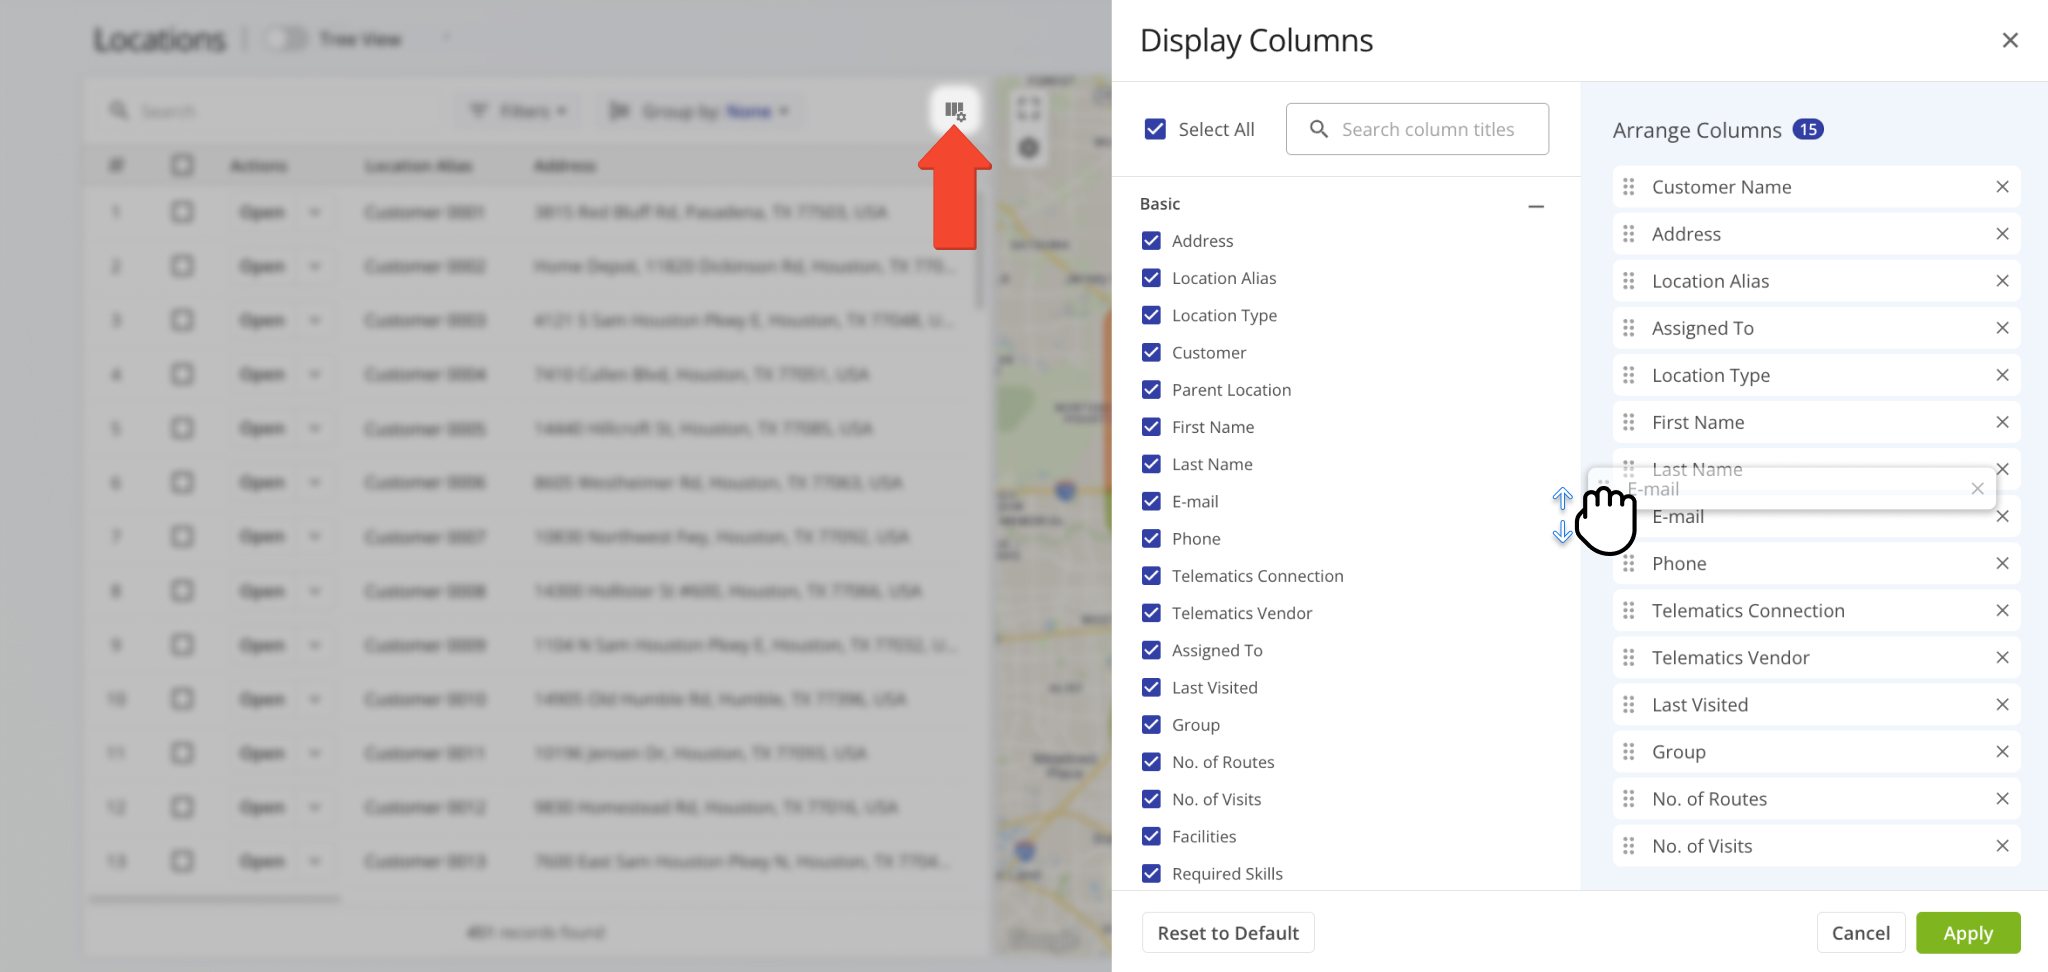
For convenience, you can easily customize which Display Columns appear on your Customer Locations page and in what order. Just click on the Columns Icon to open the Display Columns Panel where you can make modifications.
Check the boxes next to the Columns you want to display. To rearrange the order, drag a column name to reposition it. See the table below for details on the data associated with each column.
Data Columns
Filter Customer Locations – Narrow Displayed Results By Criteria
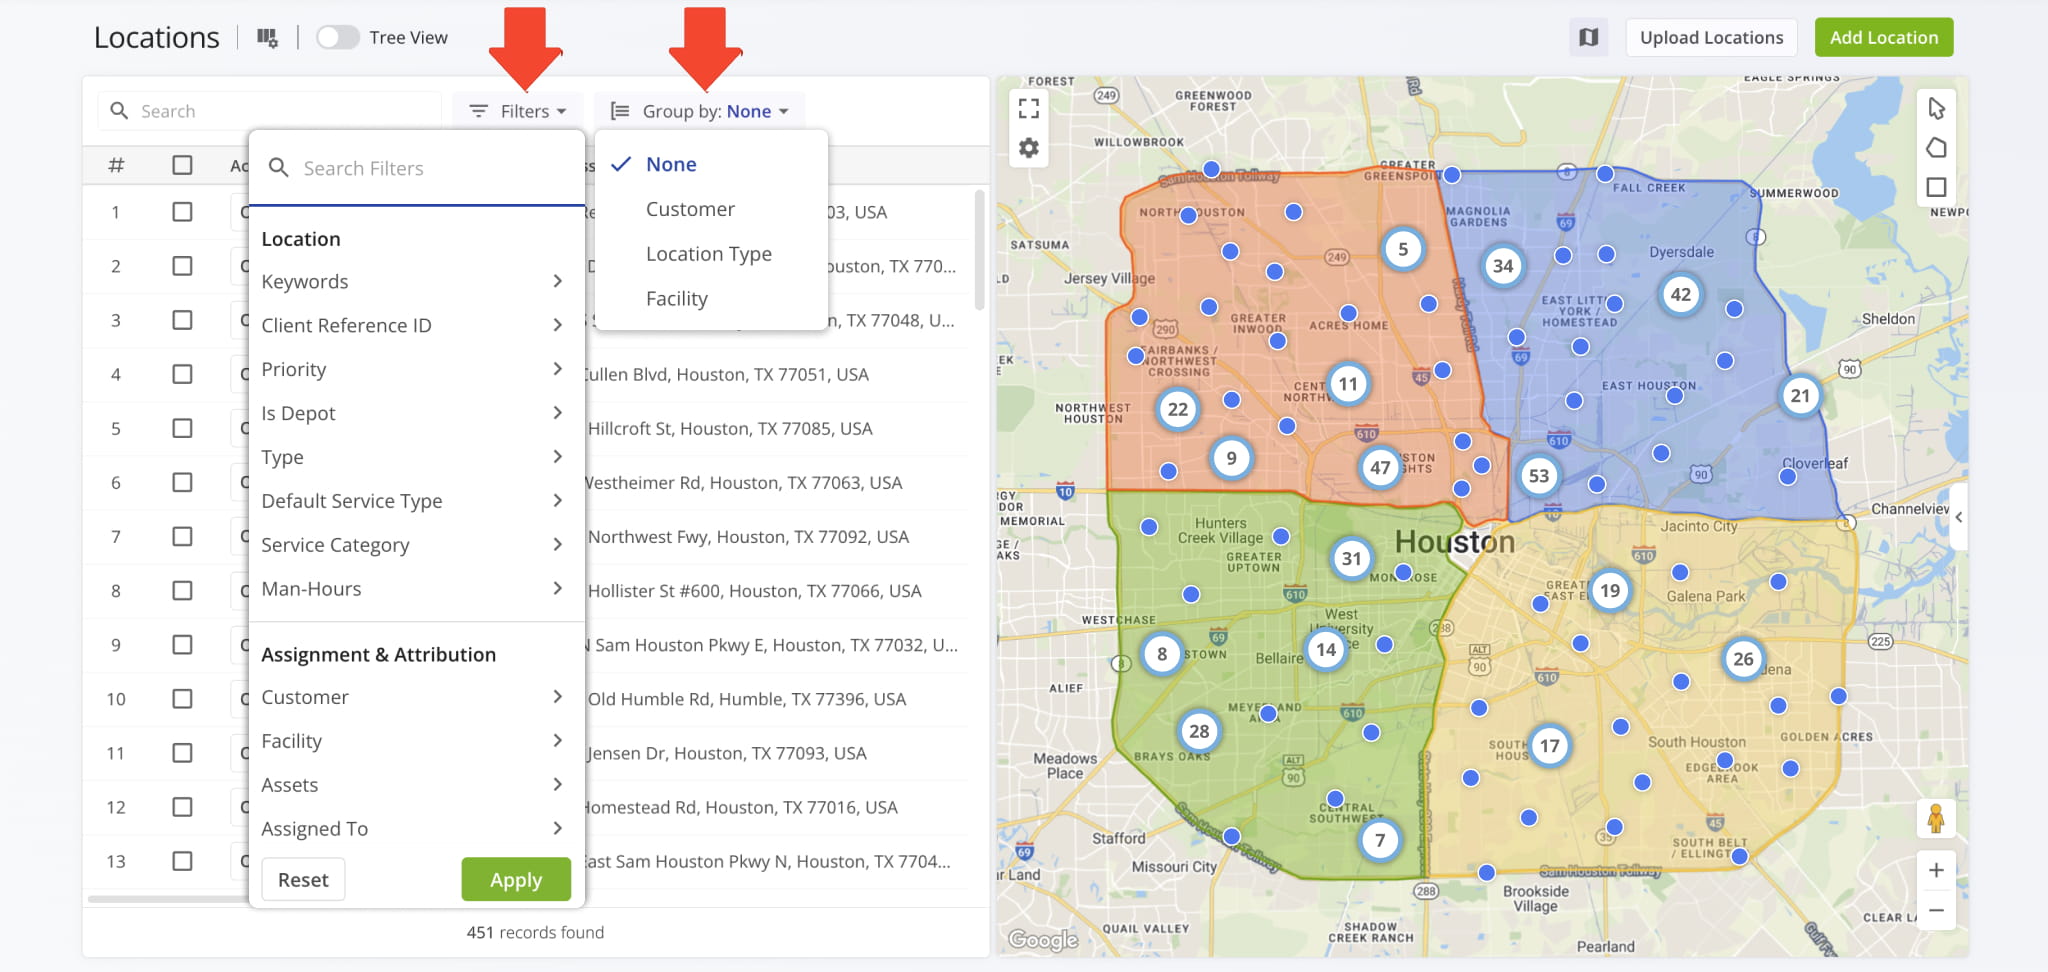
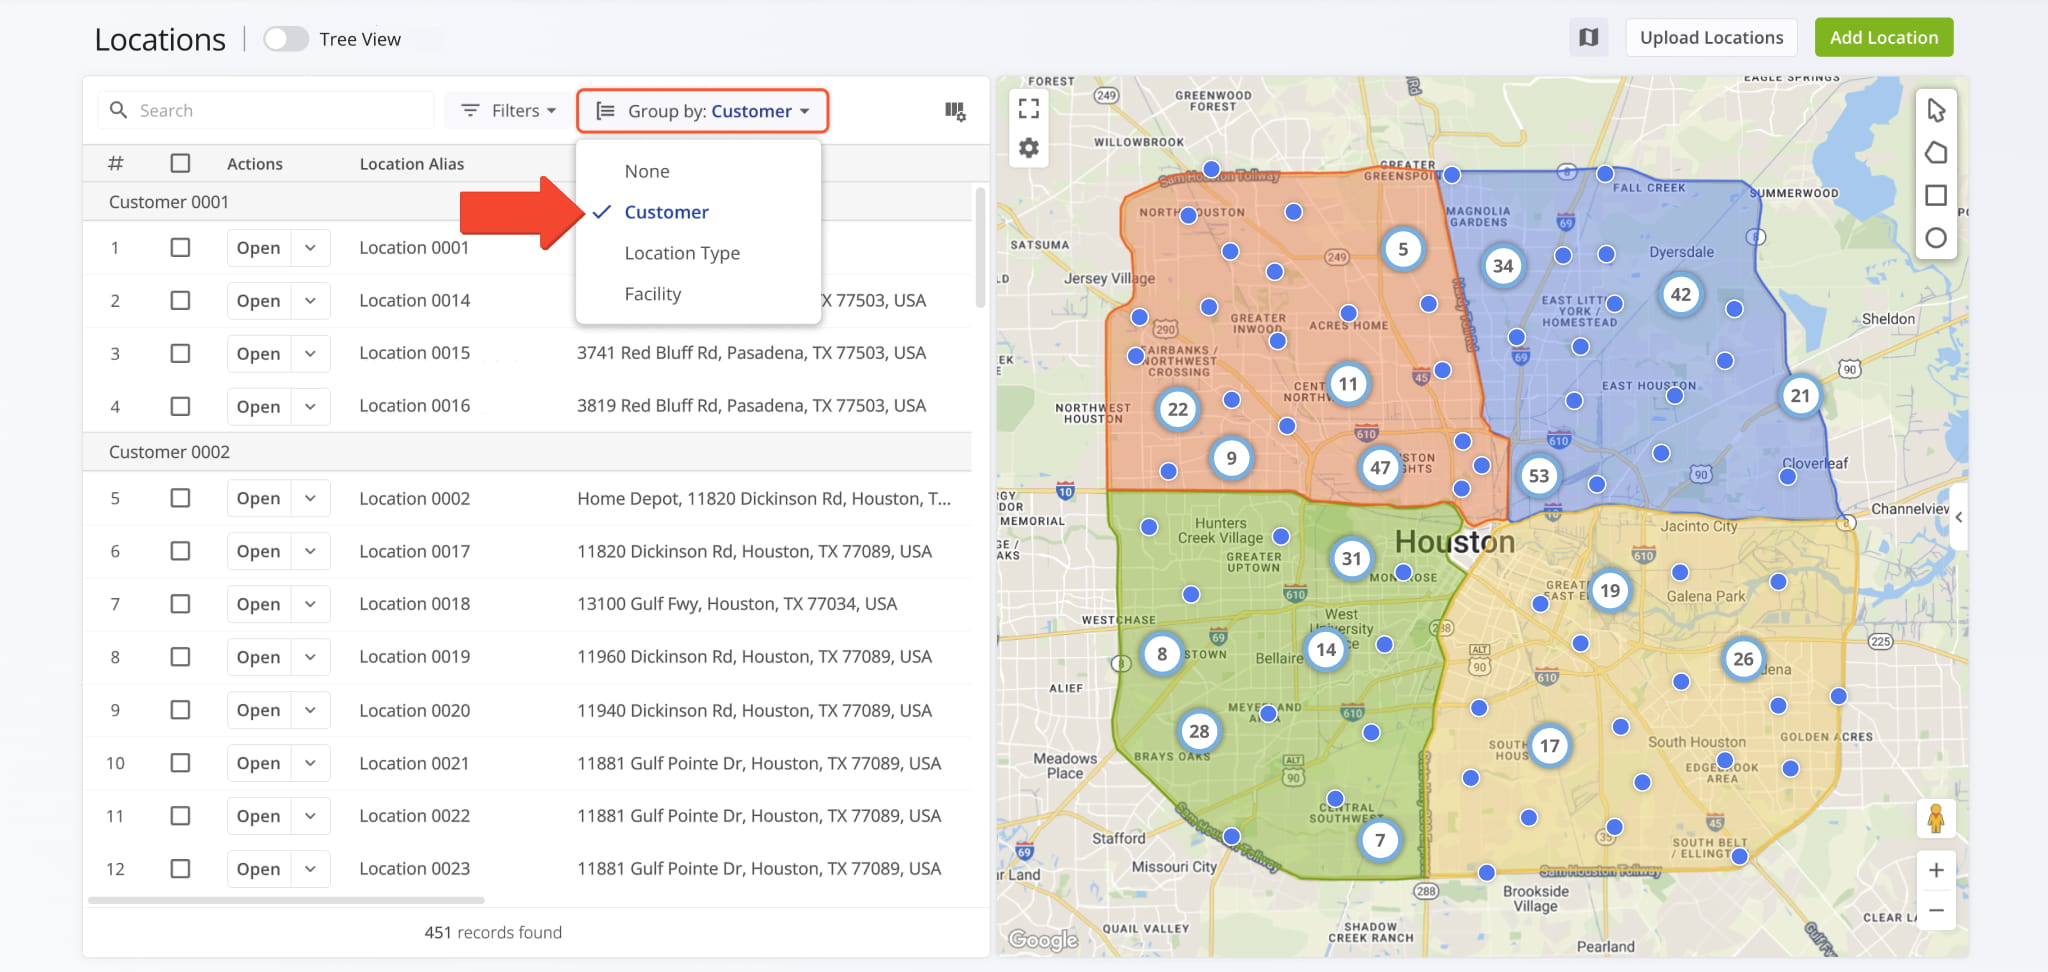
If you have many Customer Locations, use the “Group by” option to view Locations by Customer, Location Type, or Facility. Or apply “Filters” to narrow results based on specific criteria. See the table below for filtering options.
Filter Options
When you group by Customer, the list organizes all Locations under the customer they belong to. Grouping by Location arranges them by Location Type (e.g., Storeroom, Warehouse, Customer Location). Grouping by Facility sorts all Locations by their assigned Facility.
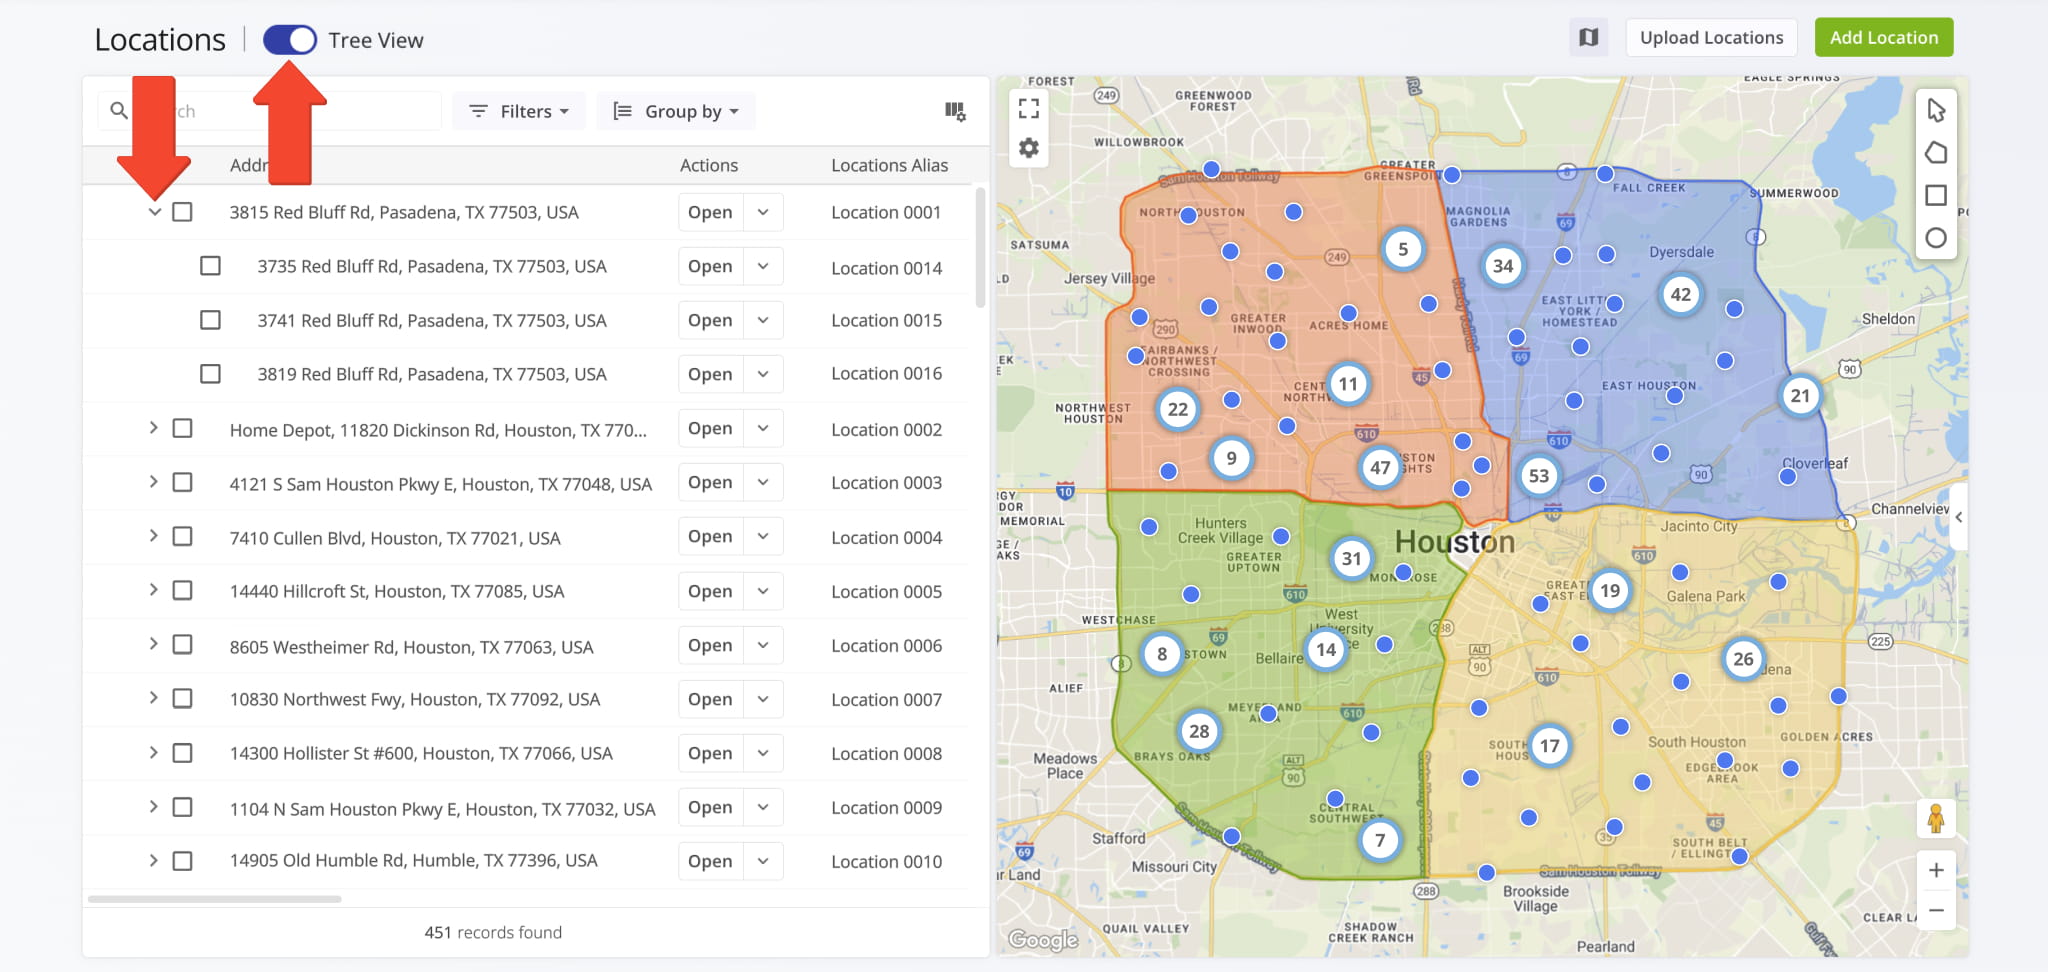
Alternatively, click the “Tree View” toggle to group Locations under their Parent Locations if applicable. To view the Sub-locations of a Parent Location in Tree View, simply click the Down Arrow next to it.
NOTE: To maintain readability, Tree View and Customer Name Grouping can’t be used together.
Manage Customer Locations – View, Edit, And Modify Location Details
Your Customer Locations list offers a number of ways to view and manage Locations. To manage multiple Locations, check the boxes next to them and click “Bulk Actions“.
To manage a single Location, click the Down Arrow next to “Open” and select an option from the menu. You can learn more about available Bulk Actions and management options in the table below.
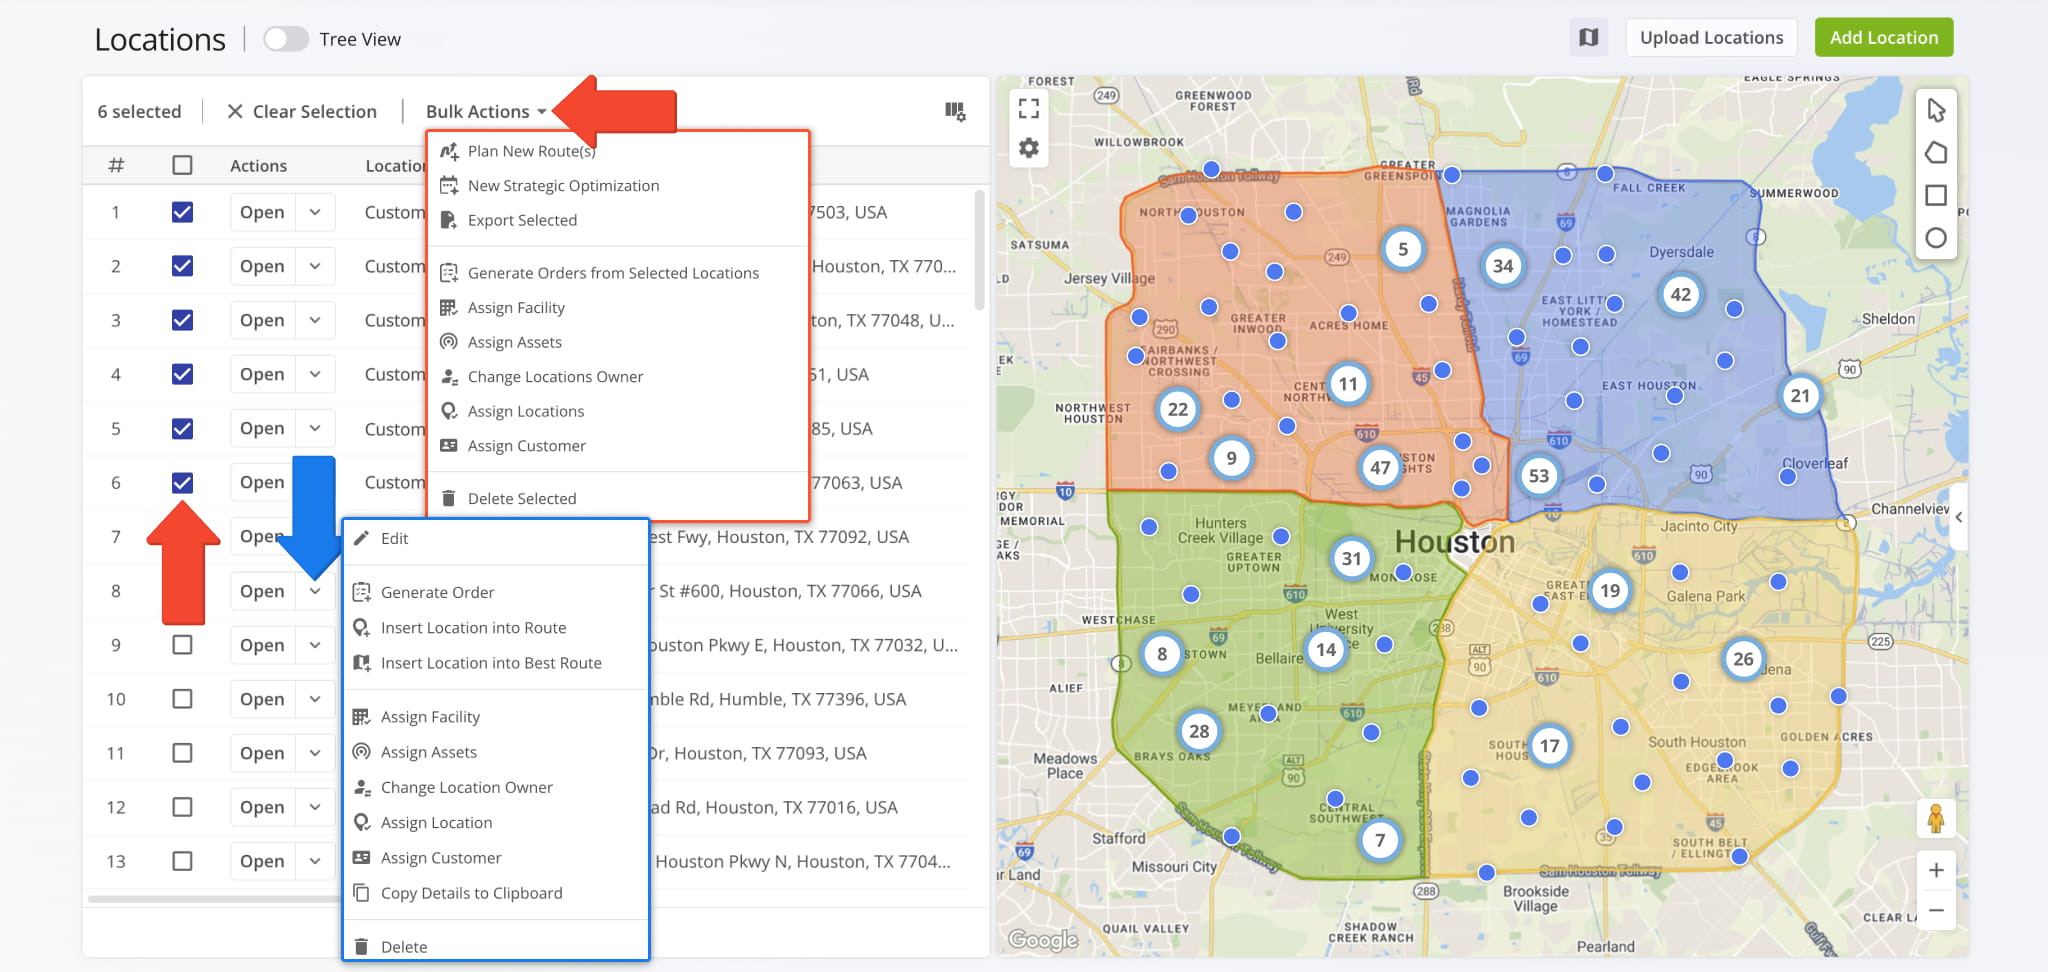
Management Options
Customer Locations Map – Add Territories, Avoidance Zones, And More
You can use the map to create Route Territories and Avoidance Zones. In the upper right corner of the map, you’ll find drawing tools to create defined areas on the map.
Click on the defined area to access an actions menu, detailed in the table below. When finished, click “Save As” in the menu or the Save Button at the bottom of the screen to save the area as a Territory or an Avoidance Zone.
To view all of your Territories and Avoidance Zones, click the Slider located center-left of the map.
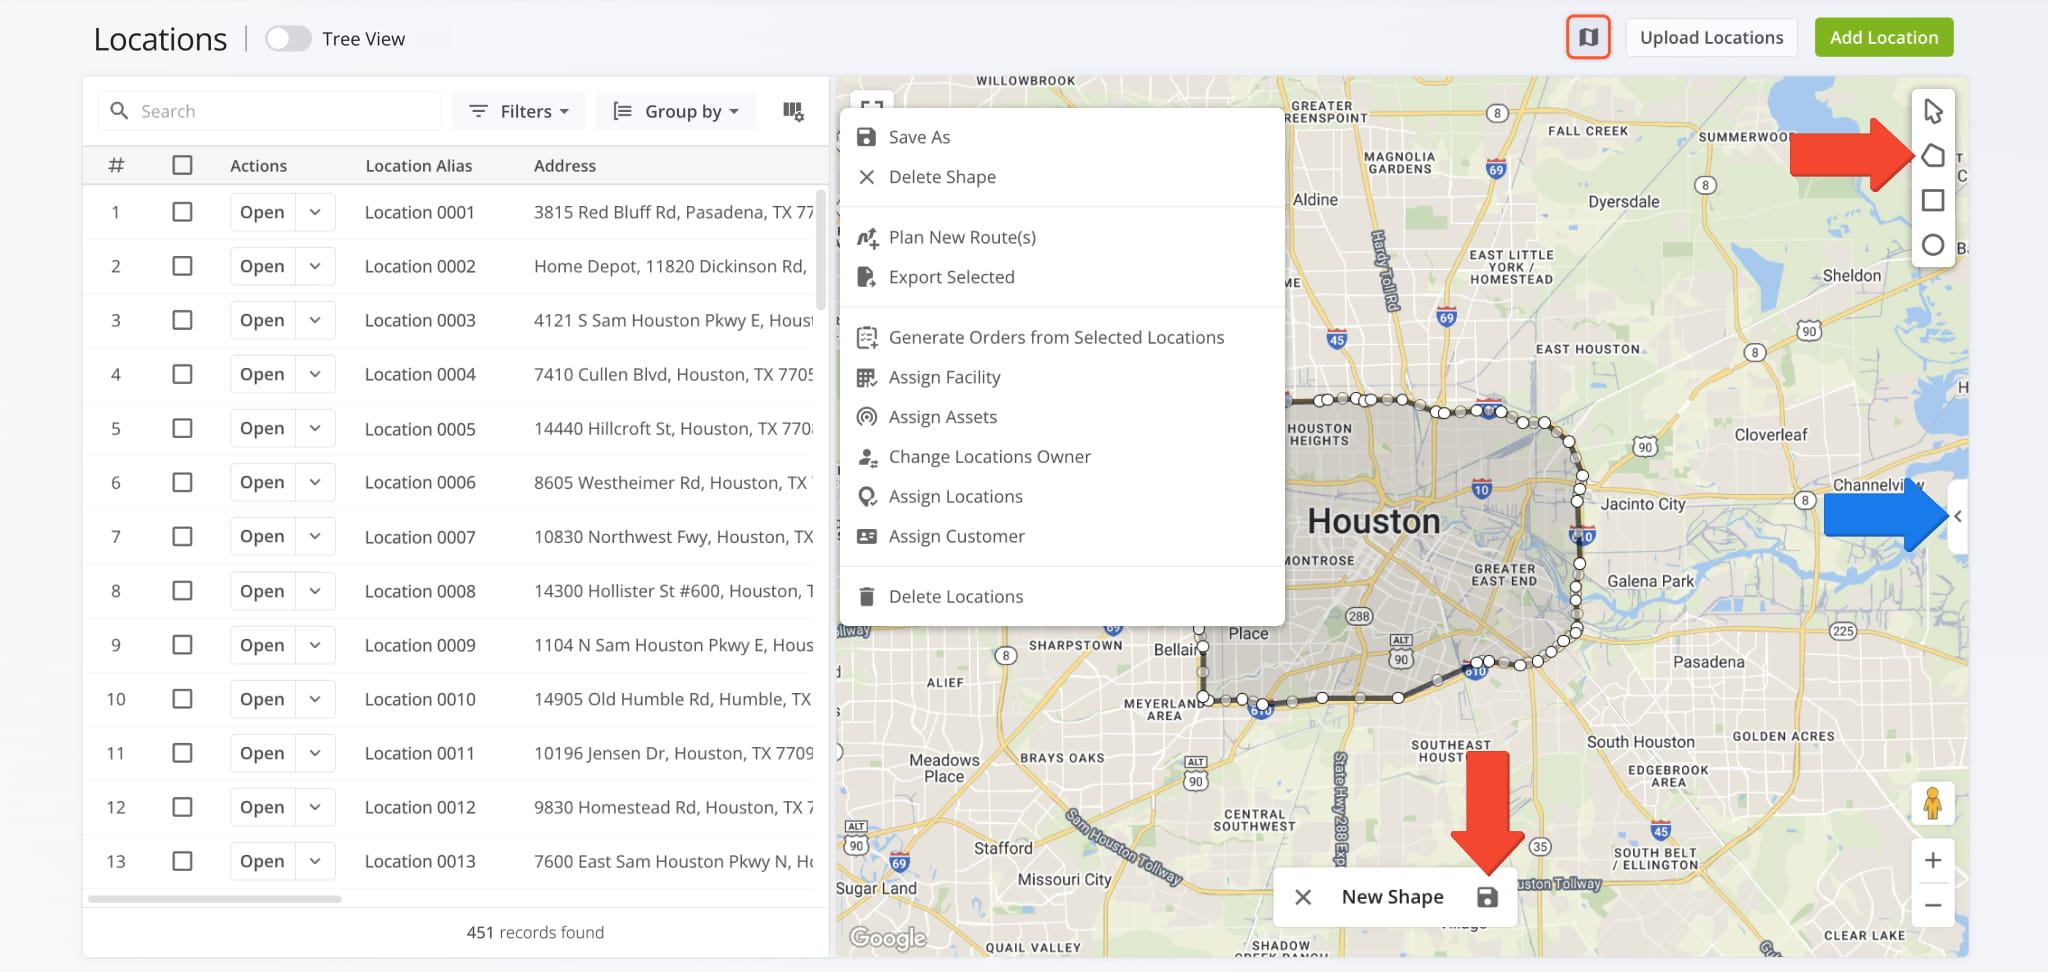
Actions Menu Options
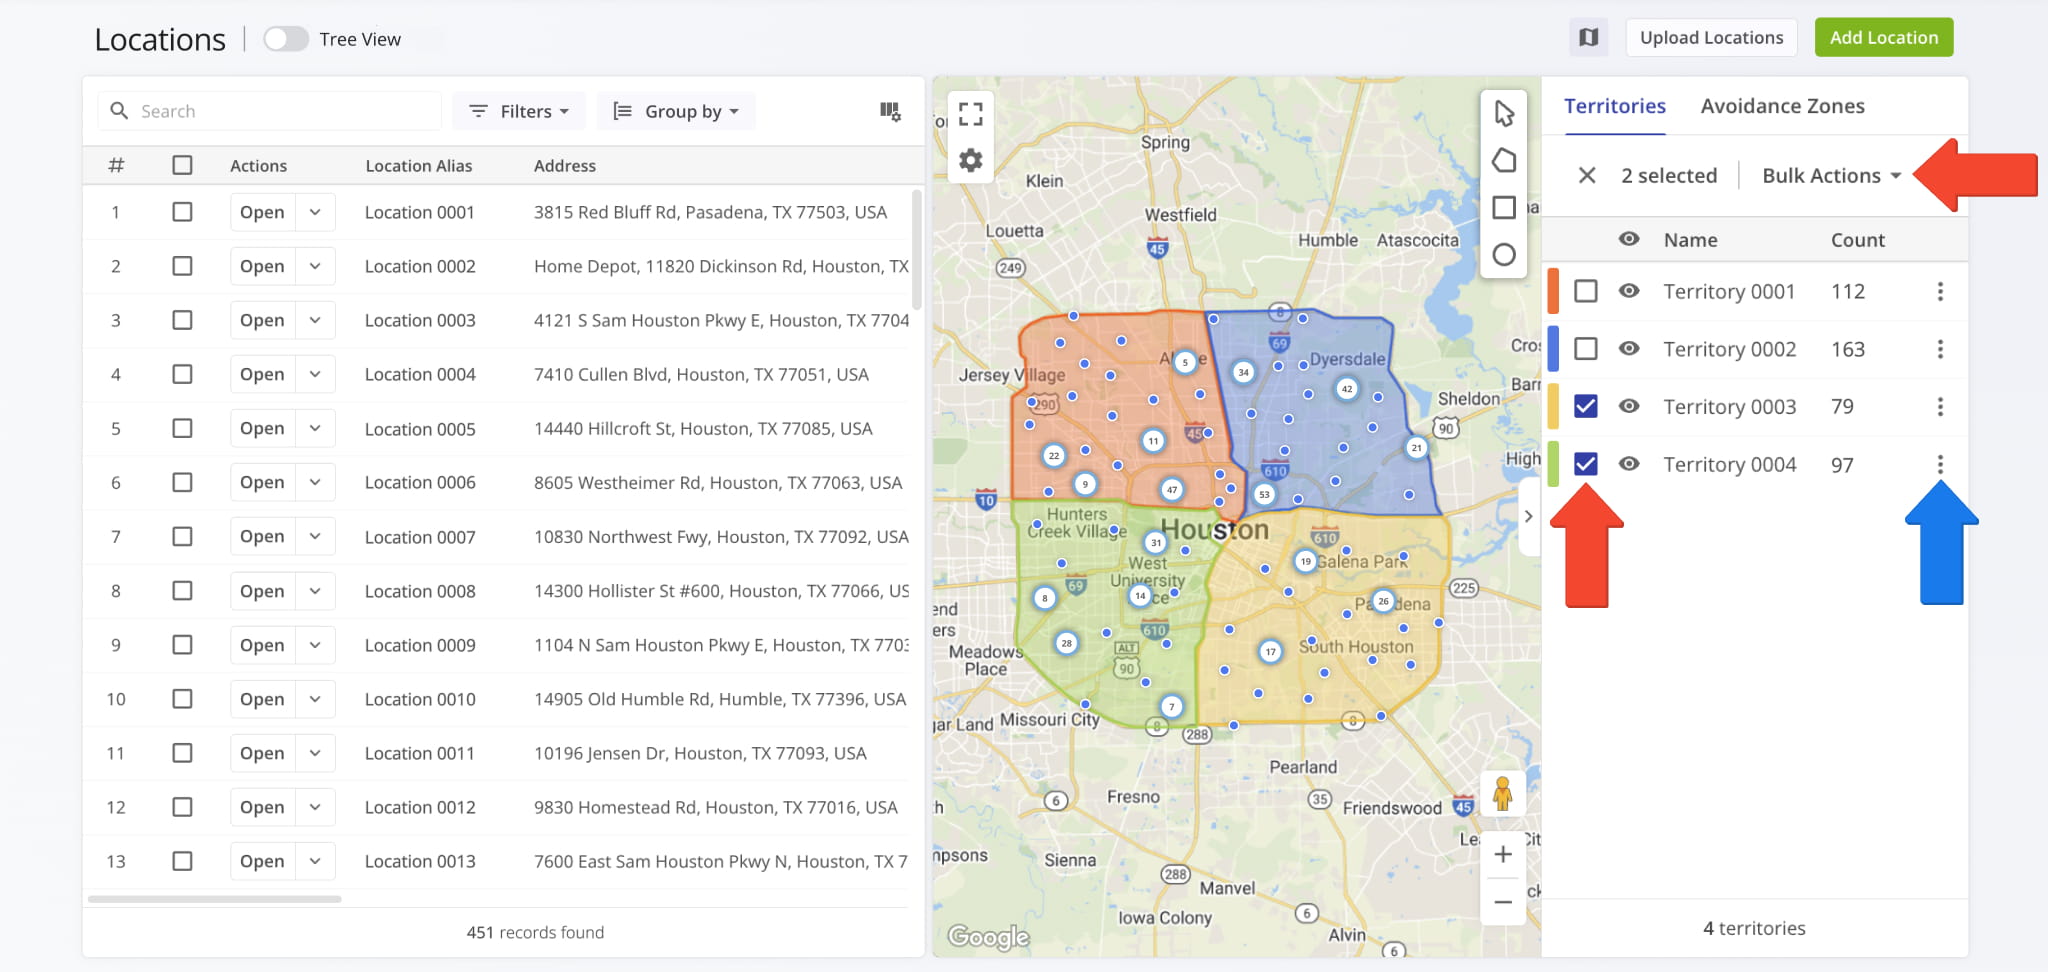
Clicking the Slider opens a panel where your Territories and Avoidance Zones are grouped into corresponding tabs.
To perform actions on a Territory or Avoidance Zone – such as edit, delete, or plan a route – click the Three-dot Icon next to it. To perform an action on multiple Territories or Avoidance Zones, check their boxes and choose “Bulk Actions“.
You can update additional map settings by clicking the Gear Icon. Address pins are grouped into clusters when “Clusters” is enabled and there are fewer than one thousand Locations; otherwise, pins are shown individually.
When the “Density Heatmap” is enabled, the “Hide Locations” checkbox appears (enabled by default) to hide address pins or clusters; disabling it shows both the Heatmap and pins/clusters.
You can also enable Traffic lines, Territories, Avoidance Zones, and other layers, detailed in the table below.
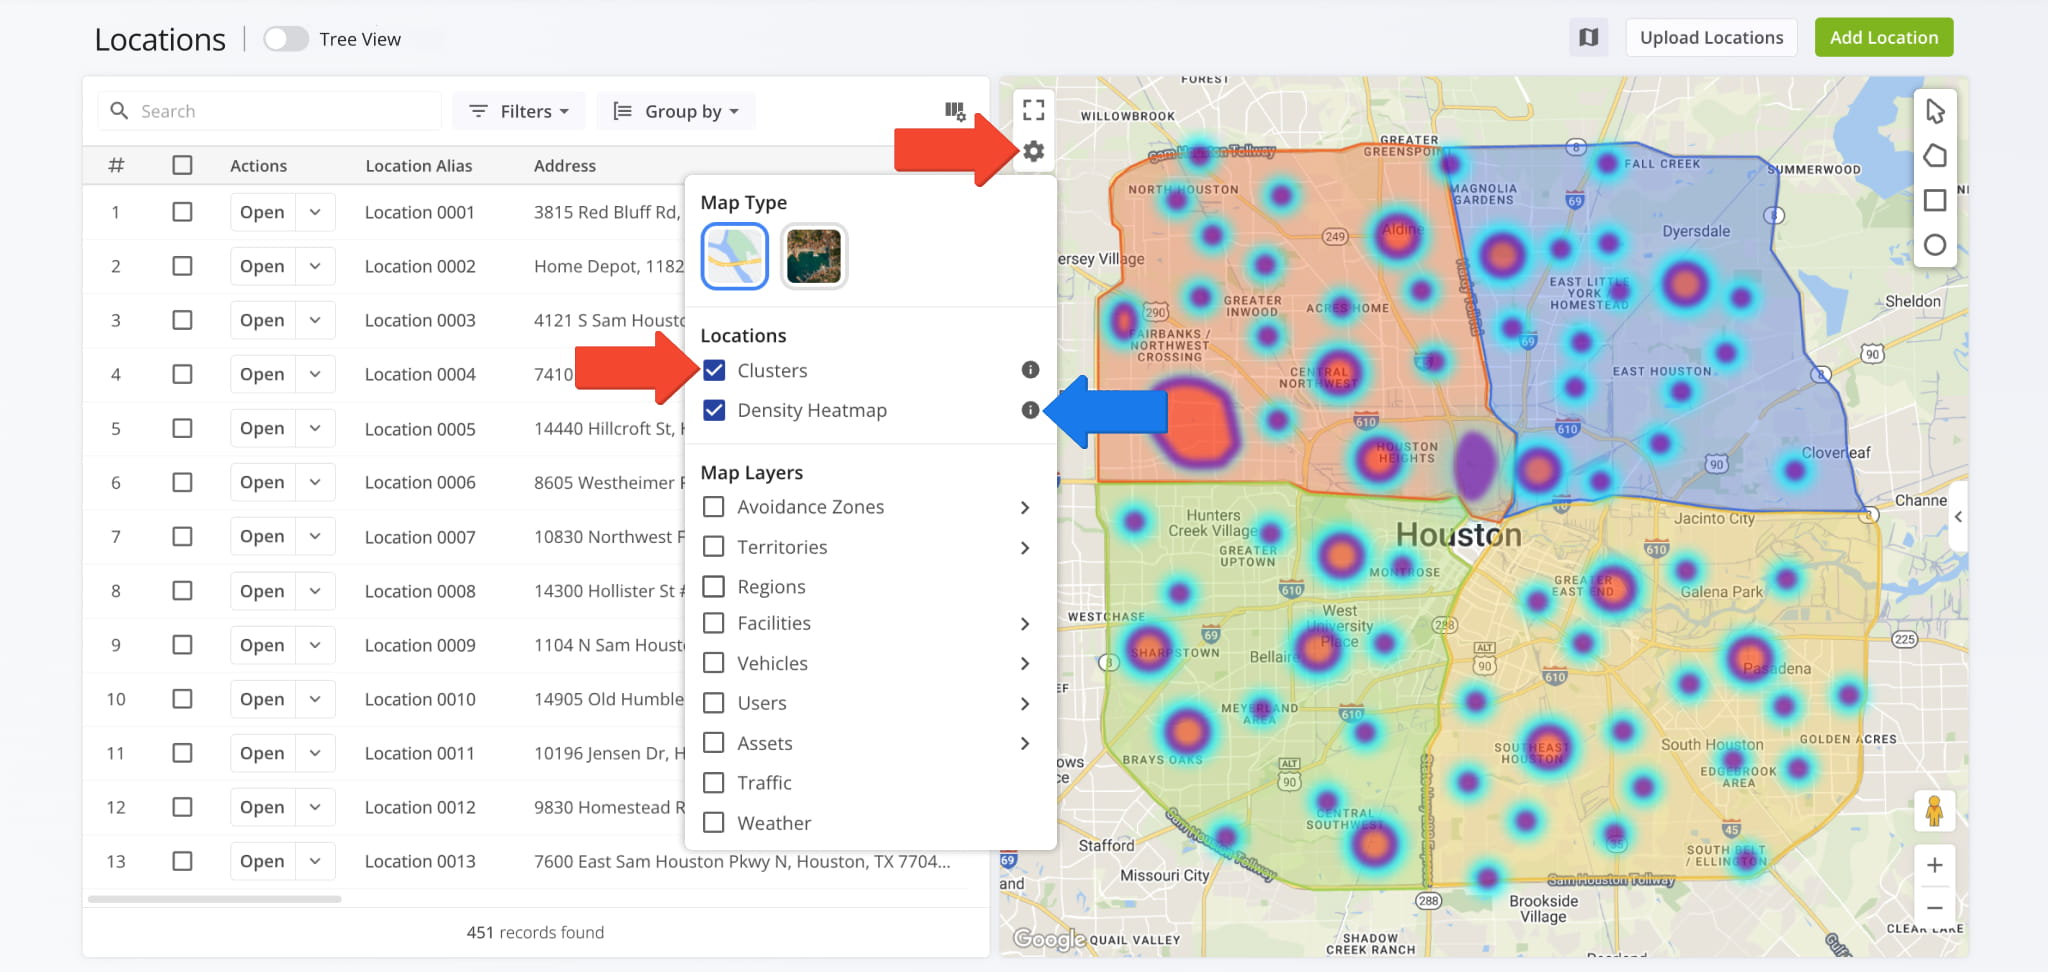
Map Features
Visit Route4Me's Marketplace to Check out Various Modules and Add-Ons:
- Route Optimization
Time Windows
- Operations
Advanced Team Management Add-On
About author: Kristian Andreev

