Contracts – Customer Agreements And Contract Management
Route4Me’s ERP tools enable you to seamlessly create and manage contract entries directly in your account. Contracts can be associated with specific customers and routes, enabling structured oversight of customer agreements, service periods, and more. Each Contract stores key details such as start and end dates and external reference IDs for customer profiles imported from external vendors. Keep reading to learn more about Contract management and attribution.
Table of Contents
Add Contracts – Create Contract Entries In Your Route4Me Account
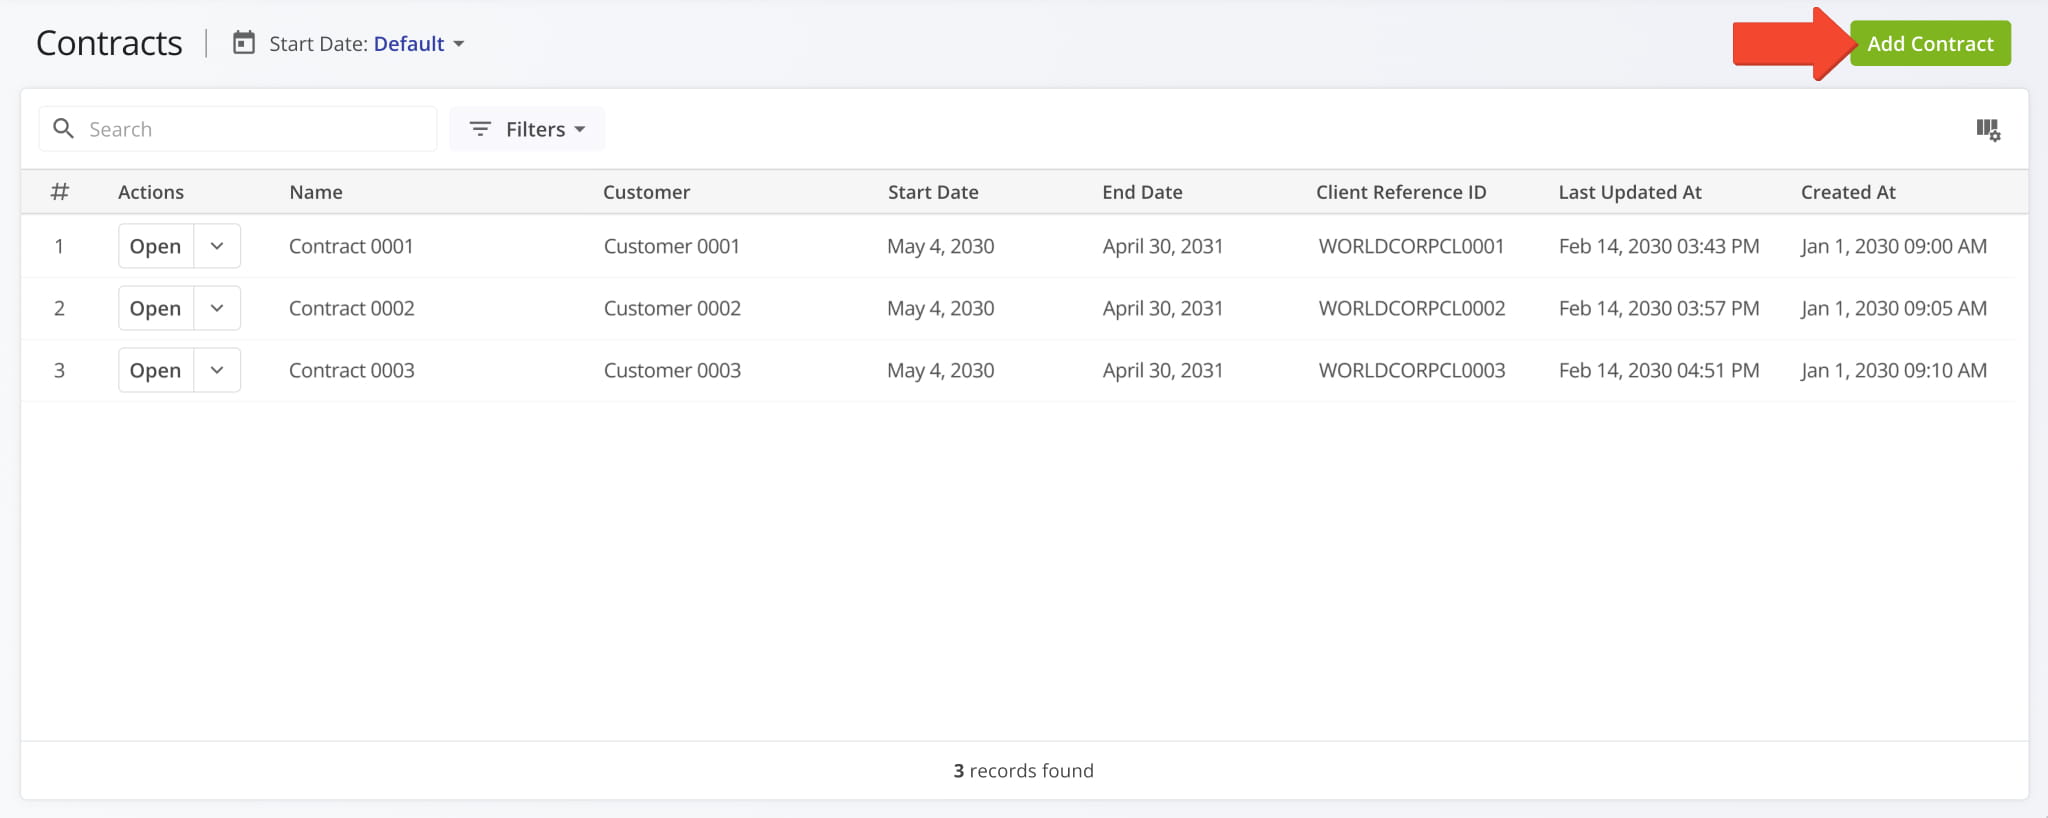
To open your Contracts Page, go to “ERP” > “Contracts” in the Navigation Menu. To add a new Contract, click the “Add Contract” button. NOTE: If you can’t access the Contracts Page or need further details, contact Route4Me Support to get set up.
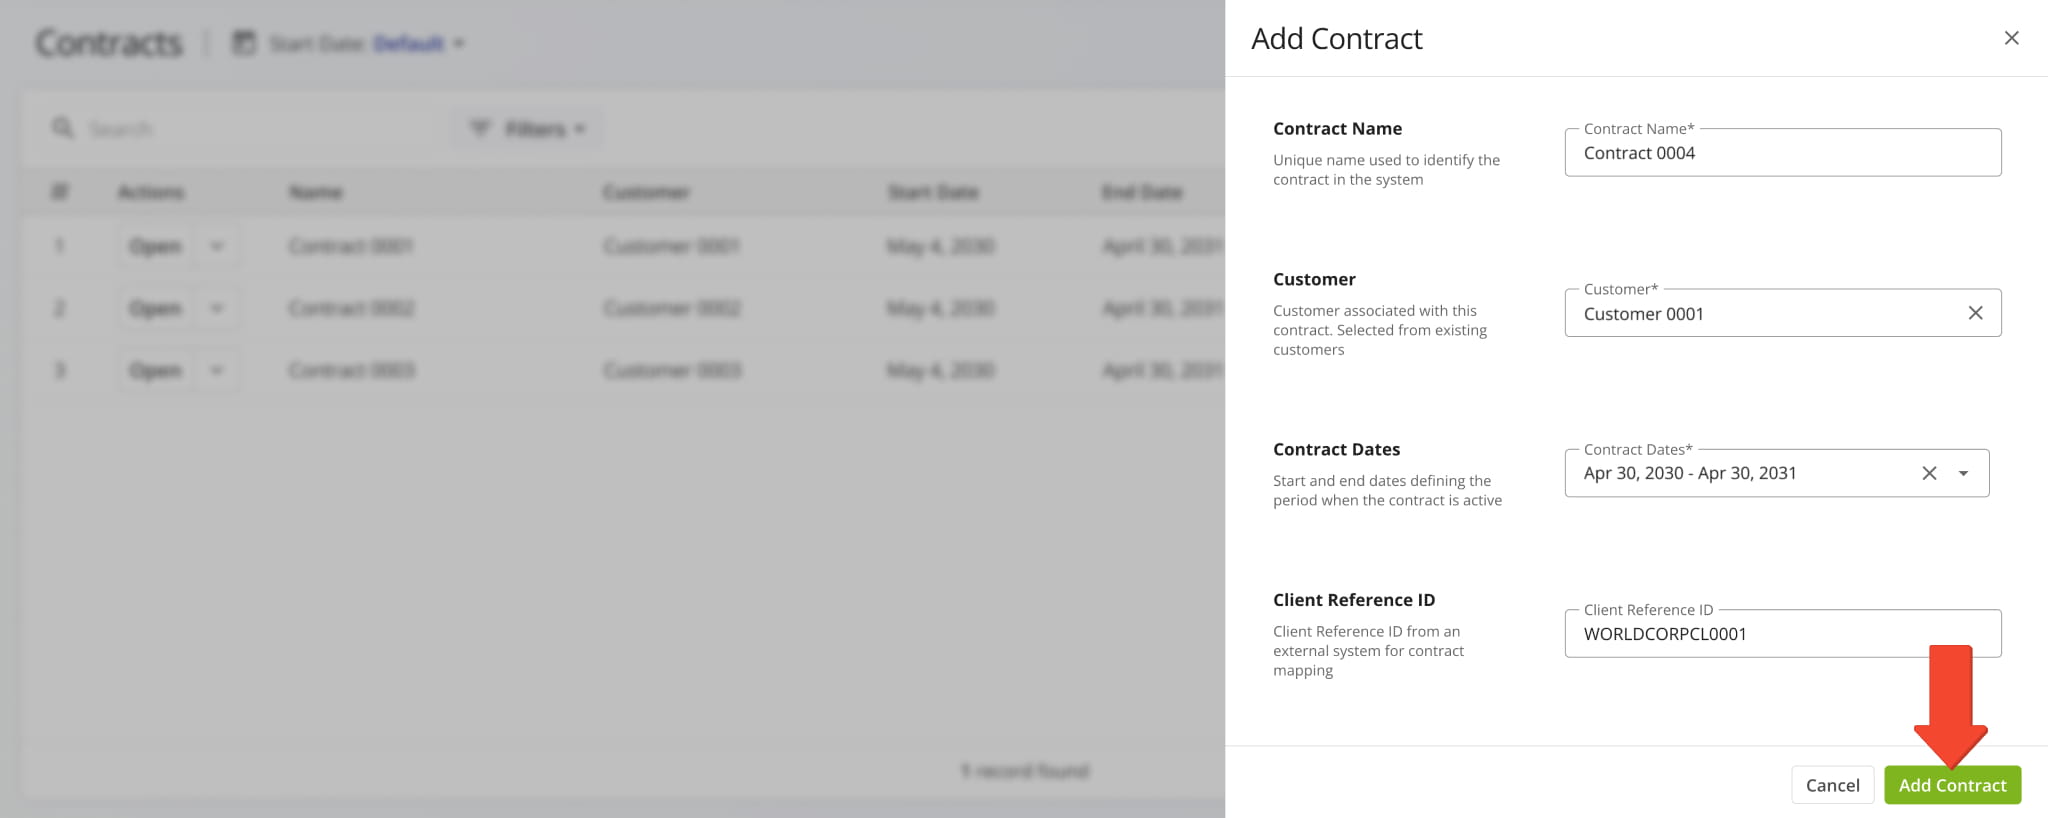
Then, fill in the details of the new Contract and click “Add Contract” to finalize. See the table below for a list of available fields.
Contracts – Add Contract Fields
Contract Name
Enter a name or alias used to identify the Contract in your account. You can use this to easily find the Contract via the Search function.
Contract Dates
Define the start and end dates of the Contract to determine its active period.
Client Reference ID
Enter a unique identifier assigned to the Contract Client from an external system such as a CRM or ERP vendor. NOTE: This field is not mandatory and can only be used for synced or imported clients.
Manage Contracts – Find, Edit And Delete Contract Entries
The Contracts Page supports date and Customer filters to help you find the Contracts relevant to your needs. Simply click “Filters” and use the “Customer” option to select which Customers should be used to filter the Contracts list.
Additionally, you can use the date filter at the top to filter Contracts by their start or end dates.
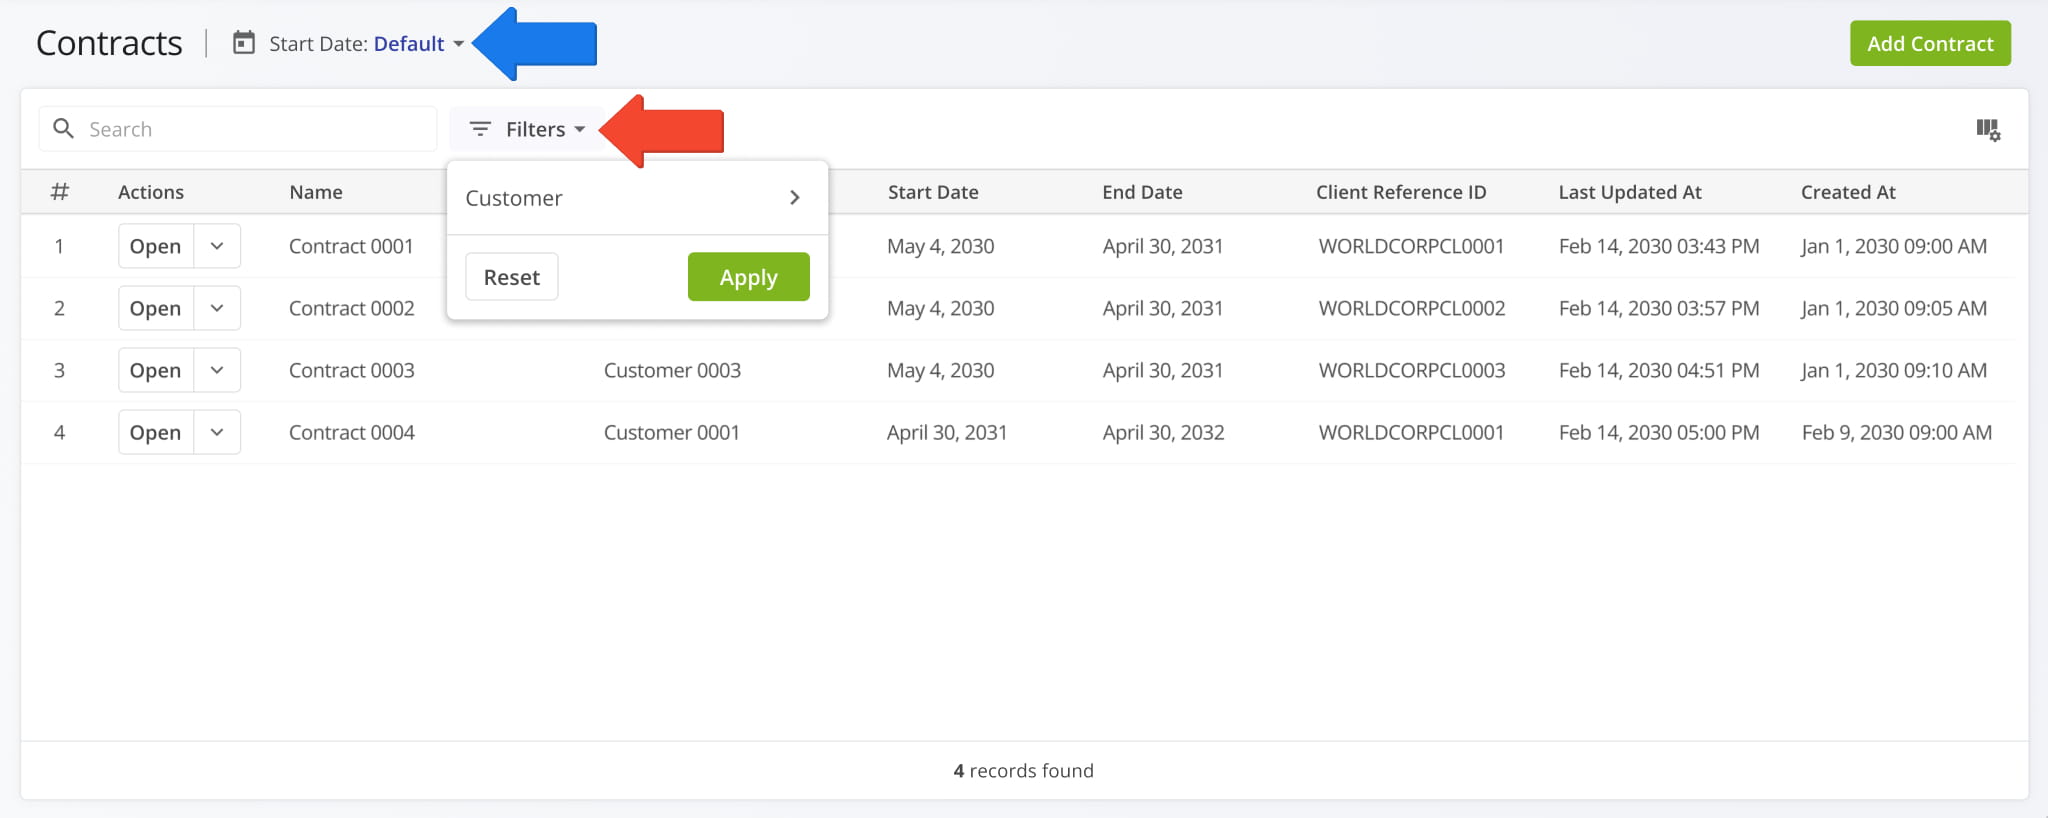
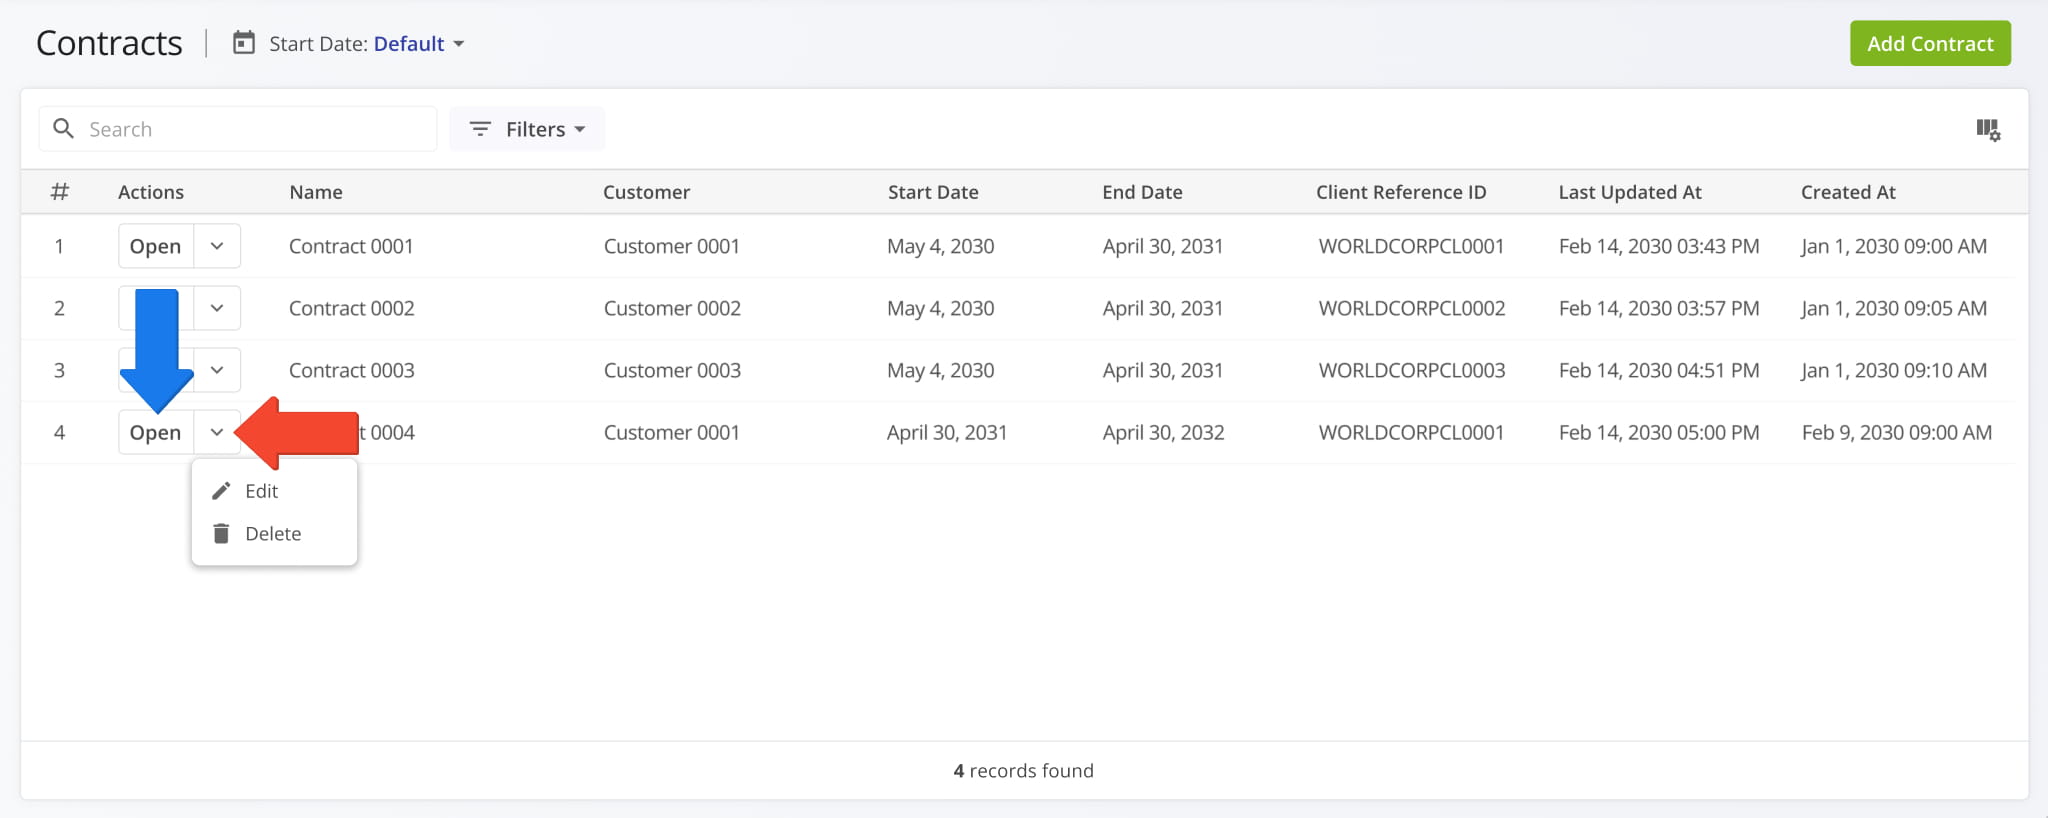
To edit or delete a contract, click the Down Arrow next to it. When you select “Edit“, you can adjust the same Contract settings available when you add contracts. Selecting “Delete” from the action menu will remove the Contract from your account.
You can also click the “Open” button to see a Contract Snapshot where you can see a Contract’s associated route activity.
Contract Data – Customize Contract Display Columns
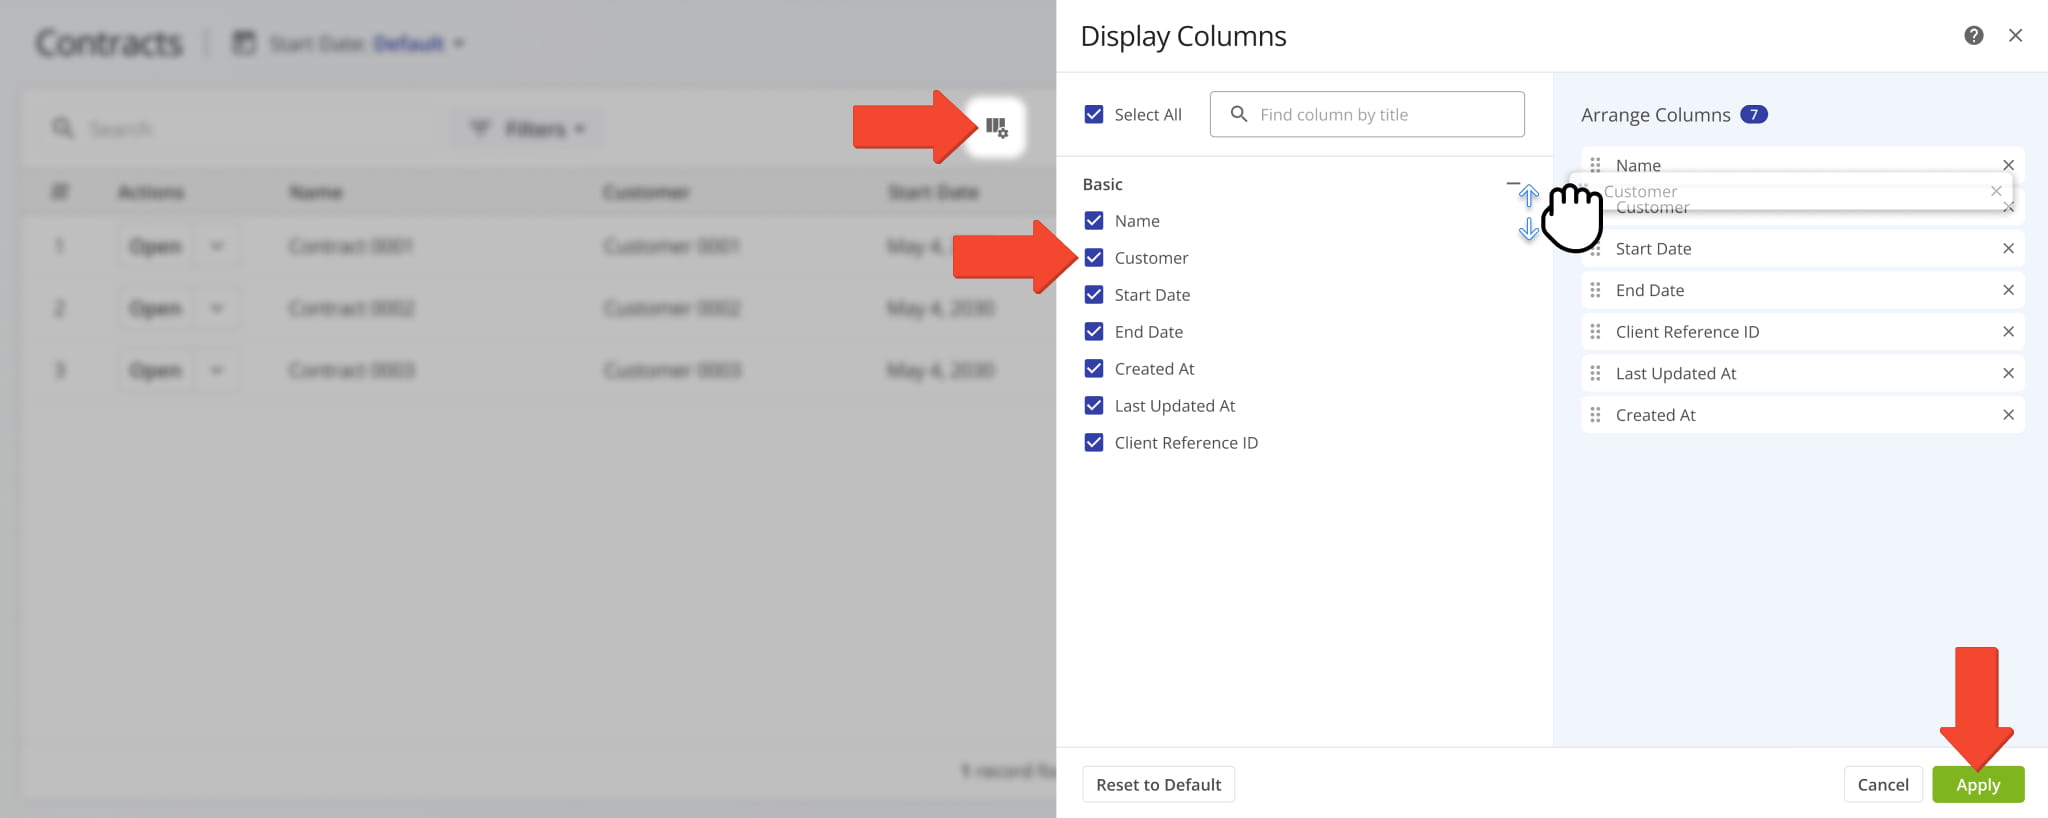
To adjust the data columns on your Contracts Page, click the Display Columns Icon. Then, check the boxes next to the columns you want to enable. You can change their order in the “Arrange Columns” section by clicking and dragging column headers.
The table below provides an overview of all available Contracts data columns.
Contracts – Data Columns
Name
Name or alias used to identify the Contract in your account.
Customer with whom the Contract is associated with.
Start Date
The day from which the Contract is active, i.e. the Contract Start Date.
End Date
The day until which the Contract is active, i.e. the Contract End Date.
Created At
Date on which the Contract was created in your account.
Last Updated At
Date when the Contract was last updated, changed, or edited in your account.
Client Reference ID
Unique identifier assigned to the Contract Client from an external system such as a CRM or ERP vendor.
Contract Route Attribution – Associate Contracts With Planned Routes
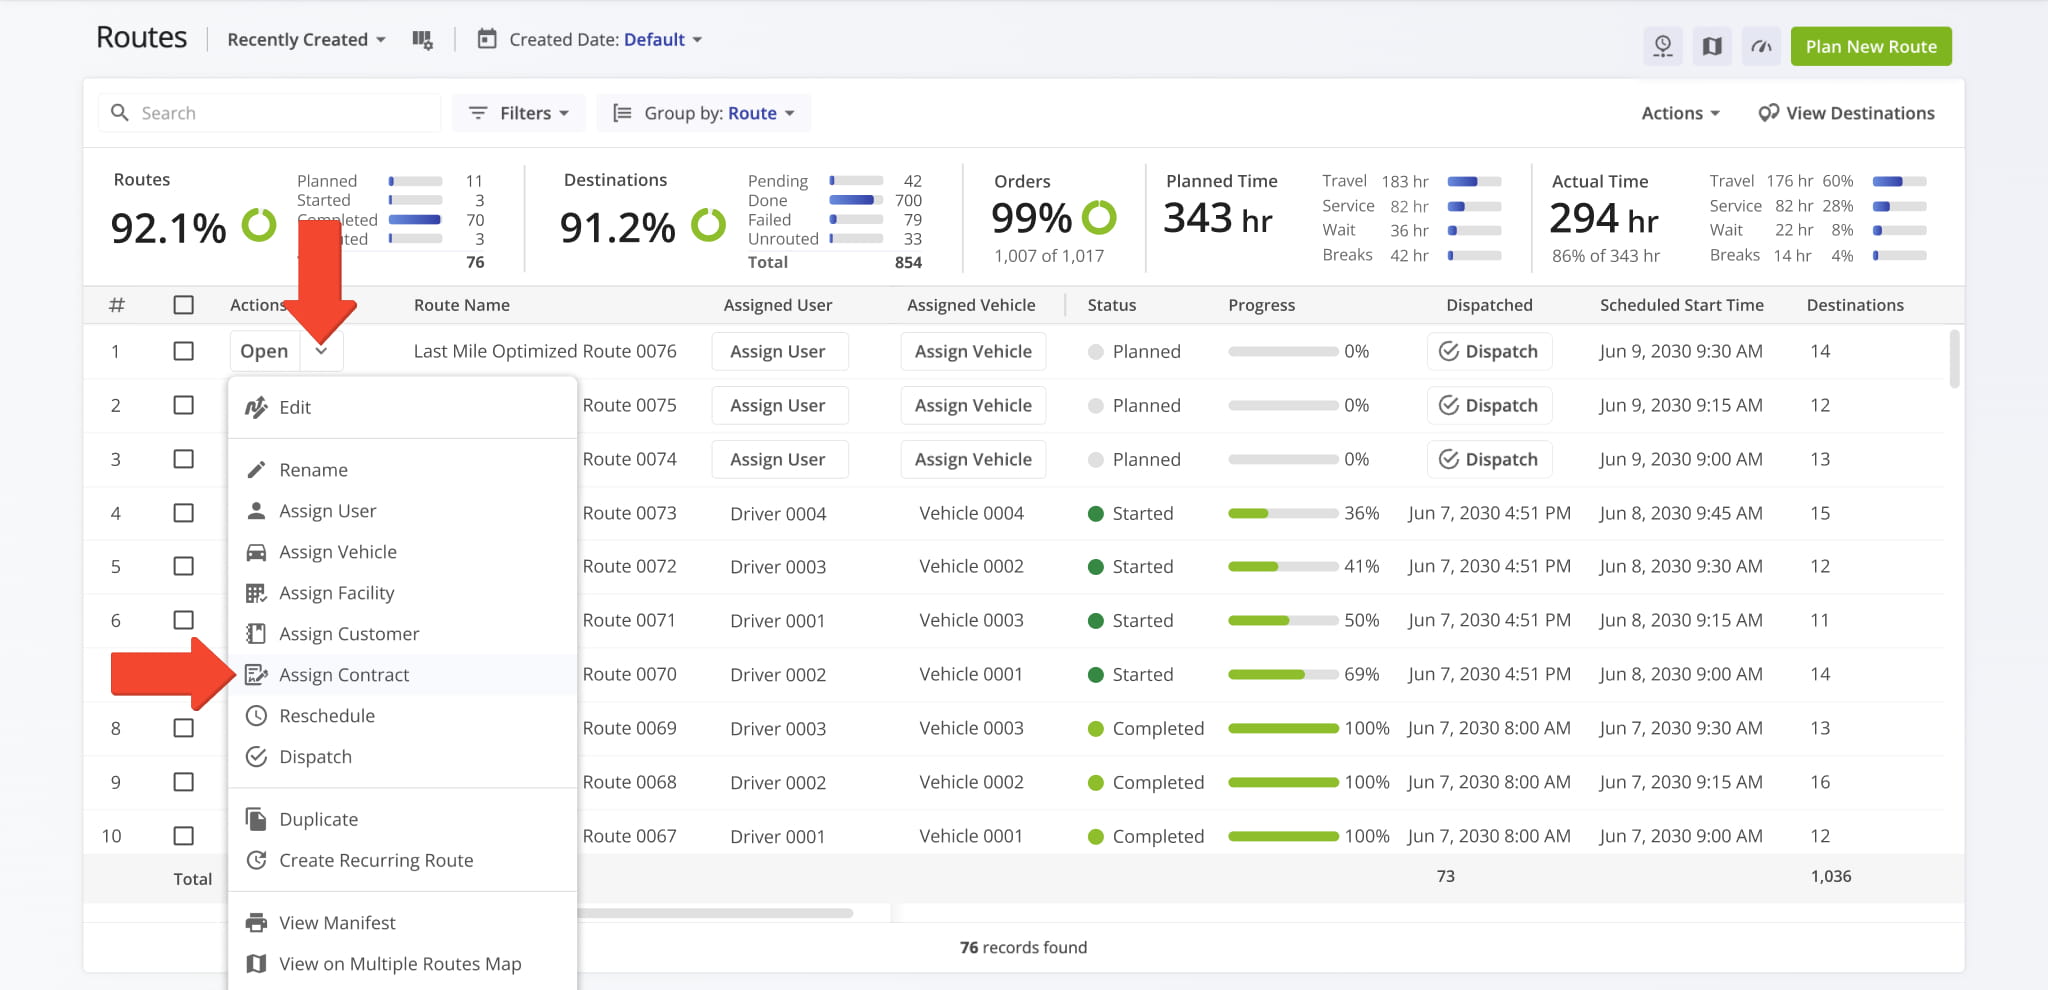
To create a clear link between operational routing data and contractual agreements, you can assign Contracts to routes. To do so, open your Routes Page, click the Down Arrow next to a route, and select “Assign Contract” from the menu.
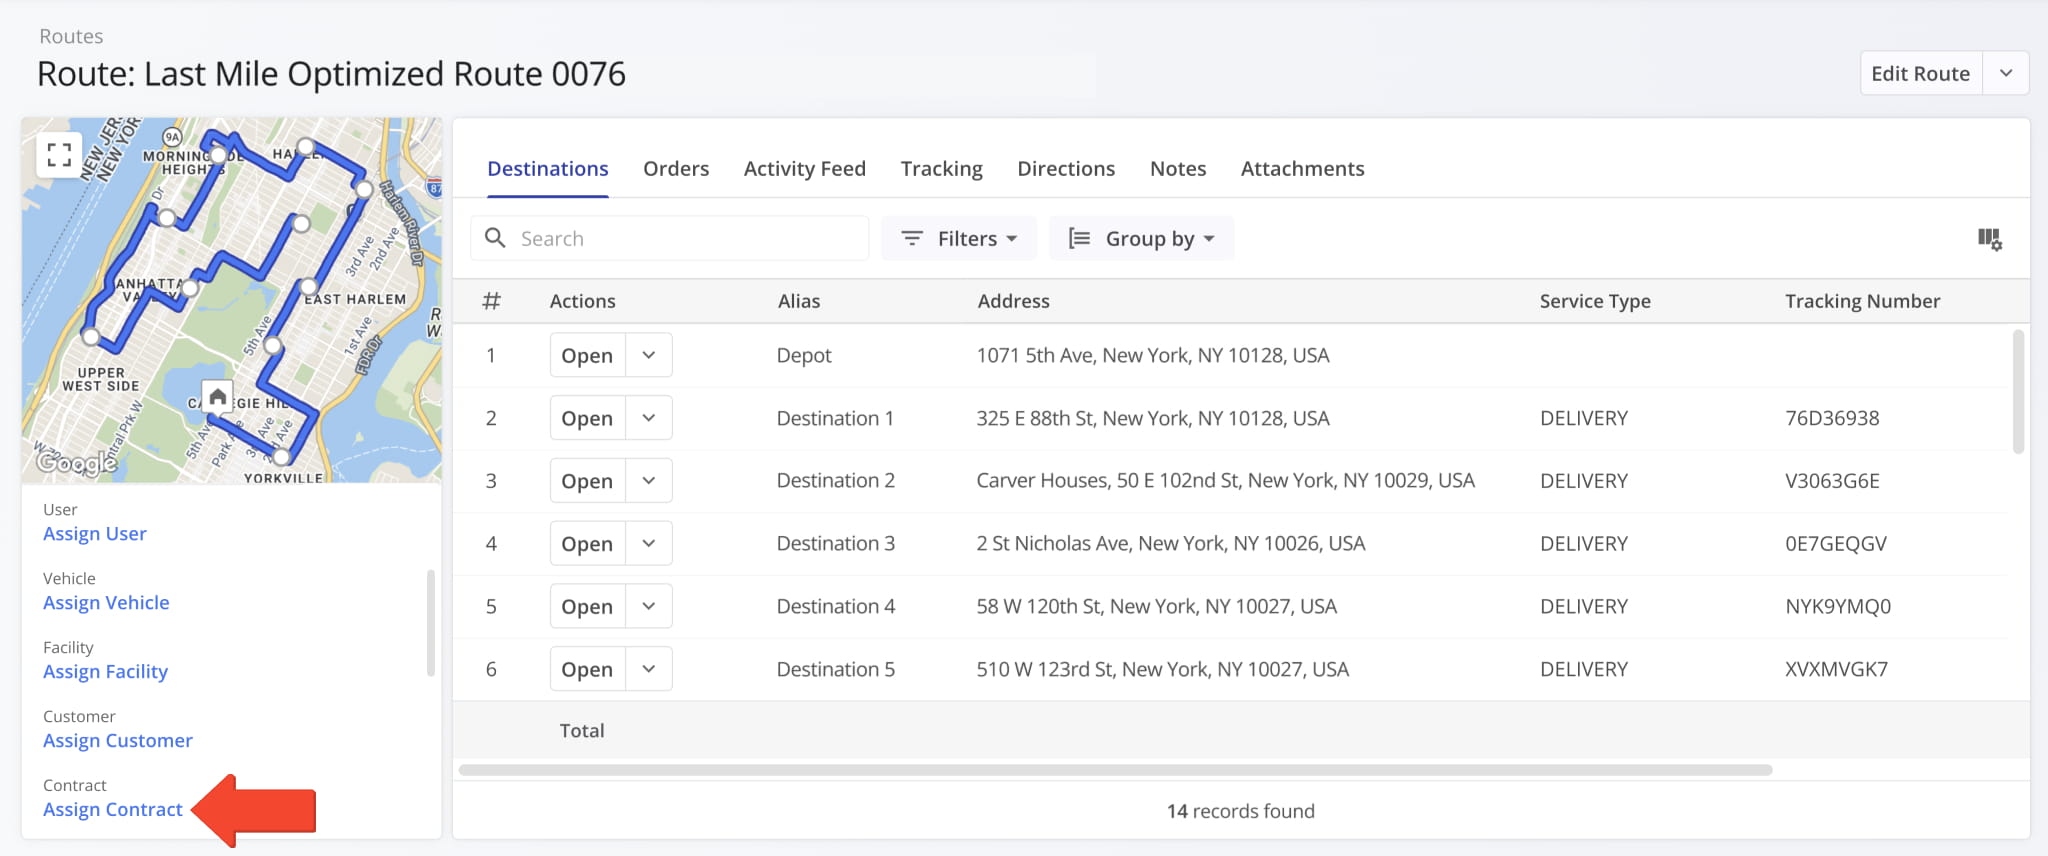
You can also assign Contracts to routes and see a route’s Contract attribution in Route Snapshots. To do so, simply scroll down to the “Contracts” field and click “Assign Contract” if one isn’t already associated with the route.
Visit Route4Me Marketplace to Check Out More Add-Ons:
- Route Optimization
Commercial Vehicle & Truck Routing
- Operations
Audit Logging and Activity Stream
About author: Kristian Andreev
Kristian is a Technical Writer at Route4Me. With over a decade of experience in writing and localization, he's an expert at communicating complex technical data in a clear, concise, and user-friendly way. Passionate about bridging the gap between engineers and users, he specializes in creating documentation to streamline onboarding, enhance product usability, and support global teams on the path to success.