Routes Page Guide – Account Routes List, Routes Map, Routes Timeline And More
The Routes Page offers enterprise businesses a centralized view of all planned, scheduled, and completed routes in your account. This guide provides an overview of the main interface elements so you can see how the Page is organized and where key tools are located. It highlights key features that help you view and manage routes and support last mile route optimization at a glance.
Table of Contents
Customize Data Columns – Control Which Route Details Are Displayed
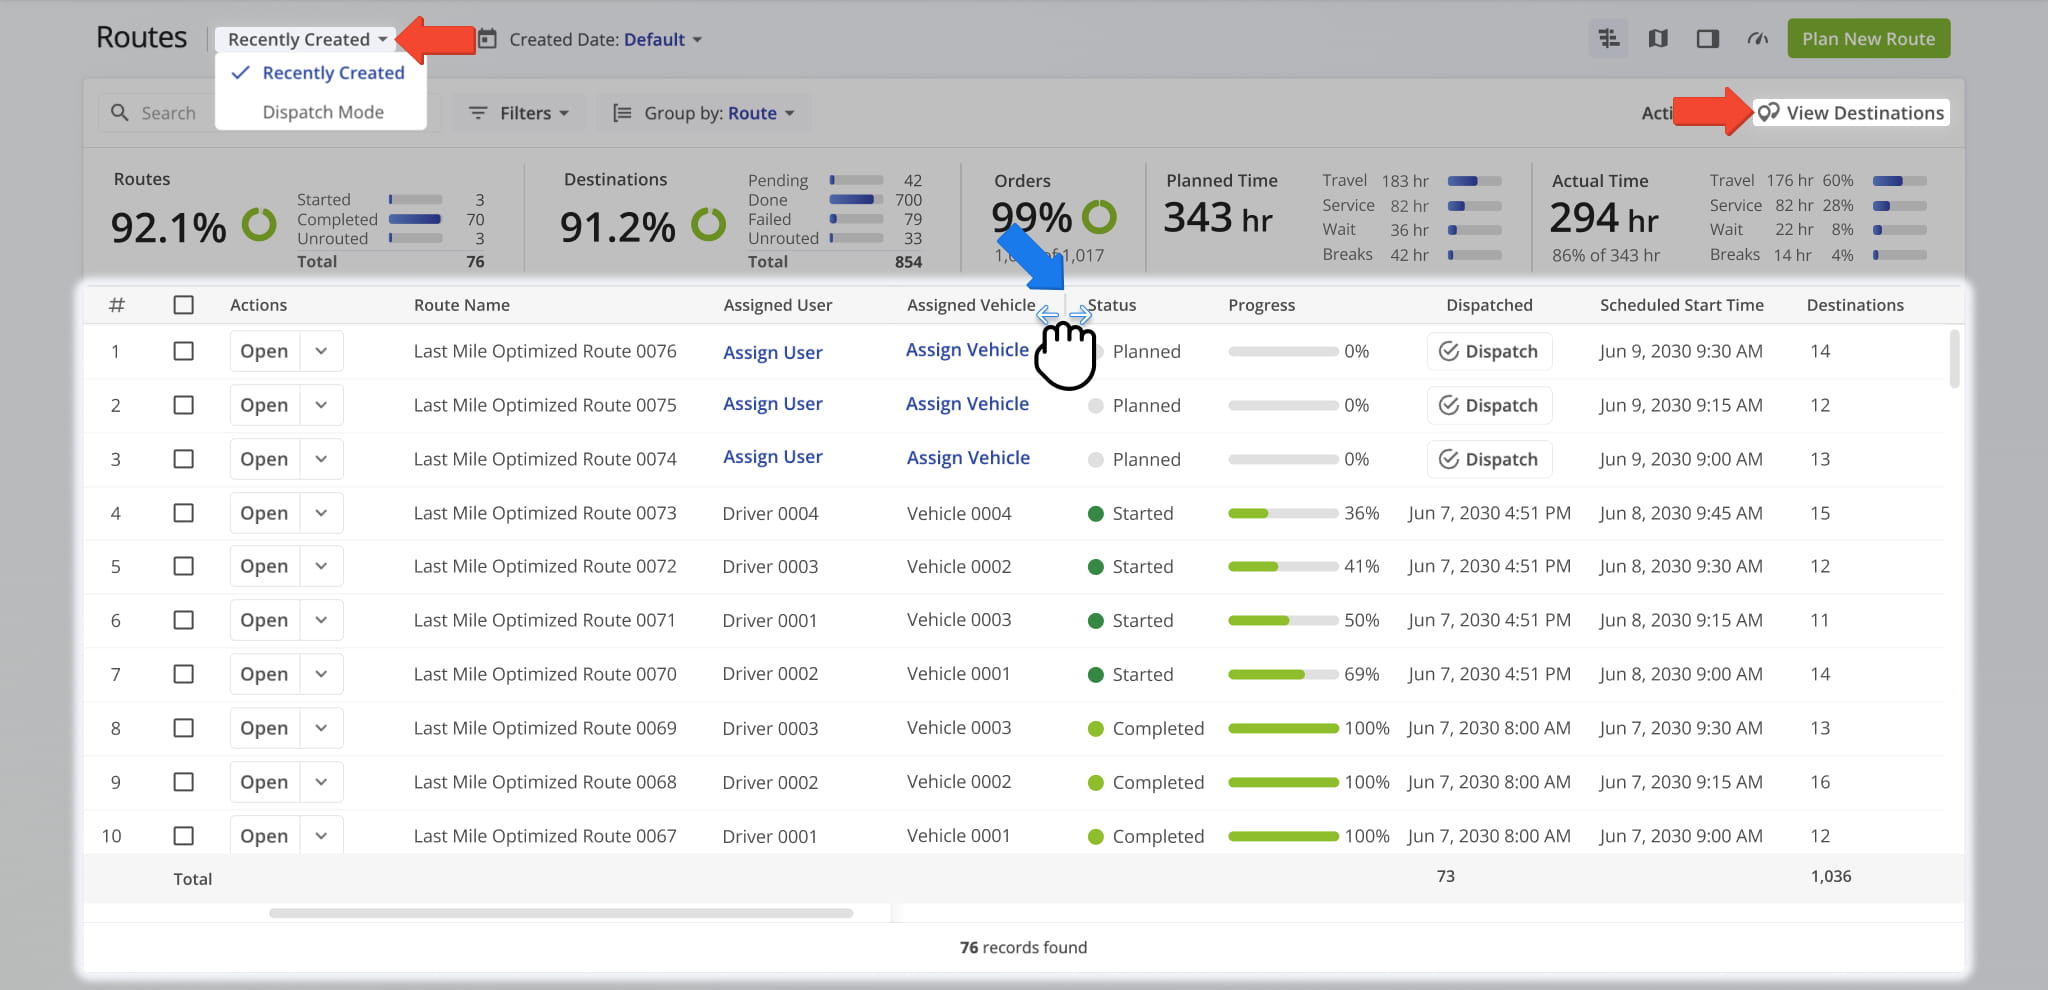
The Routes Page is a flexible data table that lets you control which route details appear on screen. You can show or hide data columns, reorder them to match your workflow, and adjust column widths to make specific route information easier to scan.
The Routes Page offers different View Modes: “Recently Created“, “Dispatch“, and “Destinations” View Mode. Each Mode can have a different column layout, letting you see the data you need in the way that works best for that Mode.
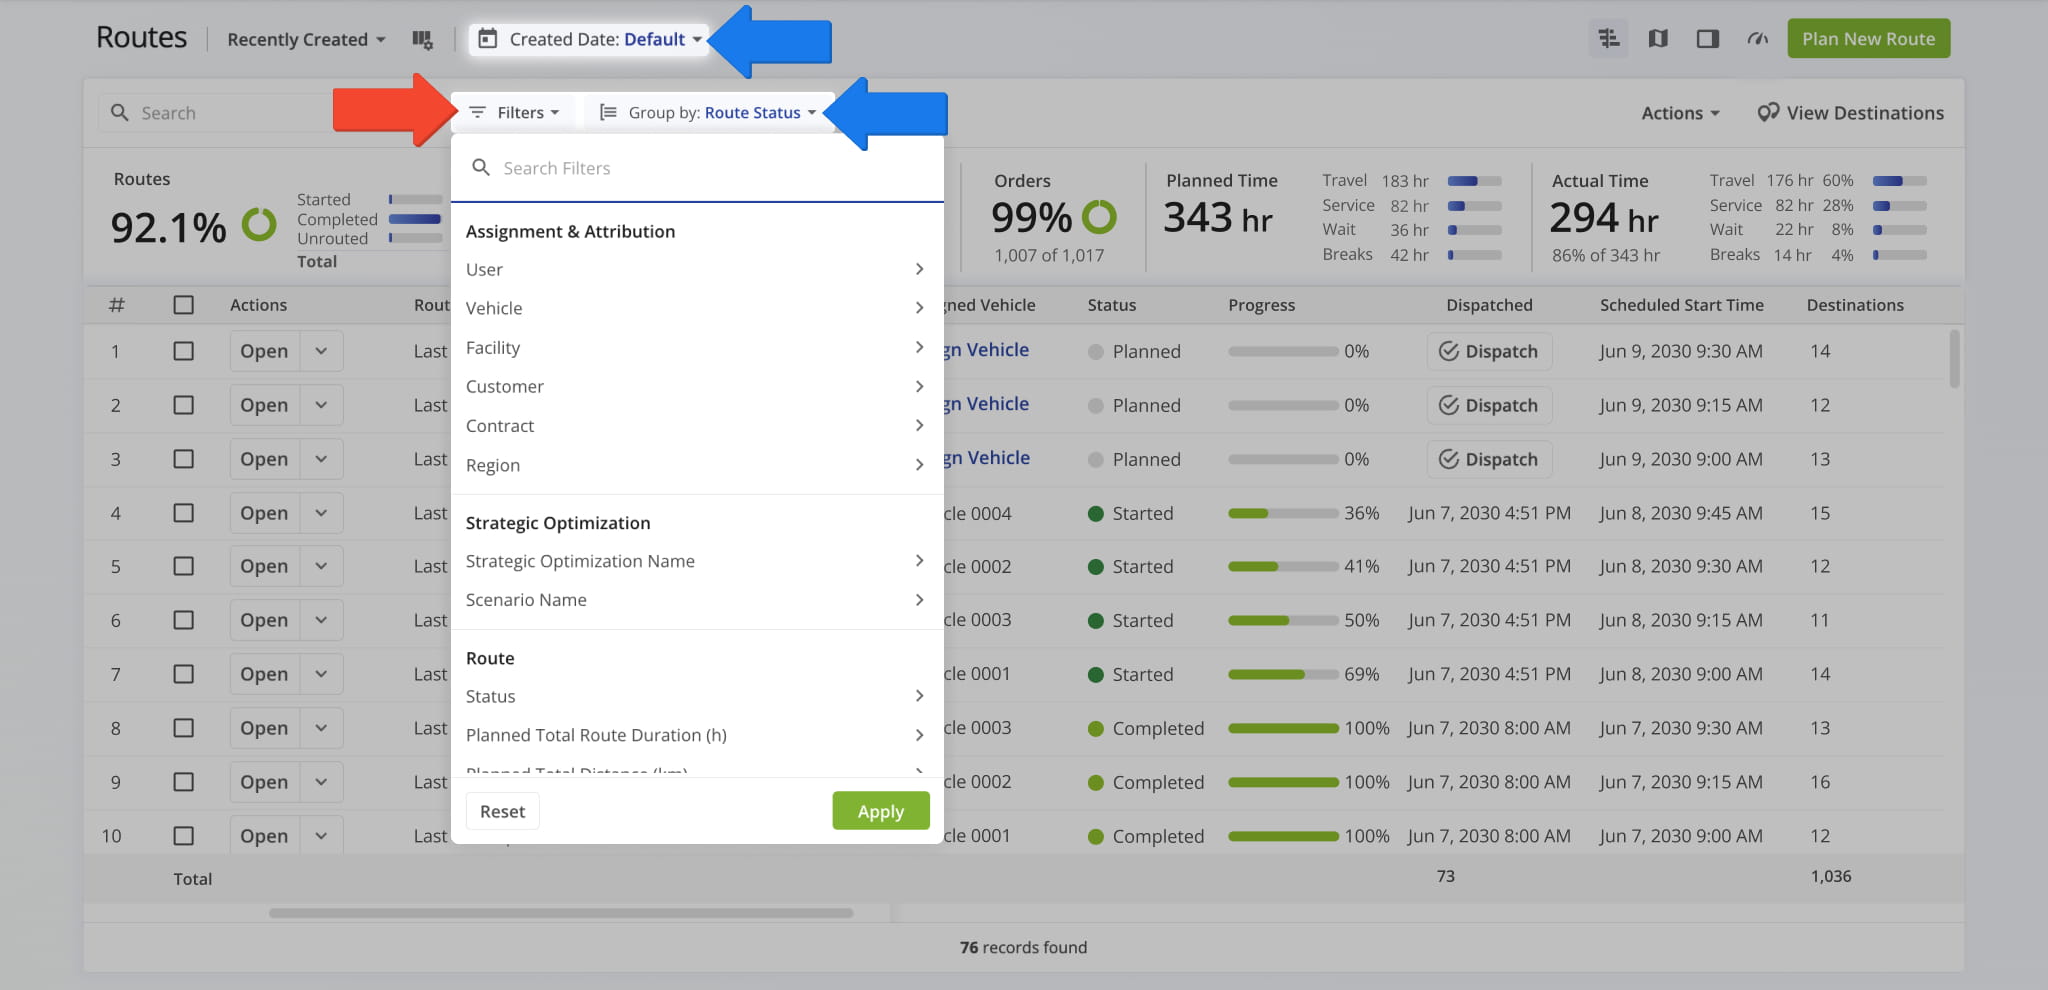
Filter And Group Routes – Easily Navigate And Organize Your Routes
Filtering and grouping tools make it easy to manage even the largest route databases.
Use filters to narrow routes by attributes such as status or assigned user. Use the “Group by” option to organize routes by shared characteristics, such as facility or vehicle, so you can quickly review routes with similar attributes.
You can also use the “Created Date” field to filter routes by a specific date or date range.
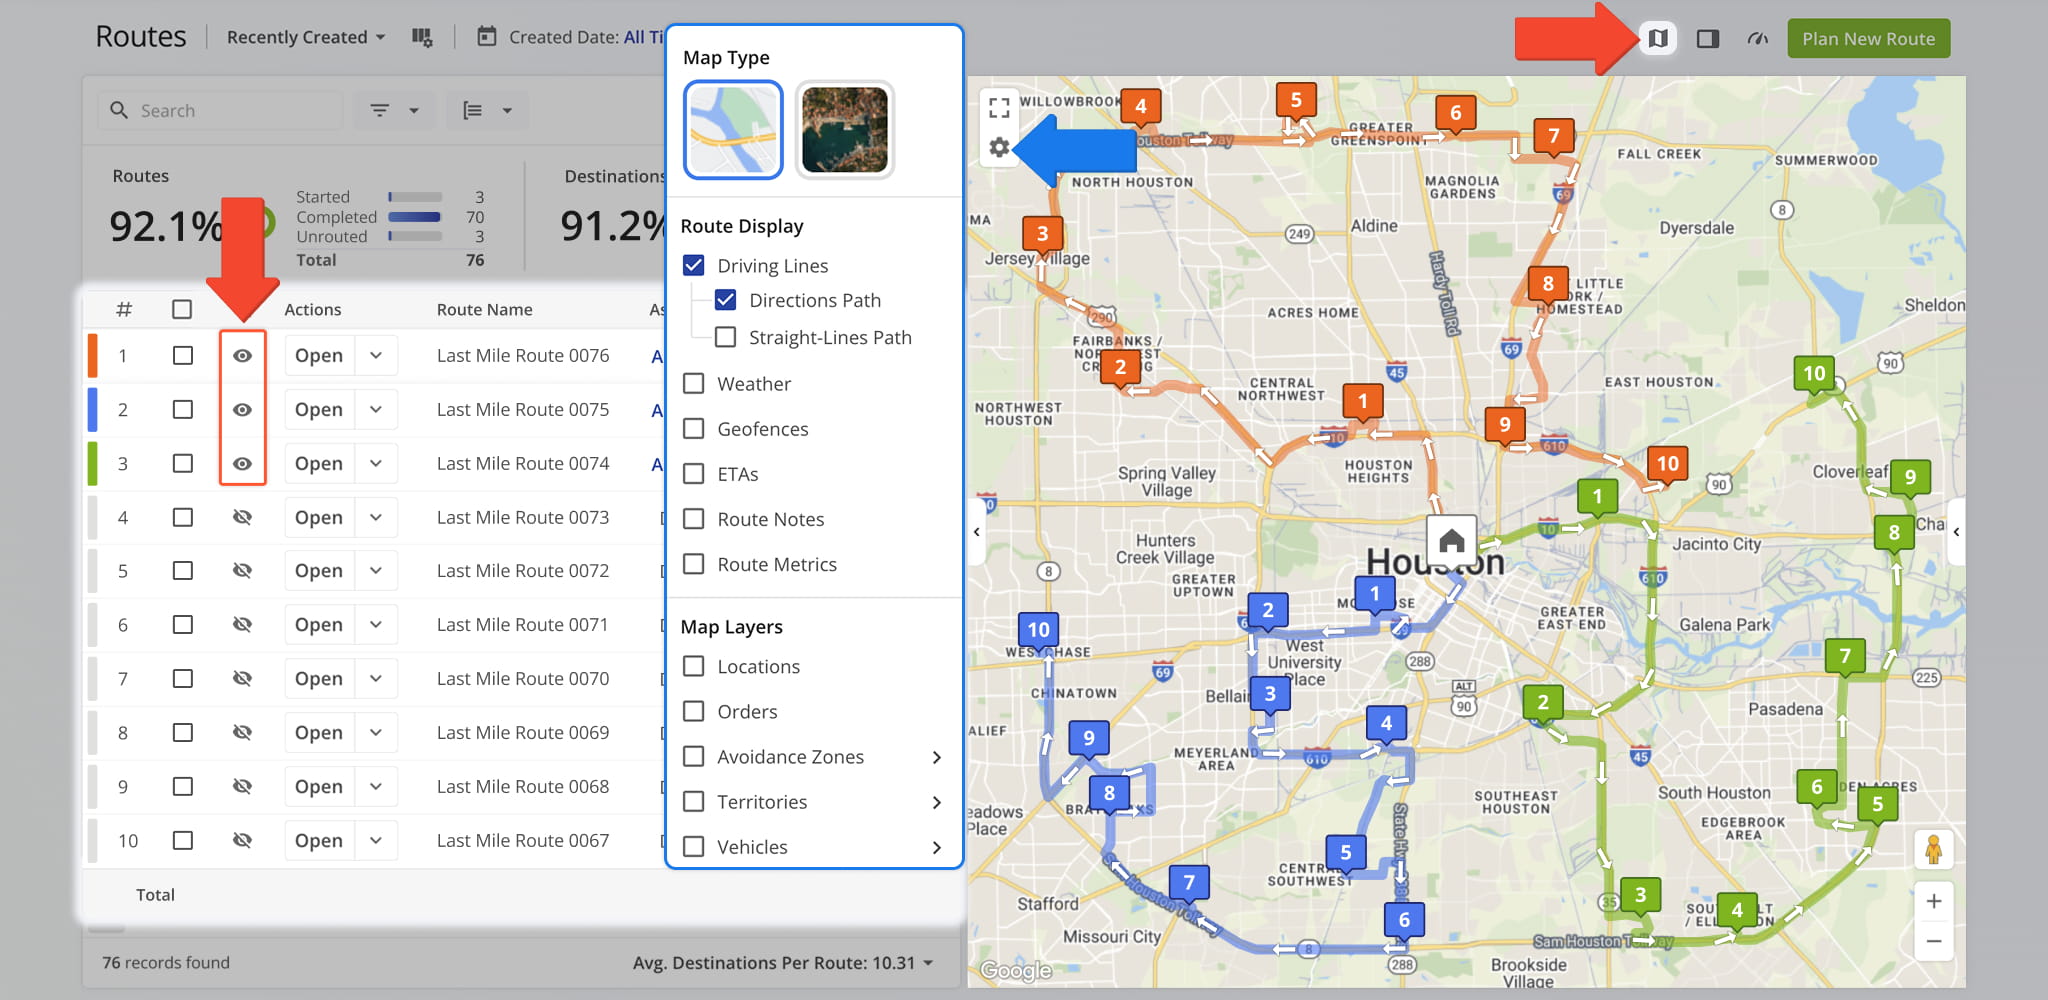
Routes Map – Visualize Routes On A Dynamic Map
The Routes Map provides a visual representation of one or more selected routes.
You can choose which routes appear on the map and switch between map styles. You can also select Route Displays and Map Layers to view route territories, geofenced areas, and other map overlays.
The Routes Map helps you visualize route distribution, the areas served, and how selected routes relate to each other in real time.
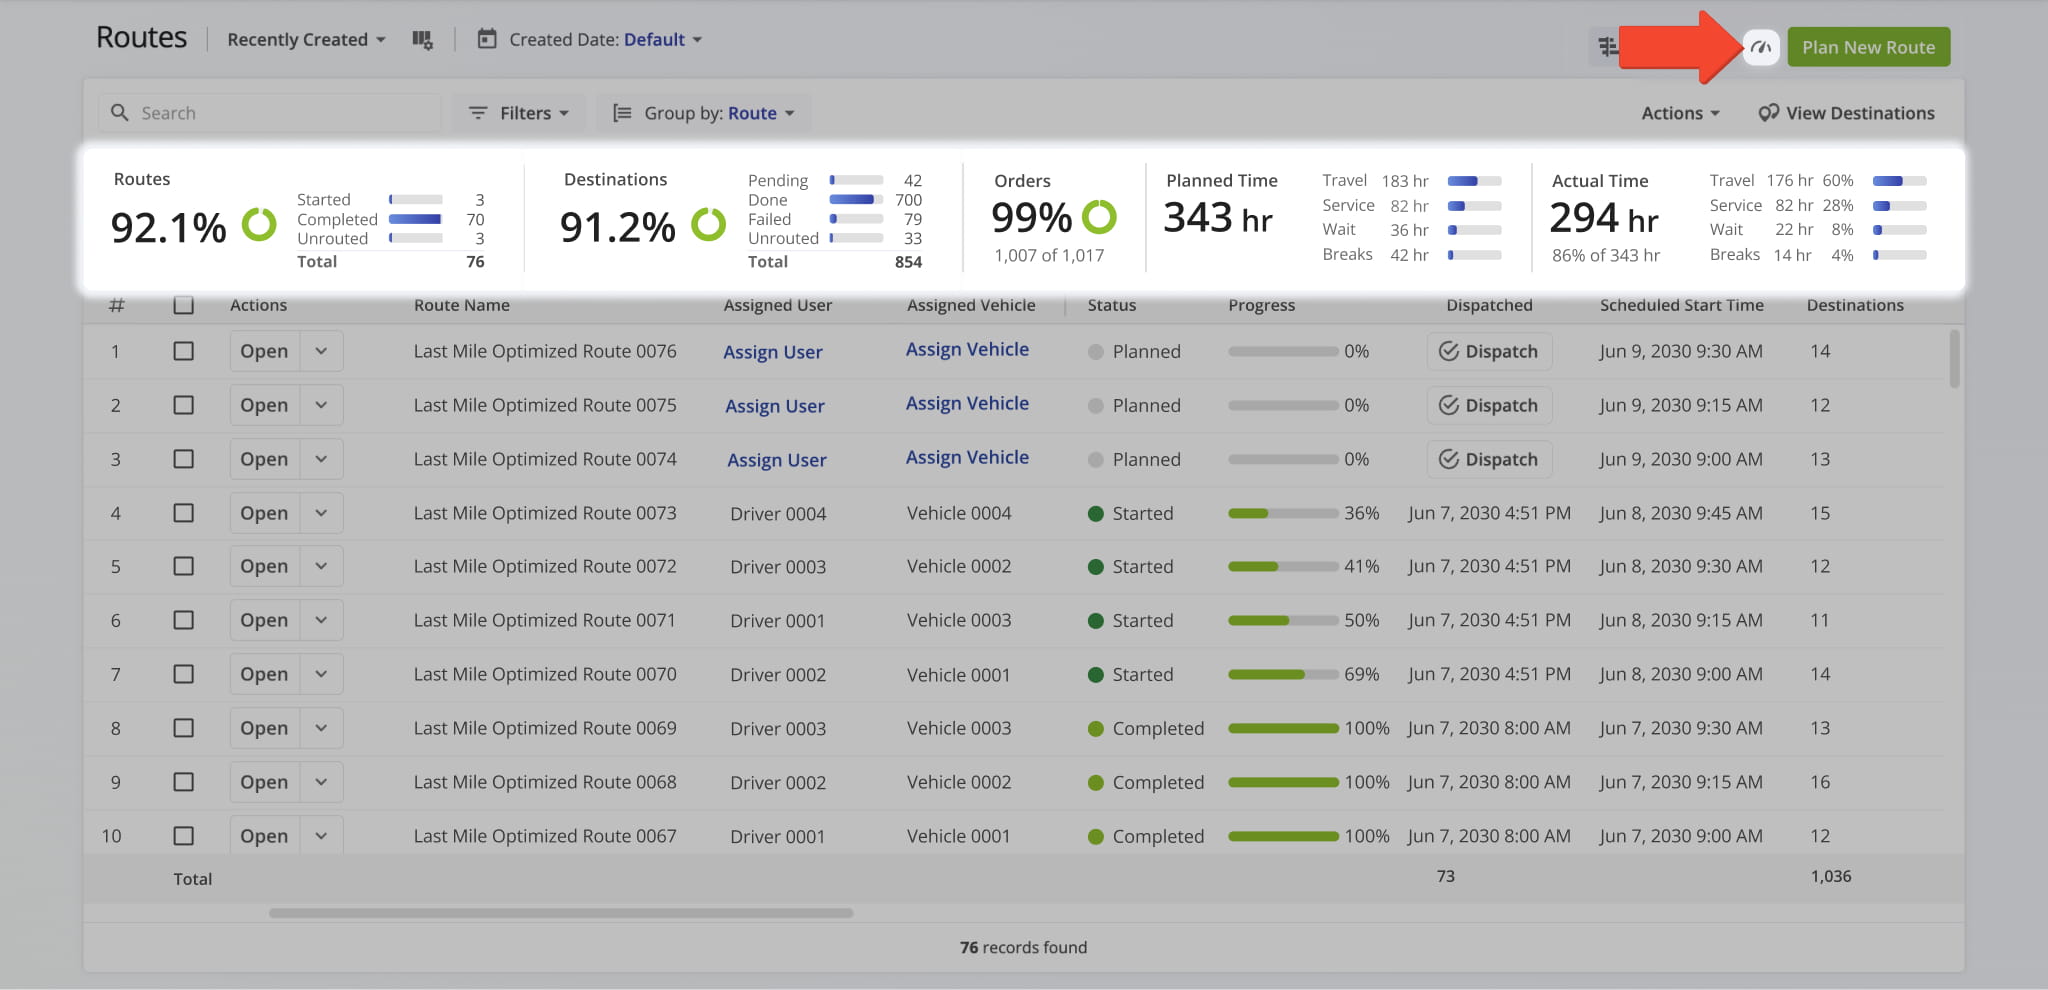
Performance Metrics – Track Route Completion And Operational Data
The Performance Metrics panel presents a concise summary of statistics for the routes currently shown on the screen. This includes such data as completion rates, destination counts, and planned totals for time or distance.
It offers a quick overview of progress and operational efficiency across all routes in your list.
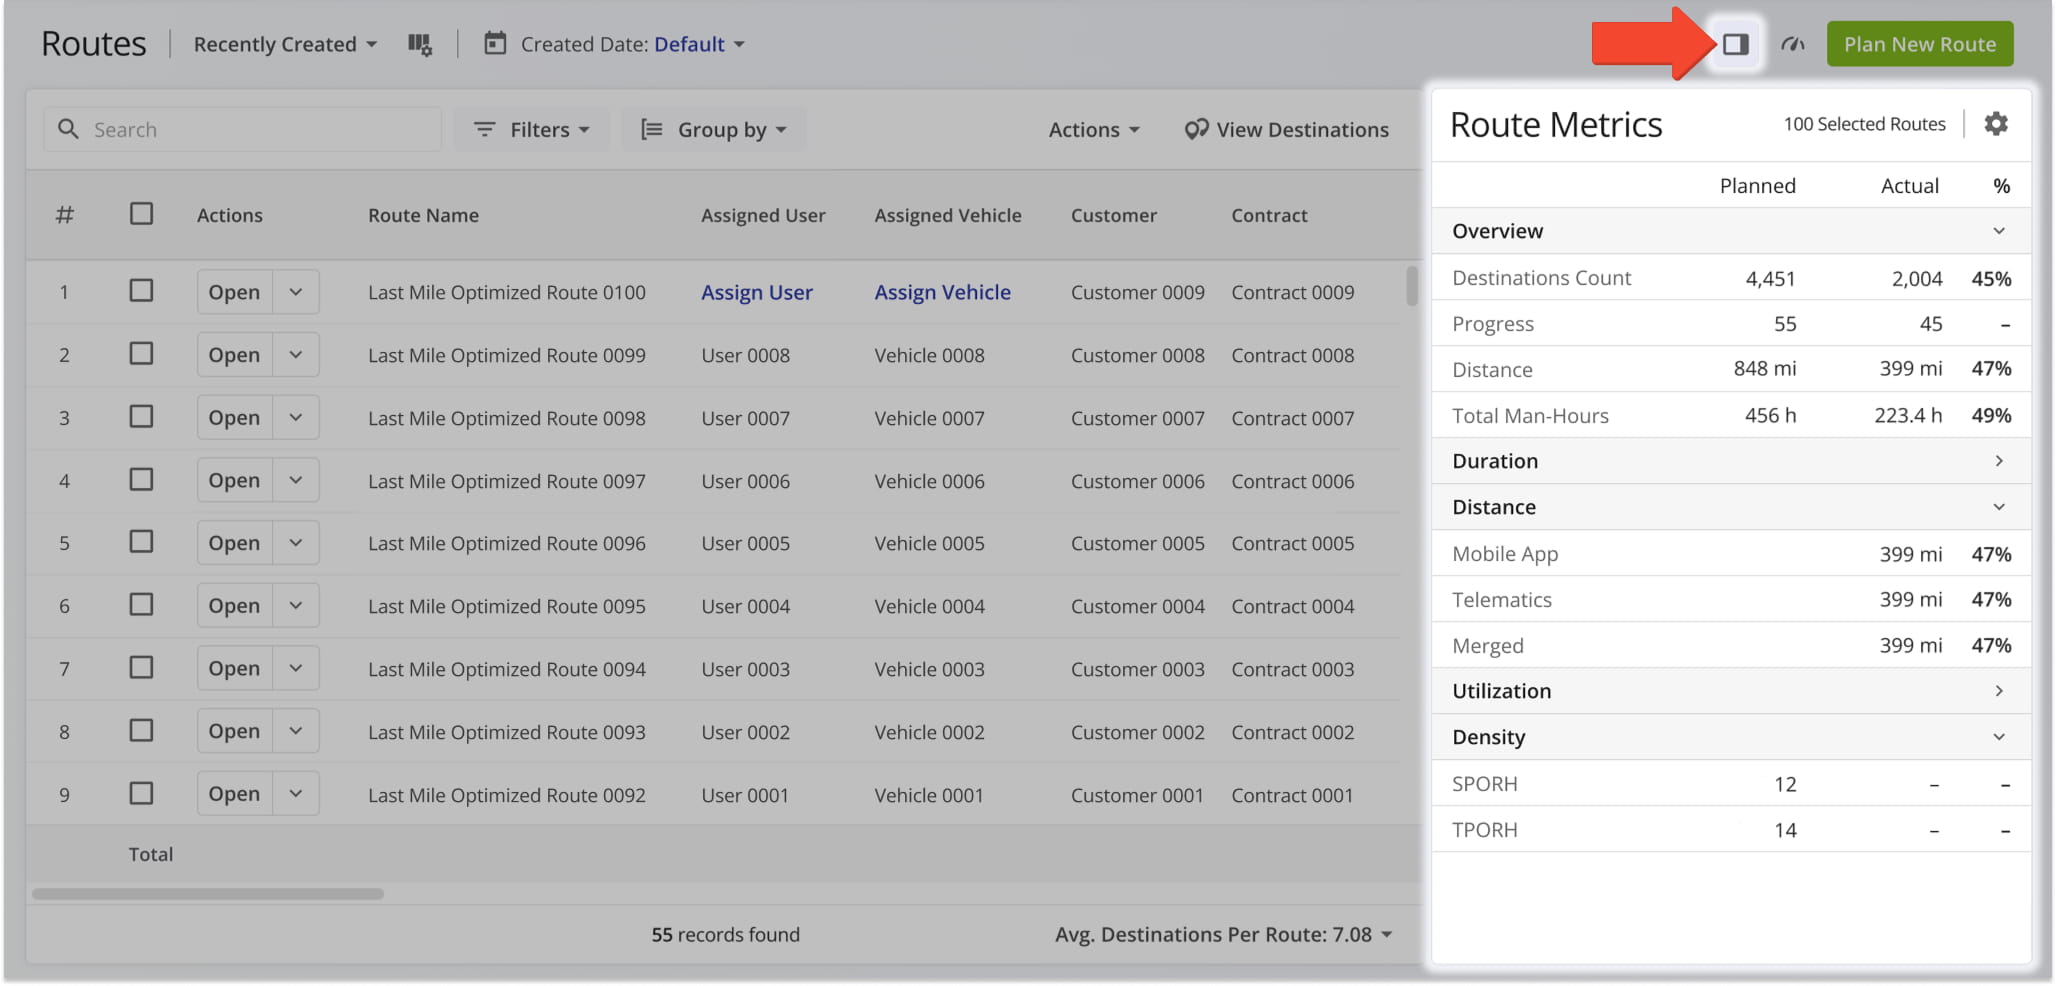
Routes Performance Analysis – Compare Route Metrics
Use Route Performance Analysis to review key operational metrics for selected routes. The metrics sidebar provides an overview of planned and actual route performance, helping you quickly evaluate route progress and operational efficiency.
The displayed metrics automatically update based on the routes shown in your current view. When you adjust filters, grouping options, or view modes, the panel refreshes to reflect the corresponding route performance data.
Routes Timeline – View Route Start Times And Stop Sequences
The Routes Timeline offers a visual overview of route schedules and destination sequences. It shows when routes begin, how their stops are arranged, and how multiple routes overlap throughout the day.
The Timeline makes it easy to review scheduled start times and stop sequences, compare workloads, and understand scheduling patterns across your operations.

Route Snapshots – Summarize Route Details And Performance
From the Routes Page, right-click any route to access its Route Snapshot. The snapshot provides a summarized view of the route’s details, including its destinations, orders, and completed activities. It also displays a map of the route and its stop sequence.
This gives you a clear picture of the route’s performance and structure without opening each stop individually.
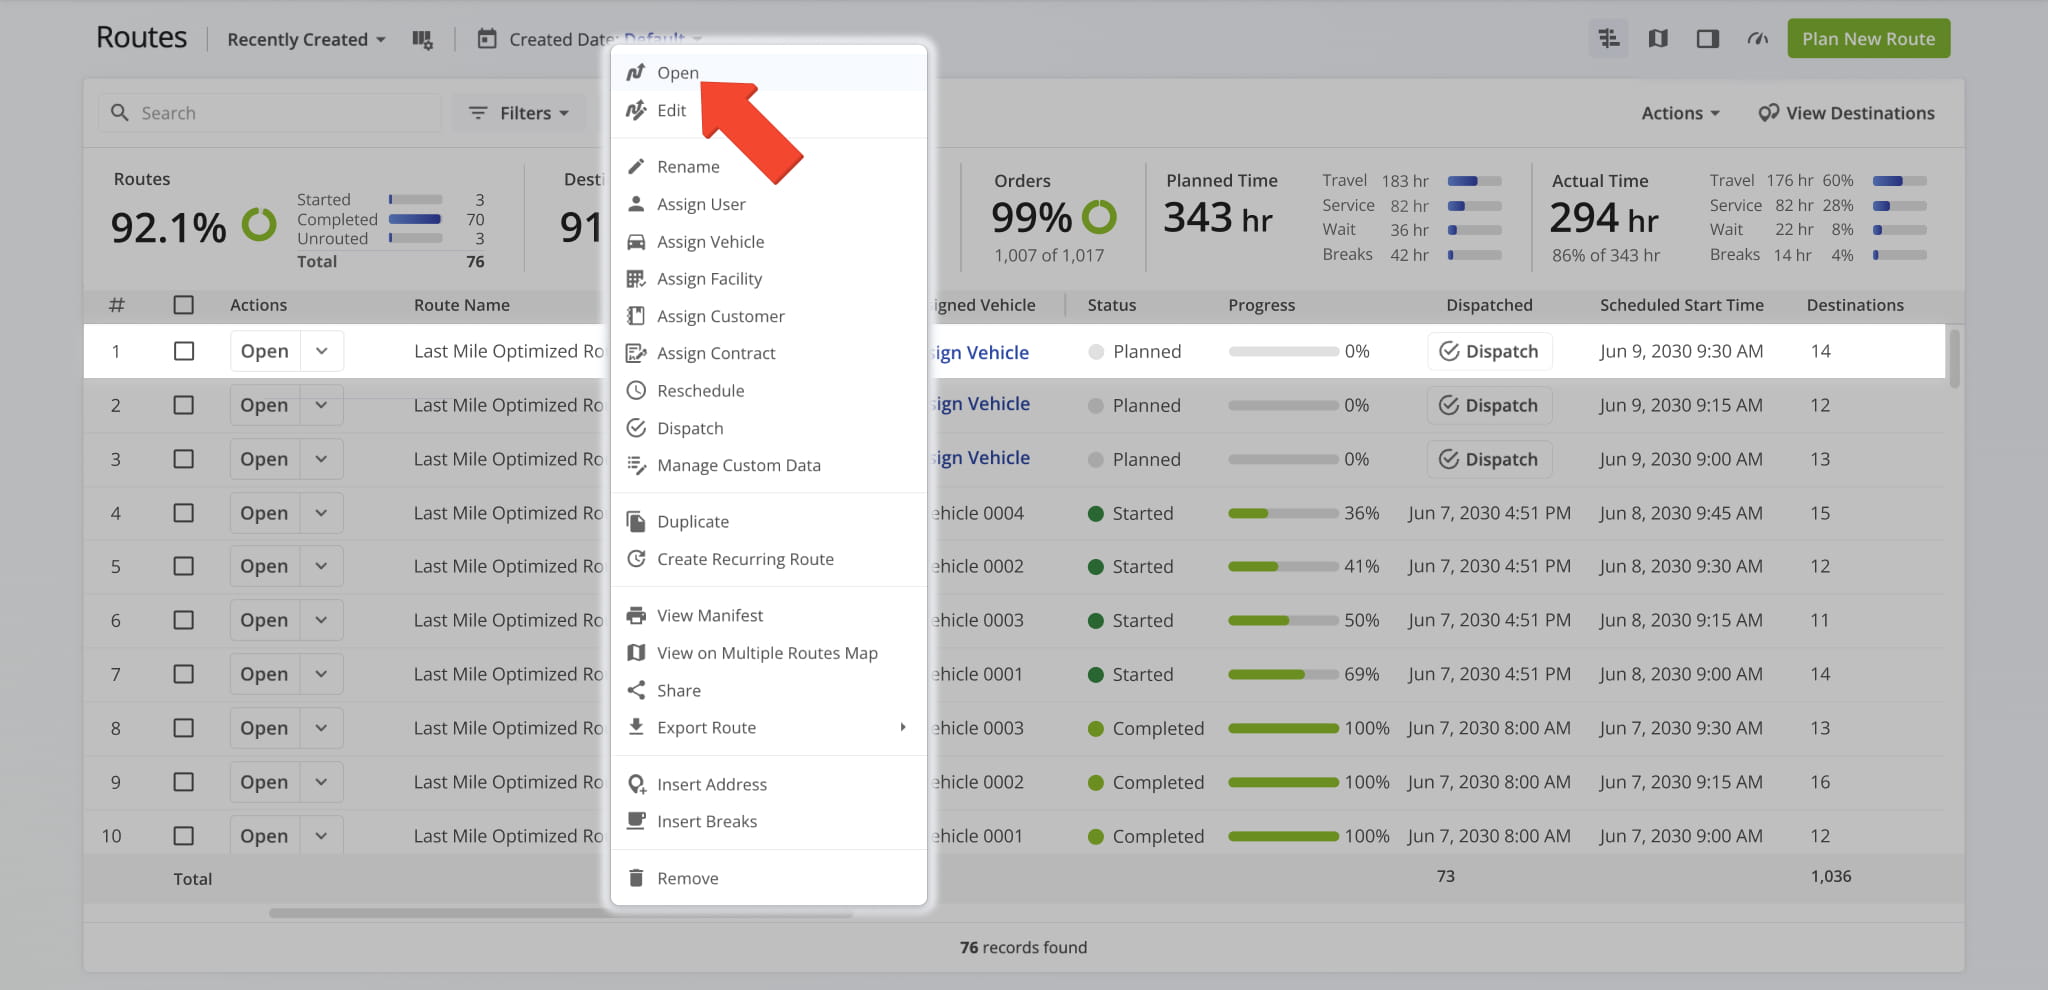
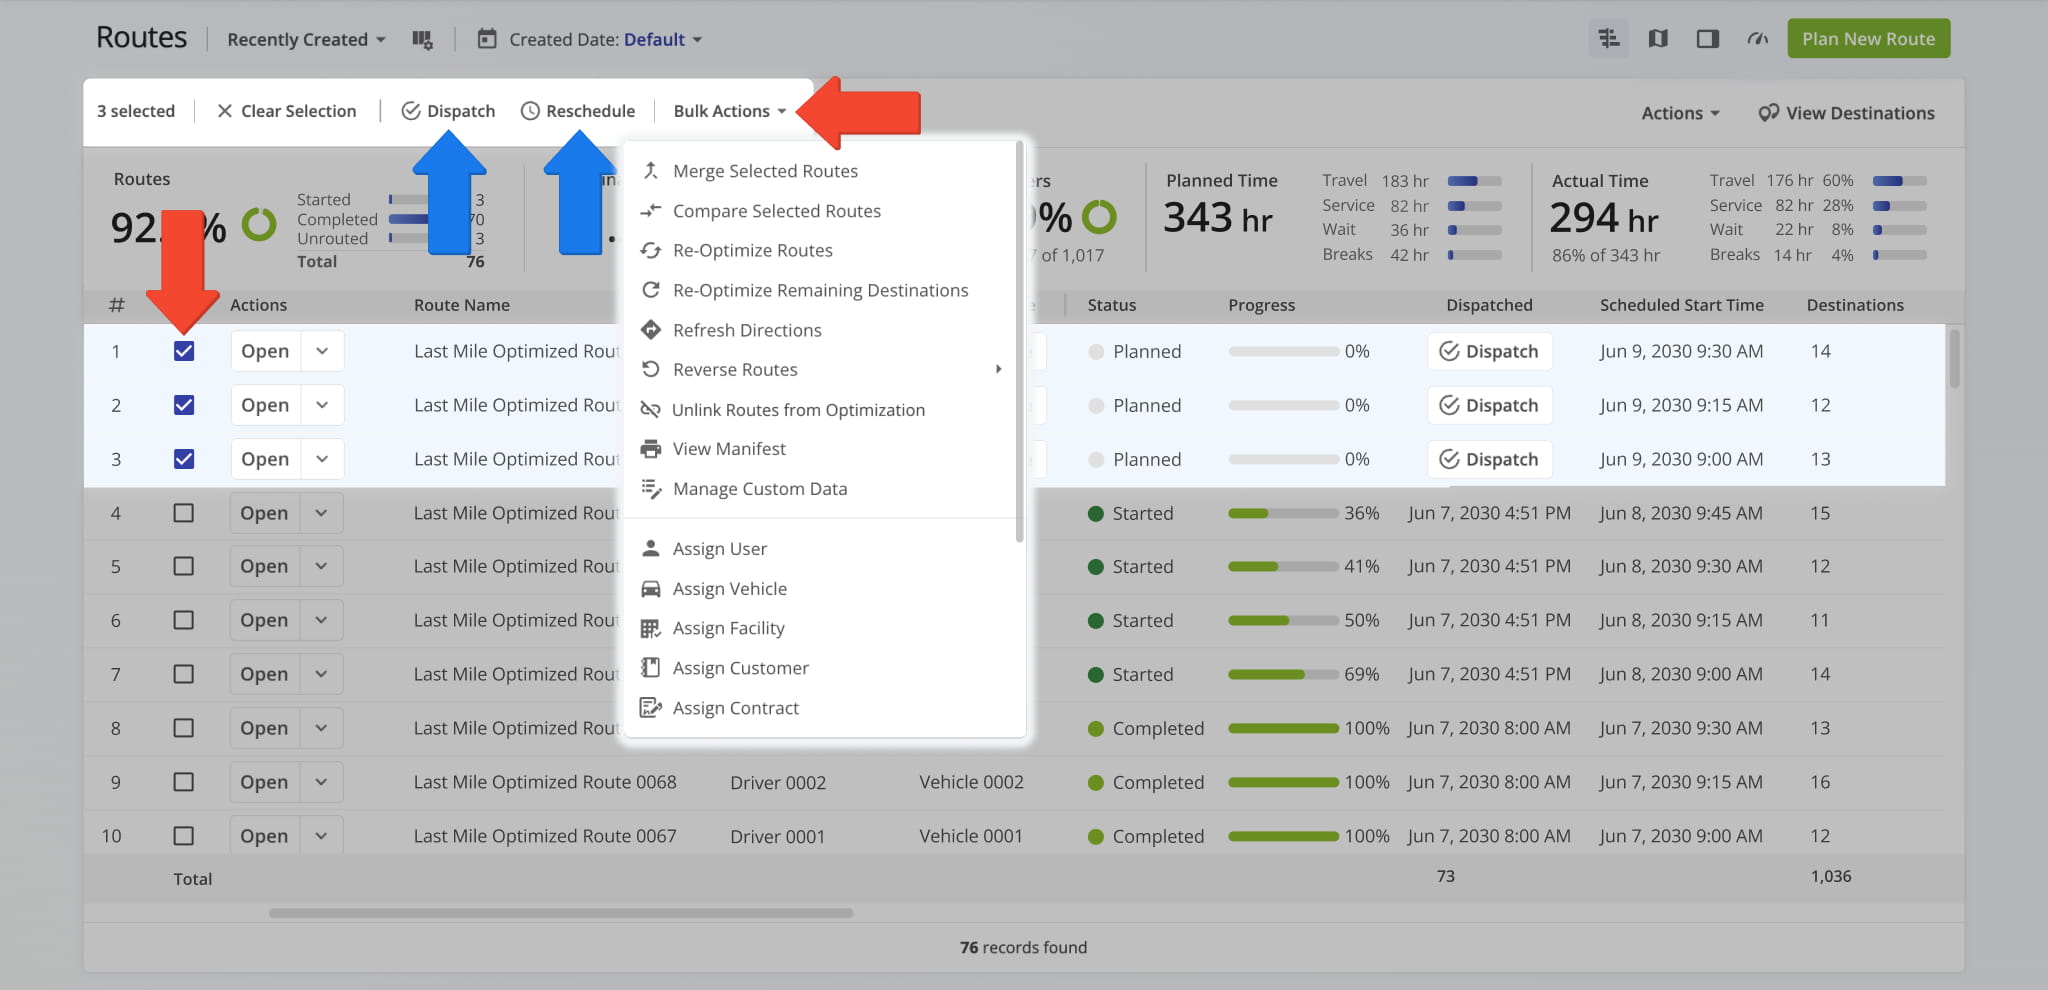
Route Management Actions – Assign Users, Update Schedules, And More
From the Routes Page, you can perform a variety of management tasks. Depending on your user permissions, you can open routes, assign drivers or vehicles, dispatch routes, modify basic details, or access related views such as Destinations Mode.
These actions allow you to oversee day-to-day operations directly from the Routes Page, your central route database.
Visit Route4Me's Marketplace to Check out Various Modules and Add-Ons:
- Route Optimization
Time Windows
- Operations
Advanced Team Management Add-On
About author: Daniel Archer
With a background in pedagogy and writing instruction, Daniel is a former tenured English Instructor who, after nearly 20 years of teaching, transitioned into content strategy and leading writing teams for global brands. Now, as Technical Documentation Manager at Route4Me, he translates complex logistics technology into clear, accessible content that empowers users.