Dispatch Routes And Notifications – Automatically Send Customer Order Status Alerts
Route4Me’s last mile routing software helps you streamline dispatch management, dispatch routes with ease, and keep customers informed with automated order notifications. Once you dispatch routes from the Routes List, Route Editor, or Routes Map, all associated contacts receive SMS and email updates with order status details, including when, where, and how their orders will be completed. They also receive a link to Route4Me’s Online Order Tracking Portal for real-time updates. Learn how Route4Me’s customer notifications and tracking tools work, and how to use them to improve your last mile delivery experience.
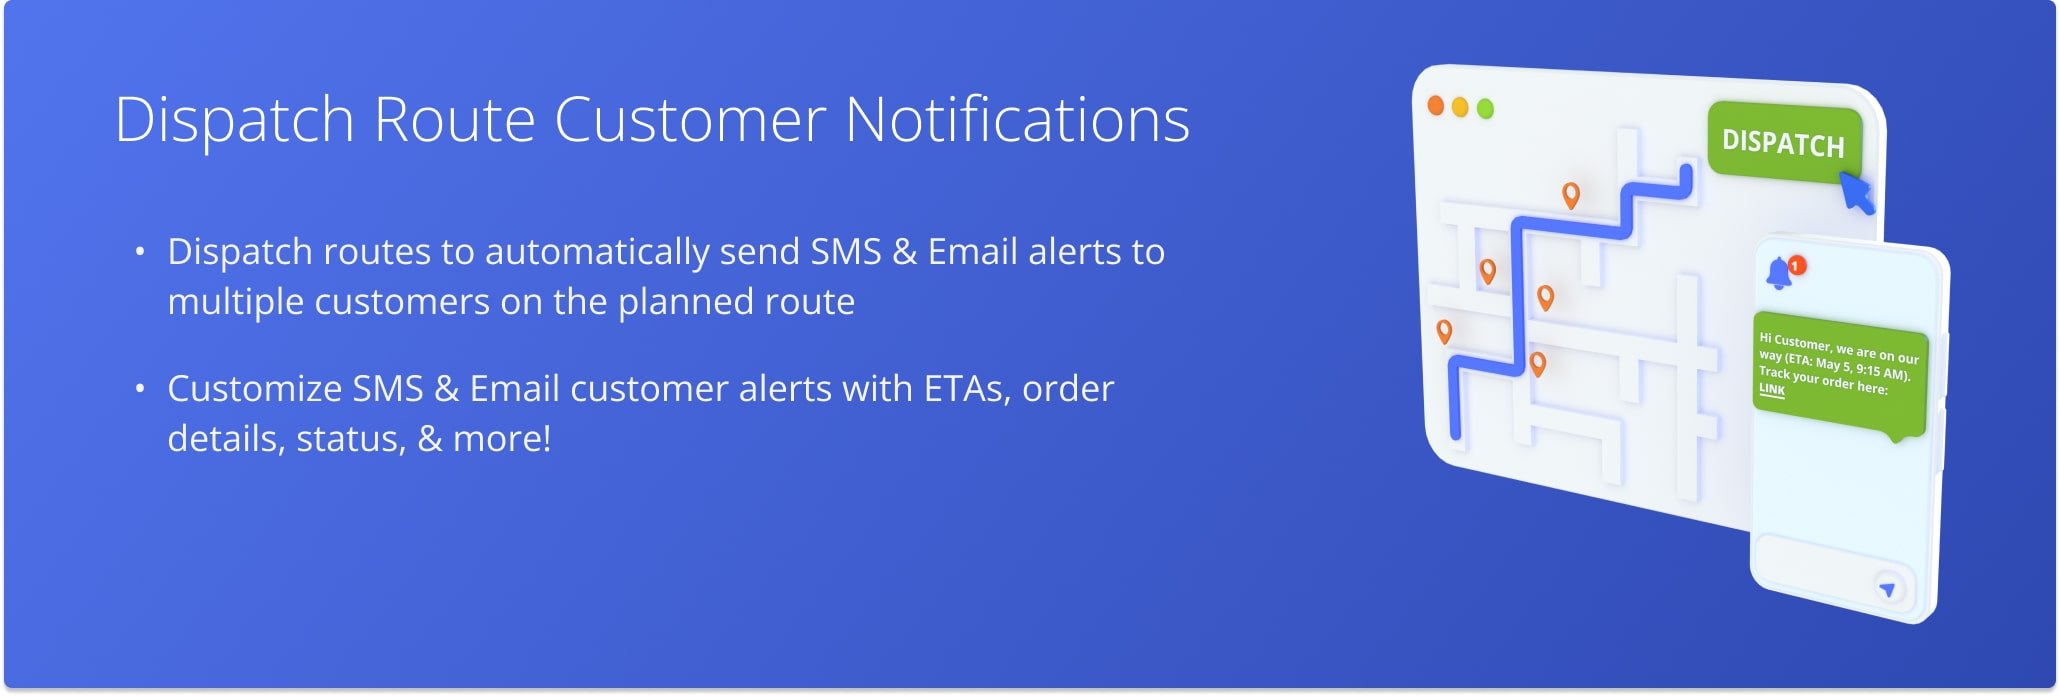
Table of Contents
Send Route Dispatch Customer Notifications Directly From Routes List
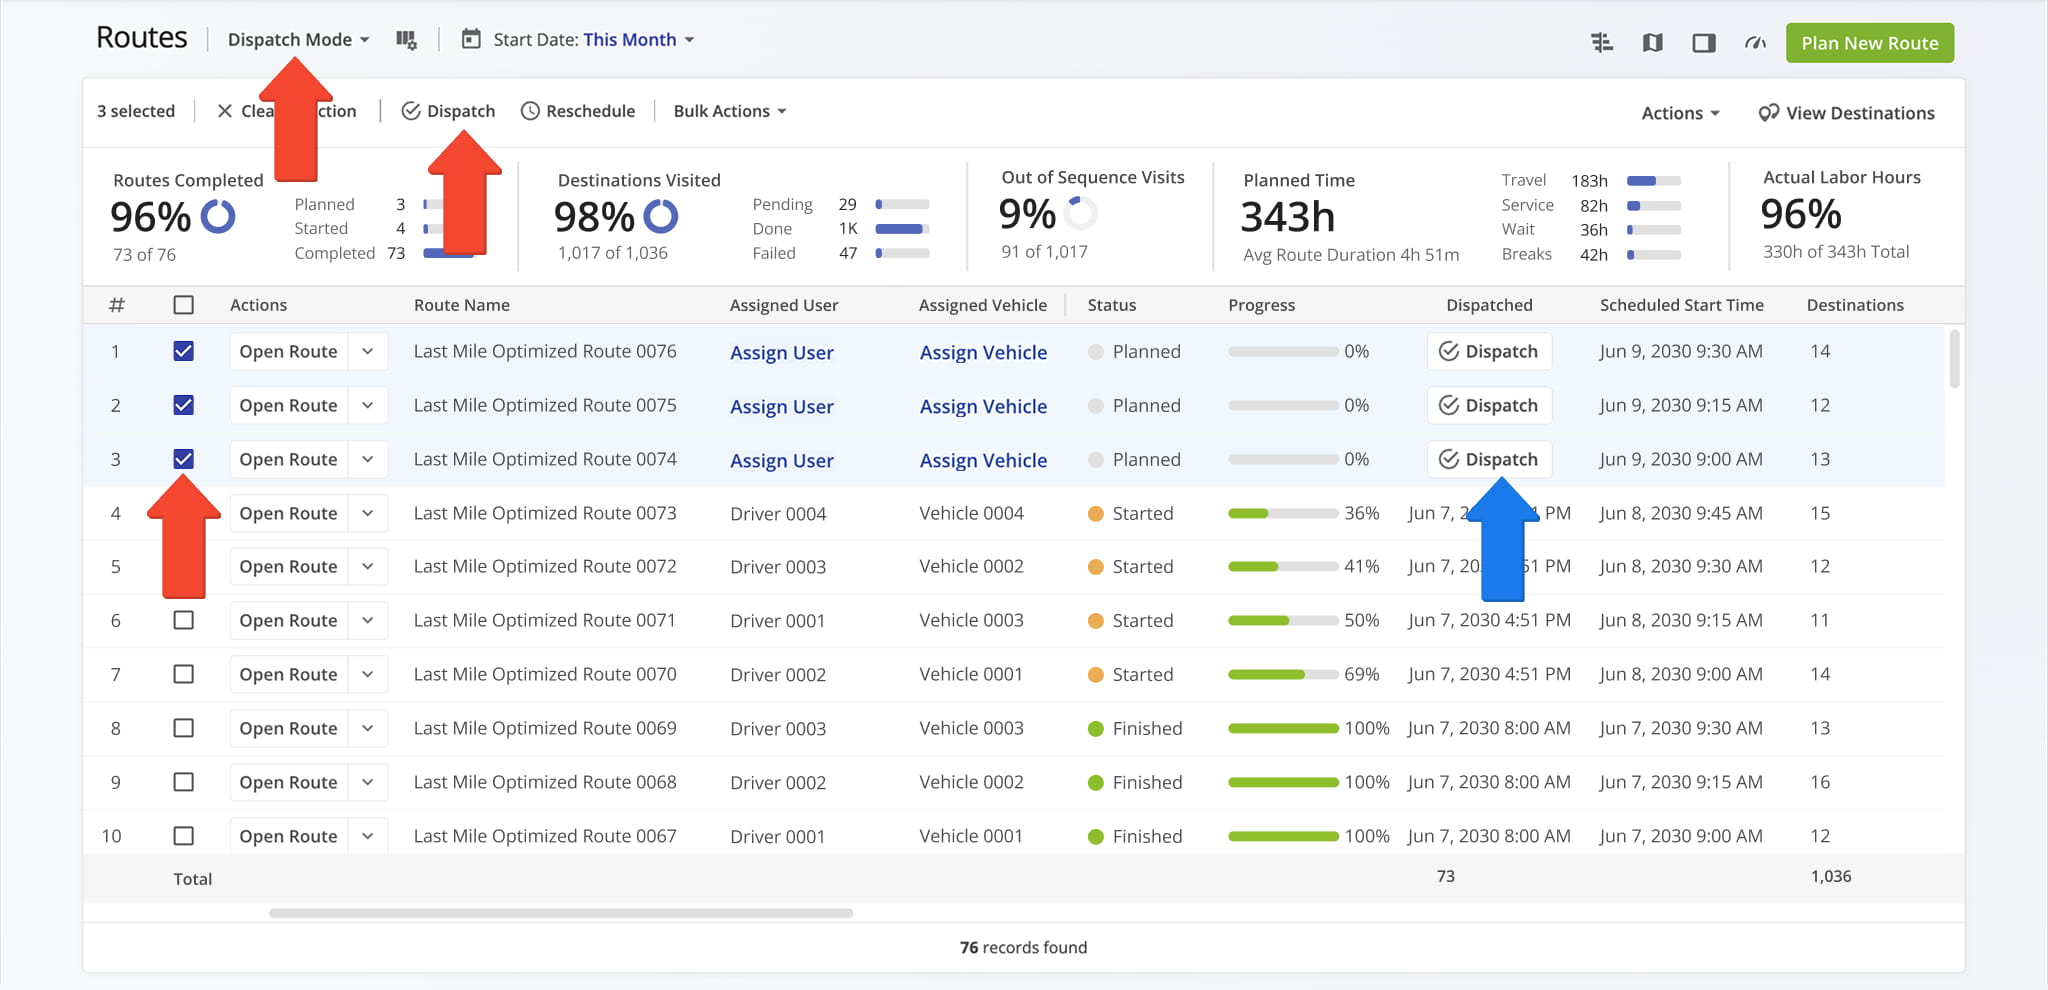
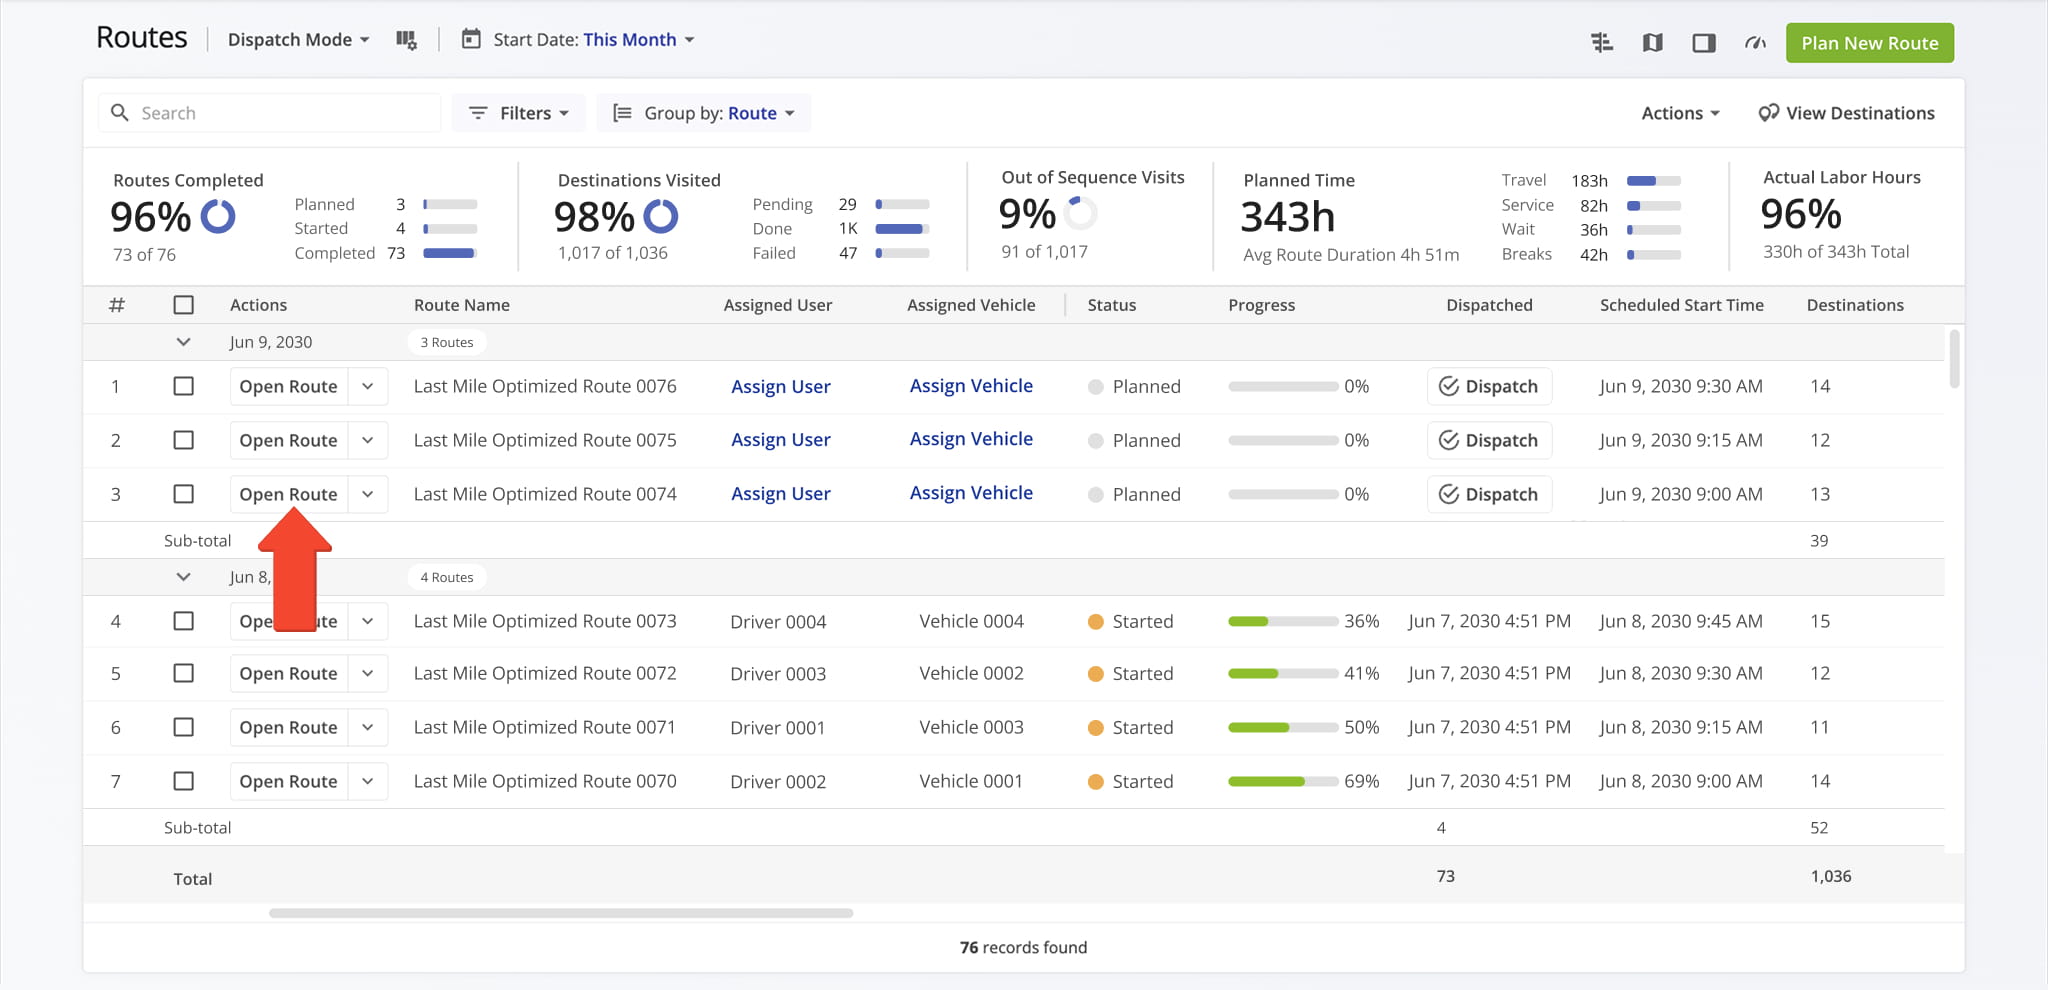
When dispatching route notifications from the Routes List, you can simultaneously send automatic notifications for multiple routes with a single click. To access your Routes List, click “Dynamic Routing” > “Routes” in the Navigation Menu.
From your Routes List, check the box next to all concerned routes. Then, select “Dispatch Mode” > “Dispatch” in the top menu bar. Or, to dispatch an individual route, click the “Dispatch” button next to it.
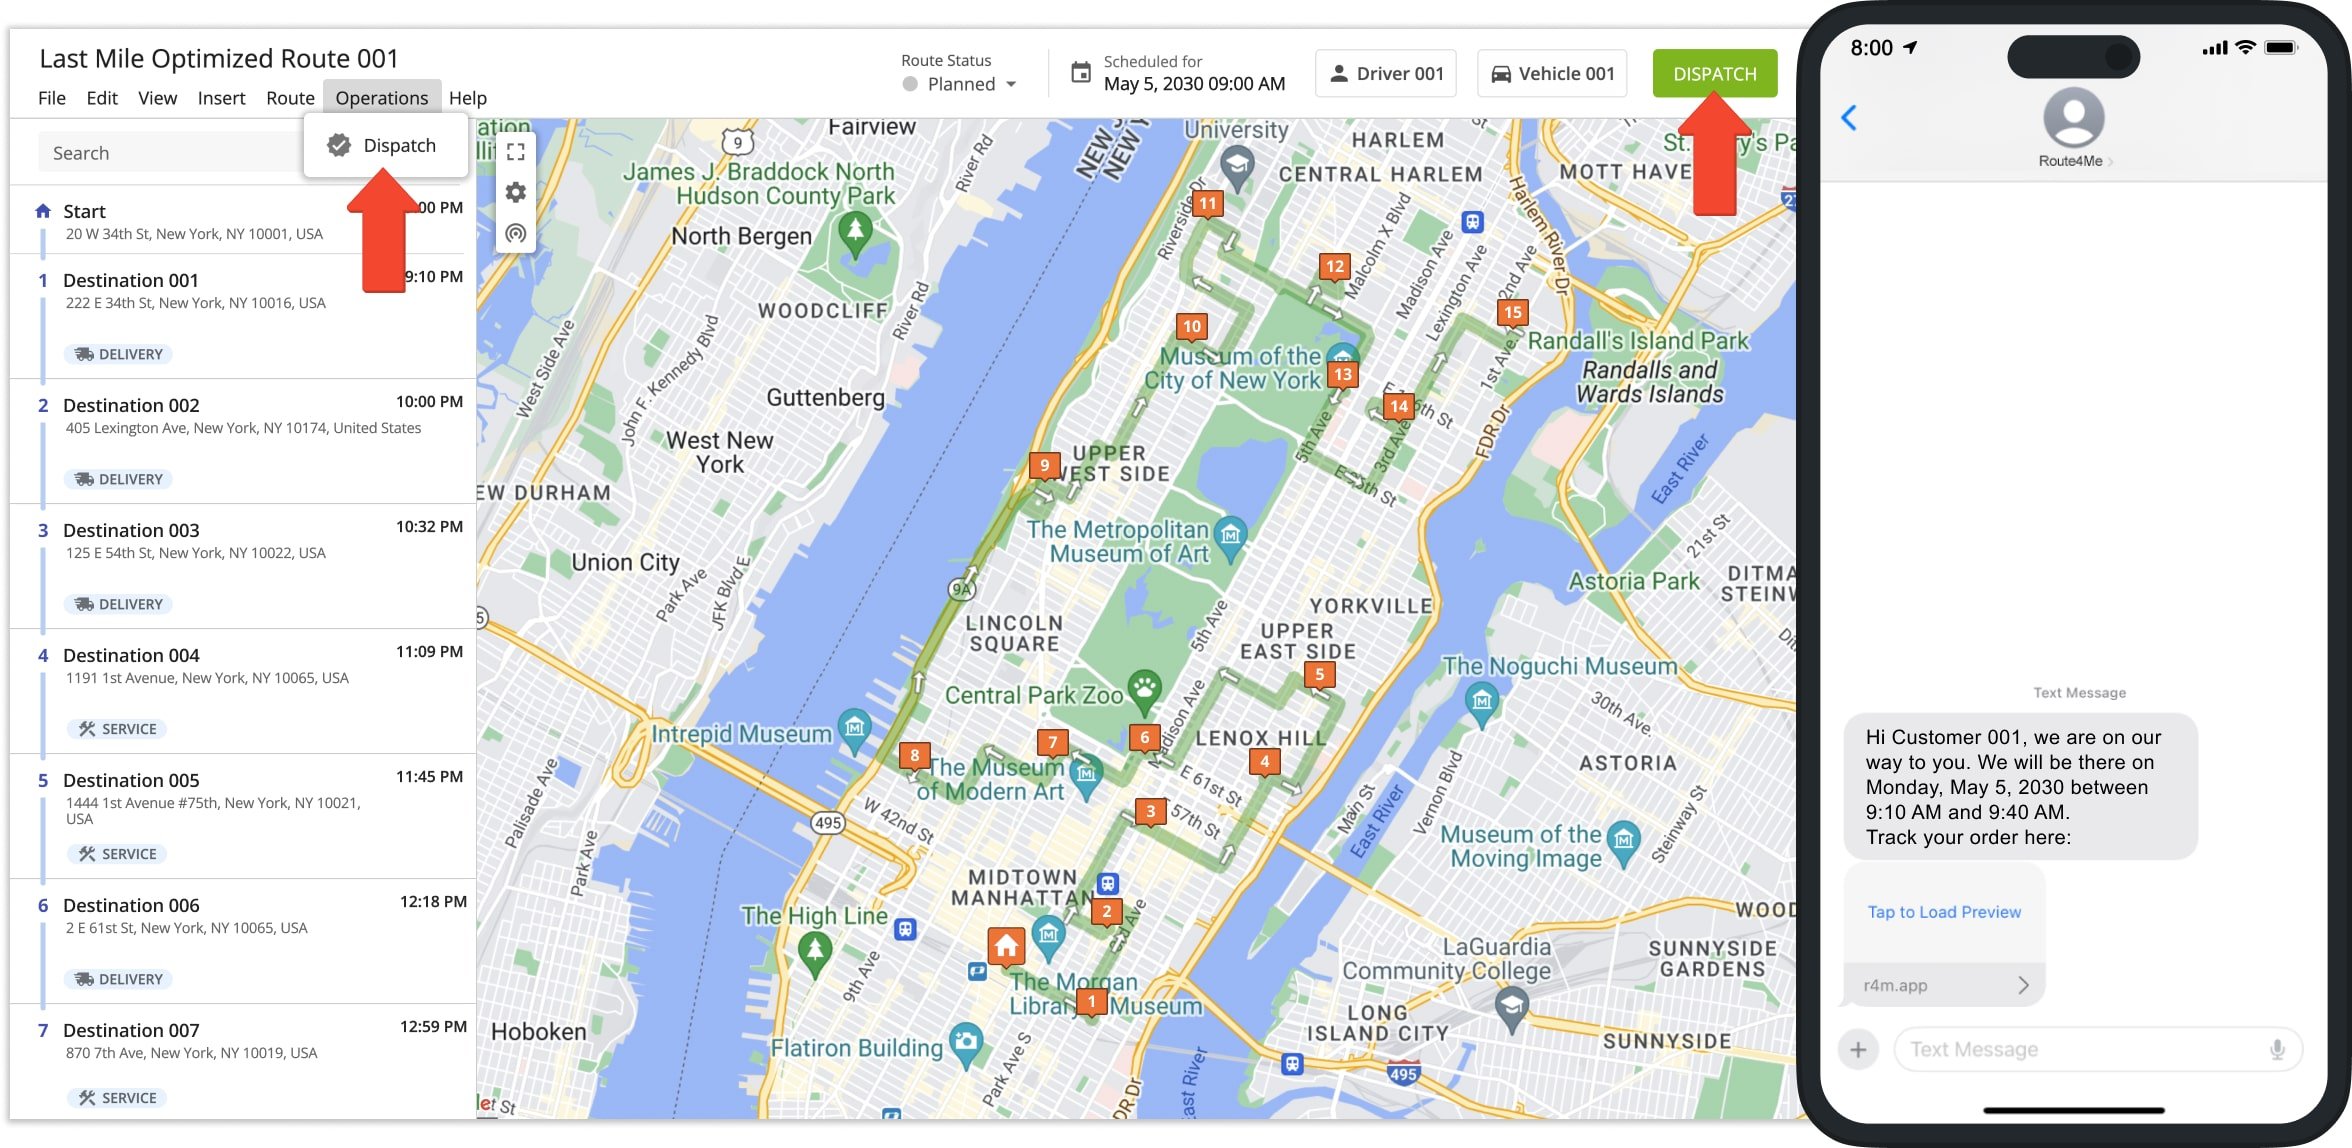
Send Route Dispatch Notifications From Route Editor
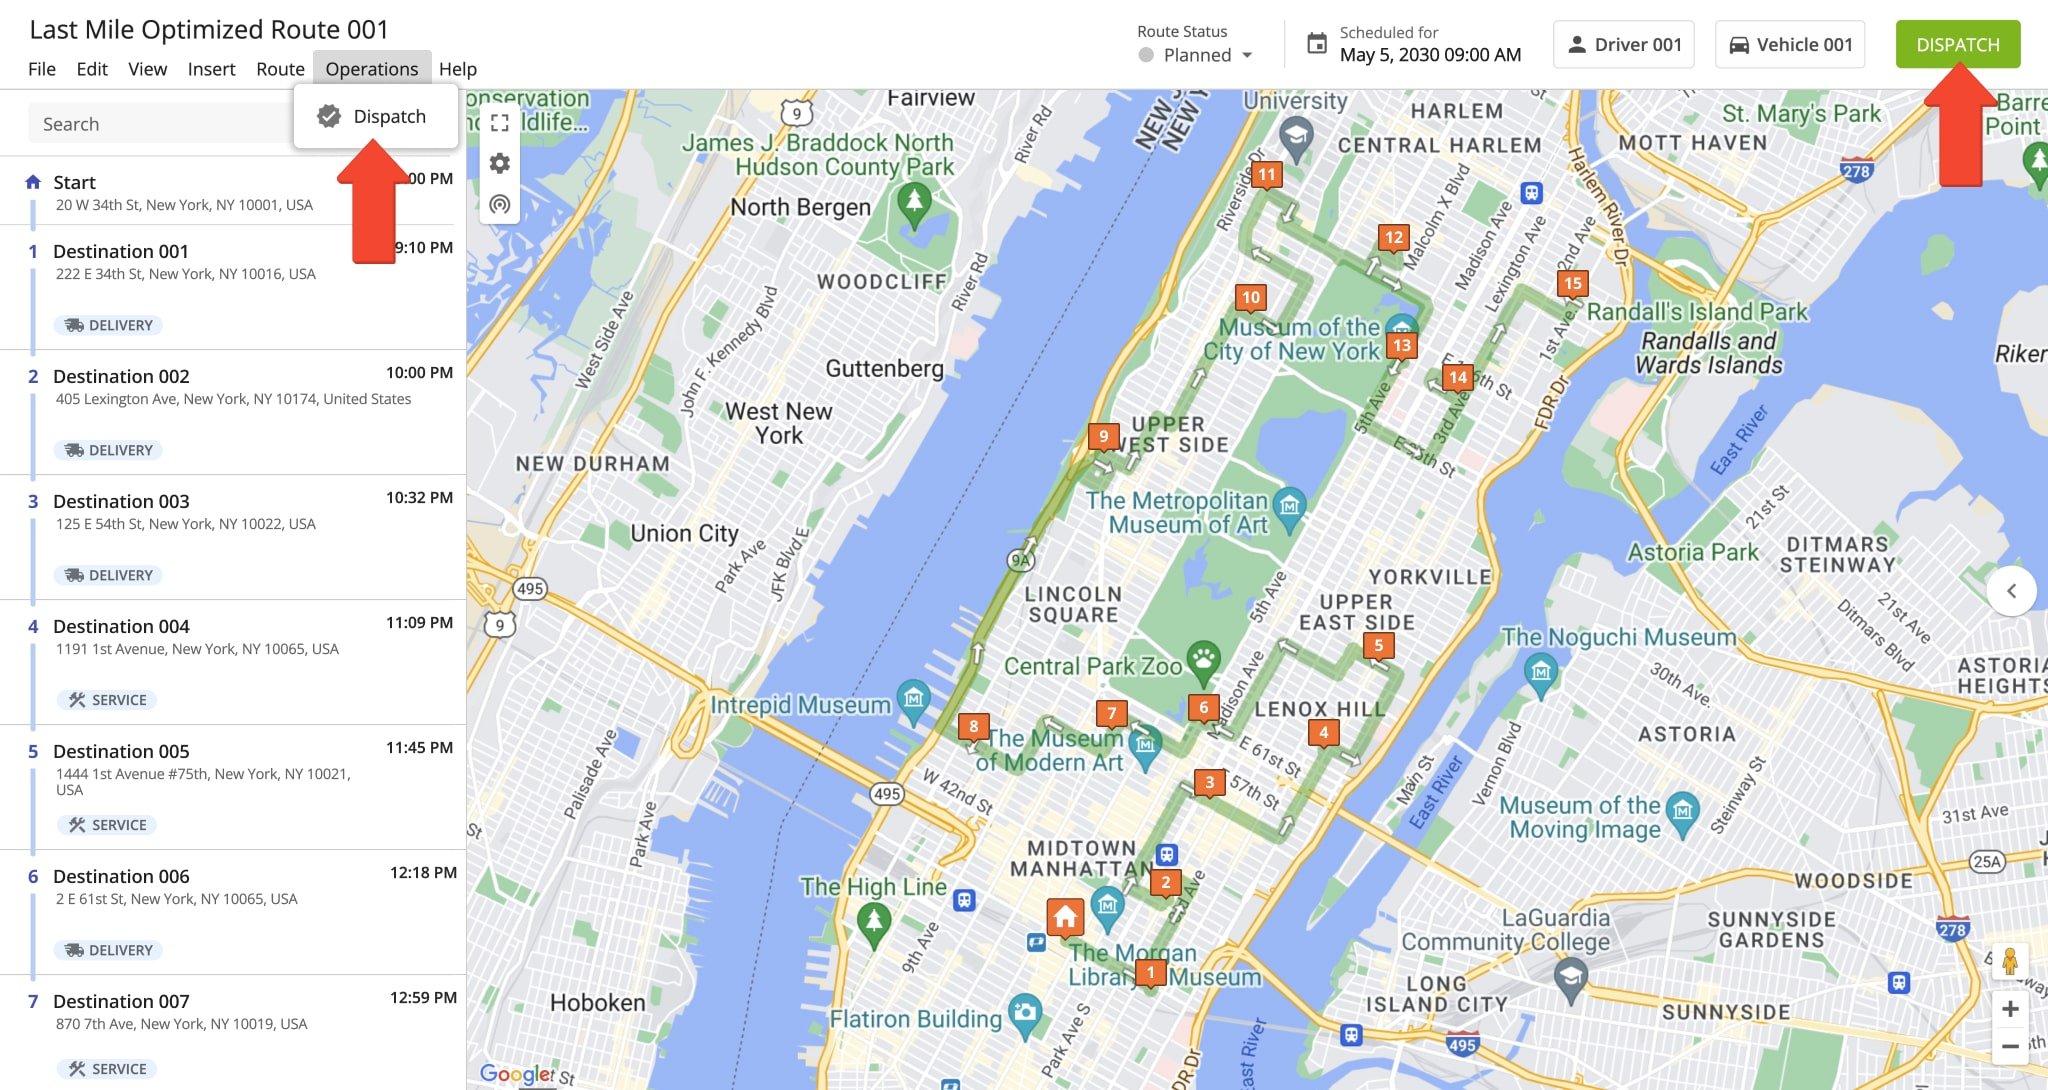
To dispatch a specific route using the Route Editor, open your Routes List from the Navigation Menu. Then, click the “Open” button next to the route you want to dispatch to open it in the Route Editor.
In the Route Editor, click “Operations” > “Dispatch” in the top menu bar or click the “Dispatch” button in the top right. Notifications will automatically be sent to all contacts associated with the selected routes.
NOTE: Once dispatched, you can also “Undispatch” routes from the “Operations” menu.
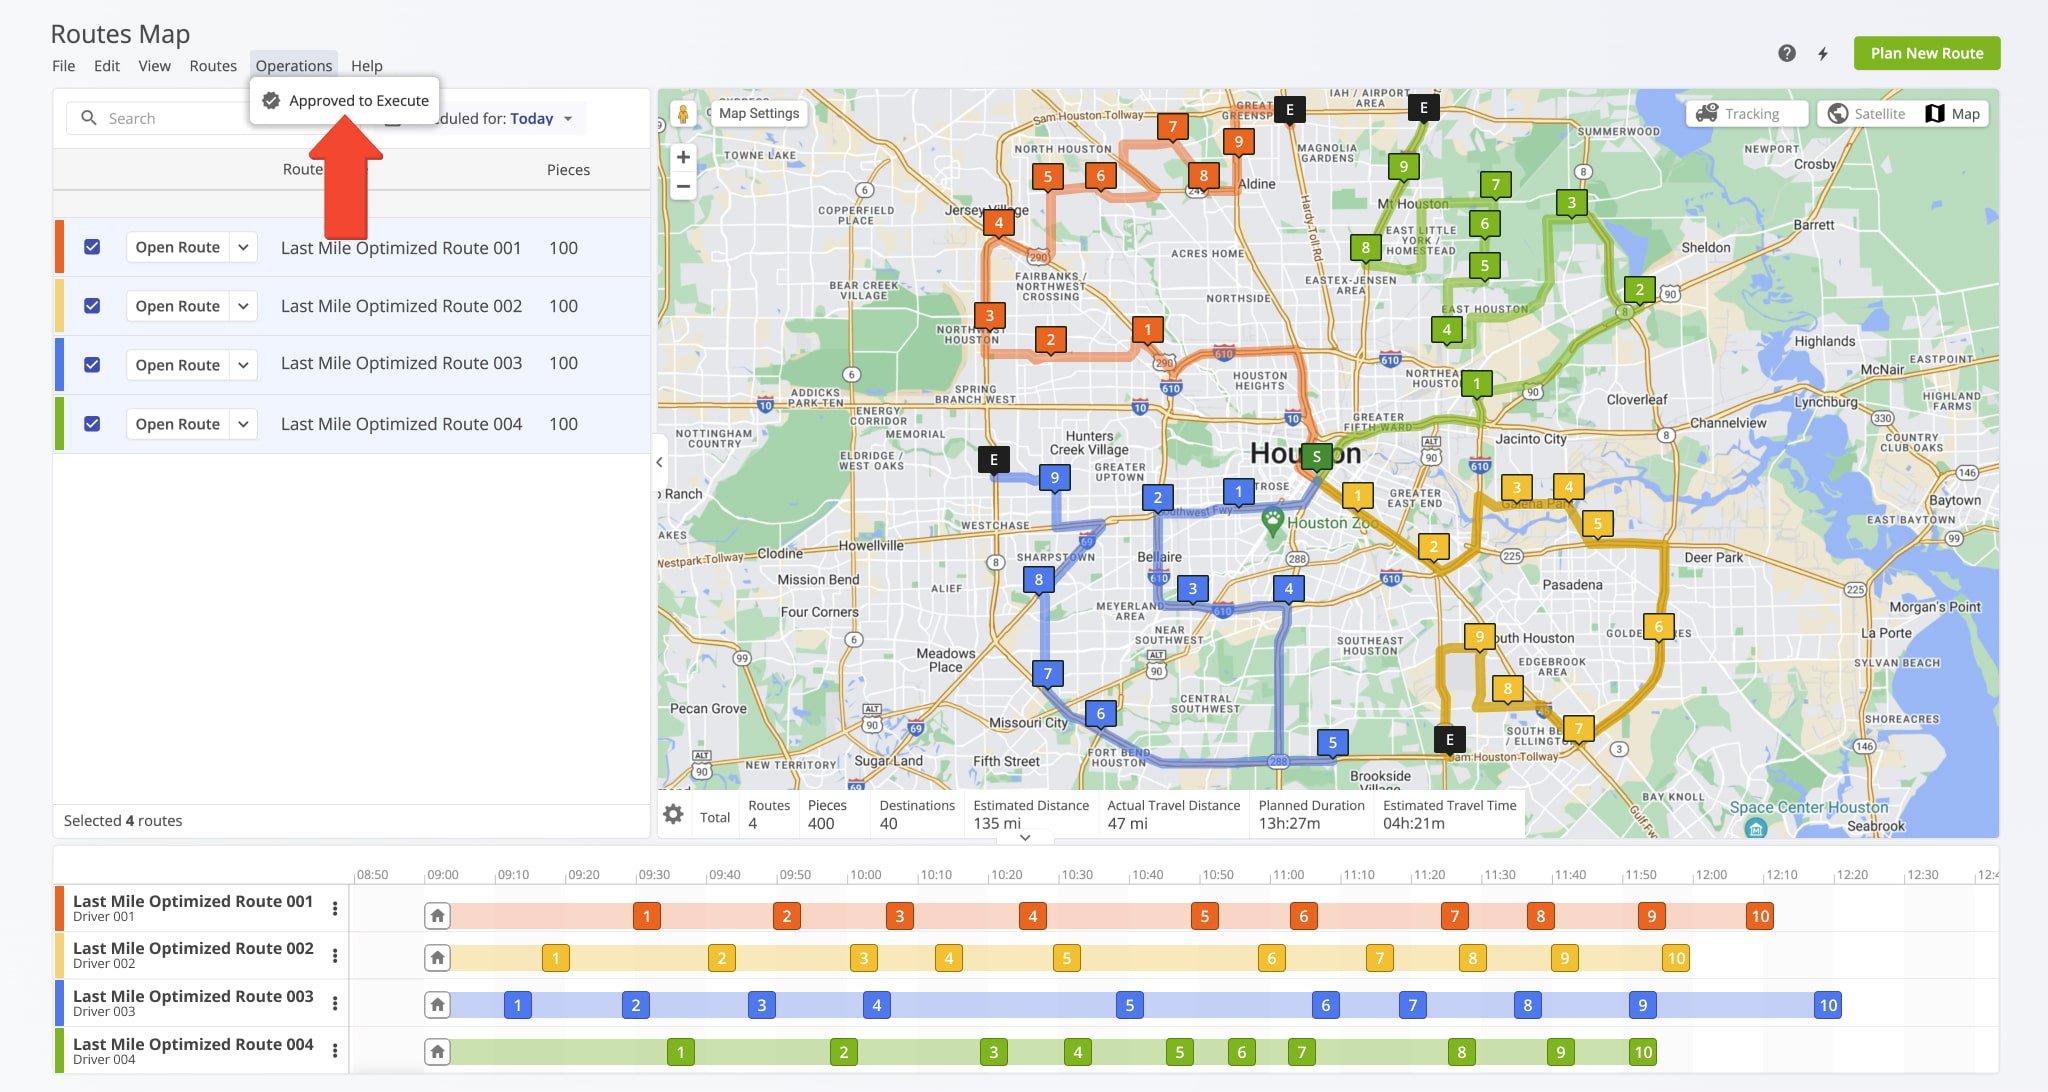
Dispatch Routes To Customers From Routes Map
Dispatching multiple routes from the Routes Map works similarly to the Route Editor.
Open your Routes List and check the box next to all routes you want to open. Then, click “Bulk Actions” > “View on Multiple Routes Map” to display the routes on your Routes Map.

Once redirected to your Routes Map, click “Operations” > “Approve to Execute” in the top menu bar. Notifications will automatically be sent to all destination contacts.
Customer Notifications Received When You Dispatch Routes
When you dispatch a route, customers receive SMS and email notifications with the scheduled delivery time. These notifications also include a tracking link for the order tracking portal, where they can follow real-time status updates.
NOTE: Learn more about automated email and SMS customer notifications.
Visit Route4Me's Marketplace to Check out Associated Modules:
- Operations
Custom Data Add-On
- Operations
Advanced Team Management Add-On
About author: Kristian Andreev
Kristian is a Technical Writer at Route4Me. With over a decade of experience in writing and localization, he's an expert at communicating complex technical data in a clear, concise, and user-friendly way. Passionate about bridging the gap between engineers and users, he specializes in creating documentation to streamline onboarding, enhance product usability, and support global teams on the path to success.