Business Rules – Plan Routes With Operational Constraints
Business rules serve as per-route constraints, optimizing routes by limiting distance, time, weight, package count, cubic volume, number of destinations, and revenue. These rules help businesses avoid capacity overloads and ensure drivers operate within safe limits. They also help control costs, improve delivery performance, and ensure reliability. Route4Me’s advanced constraints guarantee that each optimized route adheres to your business rules, maintaining smooth and consistent operations. This guide explains how business rules work and how to apply them to your routes.

NOTE: To use advanced route optimization Business Rule constraints, you must be subscribed to Route4Me’s Business Optimization package which enables you to plan routes for multiple drivers from a single set of addresses.
Table of Contents
Supported Business Rules – Constraints For Optimized Route Planning
Business rules, also known as constraints, are settings that define specific operational limits in route planning. They help balance workload distribution, prevent overloading, and optimize routes based on factors like time, distance, and capacity.
The table below explains each available constraint and how it can support more efficient route planning.
| Constraint | Description |
|---|---|
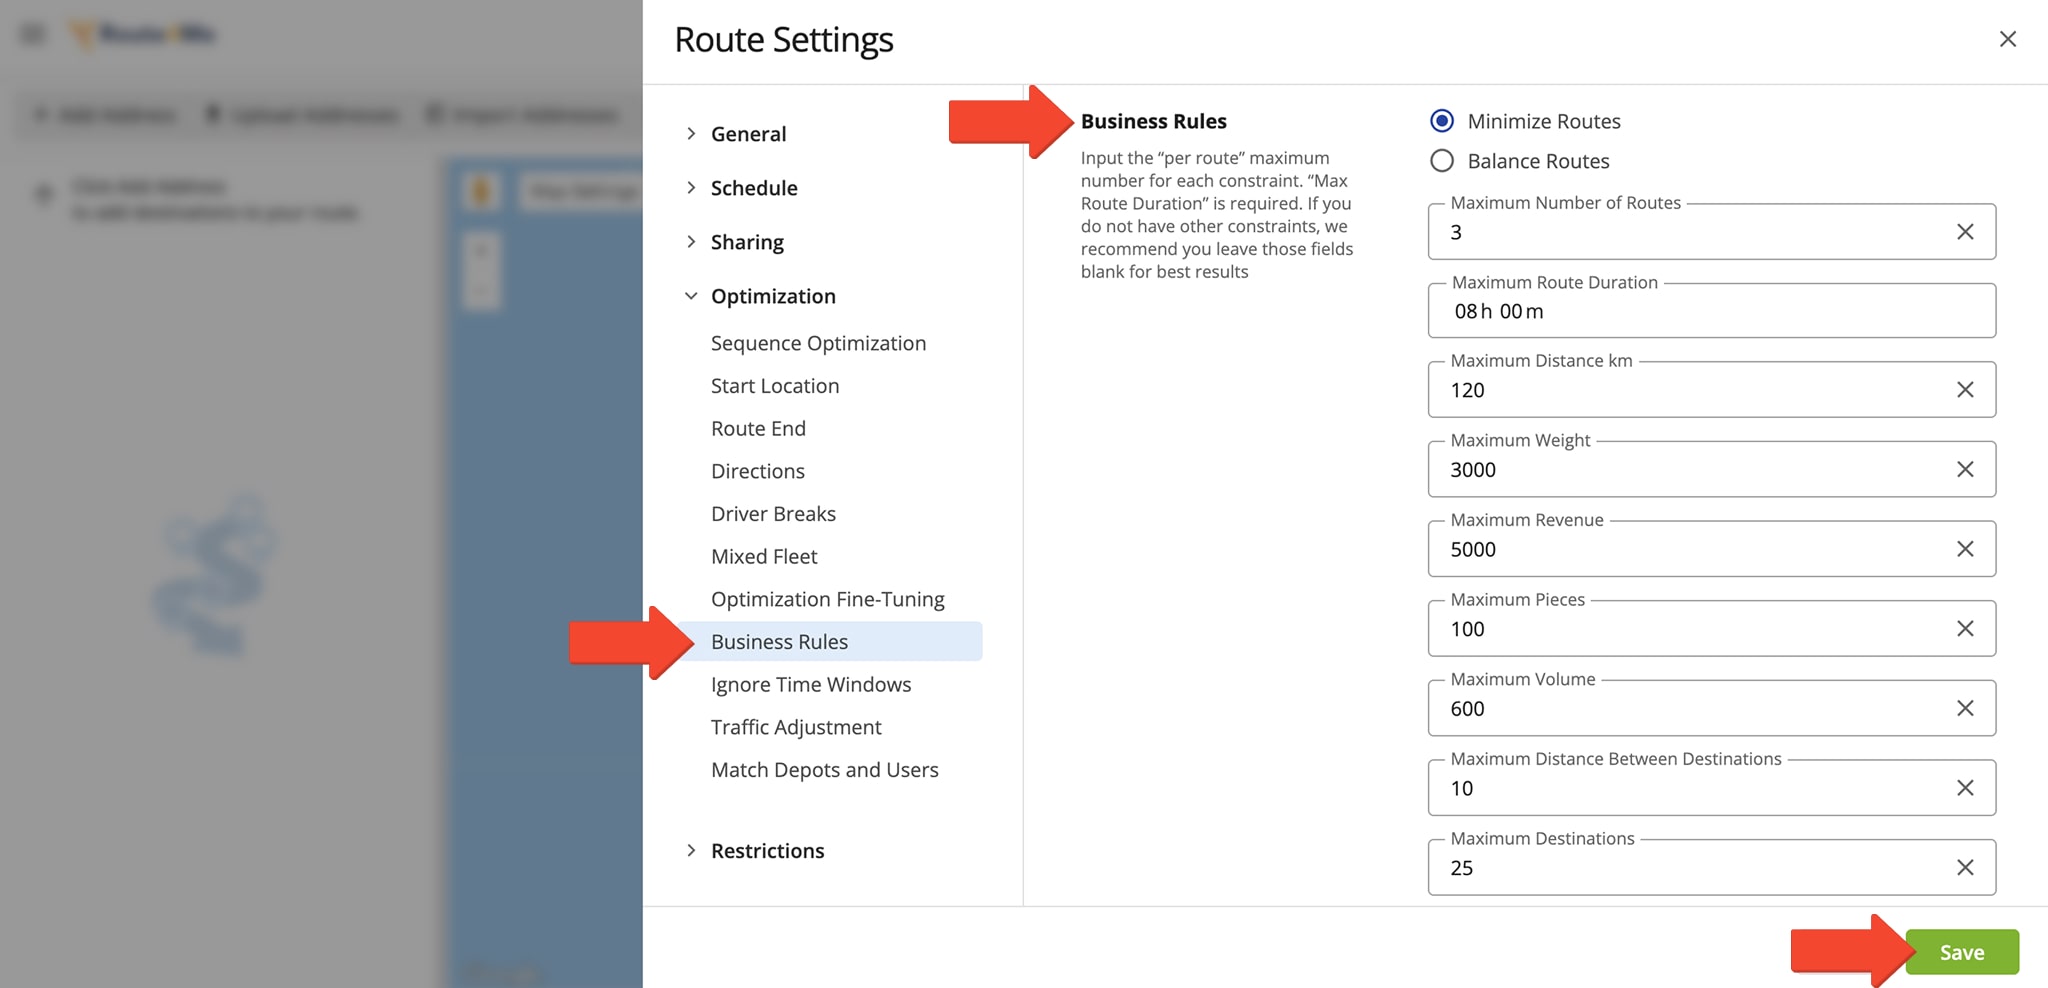
| Maximum Number Of Routes | Set the maximum number of routes that can be created for a given set of destinations, based on your vehicle availability and operational limits. This constraint helps distribute workloads efficiently and prevents the system from generating more routes than your fleet can handle. |
| Maximum Route Duration | Set the maximum time allowed for a route, including both travel and service time. If this limit is exceeded, the system automatically creates additional routes to help manage driver hours, vehicle limits, and scheduling efficiency. |
| Maximum Distance | Set the maximum travel distance for a single route. If this limit is exceeded, the system creates additional routes to help balance workloads, reduce driver fatigue, and maintain efficient route distribution. |
| Maximum Destinations | Set the maximum number of stops allowed on a single route. If this limit is exceeded, the system creates additional routes to prevent driver overload, optimize fleet usage, and maintain balanced distribution. |
| Maximum Distance Between Destinations | Set the maximum allowed distance between stops to prevent inefficient routes caused by overly short spacing, backtracking, or overlap. |
| Maximum Pieces | Set the maximum number of order units per route. The system tracks items loaded and unloaded to ensure the vehicle’s capacity isn’t exceeded. |
| Maximum Weight | Set the maximum order weight allowed per vehicle and route. Route4Me tracks loaded and unloaded weight to help you stay within your fleet’s carrying capacity. |
| Maximum Volume | Set the maximum cubic volume per vehicle and route. Route4Me tracks loaded or reserved volume to help you stay within fleet capacity. |
| Maximum Revenue | Set revenue limits per route and destination to control expected earnings, with the software tracking and managing these limits during route planning. |
Optimization Profile Business Rules – Predefine Constraints Per Route
To access your Optimization Profiles, go to “Settings” in the Navigation Menu and select “Optimization Profiles“. Click “Create Profile” to create a new Optimization Profile or click “Edit” to modify an existing one.
Open Your Optimization Profiles

From the “Create Profile” editor, click the “Optimization” tab, select “Business Rules“, then enter the maximum value for each constraint. Click the “Create Profile” button to save your values.

Manual Settings Business Rules – Customize Constraints Per Route
To plan routes with customized business rules, go to “Operations” in the Navigation Menu and select “Plan New Route”. Then, choose your preferred route data import method.
When prompted to select an Optimization Profile, click “Skip” to open the manual Route Settings window.

From the “Route Settings” editor, click the “Optimization” tab, select “Business Rules“, then enter the maximum value for each constraint. Click the “Save” button to save your values.
Manage Routes Optimized With Business Rules On The Routes Map
Route4Me automatically creates routes based on your constraints. If multiple routes are planned, they are displayed in the Routes Map, each labeled with a Part number to indicate its sequence.
To view a specific address’s optimization constraints, hover over its location pin in the map. To edit an address’s constraints, right-click its map pin, then select “Modify Destination” to open the editor where you can make modifications.
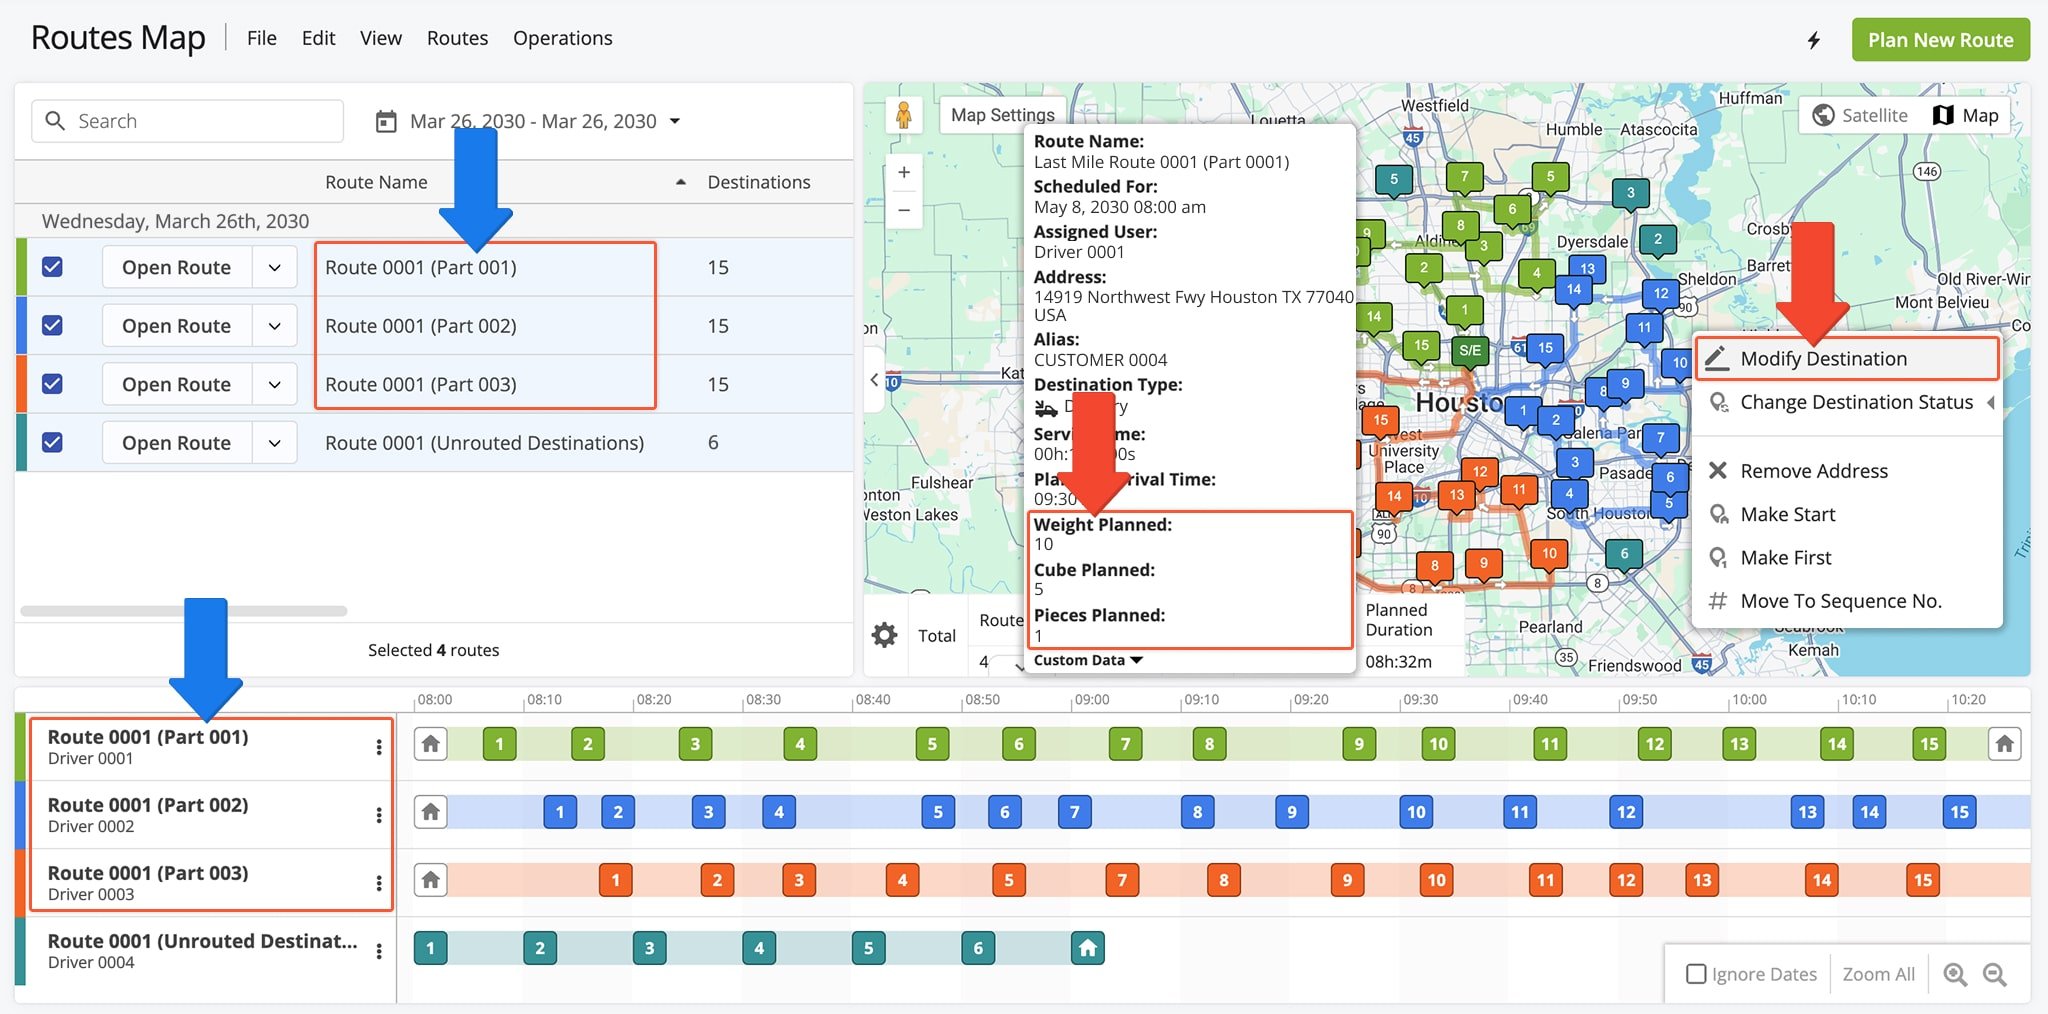
Add Unrouted Destinations To Routes On The Routes Map
Unrouted Destinations routes are automatically created when stops exceed optimization constraints. These routes contain destinations that couldn’t be assigned to a planned route.
From your Routes Map, you can quickly and efficiently recalculate routes to include these destinations. Simply click on a destination in the Timeline and drag it into another route. NOTE: Learn more about unrouted destinations.

Visit Route4Me's Marketplace to Check out Associated Modules:
Last Updated:
About author: Daniel Archer
With a background in pedagogy and writing instruction, Daniel is a former tenured English Instructor who, after nearly 20 years of teaching, transitioned into content strategy and leading writing teams for global brands. Now, as Technical Documentation Manager at Route4Me, he translates complex logistics technology into clear, accessible content that empowers users.