Multi Depot Routing – Plan Multiple Routes With Different Depots
The multi-depot vehicle routing problem is one of the most complex route optimization challenges. Even a single-depot route requires juggling multiple factors, and planning multi-depot routing with one set of addresses involves countless possible solutions to assign addresses and sequence stops. Route4Me’s dynamic routing software automatically calculates these scenarios, enabling effortless multi-depot route planning. Simply enter your depot facility locations and customer addresses, and the software will create optimized routes that save time, lower fuel expenses, and improve customer satisfaction.
Table of Contents
Single Depot Routing – Plan Multiple Routes Starting From One Depot Locations
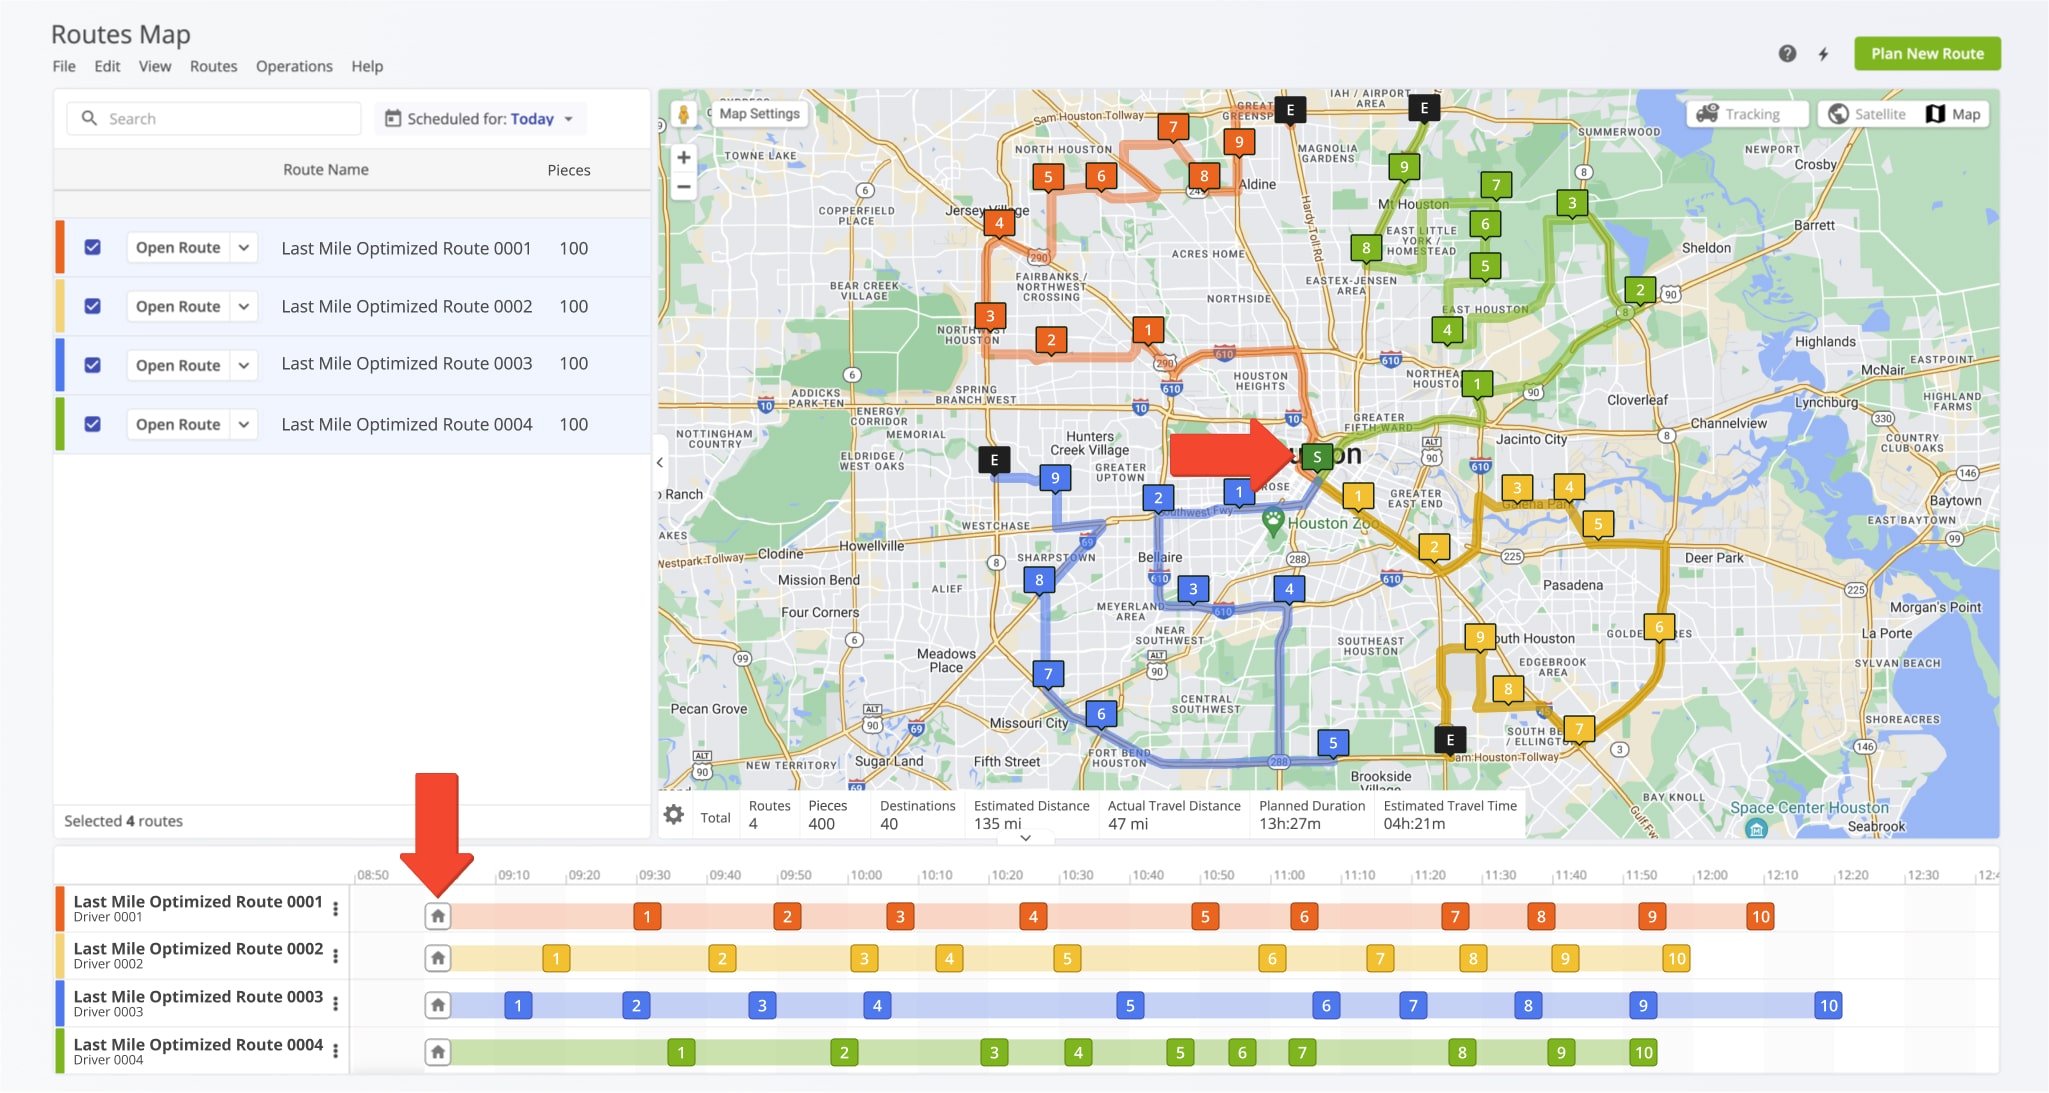
with Route4Me’s dispatch and routing software, you can plan both single and multiple routes from a single depot. Simply input a set of addresses, specify the depot address (or use the first address as the depot), and set your preferred routing constraints. You can manually adjust constraint and business rules or use route Optimization Profiles. Route4Me’s proprietary algorithm will then generate the optimal number of routes starting from the same depot based on your settings. When you plan multiple routes, the software will automatically open them on the Routes Map for your convenience.
Multi Depot Routing – Plan Multi Depot Routes From Single Address Set
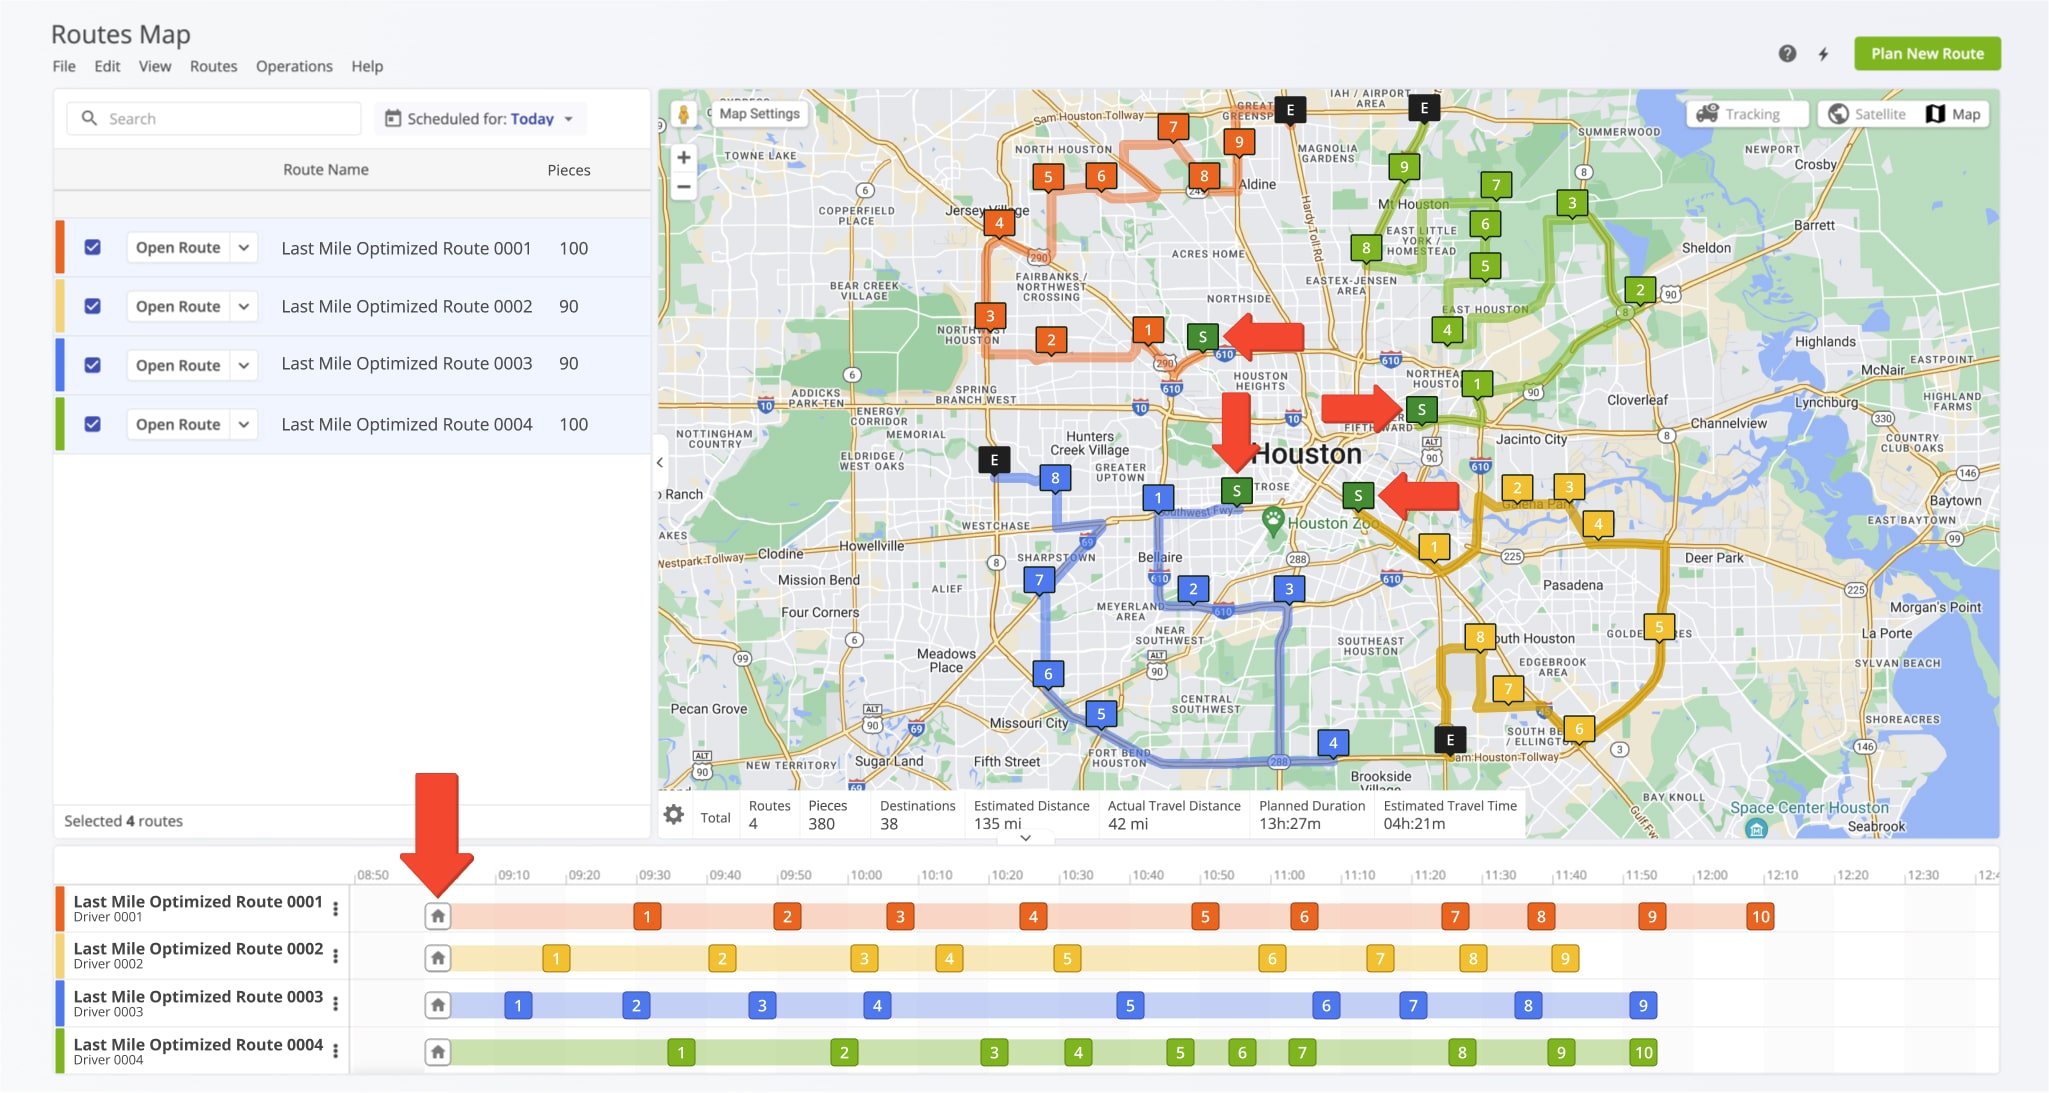
Planning routes with multiple depots is just as easy as planning routes with a single depot. All you have to do is specify which addresses should be used as route depots. Route4Me will use those depot addresses as route start locations and sequence all remaining addresses into the corresponding number of optimized routes according to your settings and preferences. You can specify depot addresses in manual route optimization settings, Optimization Profiles, and route upload spreadsheets.
Optimization Profiles – Add Multiple Route Depots In Reusable Optimization Templates
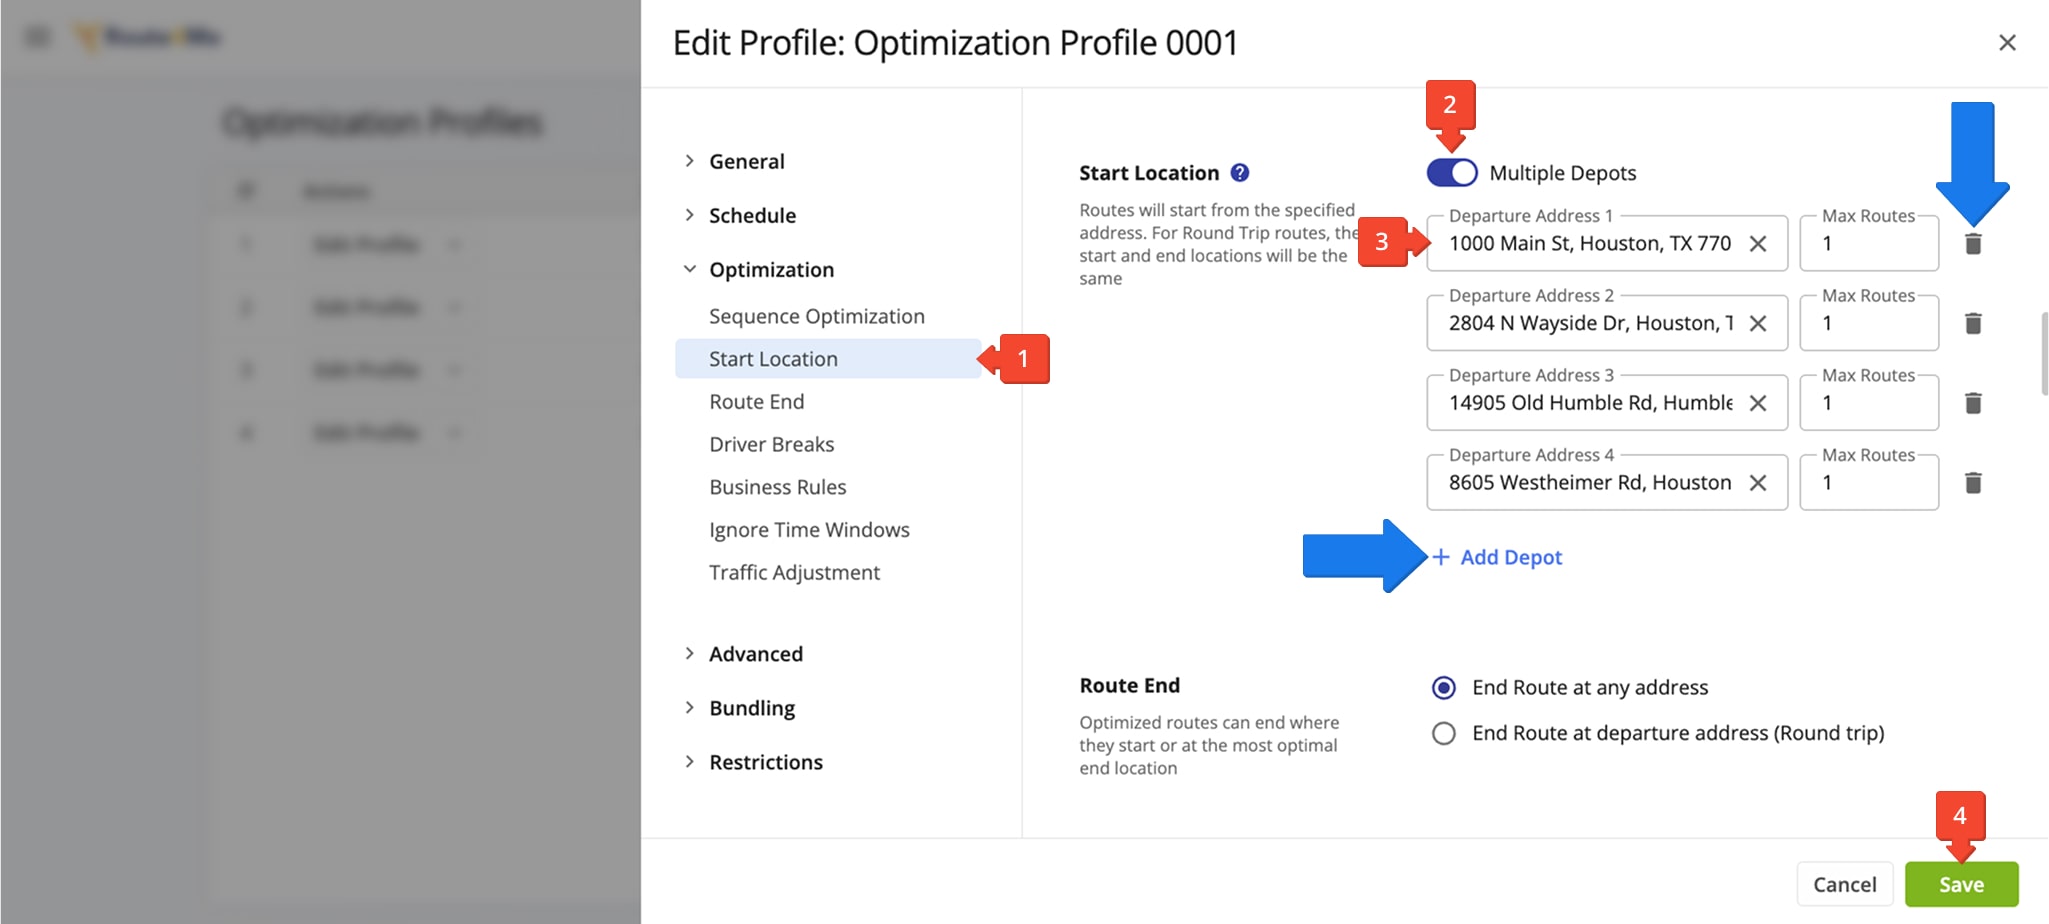
To add multiple depots to a Route Optimization Profile, go to “Optimization Settings” > “Optimization Profiles” from the Navigation Menu. Then, create a new or edit an existing profile and follow the steps below:
- Go to the “Optimization” tab of the settings to find the “Start Location” section.
- Click the “Multiple Depots” toggle to enable multiple depot addresses for the respective profile.
- Enter depot addresses in the “Departure Address” fields and the maximum number of routes you want to start from each depot in the “Max Routes” field.
- Click the “Save” button to add your depots to the Optimization Profile.
For convenience, you can add more depots fields to the profile by clicking the “+ Add Depot” button and remove depots by clicking the Delete Icon next to the entry you want to remove.
Open Your Optimization Profiles
NOTE: The “Max Routes” value sets a limit on the number of optimized routes that can start from the designated depot when using this profile. Depending on your settings, fewer than the specified number of routes may be planned but never more.
Optimization Settings – Manually Select Multiple Depot Addresses When Planning Routes
You can also specify multiple depot addresses in your manual optimization settings when you plan routes. To do so, click “Skip” when prompted to select an Optimization Profile and follow the easy steps below:
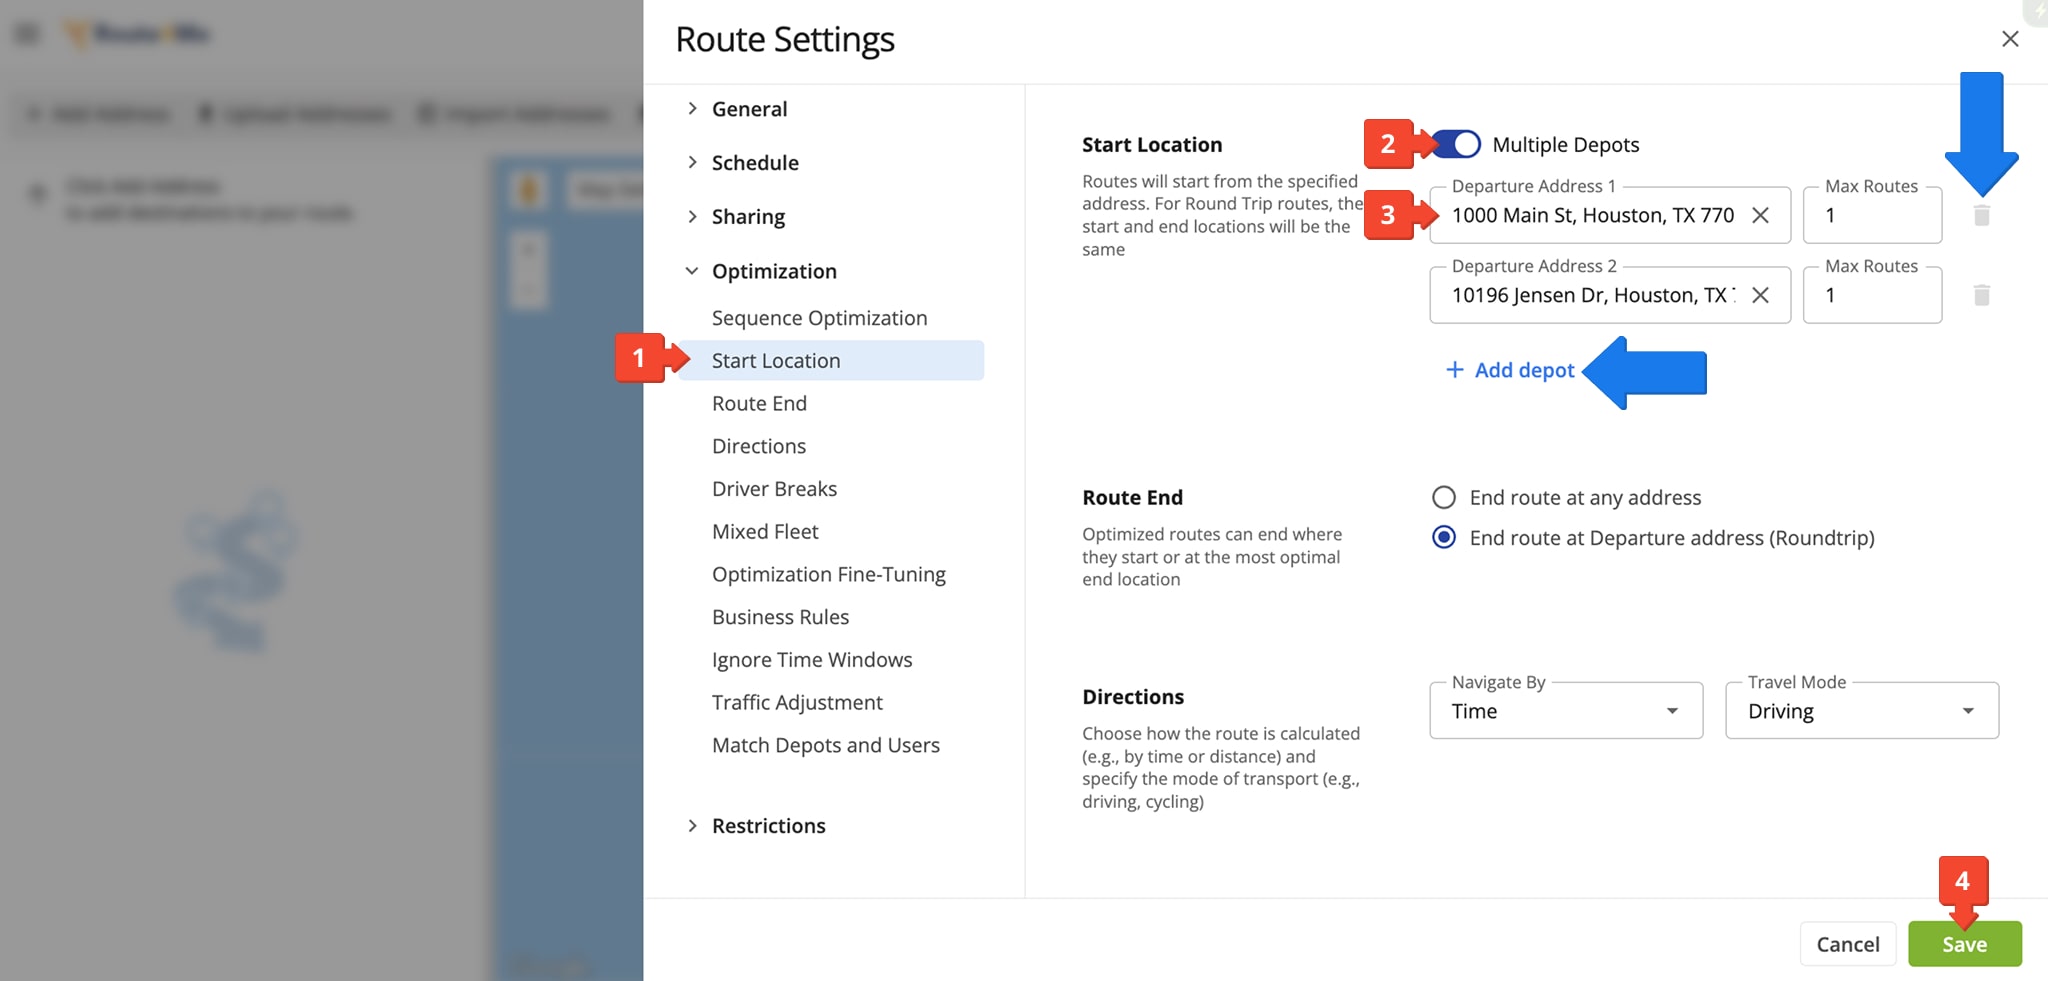
- Click “Start Location” under the “Optimization” tab .
- Turn on “Multiple Depots” to enable multi-depot routing.
- Enter depot addresses and the maximum number of routes you want to start from each depot.
- Click the “Save” button to add your depots.
Add more depots by clicking the “+ Add depot” button. Remove depots by clicking the Delete Icon next to an entry.
NOTE: The “Max Routes” value limits the number of routes that can start from the designated depot. Depending on your settings, fewer than the specified number of routes may be planned but never more.
Upload Multi Depot Routes – Add Multiple Depots To Route Planning Spreadsheet
With Route4Me, you don’t even have to change optimization settings to add depots when planning routes. You can mark an address as a depot directly in your address upload spreadsheet. To do so, simply add a column labeled “Depot” to your sheet. Then, mark every depot address with “Yes” or “1“, and the system will automatically verify those depot addresses and use them as route start locations with no additional input required. Learn more about Route4Me Spreadsheet Formatting.
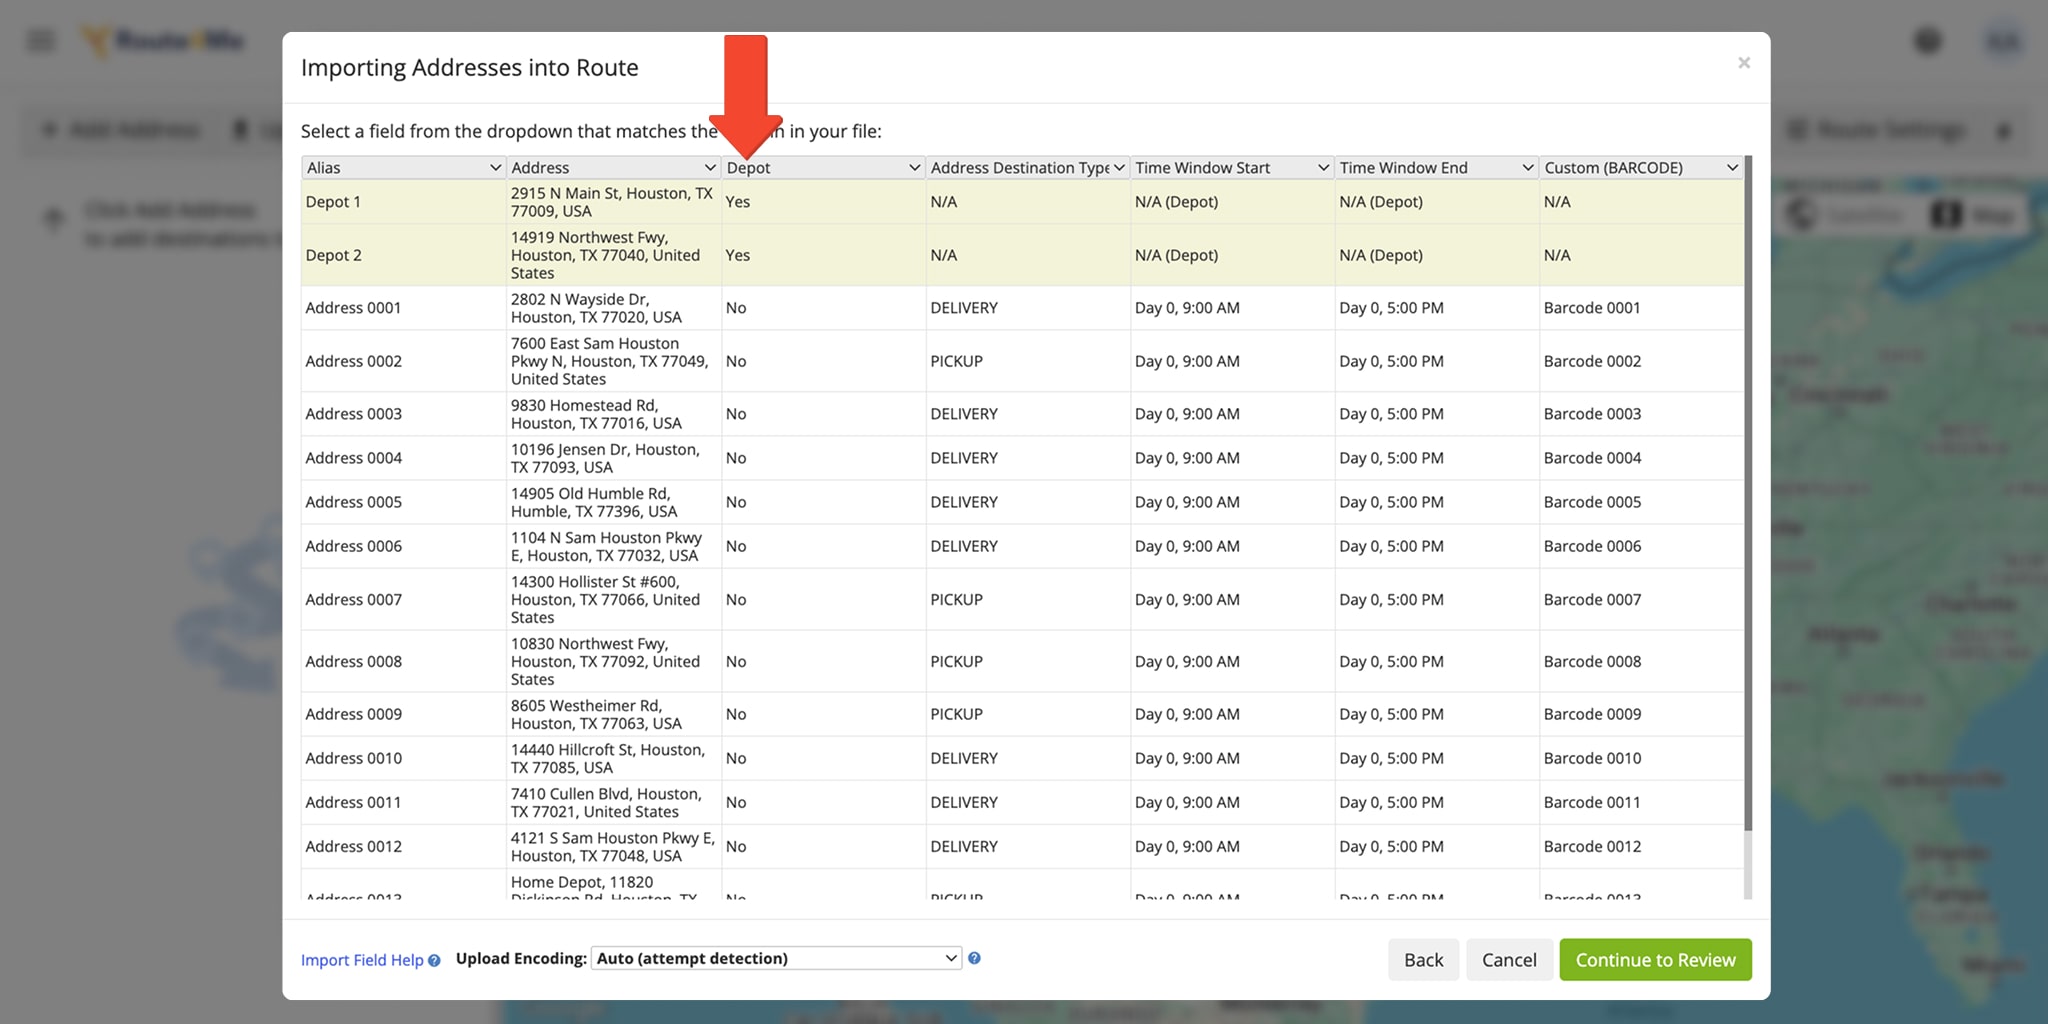
NOTE: It’s not mandatory to mark destination addresses with “No” or “0“, the system will do so automatically. If your unique use case or routing scenario requires marking all addresses as depots or destinations, simply add “No” or “0” to the “Depot” column.
Visit Route4Me Marketplace to Check Out More Add-Ons:
- Route Optimization
Commercial Vehicle & Truck Routing
- Operations
Audit Logging and Activity Stream
About author: Kristian Andreev
Kristian is a Technical Writer at Route4Me. With over a decade of experience in writing and localization, he's an expert at communicating complex technical data in a clear, concise, and user-friendly way. Passionate about bridging the gap between engineers and users, he specializes in creating documentation to streamline onboarding, enhance product usability, and support global teams on the path to success.