Mandatory Tasks – Capture Proof Of Delivery Or Service In The Mobile App
Route4Me’s Mandatory Tasks enable you to require specific actions your team members must complete to finish deliveries, visits, or services. This guide explains how to enable and manage these tasks to ensure proper proof of delivery and service completion. NOTE: Route4Me’s Mandatory Task feature is scheduled to be disabled soon. Instead, you can use Route4Me’s Workflows, which offer more task options, flexible customization, and a dedicated user interface.
Table of Contents
Enable And Manage Mandatory Tasks In Route4Me
You can enable or disable Mandatory Tasks through your Advanced Configuration Editor. Once you enable a task, drivers and field team members can view and complete it directly from Route4Me’s Android Route Planner app or iOS Route Planner app.
Open Your Advanced Configuration Editor
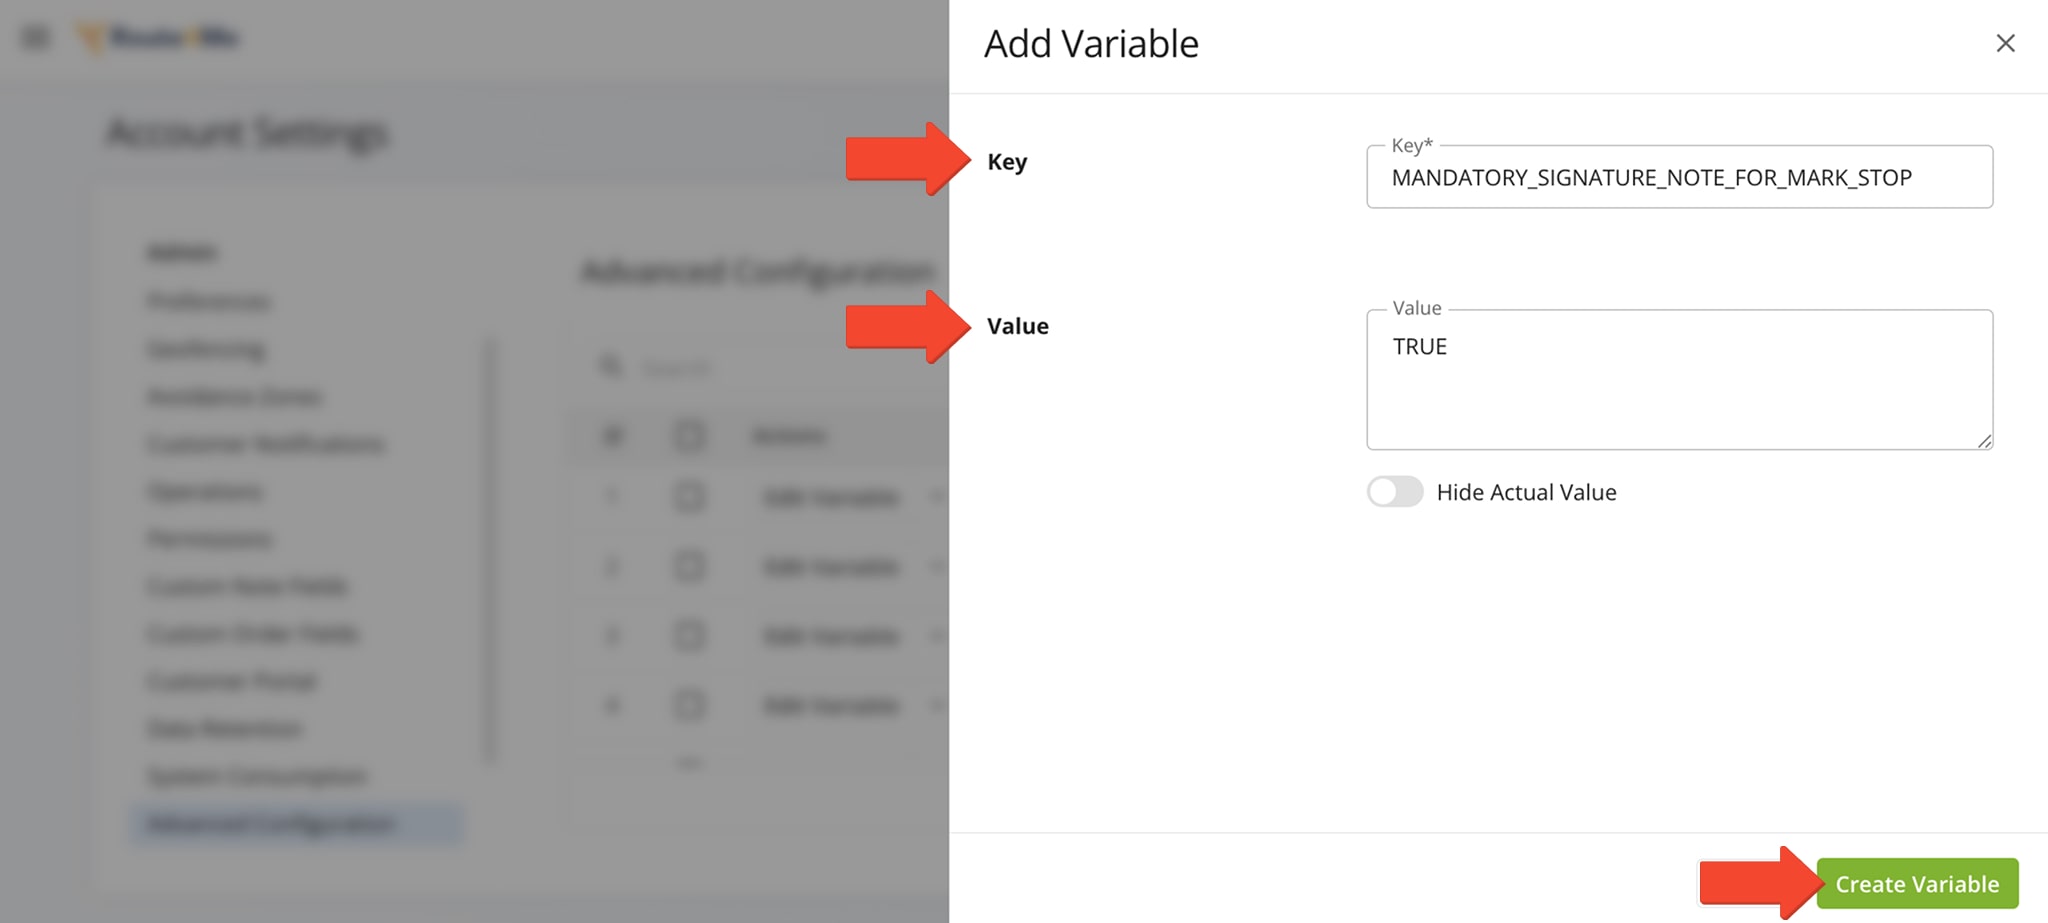
The table below lists all Mandatory Tasks and their corresponding configuration keys. To enable a task, set its configuration to “TRUE“. Setting the value to “FALSE” disables the task.
You have full control over which mandatory tasks your team members must complete before marking destinations as done.
Mandatory Tasks
Signature Capture
MANDATORY_SIGNATURE_NOTE_FOR_MARK_STOP
Requires capturing a signature before marking a destination as completed.
Image Attachment
MANDATORY_IMAGE_NOTE_FOR_MARK_STOP
Requires attaching a photo or image as proof before completing a destination.
Text Note Attachment
MANDATORY_TEXT_NOTE_FOR_MARK_STOP
Requires adding a text note attachment before marking a destination as done.
Use Mandatory Tasks For Proof Of Delivery And Order Verification
Mandatory Tasks ensure drivers complete required actions, such as collecting signatures, photos, or notes, before marking stops as done. These tasks improve delivery accuracy, enhance accountability, and build customer trust.
The Route4Me mobile app clearly displays required tasks at each destination, ensuring team members know what actions must be performed to complete deliveries and services.
Mandatory Signature Capture
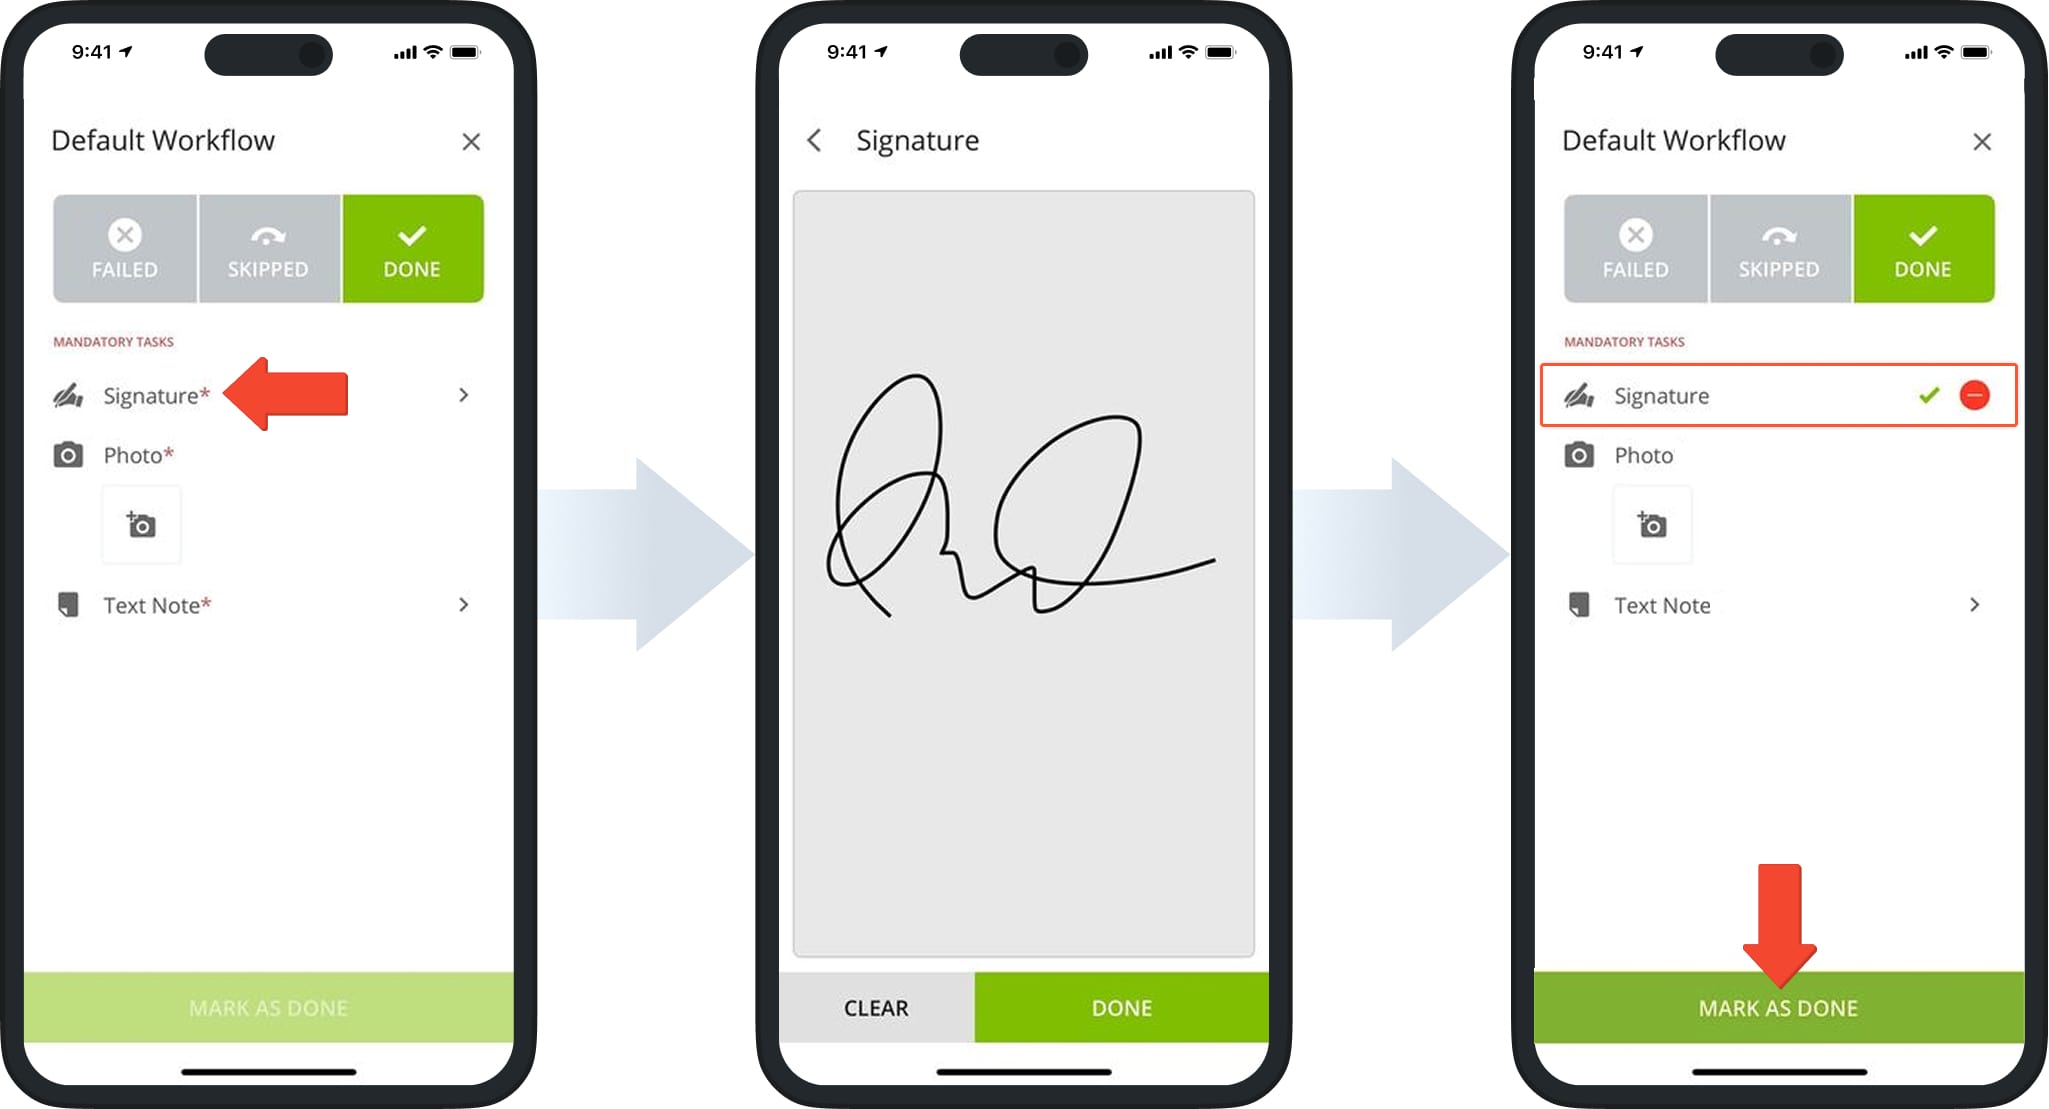
Mandatory Signature requires drivers to collect an electronic signature before marking a destination as completed or an order as delivered. This provides verified proof of receipt.
In the app, “Signature” appears as a mandatory task, showing a green checkmark when completed. Drivers can delete and recapture the signature by clicking the red circle. After completing all mandatory tasks, they can click “Mark As Done“.
Mandatory Image Capture
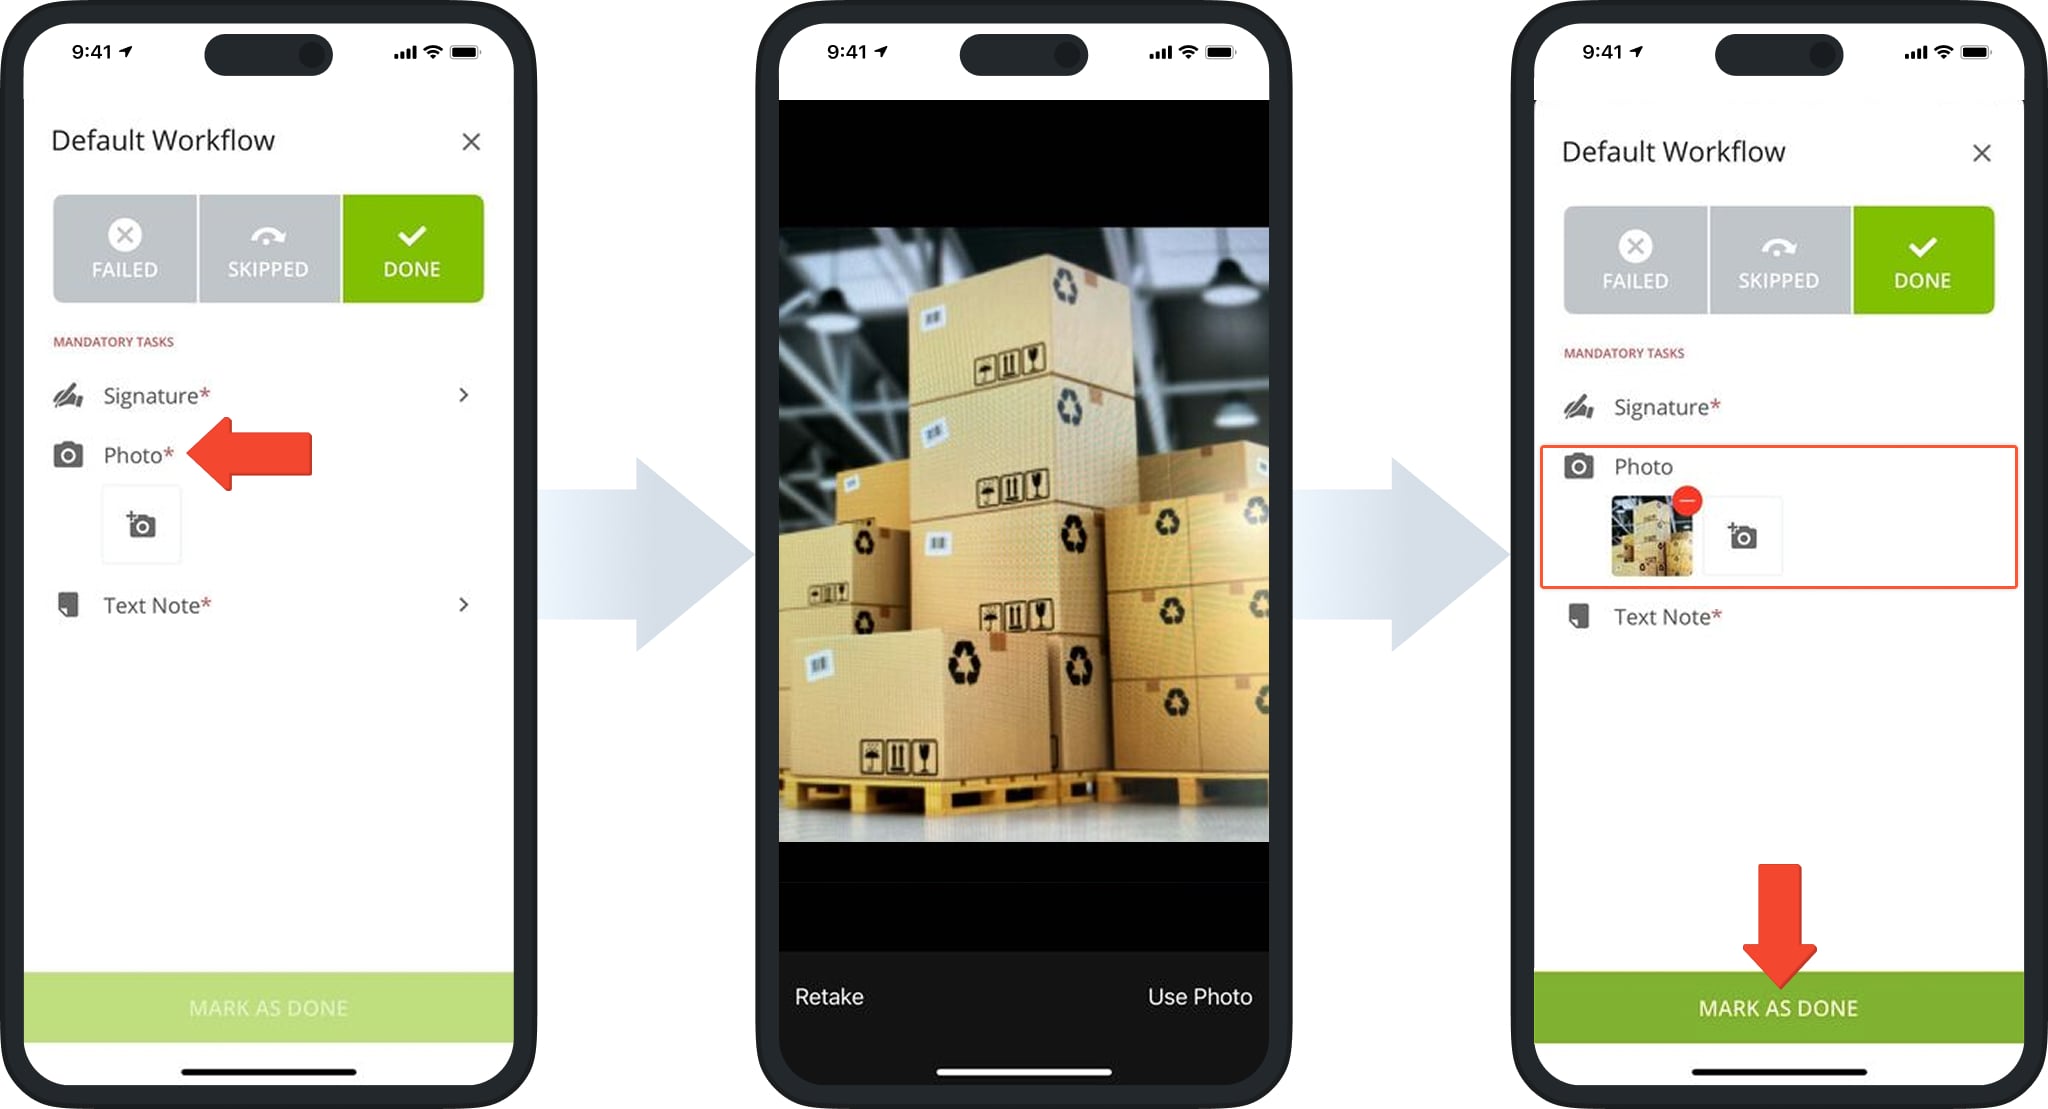
Enable Mandatory Image attachment to require photo proof of delivery before marking a destination as completed. This provide clears visual confirmation of delivery.
In the app, “Photo” appears as a mandatory task, showing a thumbnail of the image once the task is completed. Drivers can tap the red button to delete and retake the photo if needed. They can click “Mark As Done” when all mandatory tasks are completed.
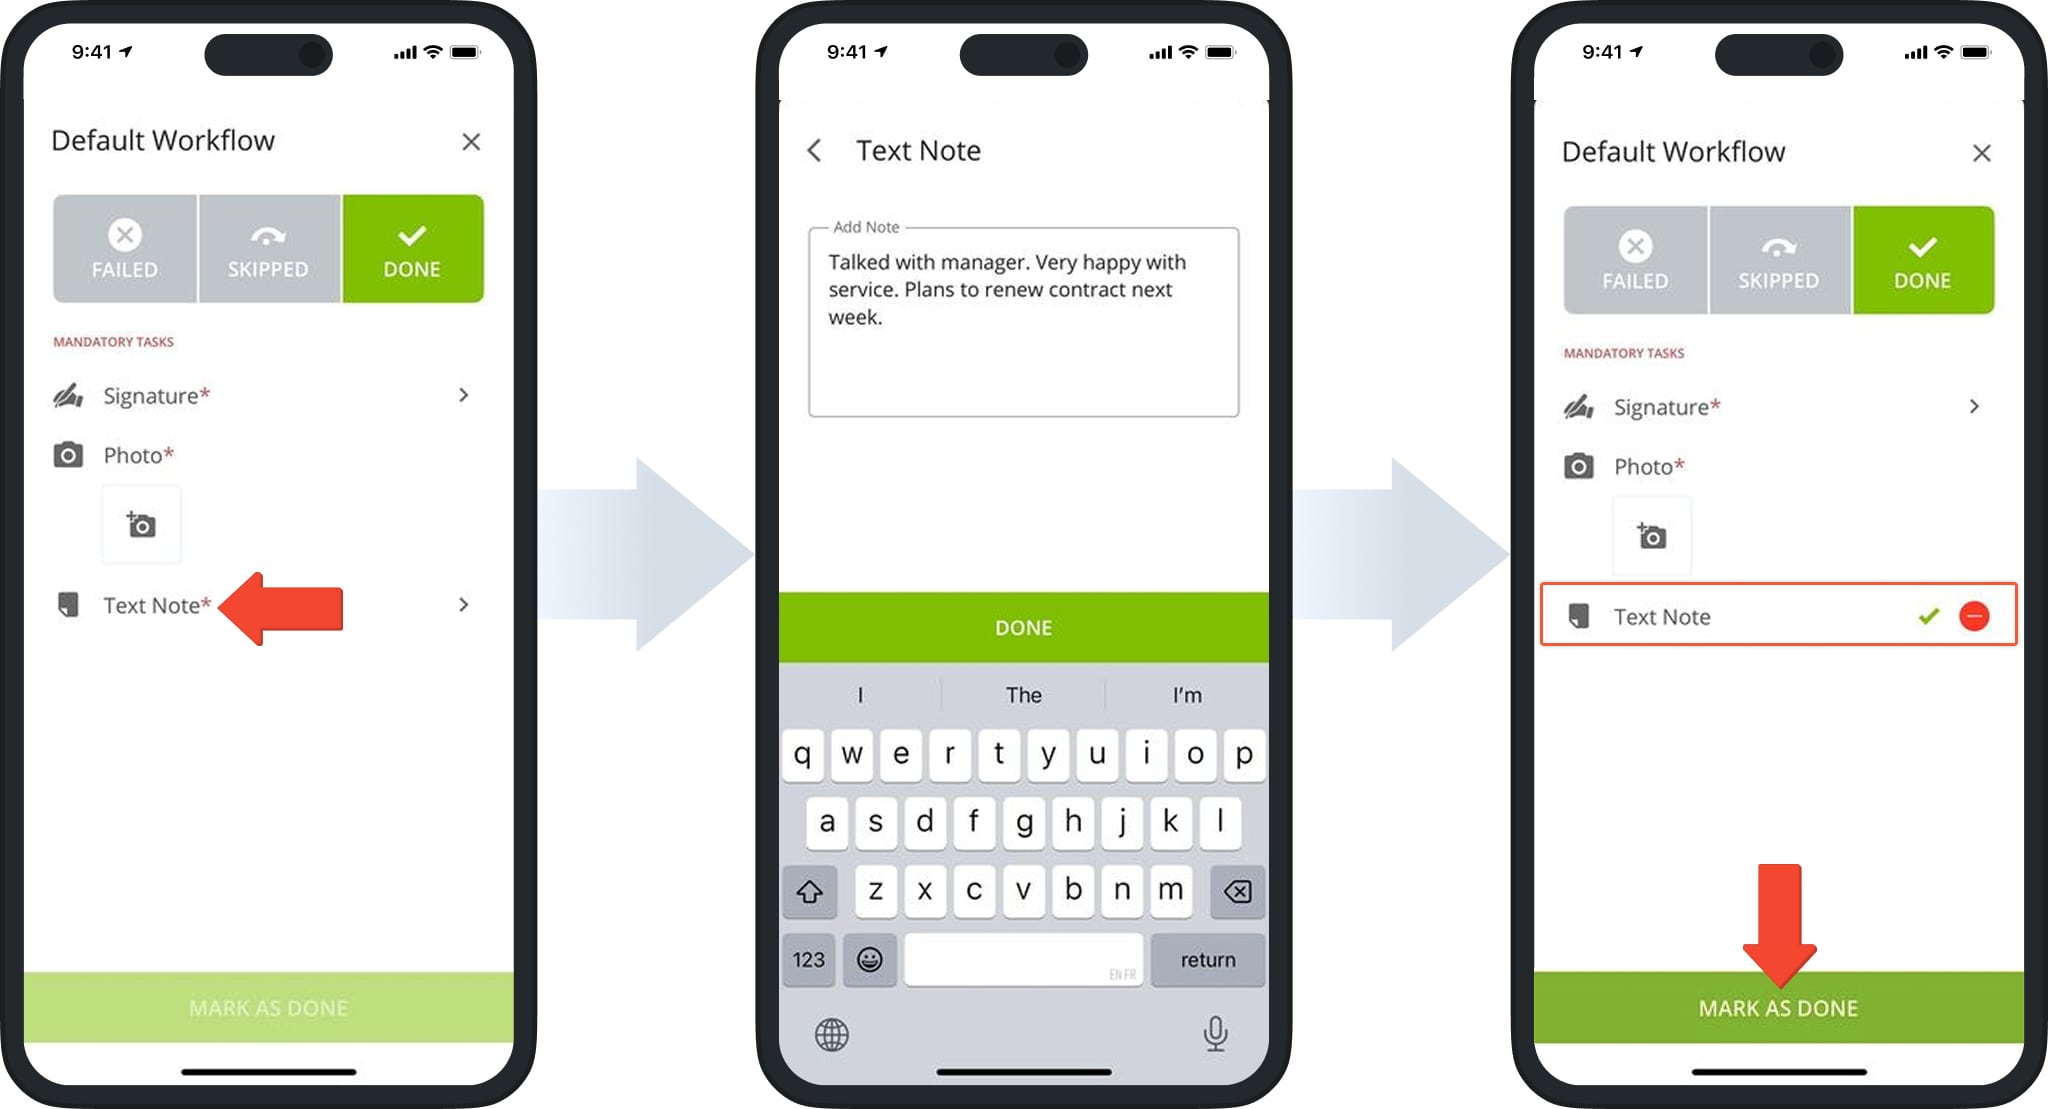
Mandatory Text Note Capture
Mandatory Text Note attachment requires drivers to add a text note before marking a destination as completed or an order as delivered. This provides additional context or important details that signatures or images may not capture.
In the app, “Text Note” appears as a mandatory task, with a green checkmark confirming attachment. Drivers can tap the red button to delete and rewrite the note. The destination can be marked as done when all mandatory tasks are completed.
Mandatory Tasks Best Practices And Use Cases
- Use Mandatory Tasks to ensure consistent, reliable proof of delivery and service verification. Leverage signatures, photos, or notes to capture essential verification evidence in the field.
- Incorporate QR code and barcode scanning workflows to improve accuracy and efficiency during loading, unloading, and delivery processes. Learn more about mandatory barcode reconciliation.
- Train field team members to follow Mandatory Task prompts within Route4Me’s mobile route planning apps. Promote compliance and enable real-time data synchronization with dispatchers and managers.
Visit Route4Me's Marketplace to Check out Associated Modules:
- Operations
Advanced Team Management Add-On
About author: Daniel Archer
With a background in pedagogy and writing instruction, Daniel is a former tenured English Instructor who, after nearly 20 years of teaching, transitioned into content strategy and leading writing teams for global brands. Now, as Technical Documentation Manager at Route4Me, he translates complex logistics technology into clear, accessible content that empowers users.