
Add Orders – Create Orders, Import Orders, And Upload Orders
Route4Me’s Order Management and Routing Software helps medium and large last mile businesses import, organize, and schedule millions of orders from CRMs and other systems. In this guide, you’ll learn how to import orders using the ERP order import API, manually create new orders in the Route4Me platform, and upload orders from spreadsheets. You’ll also see how to manage, route, and complete orders with greater efficiency.
Table of Contents
Import CRM Orders Into Route4Me ERP Software Via API
With Route4Me’s enterprise routing API, you can automatically import millions of orders. Contact your Route4Me Routing Expert or Support Team to set up API imports.
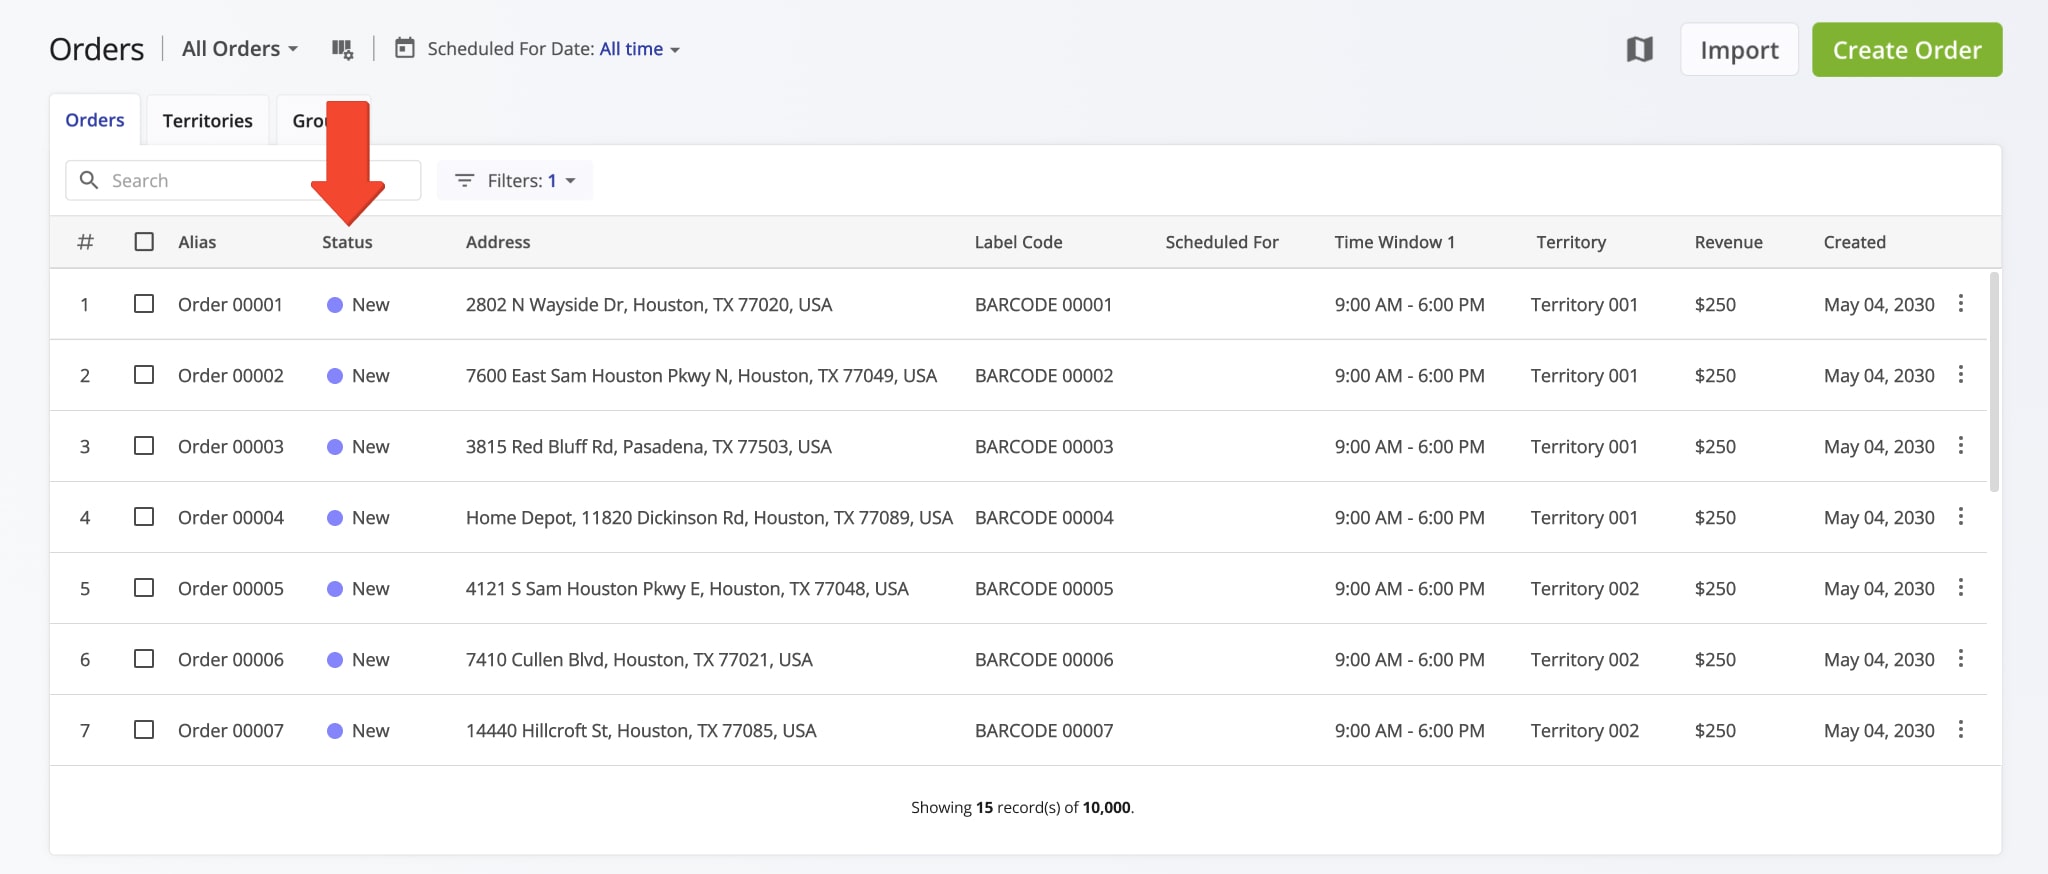
Imported orders appear in your Orders List with the “New” status. To enable barcode scanning for confirming, sorting, and scheduling orders, add a Custom Data column labeled “BARCODE” with unique codes for each order.
To open your Orders List, click “Business Operations” > “Orders” in the Navigation Menu,
Schedule New Orders For Route Planning
Once imported into the Route4Me optimization software, orders receive the “New” status. These orders can’t be used for route optimization or added to planned routes until they are scanned, confirmed, and scheduled in the system.
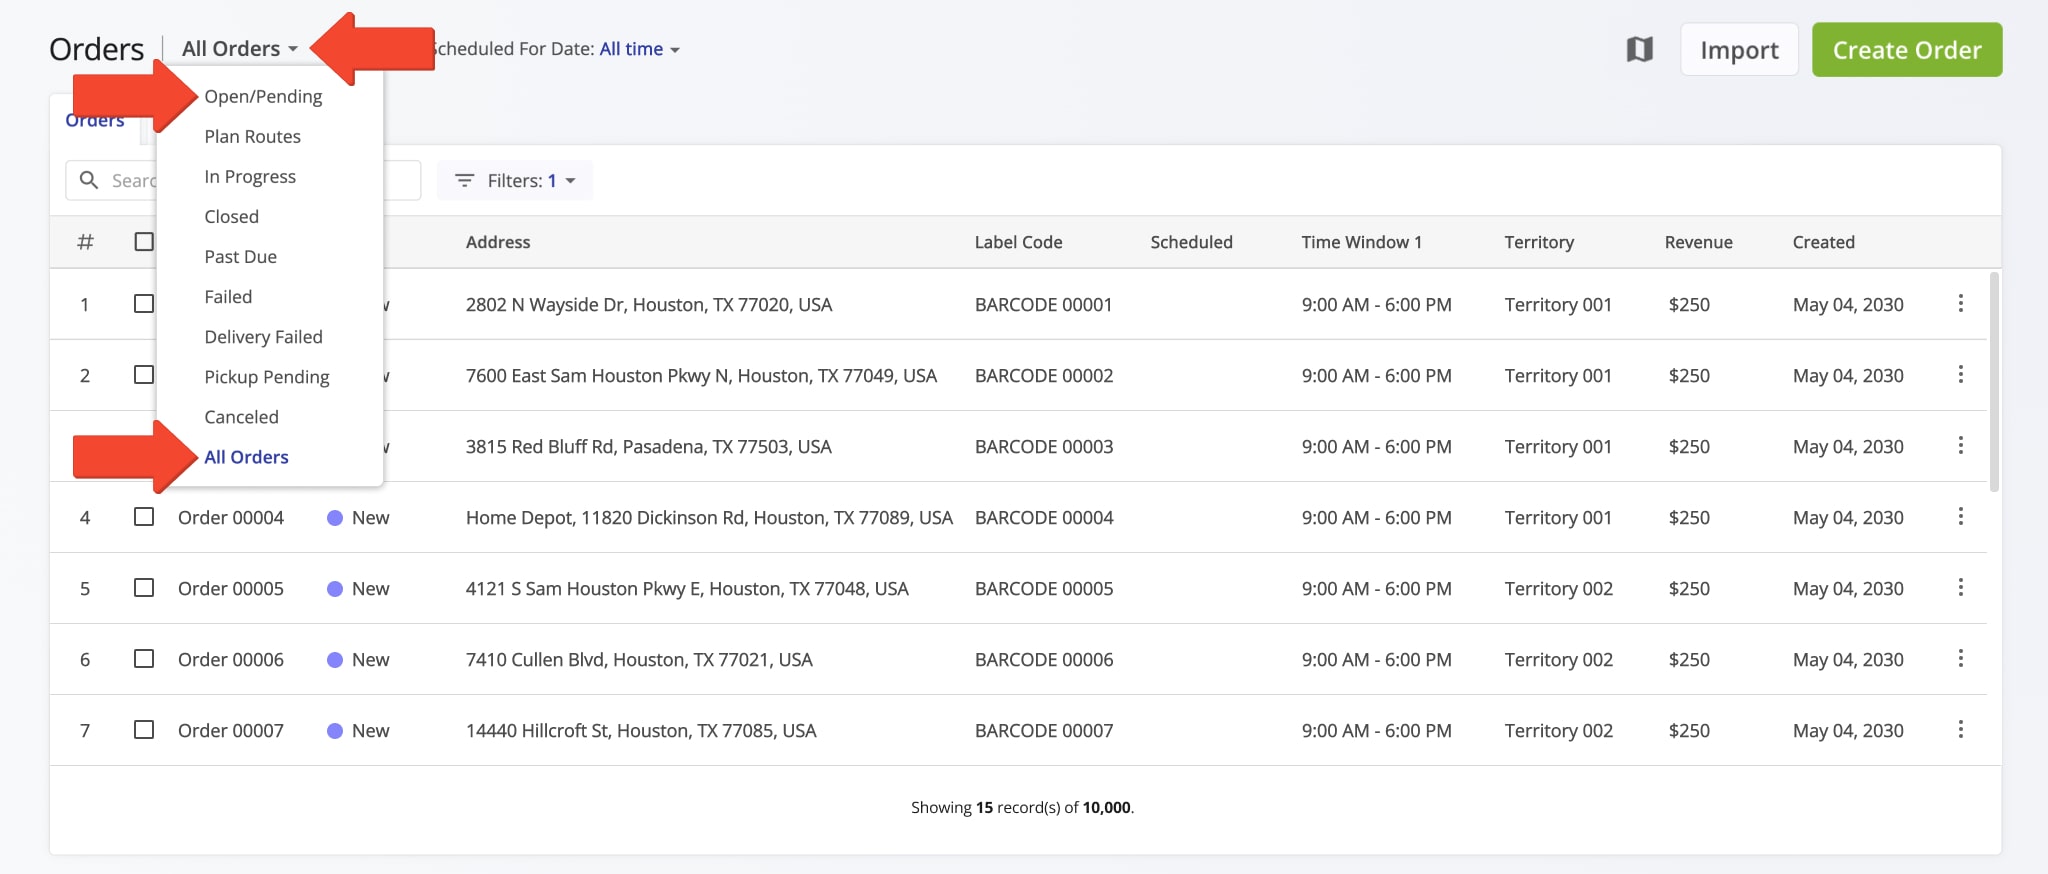
To view orders with the “New” status, switch to the “All Orders” or “Open/Pending” view modes in your Orders List. NOTE: Learn more about managing orders in Route4Me.
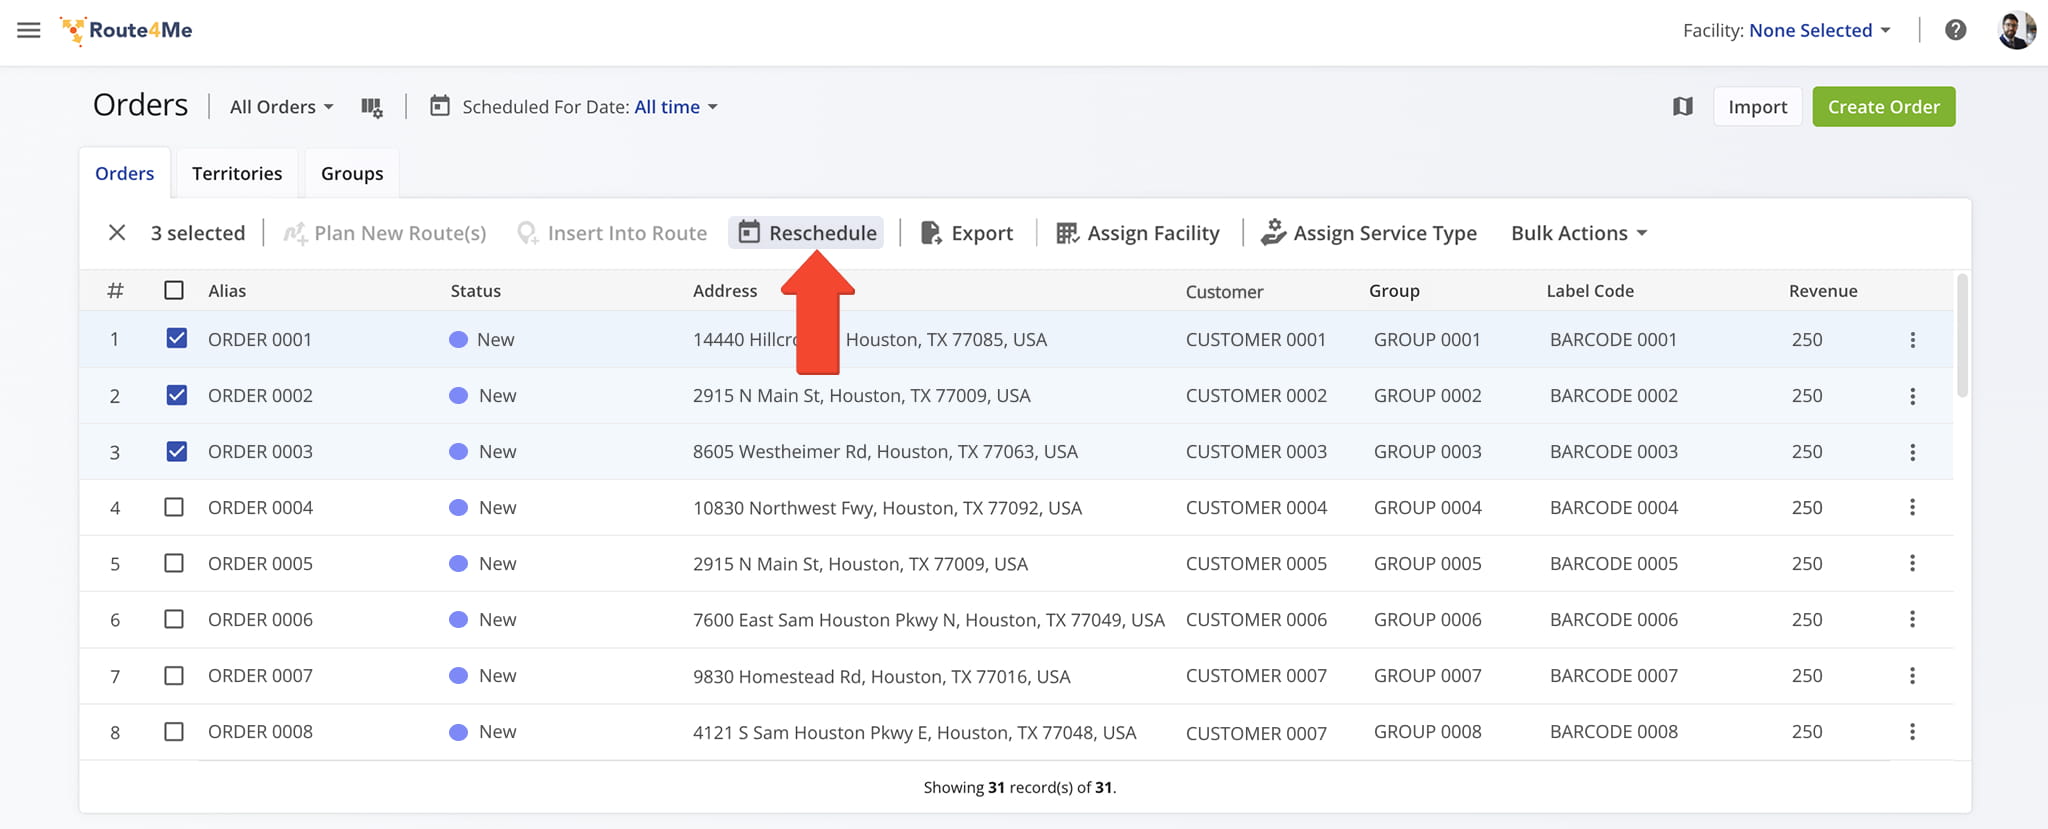
You can also manually schedule one or multiple “New” orders. Select the orders by checking the boxes next to them, then click “Reschedule” in the action bar above the Orders List.
Scan Order Label Codes To Confirm, Sort, And Schedule New Orders
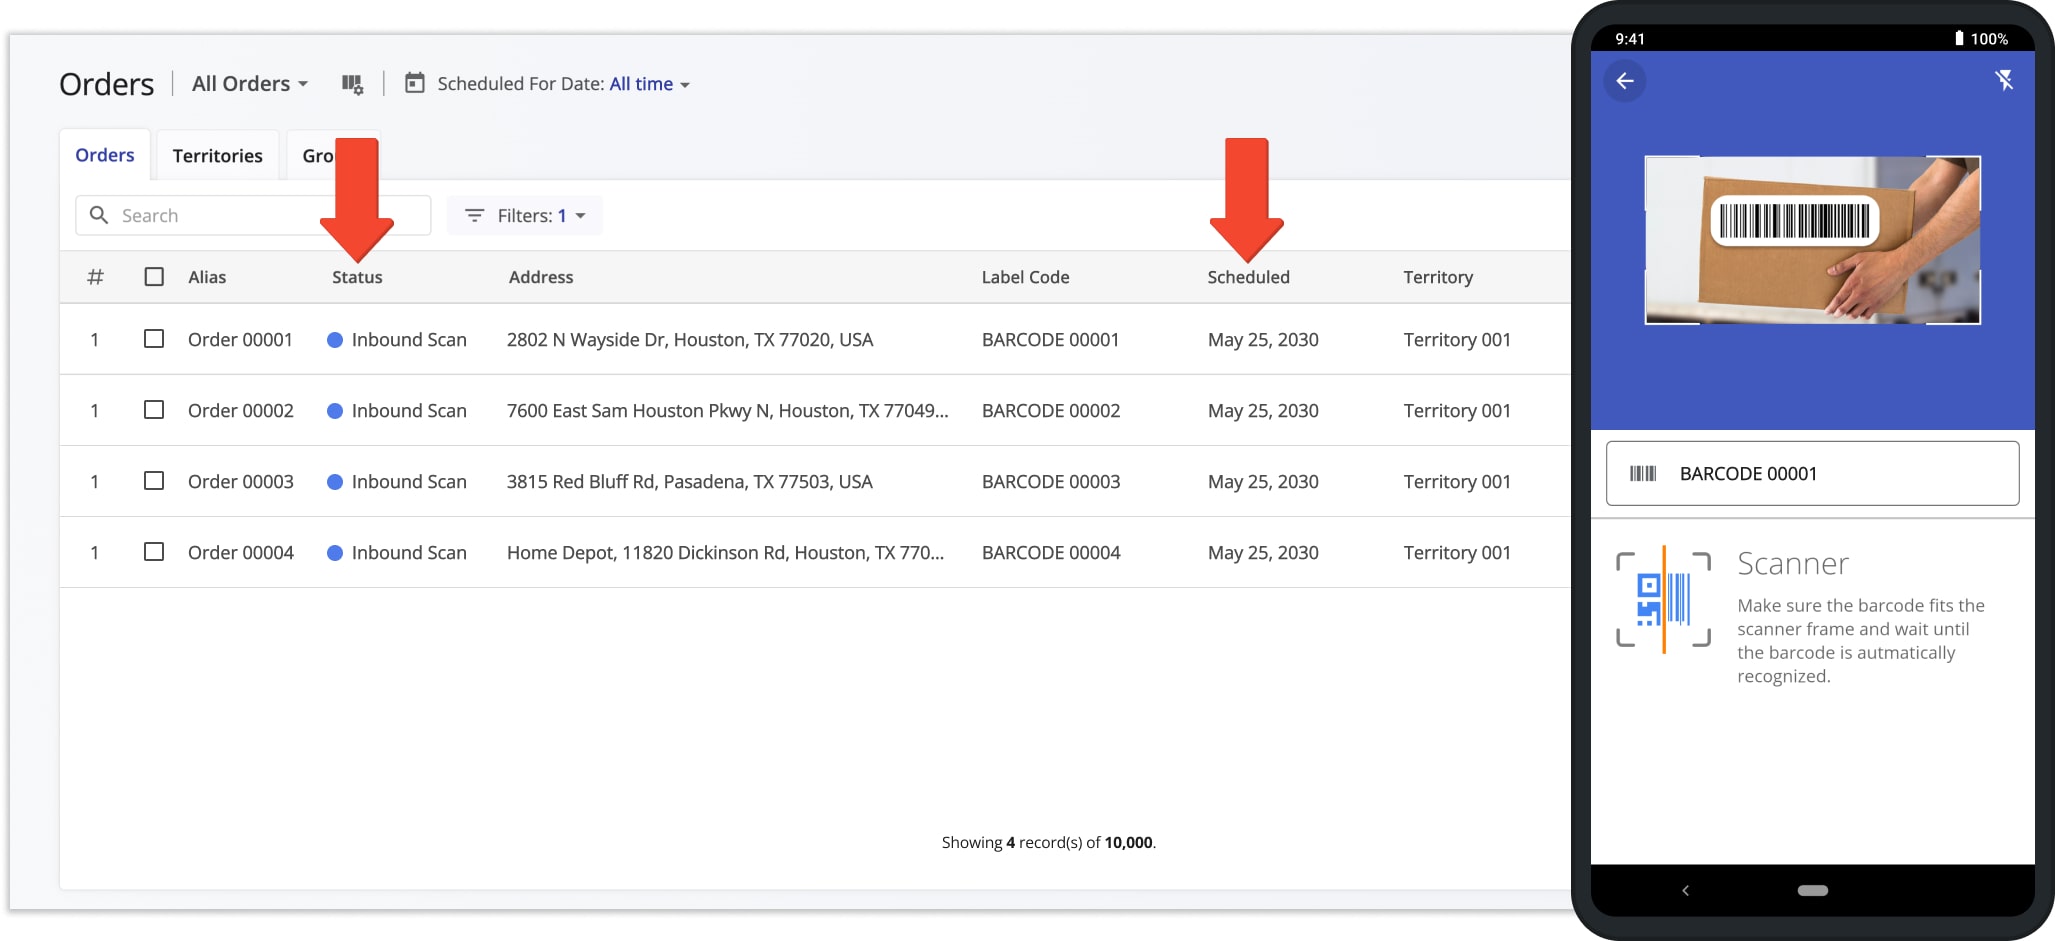
The primary way to process “New” orders for route planning and optimization is by scanning label codes. Route4Me’s Android and iPhone Route Planner apps include a built-in barcode scanner and support commercial Bluetooth scanners.
The Inbound Scan registers orders in the system, while the Sorted Scan schedules them for a specific date and organizes them by Territory.
Using the mobile app, you can continuously scan order labels to sort and schedule “New” orders, which then receive the “Sorted” and “Scheduled” statuses. Once scheduled, they can be used to plan and optimize order routes.
Bulk Upload Orders Spreadsheet To Route4Me Order Routing Software
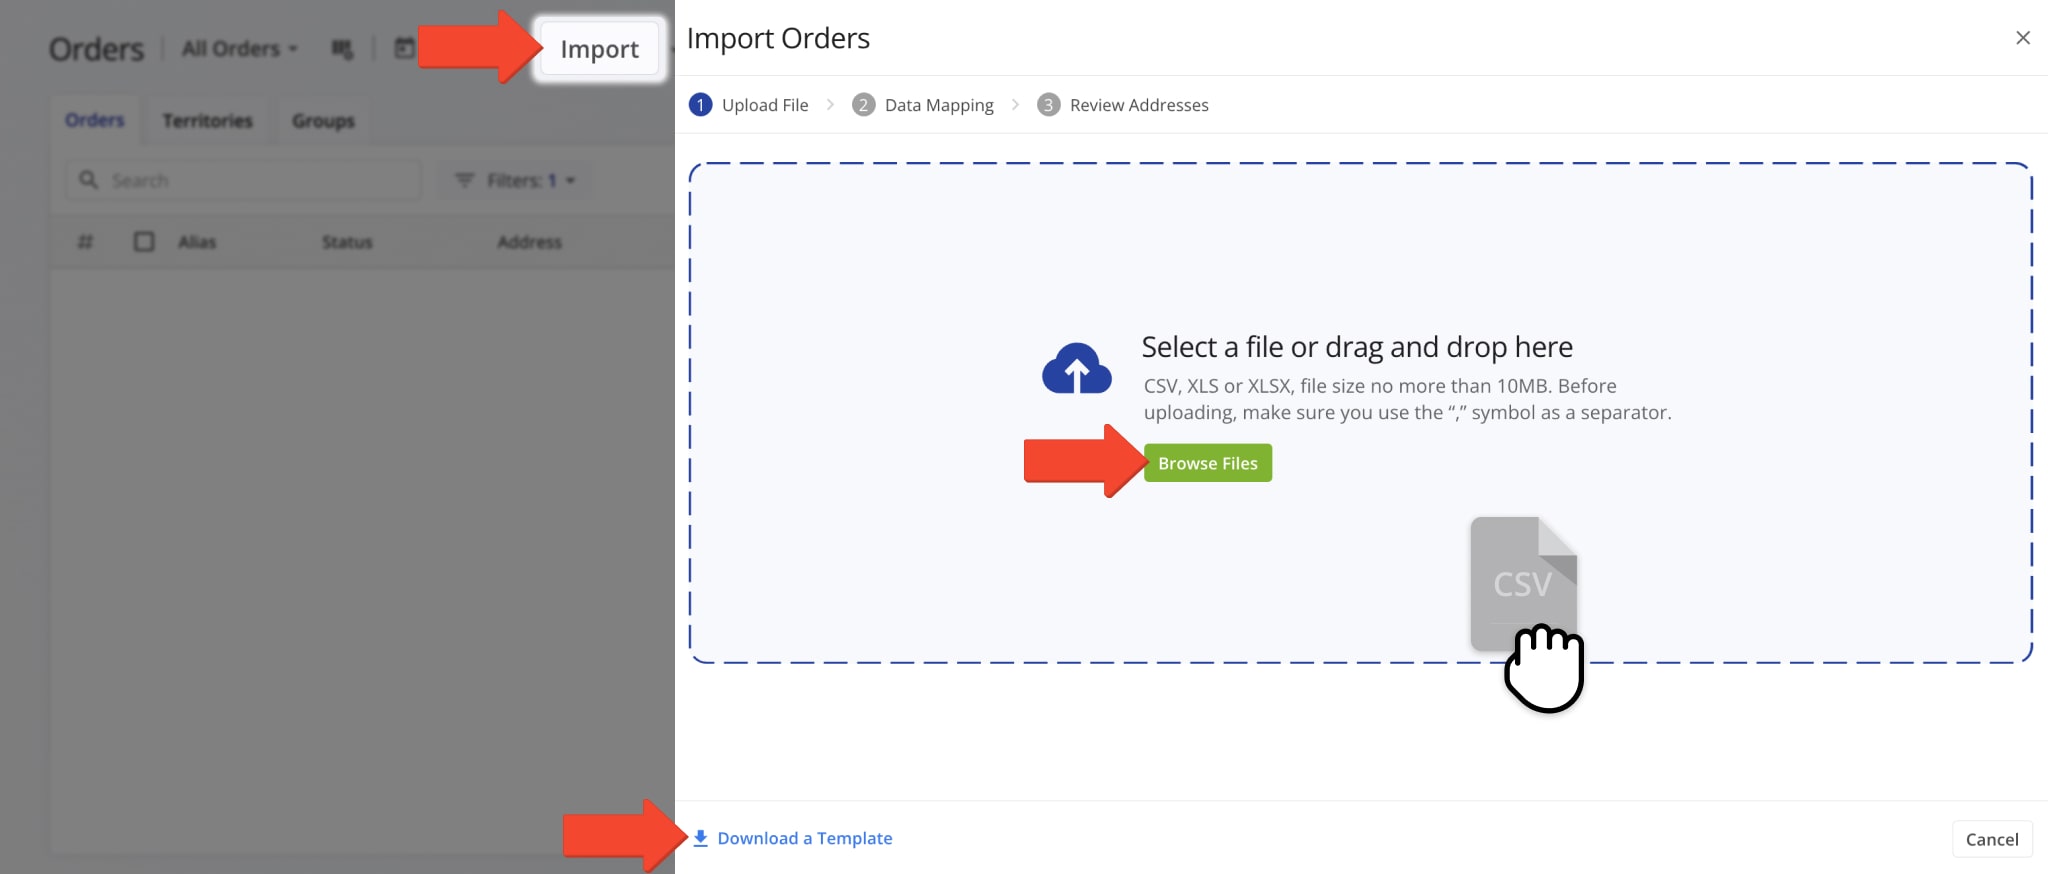
You can upload millions of orders to your Orders List using a spreadsheet file. Click the “Import” button in the Orders List, then upload your CSV file with order data.
You can add schedule details and other attributes directly to your upload spreadsheet. The table below lists the valid order data column headers and their corresponding values that Route4Me will validate during the upload process.
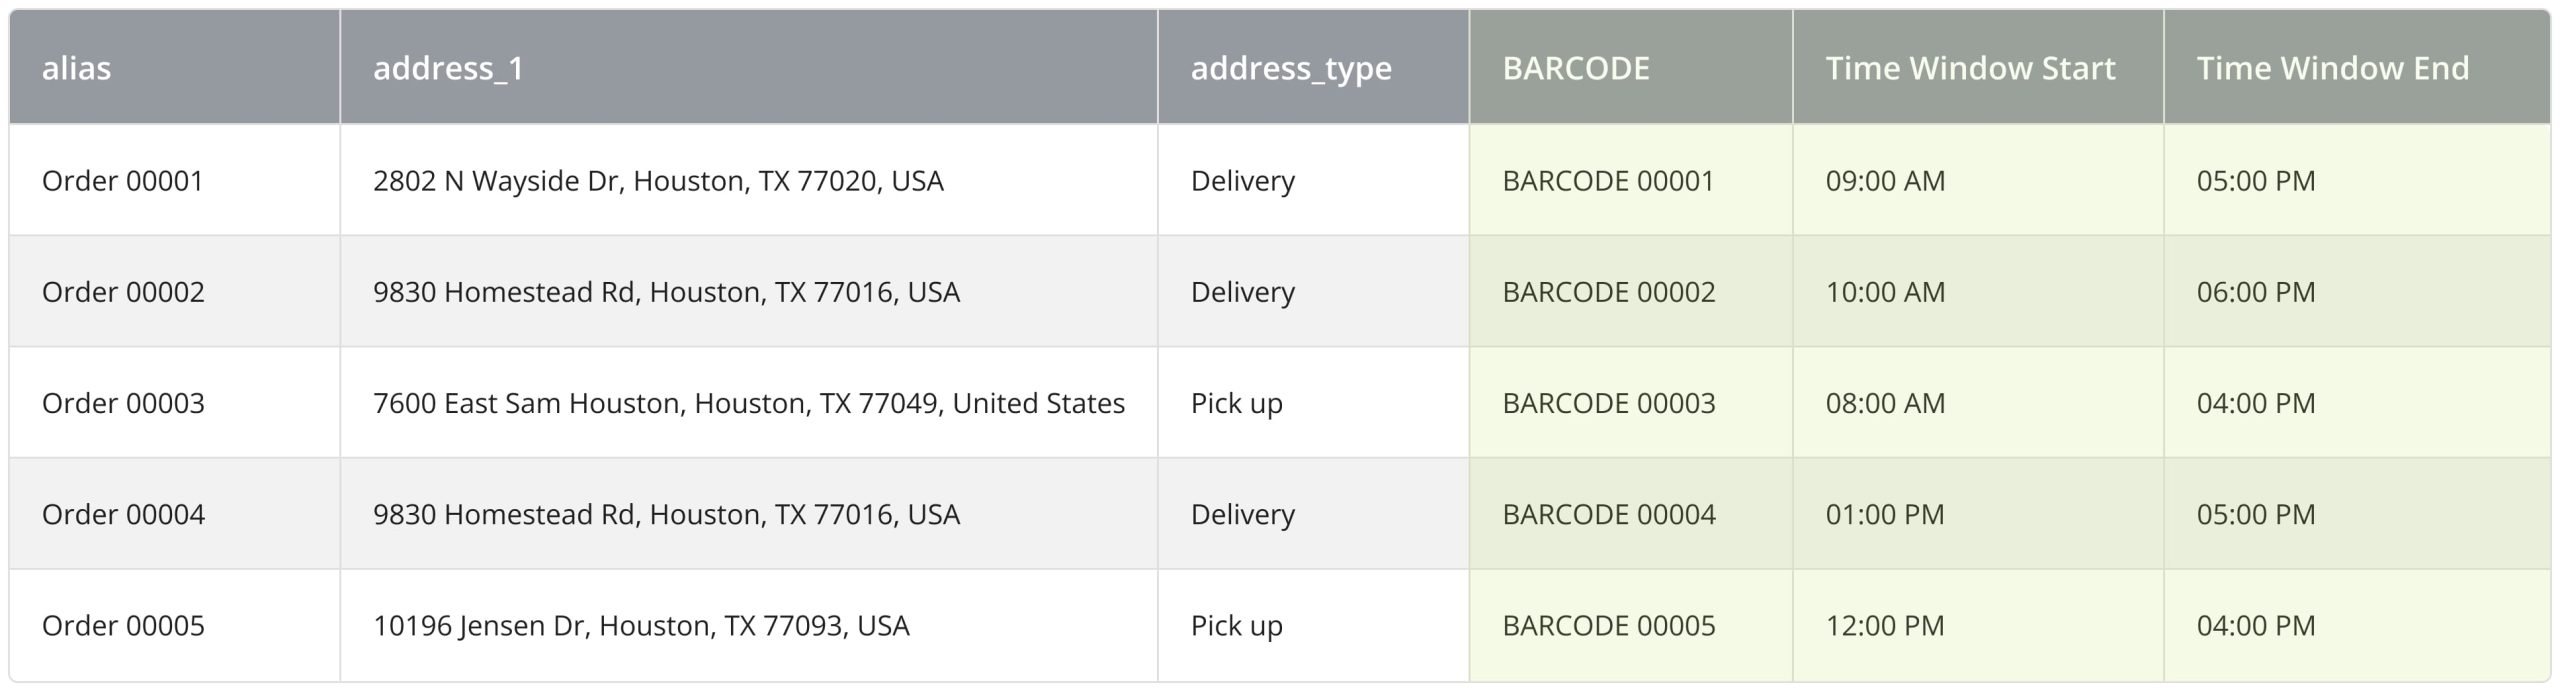
NOTE: To scan labels for confirming, sorting, and scheduling orders, include a Custom Data column labeled “BARCODE” with unique codes for orders. To enable mandatory barcode scanning for loading and unloading orders, use the Advanced Configuration Editor.
Order Data Column Headers
You can also download Route4Me’s Order Upload File Template, add your order details, then upload it to the software. Uploaded orders receive the “New” status and can then be scheduled, planned into new routes, or inserted into existing routes.
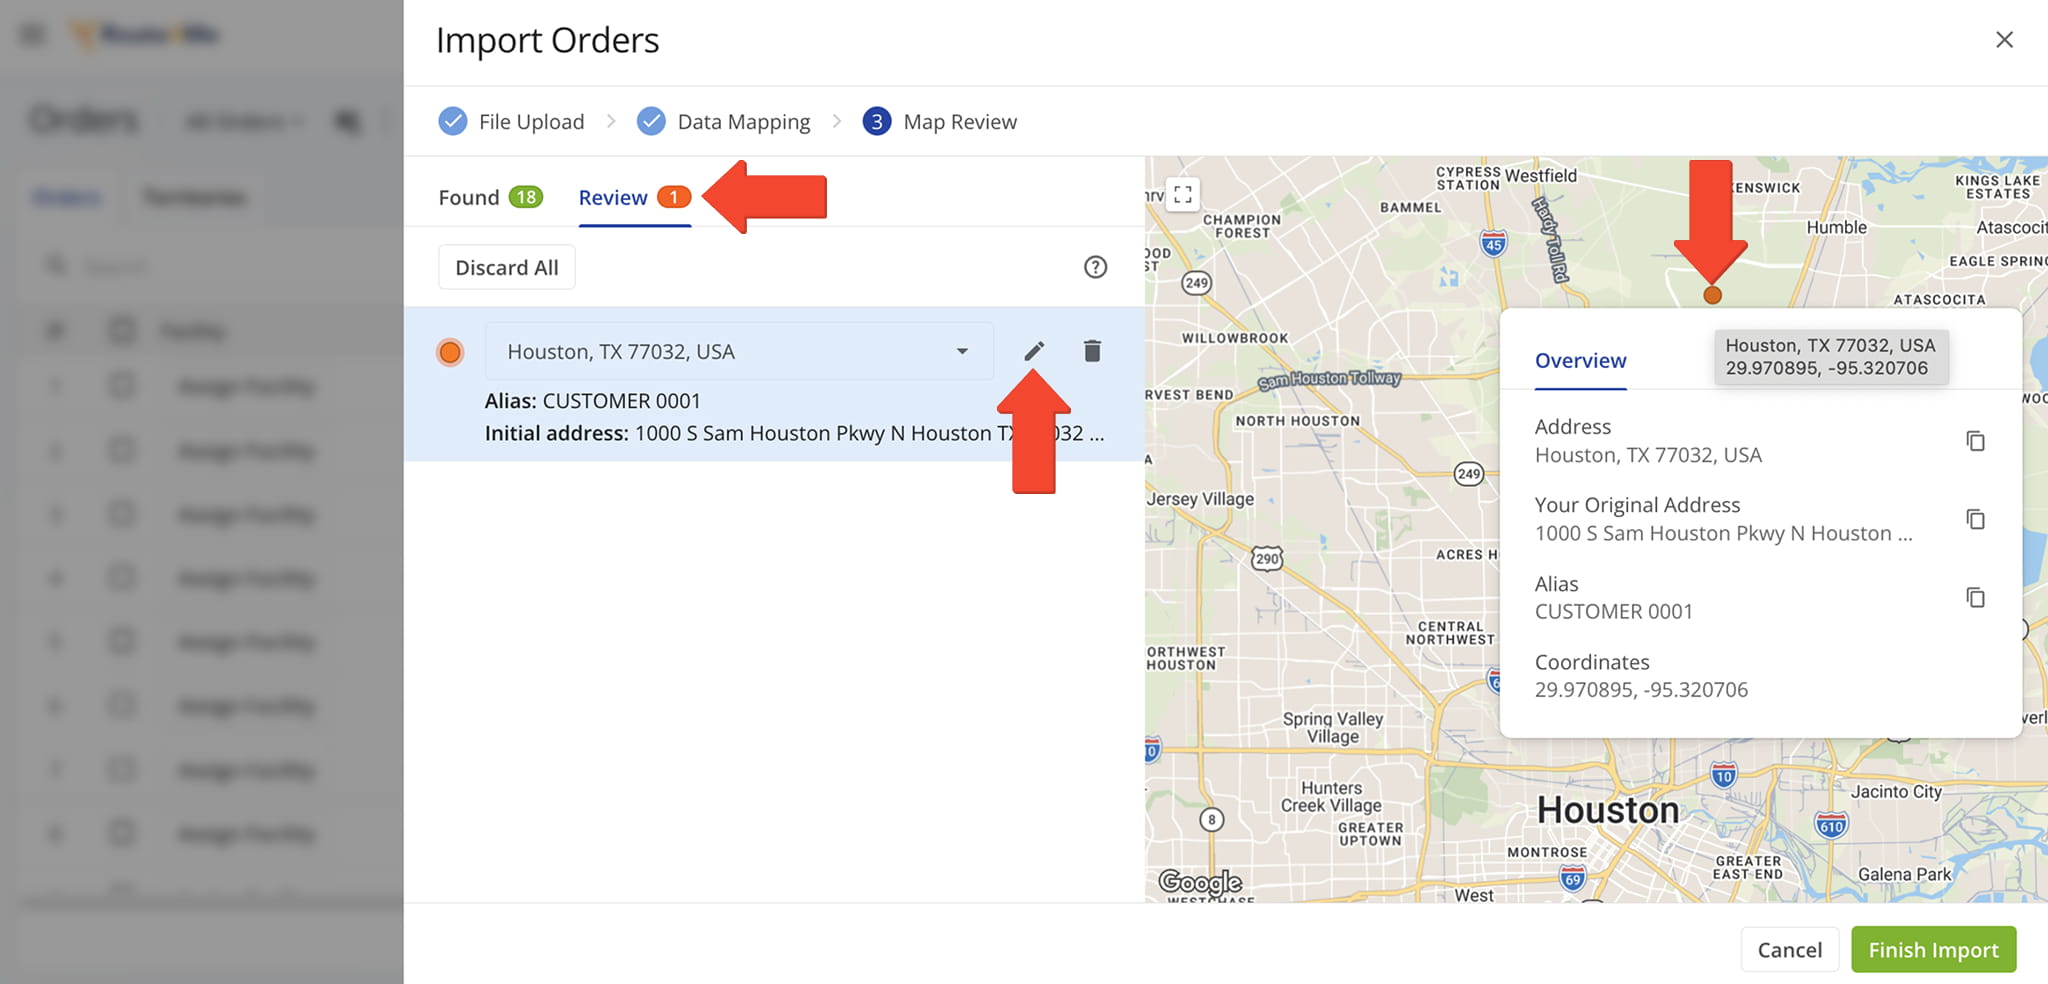
Once uploaded, Route4Me geocodes each address and displays all orders on the map for review. If any address cannot be accurately geocoded, you can review it directly on the map and make edits to correct the location before routing.
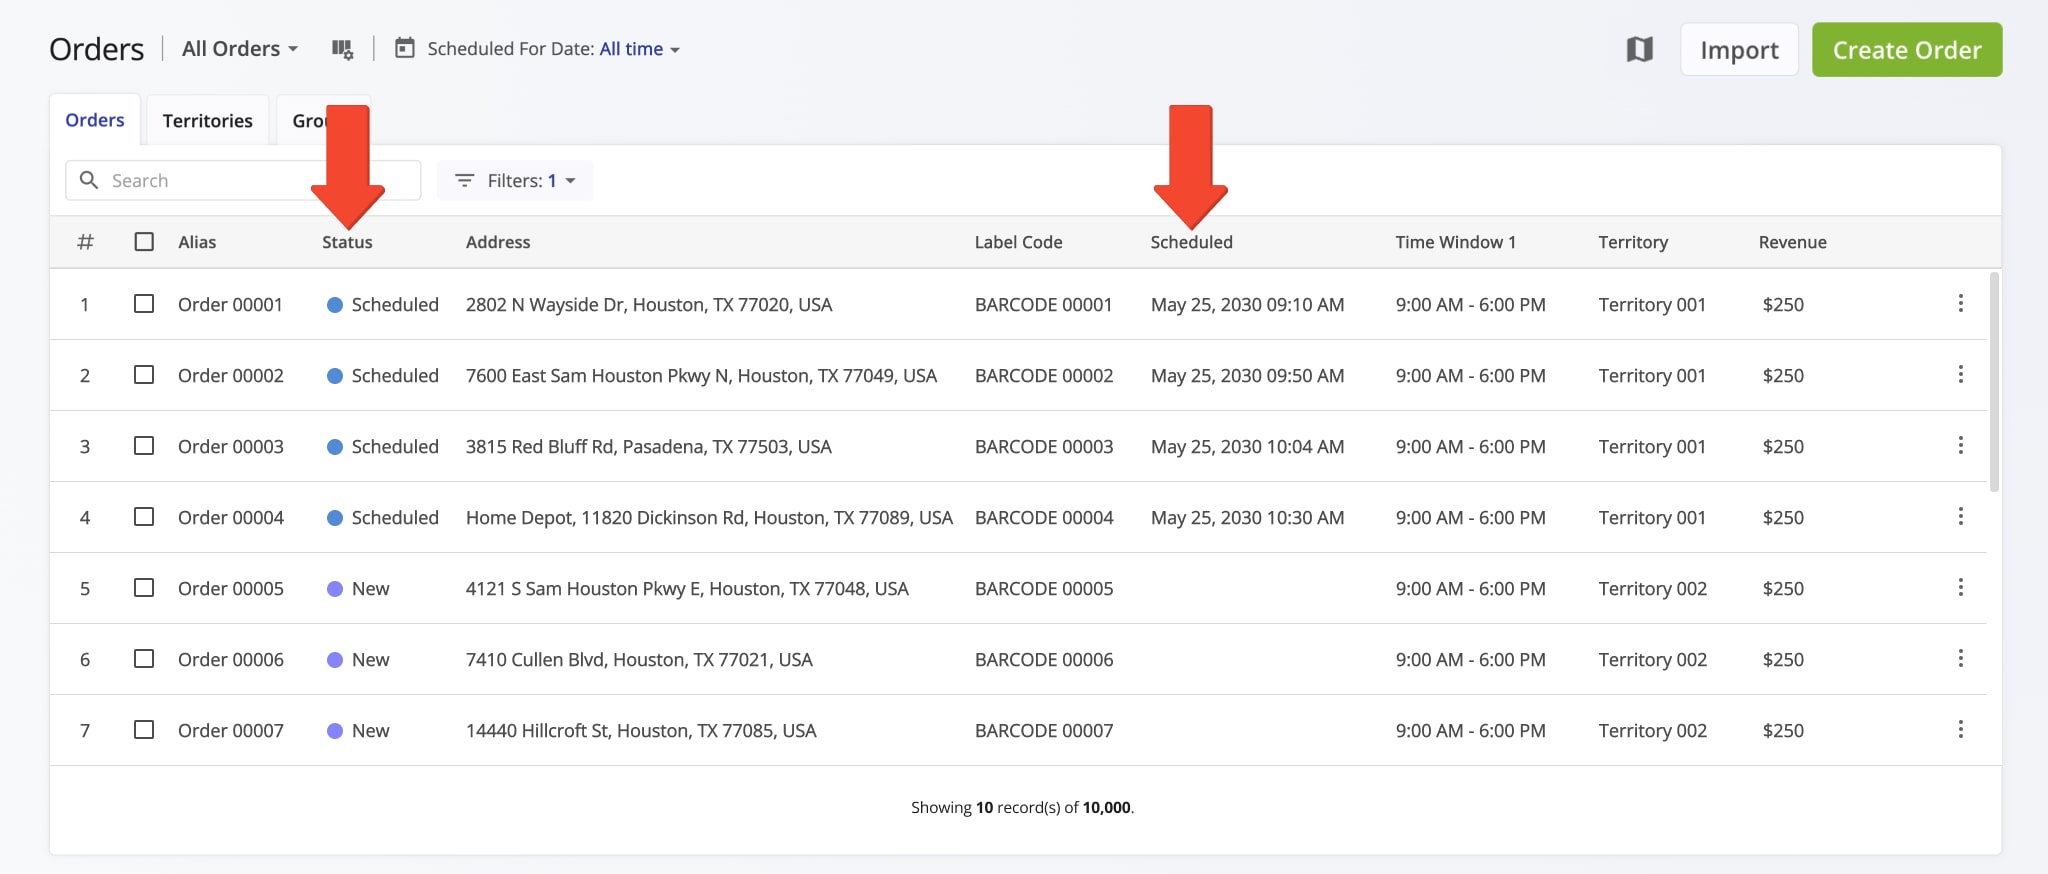
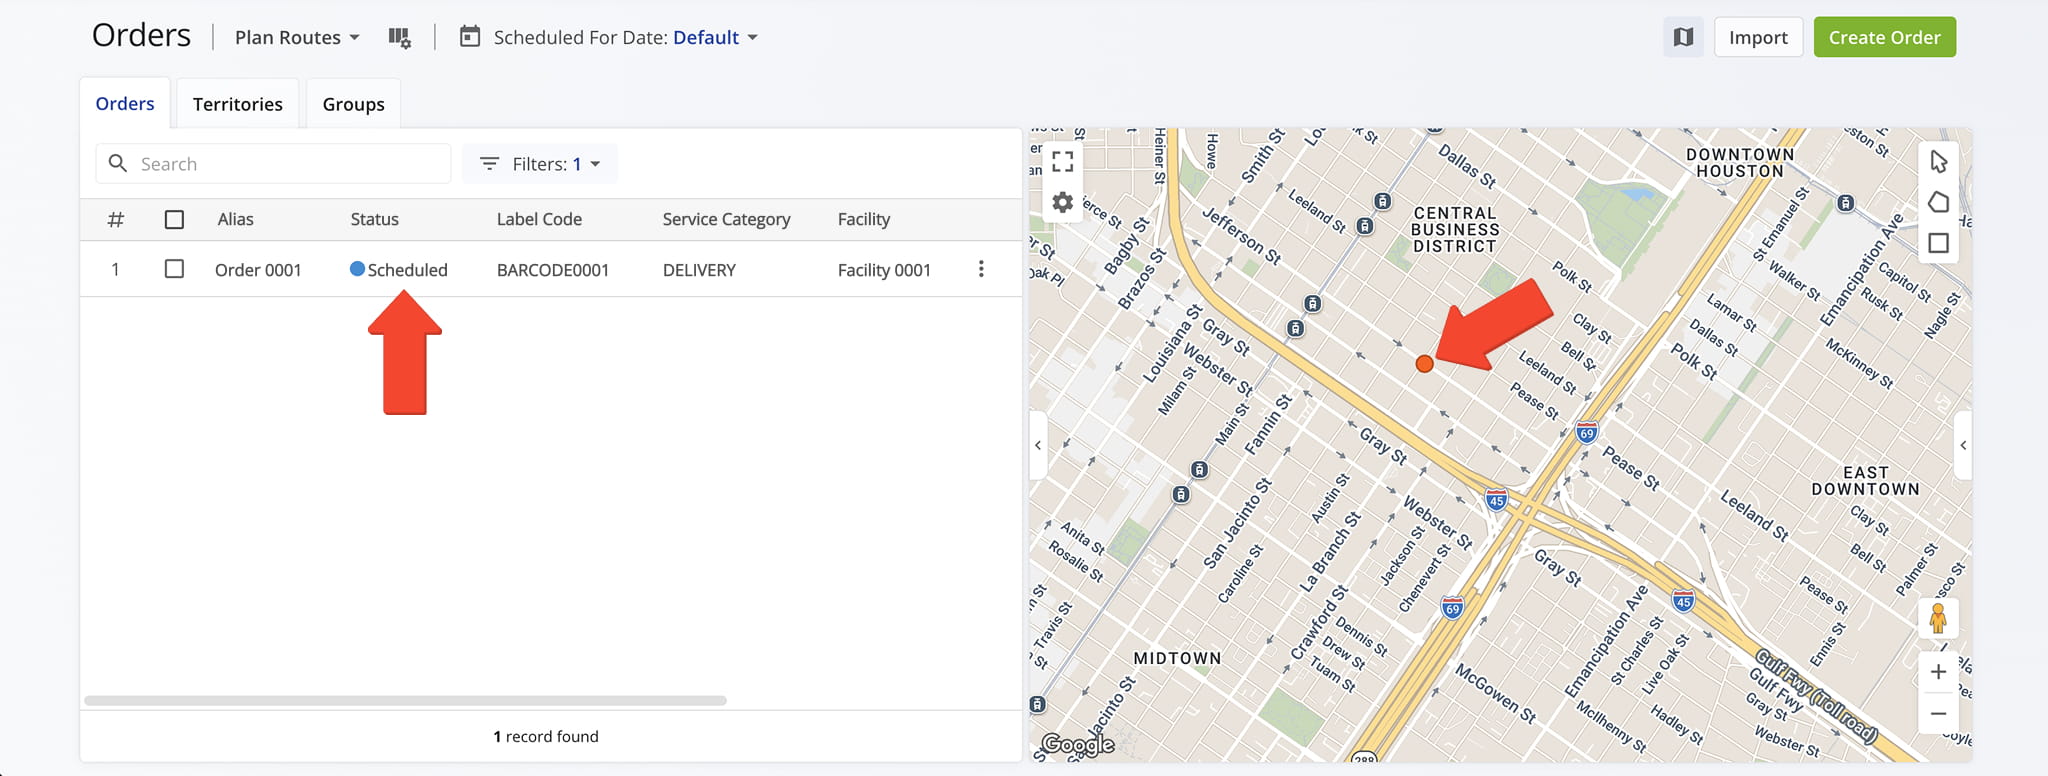
The orders appear in your Orders List with a “New” status and can be scheduled for the upload date or dates specified in the spreadsheet. Once scheduled, orders receive a “Scheduled” status and are ready to be used for routing.
Uploaded and validated orders appear in your Orders List with their data converted into order details.
If your upload includes scheduling information, orders will have the “Scheduled” status. Orders without scheduling details receive the “New” status and must be scanned to sort and schedule or scheduled manually.
Create Orders – Add New Orders Manually To Orders List
You can also manually add custom orders from the Orders List by clicking “Business Operations” > “Orders” in the Navigation Menu. Then, from the Orders Page, click the “Create Order” button.
Enter all requested details (described below), then create the order. Route4Me will geocode the address and assign the order a “Scheduled” status, making it ready for route optimization or insertion into planned routes.
NOTE: To enable scanning of order labels for confirmation, sorting, and scheduling, add a Custom Data field named “BARCODE” and enter the unique label code in the “Custom Data” field.
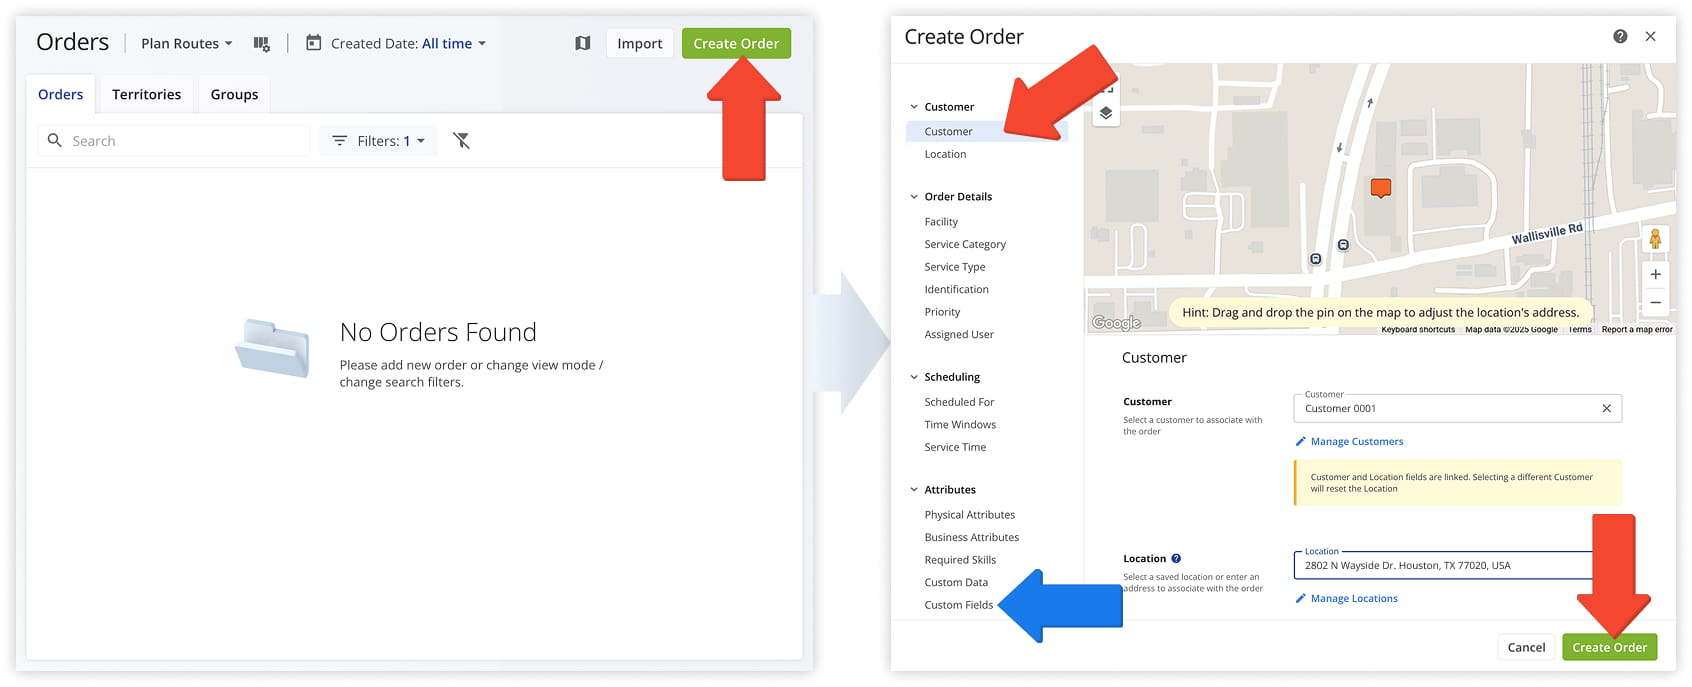
Create Order Fields
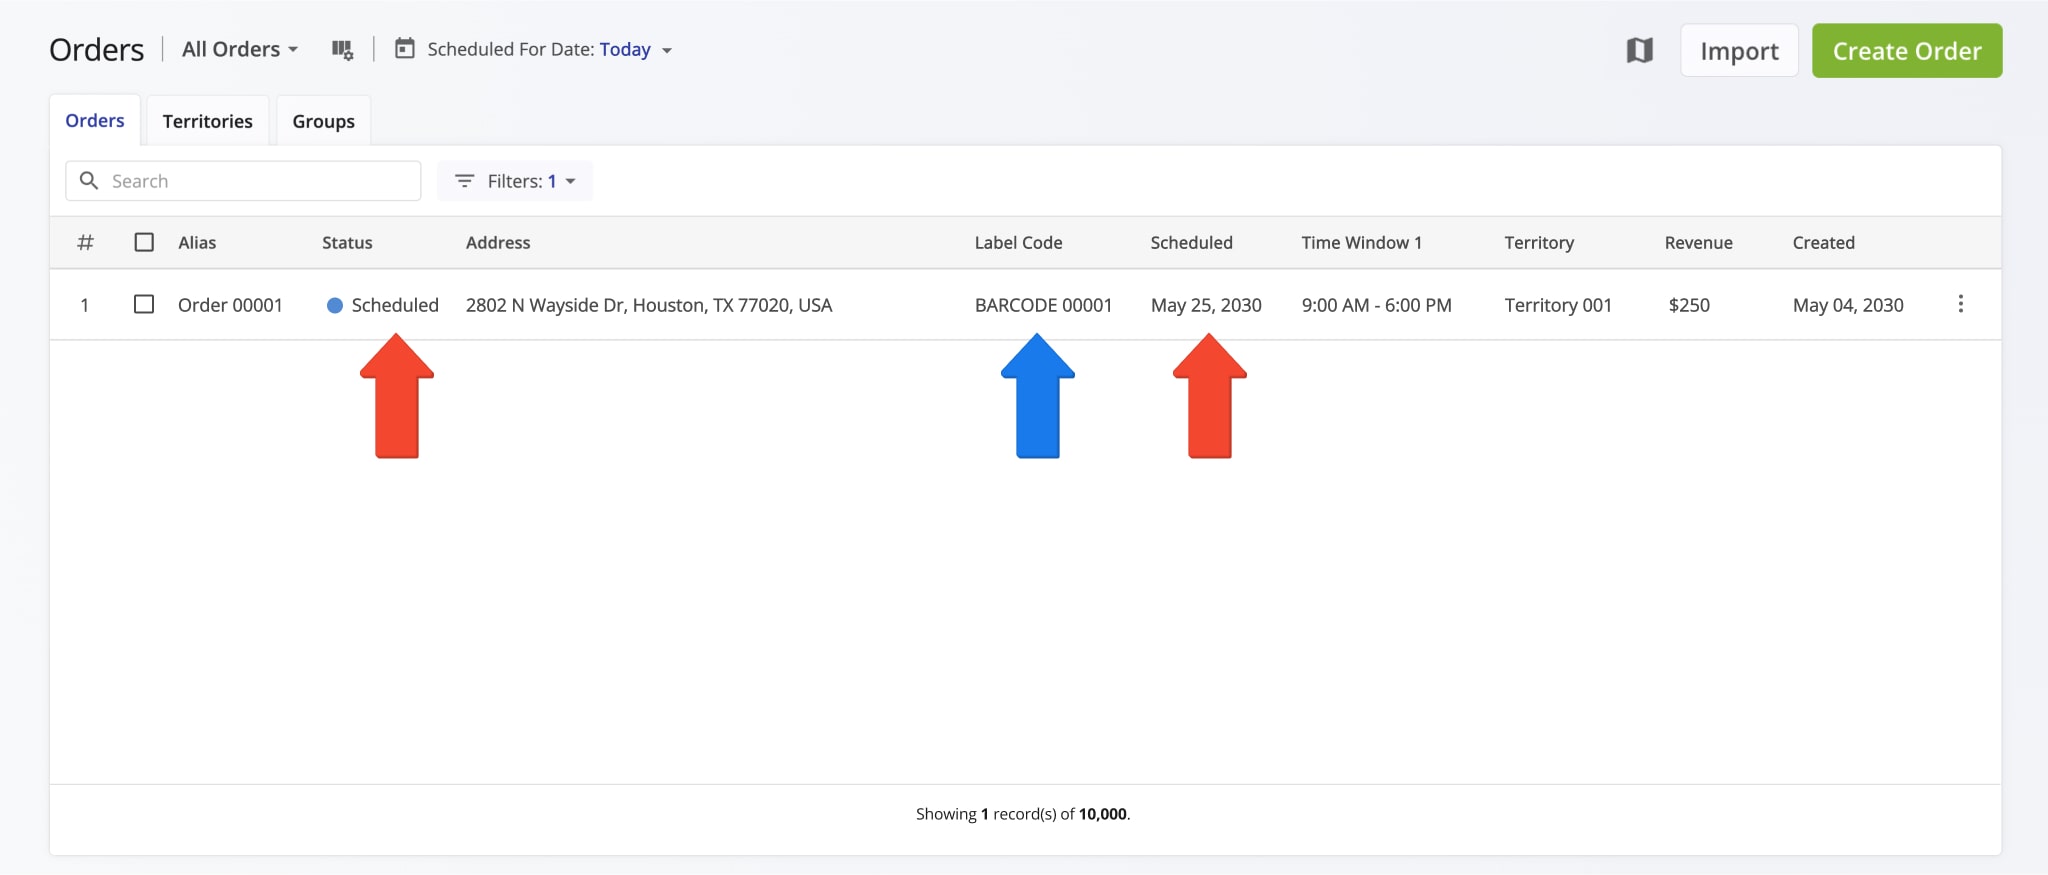
Once created, the order, the order appears in your Orders List with the “Scheduled” status for the specified date, ready to optimize new routes or be inserted into planned routes.
Adding the “BARCODE” Custom Data value lets Route4Me automatically validate the code and enable the “Label Code” column in the Display Columns menu.
Create New Orders On The Interactive Orders Map
You can also add new orders from the interactive Orders Map by clicking the Orders Map icon on the Orders Page, right-clicking near your desired location, and selecting “Add The Nearest Valid Address”.
Then, fill in the exact address, schedule, order details, Custom Data, and more in the Create Order window.
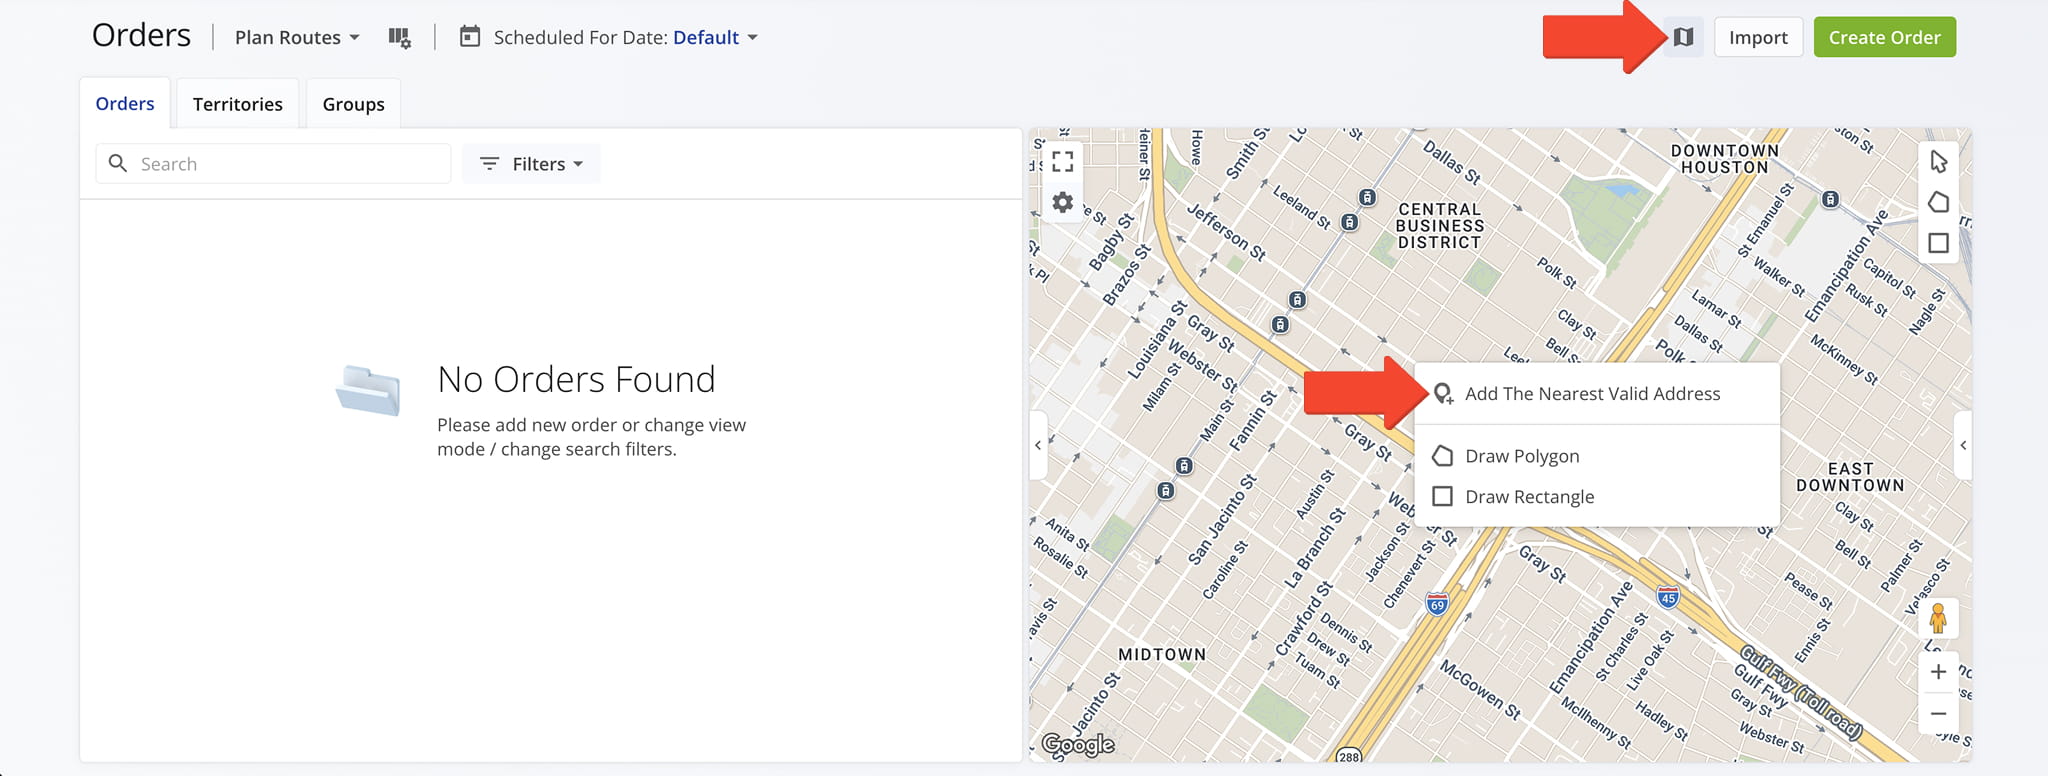
When adding an order from the map, the “Scheduled For” field defaults to the current date but can be changed. Additionally, every order added through the map will have the “Scheduled” order status.
Visit Route4Me's Marketplace to Check out Associated Modules:
- Operations
Advanced Team Management Add-On
- Operations
Custom Data Add-On
About author: Kristian Andreev

