Customer Notifications (Classic) – Order Tracking And Messaging Settings
Route4Me’s Customer Notifications (Classic) provides a centralized way to manage customer communications from the Route4Me Order Tracking Page. It allows you to control when Notifications are sent, how they are delivered, and what information they include across email, SMS, and voice call channels. This article explains each configuration section within Customer Notifications (Classic) and how it can be adjusted to support different notification and tracking settings.
NOTE: Route4Me also offers an updated version of Customer Notifications with additional configuration options and an improved interface. To learn more, see our guide to the new Customer Notifications settings.
Table of Contents
Customer Notifications (Classic) – Overview
The Classic Customer Notifications page provides a centralized space to manage how customers are informed throughout the delivery or service process. From this page, you can configure and review Notification settings to update customers with timely information.
To access the Classic Customer Notifications page, navigate to “Customer Experience” and select “Customer Notifications” from the Navigation Menu. This will open the Notifications interface, where settings are organized into dedicated tabs for easy navigation.
Open Your Notification Settings
Notifications Settings – Delivery And Configuration Options
Main Logo Tab – Customize Notification Branding
The “Main Logo” tab allows you to define the visual branding used in Customer Notifications. You can:
- Add both a “Large Logo“and a “Mobile Logo” by pasting hosted image URLs into their respective fields.
- Control alignment (left, center, or right) to ensure they display correctly across different Notification formats and devices.
- For improved clarity on high-resolution screens, configure “Large Logo Retina” and “Mobile Logo Retina” versions.
- Use the built-in preview feature to review how all logo variations will appear in Notifications before sending them.
![]()
Icons Tab – Set Customer Tracking Map Icons
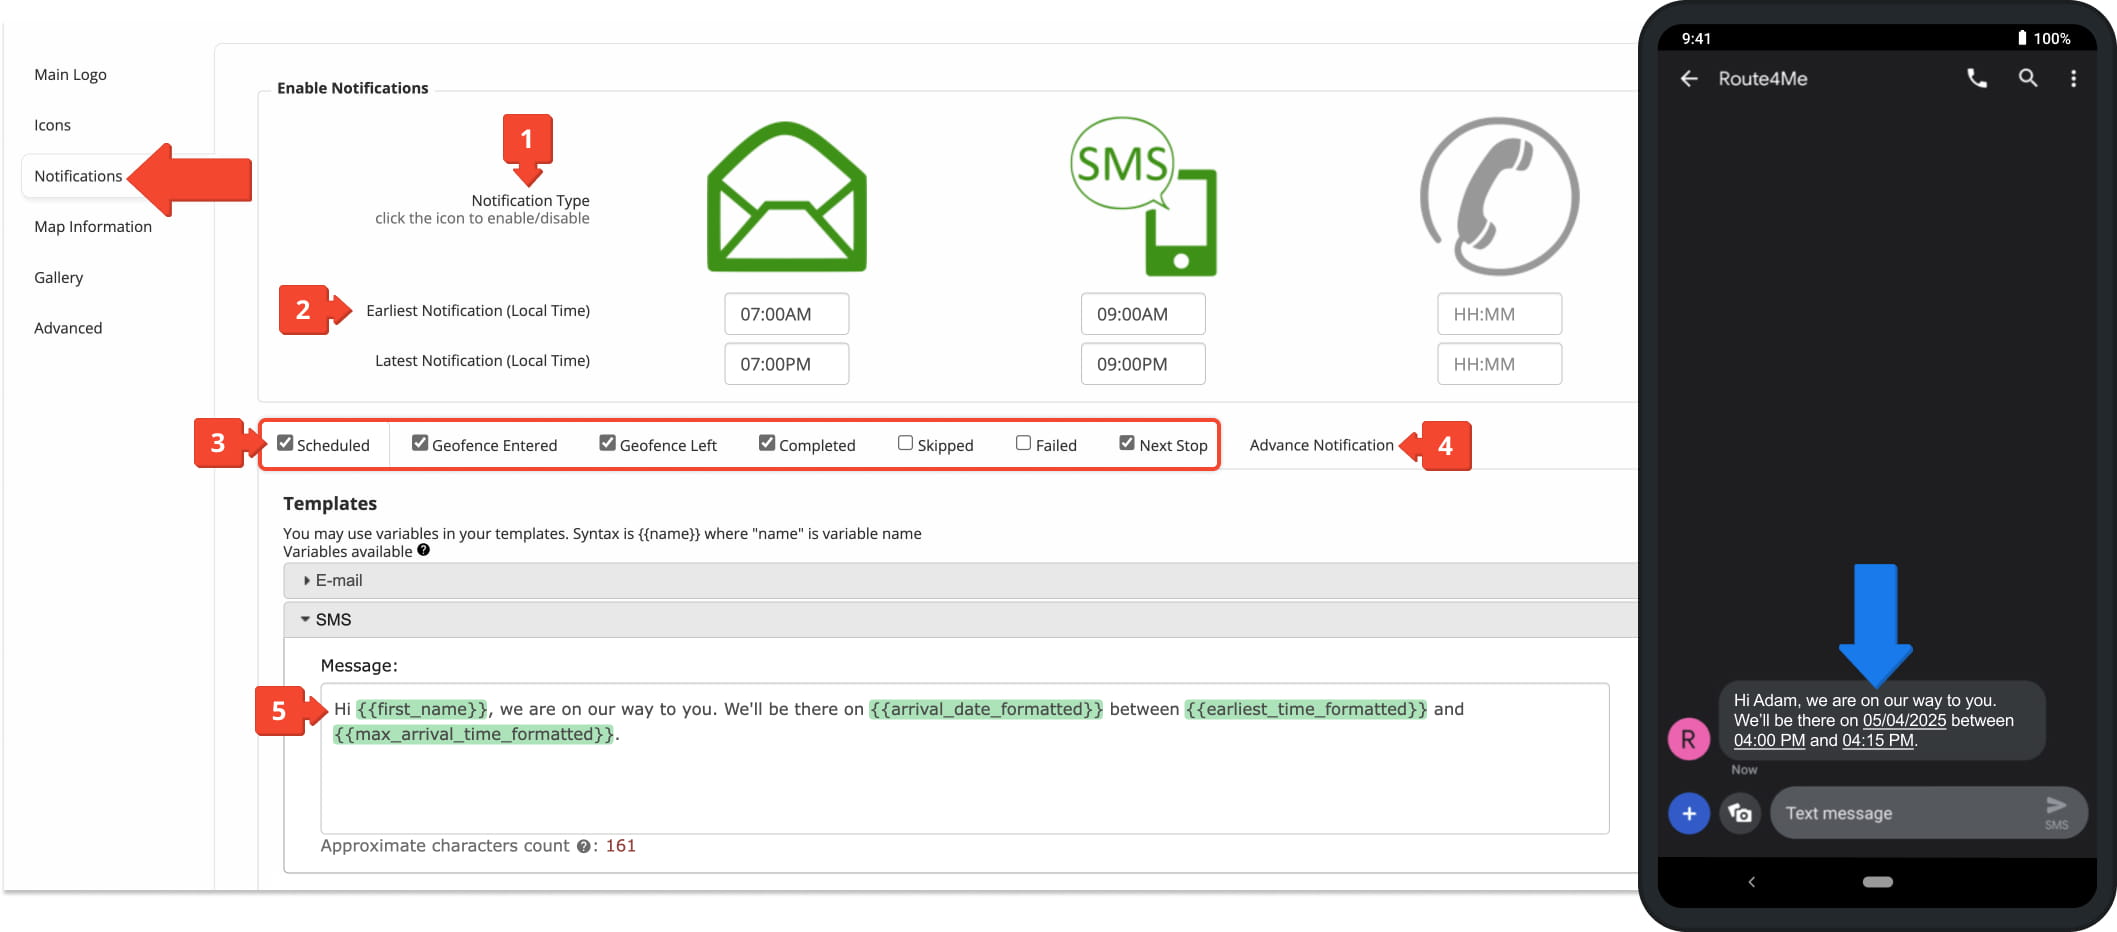
| Trigger Type | Description |
|---|---|
| Scheduled | Sends a Notification when a delivery or visit is scheduled. |
| Geofence Entered | Sends a Notification when a driver enters a defined geofence area. |
| Geofence Left | Sends a Notification when a driver exits a defined geofence area. |
| Completed | Sends a Notification when a delivery or visit is completed. |
| Skipped | Sends a Notification when a stop or visit is skipped. |
| Failed | Sends a Notification when a delivery or visit fails. |
| Next Stop | Sends a Notification when the customer is the next upcoming stop. |
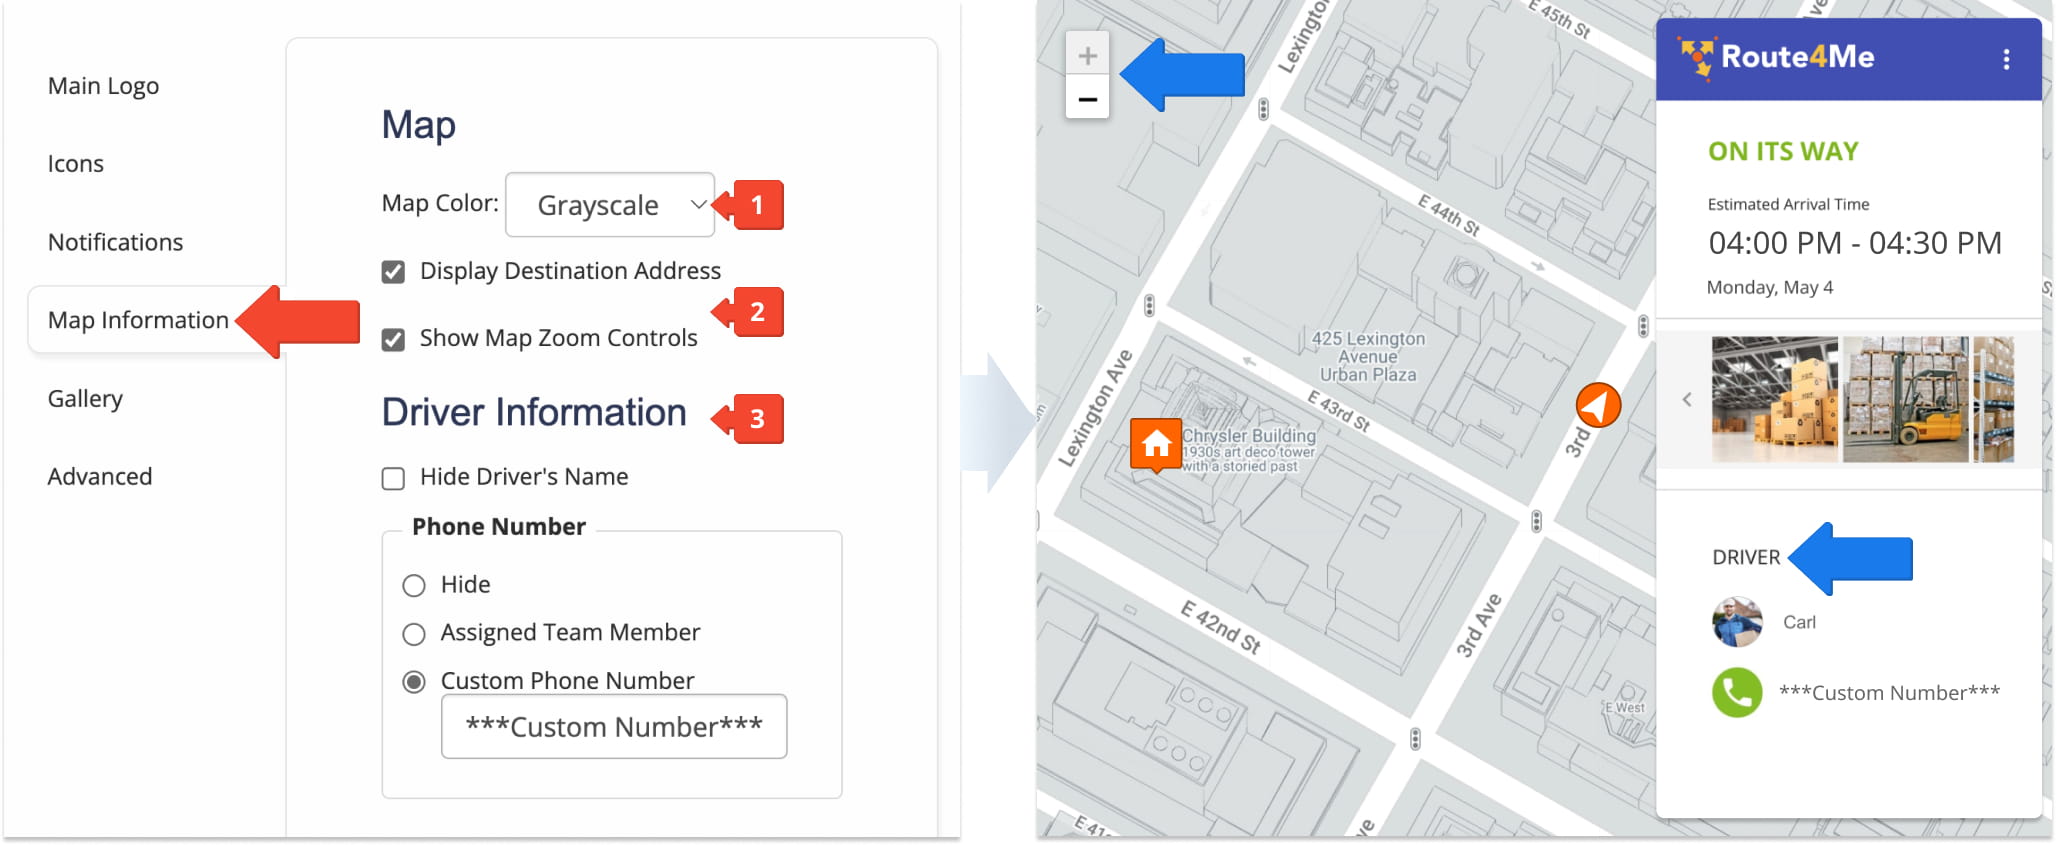
Map Information Tab – Manage Customer Tracking Map Display
The “Map Information” tab allows you to customize how the customer tracking map appears and what information is displayed to customers. You can:
- Select the map color, choosing either default or grayscale.
- Choose whether to display the destination address and map zoom controls.
- Choose whether to display driver information, including the driver’s name and phone number.
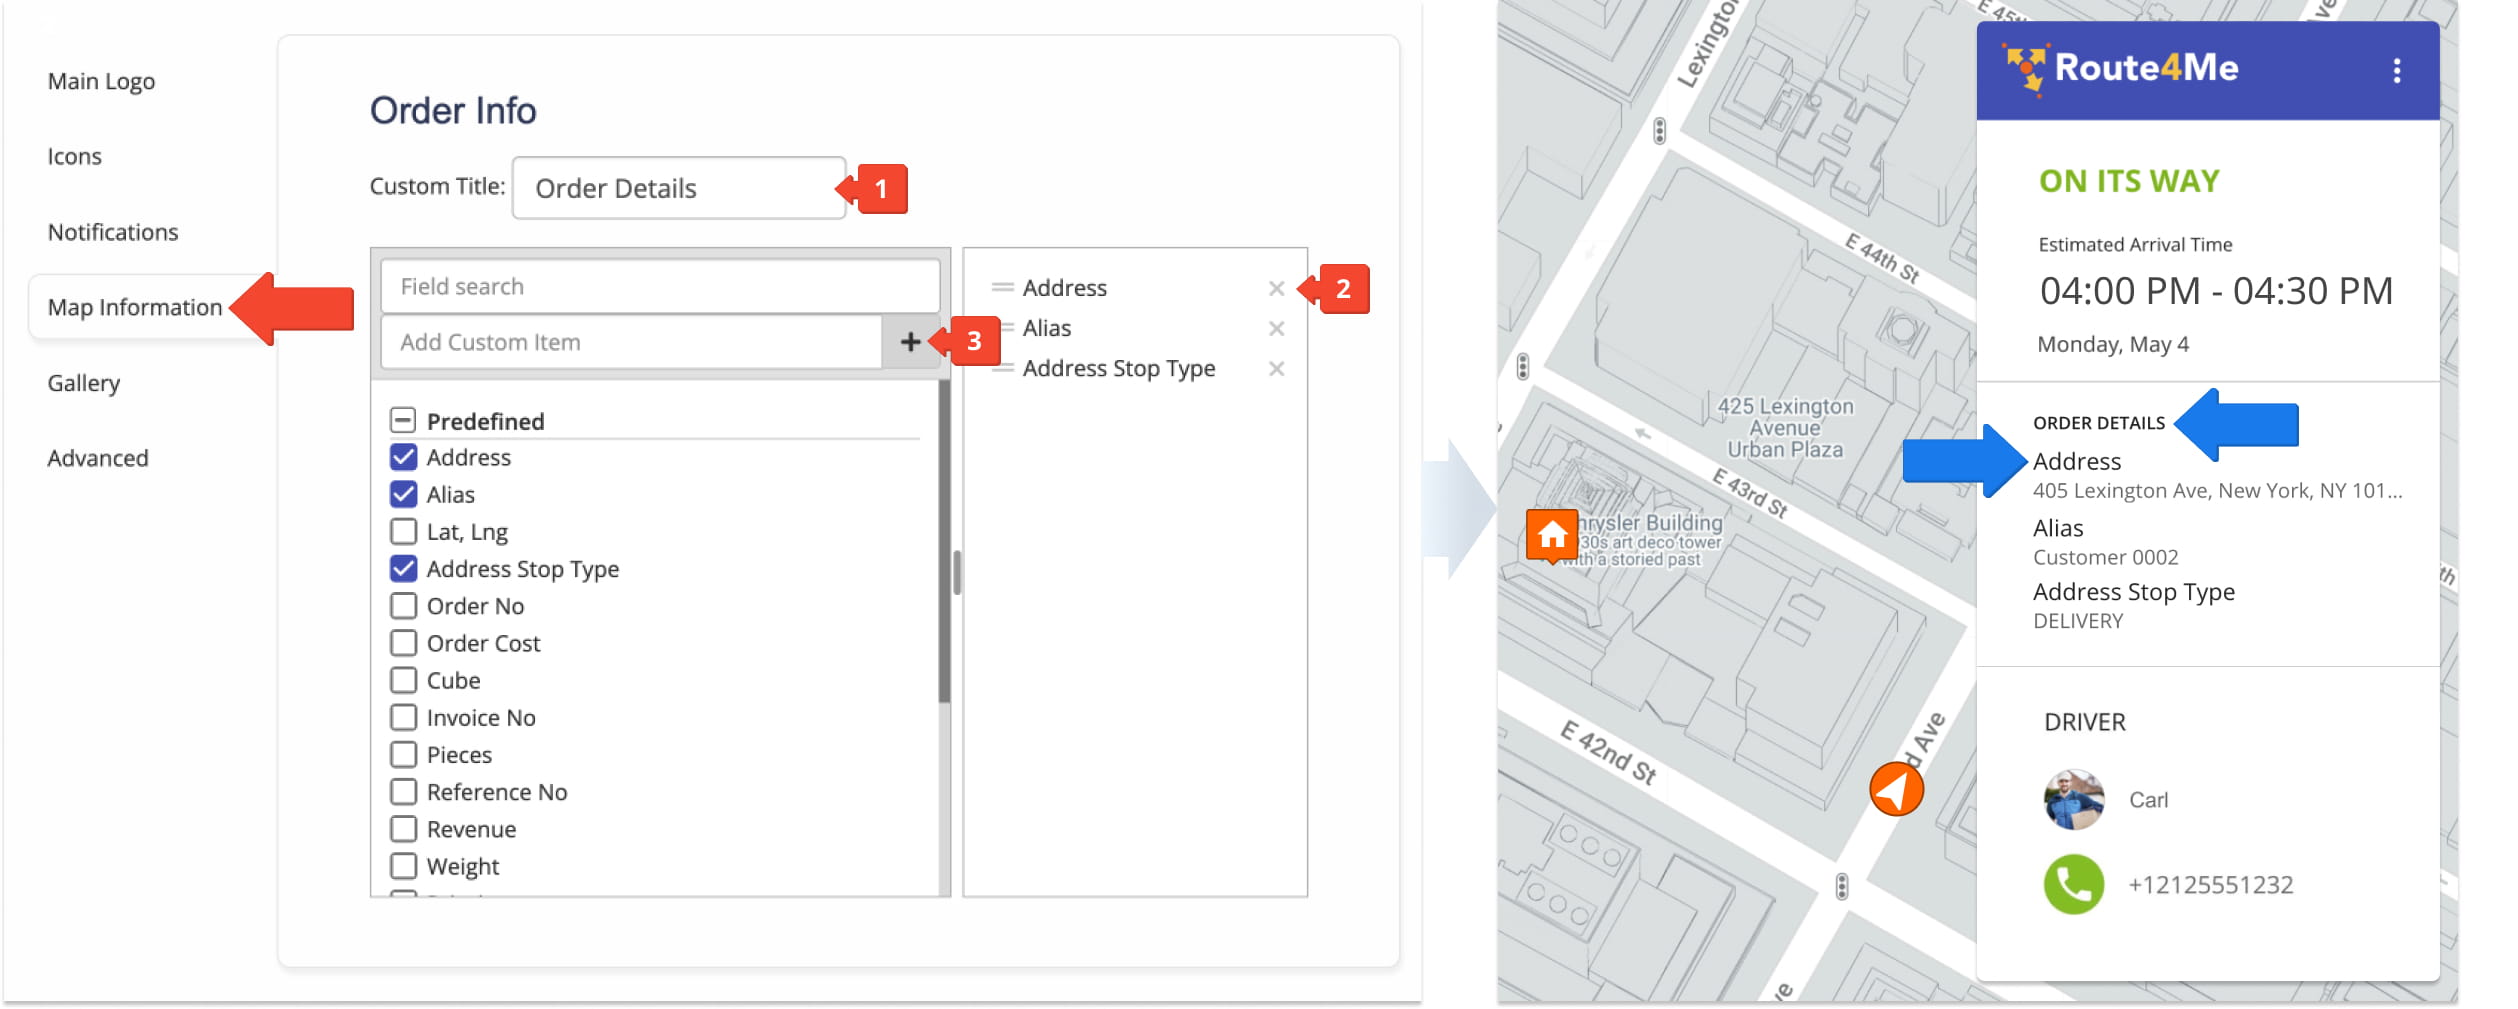
You can also:
- Create an order details section with a custom title.
- Select from a set of predefined order-related details which order information fields appear in the Notification.
- Add custom items not included in the predefined list.
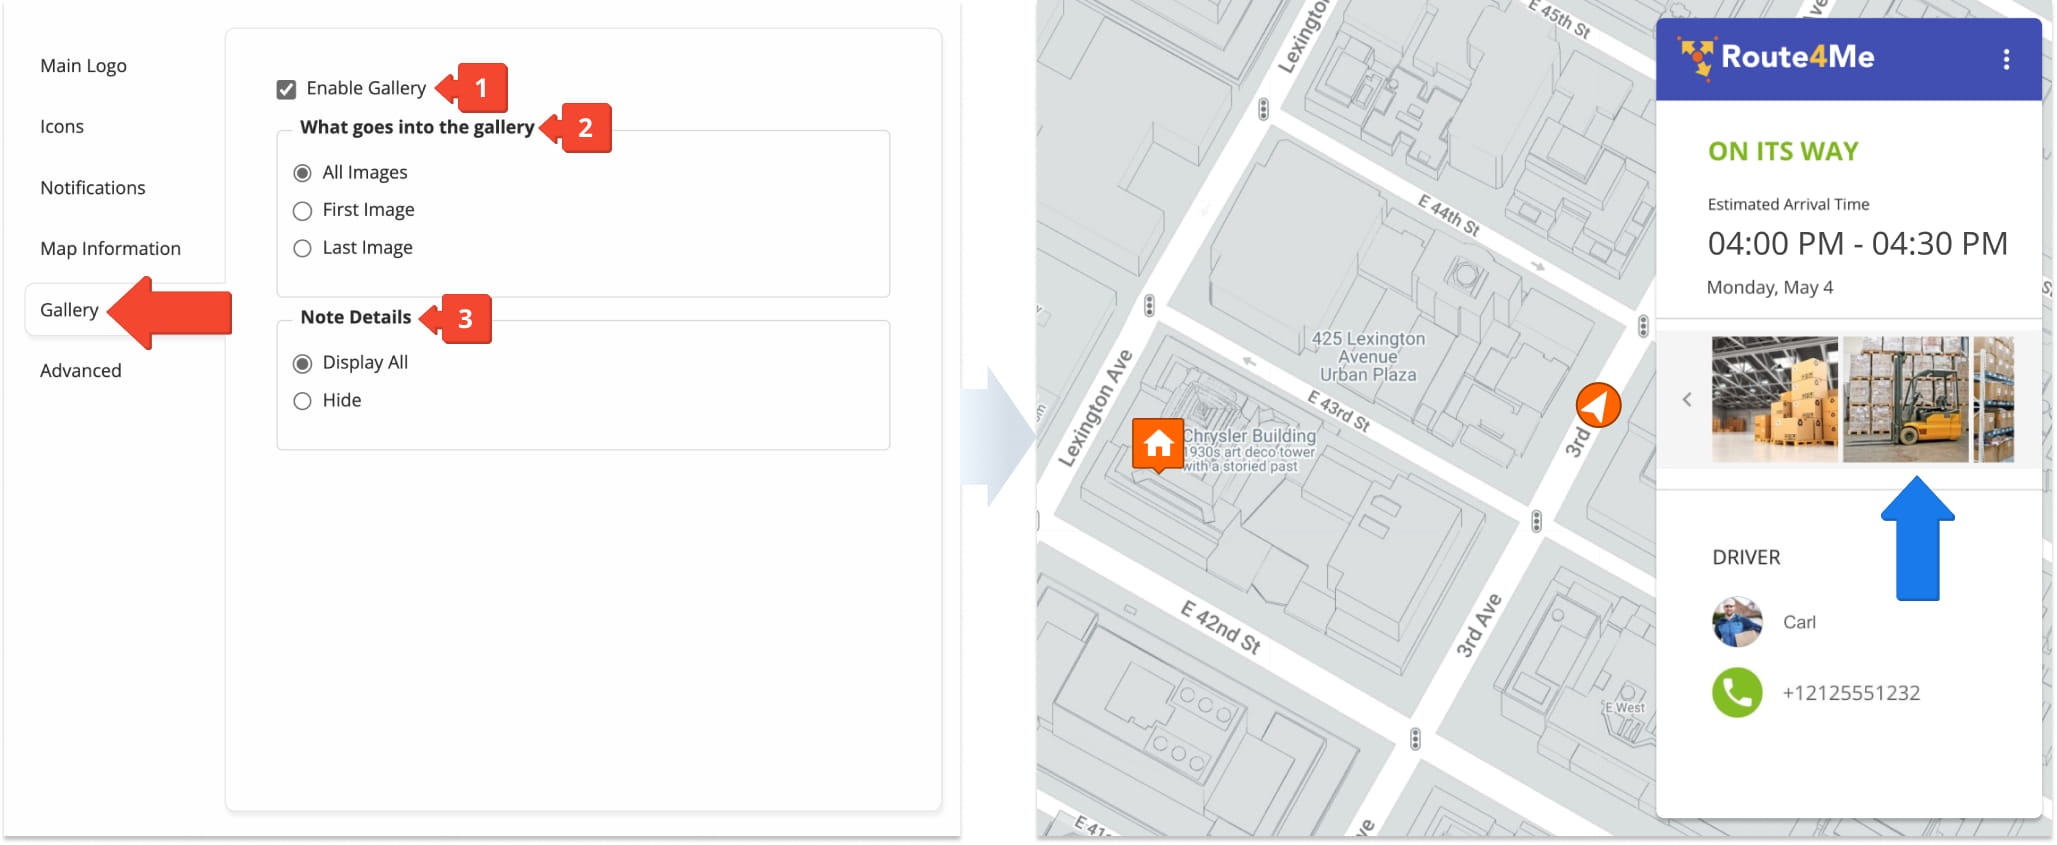
Gallery Tab – Control Proof Of Visit Image Display
The “Gallery” tab allows you to control how note images and attachments, such as proof of visit updates from the driver’s Route4Me mobile app, are displayed in Notifications. You can:
- Enable the Gallery by checking the “Enable Gallery” box.
- Specify which images are included in the Gallery.
- Define which note details are included in the Notification.
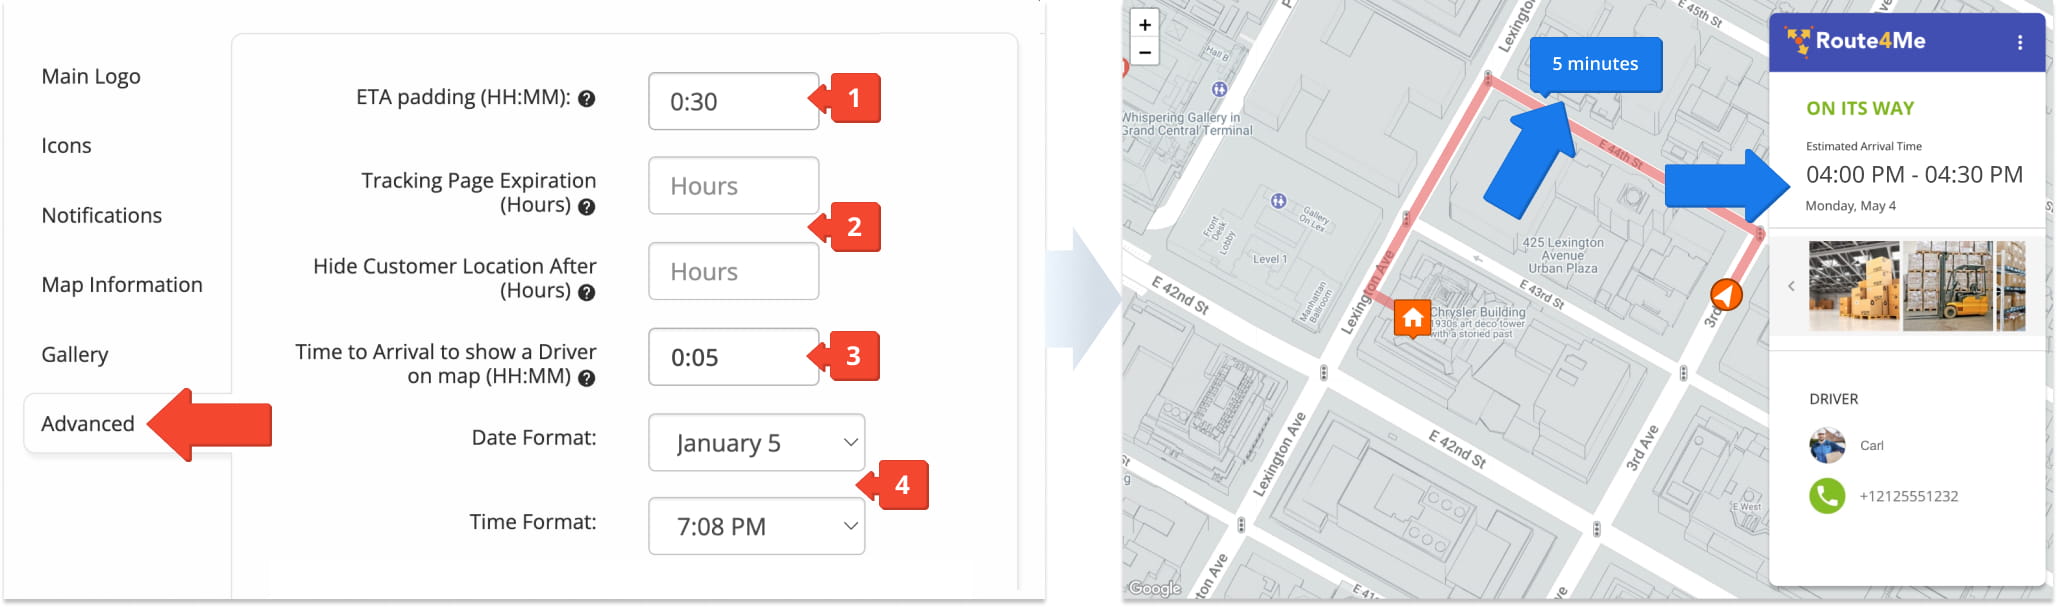
Advanced Tab – Define Notification, Tracking, And Provider Settings
The “Advanced” tab allows you to control additional settings that affect Notification timing, tracking visibility, display formats, and service provider configuration. You can:
- Define ETA padding to adjust estimated arrival times.
- Set tracking page expiration and define how long the tracking page remains accessible.
- Set the time threshold for when a driver appears on the map.
- Define the date and time format used in Notifications and tracking.
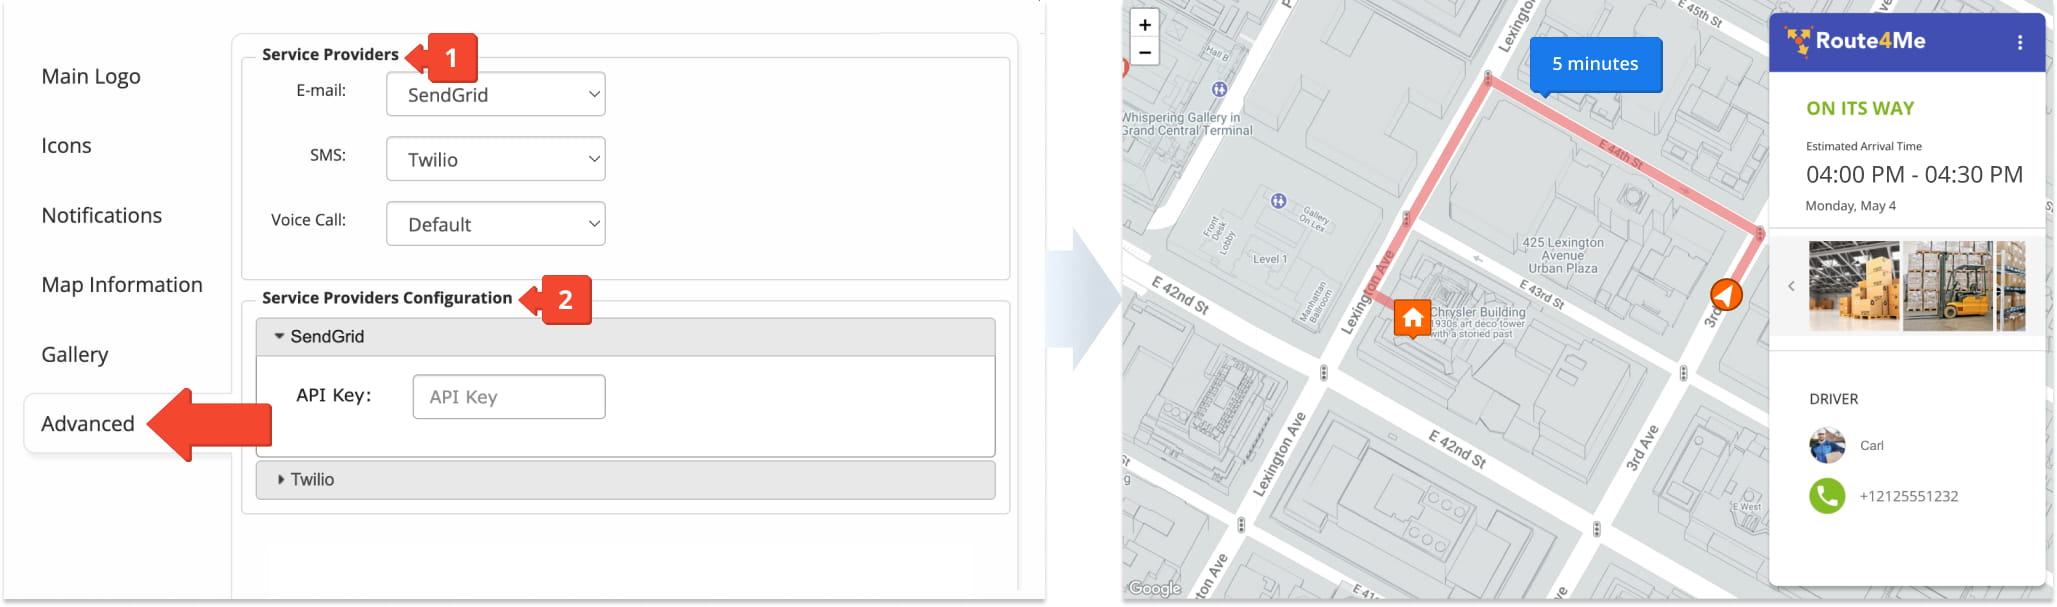
You can also:
- Select service providers for email, SMS, and voice call Notifications.
- Configure service provider settings by entering required credentials such as API keys, account SID, or authorization tokens.
NOTE: To enable SMSGlobal as a service provider, contact Route4Me Support.
Visit Route4Me's Marketplace to Check out Associated Add-Ons:
- Notifications & Alerts
Route Scheduled
- Notifications & Alerts
Geofence Entered
- Notifications & Alerts
Geofence Departed
- Notifications & Alerts
Visit Completed
- Notifications & Alerts
Notify Next Customer
About author: Daniel Archer
With a background in pedagogy and writing instruction, Daniel is a former tenured English Instructor who, after nearly 20 years of teaching, transitioned into content strategy and leading writing teams for global brands. Now, as Technical Documentation Manager at Route4Me, he translates complex logistics technology into clear, accessible content that empowers users.