Route Properties – View And Manage Route Details In The Route Editor
Route Properties provide a centralized view of key route details directly within the Route Editor. From a single panel, you can review scheduling information, assigned users, vehicles, crews, and facilities, and manage route-level Custom Data. This makes it easier to understand how a route is configured and ensure all required information is correct before execution.
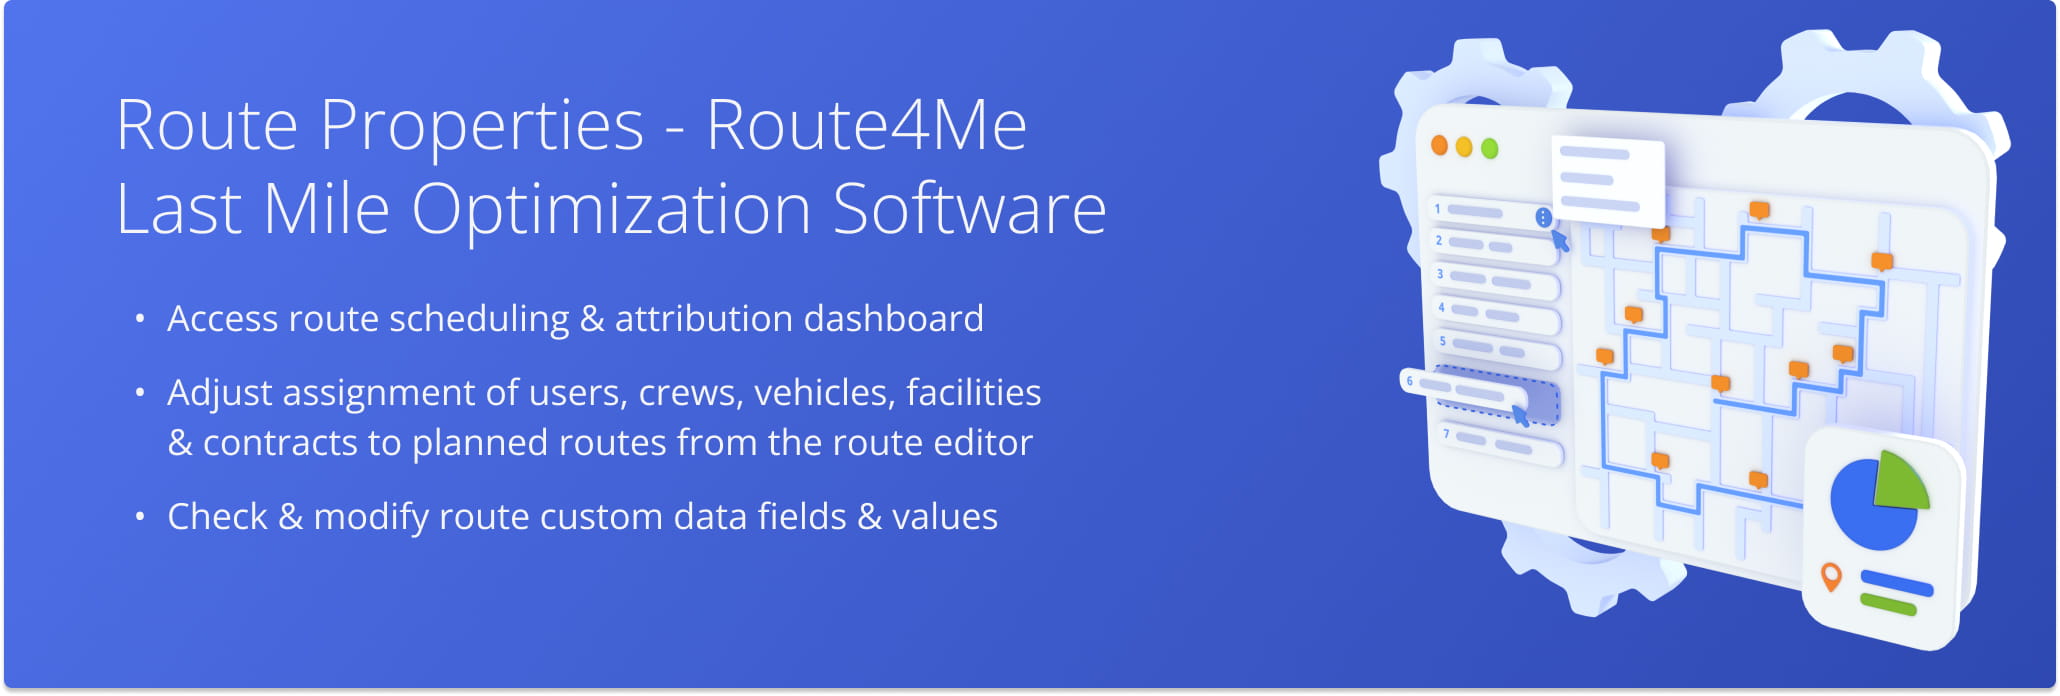
Table of Contents
Route Properties Overview – Planned Route Information Panel
When you open a route in the Route Editor, you’ll see the Route Properties field above the Destinations List. It shows the total number of destinations and the route’s planned duration. Click the field to open the “Route Properties” panel.
You’ll see expanded route schedule and attribution data. Click the “Show All” toggle to see all fields, including empty fields with no associated information. See the table below to learn about the available Route Properties fields.
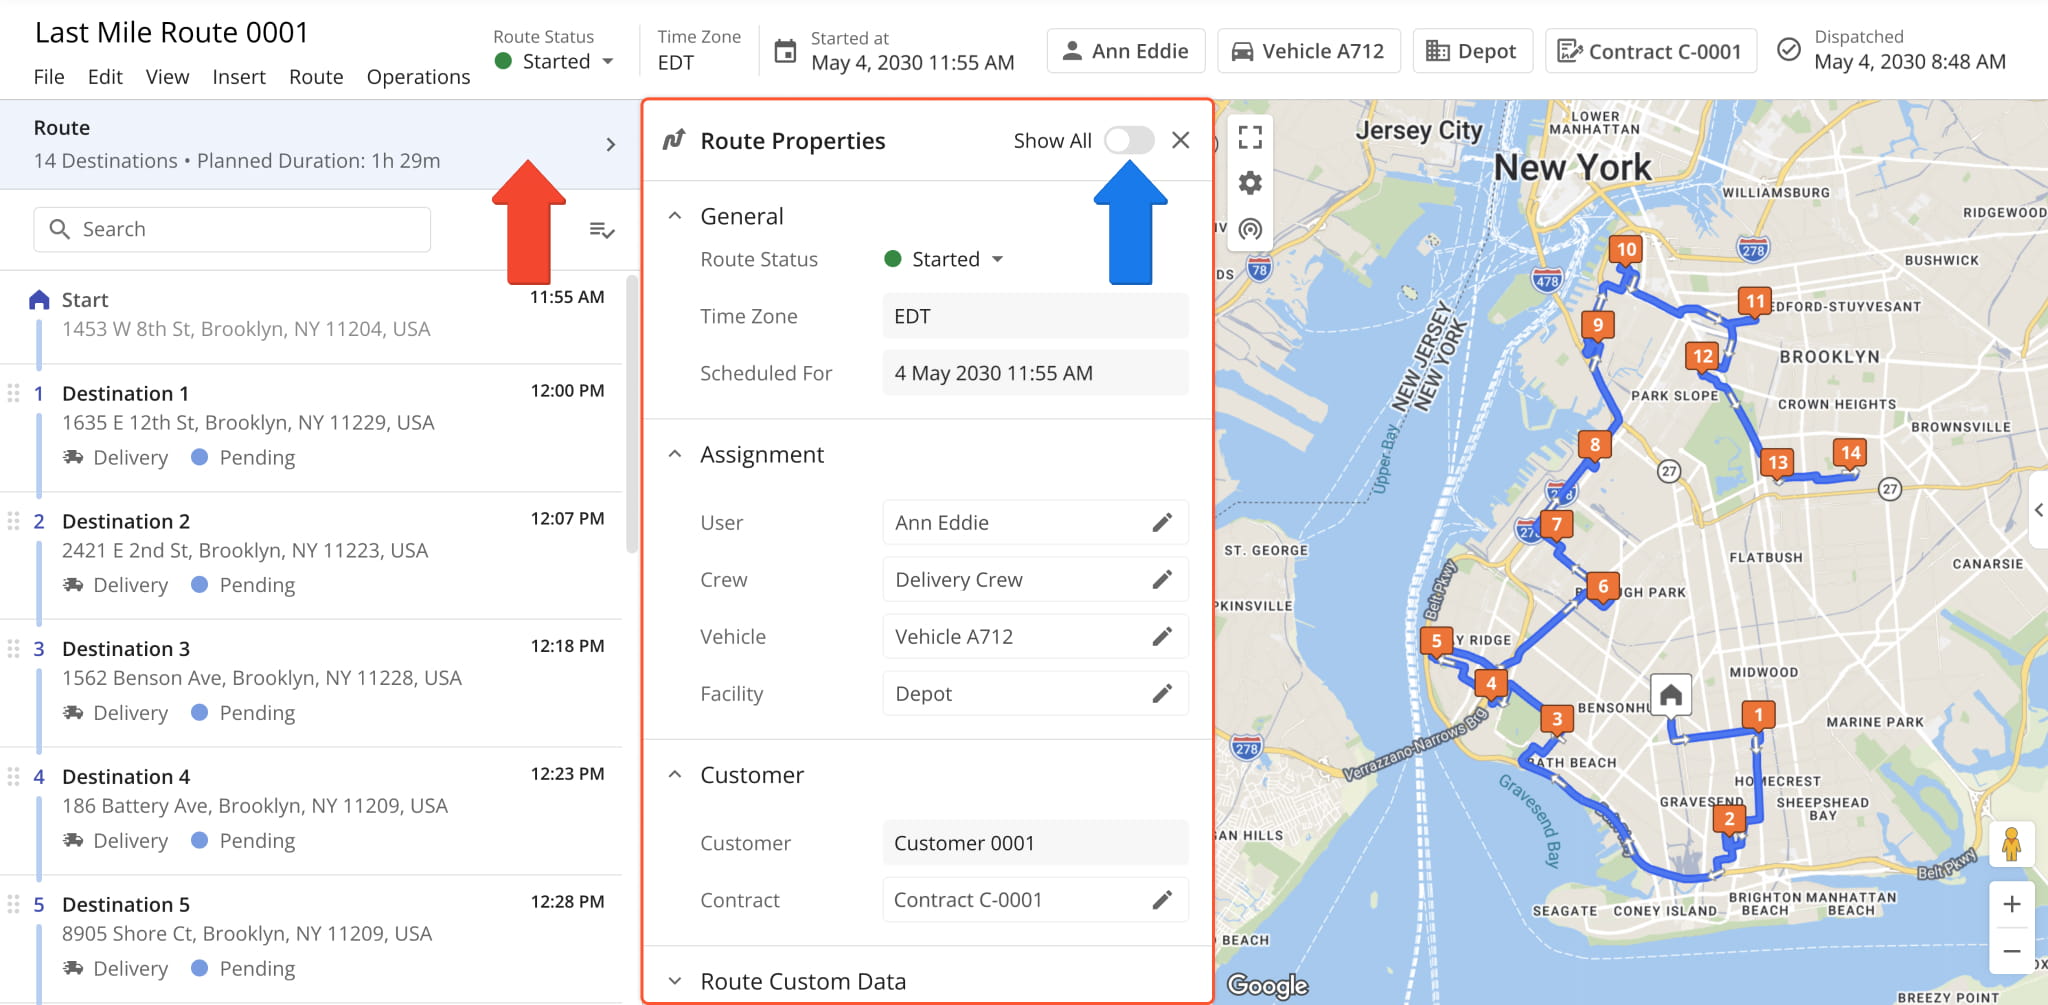
| Field | Description | |
|---|---|---|
| General | ||
| Route Status | Current status of the route (“Planned“, “Started“, or “Finished“). Depending on your account authorization, you can modify the Route Status. | |
| Time Zone | The time zone of the route start location or depot. | |
| Scheduled For | The date and time when the route is scheduled to begin in the route depot time zone. | |
| Assignment | ||
| User | Team member assigned to the route. | |
| Crew | User group or team assigned to the route. | |
| Vehicle | Fleet vehicle assigned to the route. | |
| Facility | Organization facility assigned to the route. | |
| Customer | ||
| Customer | ERP Customer profile associated with the route. | |
| Contract | Customer agreement associated with the route. | |
| Route Custom Data | ||
| Custom Data | Custom fields and values associated with the route. | |
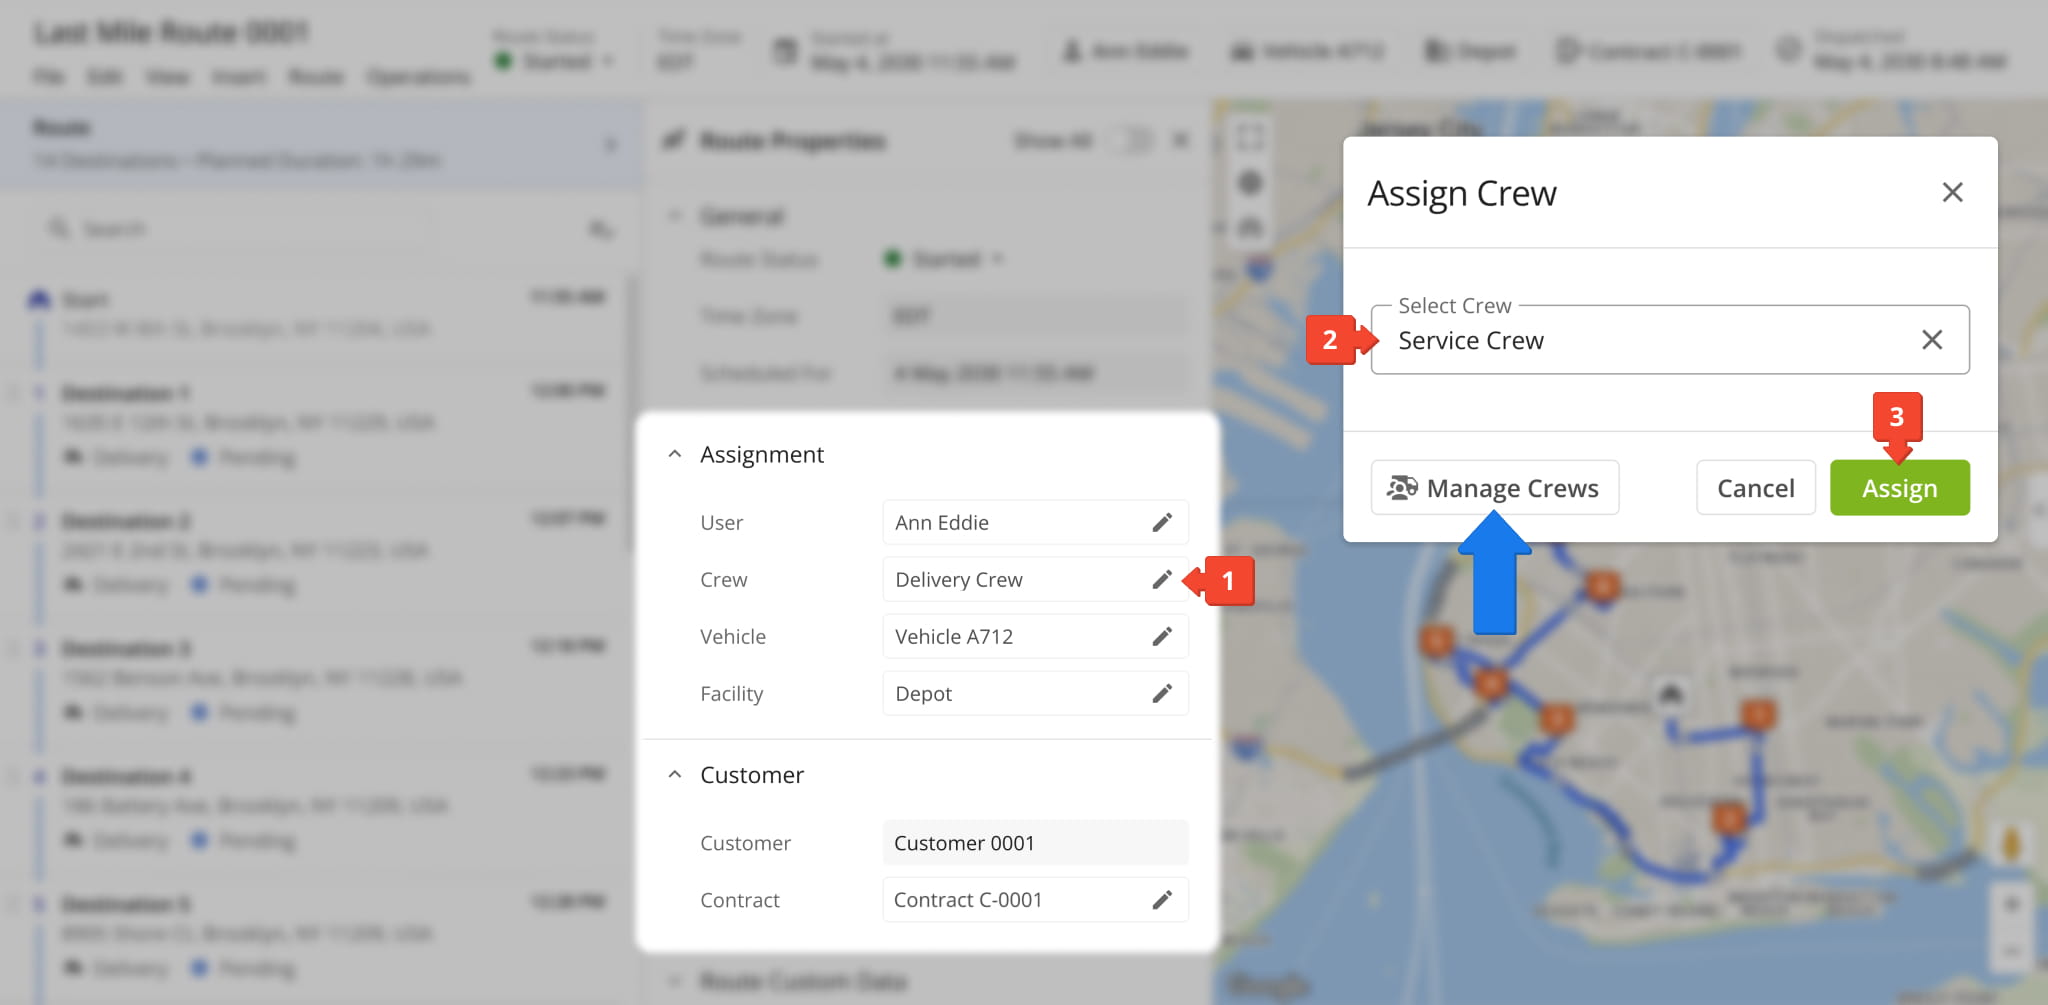
Route Assignment And Attribution Settings
The “Assignment” and “Customer” sections of the Route Properties panel show the entities (users, vehicles etc.) assigned to or associated with the route. You can also change assigned entites by following these steps:
- Click the Pencil Icon in a field you want to edit.
- Use the main field in the assignment pop-over to select an entity.
- Click “Assign” to save your changes and finalize.
From here, you can also click the “Manage…” button to go to the corresponding page on your Route4Me account.
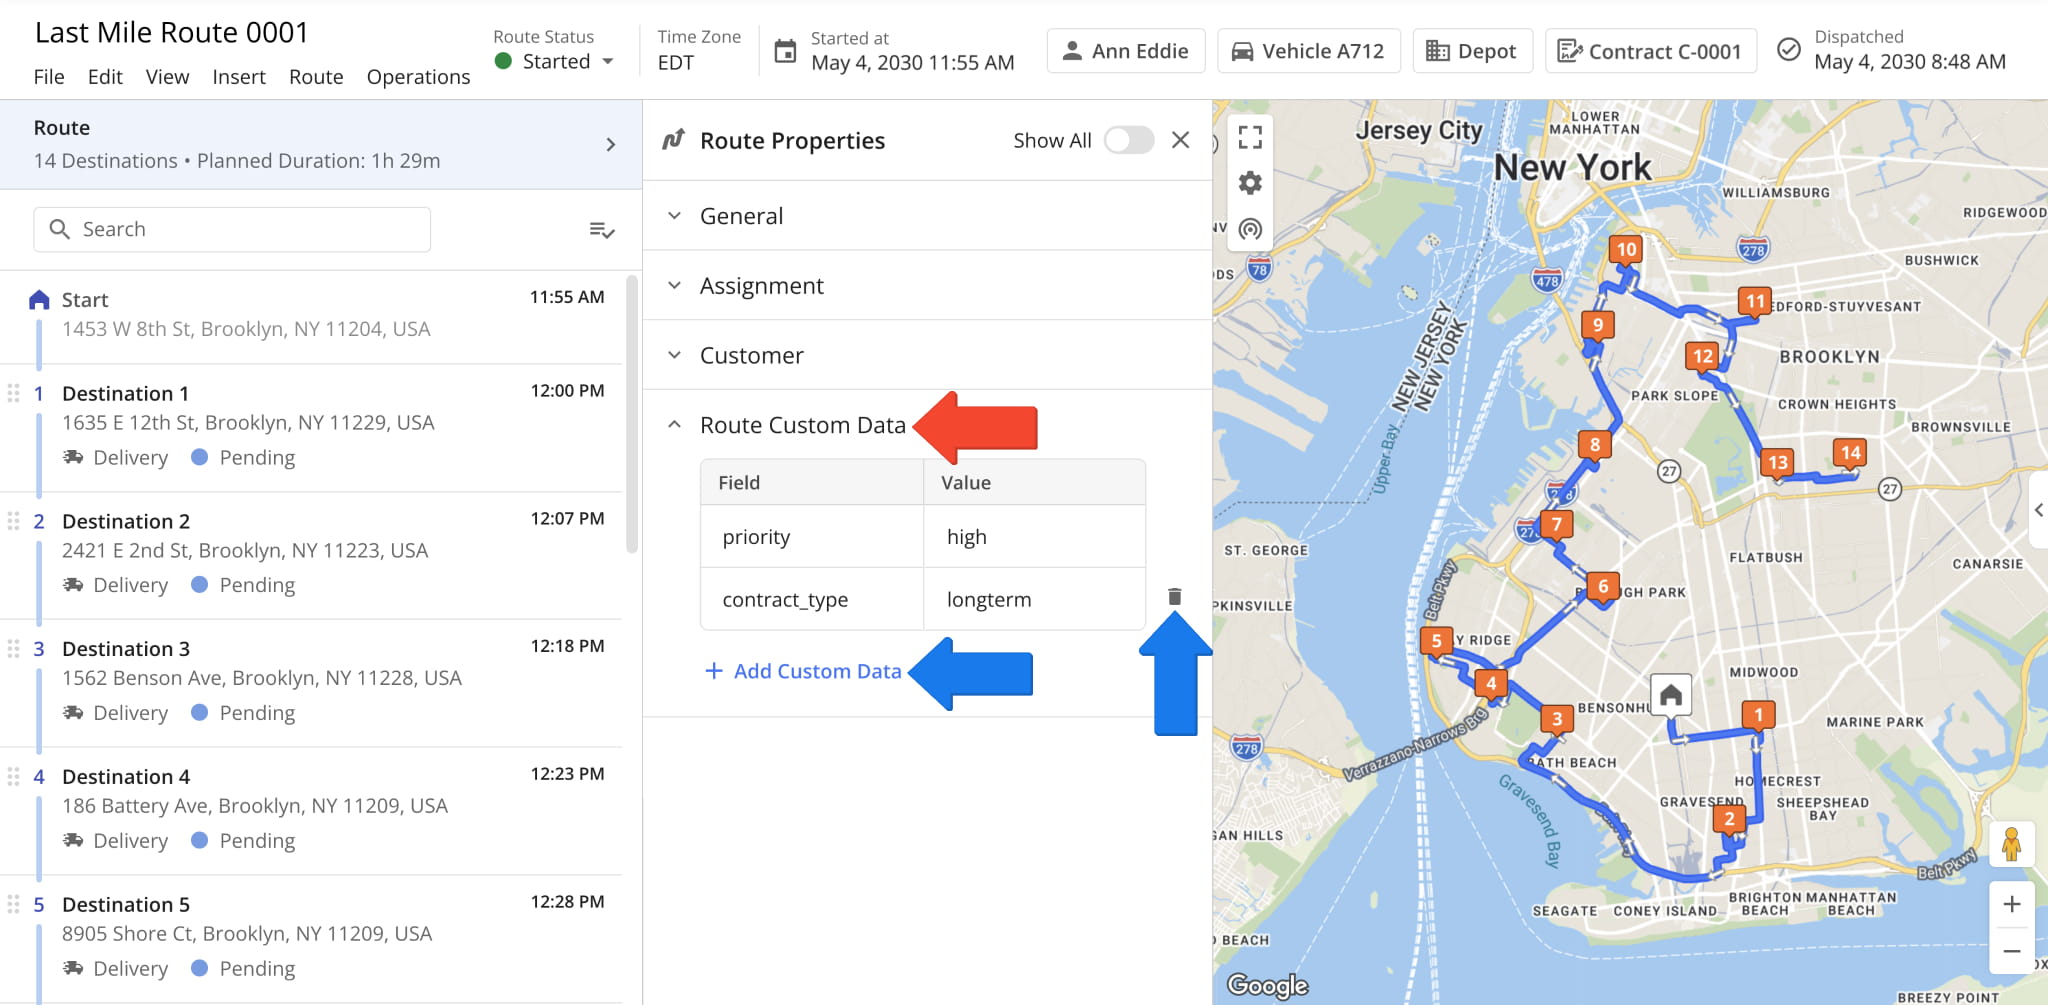
Add And Manage Route Custom Data
In the “Route Custom Data” section, you can add and manage new custom data fields and values. You can add more fields with the “Add Custom Data” button or remove fields with the Delete Icon.
The “Field” and “Value” cells are text fields where you can directly input your custom fields and values.
Visit Route4Me's Marketplace to Check out Associated Modules:
- Operations
Custom Data Add-On
- Operations
Advanced Team Management Add-On
- Route Optimization
Time Windows
About author: Kristian Andreev
Kristian is a Technical Writer at Route4Me. With over a decade of experience in writing and localization, he's an expert at communicating complex technical data in a clear, concise, and user-friendly way. Passionate about bridging the gap between engineers and users, he specializes in creating documentation to streamline onboarding, enhance product usability, and support global teams on the path to success.