Teletrac Navman Telematics Integration With Route4Me
Teletrac Navman provides smart fleet management solutions for enterprise businesses of all sizes. Its cloud-based GPS route tracking software integrates seamlessly with other business systems, transforming data captured by vehicles into real-time fleet insights for improved business performance. Among its key features, Teletrac Navman offers vehicle mapping, simplified workflows, and detailed reporting for enhanced fleet vehicle management. Use this guide to integrate Teletrac Navman with Route4Me, import telematics vehicles, and get started today, synchronizing and dispatching routes to Teletrac Navman vehicles.
Table of Contents
Sync Your Teletrac Navman Integration With Route4Me
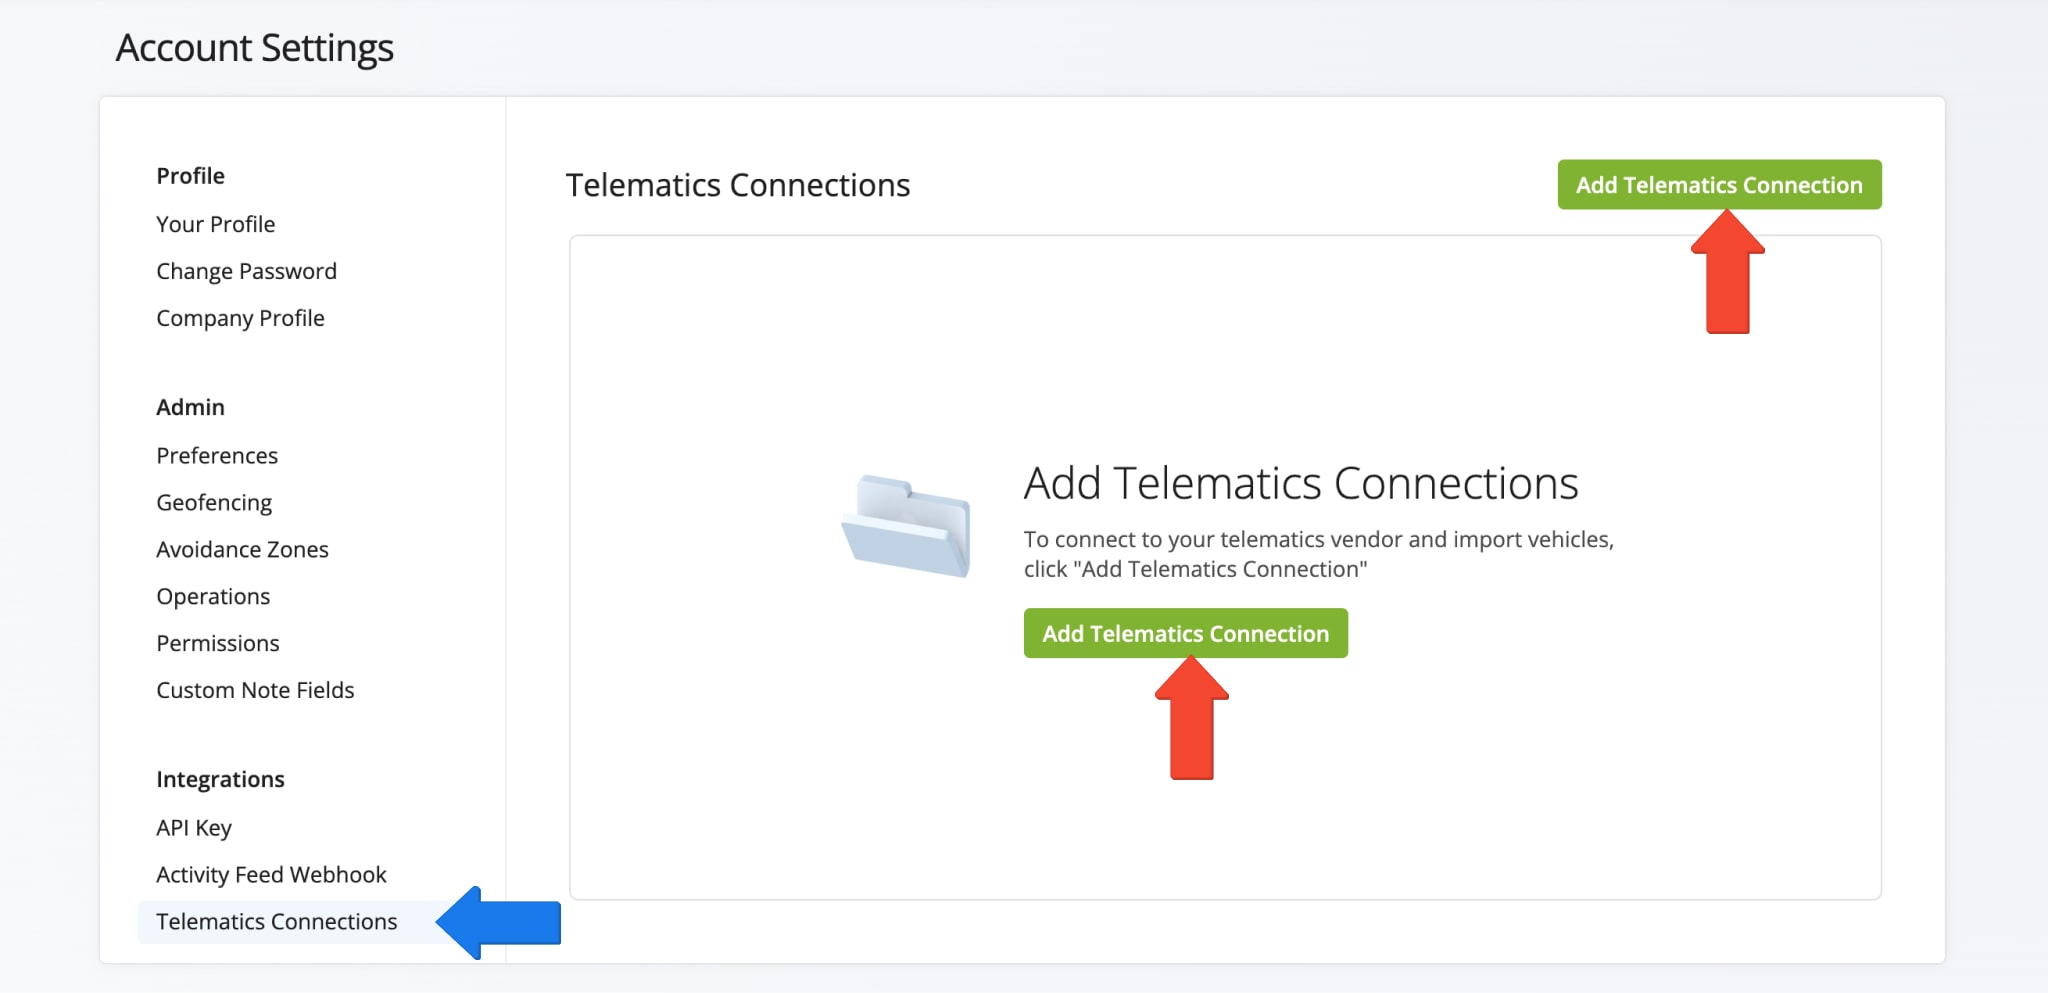
To establish a telematics connection and integrate Teletrac Navman, click “Settings” > “Optimization Settings” in the Navigation Menu. Then, click “Telematics Connections” under “Integrations“. From there, click the “Add Telematics Connection” button.
Open Your Telematics Connections
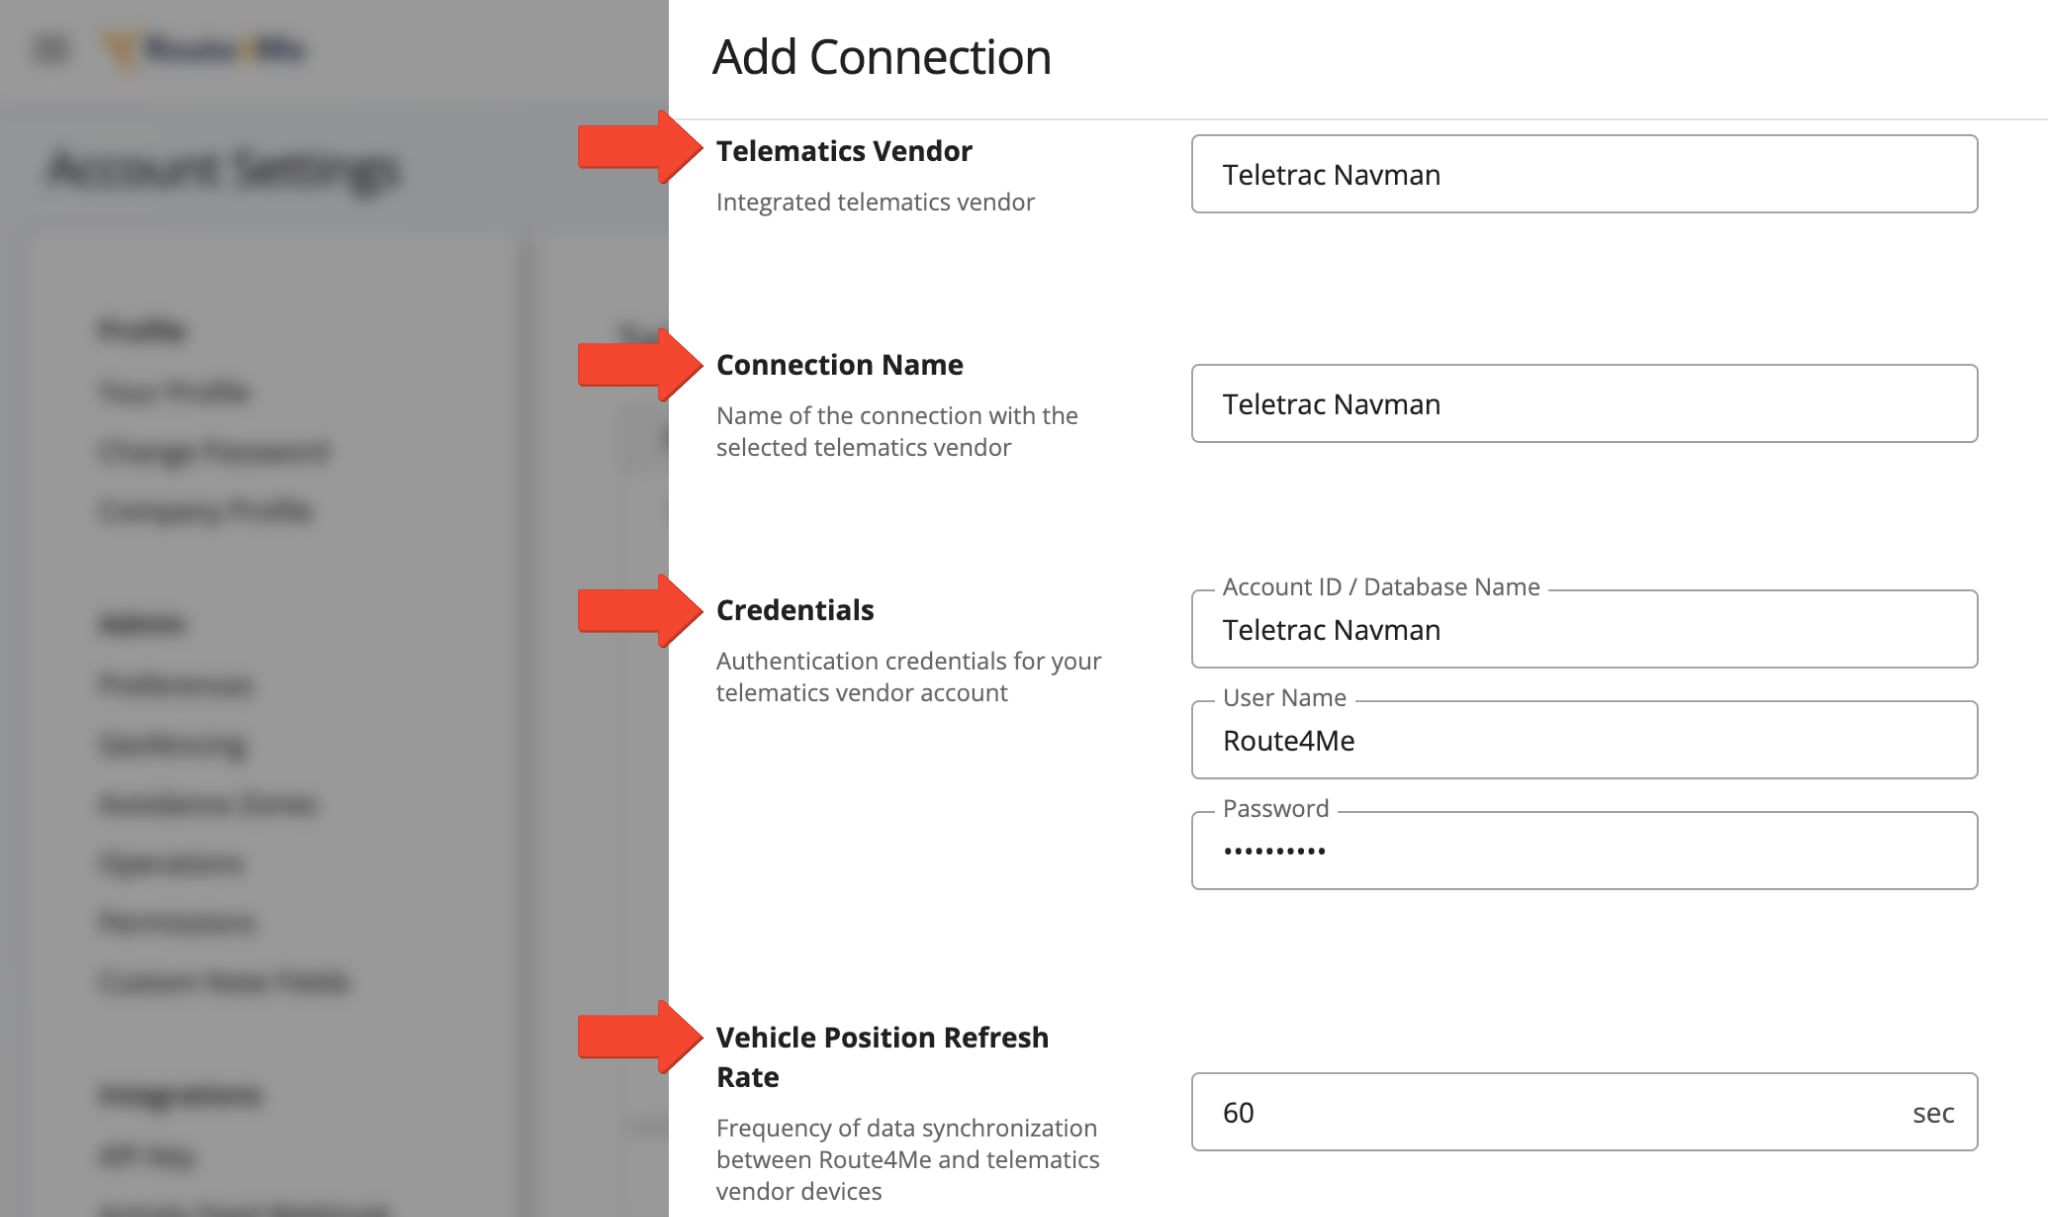
In the “Add Connection” panel, select “Teletrac Navman” from the “Telematics Vendor” menu. Then, enter a connection name (for example, the name of the vendor), input your credentials, and set your desired Vehicle Position Refresh Rate.
The Vehicle Position Refresh Rate is the frequency at which Route4Me’s Telematics Gateway retrieves vehicle tracking data from the corresponding telematics partner. Most telematics vendors receive and store data between 1 and 5 minutes, while other vendors can capture data at a higher frequency. With Route4Me, you can specify your preferred Vehicle Position Refresh Rate and extract tracking data as often as every second.
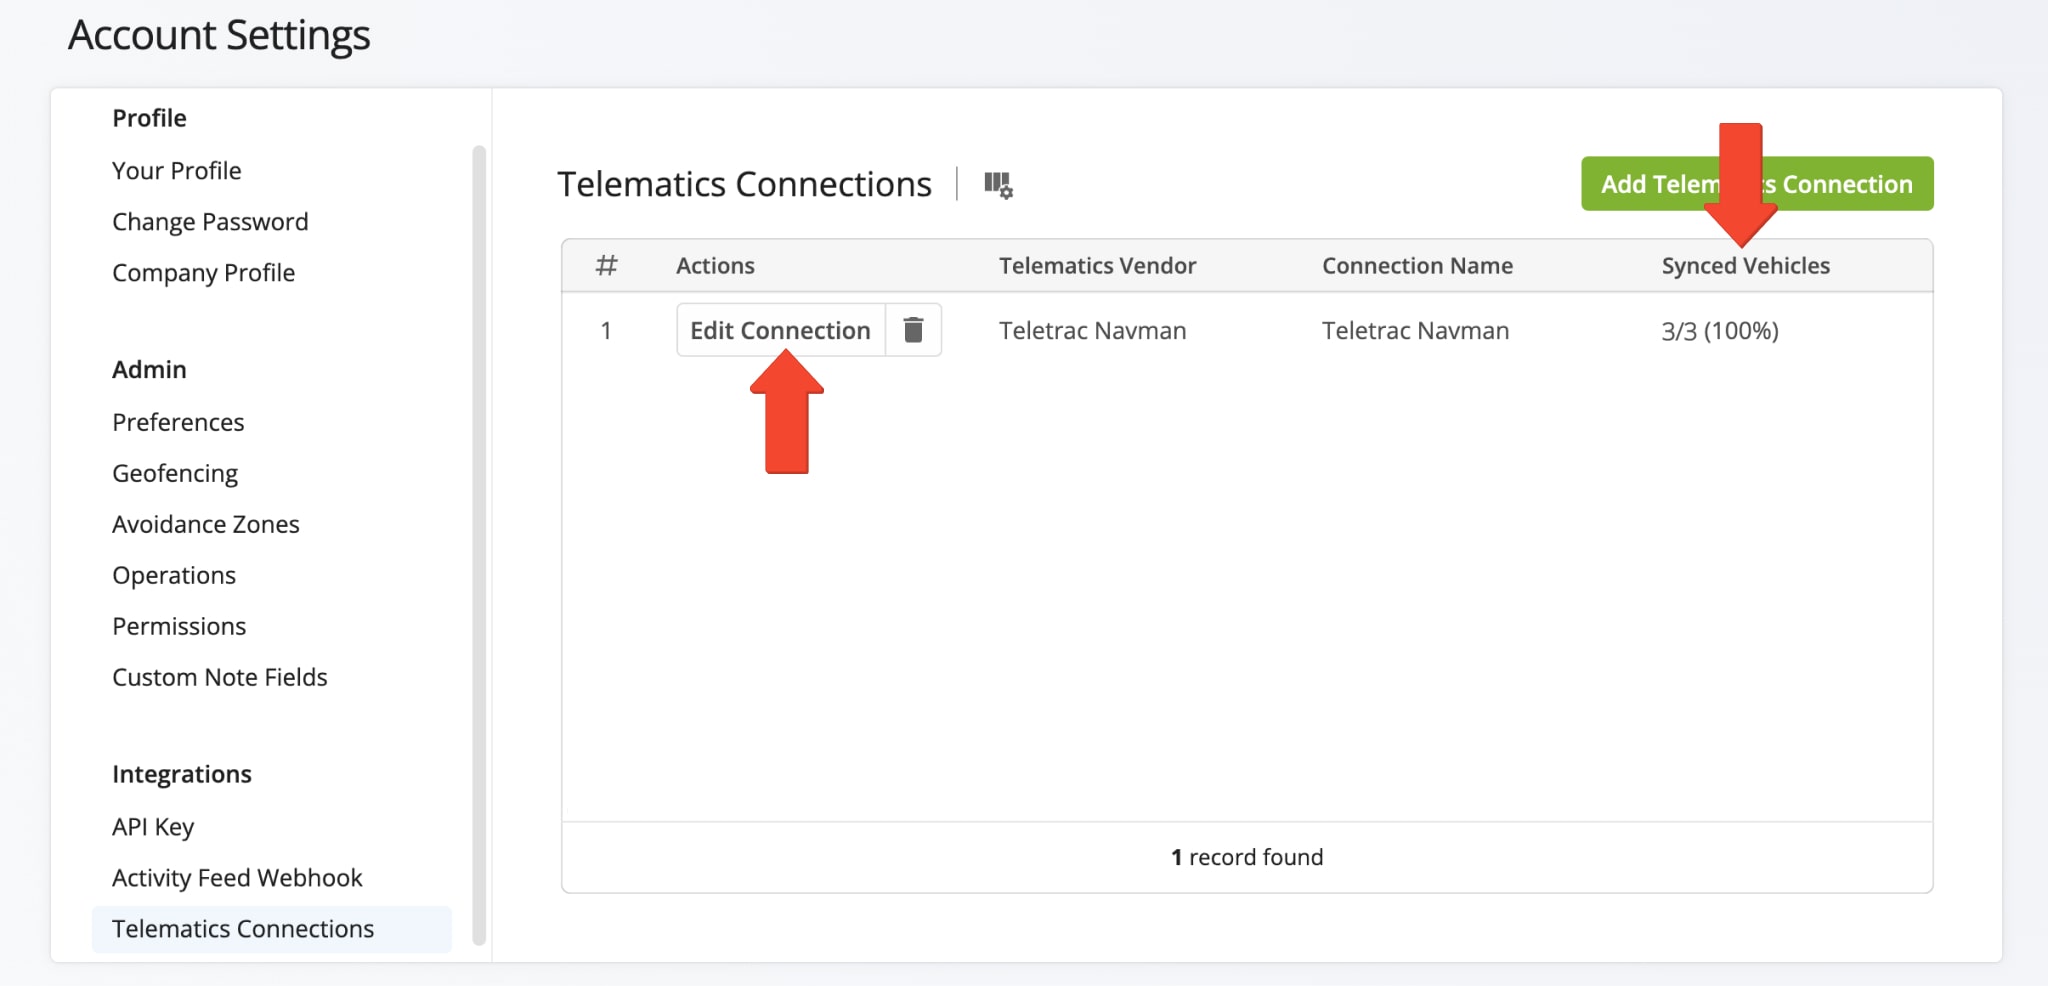
After successfully establishing the telematics connection, it will appear in your Telematics Connections list. The “Synced Vehicles” column shows the percentage of vehicles successfully synchronized. To make changes to the connection, click the “Edit Connection” button. To delete the connection, click the Delete Button.
Activate Teletrac Navman Vehicles In Your Route4Me Account
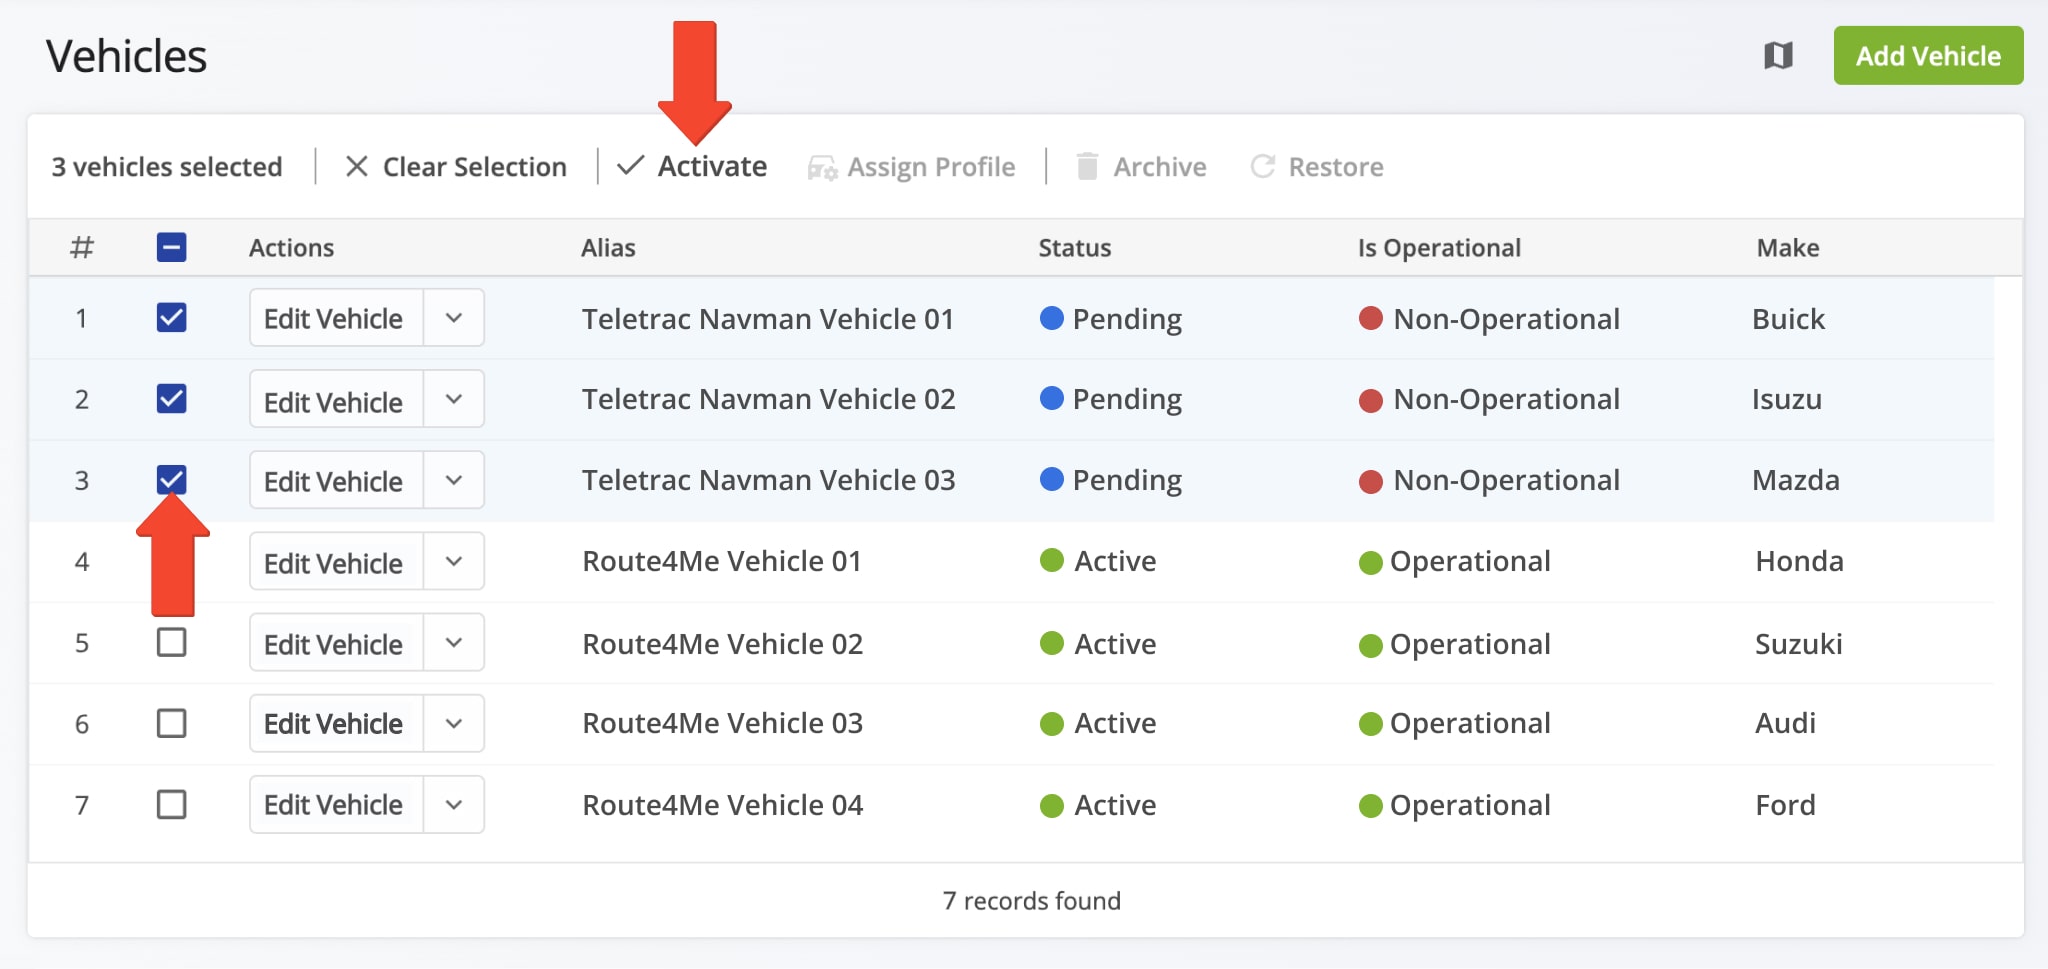
Once connected to your Teletrac Navman account, all vehicles are automatically imported and re-synchronized with your Route4Me account. To view your Vehicles Page, go to “Team” in the Navigation Menu and select “Vehicles“. From your Vehicles Page, you can edit and manage all Route4Me and telematics vehicles linked to your account.
Imported vehicles from Teletrac Navman or other telematics vendors will appear in the list with either a “Pending” or “Active” status. To enable a pending vehicle, click the “Edit Vehicle” button next to it and toggle the “Is Operational” setting. Or, to enable multiple pending vehicles, check the box next to each and click the “Activate” button above the list. Once activated, you can assign imported vehicles to routes you’ve already planned or are planning.
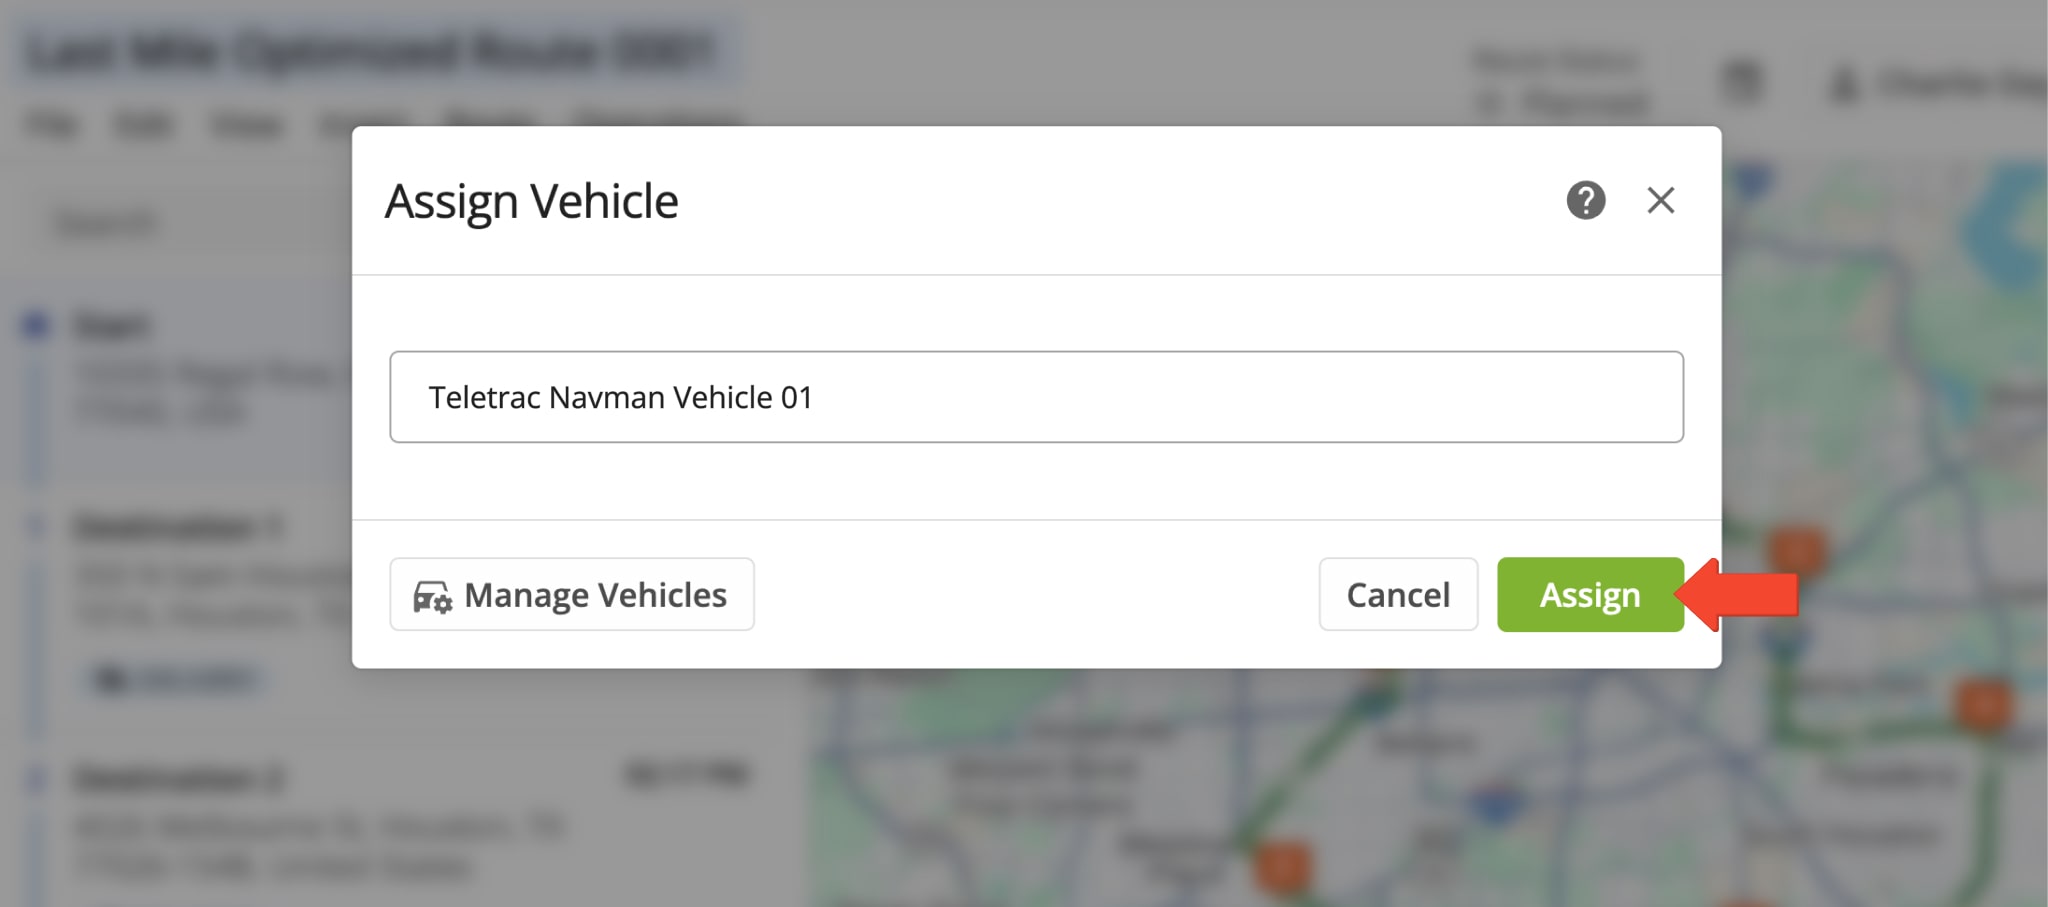
Dispatch Routes – Assign Teletrac Vehicles To Routes
To dispatch a route to a Teletrac Navman vehicle, simply assign the vehicle to a route. First, make sure the vehicle you wish to assign has the Teletrac Navman device installed and your Route4Me account is connected to your Teletrac Navman account. Then you can assign the vehicle to routes, from the Routes Map, Routes List, and Route Editor.
Track Teletrac Navman Vehicles – Gather GPS Route Tracking Data
Once you’ve assigned a telematics vehicle to a route from Route4Me’s fastest route dispatch software, Teletrac Navman will collect GPS route tracking data from the Teletrac Garmin device associated with that vehicle. It will share with you all collected GPS data, from route start to completion, providing comprehensive real-time fleet insights.
To track a vehicle on the map, click the Tracking Icon in the upper-left of the map and check the “Tracking Path” box. Then, check “Breadcrumbs” and select Teletrac Navman as your “Tracking Source“. Learn more about GPS tracking data.

Explore Route4Me’s Telematics4Me Solution
Route4Me’s Telematics4Me solution offers a comprehensive list of all commercial fleet telematics vendors worldwide. Explore detailed information and key vendor features, which you can compare side by side, to select the vendors that best meet the specific needs of your company or business model.
All the trademarks, logos, and brand names on this page are for identification purposes only. We do not endorse these trademarks, logos, and brand names. All the trademarks, logos, and brand names are the property of their respective owners. If any of the trademarks, logos, and brand names are your property or the property of your company, and you would like us to remove them from our website, please contact us at [email protected] to submit your request.
Visit Route4Me's Marketplace to Check out Associated Telematics Modules:
- Telematics
Telematics Gateway
- Telematics
Geofencing Analytics
- Telematics
Route4Me Smartphone App GPS Tracking
About author: Alex Yasko
Alex Yasko is the Go-to-Market Product Manager and Information Architecture Manager at Route4Me. With thousands of hours of experience, Alex specializes in breaking down complex last-mile optimization and routing scenarios into simple, actionable instructions, helping last-mile businesses streamline their operations effortlessly.