Grab And Go – Scan Order Barcodes To Plan Customer Order Routes
Route4Me’s Mobile Order Routing app for iPhone and Android supports seamless route planning, optimization, navigation, and completion. Drivers with appropriate User Permissions can scan order barcodes to add destinations and plan optimized routes using the in-app or Bluetooth-connected barcode scanner. This guide covers Route4Me’s Grab & Go feature, showing how to scan order labels, optimize routes with scanned orders, navigate routes, complete deliveries, and maximize the app’s barcode scanning tools for efficient route management.
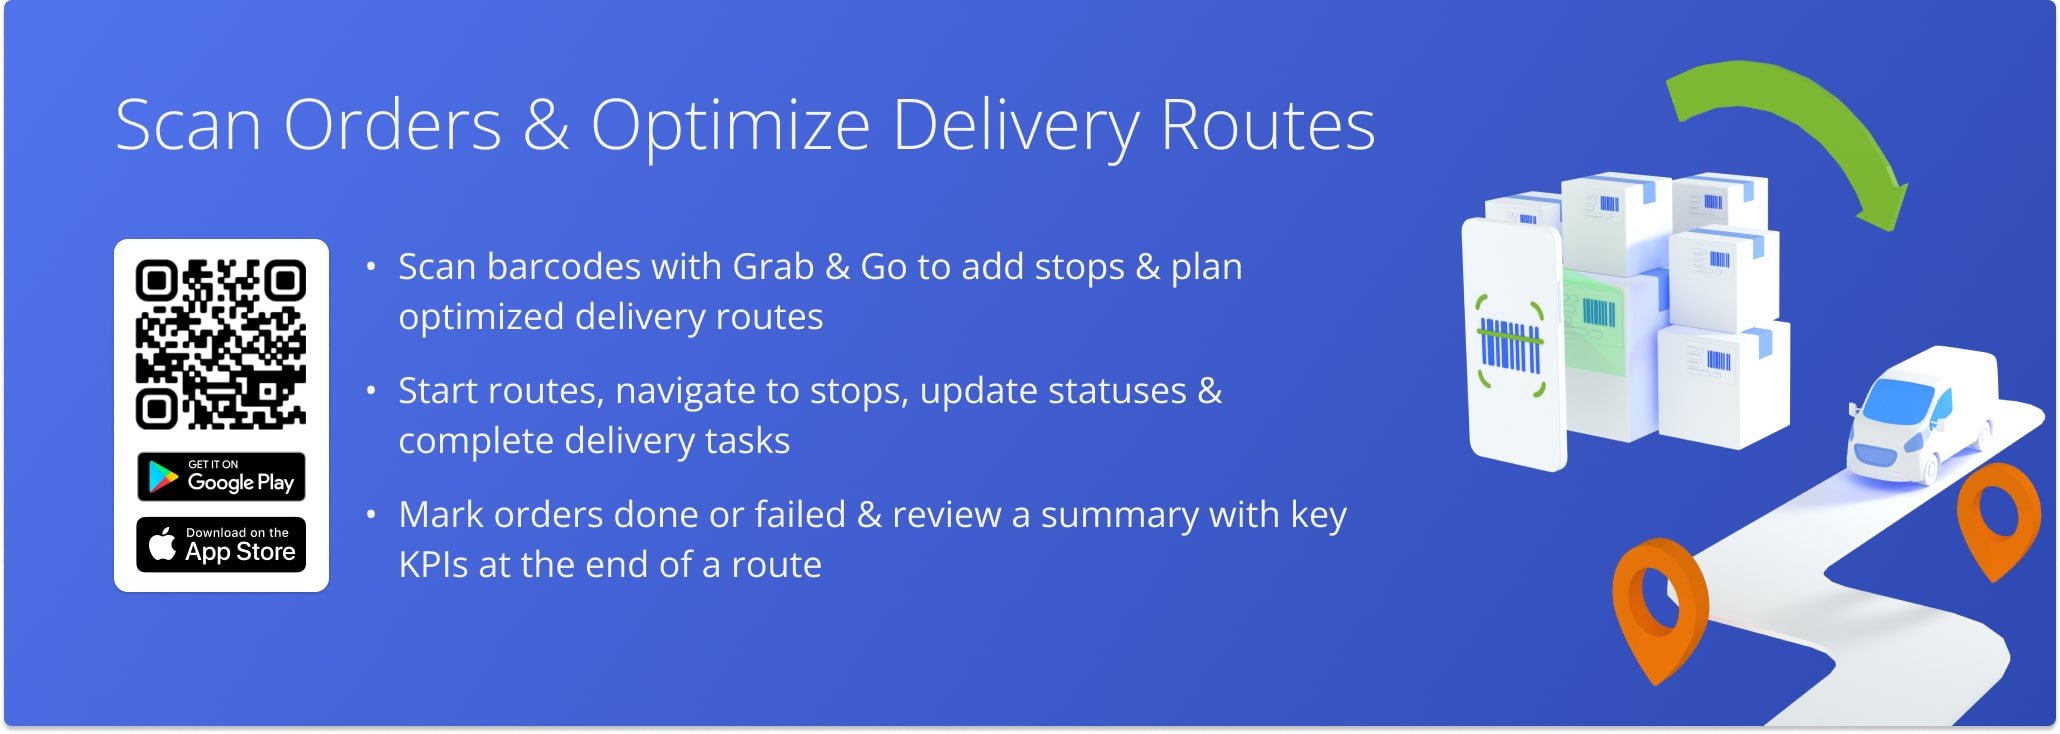
Table of Contents
Grab And Go User Permissions – Enable Scanning Labels To Plan Order Routes
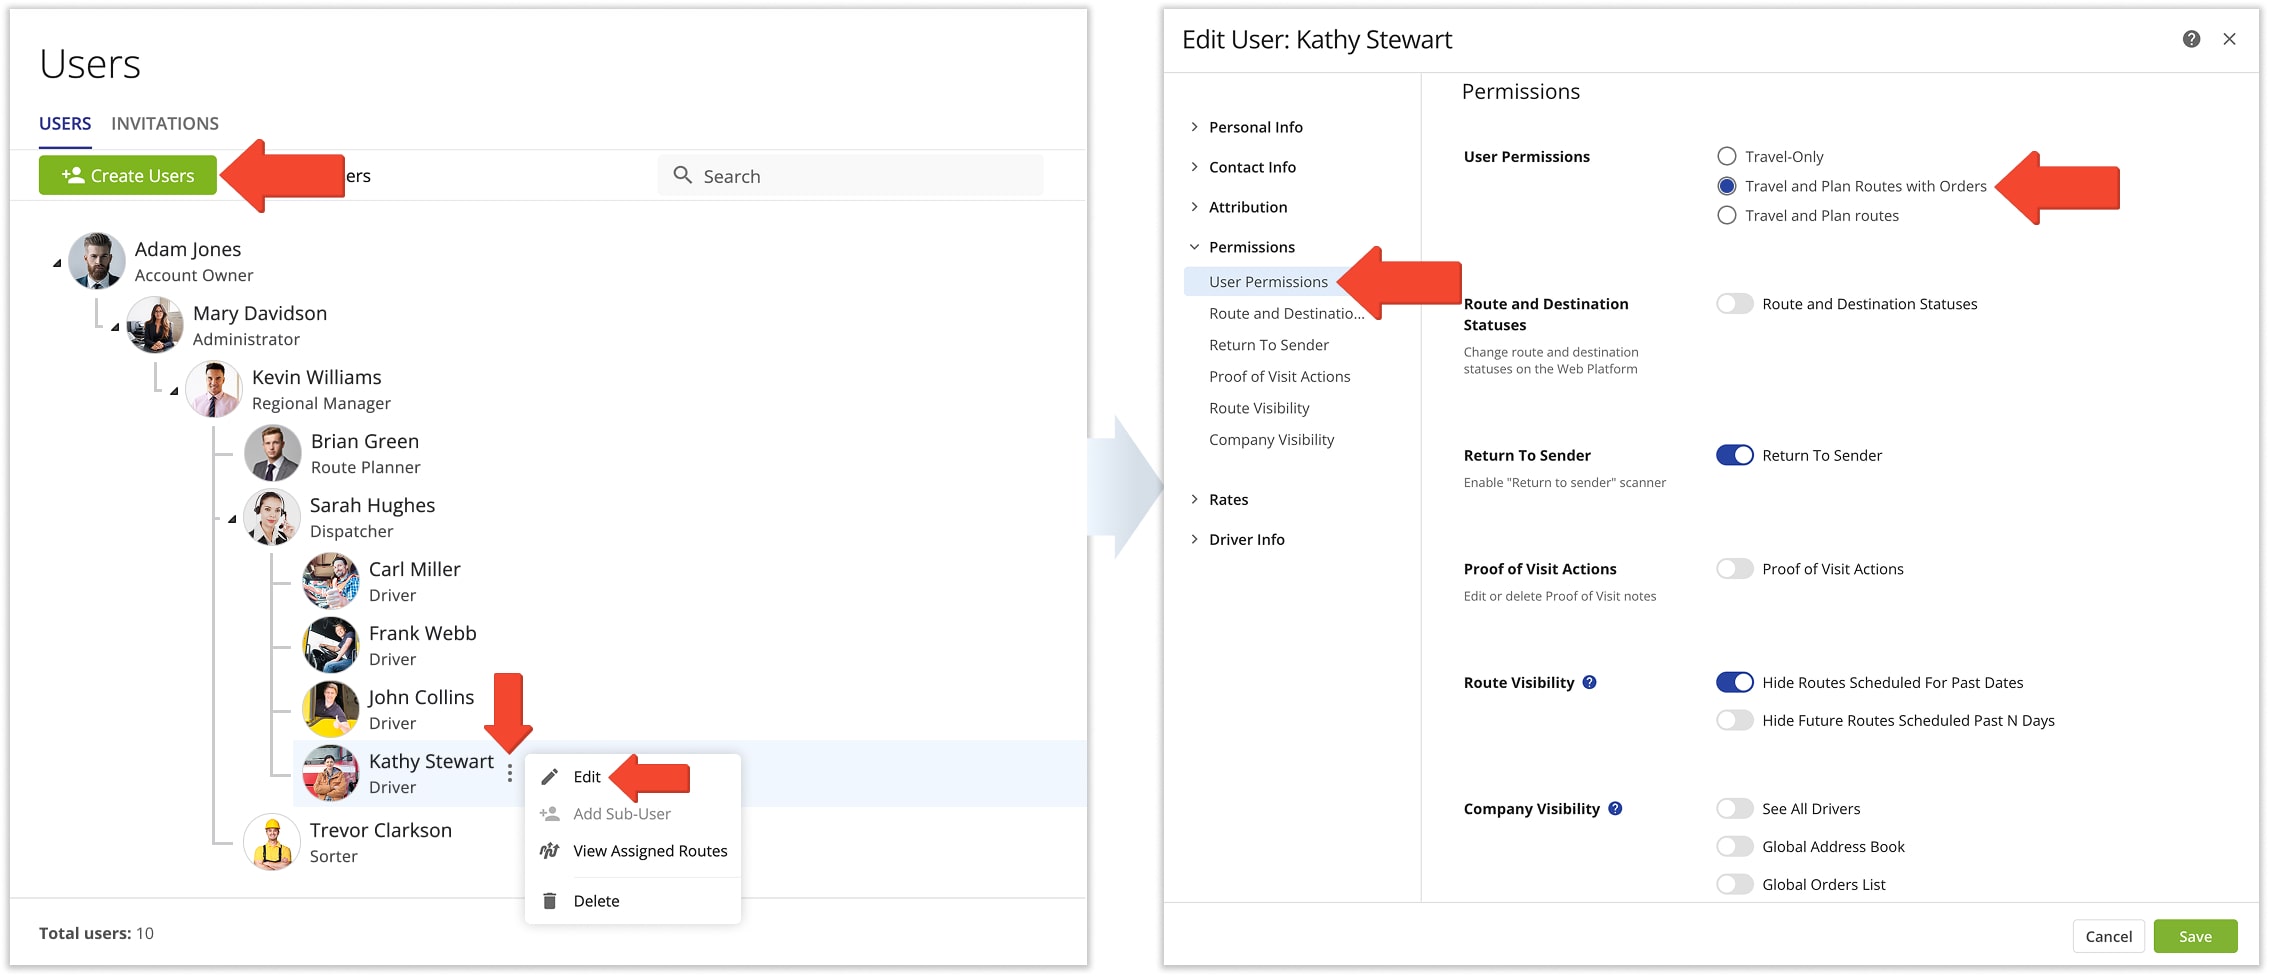
If the Grab & Go feature for scanning labels and barcodes is enabled on your account, you can set User Permissions when creating or editing a user. You can allow users to scan barcodes to plan routes, only travel routes, and more.
Click “Team & Equipment” > “Users” in the Navigation Menu. Then, click the “Create Users” button or select “Edit” from the Three-dot Icon menu. From the “Permissions” tab, select “Travel and Plan Routes with Orders” to enable barcode scanning.
NOTE: If Grab & Go is not enabled on your account, contact Route4Me Support for assistance.
| User Permissions | Field Description |
|---|---|
| Travel-Only | Equivalent to enabling Read-Only Mode for users without Grab & Go. The user can view but not edit assigned routes, addresses, orders, users, or work. |
| Travel and Plan Routes with Orders | Allows the user to scan barcodes on orders and add them as route destinations. Routes are optimized using the user’s assigned Optimization Profile. Learn more about scanning barcodes on iPhone and using the Android mobile barcode scanner. |
| Travel and Plan Routes | Equivalent to disabling Read-Only Mode for users without Grab & Go. The user can view and edit assigned routes, addresses, orders, users, and work. |
Scan Order Barcodes, Add Order Addresses And Plan Delivery Routes
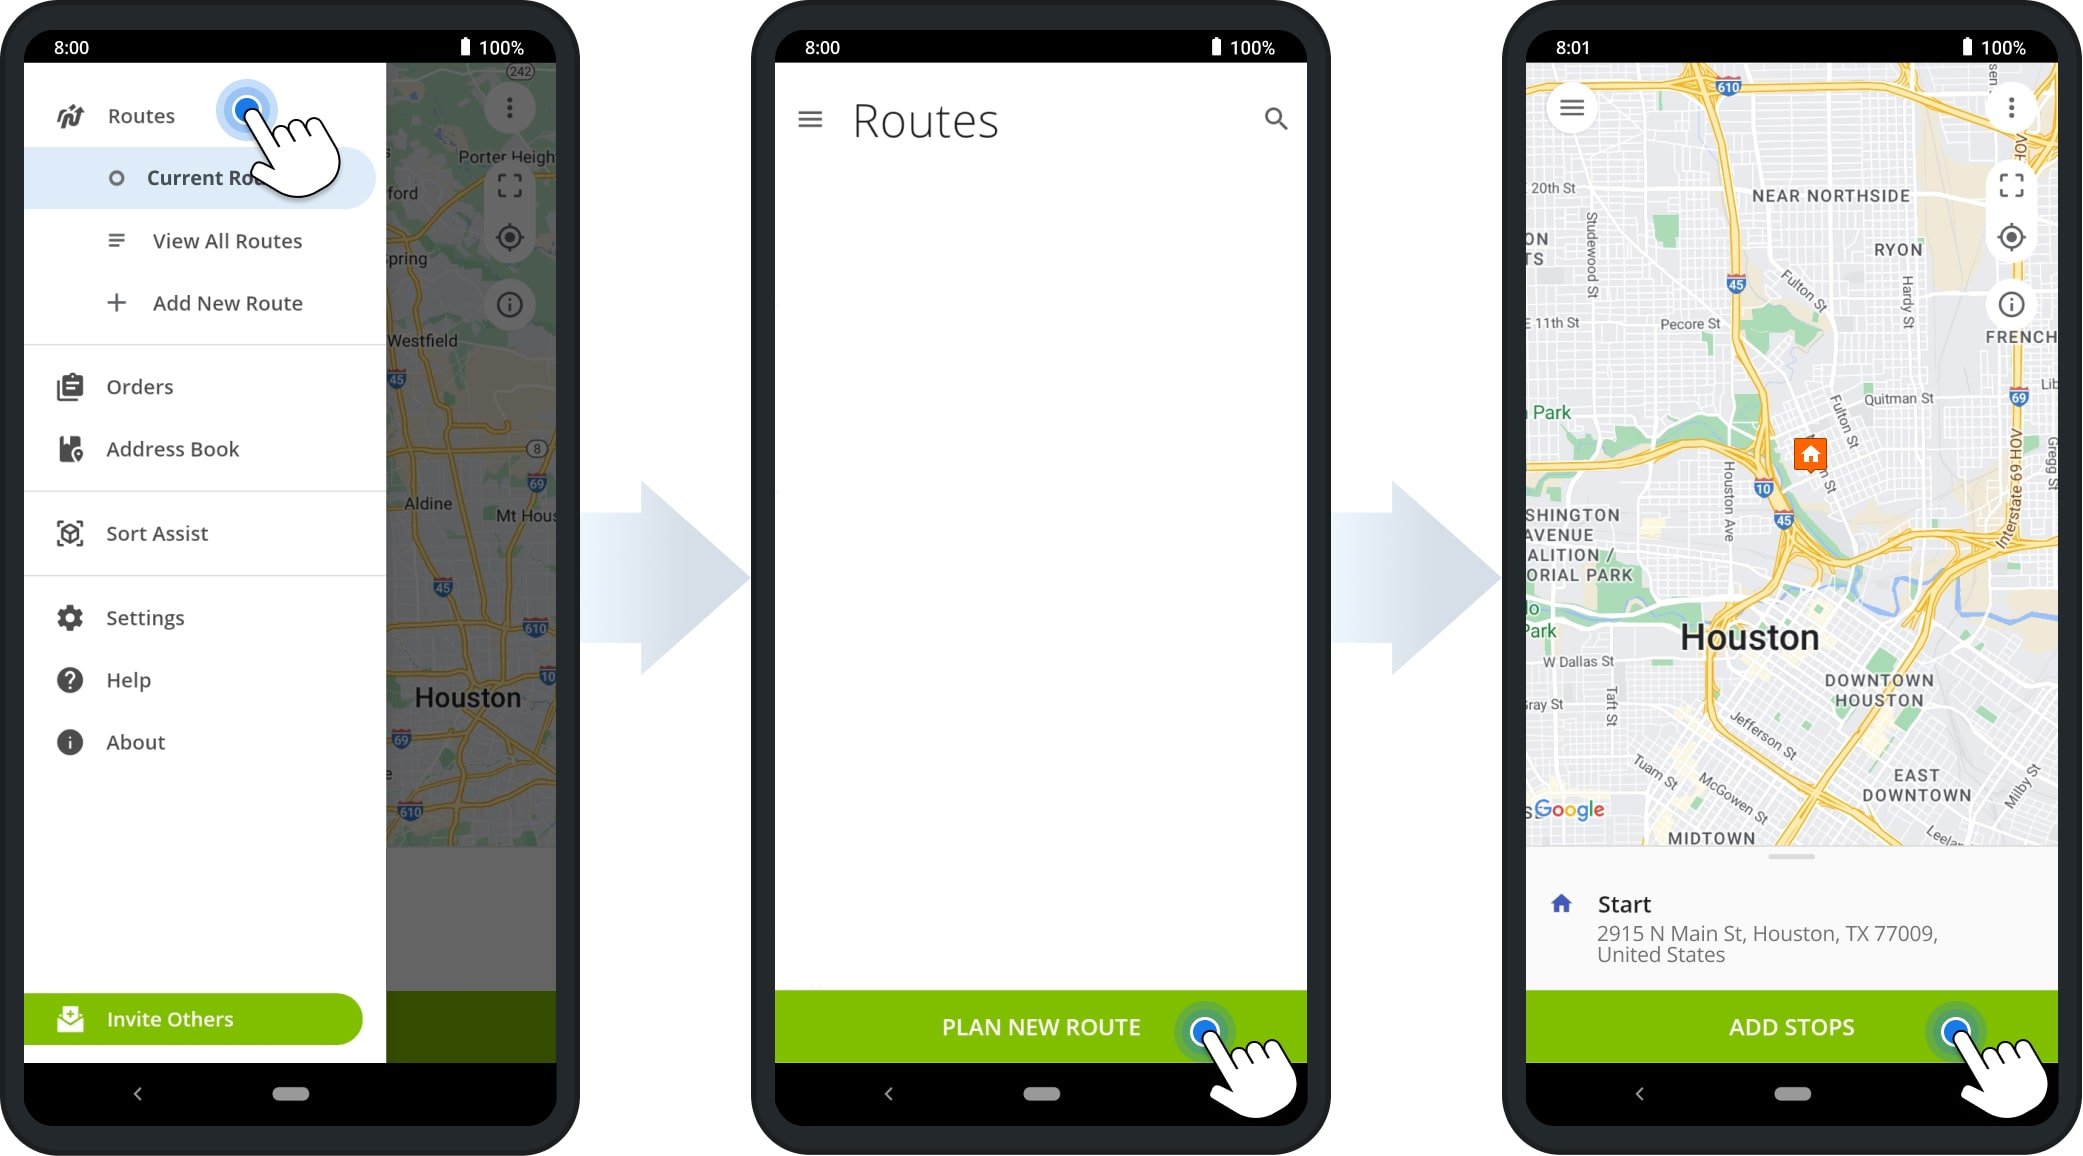
To plan routes by scanning order barcodes, go to “Dynamic Routing” > “Plan New Route” in the App Navigation Menu. The app will open the depot address from the user’s associated Optimization Profile.
Then, tap “Add Stops” to launch the barcode scanner and load orders as route destinations.
Scan barcodes on the orders to add them to the route. You can scan multiple order barcodes without closing the scanner. The app displays each order’s delivery address as it’s added.
Route4Me automatically adds these addresses as route destinations and assigns each order a unique serial number and Package ID. When finished, tap “Go to Route.”
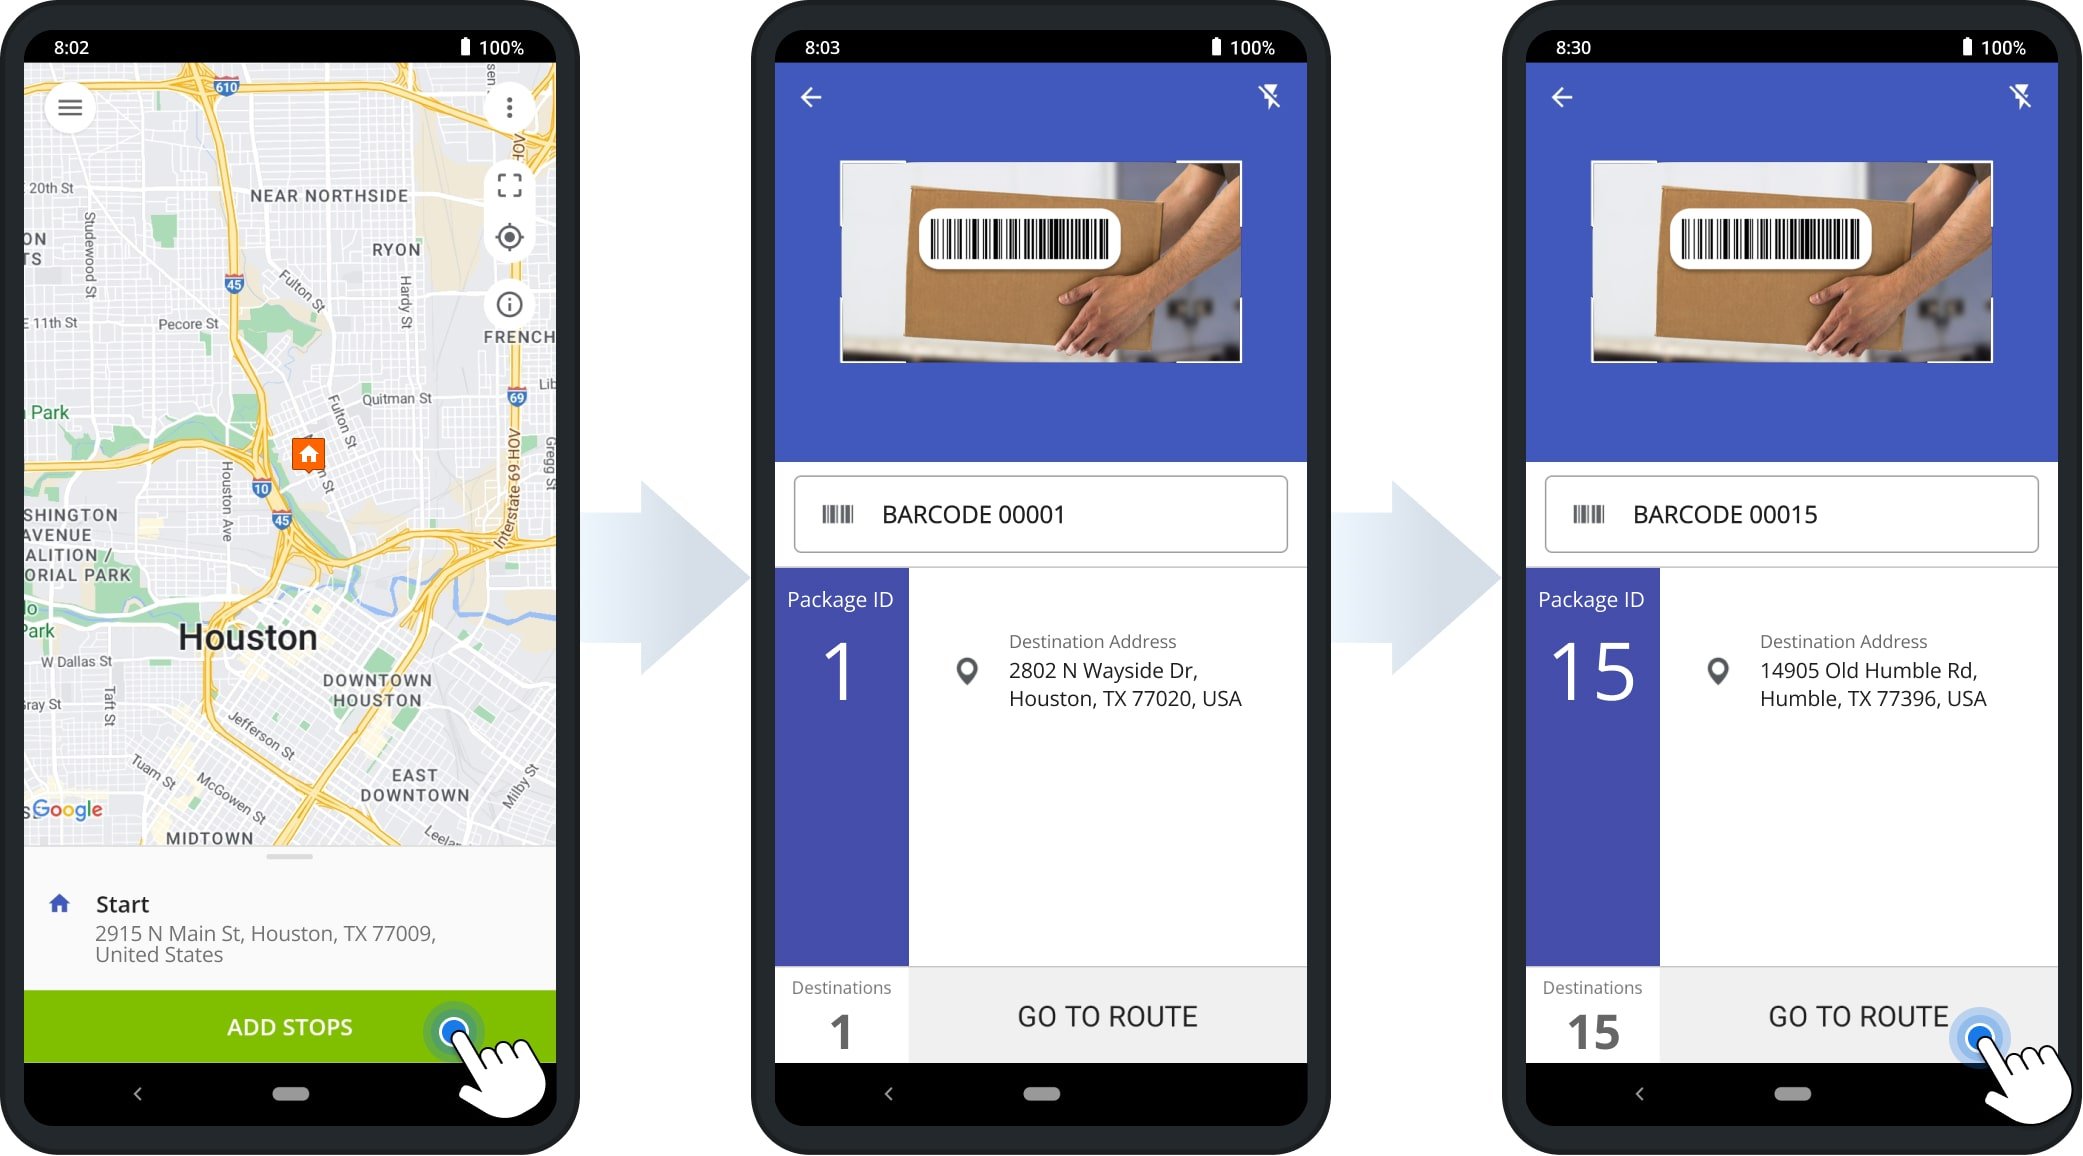
After scanning all required orders, you can view them on the map and the route destinations screen. Each scanned order must show the “Loaded” status and its Package ID. With Grab & Go, orders are automatically marked as loaded when scanned.
Tap and hold “Hold to Plan Route” to optimize. Route4Me then uses the assigned Optimization Profile to sequence all added addresses for the most efficient route.
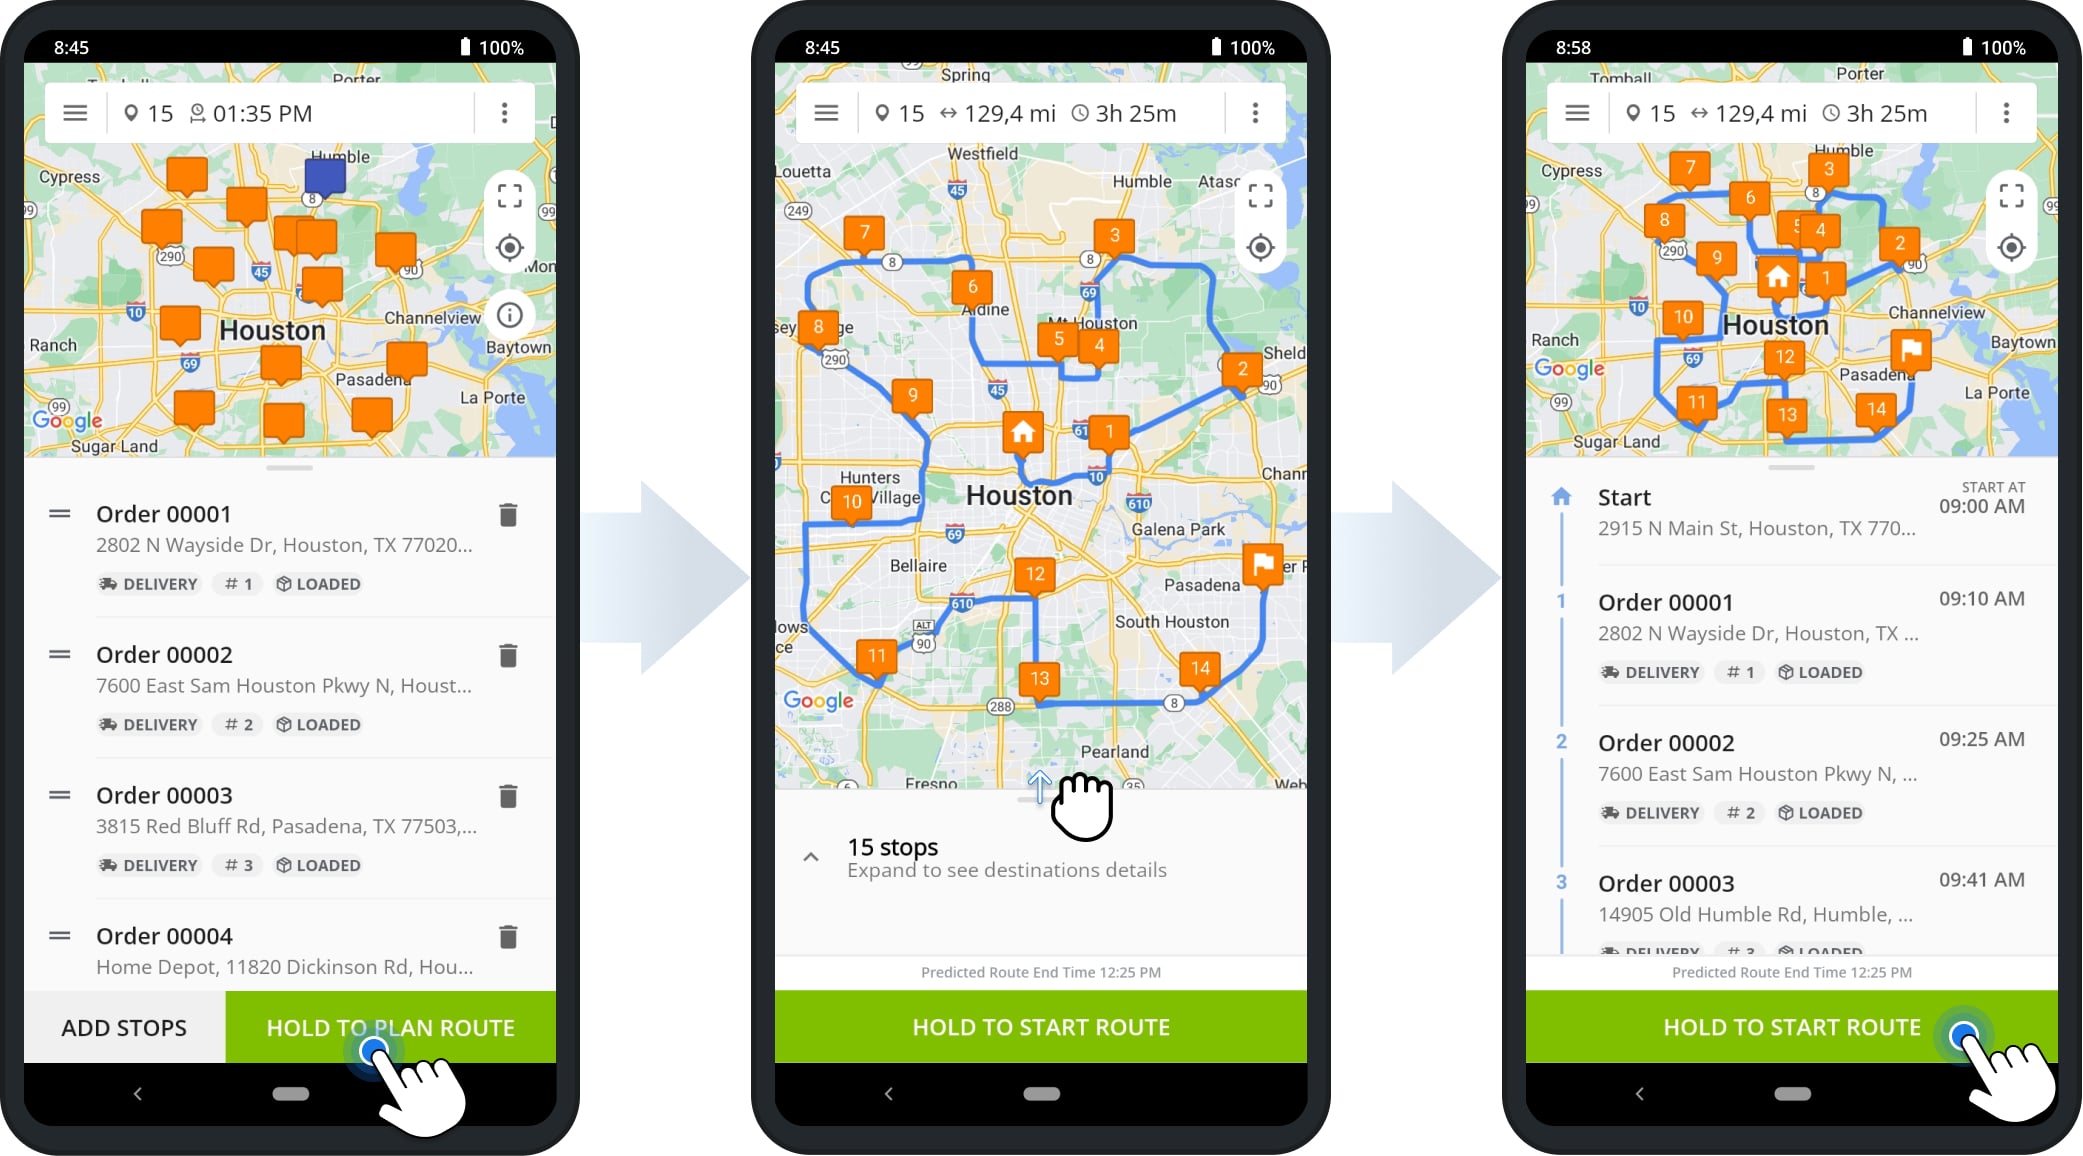
Start And Navigate Routes To Deliver And Unload Orders
Next, start the route by tapping and holding “Hold to Start Route“. The route’s start time and date automatically update to the current time and date.
To navigate to a route destination from your current location, tap the “Navigate” button next to a destination and choose your preferred navigation app or Route4Me will open your default navigation app.
You can use Route4Me’s In-App Voice-Guided Navigation or third-party apps like Google Maps, Apple Maps, CoPilot, or Waze.
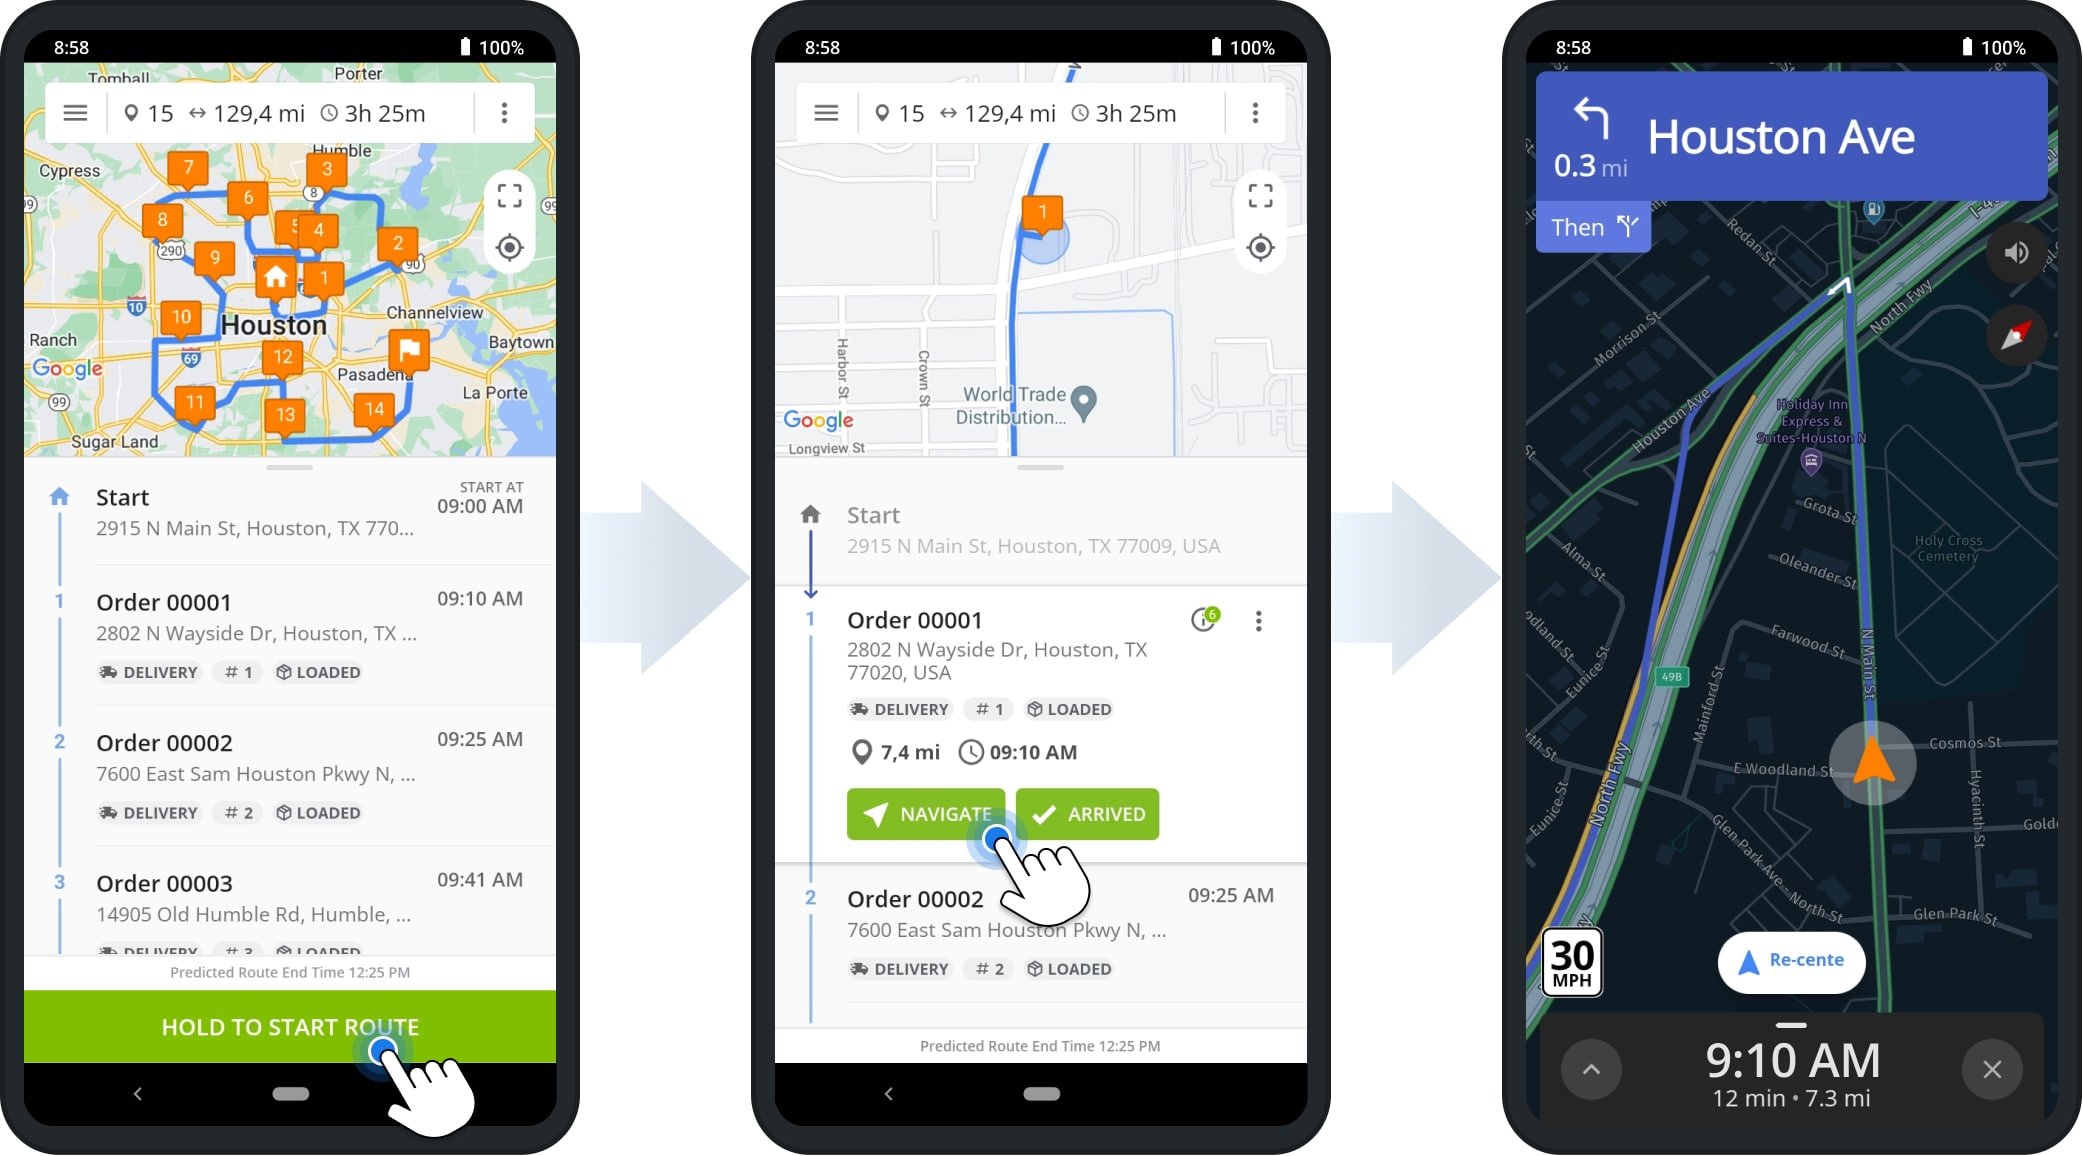
Unload Orders, Set Destination Statuses And Complete Mandatory Tasks
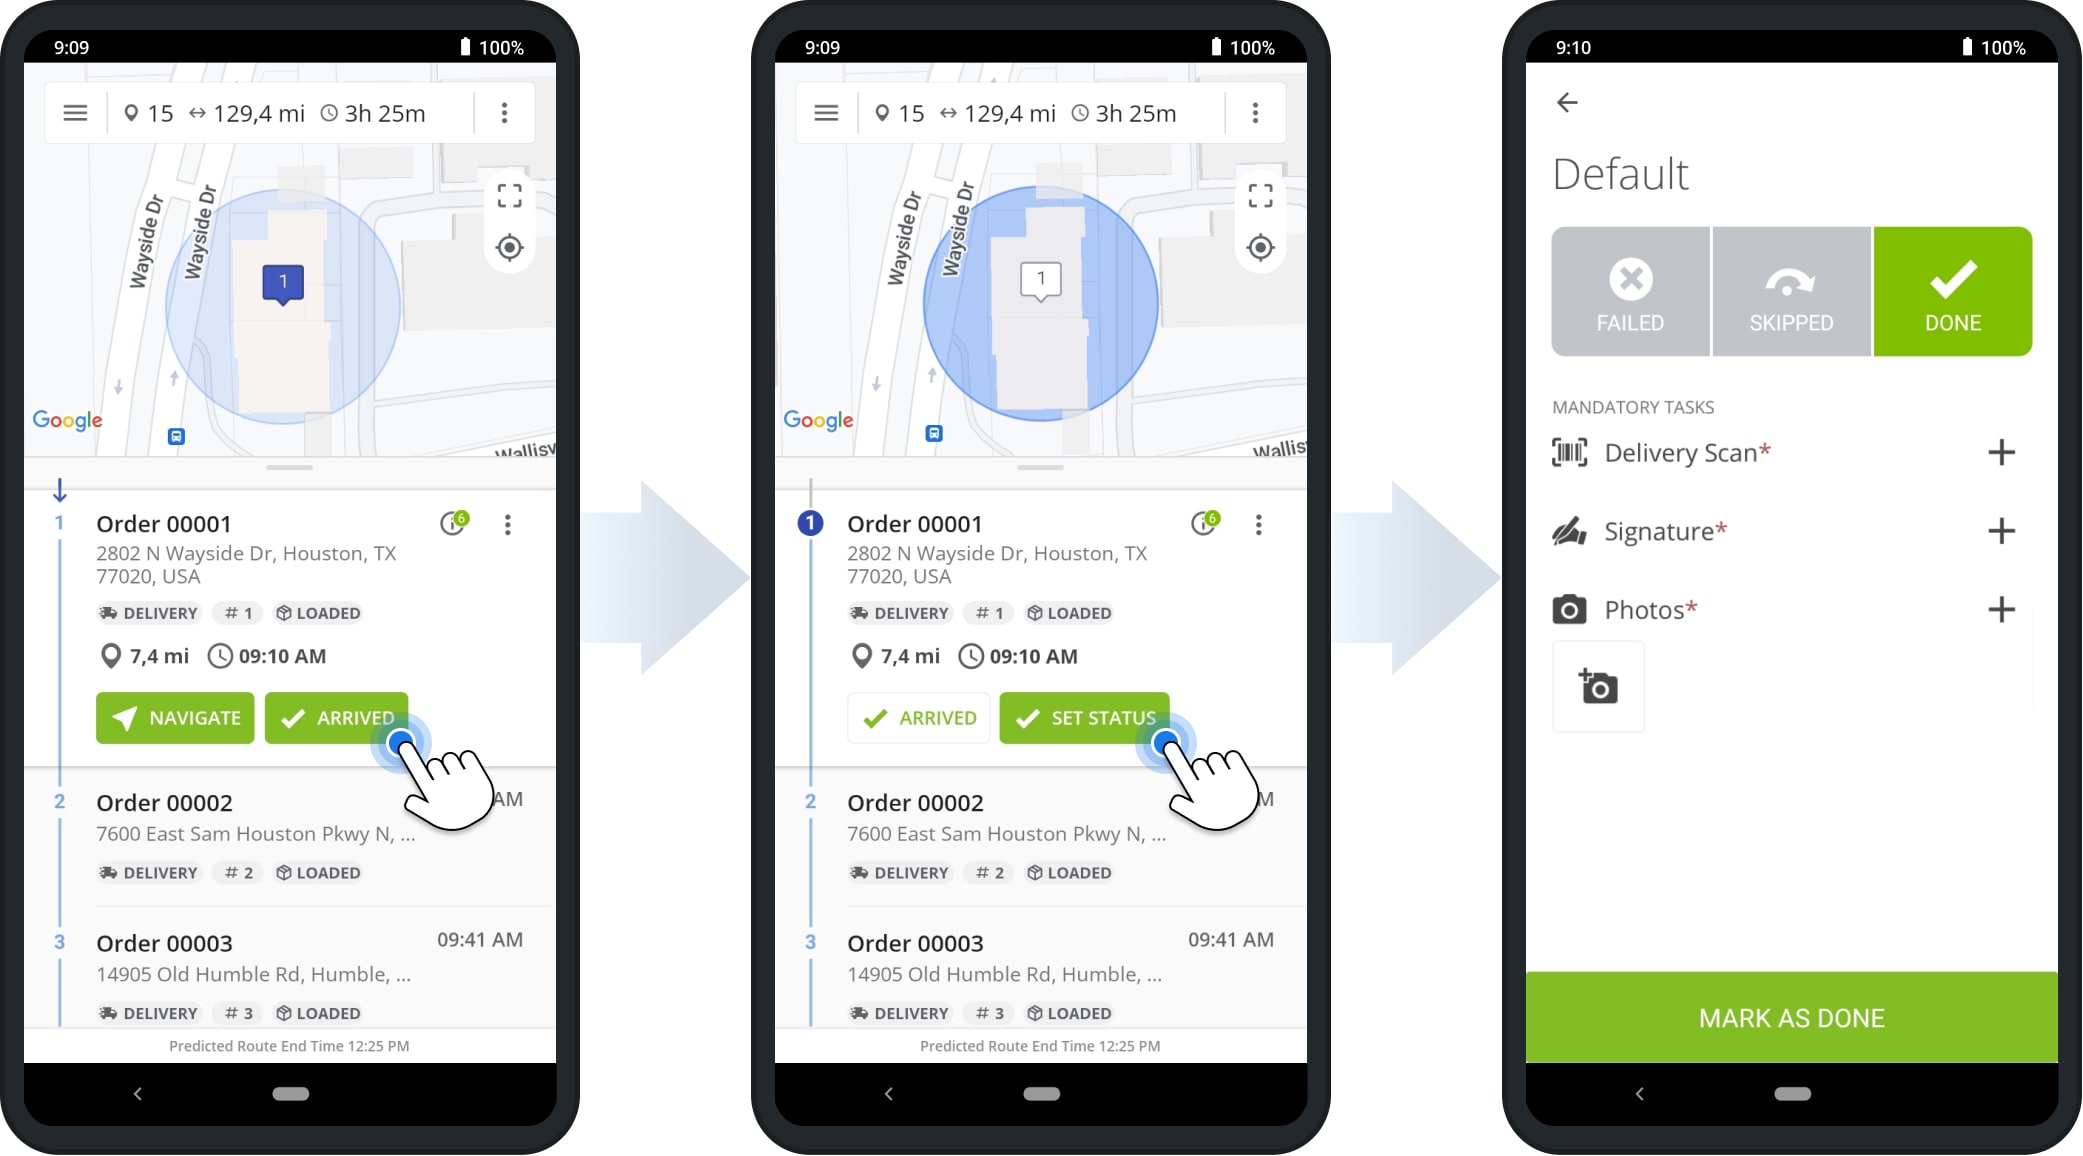
When you reach a destination, tap “Arrived,” then “Set Status“. Complete all required Mandatory Tasks, including unloading the order and collecting proof of delivery, as part of the assigned workflow.
Failed Orders – Unable To Unload Order And Fail Reason
If you can’t unload an order, mark the destination as “Failed” by selecting the “Failed” status. Choose a reason in the “Failed Reason” field, tap “Done“, then tap “Mark as Failed” to apply the status.

Done Orders – Unload Orders And Complete Mandatory Tasks
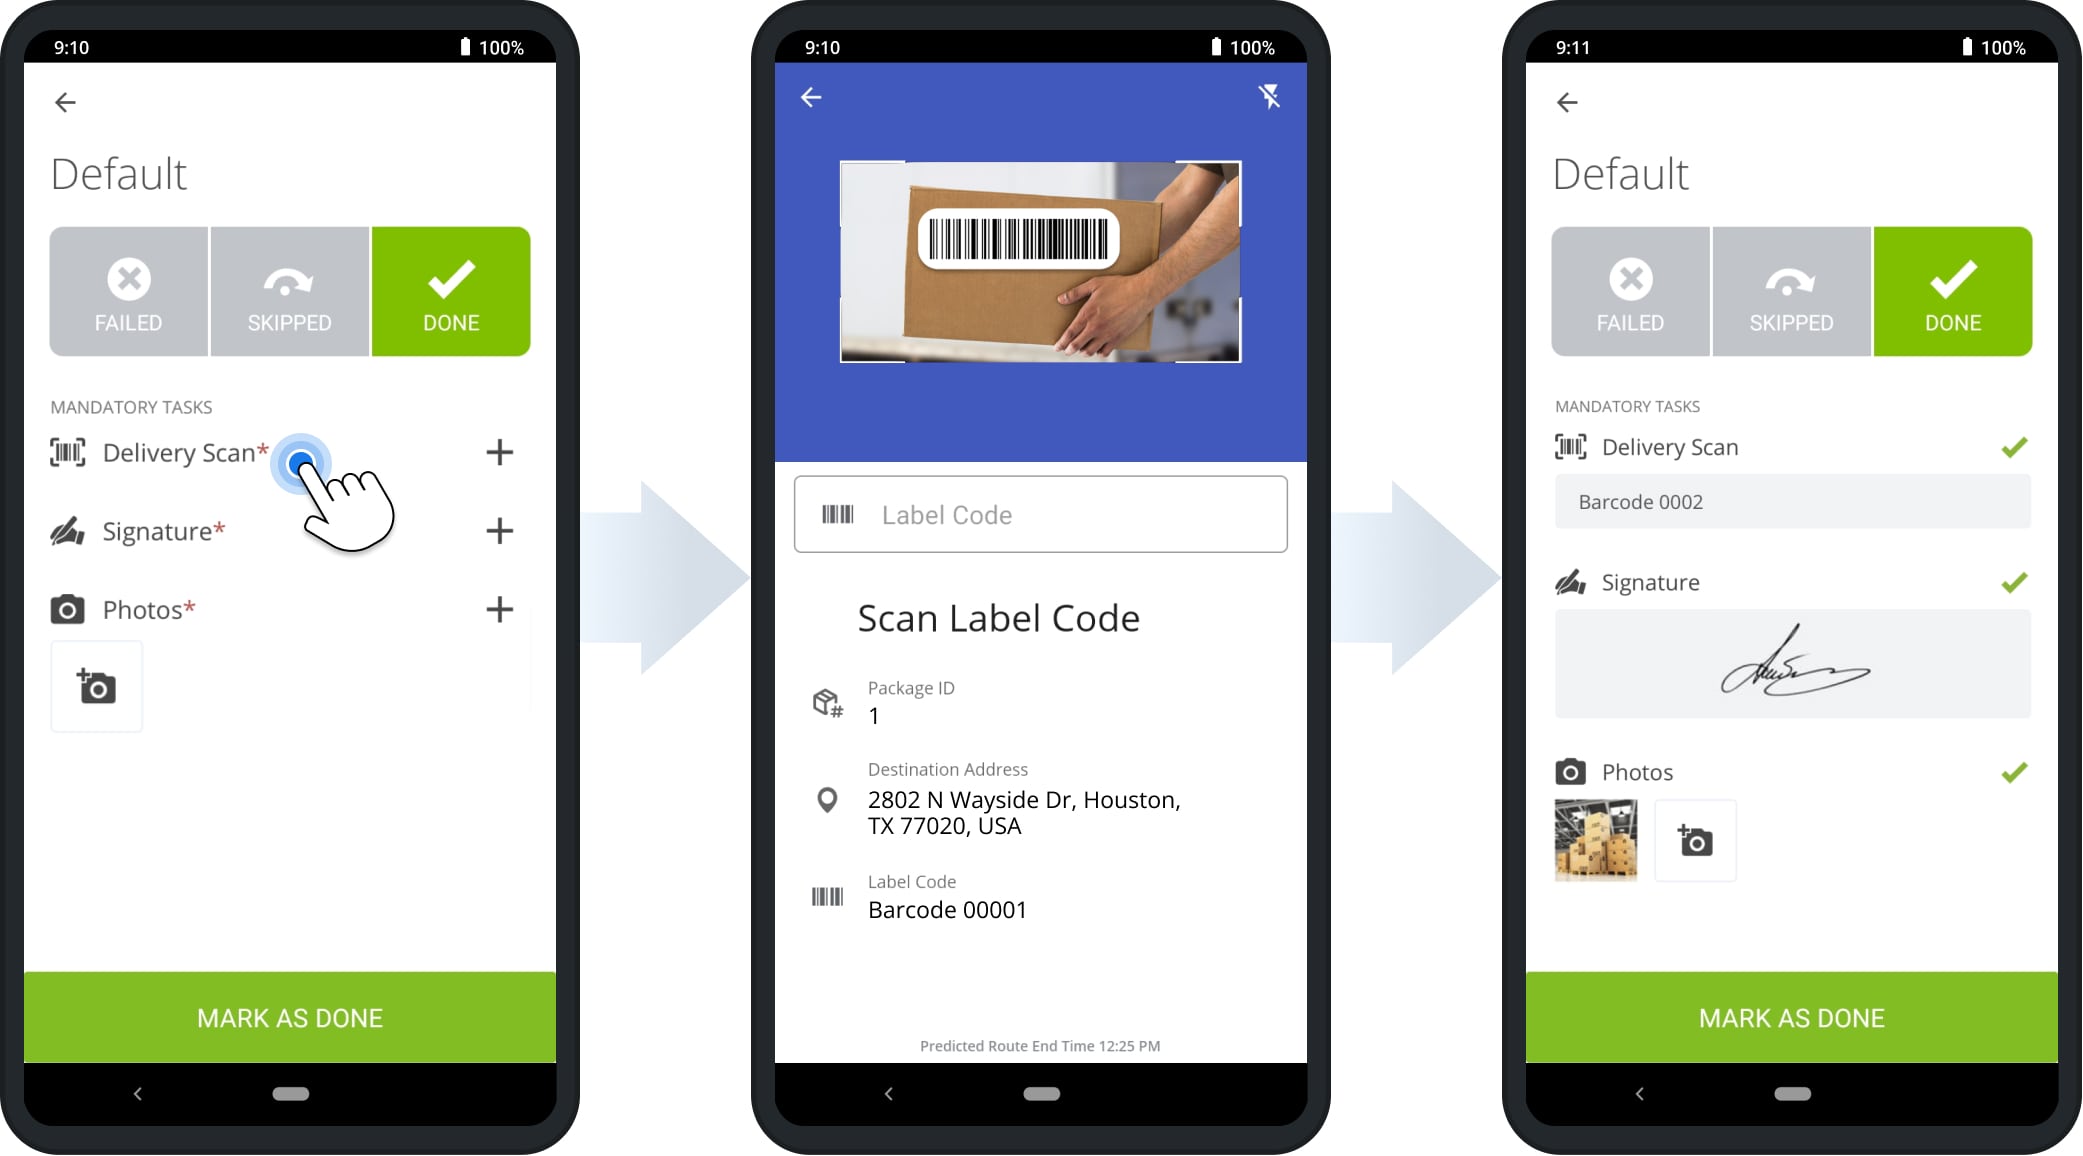
To unload an order, select the “Done” status at its destination. Tap the “Delivery Scan” field and scan the order’s barcode with the integrated scanner.
Then complete all Mandatory Tasks, such as collecting an electronic signature, attaching a receipt photo, or verifying ID.
End Routes – Completed Route Summary With Route KPIs
When you set the status at the last destination, the app prompts you to end the route. Alternatively, tap the “End Route” button at the bottom of the destinations list to end it manually.
If any destinations lack a status when ending the route, Route4Me lists them so you can set their statuses.
After ending, the app generates a Route Summary showing KPIs like total distance and time traveled, number of visited destinations, done vs. failed destinations, and more.

Visit Route4Me's Marketplace to Check out Associated Modules:
- Operations
Custom Data Add-On
- Operations
Advanced Team Management Add-On
About author: Alex Yasko
Alex Yasko is the Go-to-Market Product Manager and Information Architecture Manager at Route4Me. With thousands of hours of experience, Alex specializes in breaking down complex last-mile optimization and routing scenarios into simple, actionable instructions, helping last-mile businesses streamline their operations effortlessly.