Start, Navigate, And Complete Routes On The Route4Me Mobile App
Route4Me’s route navigation app provides seamless continuity through the entire process of starting, navigating, and completing dispatched last mile routes. In this guide, you can learn how to find and start routes, use Route4Me’s In-App Voice-Guided Navigation, add destination statuses, collect proof of delivery (POD), visit (POV), or service (POS), complete routes, and more.

NOTE: If your route includes commercial vehicles, not all areas may support truck-safe routing. See where Route4Me provides commercial navigation to plan accordingly.
Table of Contents
Open And Start Routes On The Route4Me App For Drivers
After you set up and sign in to the Route4Me app, tap the Menu Button in the top-left, then tap “Routes” or “View All Routes” to open the Routes List.
To see dispatched routes assigned to you, tap “My Routes“. Swipe down on the Routes List to refresh and load the most recent data. You can also tap the Search Icon to find routes by name, scheduled month, city, or other attributes.
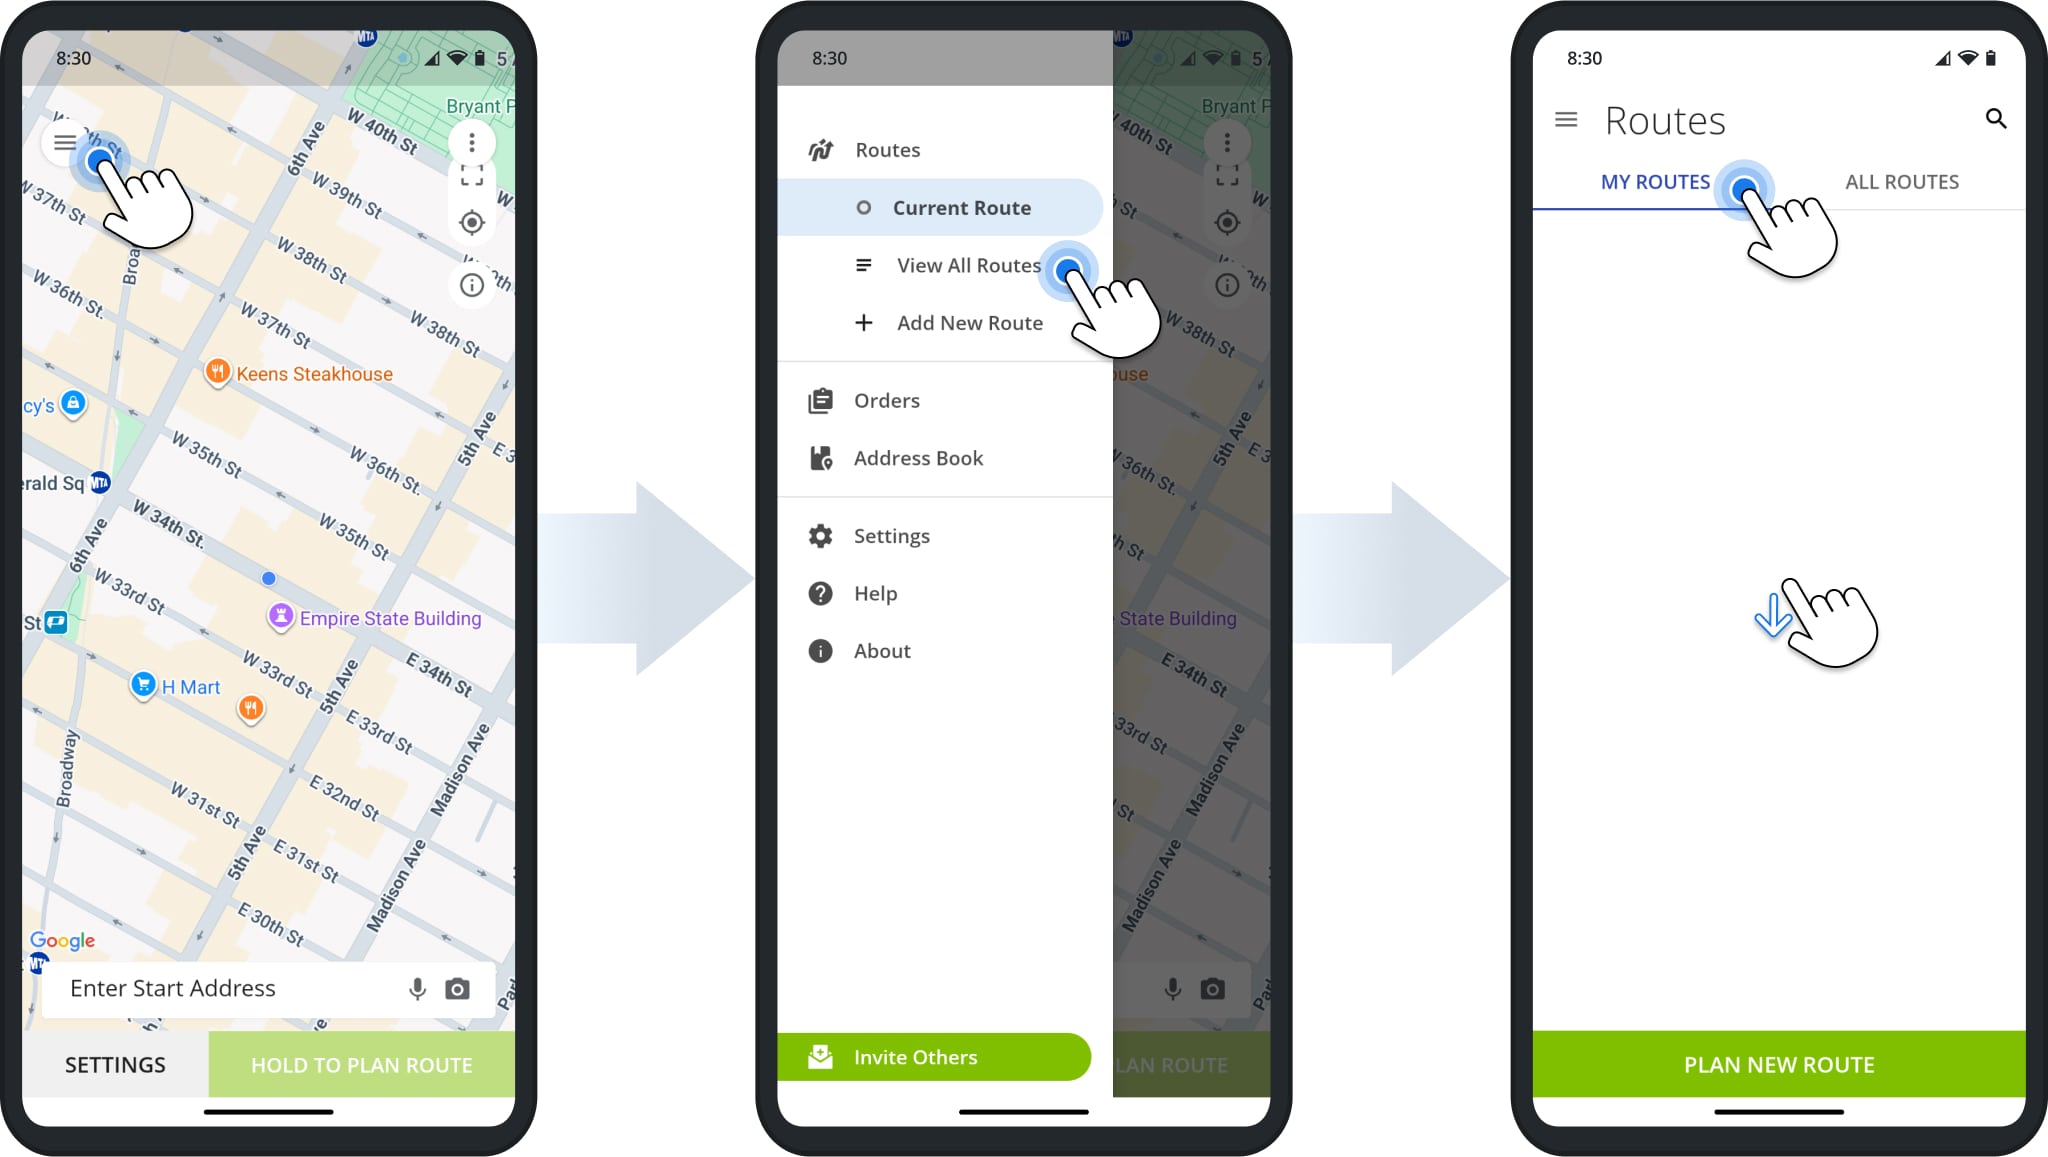
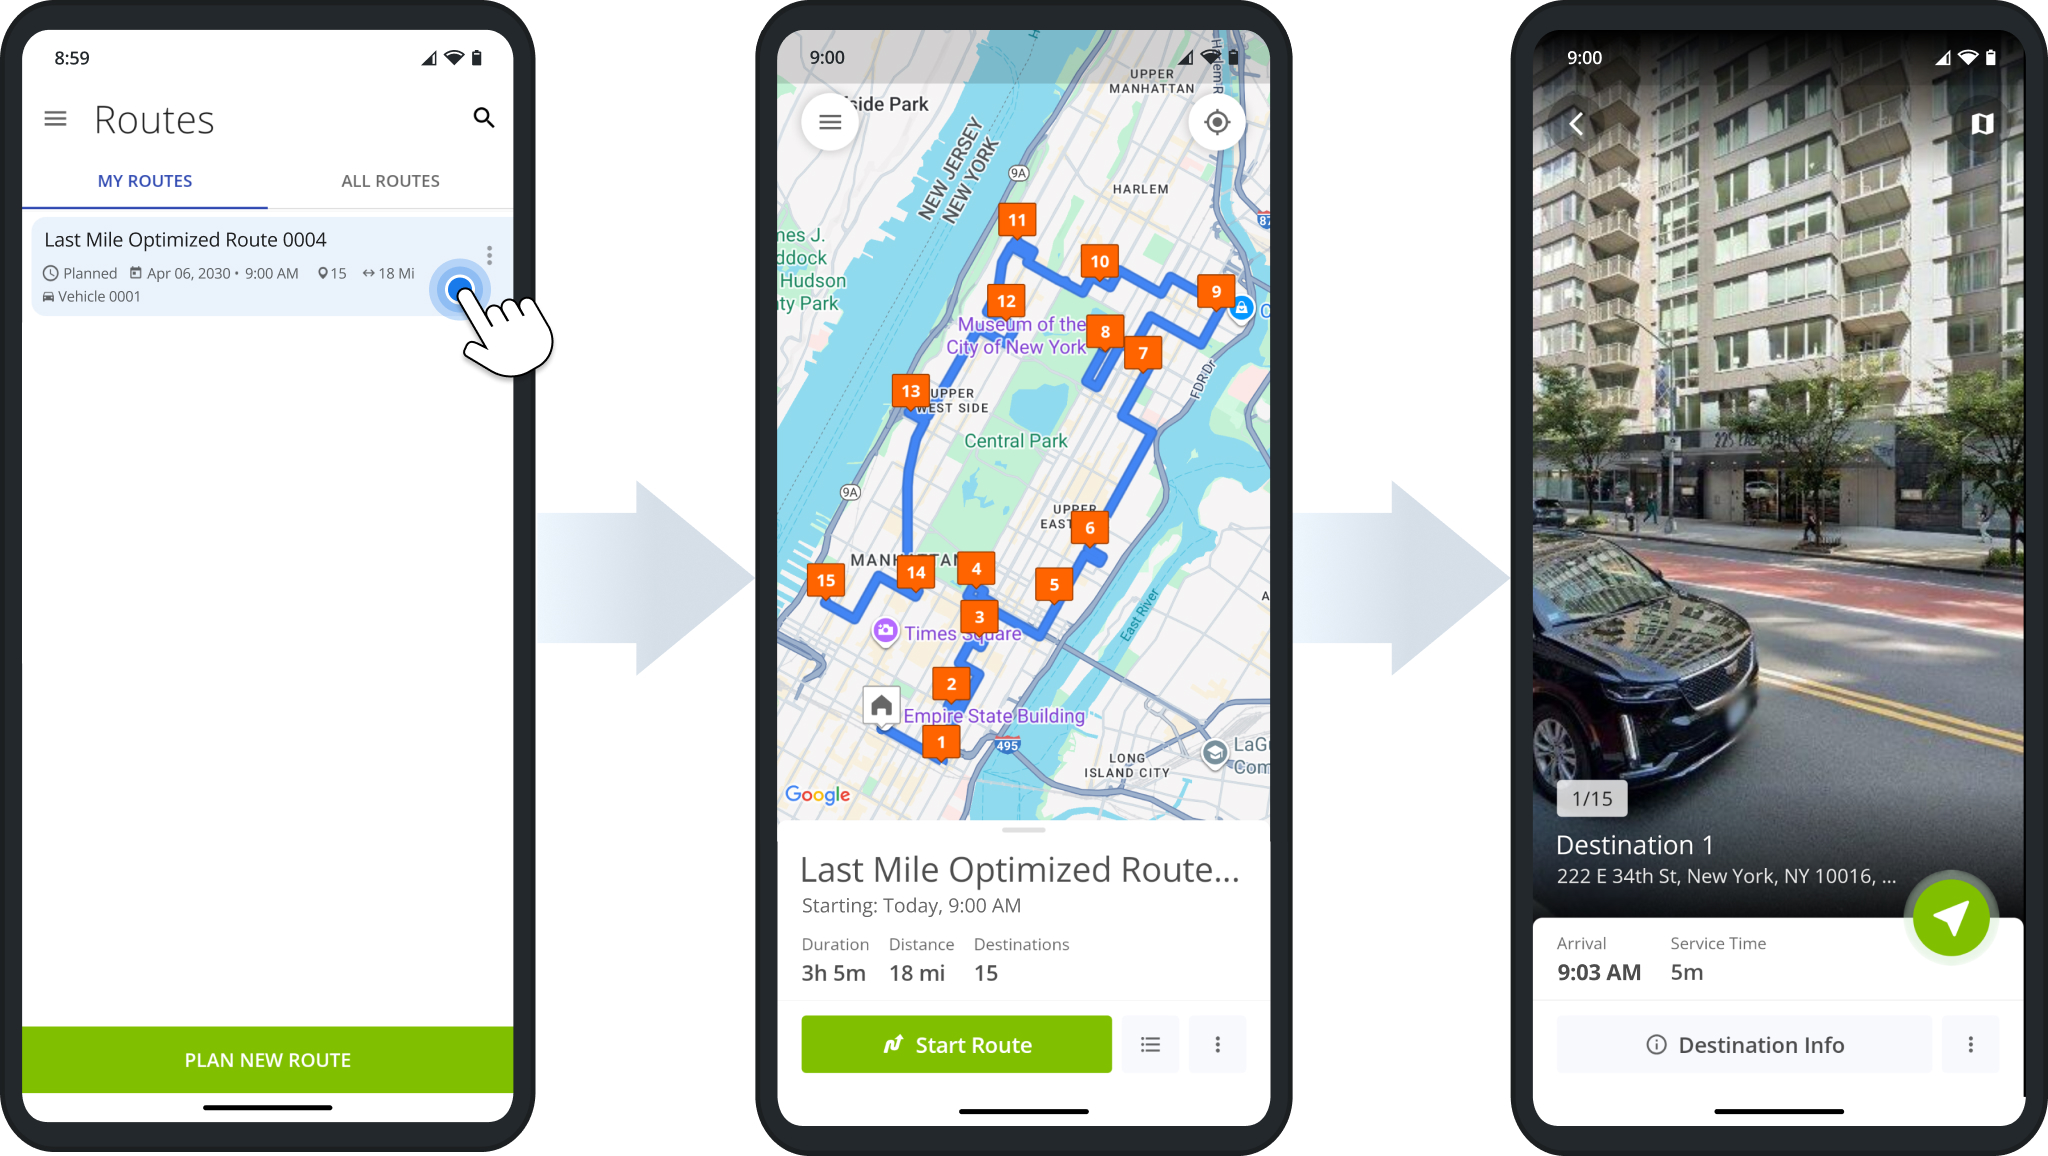
Tap a route to open it. Alternatively, tap the Three-dot Icon in the Routes List and select “Open Route” from the menu. Next, simply tap “Start Route” to open the first destination and change the route’s status to “Started“.
NOTE: When opening an already started route, “Start Route” is replaced with “Navigate“.
Open Destinations List And Share ETAs With Tracking Links
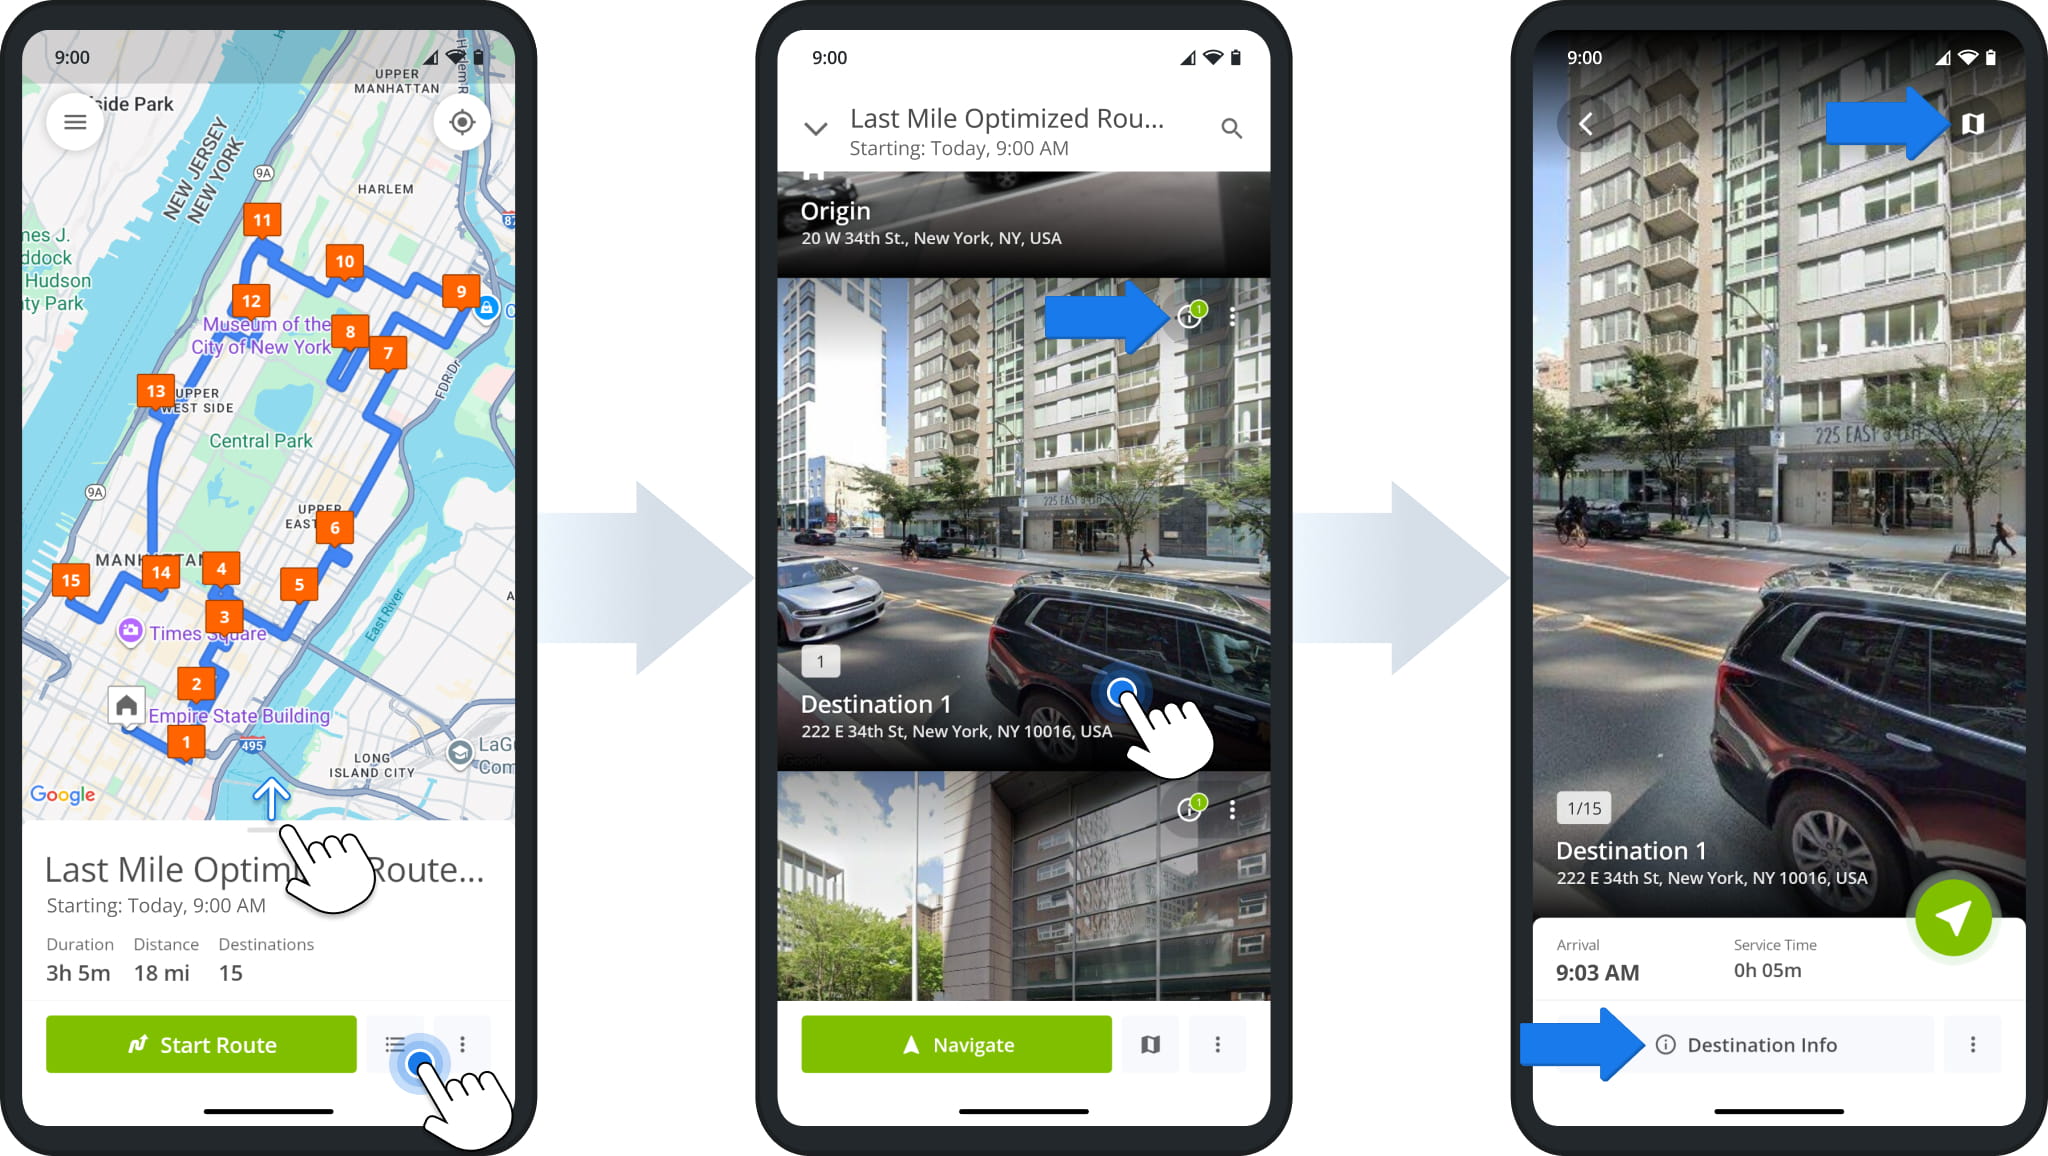
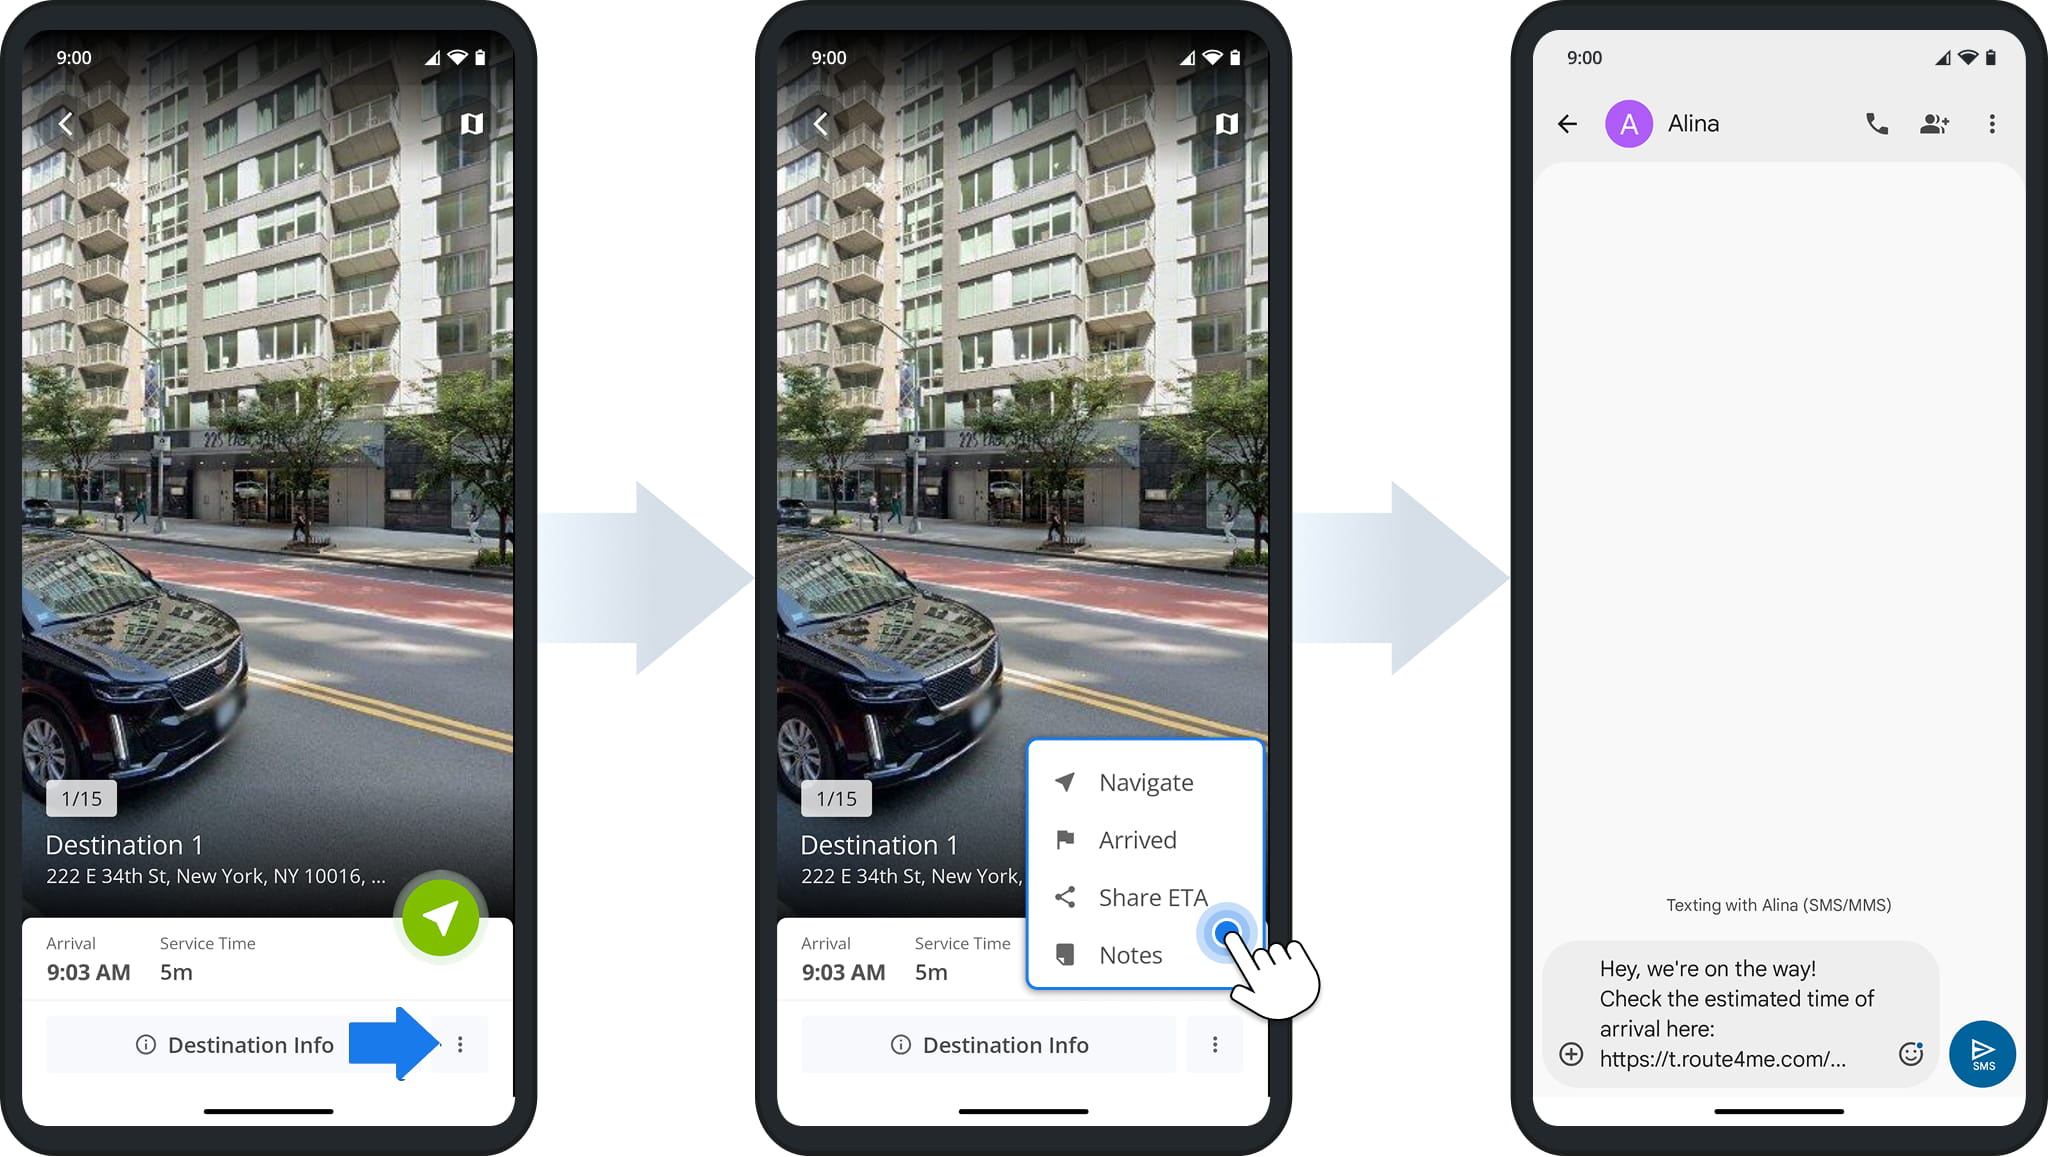
At any point, you can open the Destinations List by dragging the route information panel up or tapping the list button in the bottom-right. Tap a destination to open it or tap the Destination Information button to see more details about it.
You can also tap the Map Icon in the upper-right of an open destination to see where the address is located on the map.
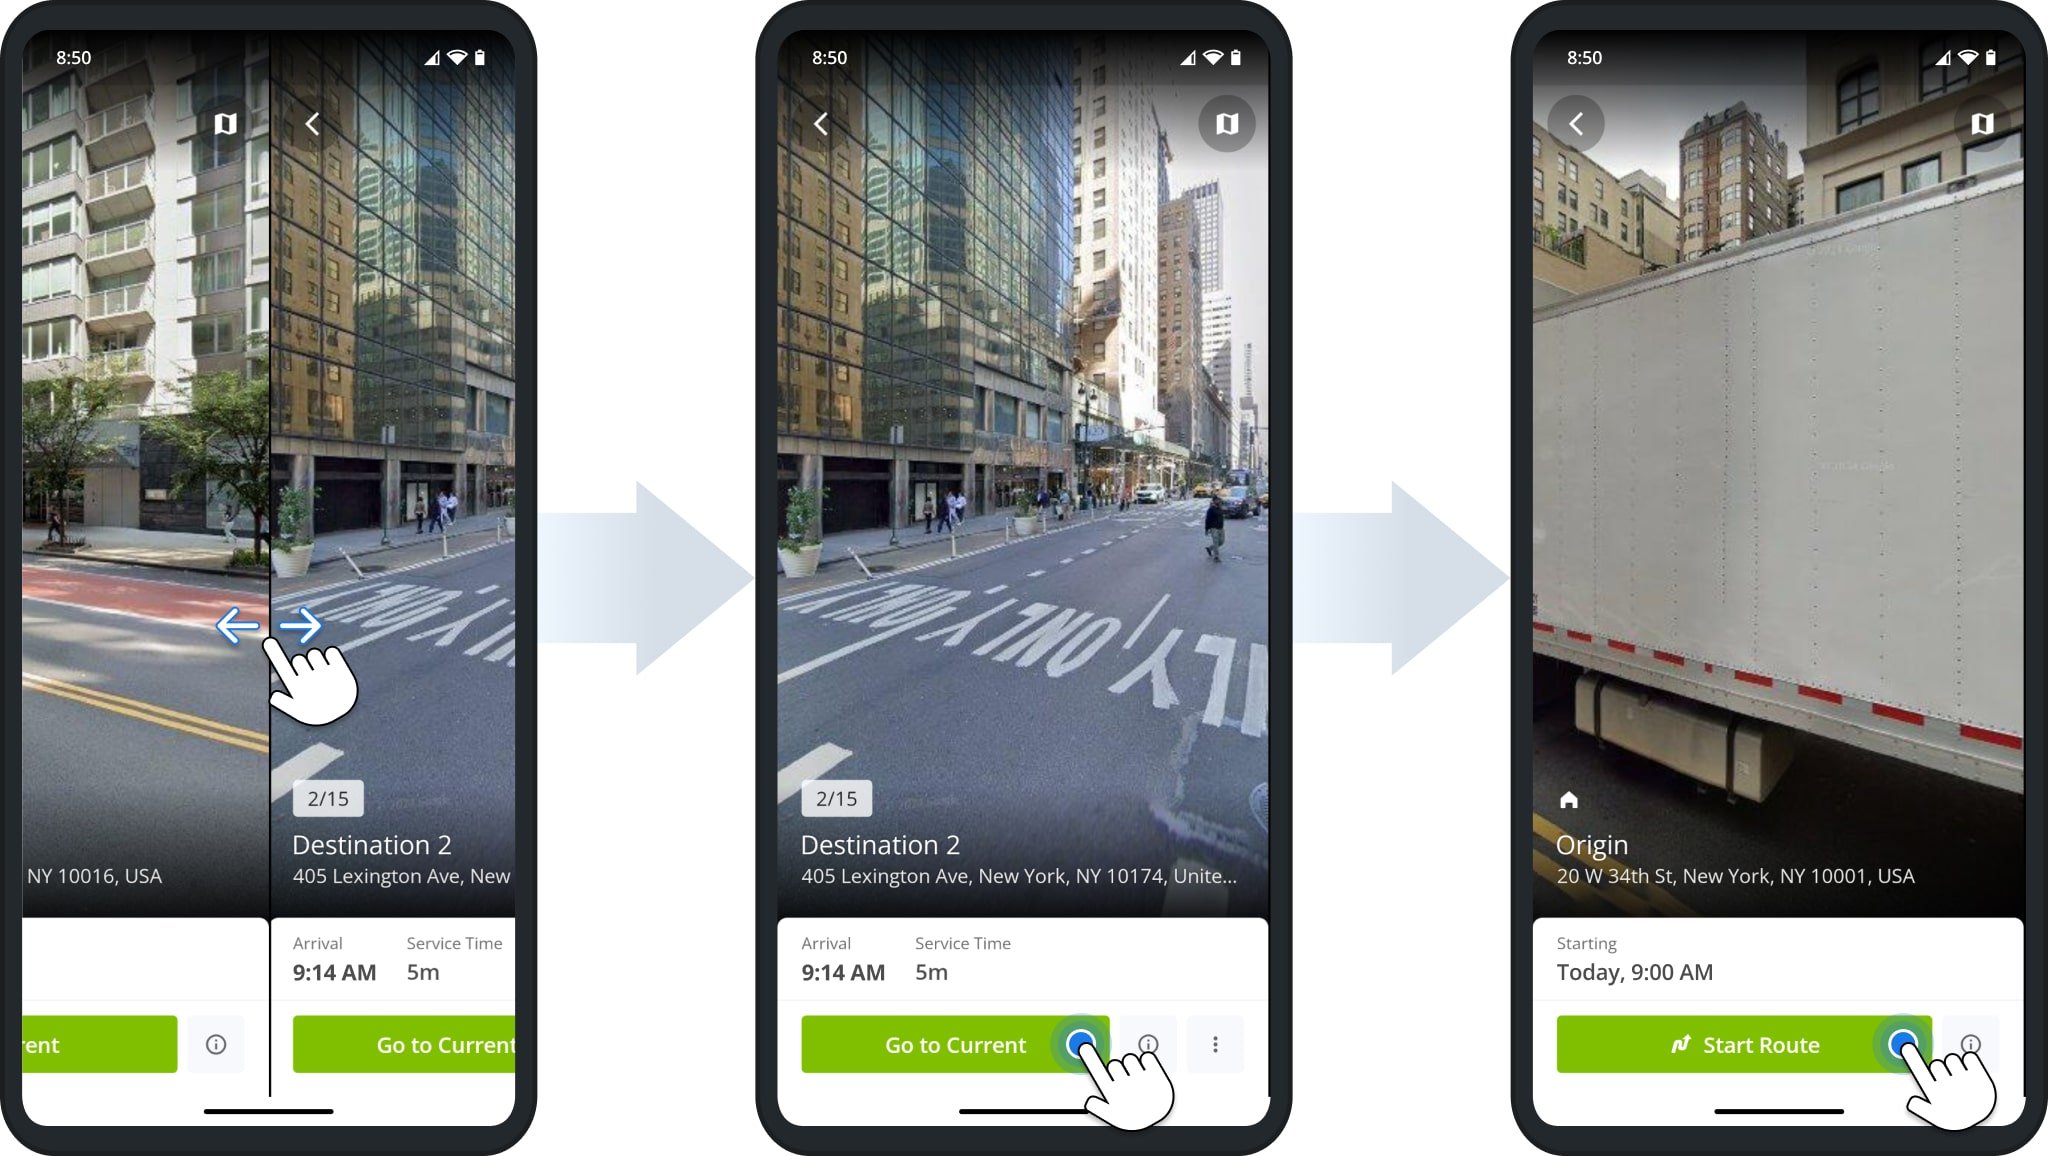
To open a different destination, swipe sideways. When you open a later or earlier Destination than the next scheduled one, you can tap “Go to Current” to open the next scheduled destination.
If you haven’t started the route, then the current destination is the route’s origin. There, you can tap “Start Route” to open the first scheduled destination and change the route’s status to “Started“.
After starting a route, you can access additional destination options from the Three-dot Icon.
To send an ETA and tracking link, simply tap “Share ETA“. Route4Me’s delivery routing software will automatically pre-populate a text message with a link to the Order Tracking Portal and the phone number associated with the destination.
Navigate Routes – Route4Me In-App Navigation With Voice-Guided GPS Directions
Once you’ve started or continued a route, you’ll see the next destination in the route sequence. To start navigating to the destination, simply tap the Navigate Button and select a navigation app or the built-in Voice-Guided GPS Navigation.
Route4Me’s Mobile Driver App supports the following navigation methods:
- In-App Voice Guided Navigation
- Google Maps Route Navigation
- Waze Navigation App
- Here Wego Navigation App
- Uber Navigation App
- CoPilot GPS Navigation App
You can easily change your Navigation Preferences from the Route4Me App Settings. To open the settings, tap the Burger Button in the top-left and select “Settings” from the menu.

NOTE: Company drivers will only see the in-app navigation option if mandatory route navigation is enabled.
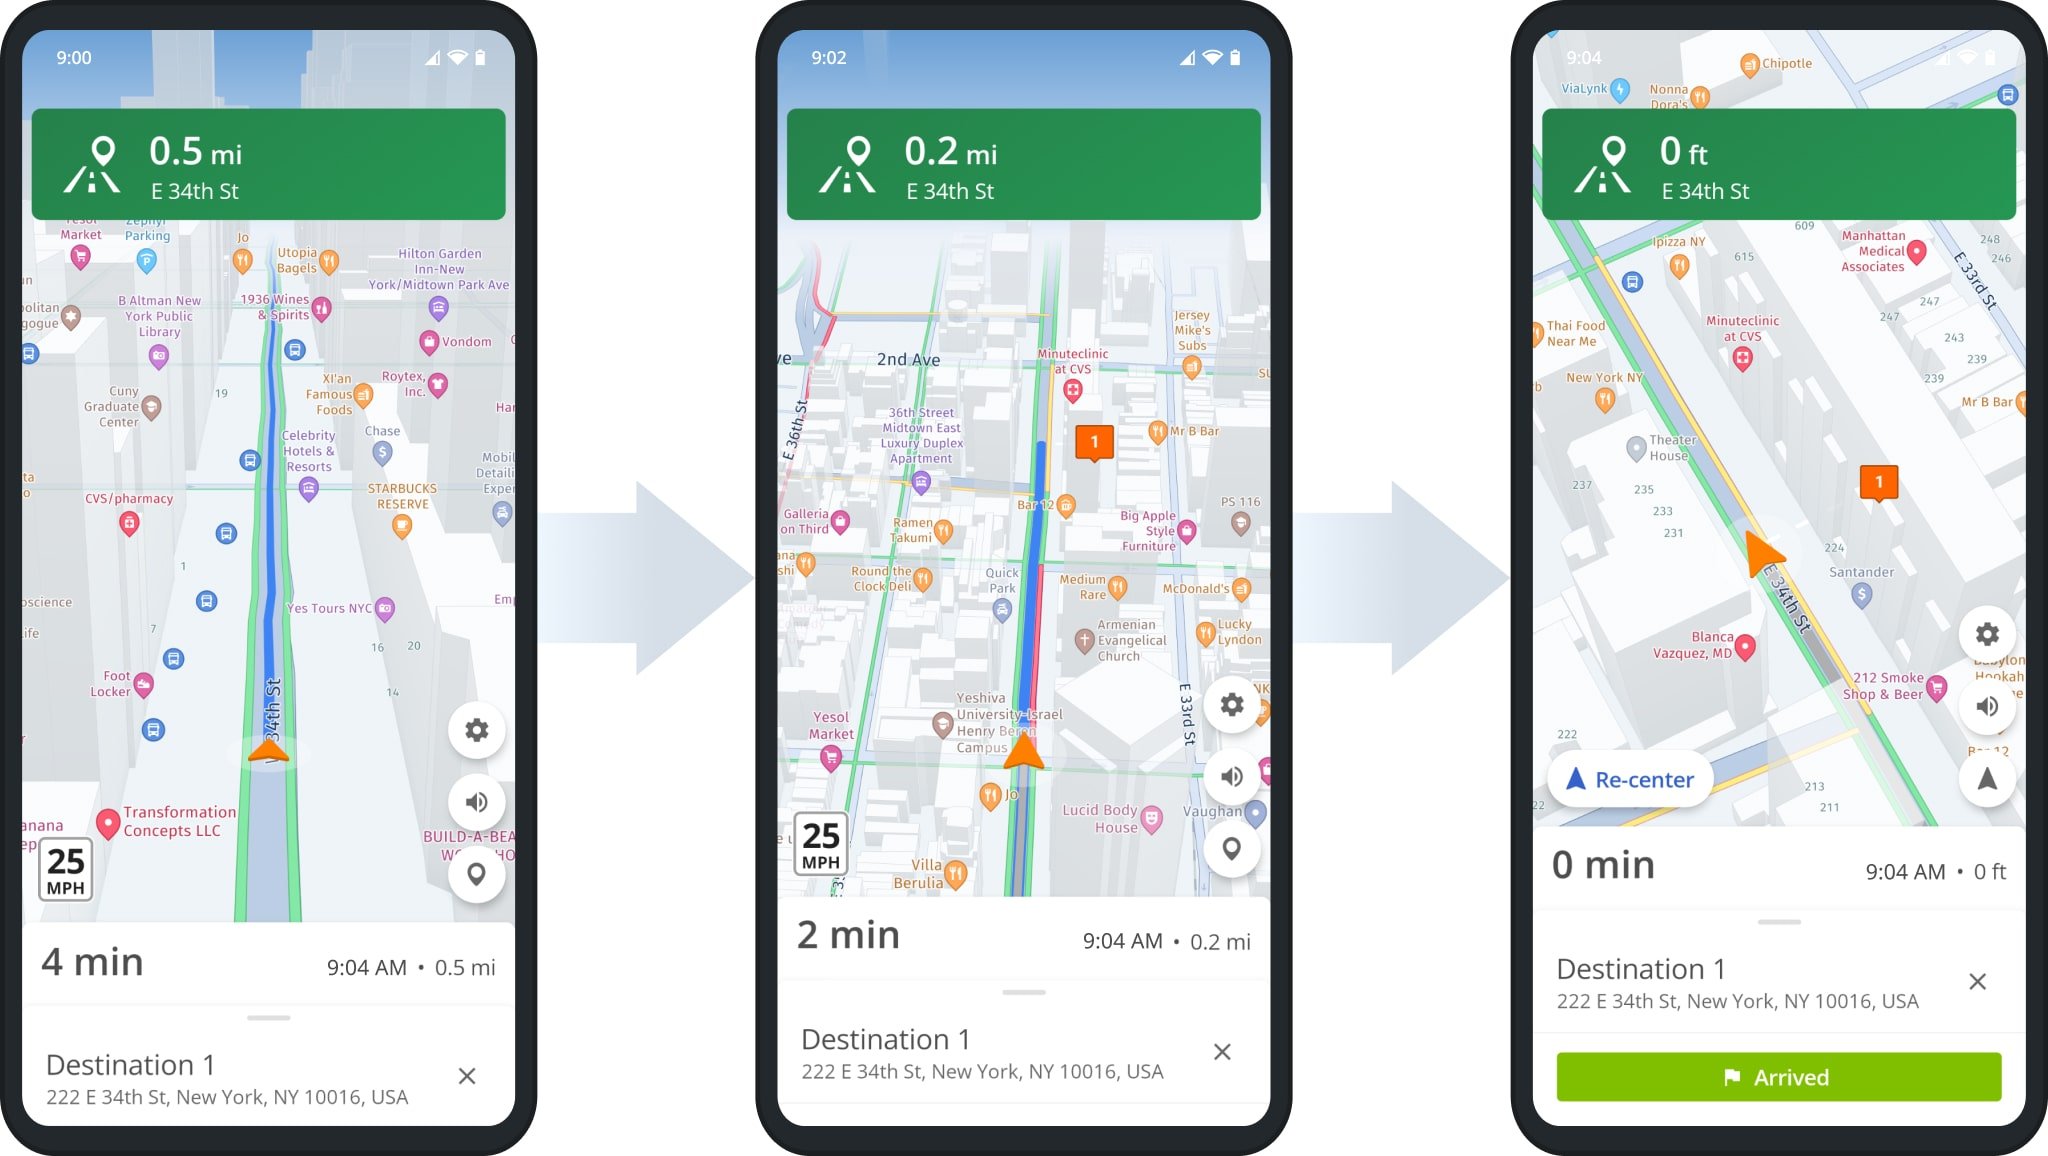
Route4Me’s In-App navigation features voice-guided driving directions for driver safety, cycling and walking directions, adjustable 2D and 3D maps, dynamic ETAs, live traffic updates, and more. Additionally, you can use pinch gestures to zoom in and out on the navigation map and change the map angle and type.
To mute or unmute driver navigation directions, tap on the speaker button. Moreover, at the bottom of the navigation screen, you can check the dynamic estimated time of arrival, which can change depending on the live traffic and other conditions. Additionally, learn more about Using Route4Me’s Integrated Voice-Guided GPS Navigation.
Arrive At Destinations And Complete Visitation With Statuses
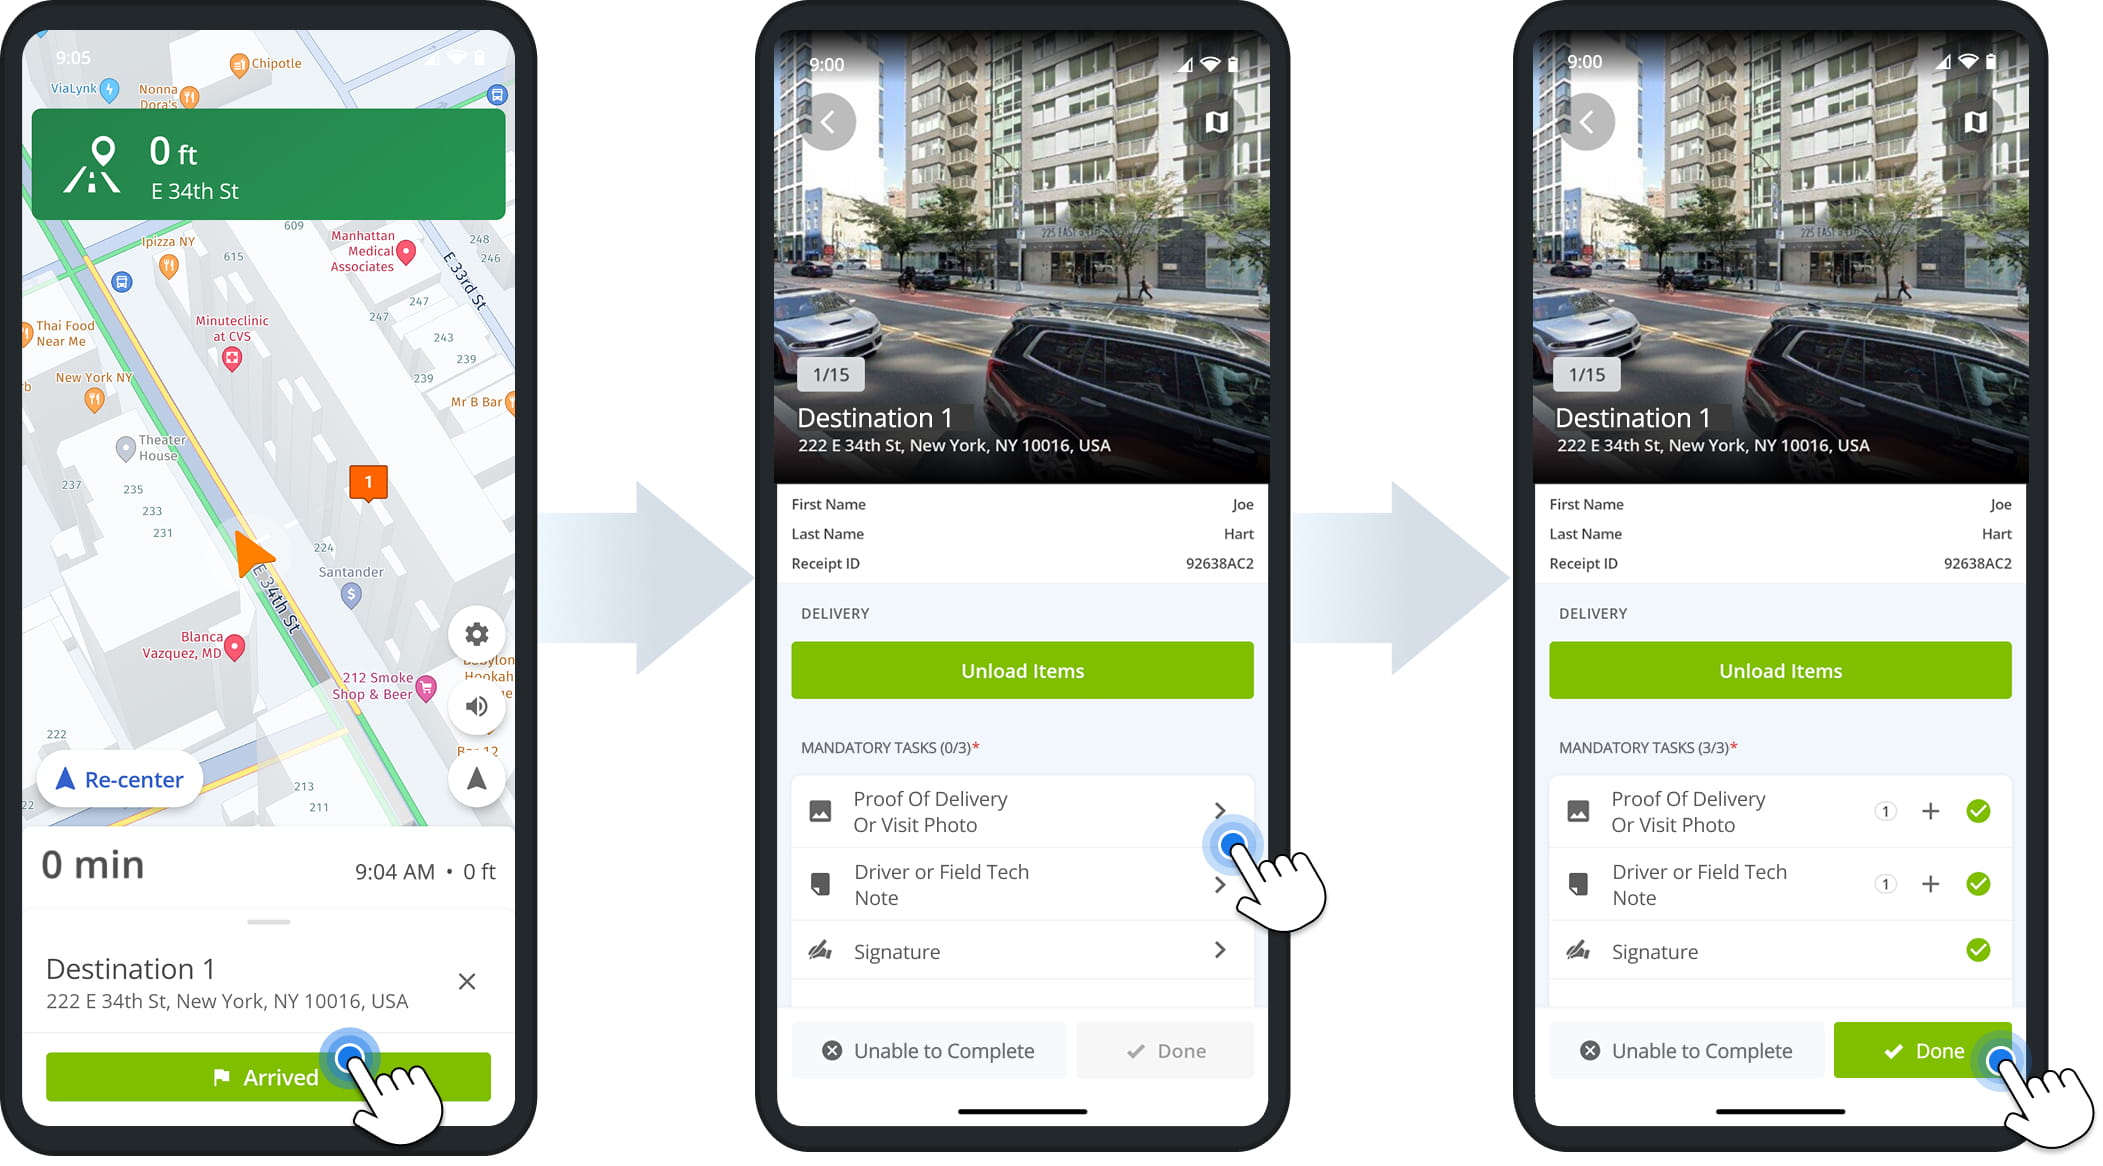
When you reach a destination, the app will automatically pull up the navigation info panel, where you can confirm your arrival by tapping the “Arrived” button.
The app will open the proof of visit and delivery screen where you can set Destination Statuses. Complete any “Mandatory Tasks” if present by tapping on a task. Then, tap “Done”
NOTE: The app automatically opens the next destination after completing a visit with any status. At any time, you can go to the Destinations List to view and manage Destination Info and any proof of visit or delivery notes you’ve collected.
Collect Digital Proof Of Visit And Delivery With Route4Me App
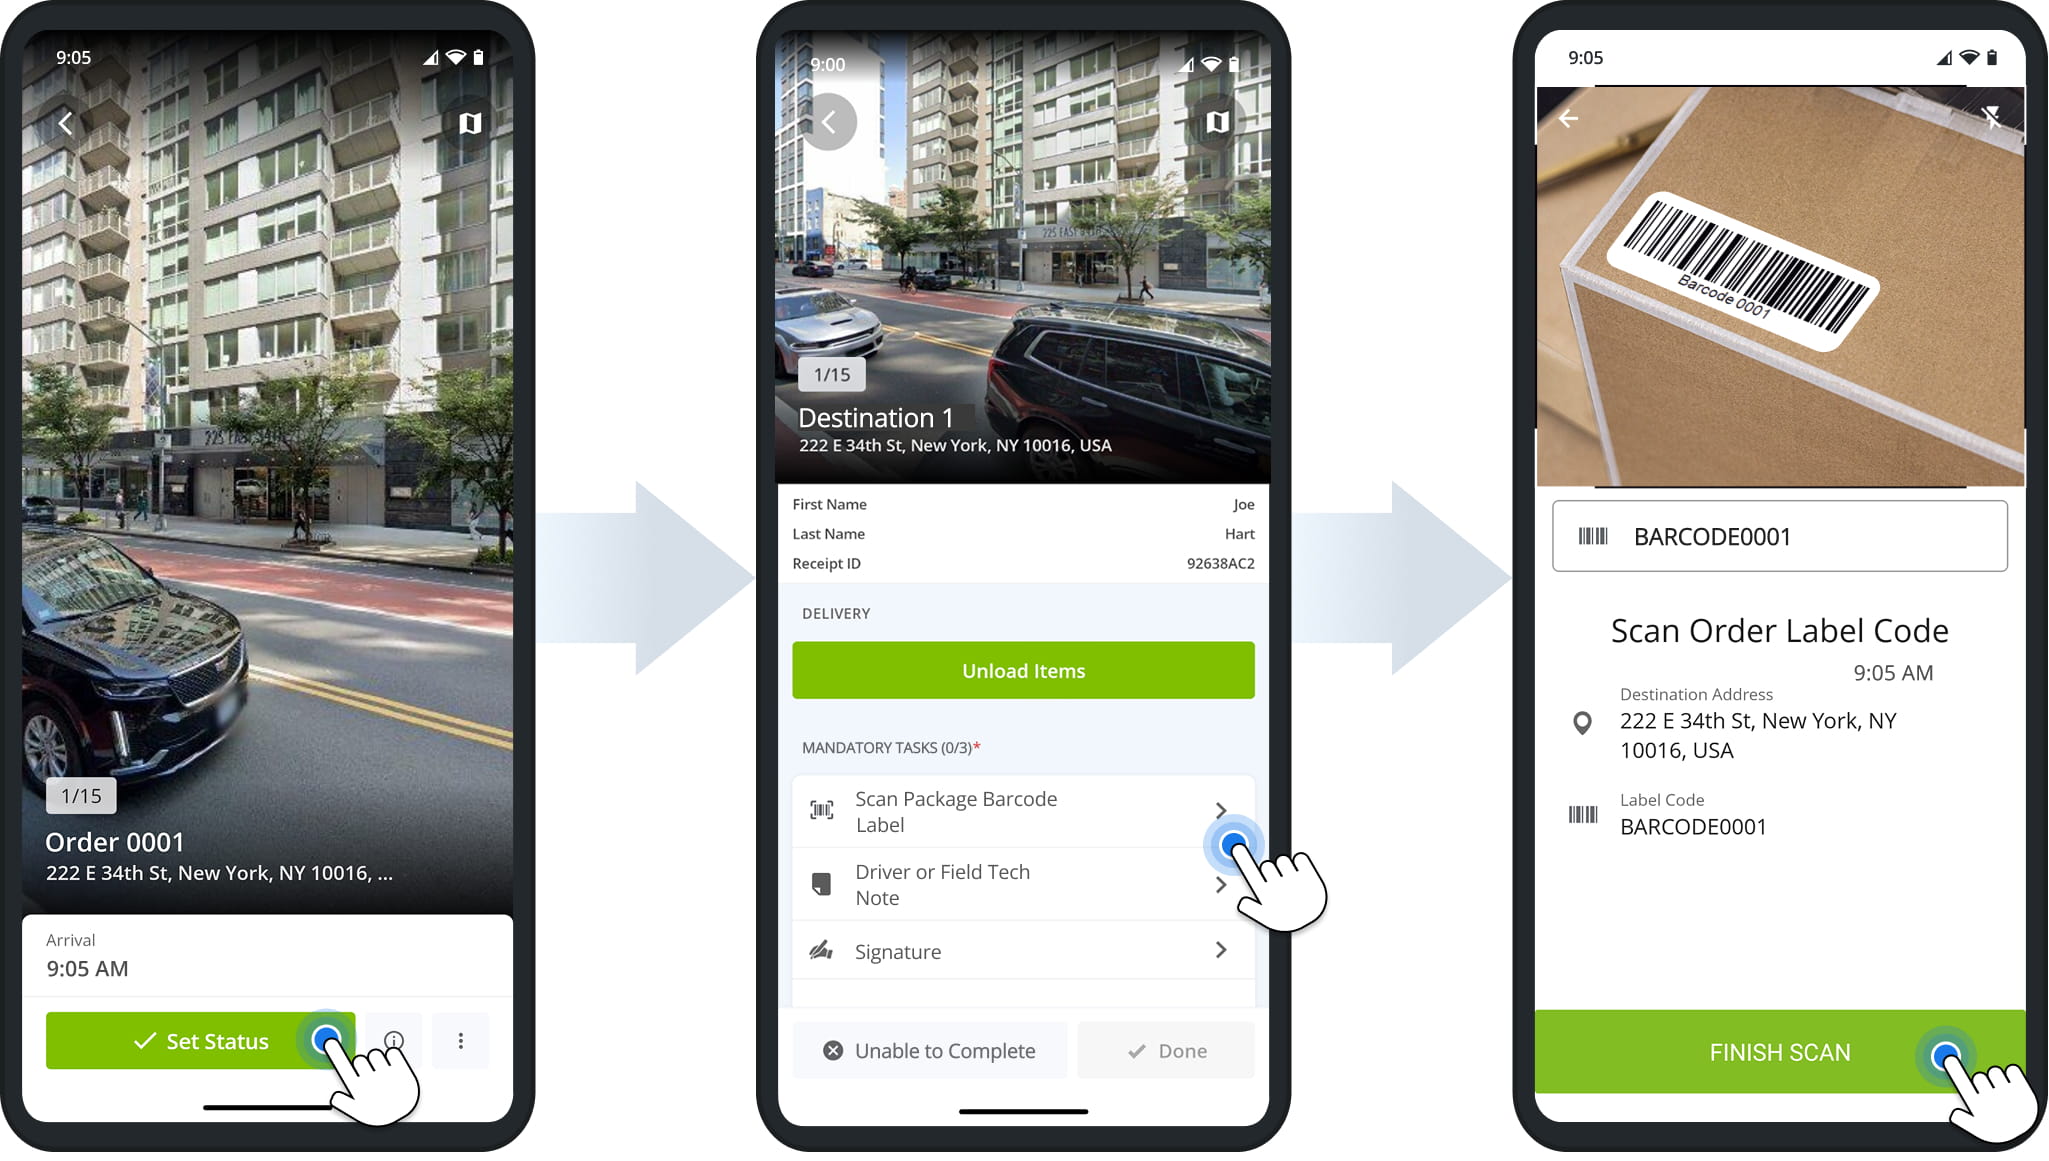
To complete proof of visit workflows, simply follow the instructions shown in the app after opening a mandatory or optional task.
Workflow tasks can involve capturing media such as photos or videos, scanning order barcodes, collecting customer information, selecting release codes, etc. Learn more about proof of visit workflows and driver tasks.
Finish Routes On Route4Me’s Mobile Route Navigation App
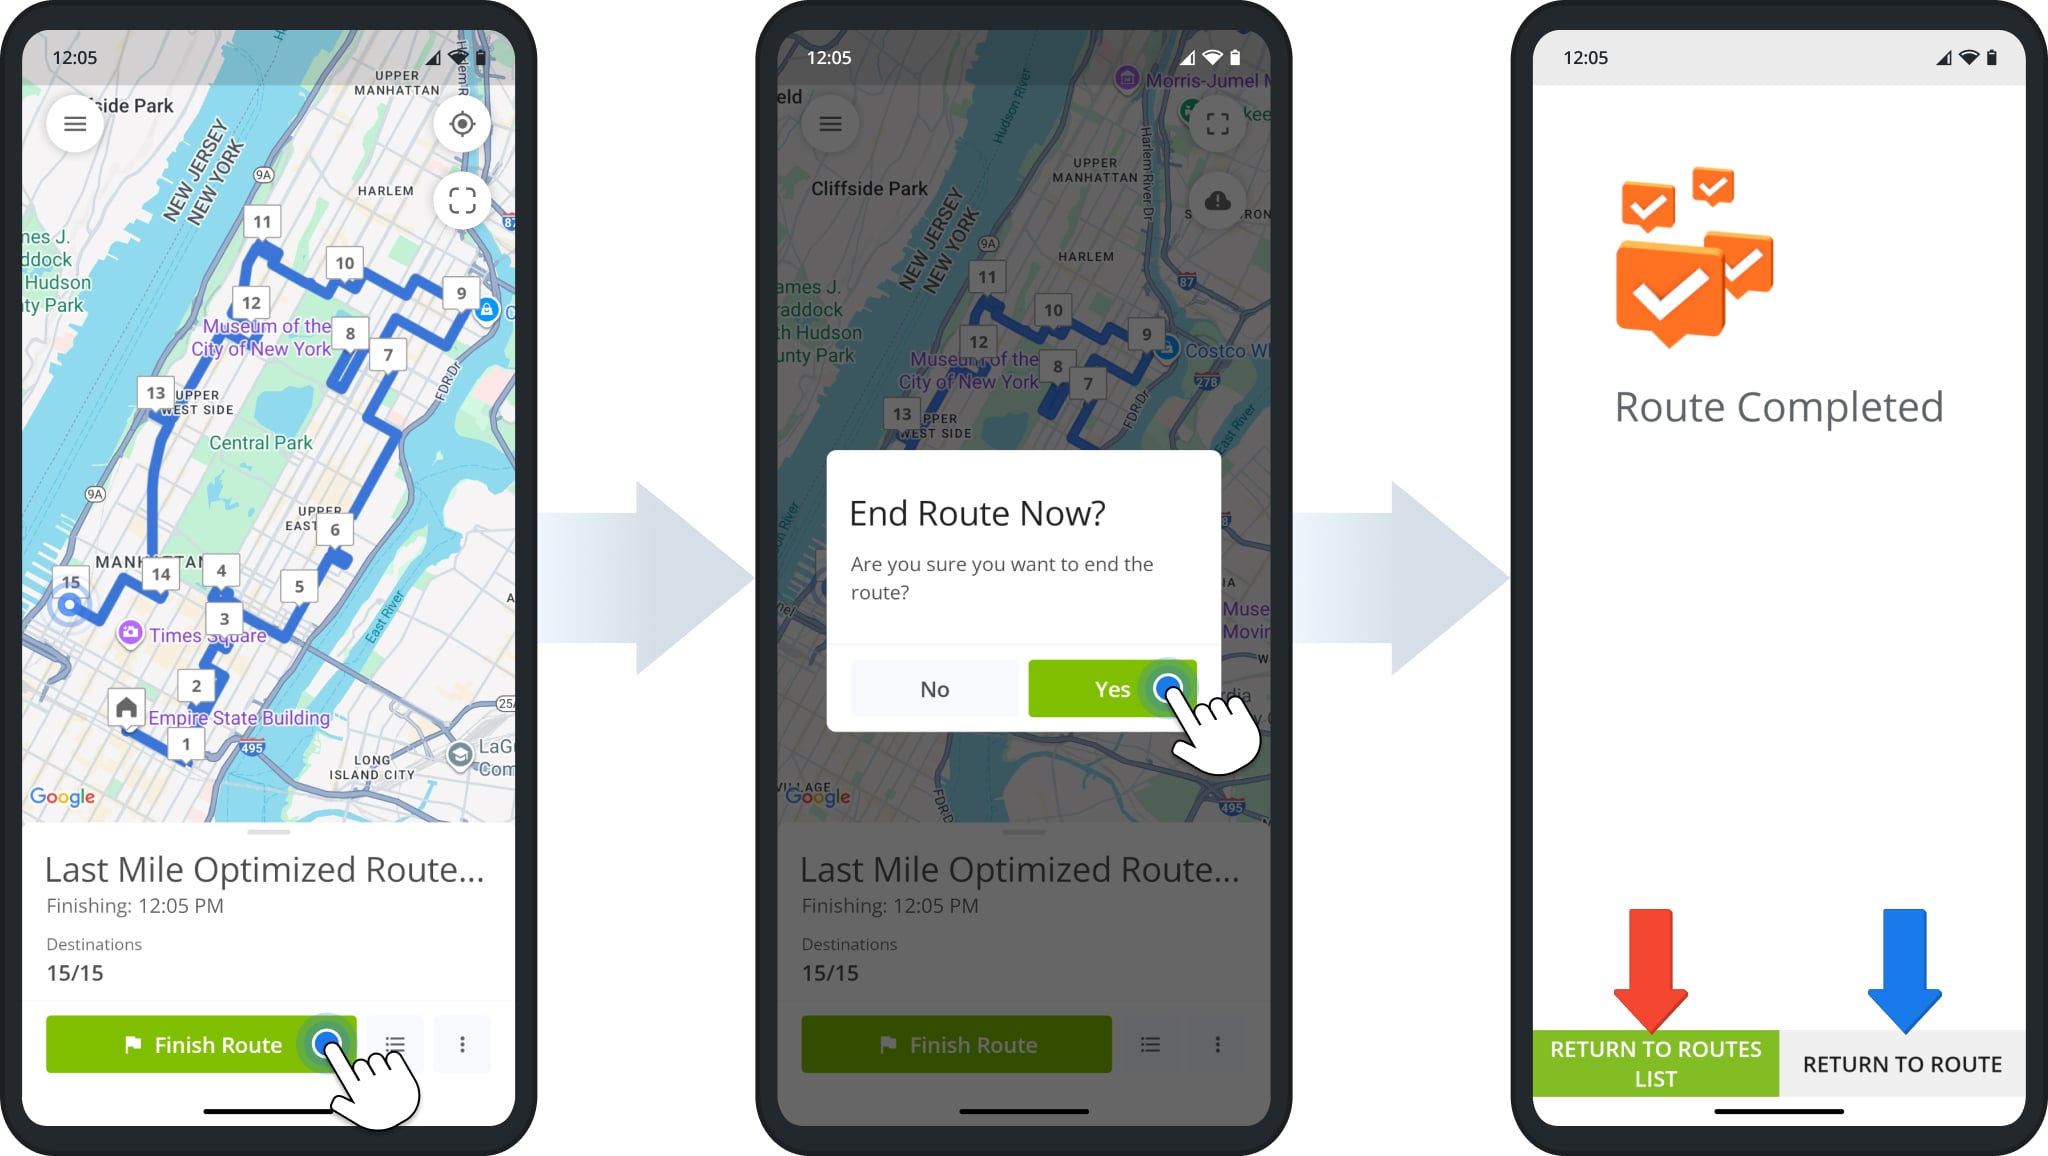
After you’ve set a status for each destination, the app will automatically prompt you to end the route. If you’re on another screen, tap the button at the bottom to open the same prompt. Confirm you want to end the route by tapping “Yes“.
On the “Route Completed” screen, you can tap “Return to Routes List” to go back to the list of dispatched routes or “Return to Route” if you need to review or manage route and destination details.
Visit Route4Me's Marketplace to Check out Associated Modules:
- Operations
Custom Data Add-On
- Operations
Advanced Team Management Add-On
About author: Kristian Andreev
Kristian is a Technical Writer at Route4Me. With over a decade of experience in writing and localization, he's an expert at communicating complex technical data in a clear, concise, and user-friendly way. Passionate about bridging the gap between engineers and users, he specializes in creating documentation to streamline onboarding, enhance product usability, and support global teams on the path to success.