
Routes Map – View And Manage Multiple Routes With Dynamic Routes Map
The Interactive Map on the Routes Page provides enterprise teams with a clear way to review routes, destinations, and route-level details. This guide explains how to access the map, use navigation controls, and configure display settings to visualize routes and monitor operational data. Using the map helps teams spot routing inefficiencies and improve last-mile performance.
Table of Contents
Routes Map Overview – Reviewing Routes On The Interactive Map
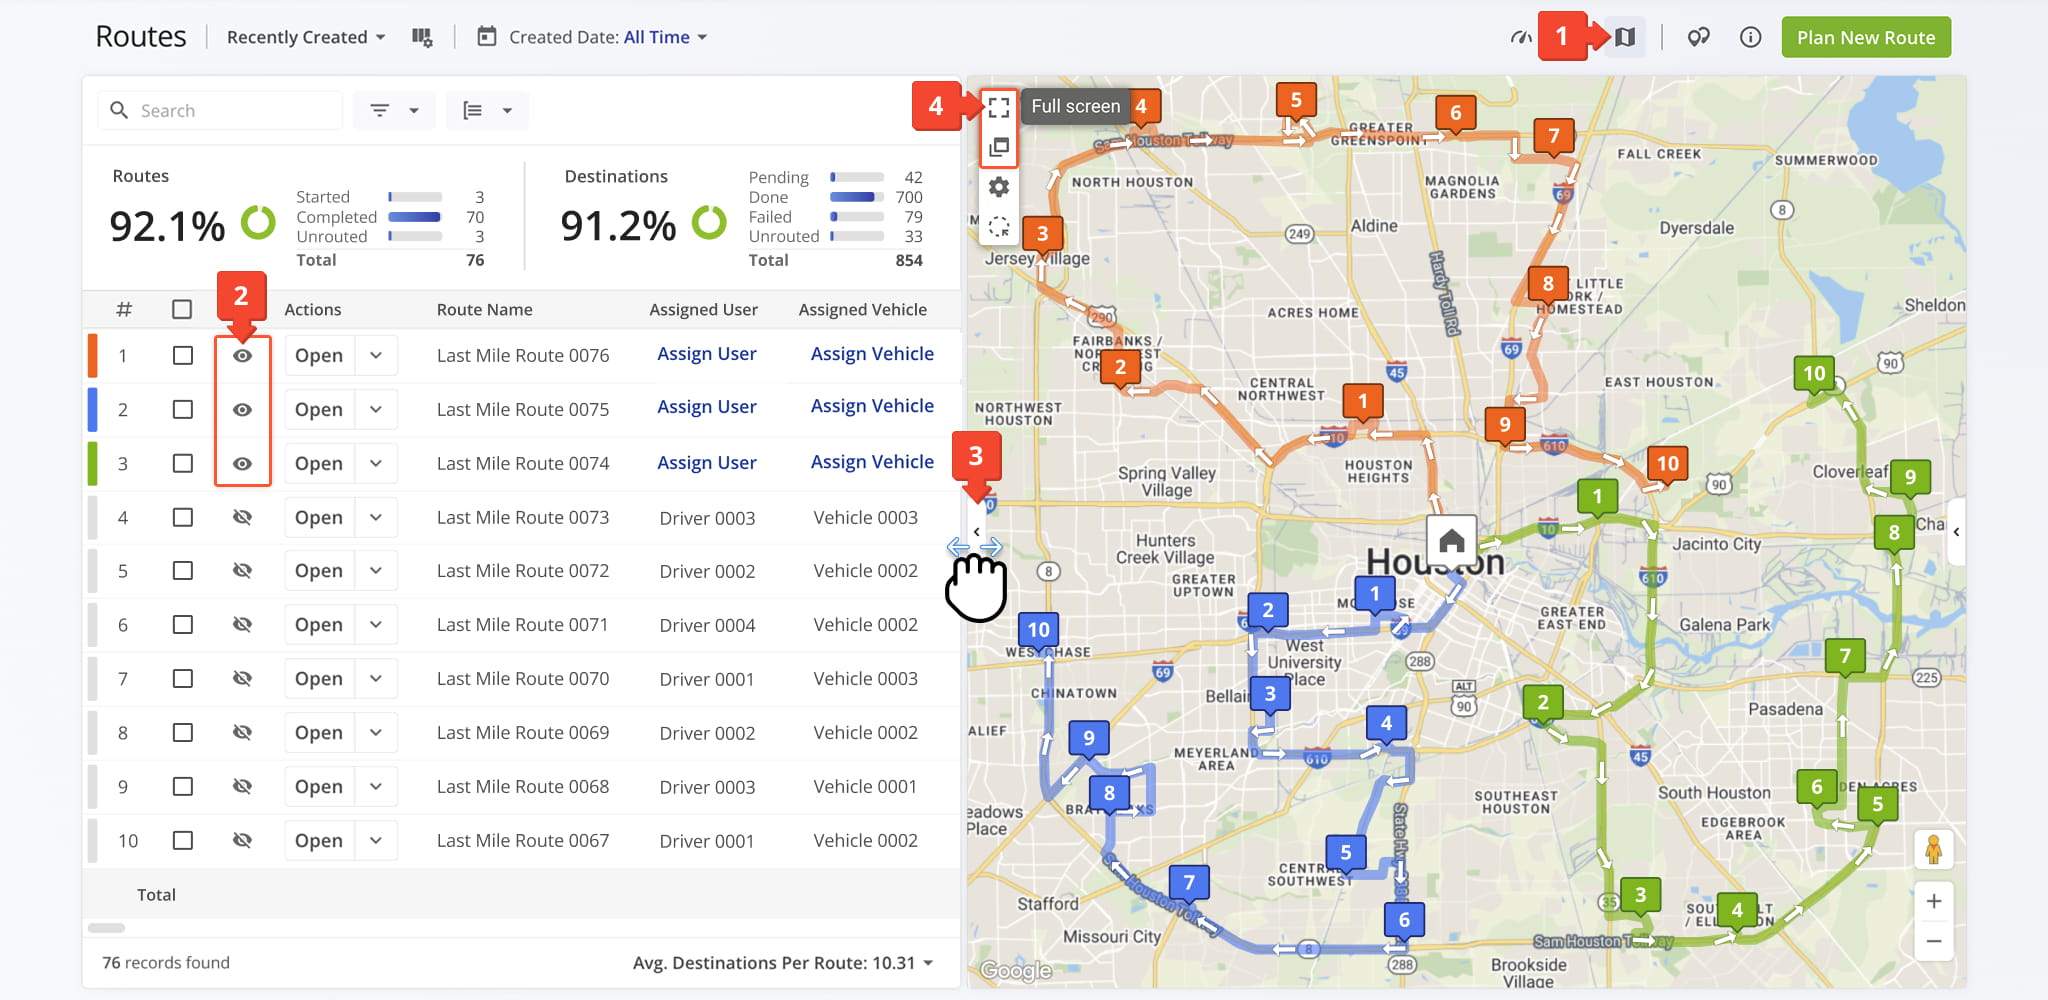
To get started, open your Routes Page by navigating to “Dynamic Routing” > “Routes” from the Navigation Menu or by clicking the button below. Then, to view routes on the map:
- Click the Map Icon in the upper-right corner.
- To display a specific route, click the Eye Icon next to it in the Routes List.
- Expand the map using the side sliders
- Click the Screen Icon to enable full screen visibility or click the Screen Within Screen Icon to open the map in a new window.
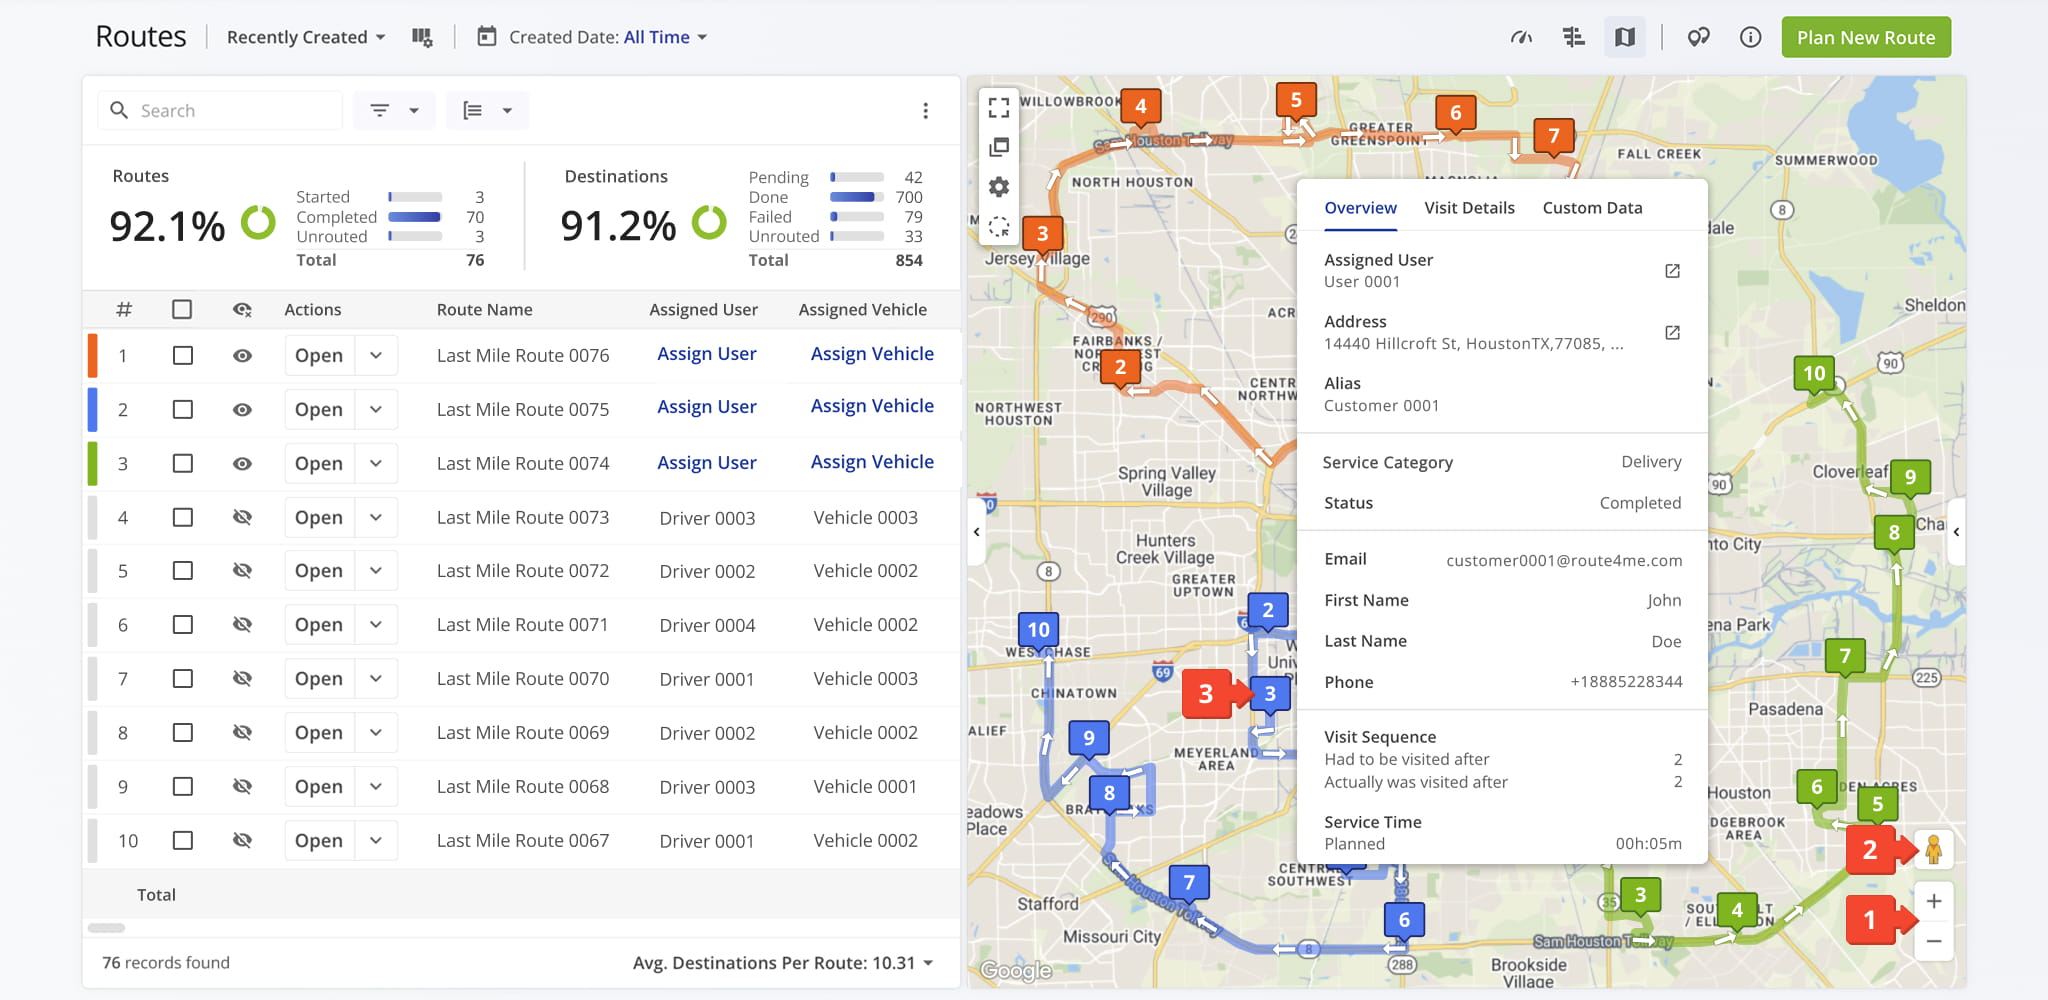
Once your routes are displayed on the map, use the following controls to navigate and explore them:
- Use the Zoom In and Zoom Out buttons in the bottom-right corner to adjust the map scale.
- Drag the Pegman Icon onto the map to explore locations using Google Street View.
- Hover over any destination to view its key details. The table below summarizes all destination details available from the Map.
Routes Page - Destination Details
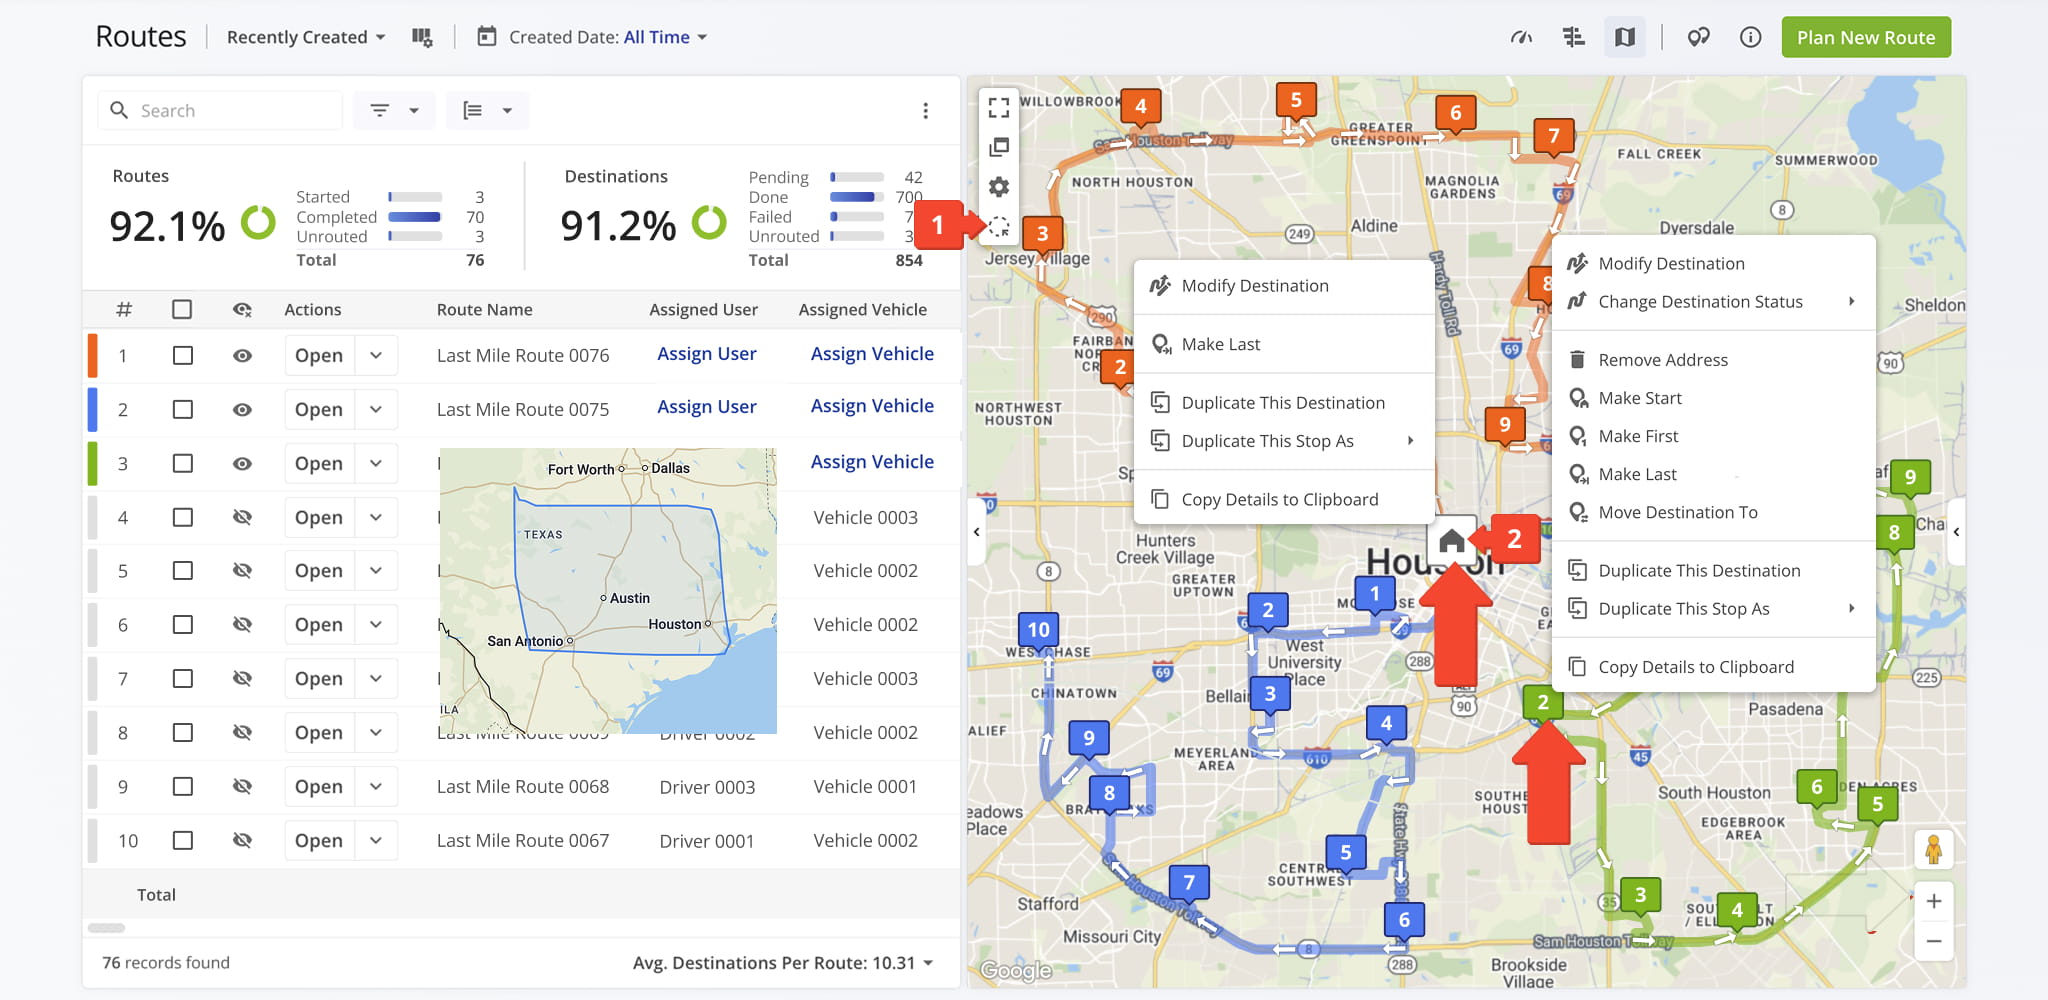
In addition to viewing destination details, you can also manage destinations directly from the map:
- Use the Lasso Tool to circle a region, a group of destinations, or a section of a route.
- Right-click any destination (or route depot) to open an actions menu with options for managing it, detailed in the table below.
Actions Menu
Map Types – View Routes In Classic Or Satellite Mode
The base view of the map can be adjusted to match your planning needs. To select a Map Type, click the Gear Icon.
The Classic Map provides a standard road network view for navigation while Satellite View offers aerial imagery of landmarks, terrain, and property layouts, all helping to improve situational awareness and route visualization.
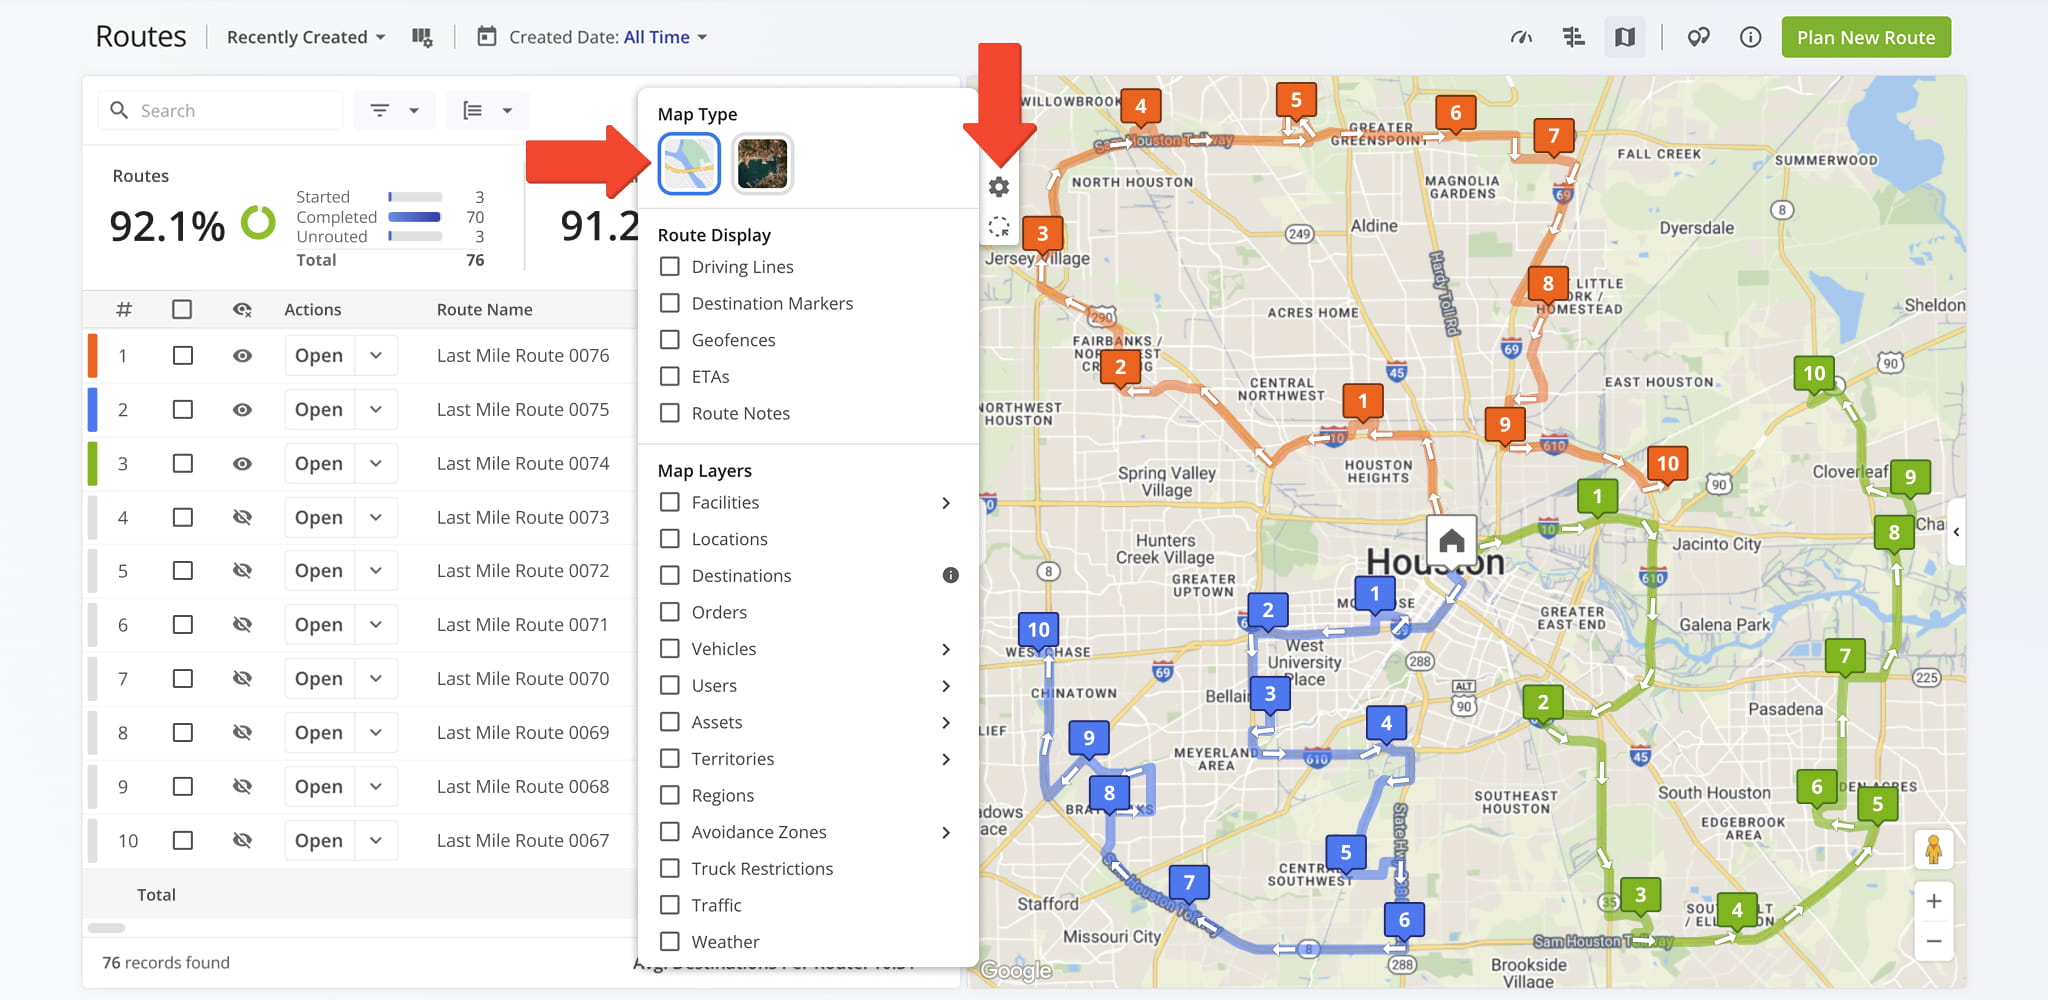
Route Display Settings – Customize How Routes Appear On The Map
Use Route Display settings, accessed via the Gear Icon in the upper-left corner, to customize how routes and destinations appear on the map. Display settings can be combined or used individually to suit your workflow and make route review more efficient.
Driving Lines Display – Directions Path Vs. Straight-Line Path
Driving Lines visually connect destinations on the map using either a directions-based path, a straight-line path, or both overlaid together. These views help you understand the actual road route, compare direct distances, and evaluate route efficiency.
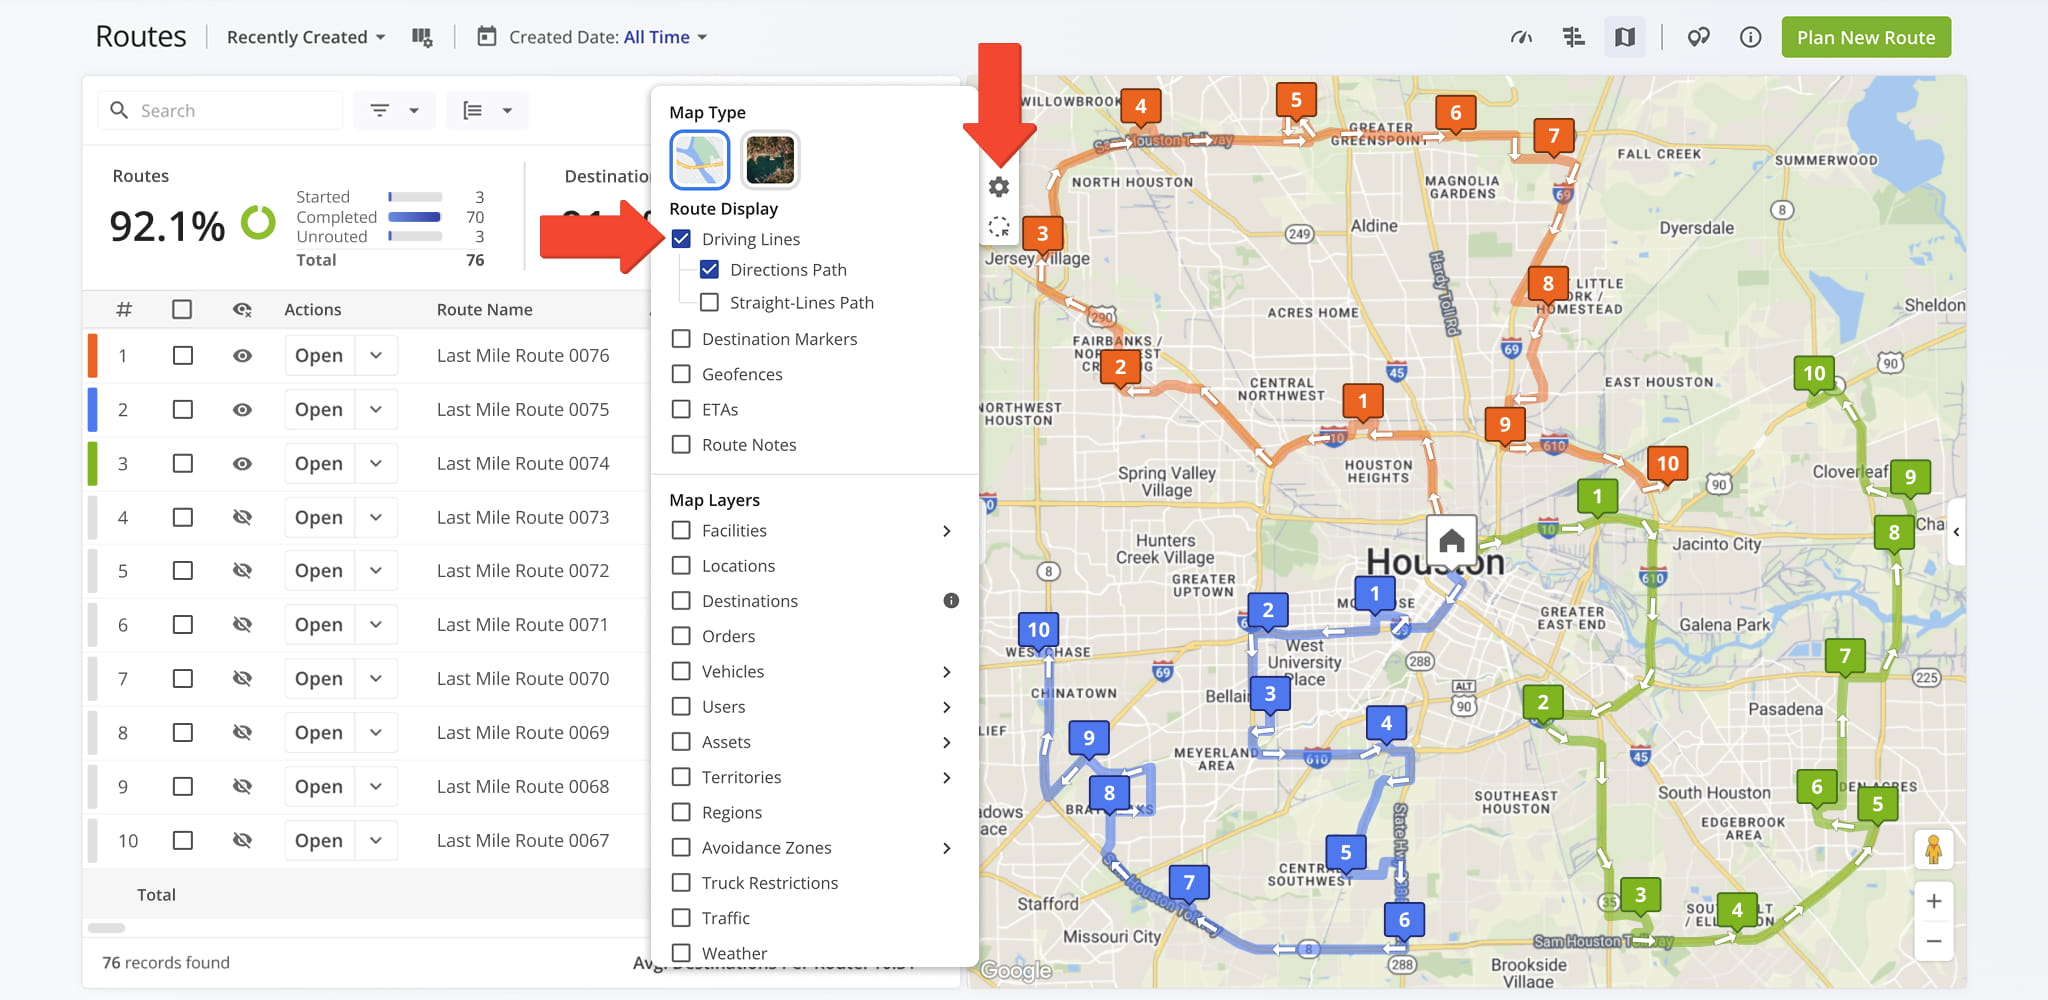
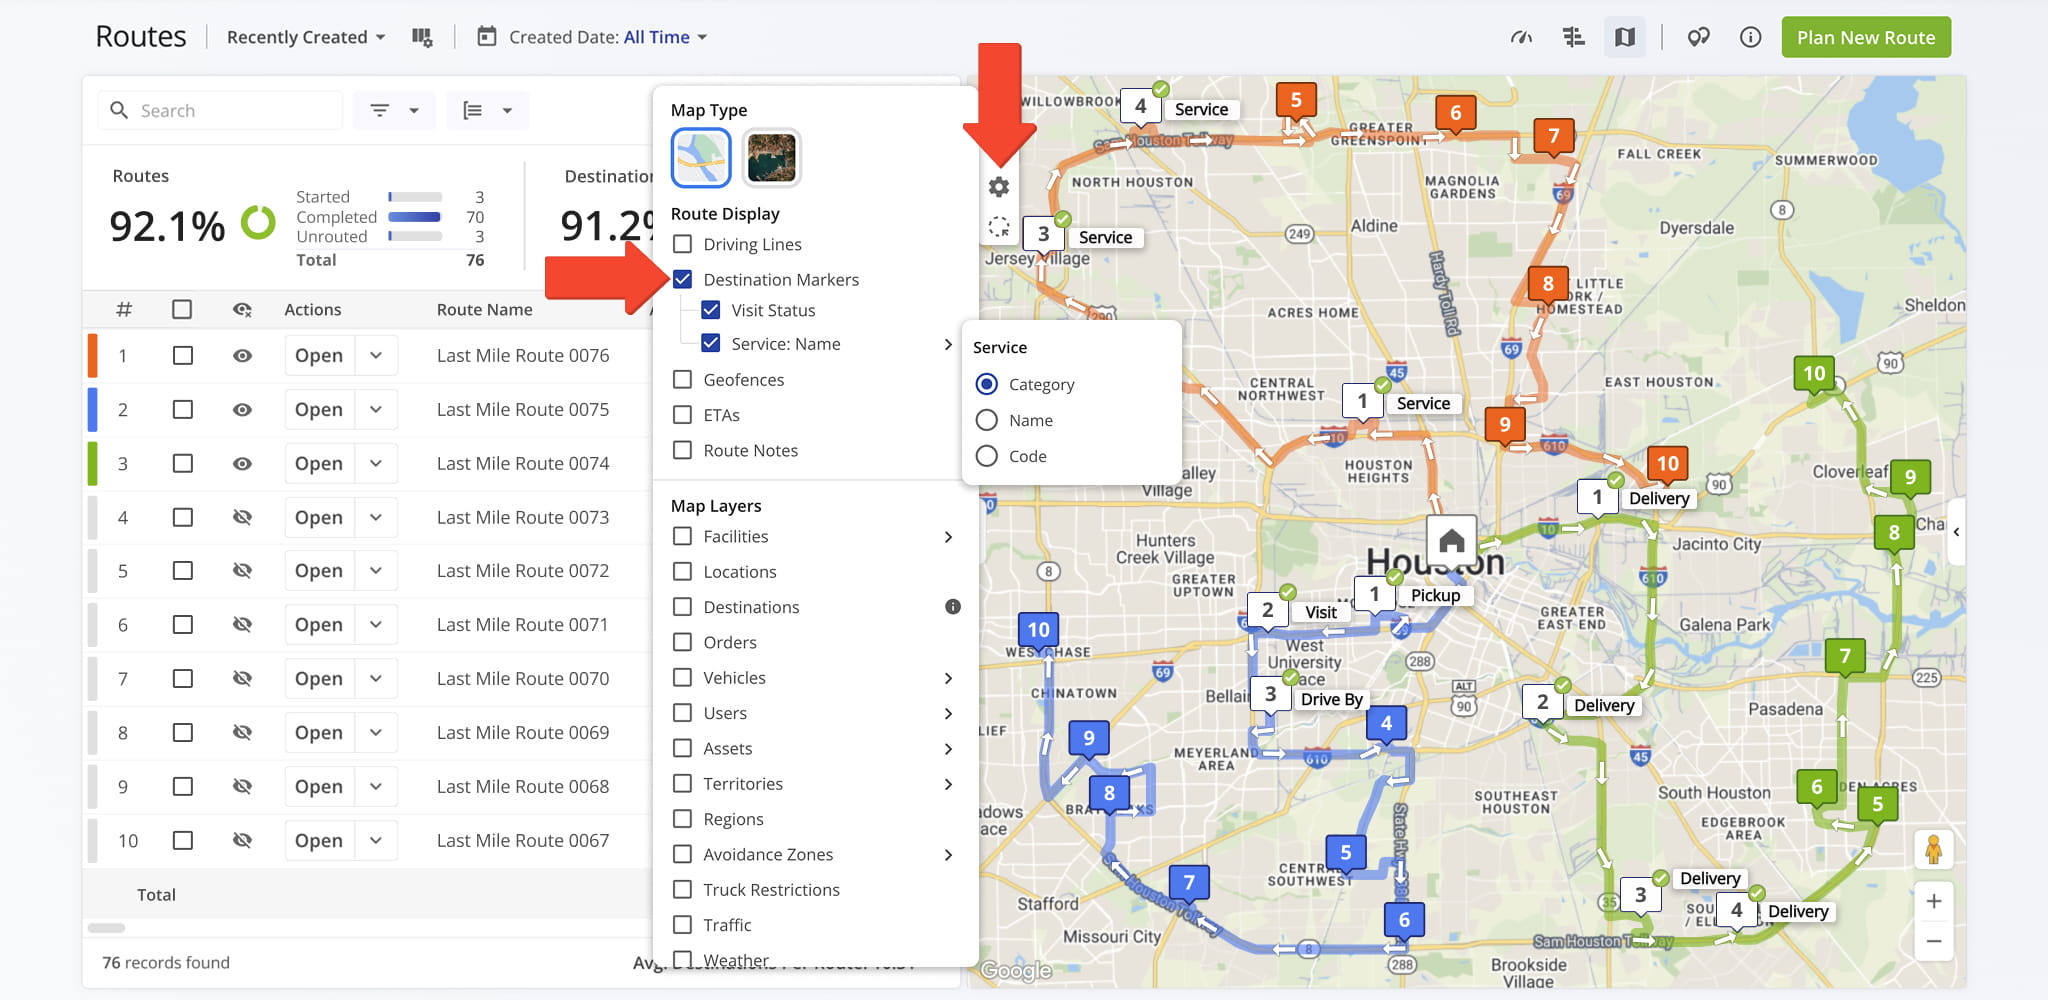
Destination Markers – Display Visit Status And Service Details
Destination Markers display each stop on the map as a numbered marker showing its position along the route.
You can also enable Visit Status to mark completed destinations with a green check, and add a Service label that shows each destination’s category, name, or code.
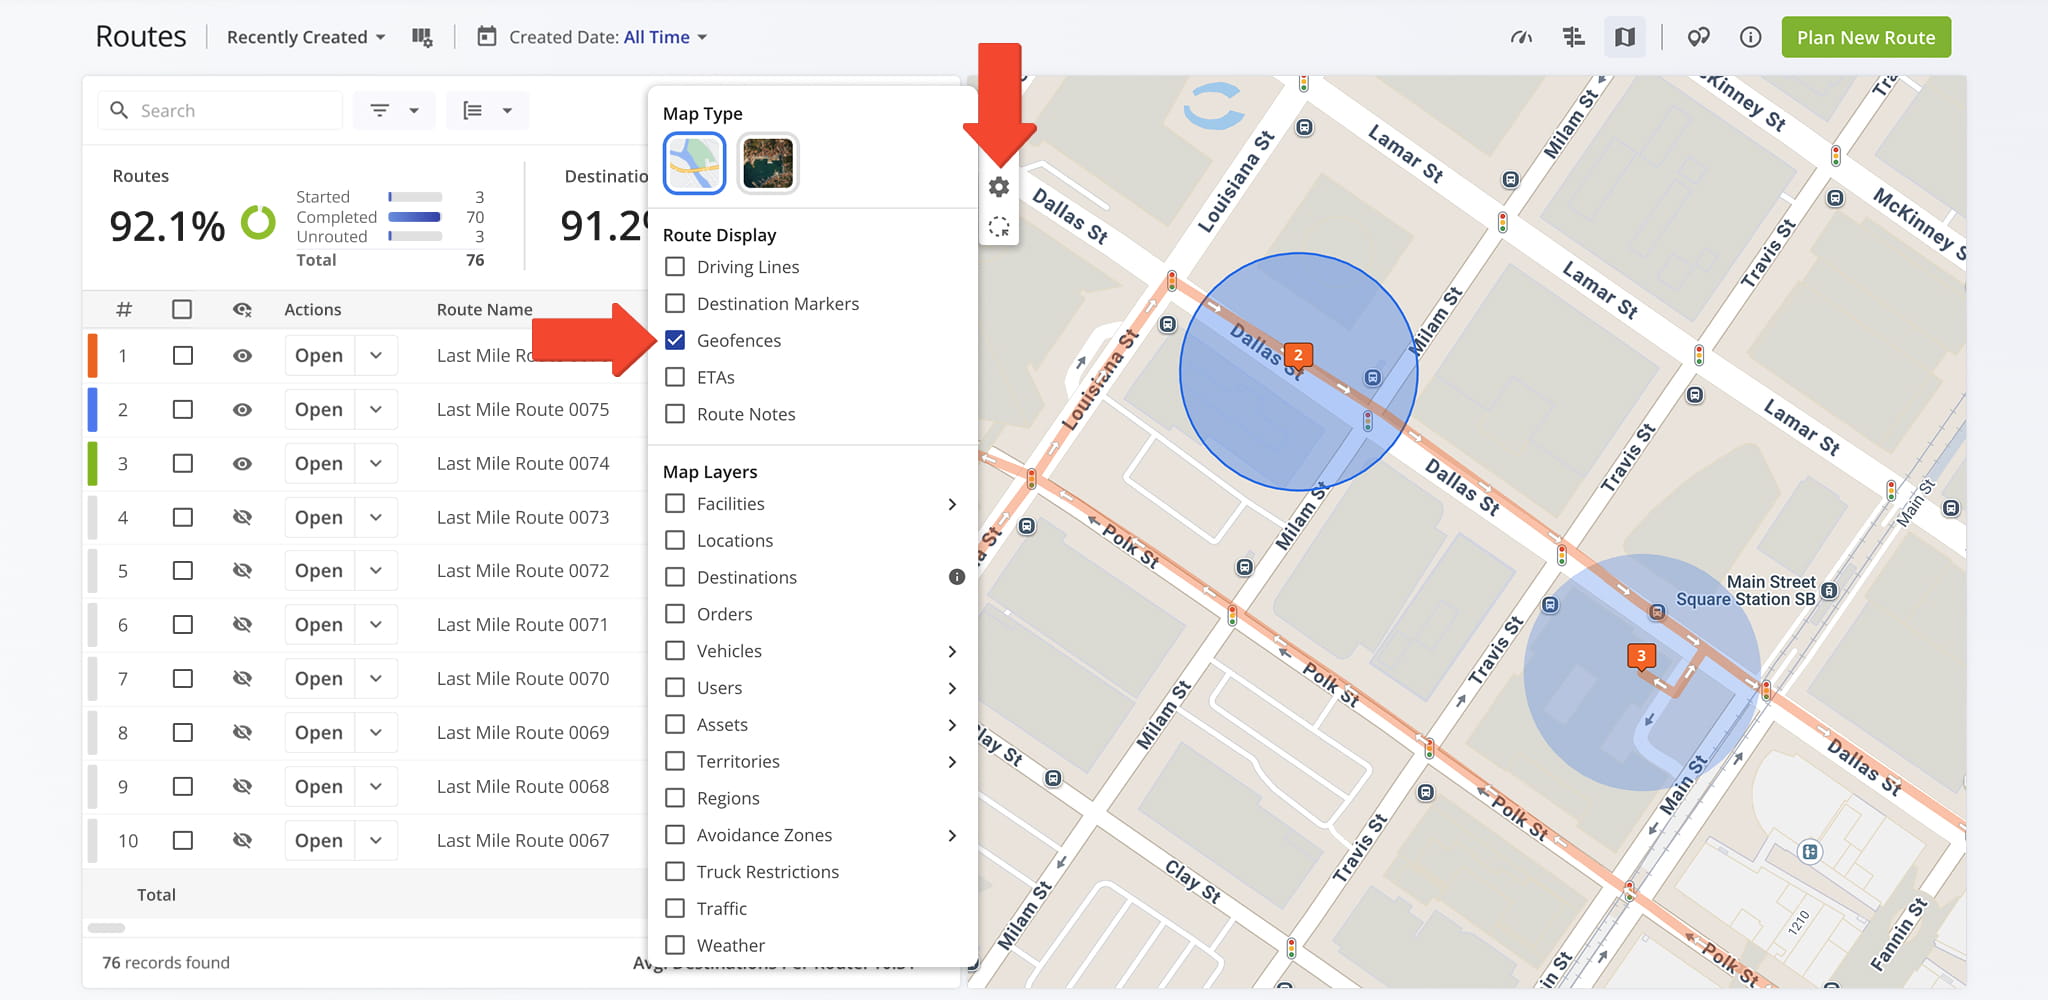
Geofences Display – Visual Boundaries For Route Locations
The Geofences feature overlays geofence boundaries directly on the map, allowing you to see exactly where each geofenced area is located. This provides a clear visual reference for route planning and monitoring arrivals or departures.
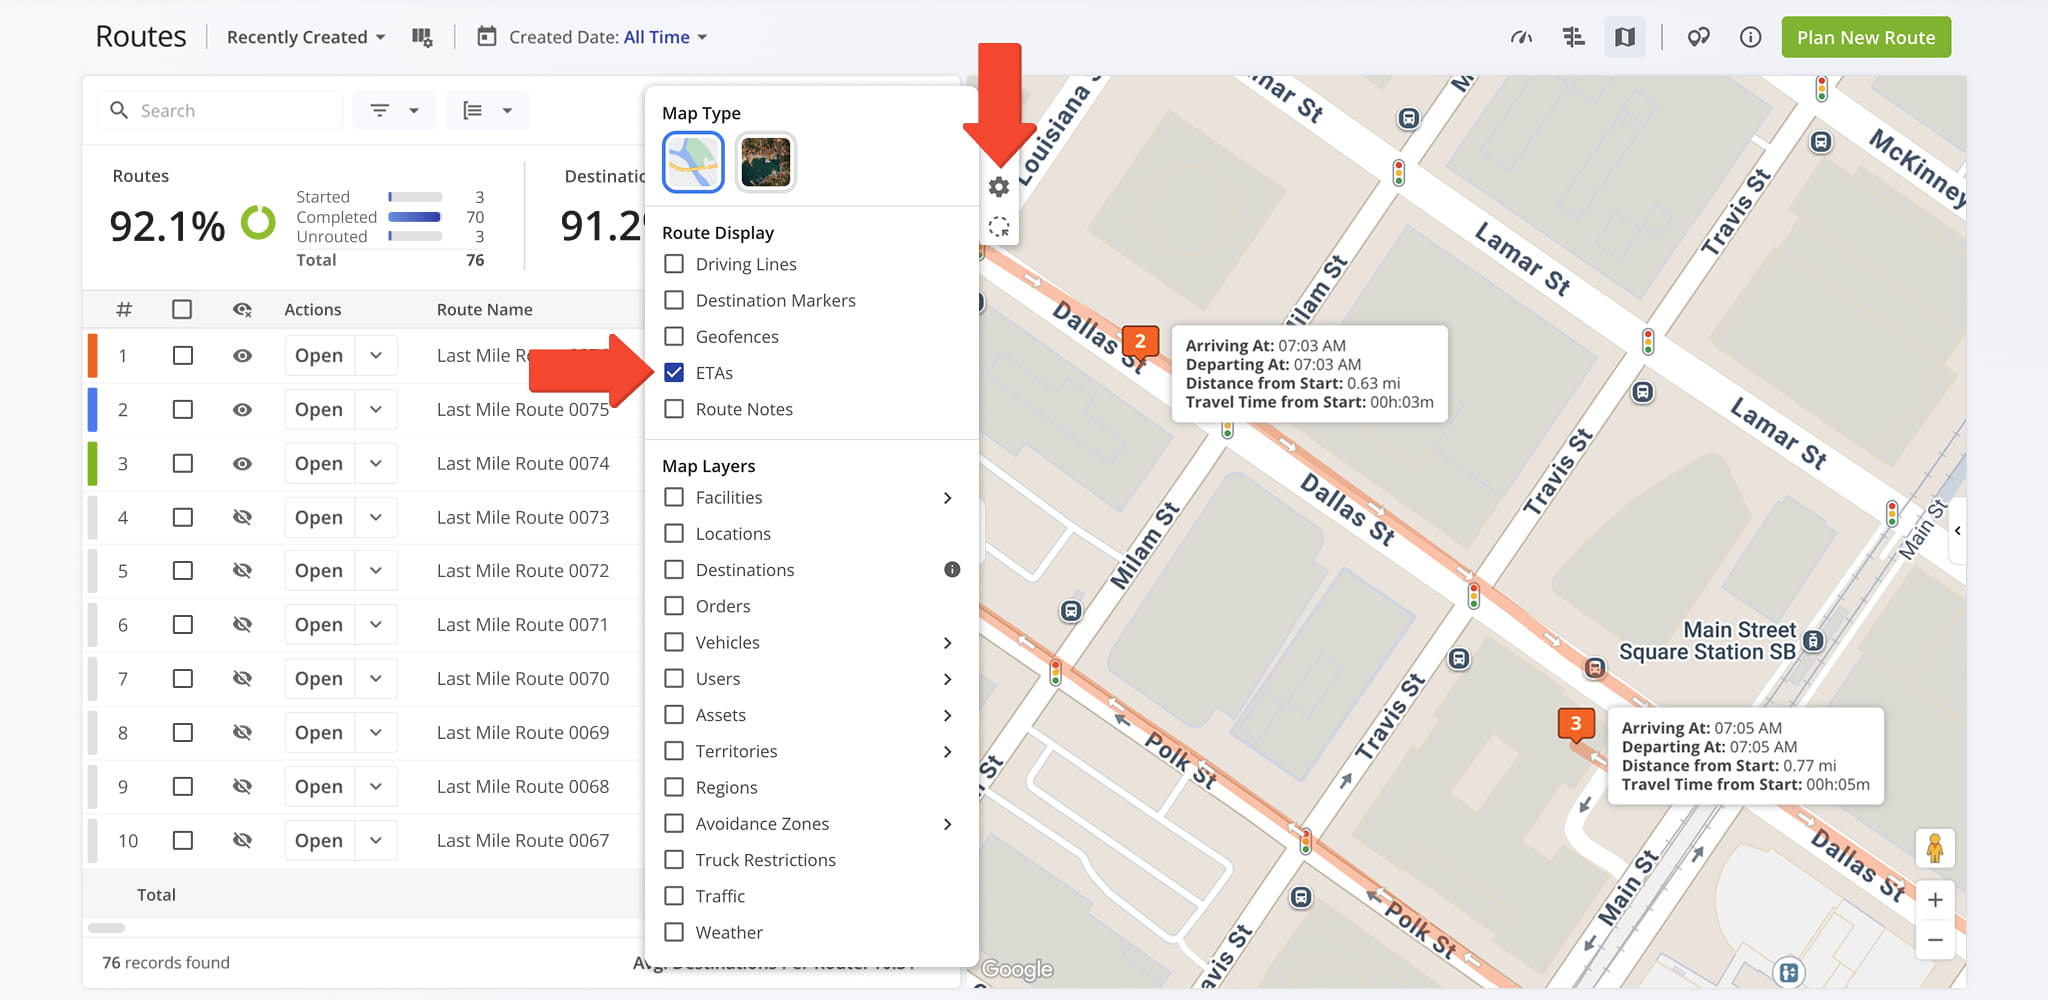
ETA Display – Estimated Arrivals And Departures
You can display estimated arrival and departure times for each destination, along with additional travel time details. This helps you quickly spot early or late stops and assess overall schedule feasibility at a glance.
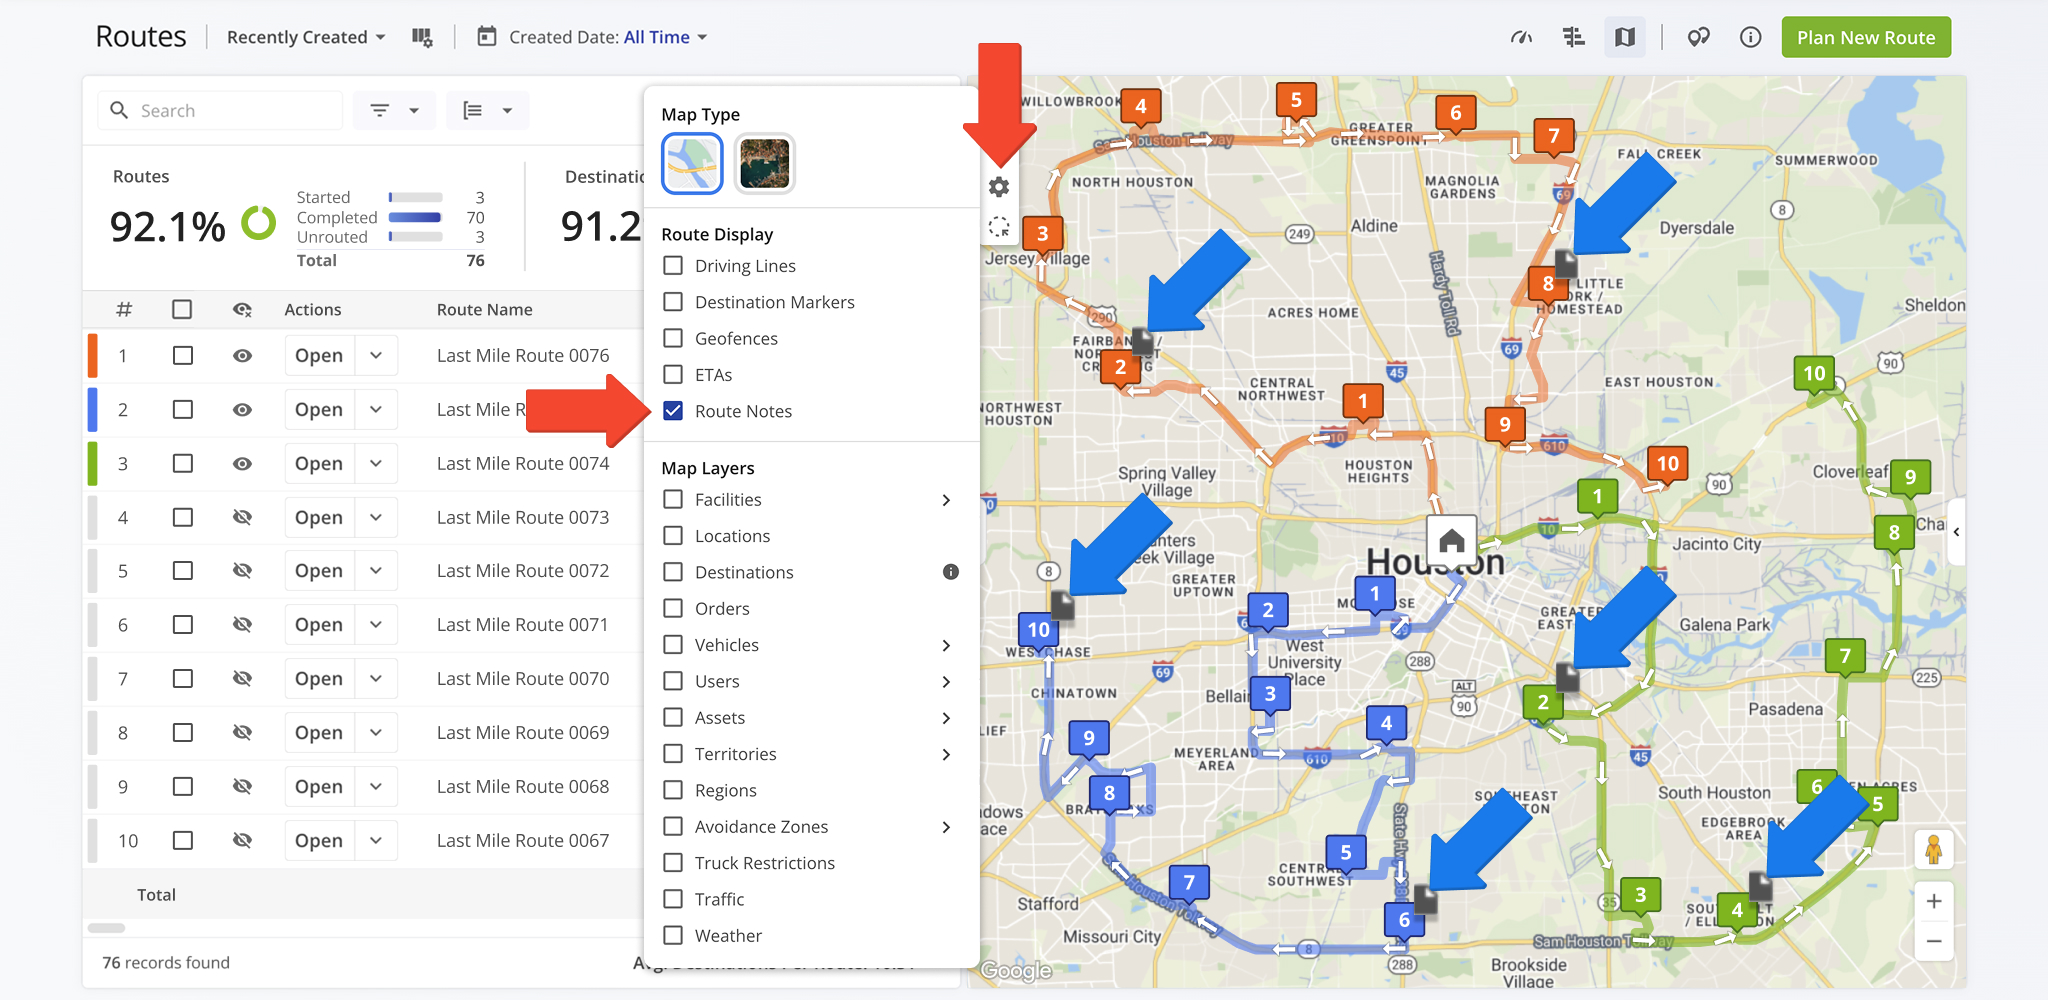
Route Notes Display – View Destination Annotations On The Map
Route Notes display directly on the map important instructions or annotations associated with destinations. Having this information immediately visible ensures critical route details are not overlooked.
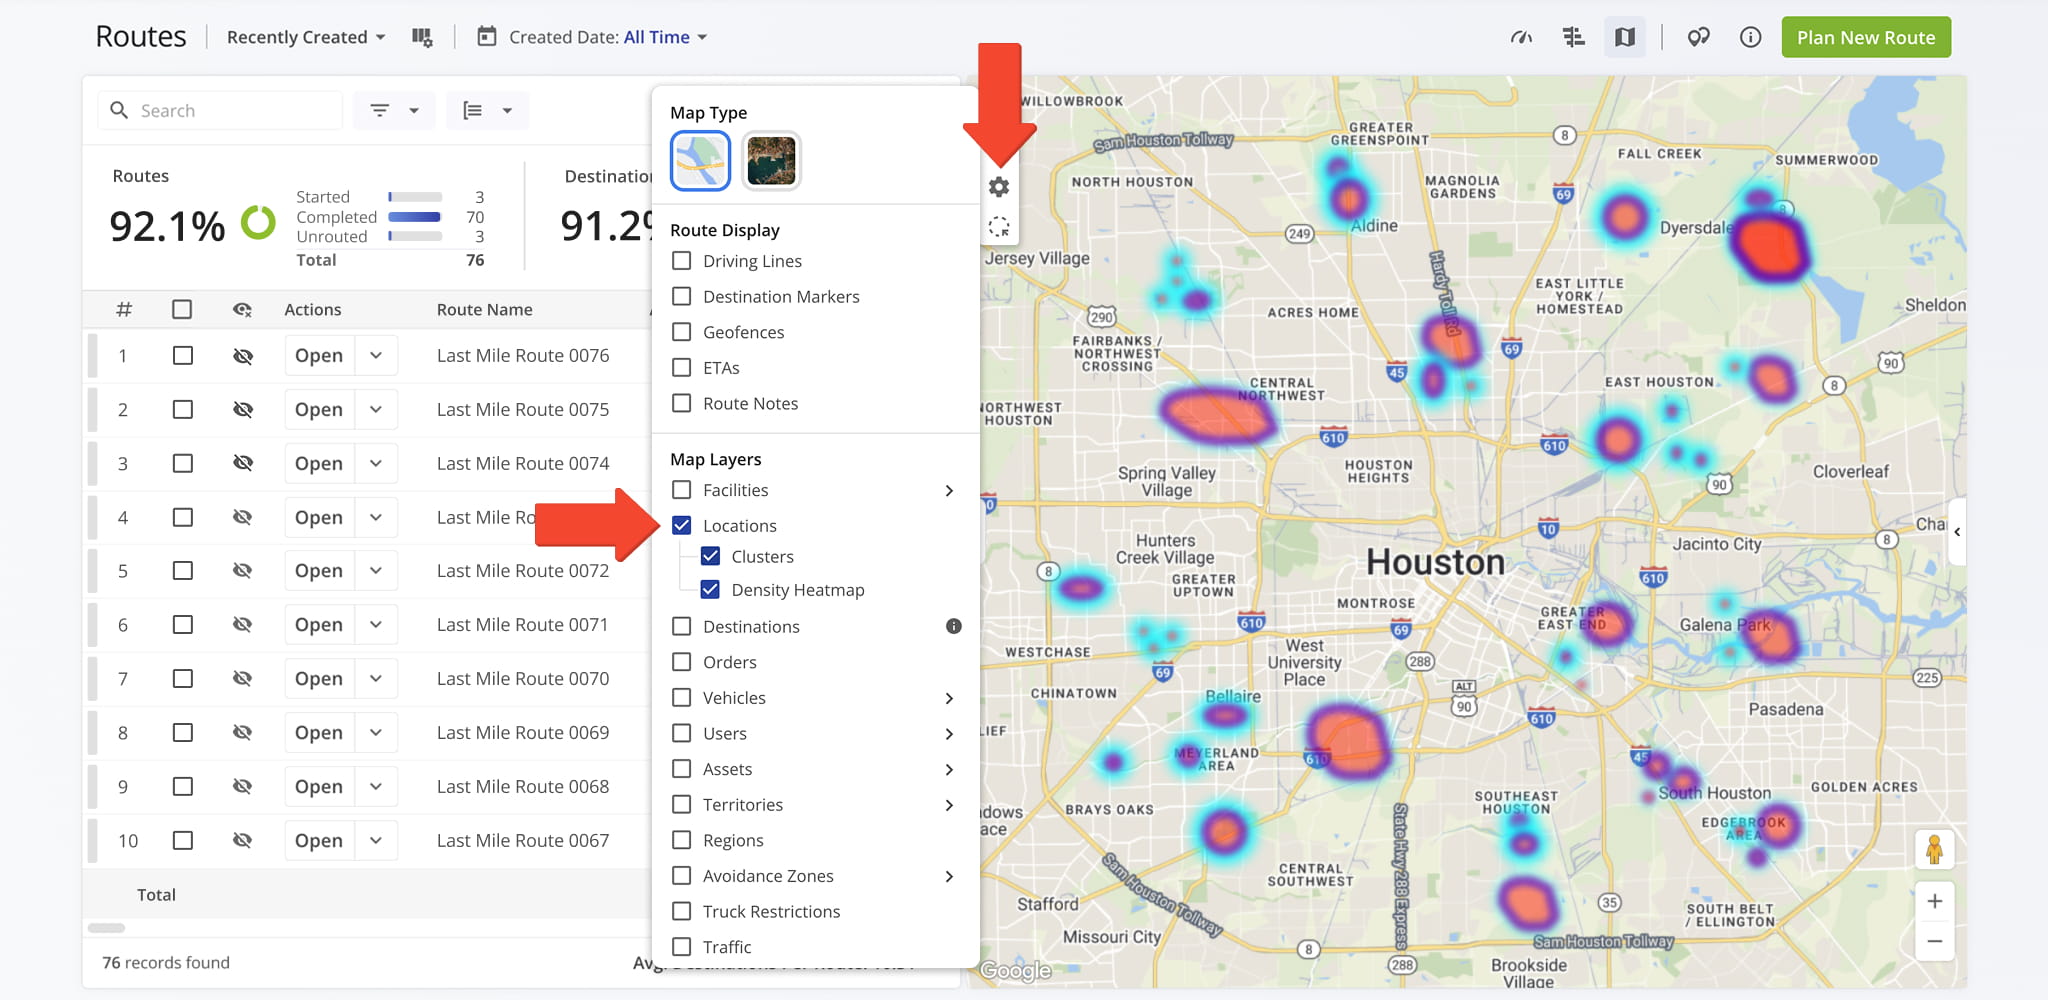
Map Layers – Overlay Locations, Vehicles, Facilities, And More
Map Layers, accessed via the Gear Icon, overlay contextual and operational data on the map, including locations, orders, vehicles, and other critical elements. You can select one or multiple layers depending on your needs.
See our dedicated article to learn more about how each layer works and how to filter and customize them.
Visit Route4Me's Marketplace to Check out Associated Modules:
- Operations
Custom Data Add-On
- Operations
Advanced Team Management Add-On
About author: Daniel Archer

