
Custom Destination View Details – Add Custom Text To Mobile App Destination View
Enhance your routes by adding custom details to the destination view, helping drivers save time, boost efficiency, and improve safety in the field. This guide will walk you through the process of adding, customizing, and using custom destination view details to streamline your operations.
Table of Contents
Enable Additional Mobile App Destination Data Fields
To show additional destination details on the Route screen in Route4Me’s mobile app, enable the respective Advanced Configurations. You can do so in the Advanced Configuration Editor. First, open the editor and click the “Add Variable” button.
Open Your Advanced Configuration Editor
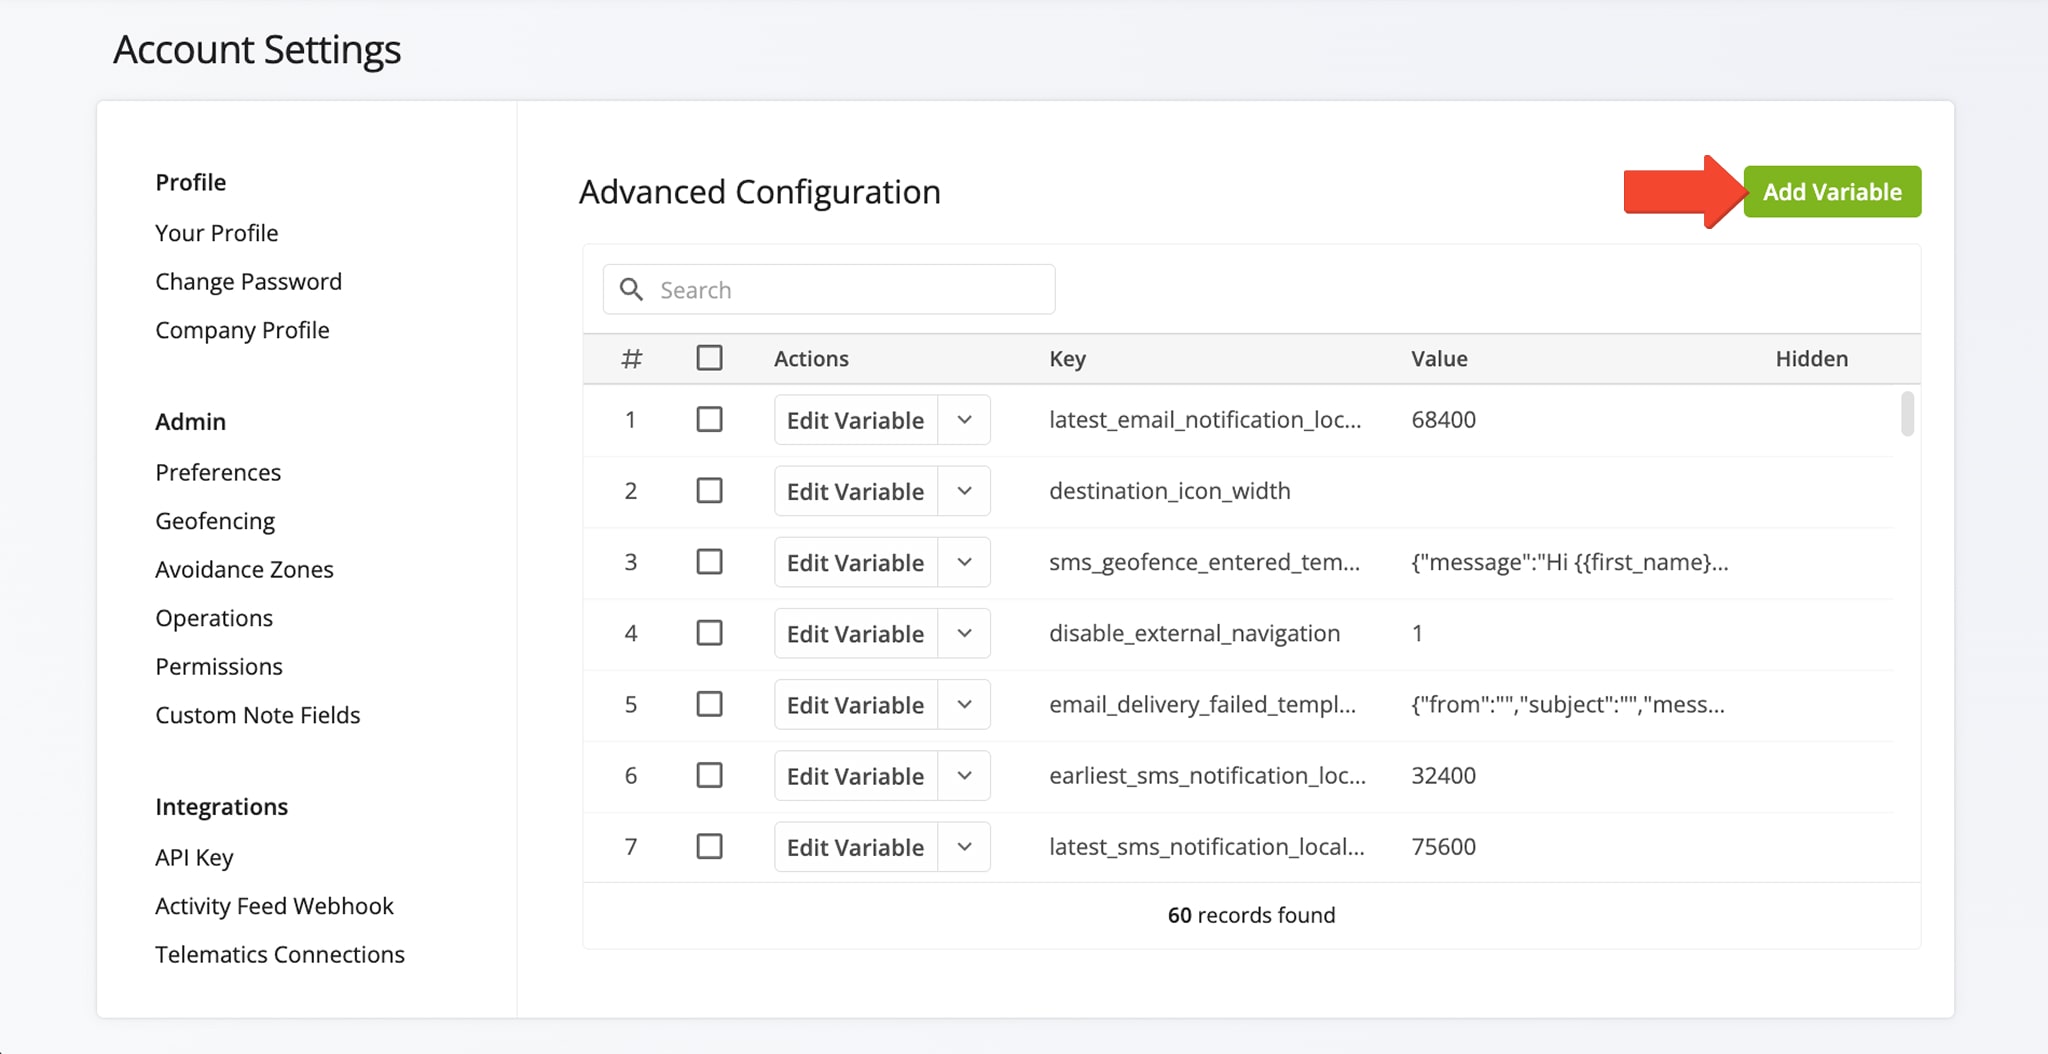
Then, you can enter the advanced configurations described in the table below. Each configuration is explained in more detail further in this guide. NOTE: When you customize the destination view, your modifications apply to all destinations associated with your account and sub-accounts. For example, if you add “Order Number“, it will be displayed on all route destinations within your account and those of your sub-users. Learn more about Route4Me’s user types and account-level permissions.
Custom Destination Variables
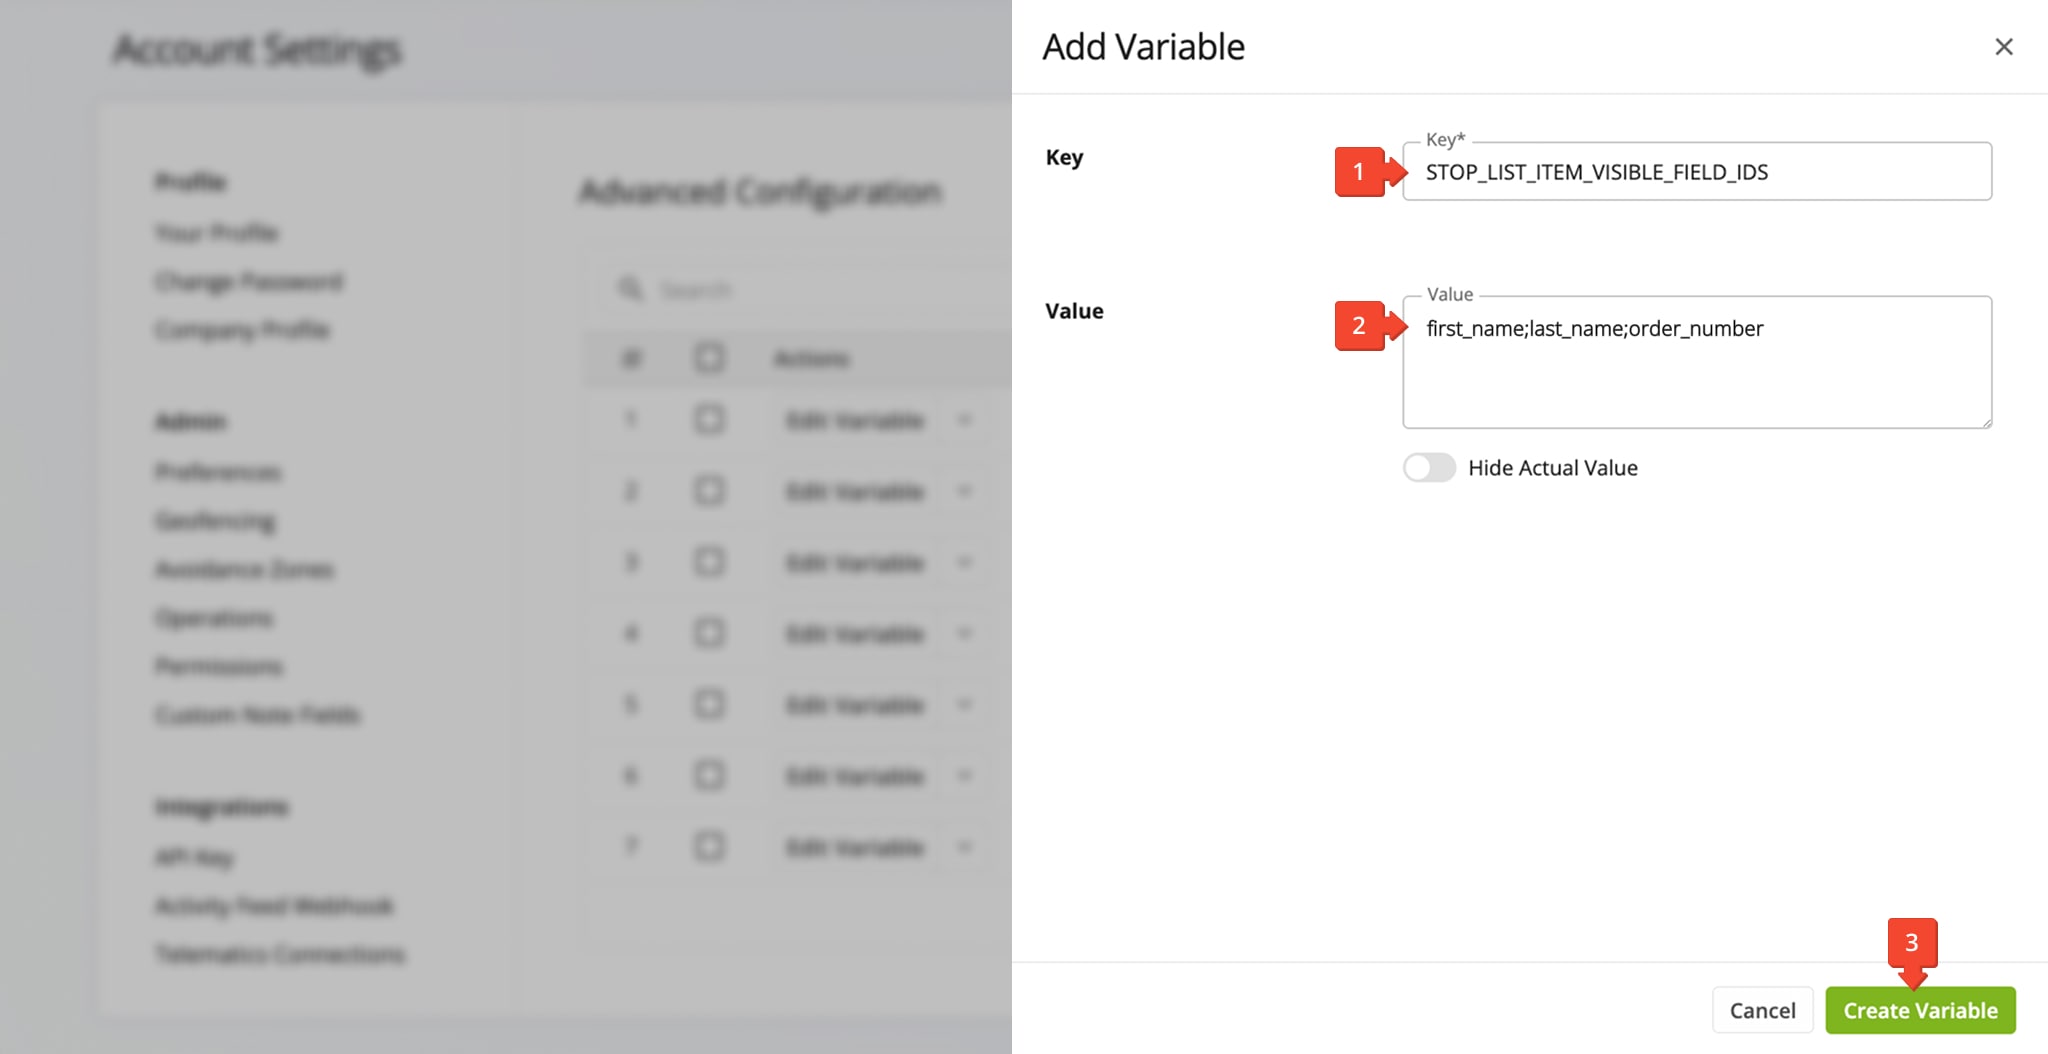
The “STOP_LIST_ITEM_VISIBLE_FIELD_IDS” configuration is used to enable specific Route4Me data fields on the mobile app Route screen. To enable this configuration and add data fields to the destination view, follow these easy steps:
- Enter “STOP_LIST_ITEM_VISIBLE_FIELD_IDS” in the “Key” field.
- Enter your preferred data field IDs in the “Value” field. You can use these separators to add more IDs: “;” “,” or “|“
- Click the “Create Variable” button to save your new advanced configuration.
You can find a list of available data fields further in this guide. Additionally, you can enable most destination data fields from your address upload spreadsheet. Learn more about Route4Me Spreadsheet Formatting.
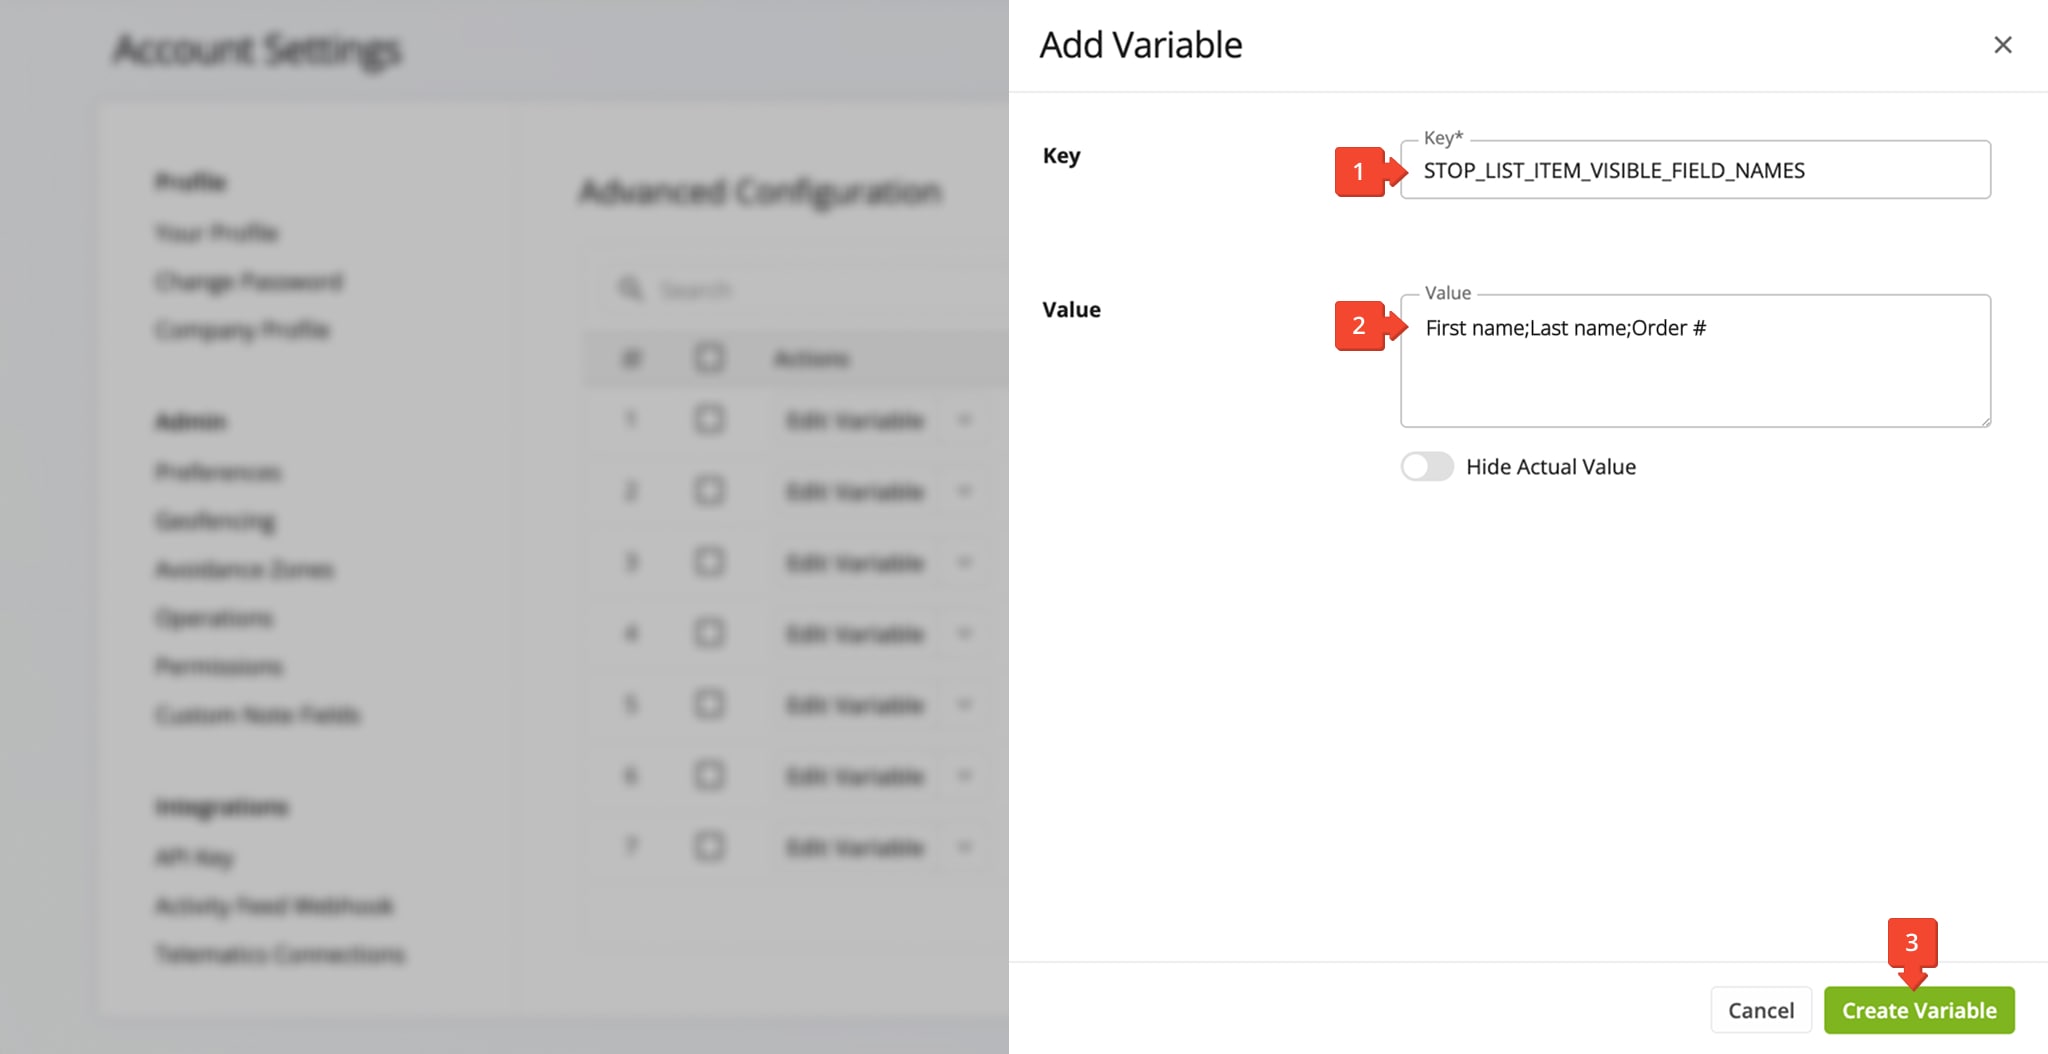
The “STOP_LIST_ITEM_VISIBLE_FIELD_NAMES” configuration is for adding user-friendly names to your destination data fields. The steps to enable this configuration and add field names to the destination view are the same as those for adding field IDs.
- Enter “STOP_LIST_ITEM_VISIBLE_FIELD_NAMES” in the “Key” field.
- Enter your preferred data field names in the “Value” field. You can use these separators to add more IDs: “;” “,” or “|“
- Click the “Create Variable” button to save your new advanced configuration.
NOTE: Field Names should follow the same sequence as the Field IDs from the previous configuration. Ensure the sequence of names matches the sequence of IDs to avoid mismatched names and data. Additionally, if the number of IDs and names doesn’t match, no additional destination data will be shown on the Route screen of the mobile app.
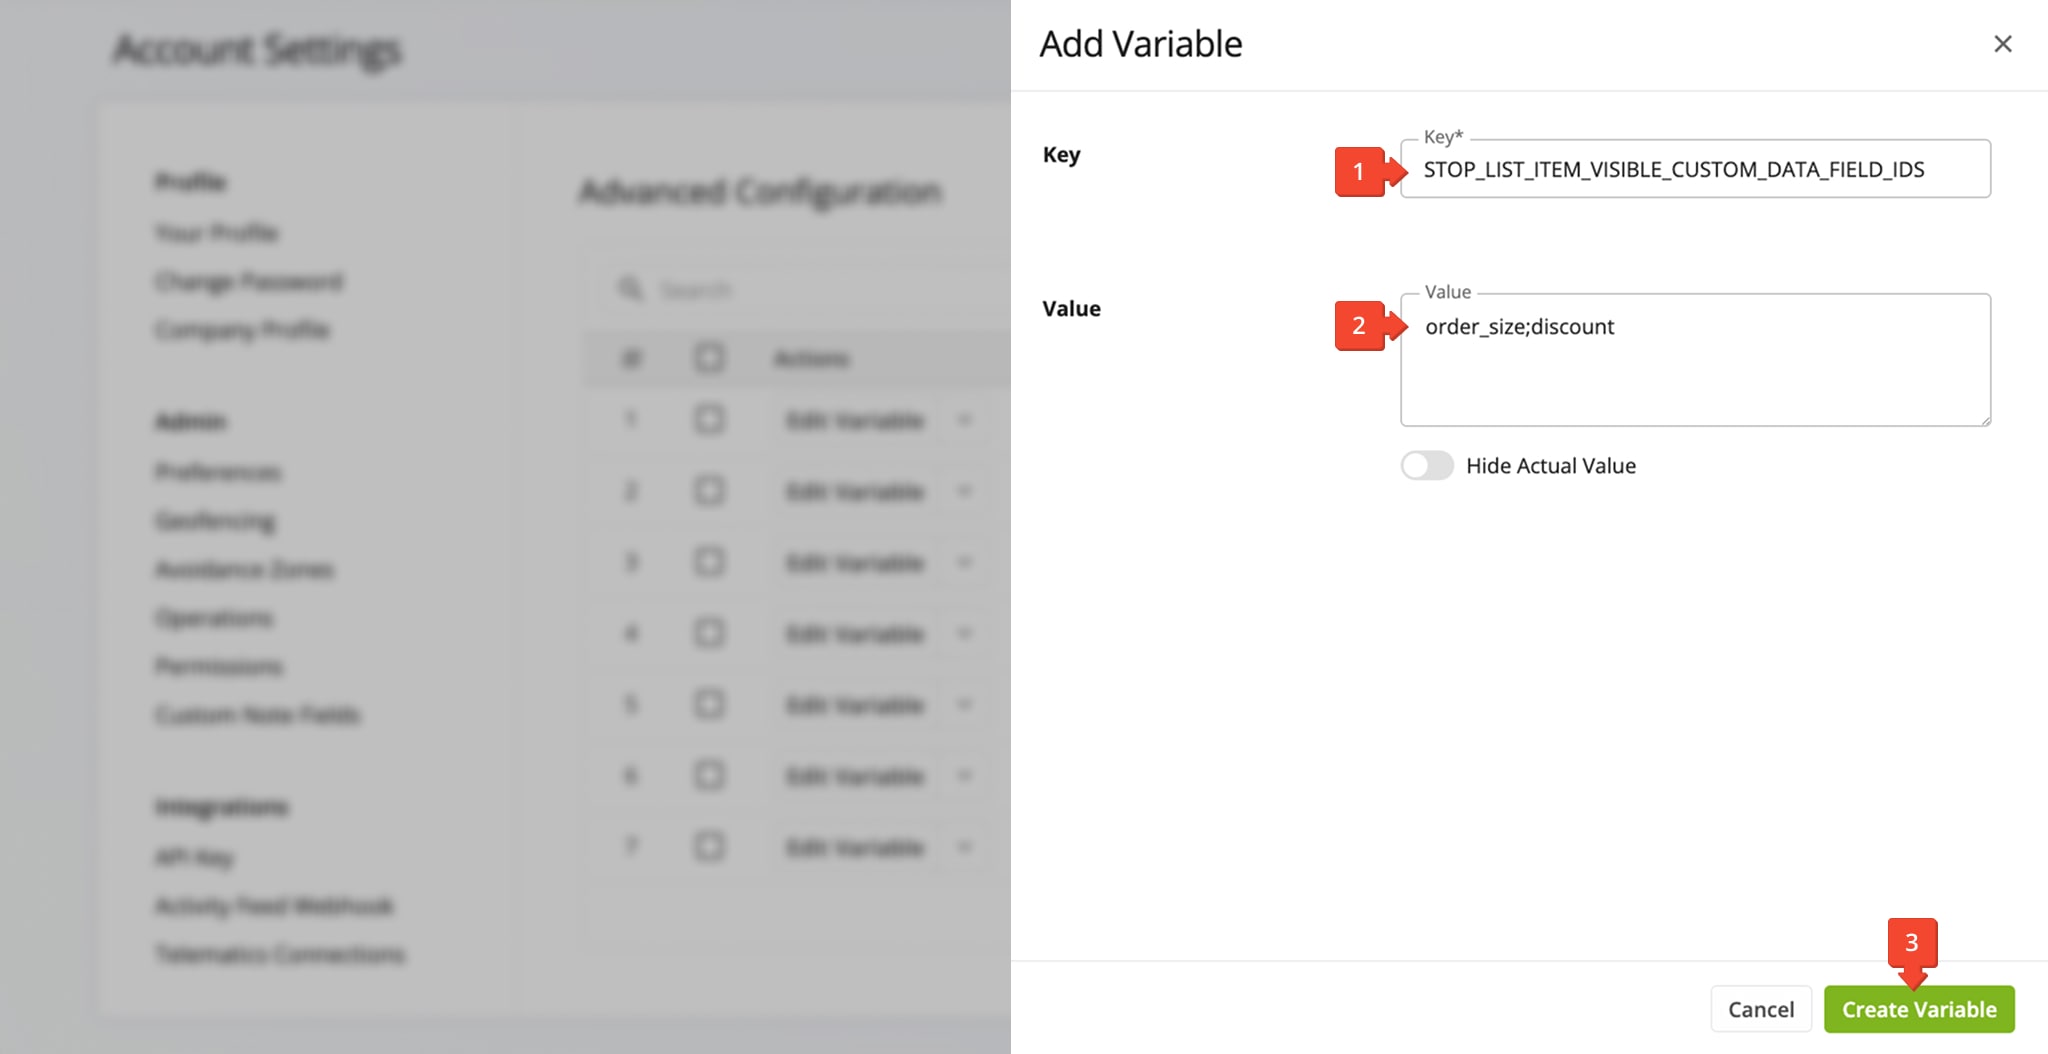
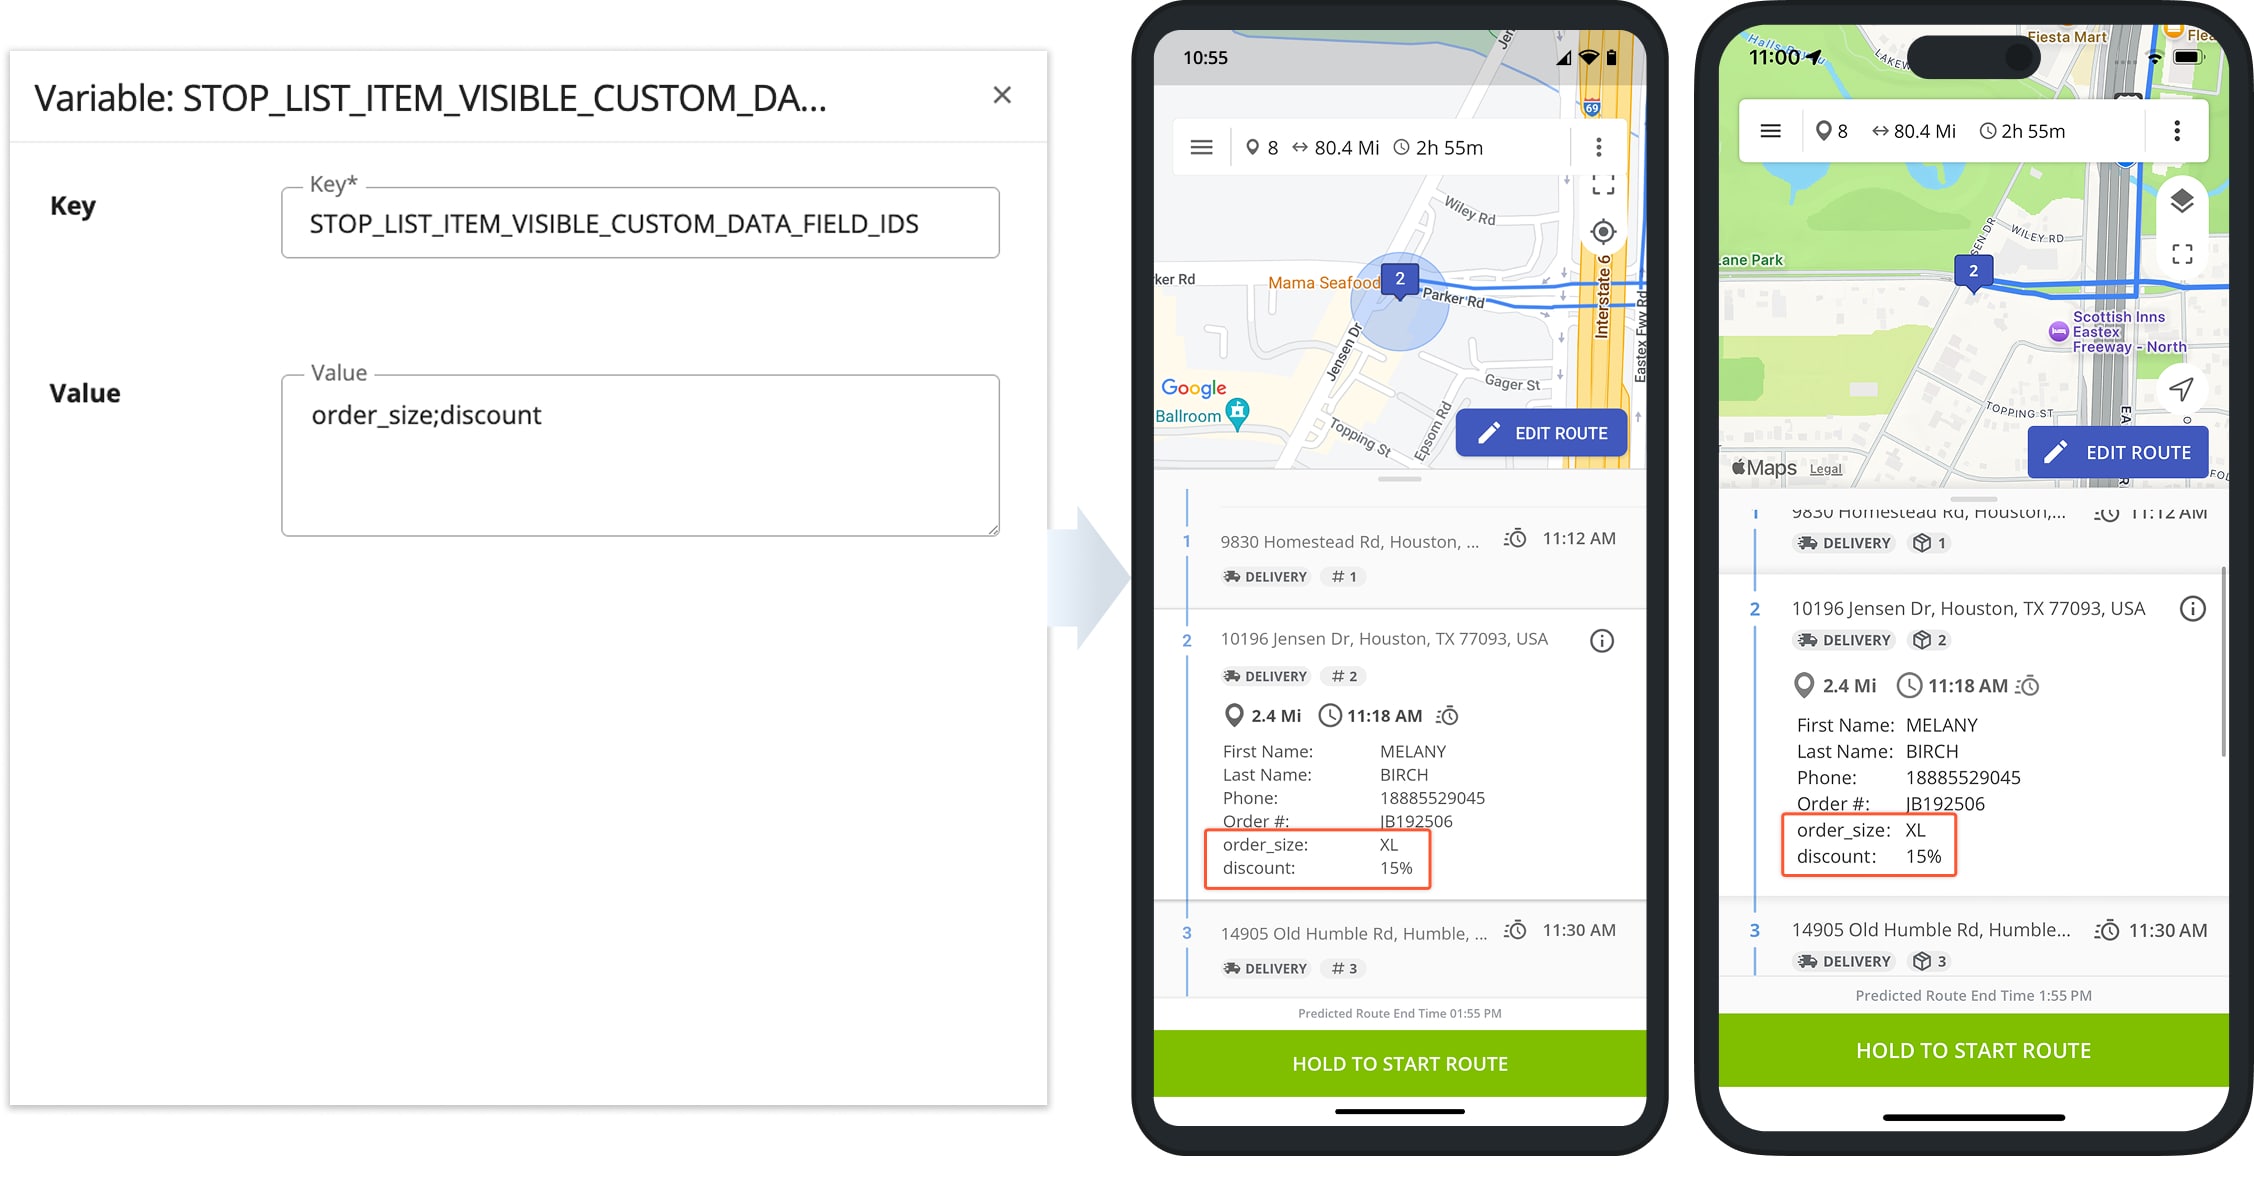
The “STOP_LIST_ITEM_VISIBLE_CUSTOM_DATA_FIELD_IDS” configuration enables you to add Custom Data fields to the destination view on the mobile app. The steps are the same as described above for regular data fields.
- Enter “STOP_LIST_ITEM_VISIBLE_CUSTOM_DATA_FIELD_IDS” in the “Key” field.
- Enter your preferred Custom Data fields in the “Value” field. You can use these separators to add more IDs: “;” “,” or “|“
- Click the “Create Variable” button to save your new advanced configuration.
NOTE: Custom Data Fields are labeled the same as their IDs. If you add names for custom fields in the “STOP_LIST_ITEM_VISIBLE_FIELD_NAMES” configuration, the number or sequence of names and IDs from the “STOP_LIST_ITEM_VISIBLE_FIELD_IDS” configuration will no longer match, and no data will be shown in the destination view.
Mobile App Examples – Custom Destination View Fields In Route4Me Mobile App
Once you’ve added your preferred destination details to the Advanced Configurations described above, they become instantly available in Route4Me’s Mobile Route App. The assigned User simply needs to tap a destination with the corresponding details, and they will be instantly visible directly on the Route screen.
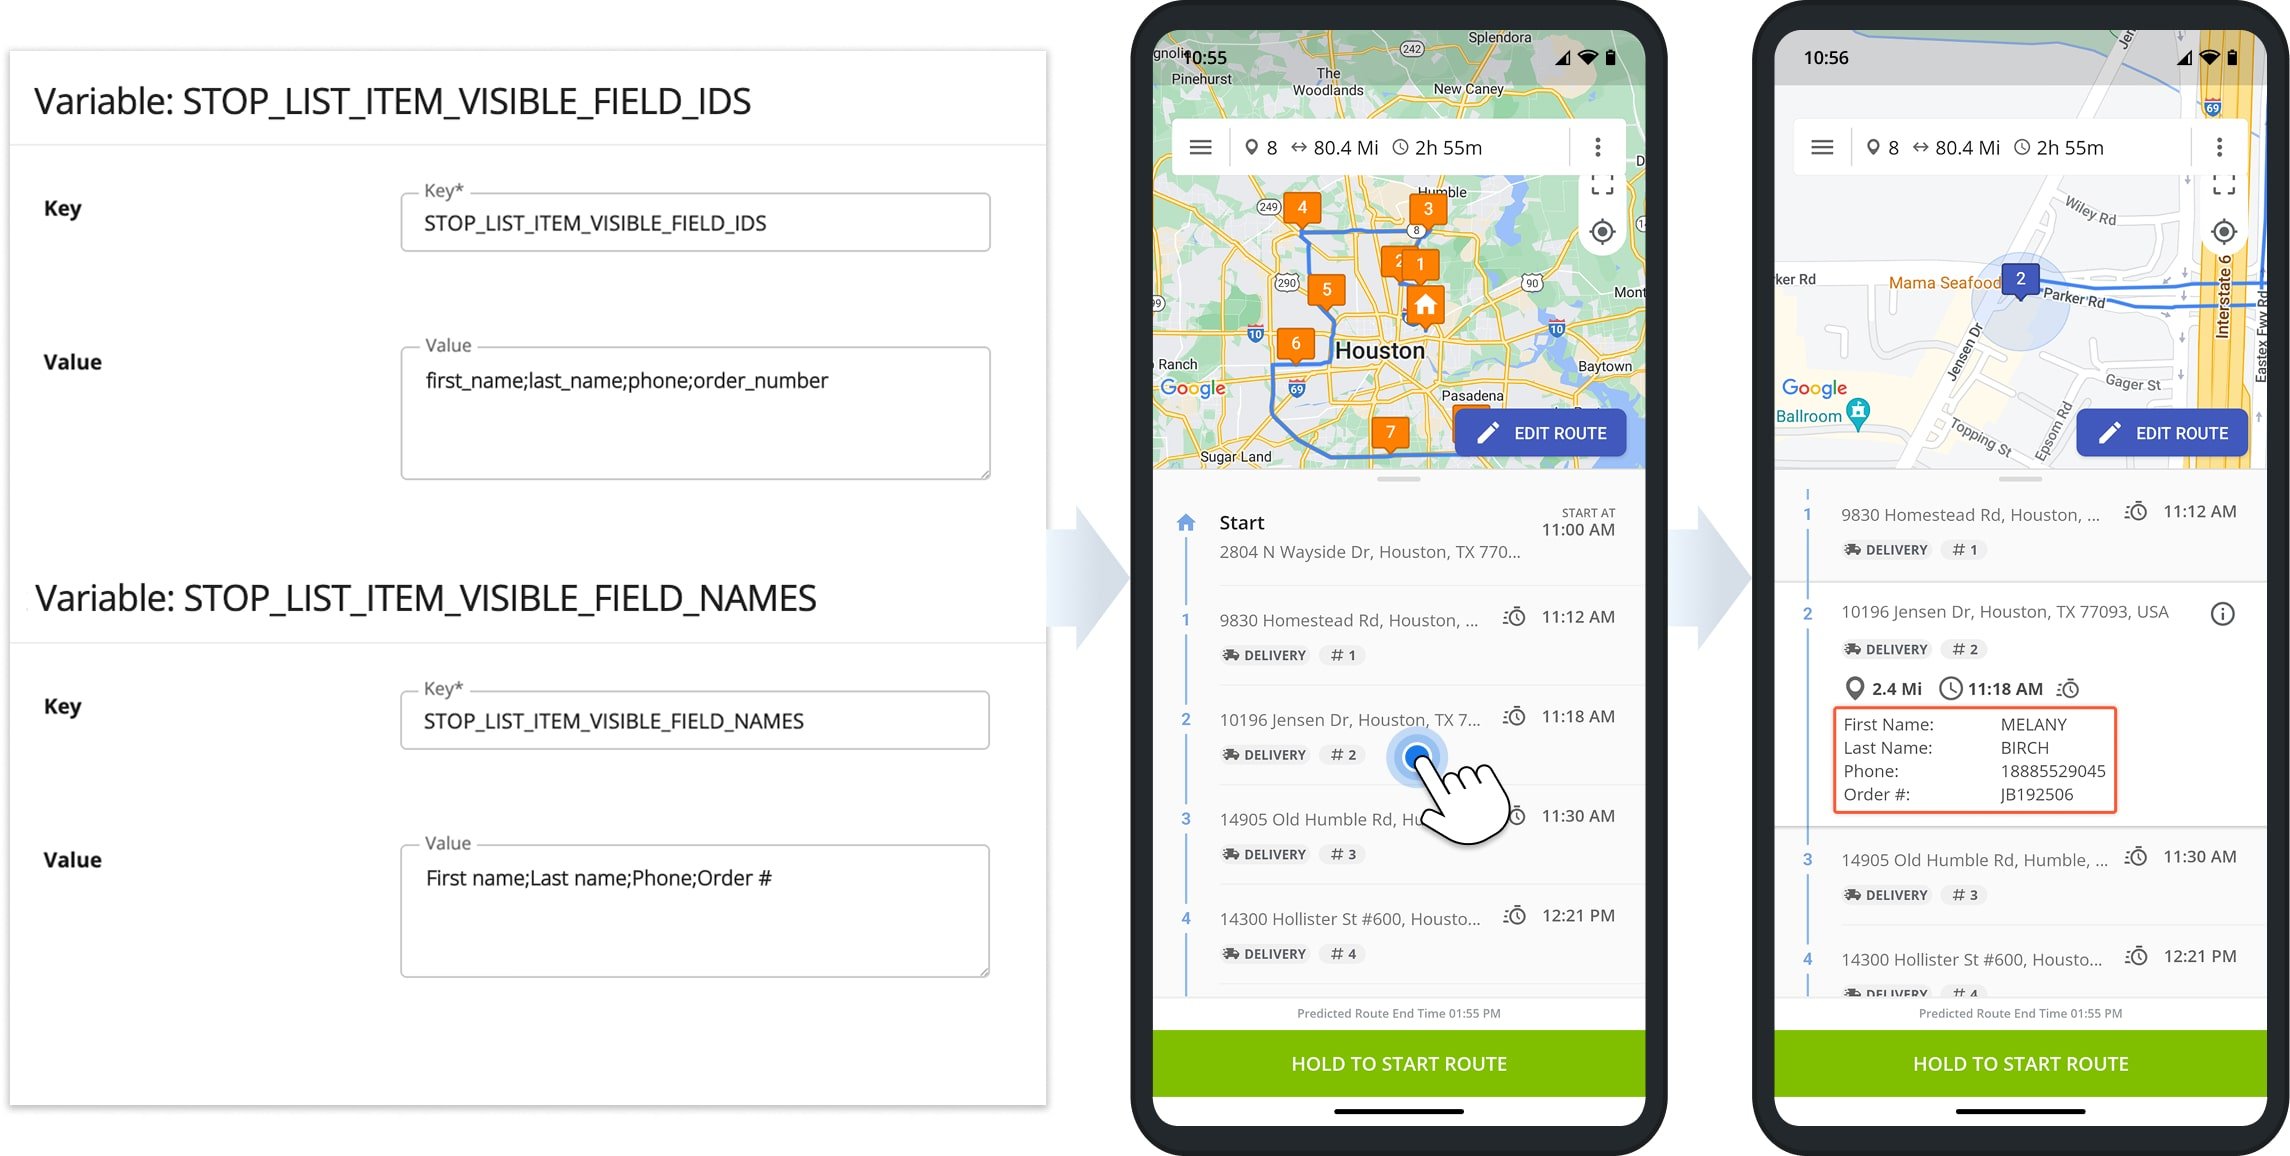
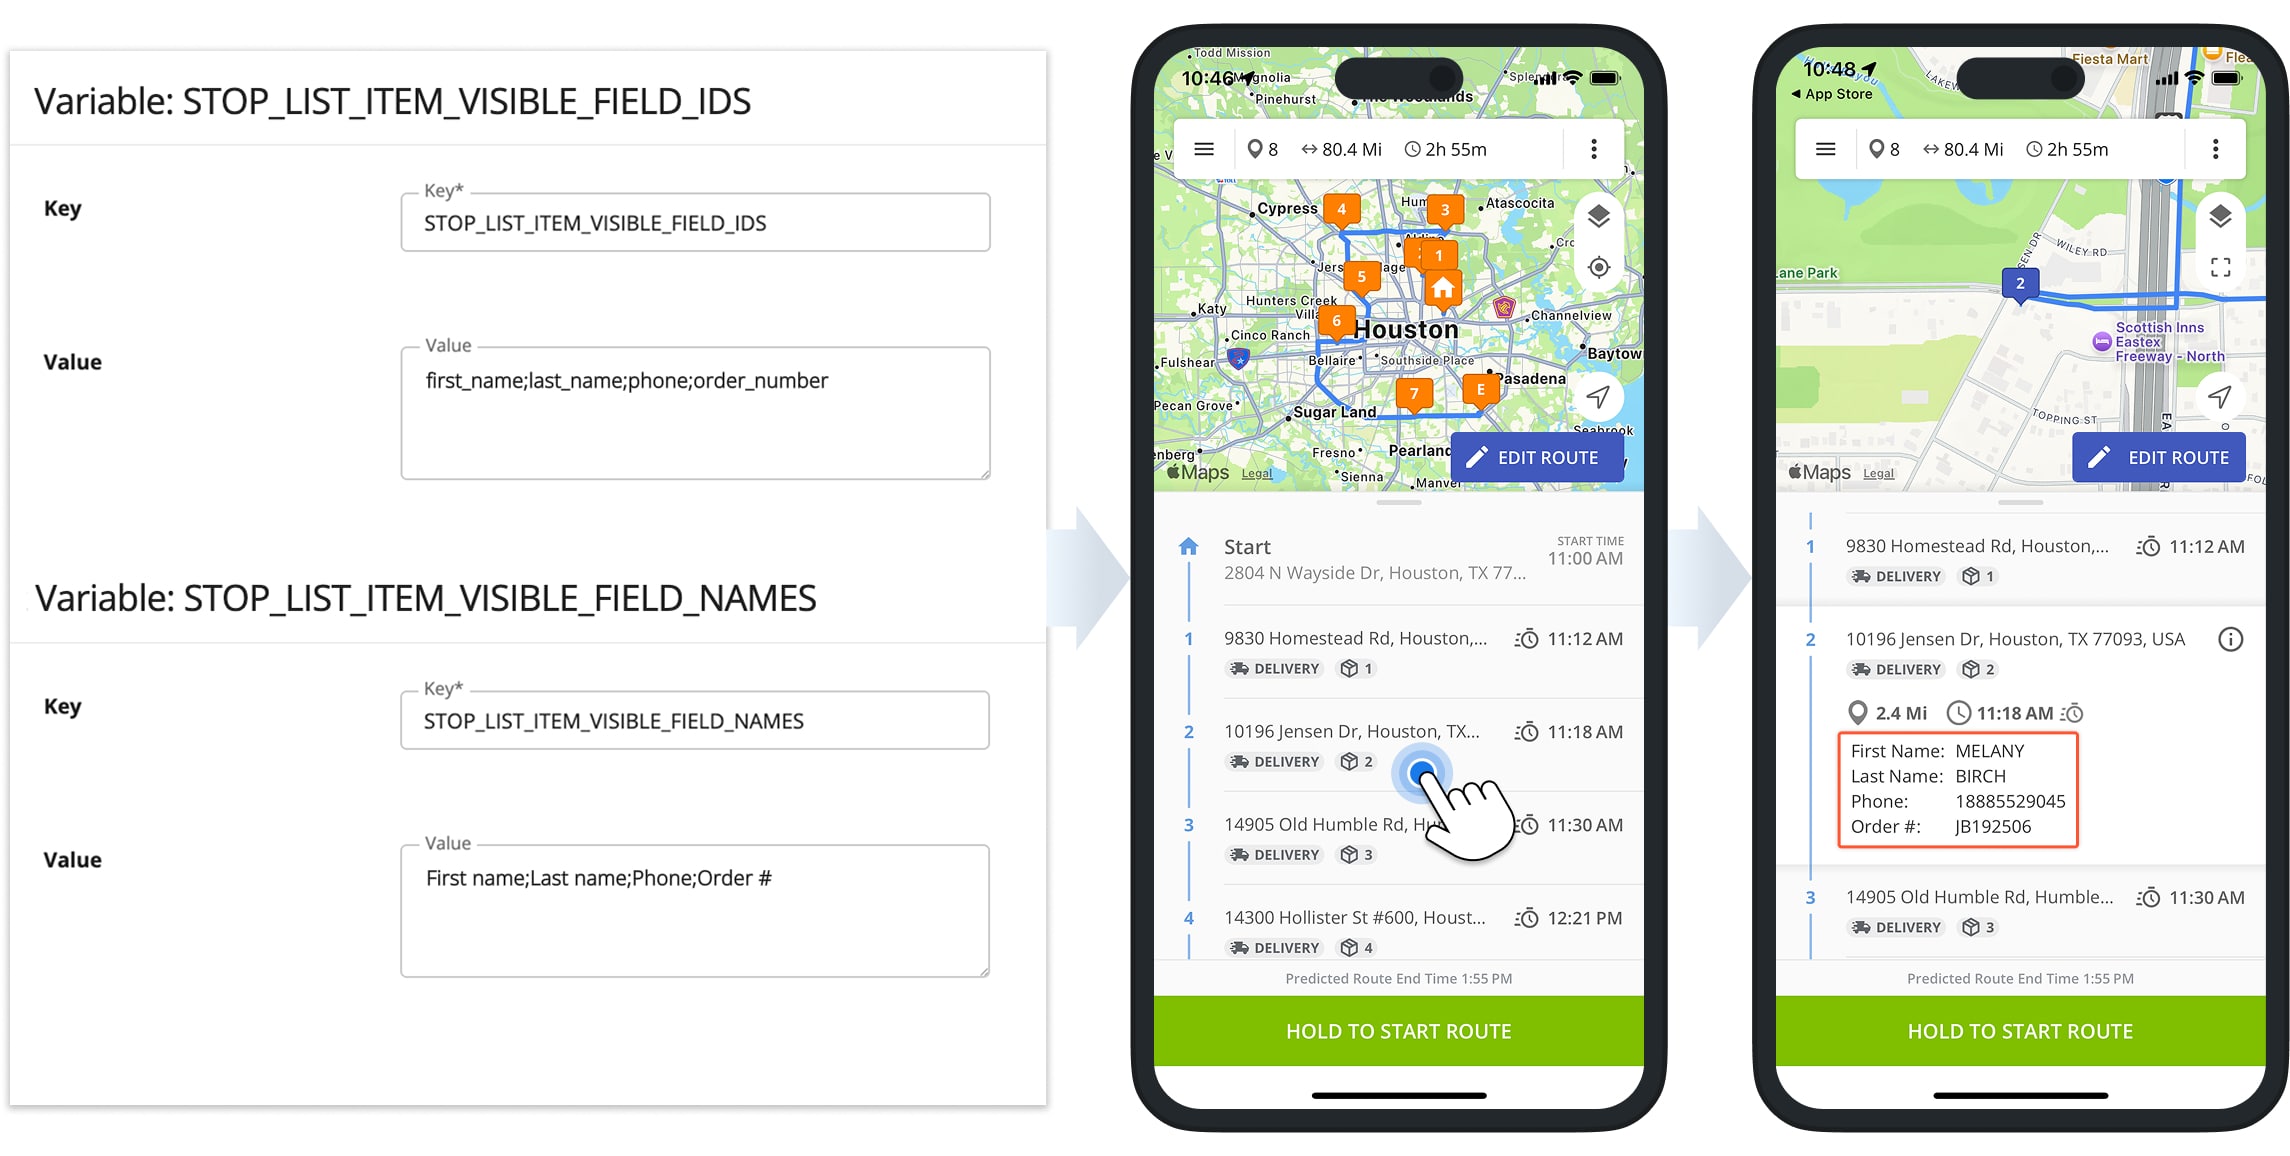
No additional action is required from you or the assigned User. Furthermore, custom destination view details are supported on both the Route4Me Android Route Navigation App and iPhone Route Planner App.
If you’ve enabled Custom Data Fields in the destination view, they will appear beneath any enabled destination details. As described above, destination view details are identical regardless of the device or operating system.
Supported Data Fields – Available Mobile App Destination View Details
In the table below, you can find a list of available details you can add to your destination view:
- Field Name: The custom name of the field displayed on the destination view. You can customize this name to suit your preferences. Note that this field will display data corresponding to its respective Field ID.
- Field ID: The unique identifier (ID) that retrieves data for the corresponding field in the destination’s details. This ID is added to the respective configuration using the Advanced Configuration Editor, as shown above in this guide.
- Description: Explanation of the data returned by the respective Field ID.
Custom Destination Data Fields
Visit Route4Me's Marketplace to Check out Add-Ons for Your Account:
- Operations
Custom Data Add-On
- Operations
Advanced Team Management Add-On
- Operations
Audit Logging and Activity Stream
About author: Kristian Andreev

