
Customers – Create & Manage Vendor, Business & Customer Profiles
Route4Me’s Customers feature helps enterprise businesses organize and manage detailed Customer Profiles across multiple locations, contacts, and departments. It provides flexible tools to view, edit, and customize essential Customer information, making it easier to handle complex relationships and logistics requirements. Discover more in this guide.
Table of Contents
Access Your Customers Page – View Customer Information At A Glance
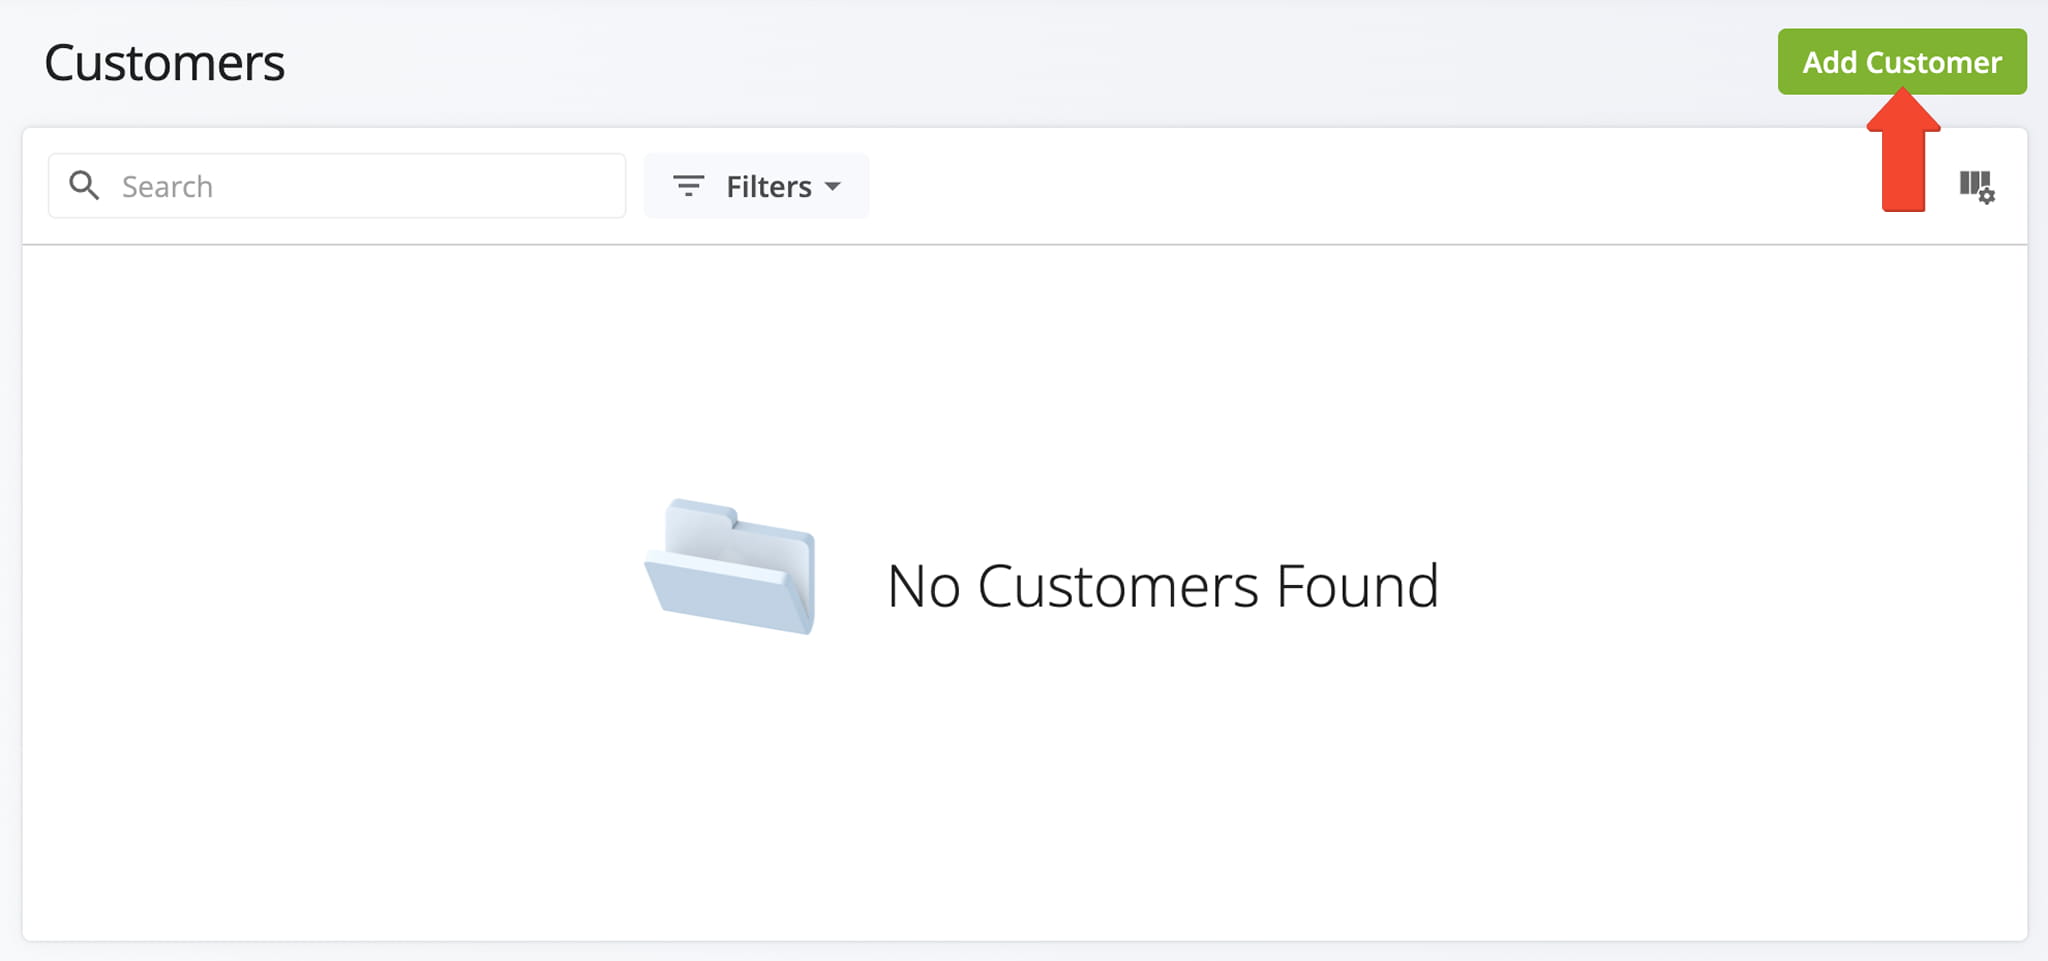
First, go to “Database” > “Customers” in the Navigation Menu to open the Customers Page. From here, you can start adding new Customers by clicking the “Add Customer” button and manage existing Customers on your account. Keep reading to learn more.
NOTE: If you don’t have access to the Customers Page in your Route4Me account, contact Customer Support to get set up.
Add A Customer – Use Data To Build A Customer Profile
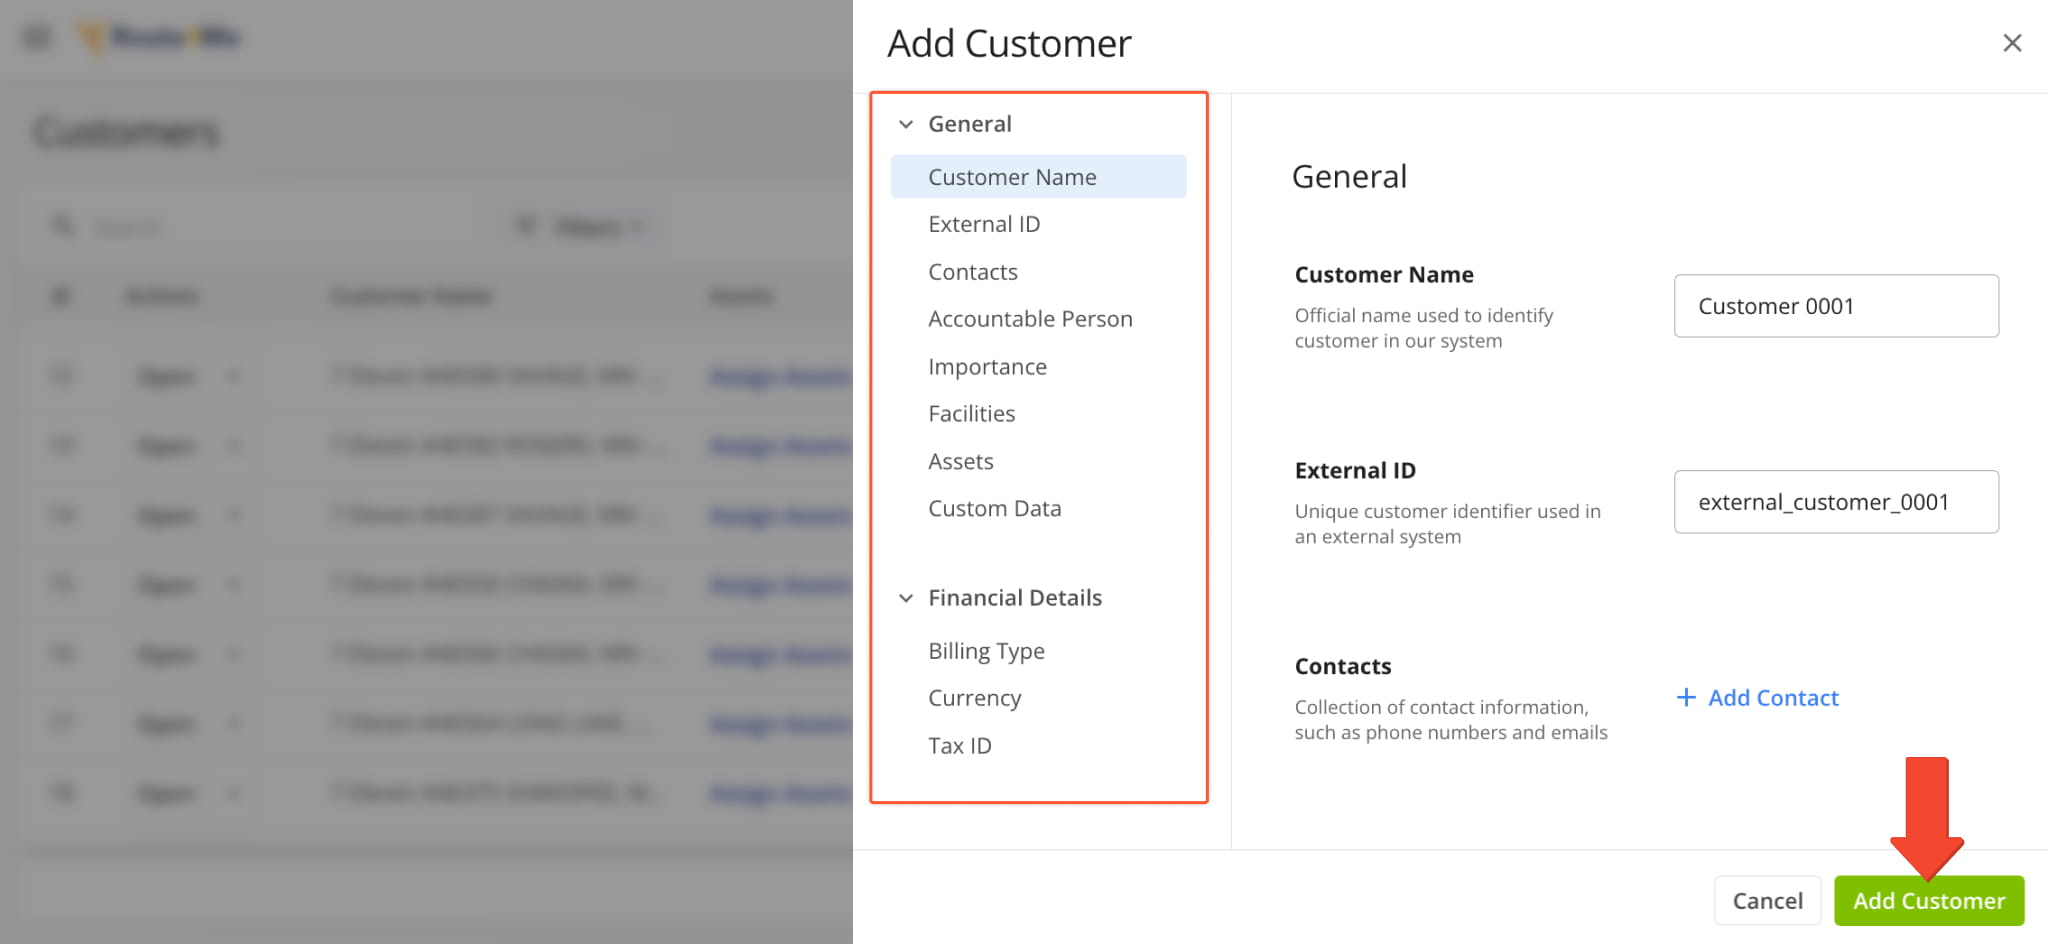
To create a new Customer, complete the fields in the “Add Customer” panel, then click “Add Customer” to finalize. The table below provides detailed information about each field.
Customer Profile Settings & Details
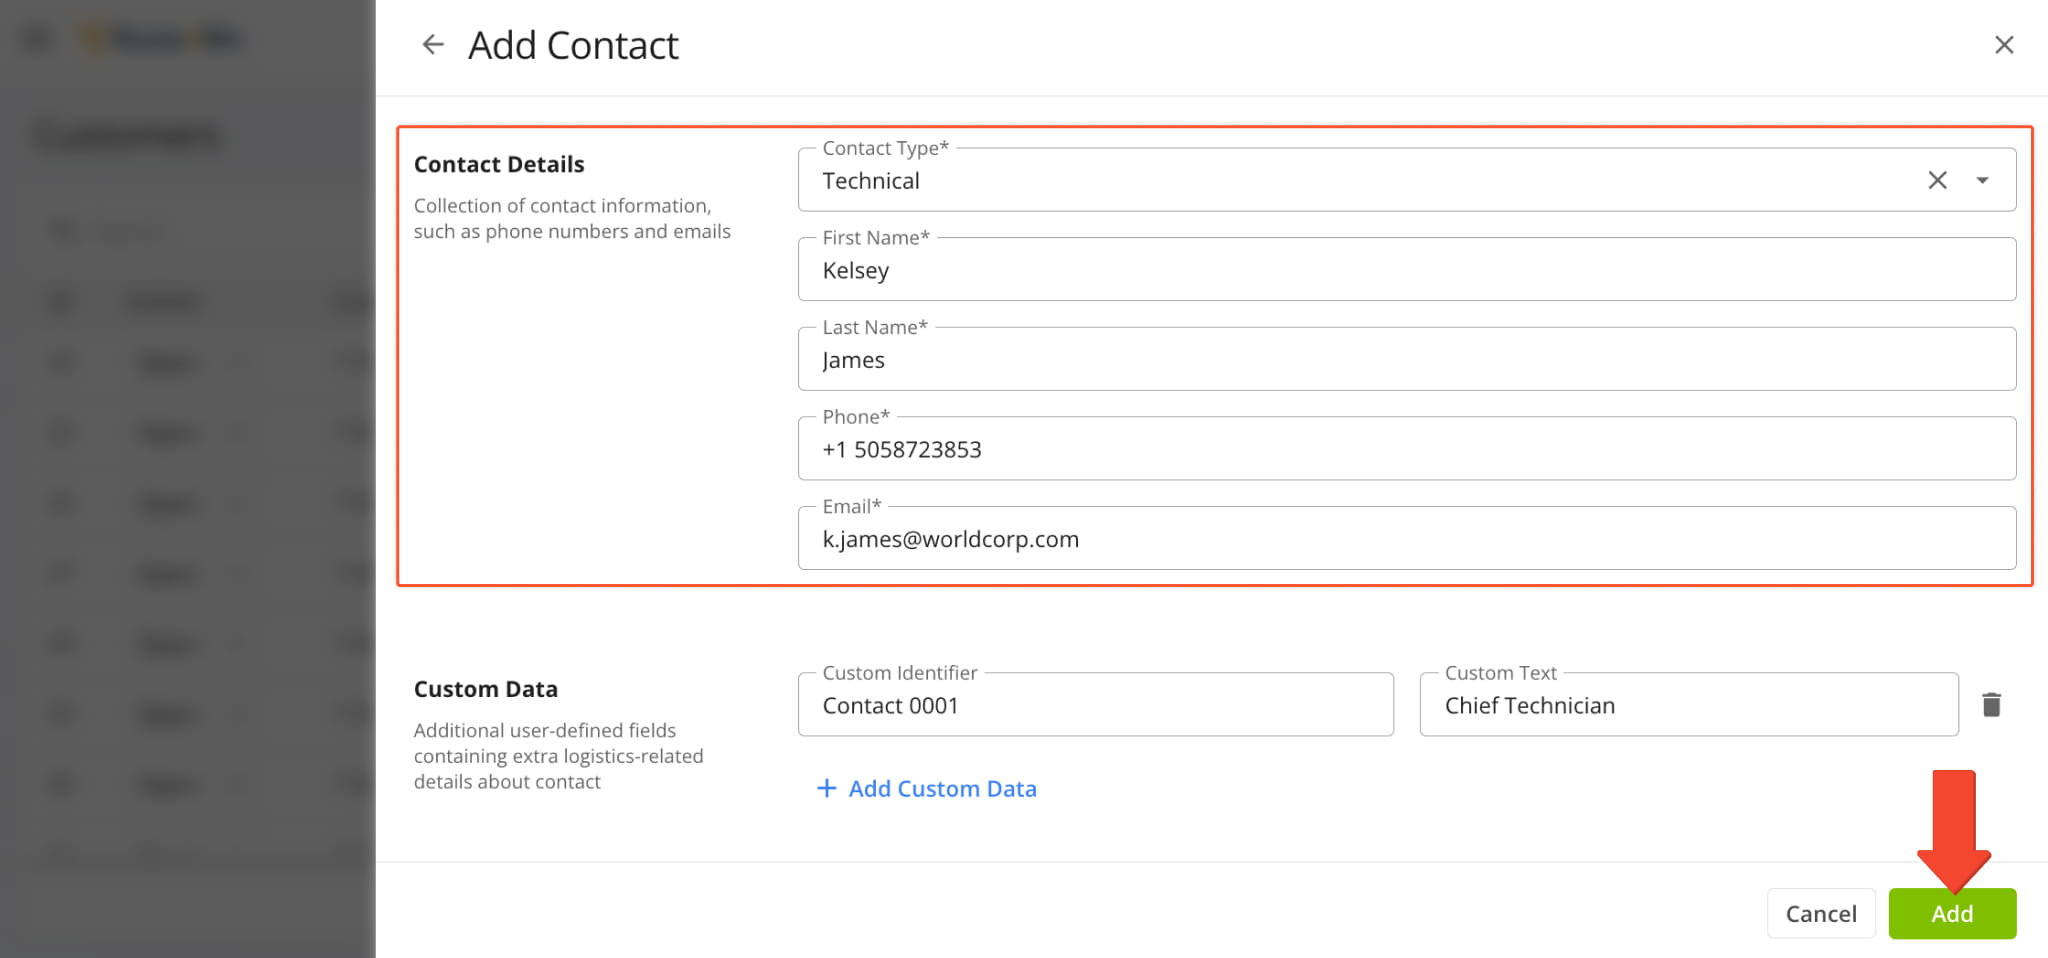
You have the option to add multiple Contacts for each Customer. You might, for example, add a Warehouse Manager as the main person responsible for coordinating deliveries. At the same time, you might also add an Assistant Manager as a backup Primary contact. Add as many Contacts as you like for each Customer.
For more efficient routing and delivery, you can also add a Custom Identifier to distinguish each Contact.
Manage Customer Profiles – Customize How You View Customer Data
Customize Data Columns
There are several ways to view and manage Customer data to fit your workflow.
To adjust which columns are visible, click the Columns Icon in the top-right corner to see all available fields, then check the columns you want to display and uncheck any you don’t need. You can reorder how data appears by dragging column headers up or down or use the “Arrow Icon” above a column to adjust the order.
These options make it easy to create a layout that highlights the information most important to you. NOTE: The table below provides an overview of all available data columns.
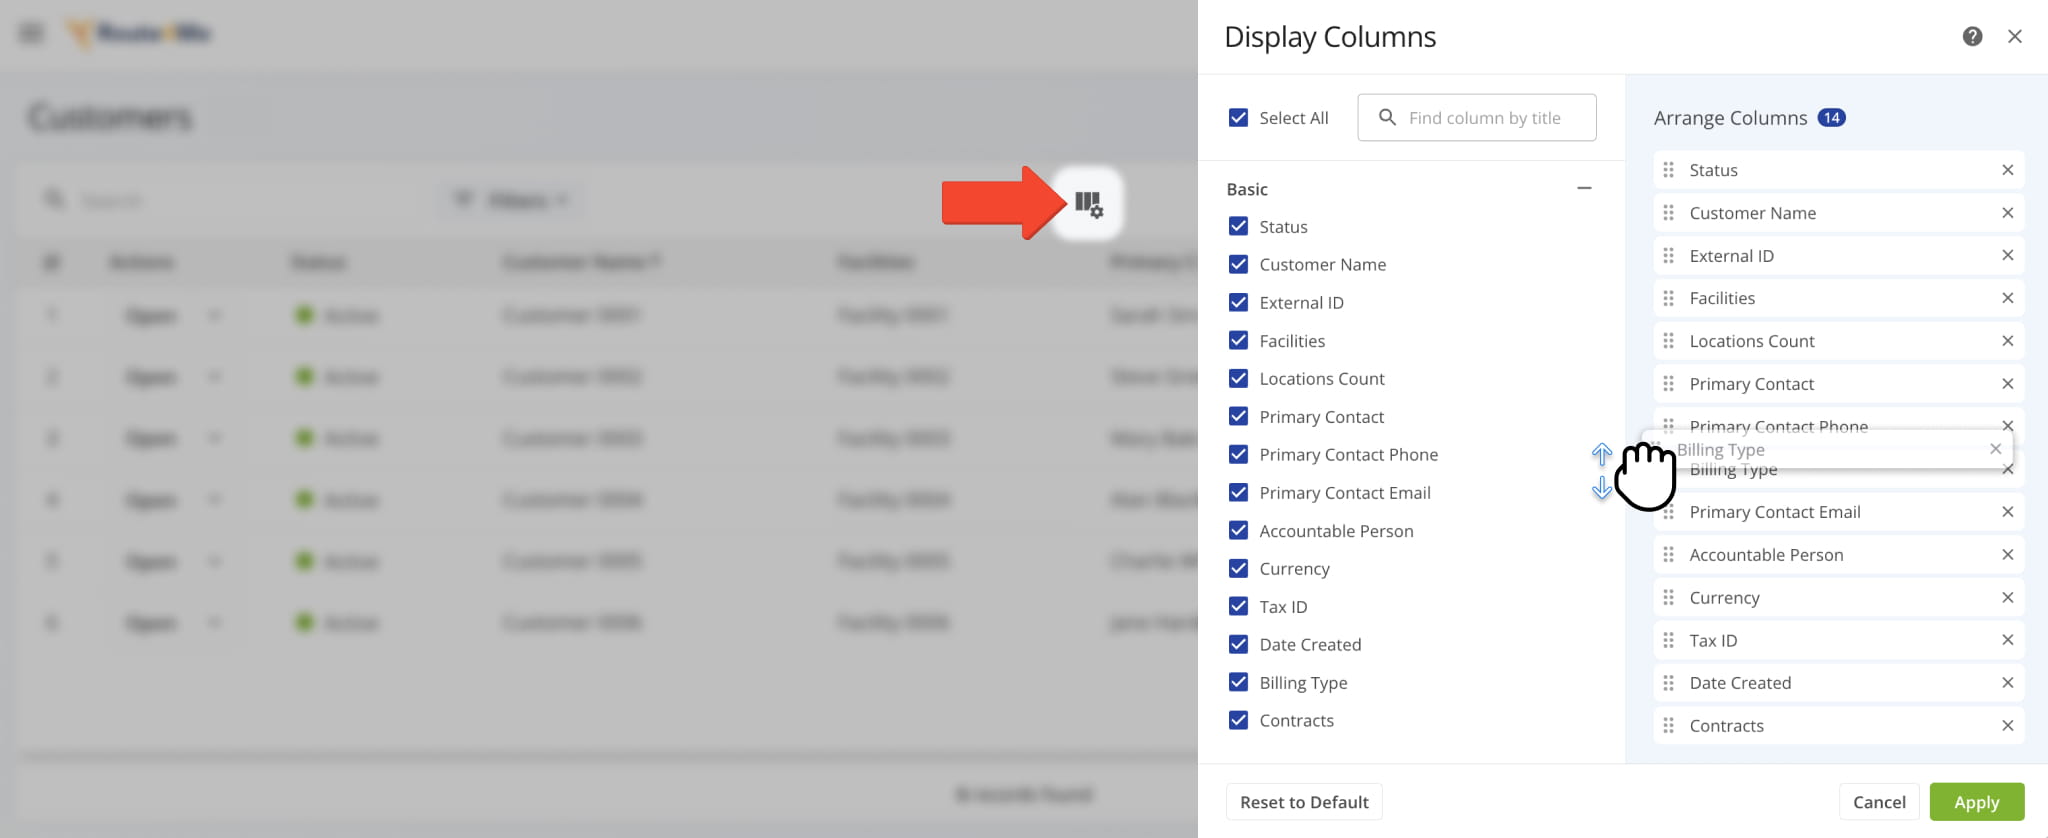
Customer Data Columns
Filter Customer Data
You can click “Filters” to view Customer data by a specific parameter, or use the “Search” bar to locate an entry. See the table below for details on each filter.
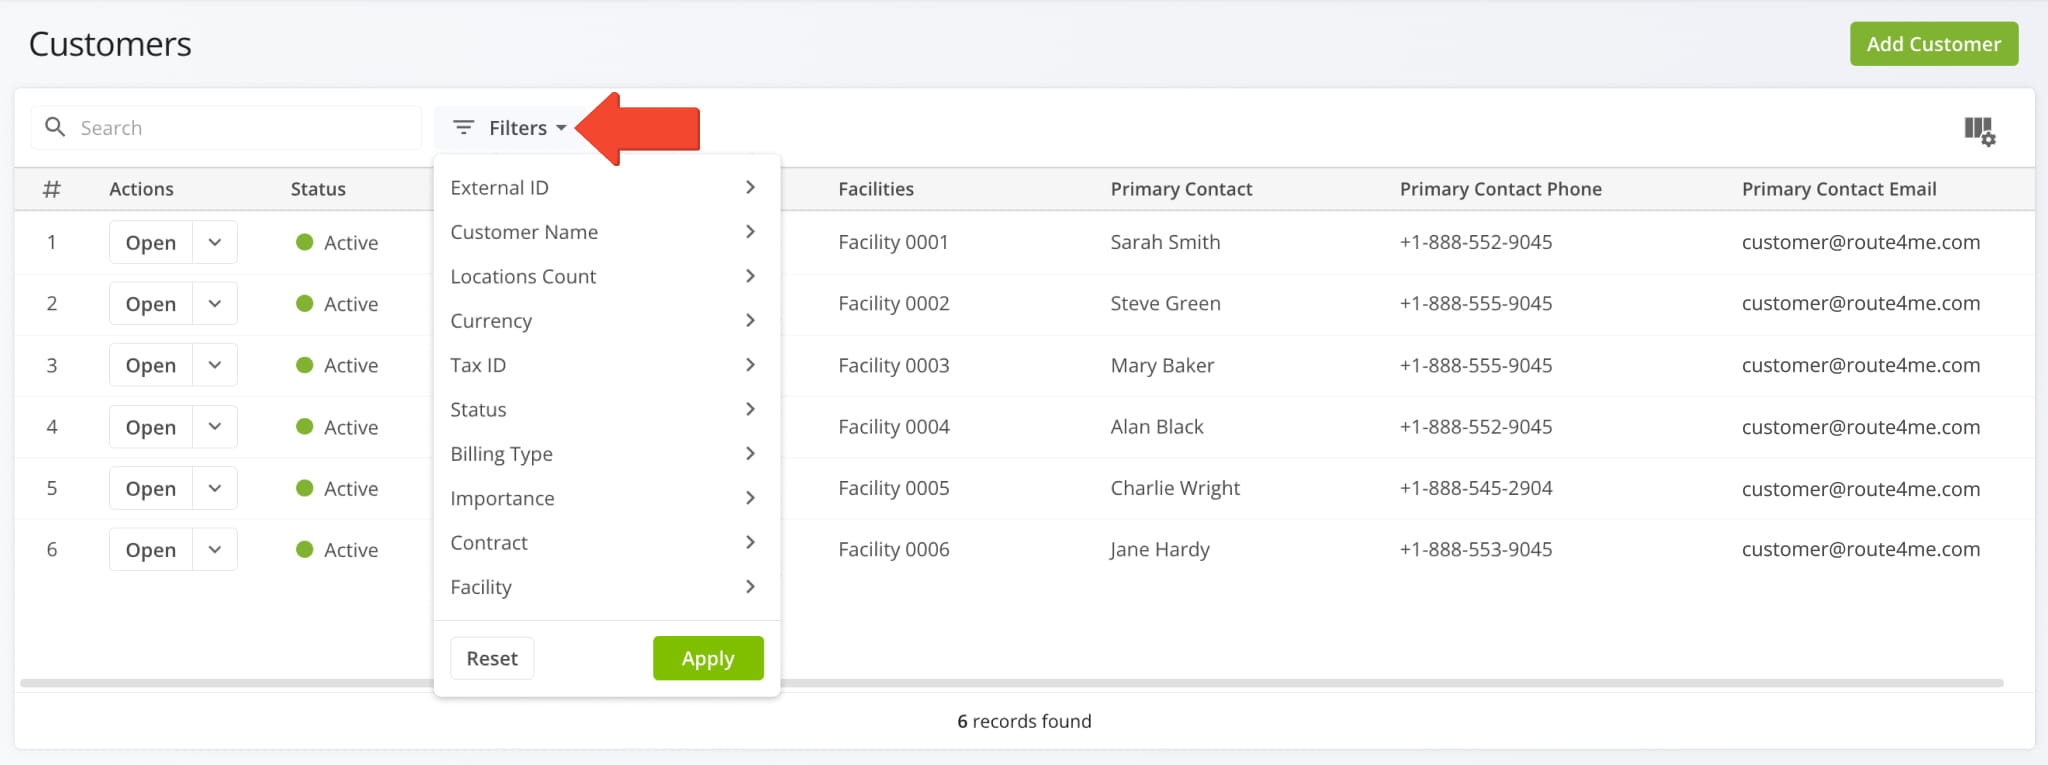
Customer Filters
Manage Customer Entries
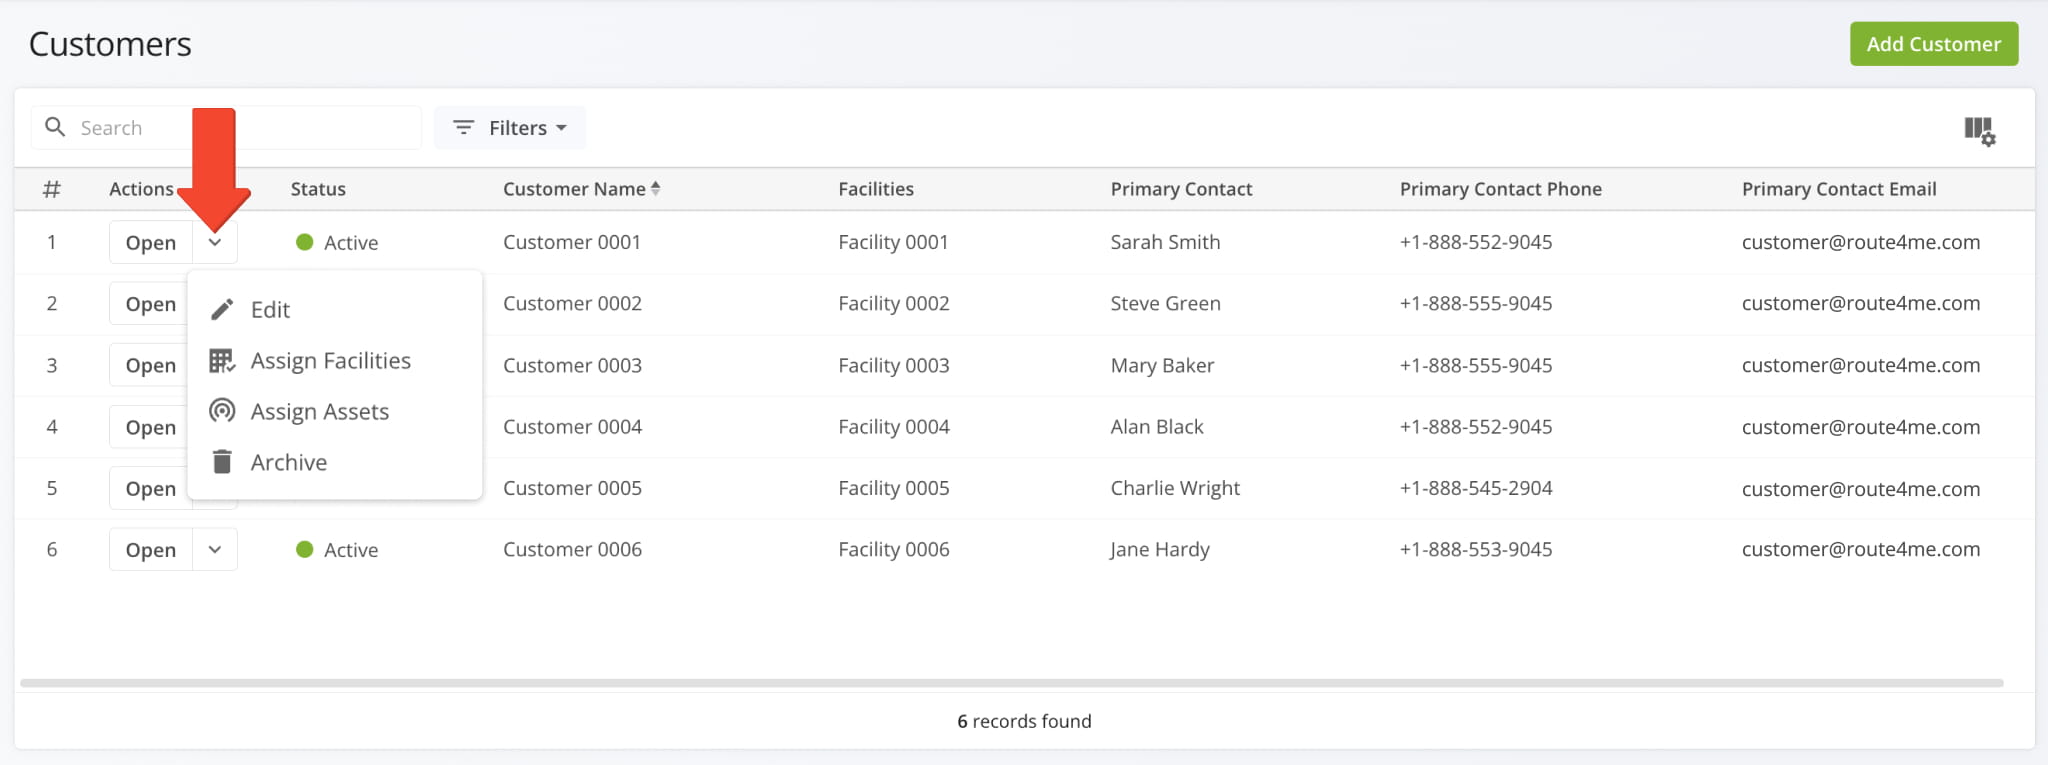
To manage a Customer entry, click the Down Arrow. This will open the context menu with the following options:
- Edit: Change the attributes and data of a Customer entry. You’ll have access to the same fields when creating new Customer entries.
- Assign Facility: Associate a Customer with a Facility on your account.
- Assign Assets: Associate a Customer with a Company Asset, equipment, or other physical resource.
- Archive: Set a Customer as inactive with the “Archived” status.
NOTE: When you manage an archived Customer entry, you’ll see the “Restore” option instead of “Archive“. This option will re-activate archived entries and change their status to “Active“.
Access Customer Snapshots
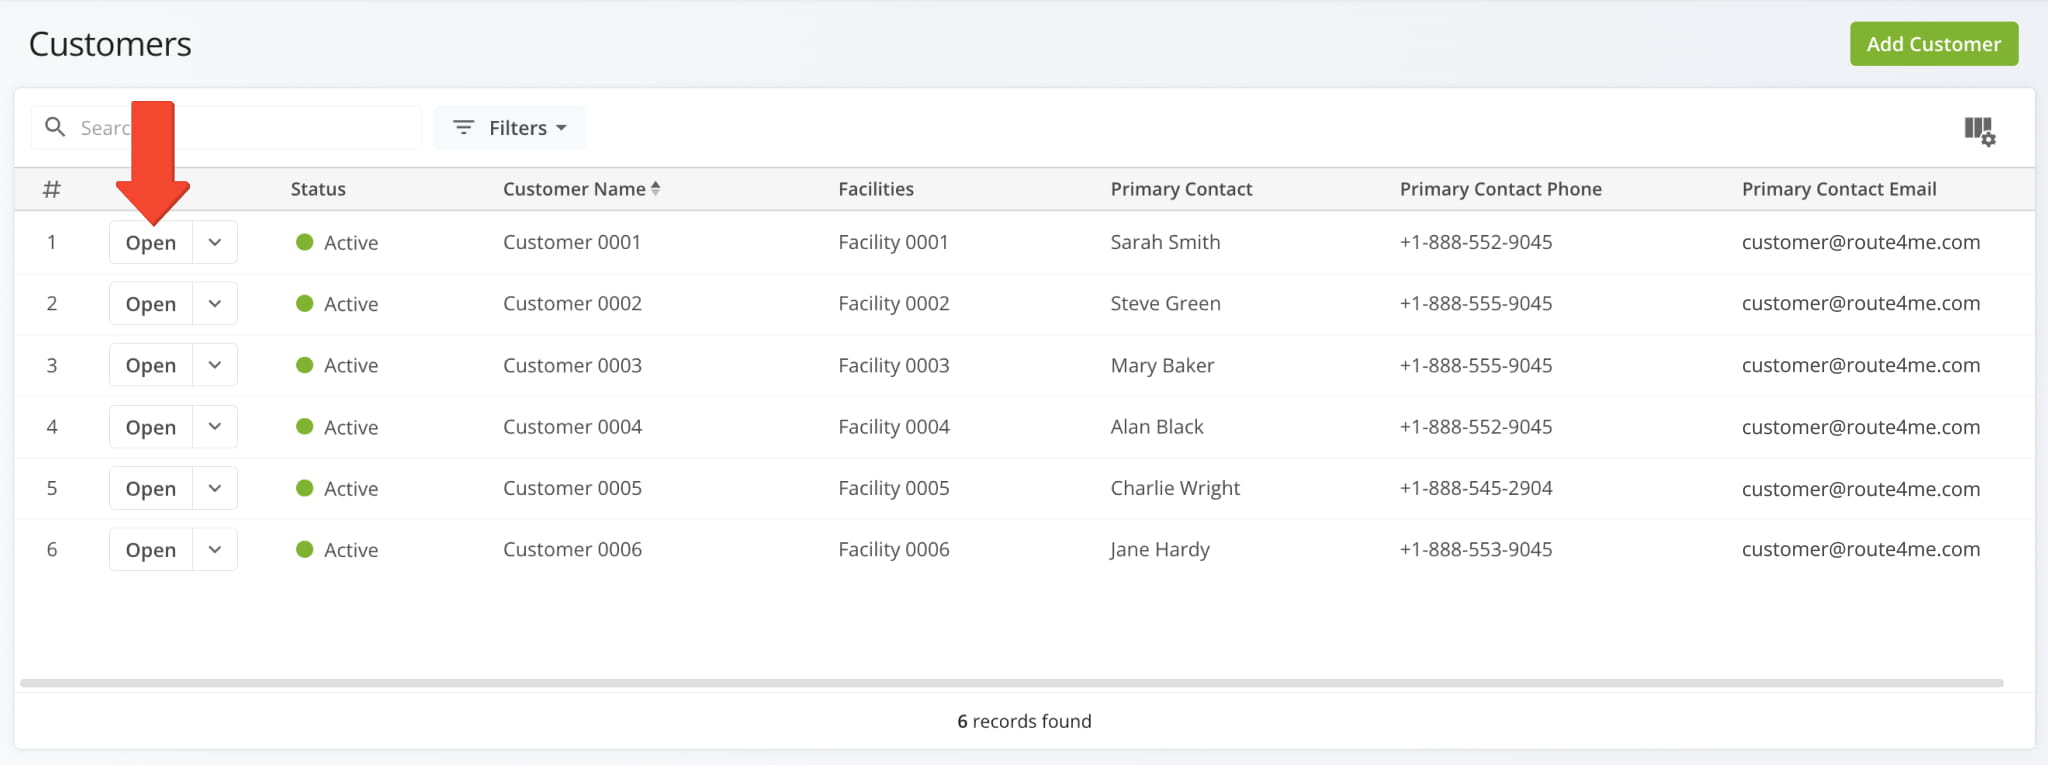
Finally, you can access Customer Snapshots which provide an overview of key metrics and details related to your customers. You can do this by clicking the “Open” button. Or right-click anywhere in the customer’s data row, then select “Open” from the pop up.
Manage Customer Importance With Customizable Importance Values
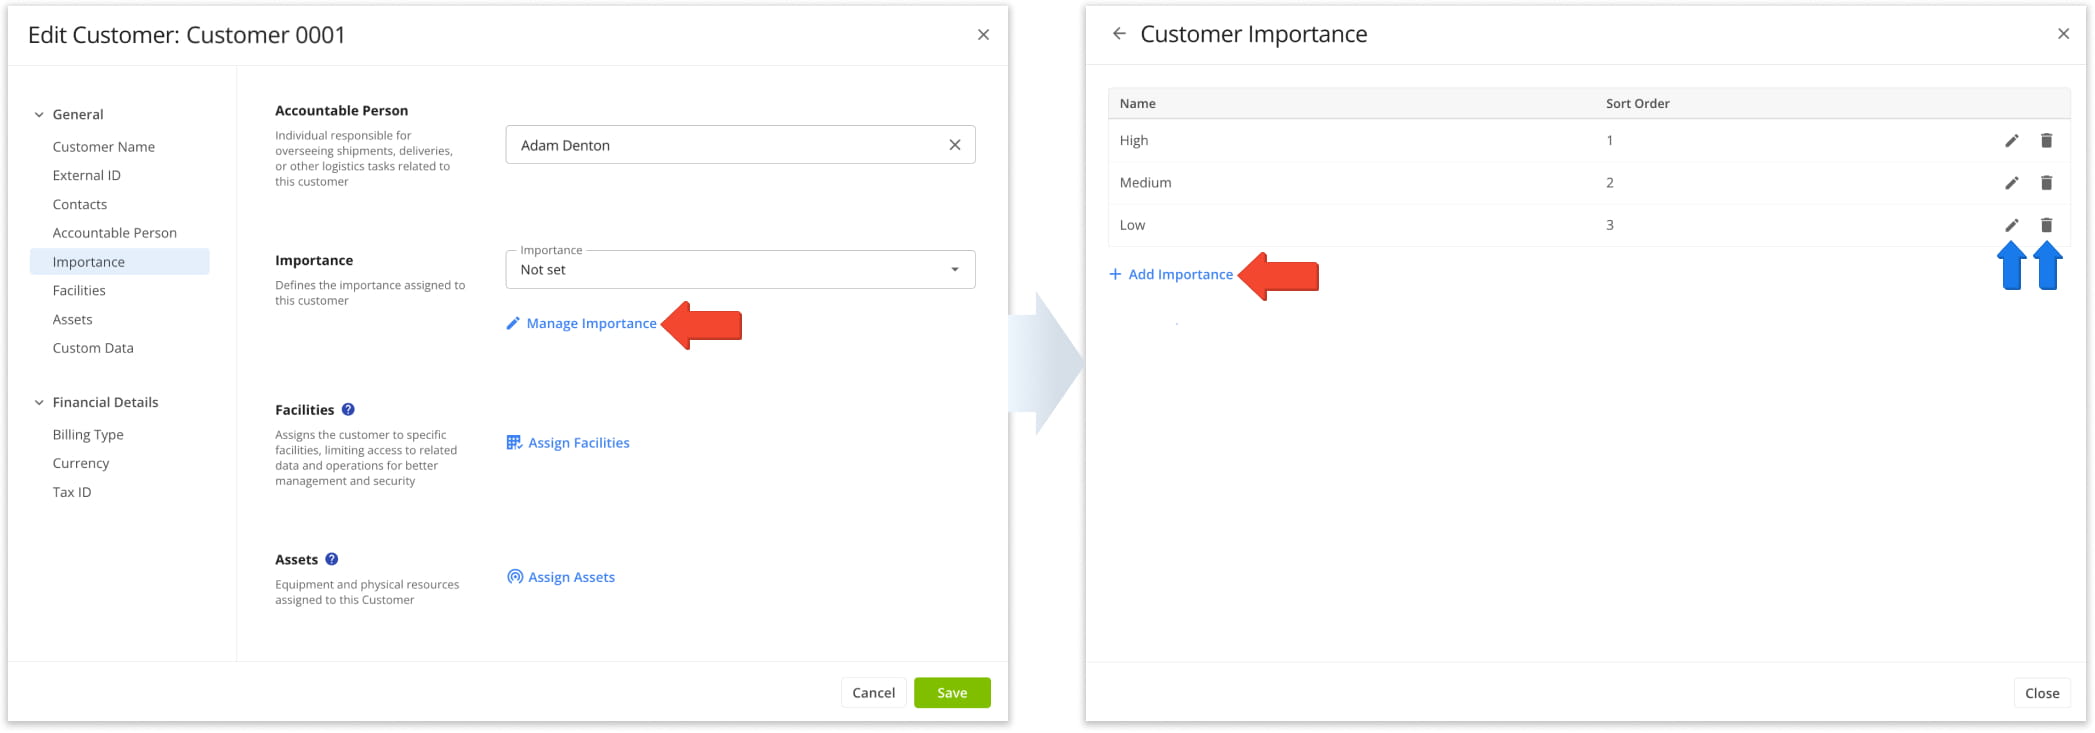
When you add and edit Customers, you can click the “Manage Importance” button. You’ll see a customization interface where you can edit or delete existing Importance values, or click “Add Importance” to create new ones.
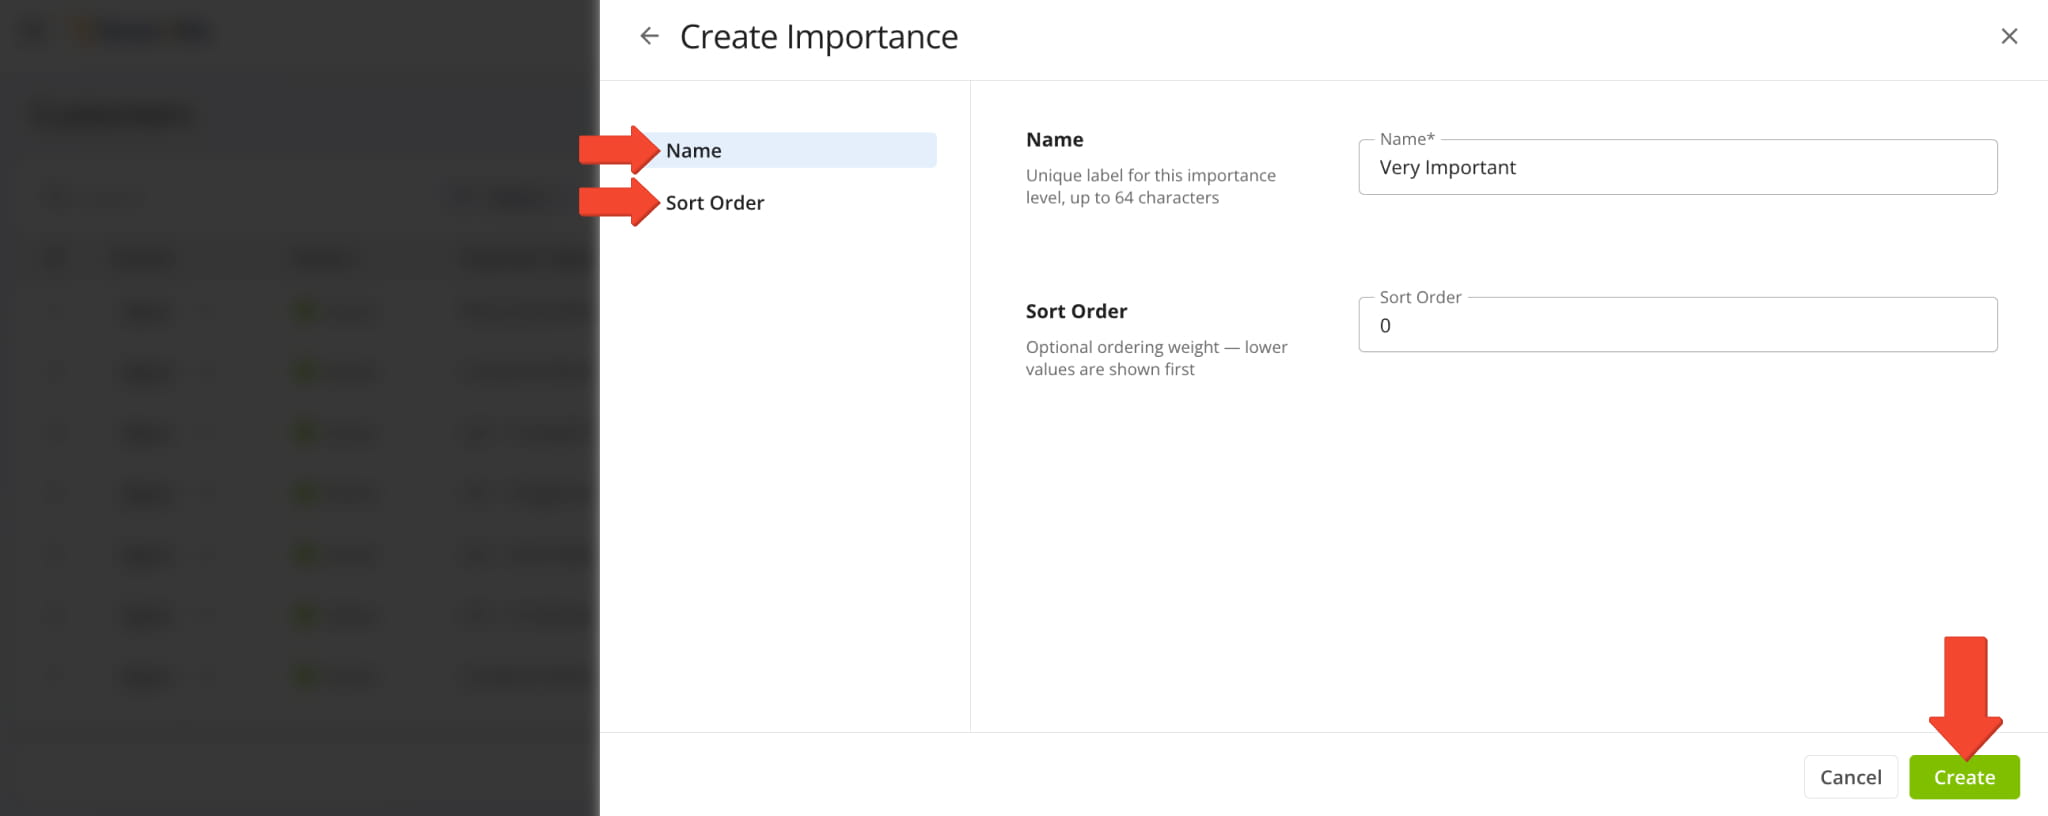
When creating Importance values, you can set their “Name” and “Sort Order” in the respective fields. Importance values with a lower Sort Order number are shown first. Click “Create” to save your new Customer Importance level.
Visit Route4Me Marketplace to Check Out More Add-Ons:
- Route Optimization
Commercial Vehicle & Truck Routing
- Operations
Audit Logging and Activity Stream
About author: Kristian Andreev

