
Switch Navigation Modes – Single Destination And Continuous Route Navigation
Route4Me’s Route Planner App makes it easy to navigate and complete routes without switching between apps, thanks to built-in GPS navigation. Our in-app navigation supports two modes, Single Destination Navigation and Continuous Route Navigation. In this guide, you’ll learn how to switch between modes, the differences between them, and how to complete routes in each.
NOTE: If your route includes commercial vehicles, not all areas may support truck-safe routing. See where Route4Me provides commercial navigation to plan accordingly.
Table of Contents
Compare Single Destination Navigation And Continuous Route Navigation
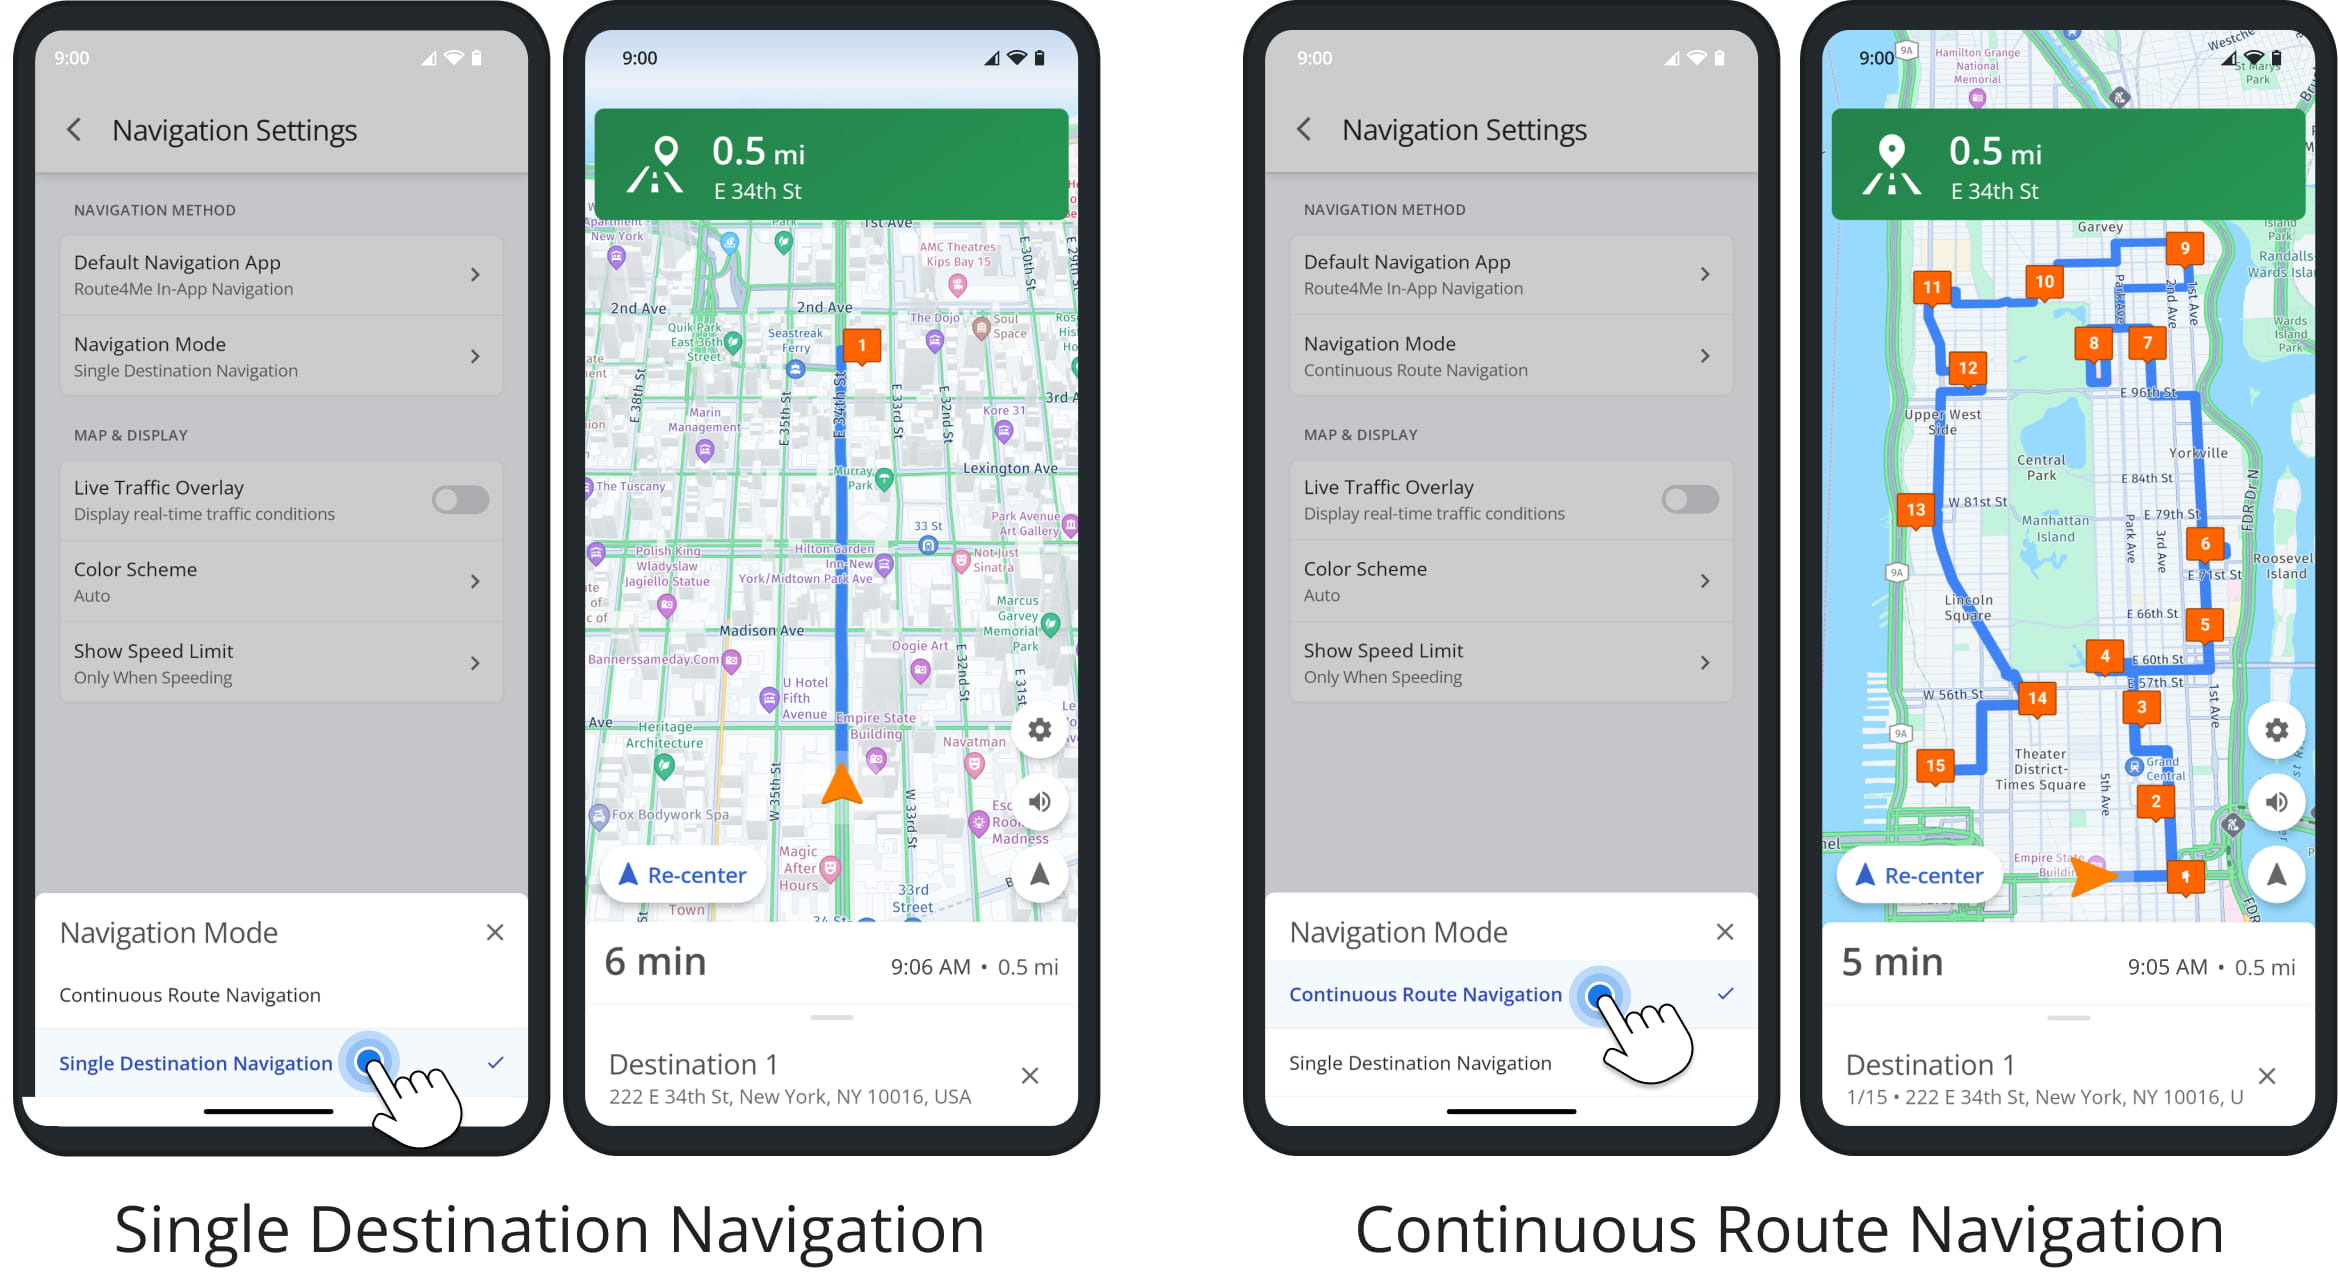
Single Destination Navigation provides optimal route directions from the current location to a single Destination. This focused navigation mode helps drivers reach Destinations and collect proof of visit.
Continuous Route Navigation automatically starts directions to the next Destination as soon as the driver arrives at the current one, while also displaying the full route for reference.
This seamless, full-route navigation mode provides uninterrupted directions.
Switch Between Navigation Modes On Mobile Routing App
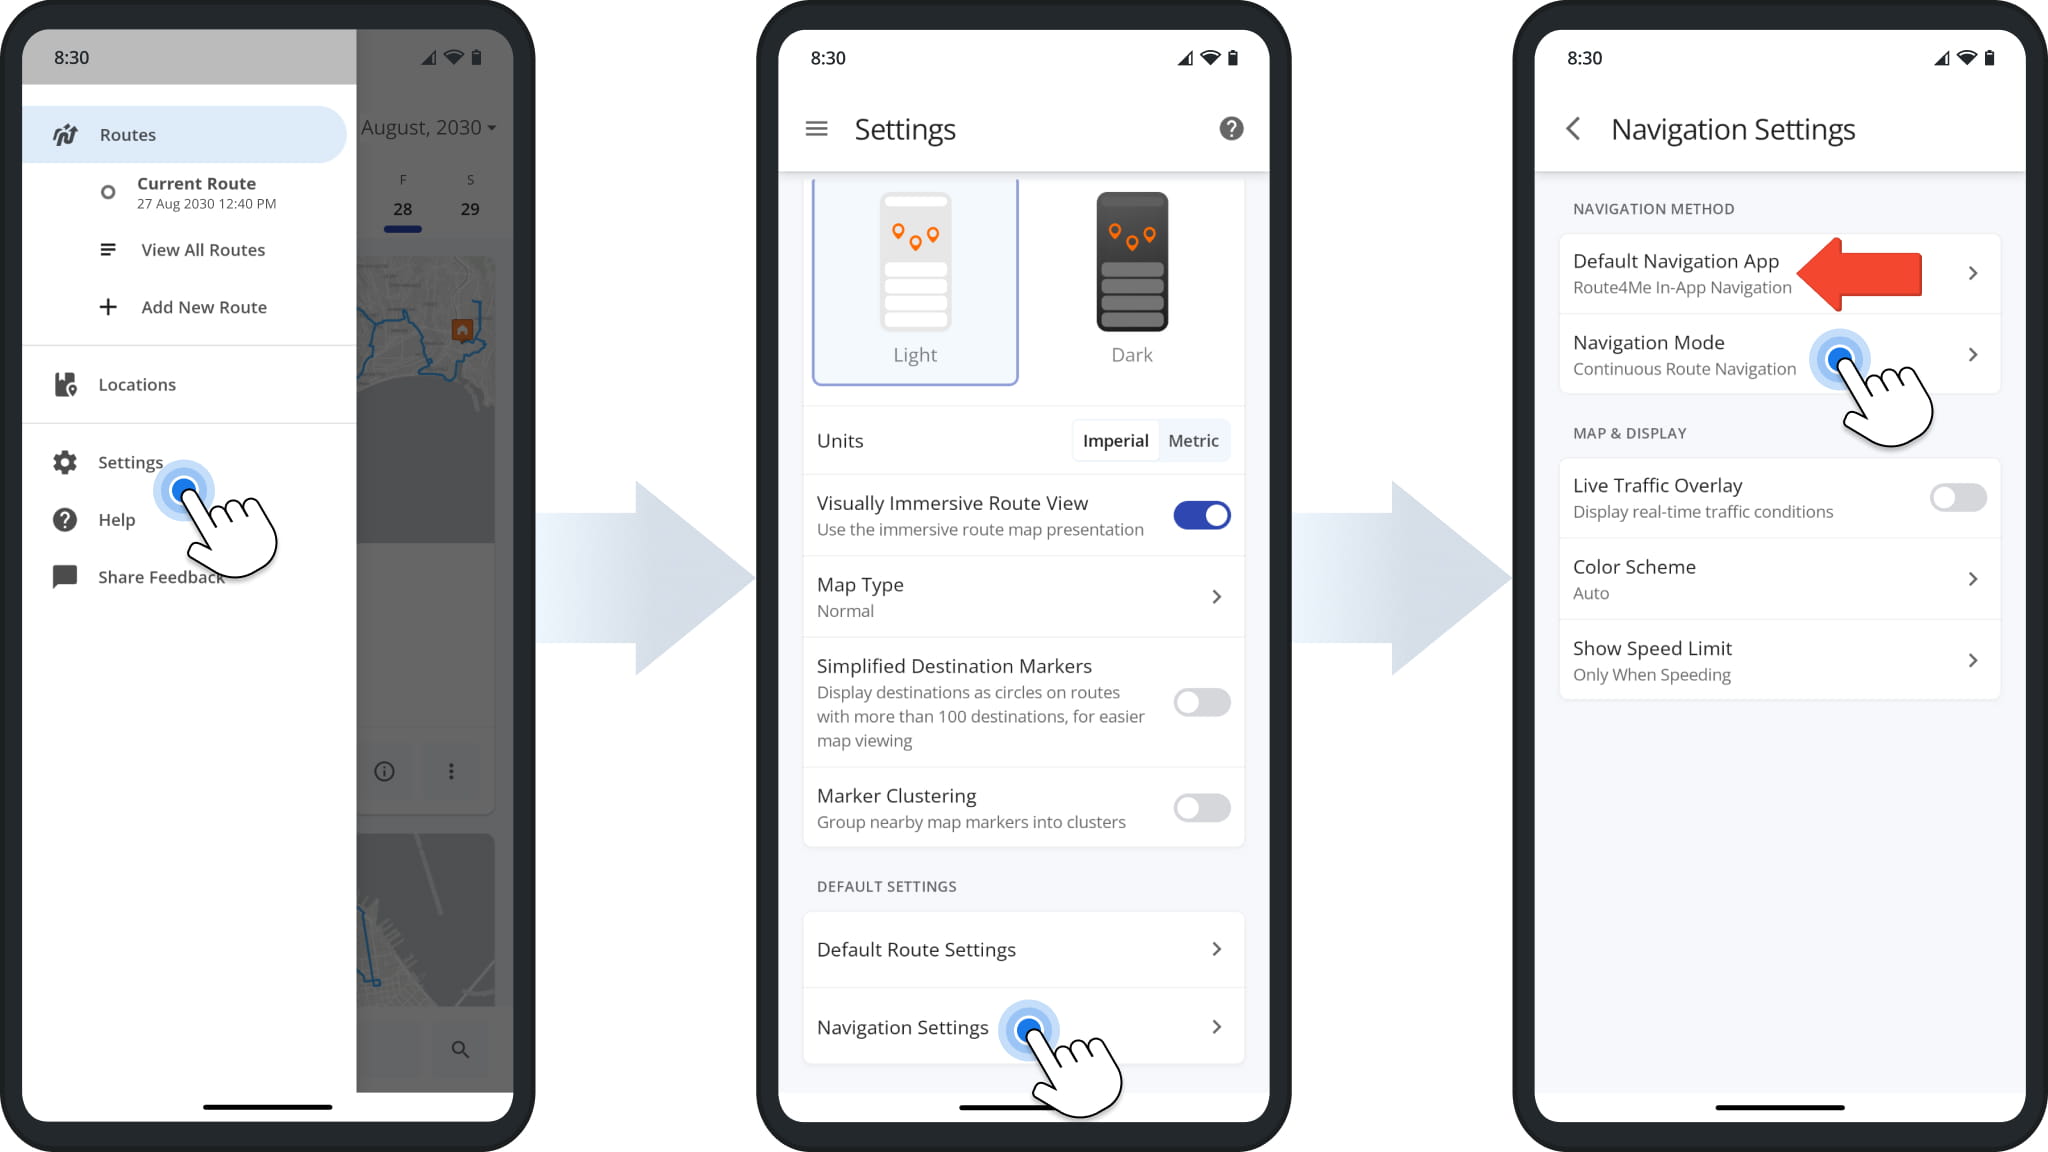
To switch between navigation modes, tap “Settings” in the app menu, then “Navigation Settings“, and select “Navigation Mode” to make your choice.
Continuous Route Navigation is only available through Route4Me’s in-app navigation. Third-party apps support single-stop navigation only.
To use Continuous Route Navigation, set your “Default Navigation App” to “Route4Me In-App Navigation“. If you’re currently navigating to a destination, end navigation first before switching modes.
Complete Routes In Single Destination Navigation Mode
With Single Destination Navigation, follow the usual process of starting, navigating, and completing routes with the Route4Me App. Once you arrive at a destination, tap the “Arrived” button to confirm your arrival.
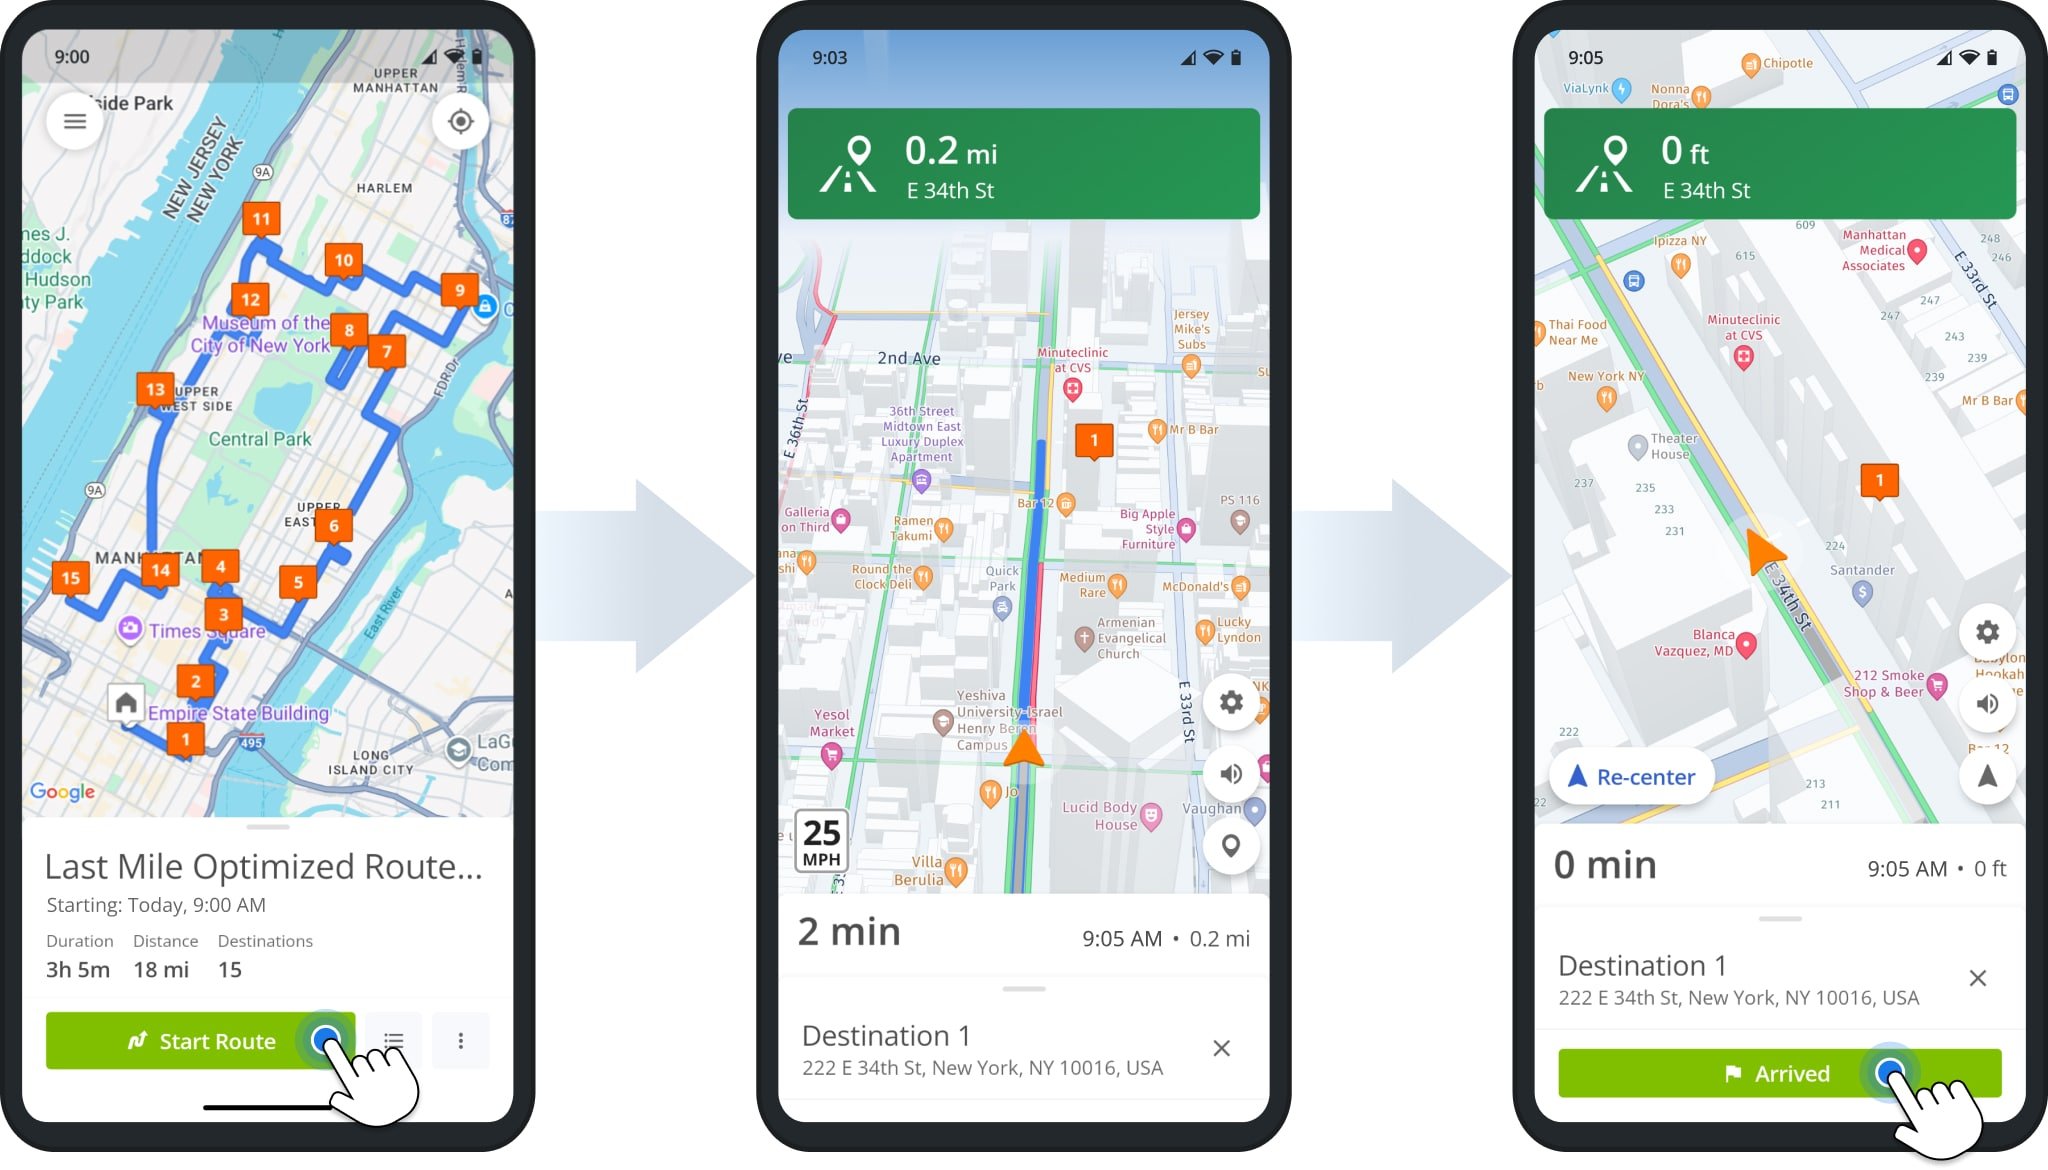
Tap “Set Status” and select “Arrived” to close navigation and open the destination in the app.
After completing any optional proof of visit or delivery tasks, tap “Mark As Completed“. The app will then automatically open the next destination and start navigation so you can continue the route.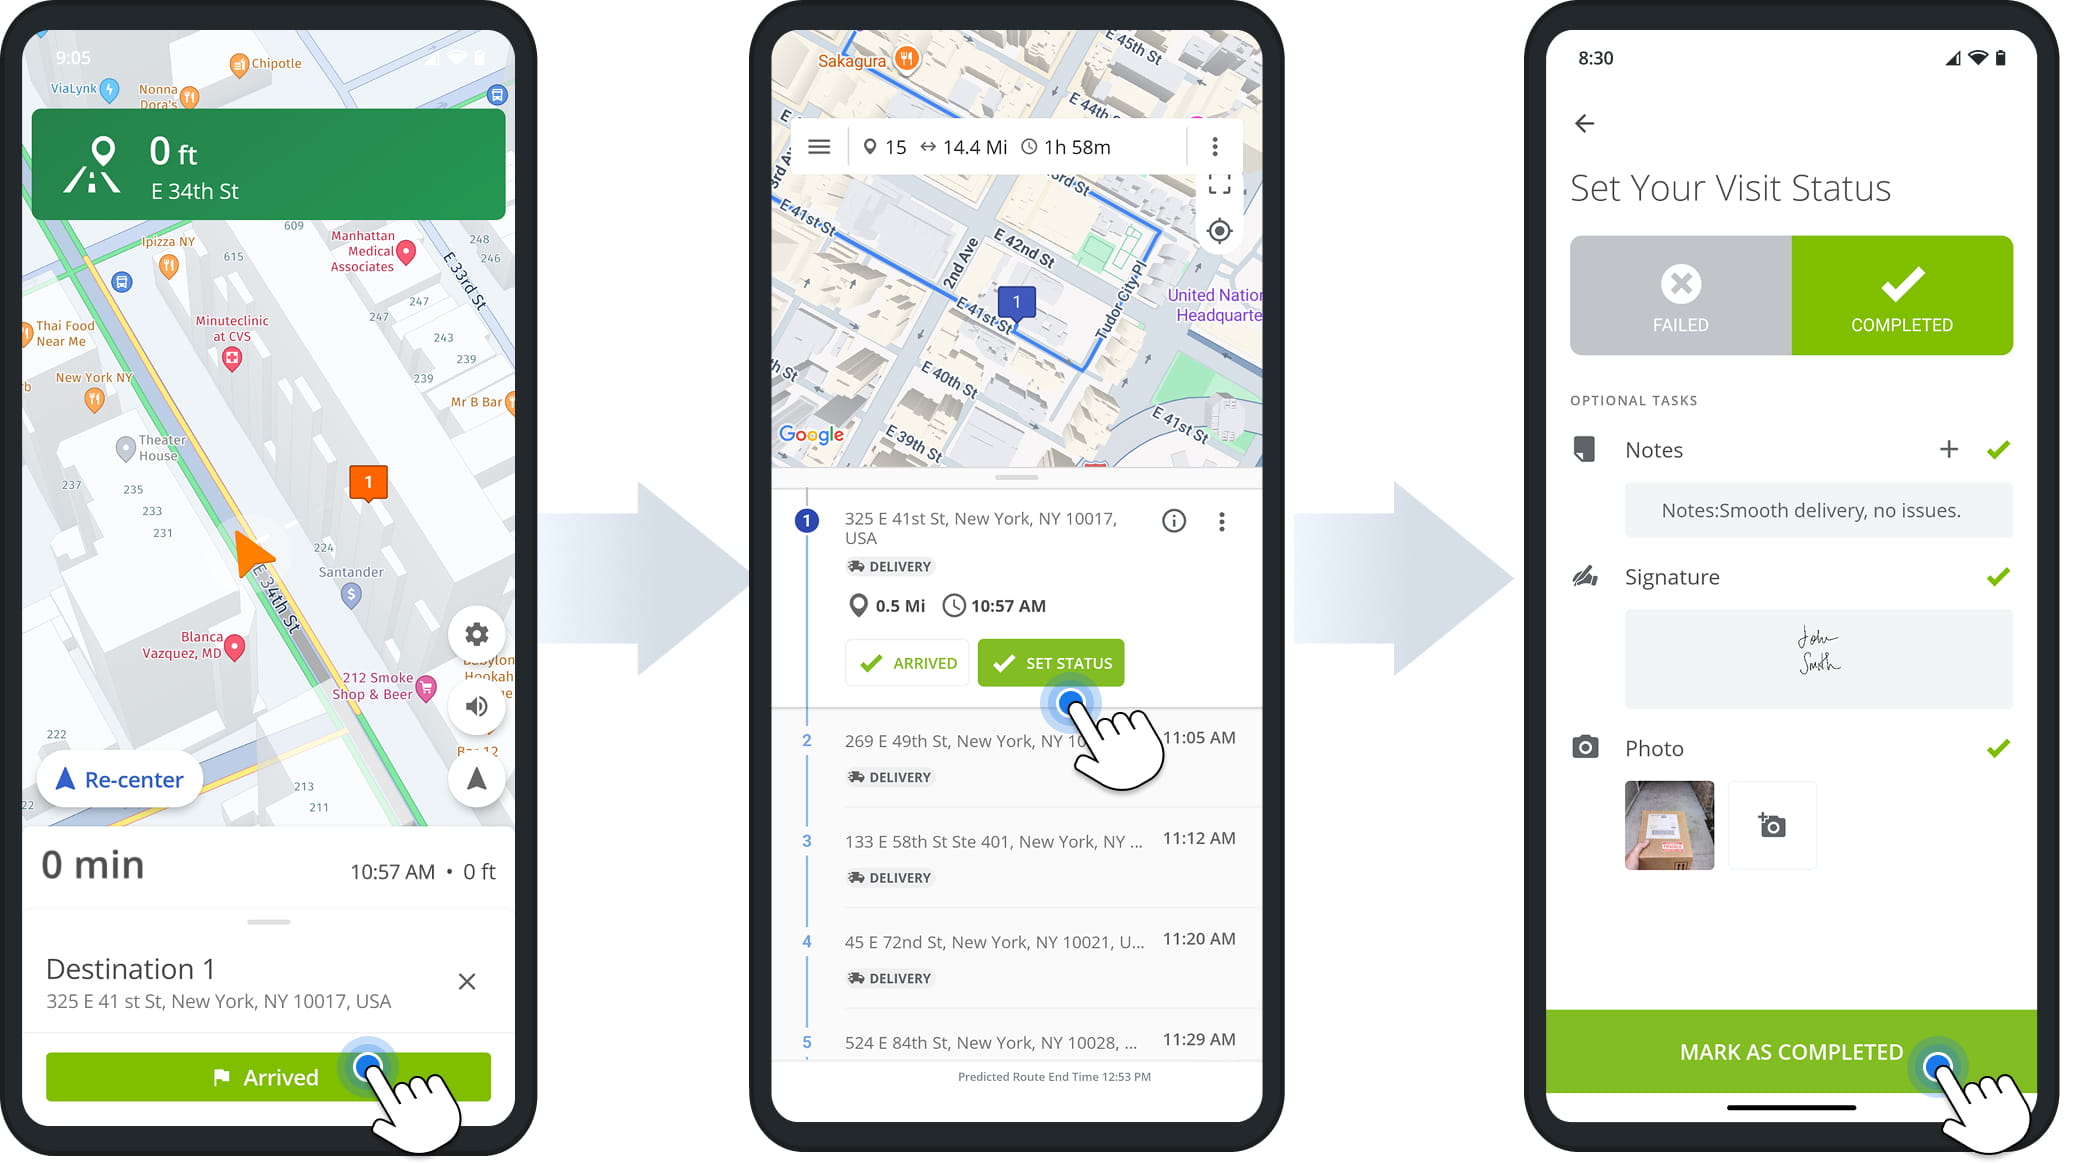
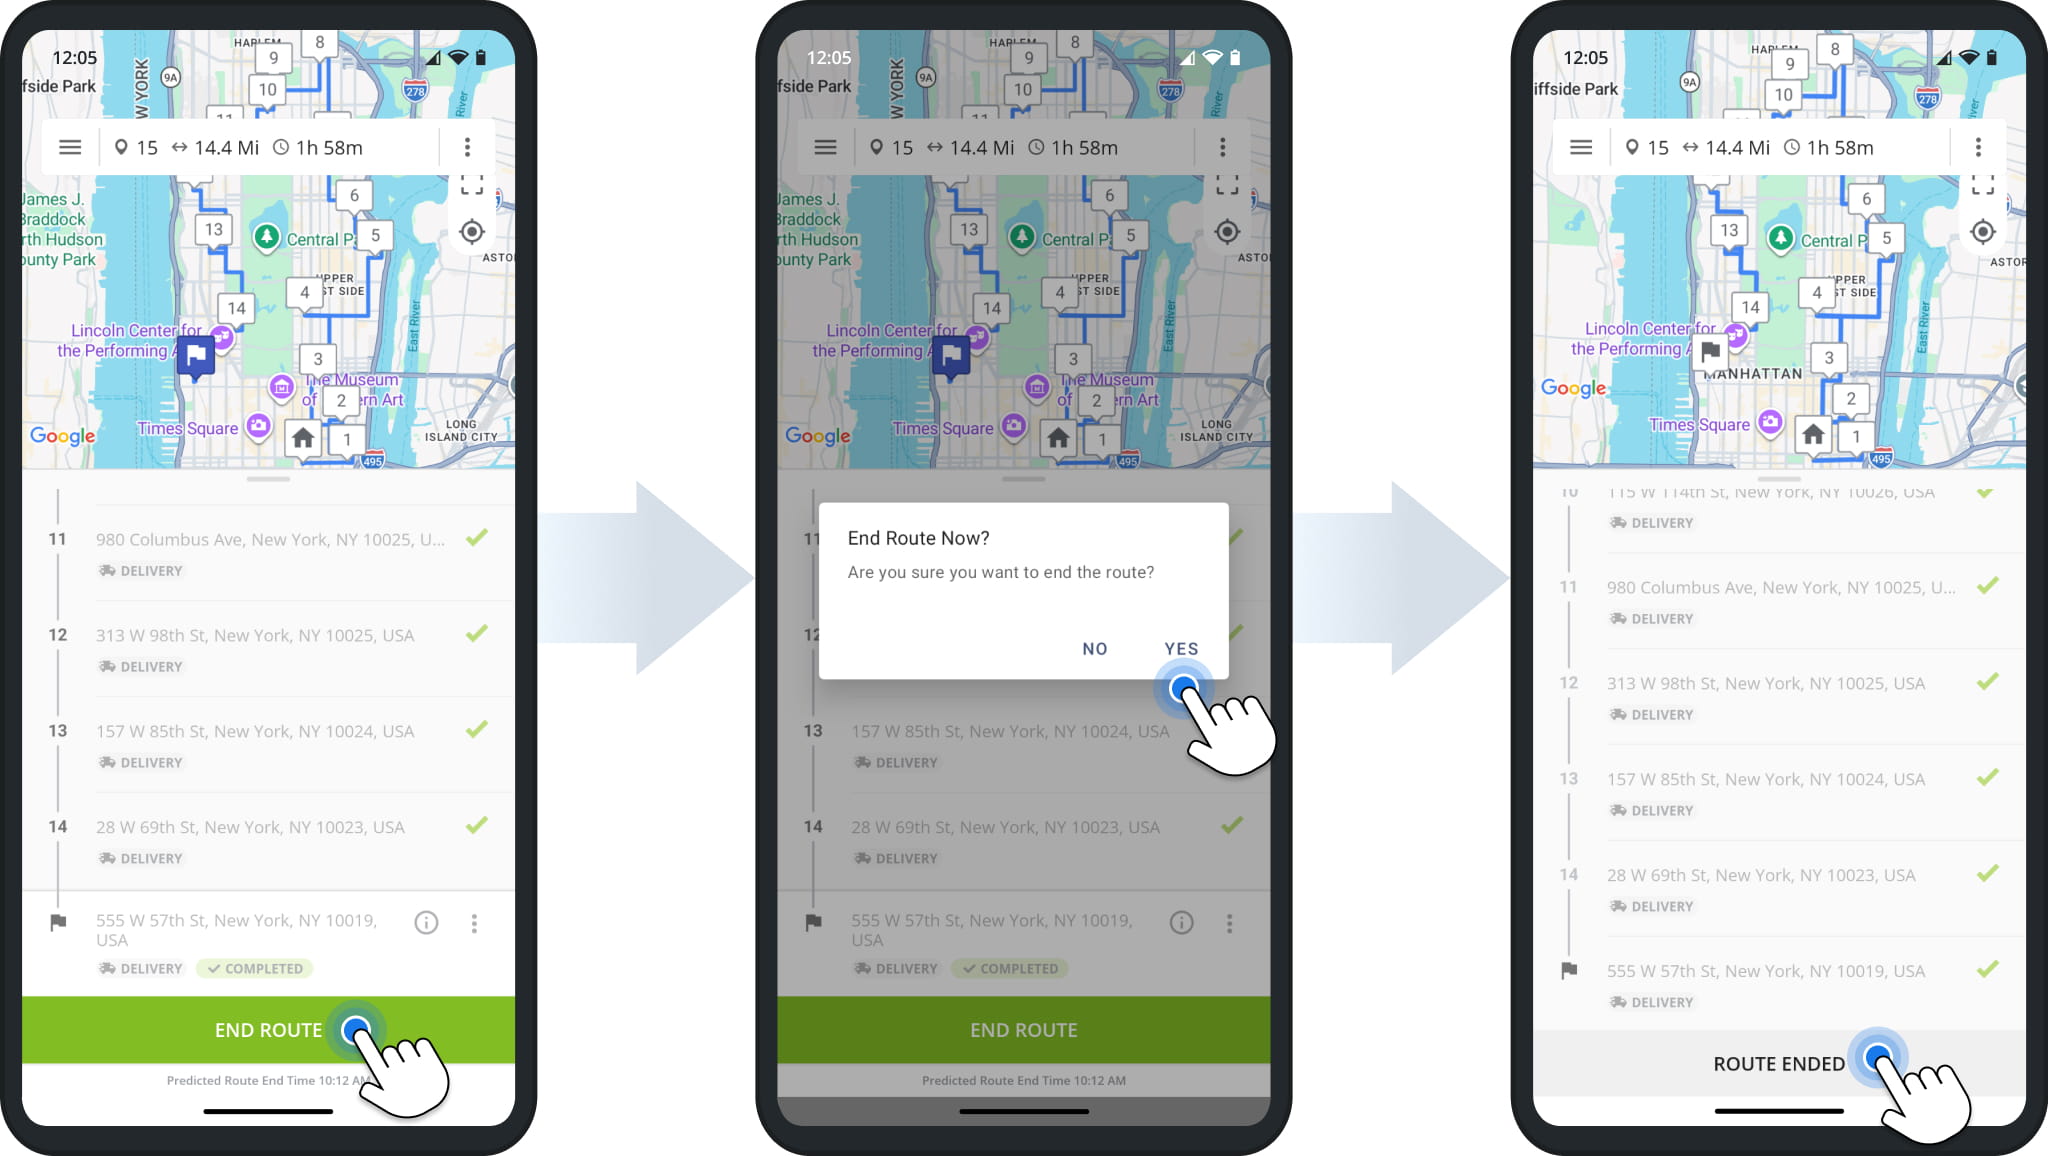
Once you’ve visited all route destinations, tap “End Route“, then tap “Yes” to confirm you’re ready to finish. After the route ends, tap “Route Ended” to reopen it if you need to check or confirm details.
Complete Routes In Continuous Route Navigation Mode
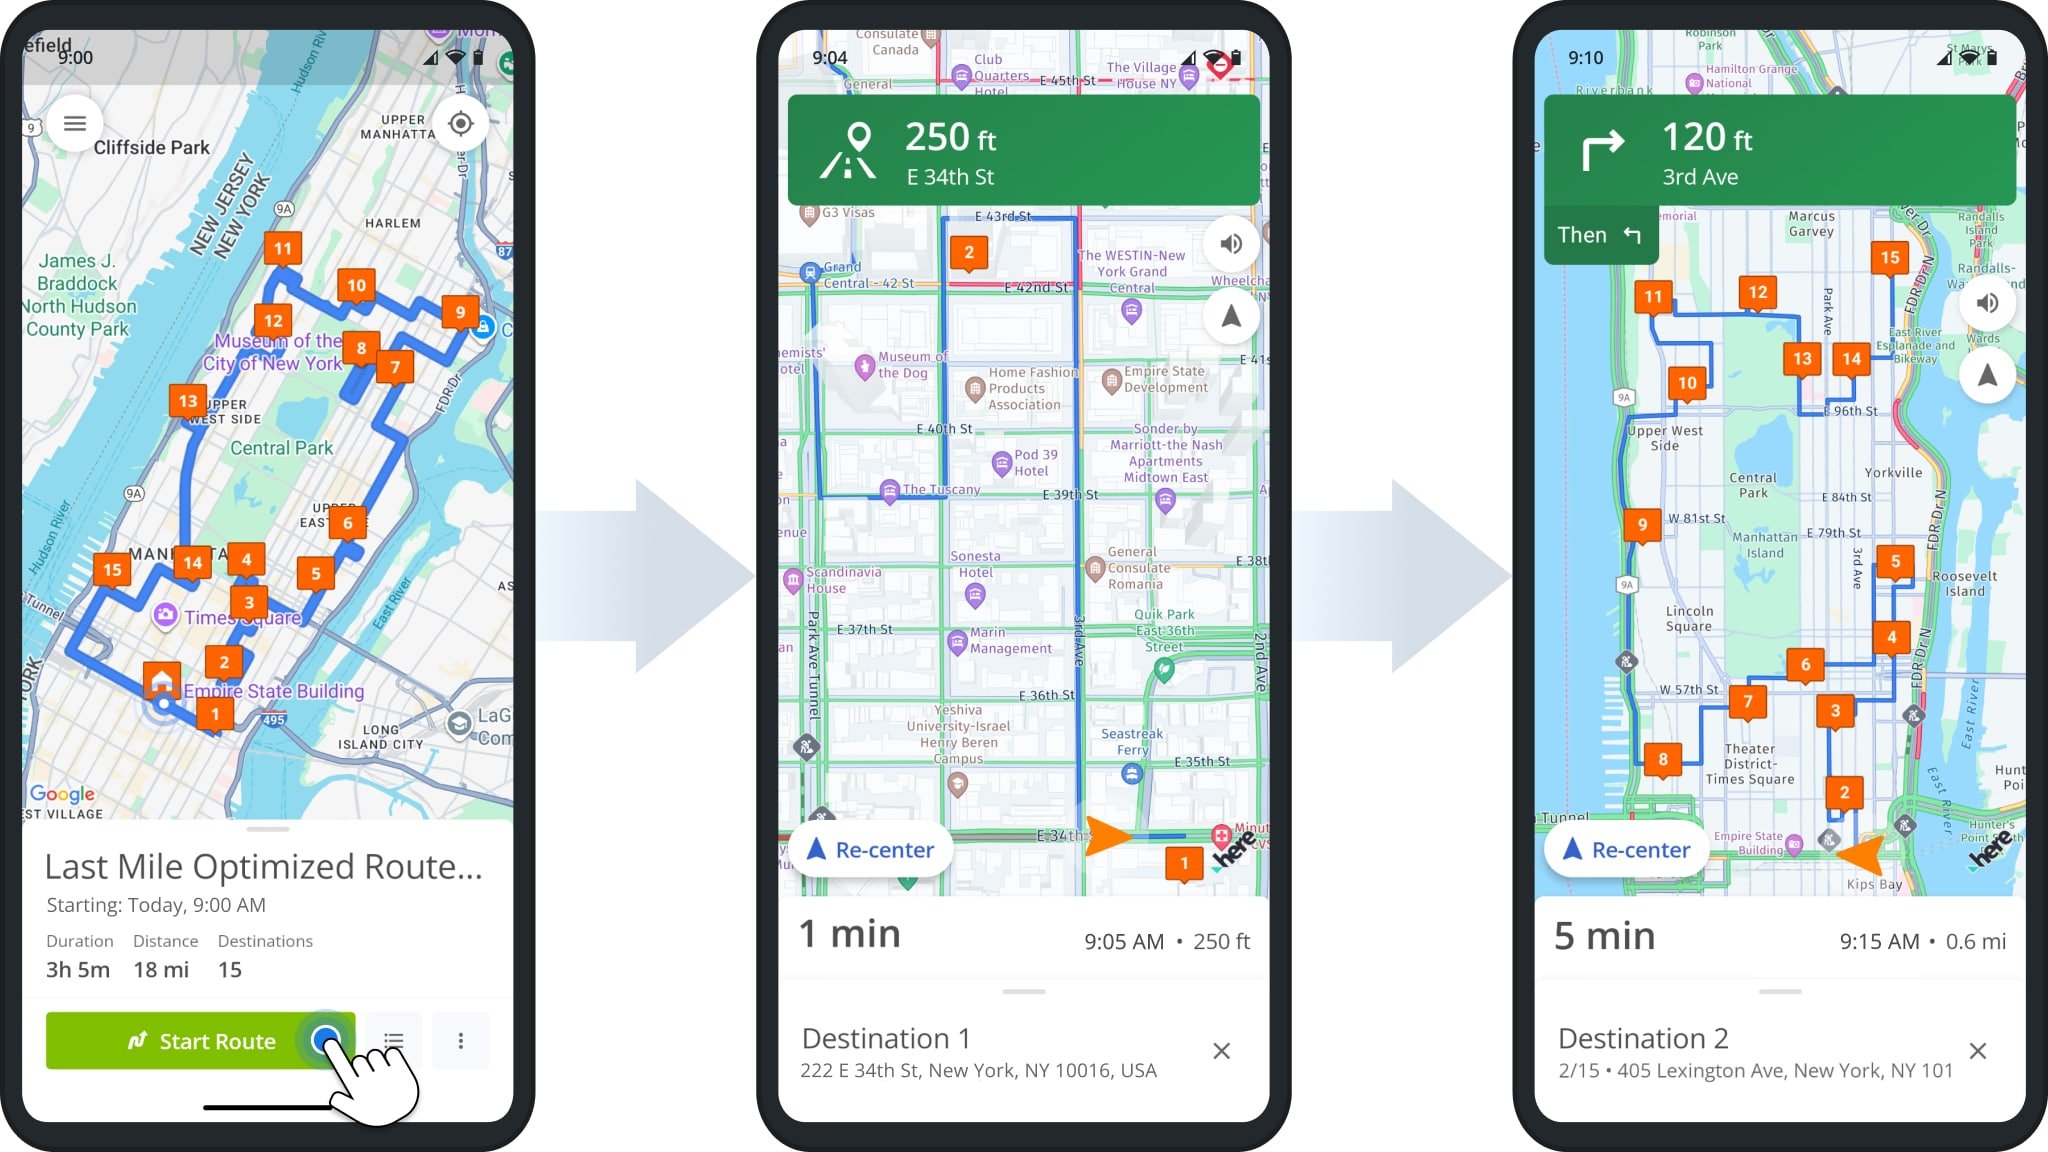
In Continuous Navigation mode, you can start routes and visit destinations as normal.
After you arrive at one, the app automatically starts navigation to the next destination on the route, so you can complete routes without exiting Route4Me’s in-app navigation.
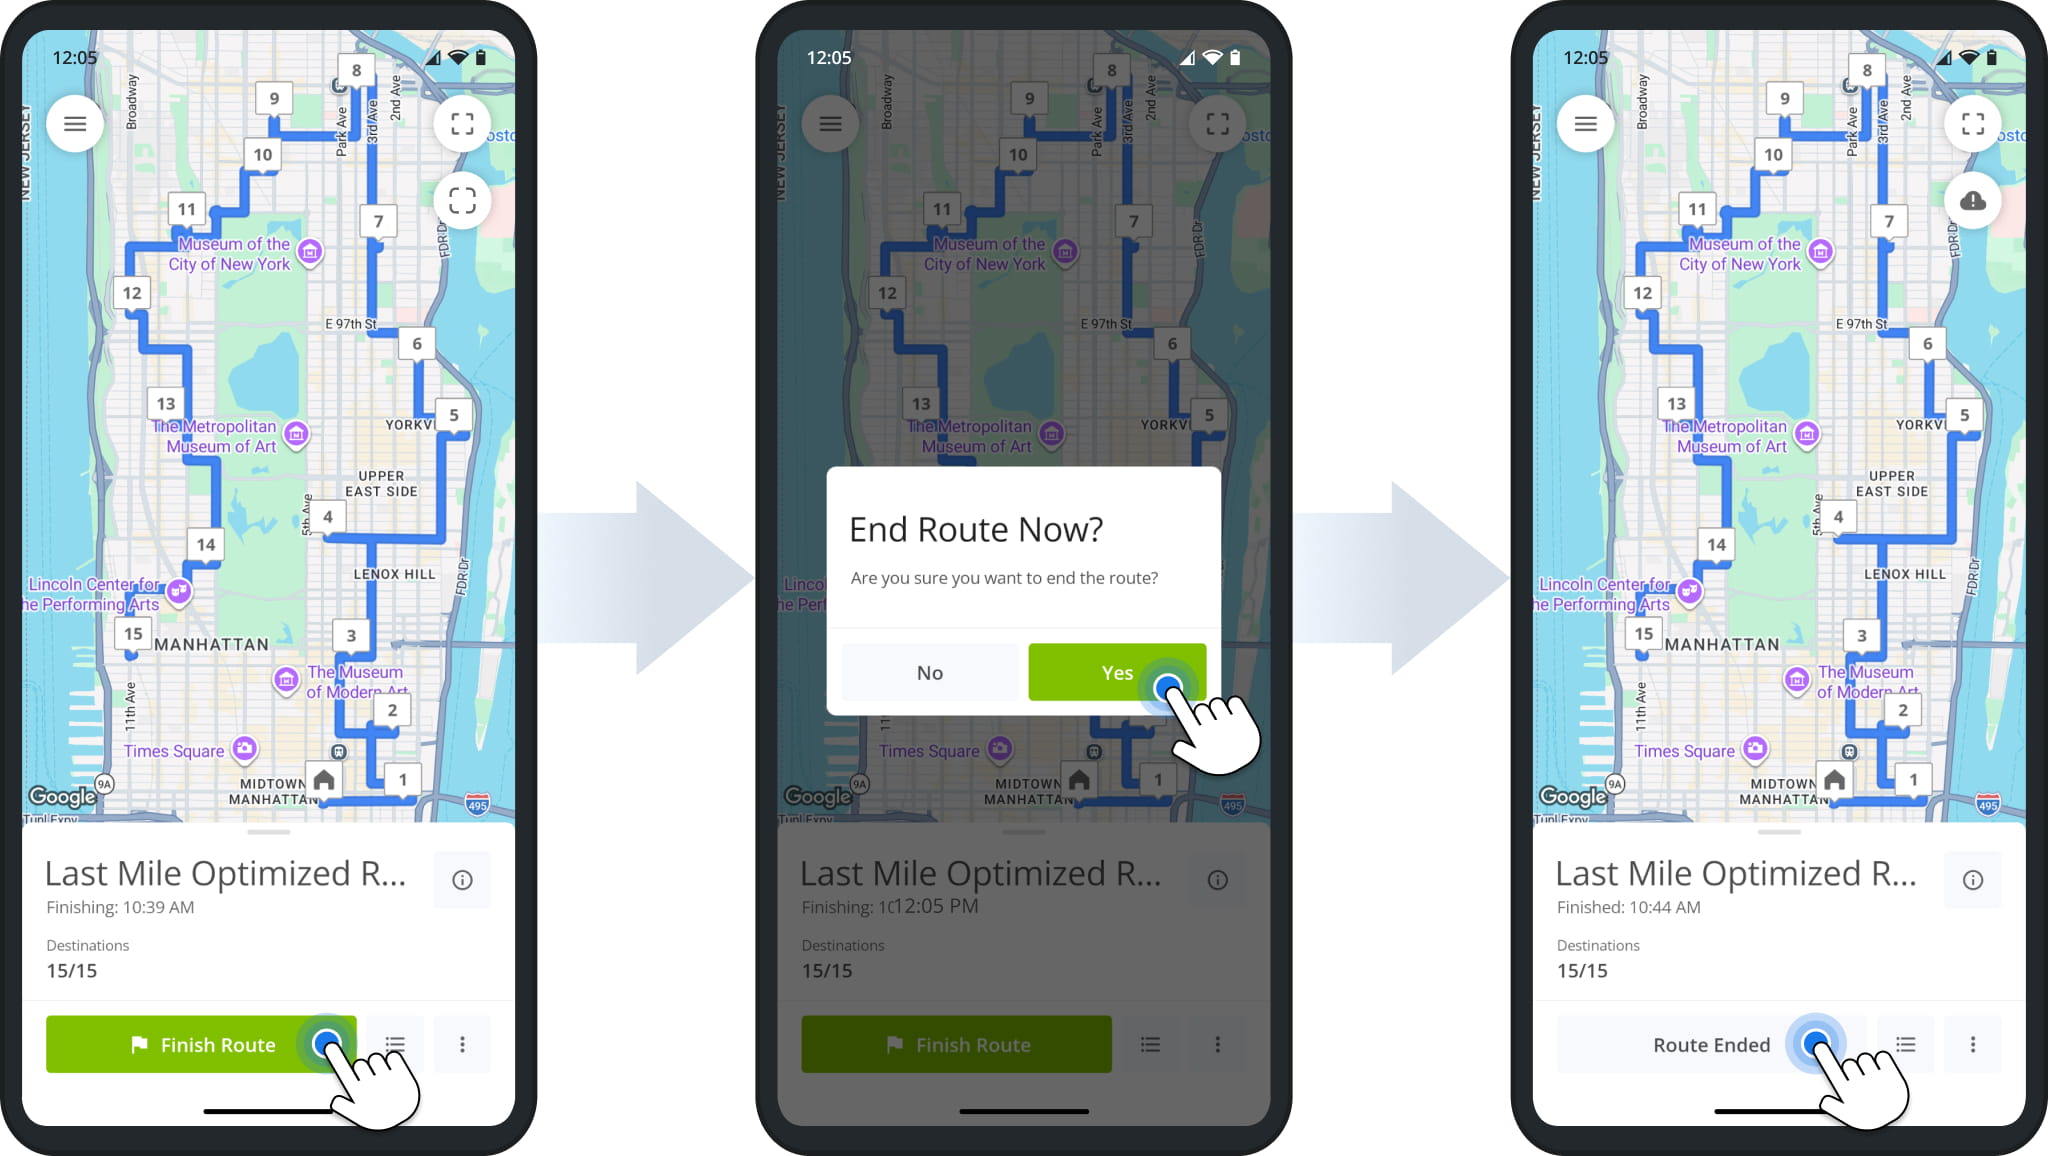
After visiting all destinations, tap “Finish Route“, then tap “Yes” to confirm you’re ready to end the route. After the route ends, tap “Route Ended” to reopen it if you need to check or confirm details.
Continuous Route Navigation Proof Of Visit Or Delivery
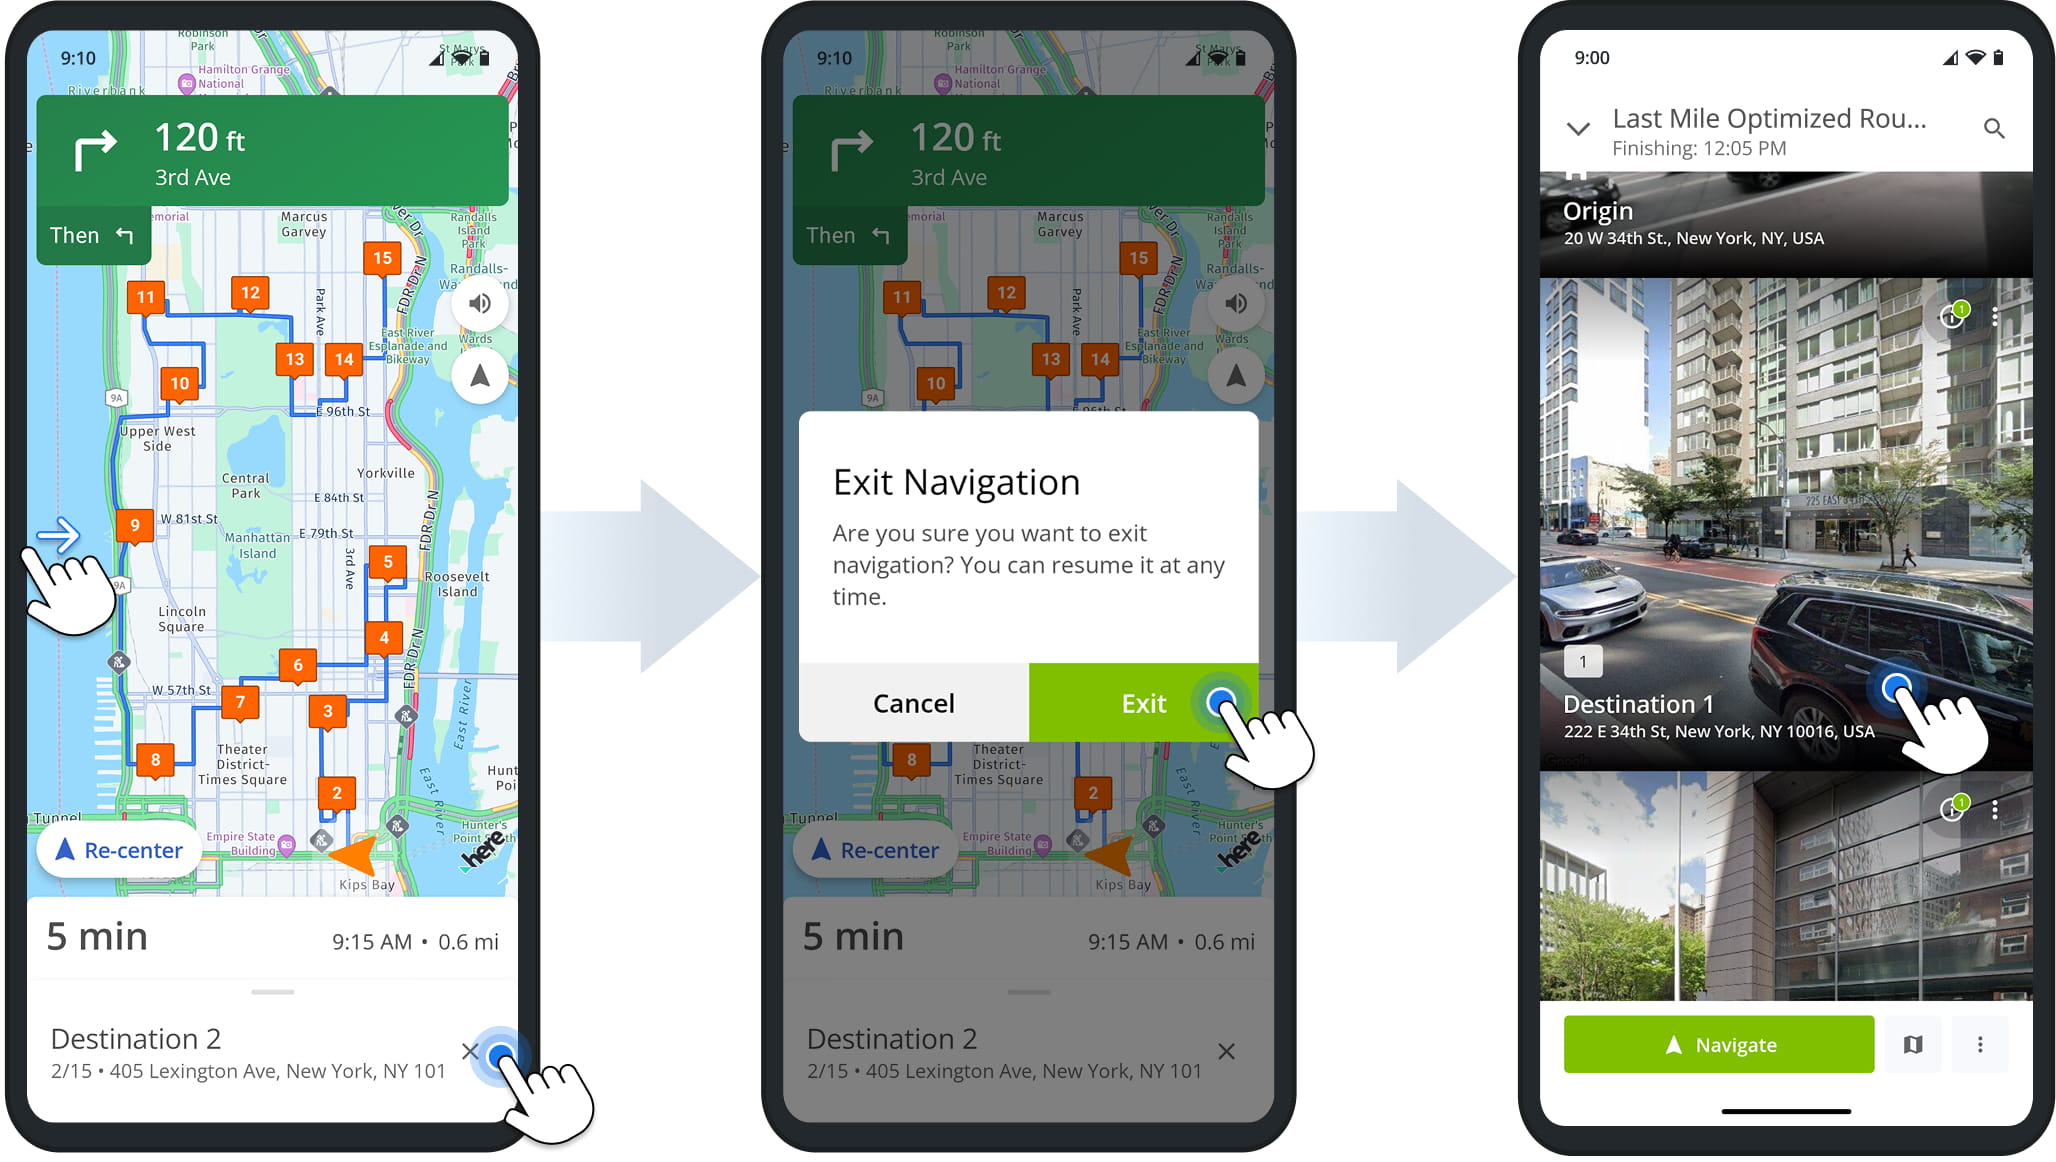
To collect proof of delivery or visit in Continuous Navigation mode, first exit navigation, swipe right from the edge of the screen, or tap and hold the “X” icon in the bottom-right, then tap “Exit” to confirm.
The app will open the destinations list. Tap the destination you want to complete POD tasks for.
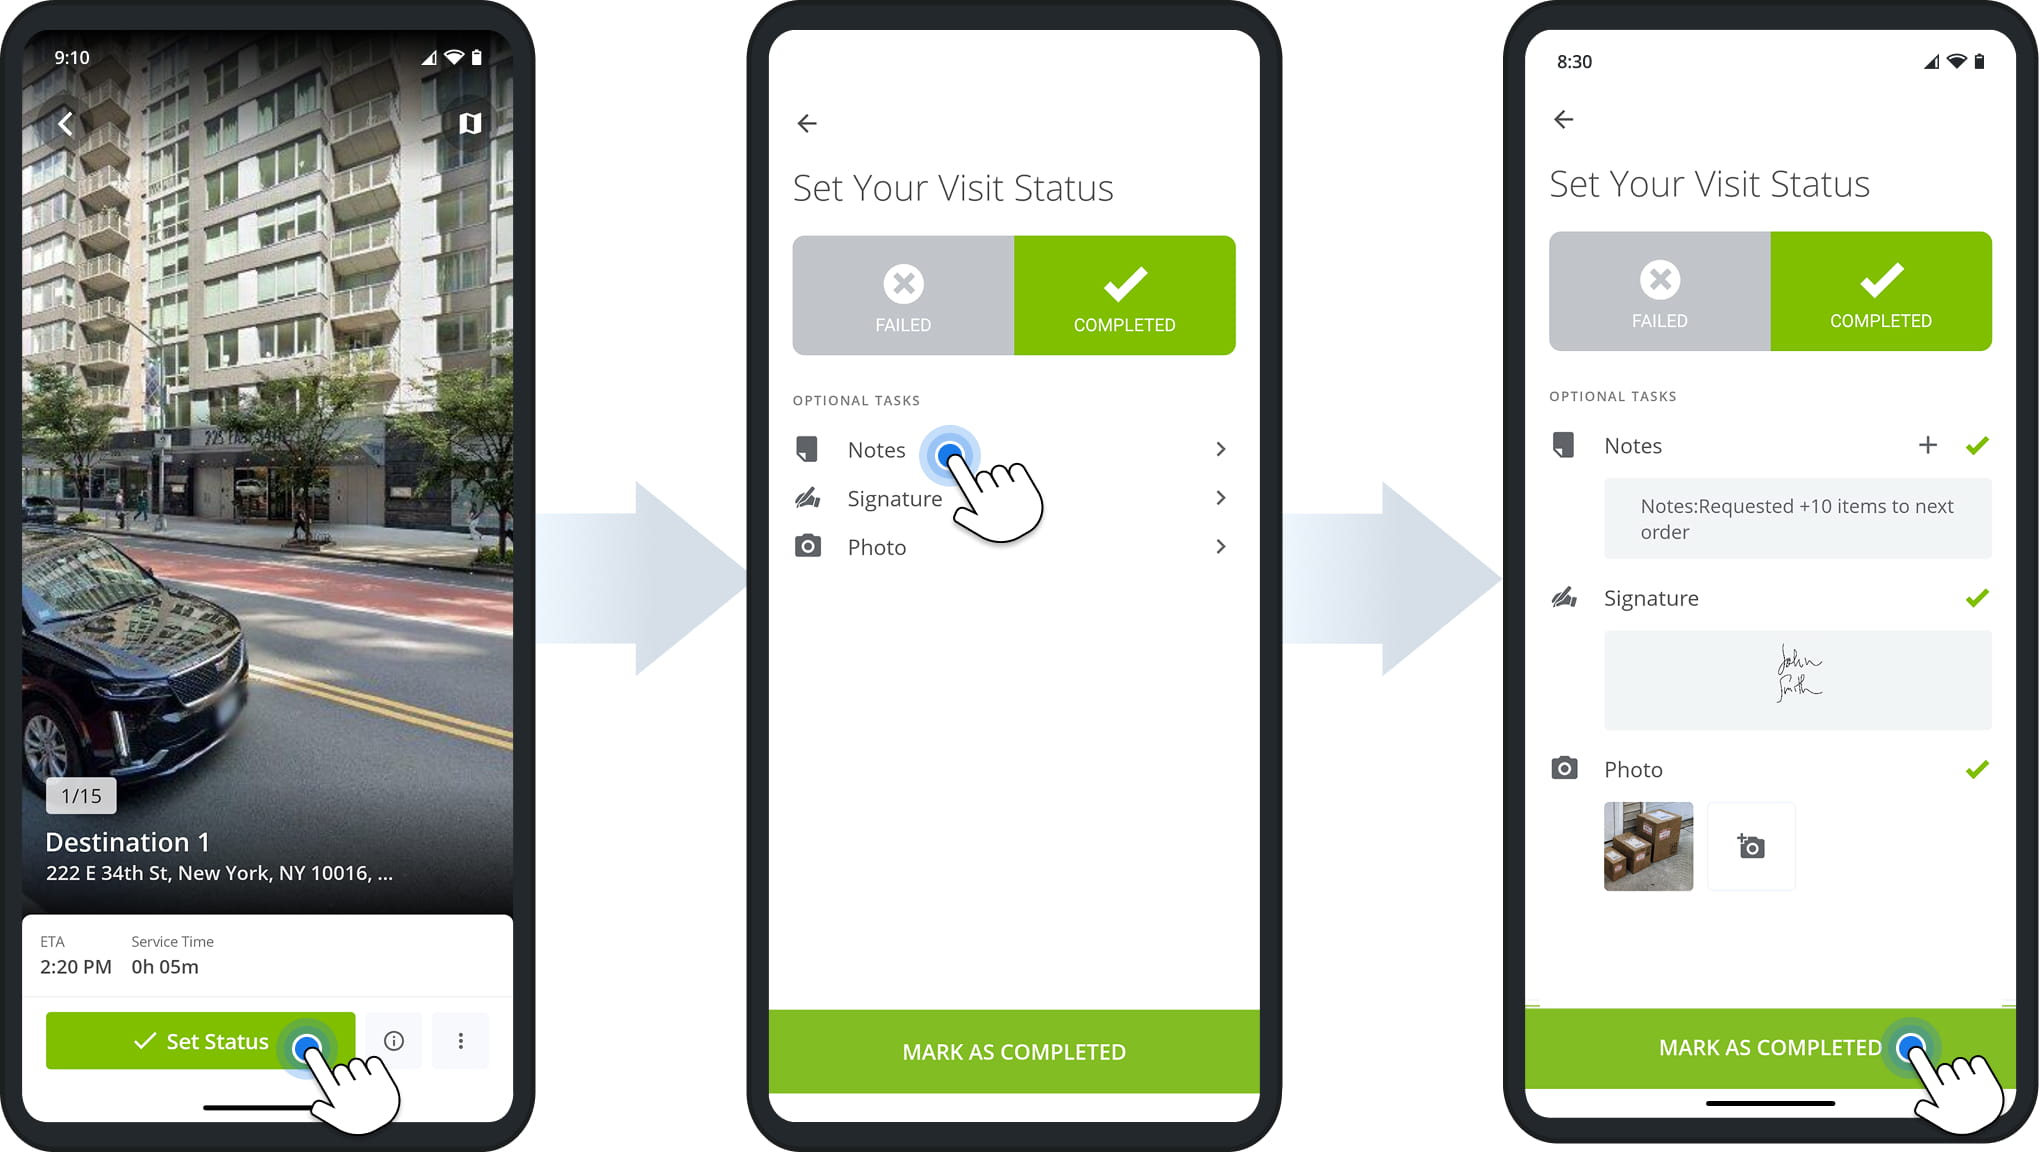
After opening an arrived destination, tap “Set Status” to collect proof of visit or delivery. When finished, tap “Mark As Completed“. The app will automatically open the next destination and start navigation so you can continue the route.
Visit Route4Me's Marketplace to Check out Associated Modules:
- Operations
Custom Data Add-On
- Operations
Advanced Team Management Add-On
About author: Daniel Archer

