
Location Sitemaps – Upload Site Map Images, Location Plans & Layout Guides
Location Sitemaps enable you to upload a map or site plan for any Customer Location on your account. Once uploaded, a Sitemap is available to field team members directly in the Destination Info screen on the Route4Me Mobile App. This gives drivers, service technicians, and other field employees an accurate on-site layout and clear location context before and during their visit. In this guide, you’ll learn how to upload Sitemap files or images and how to see them on the Web Platform and Mobile Driver App.
Table of Contents
Add Sitemaps To New And Existing Customer Locations
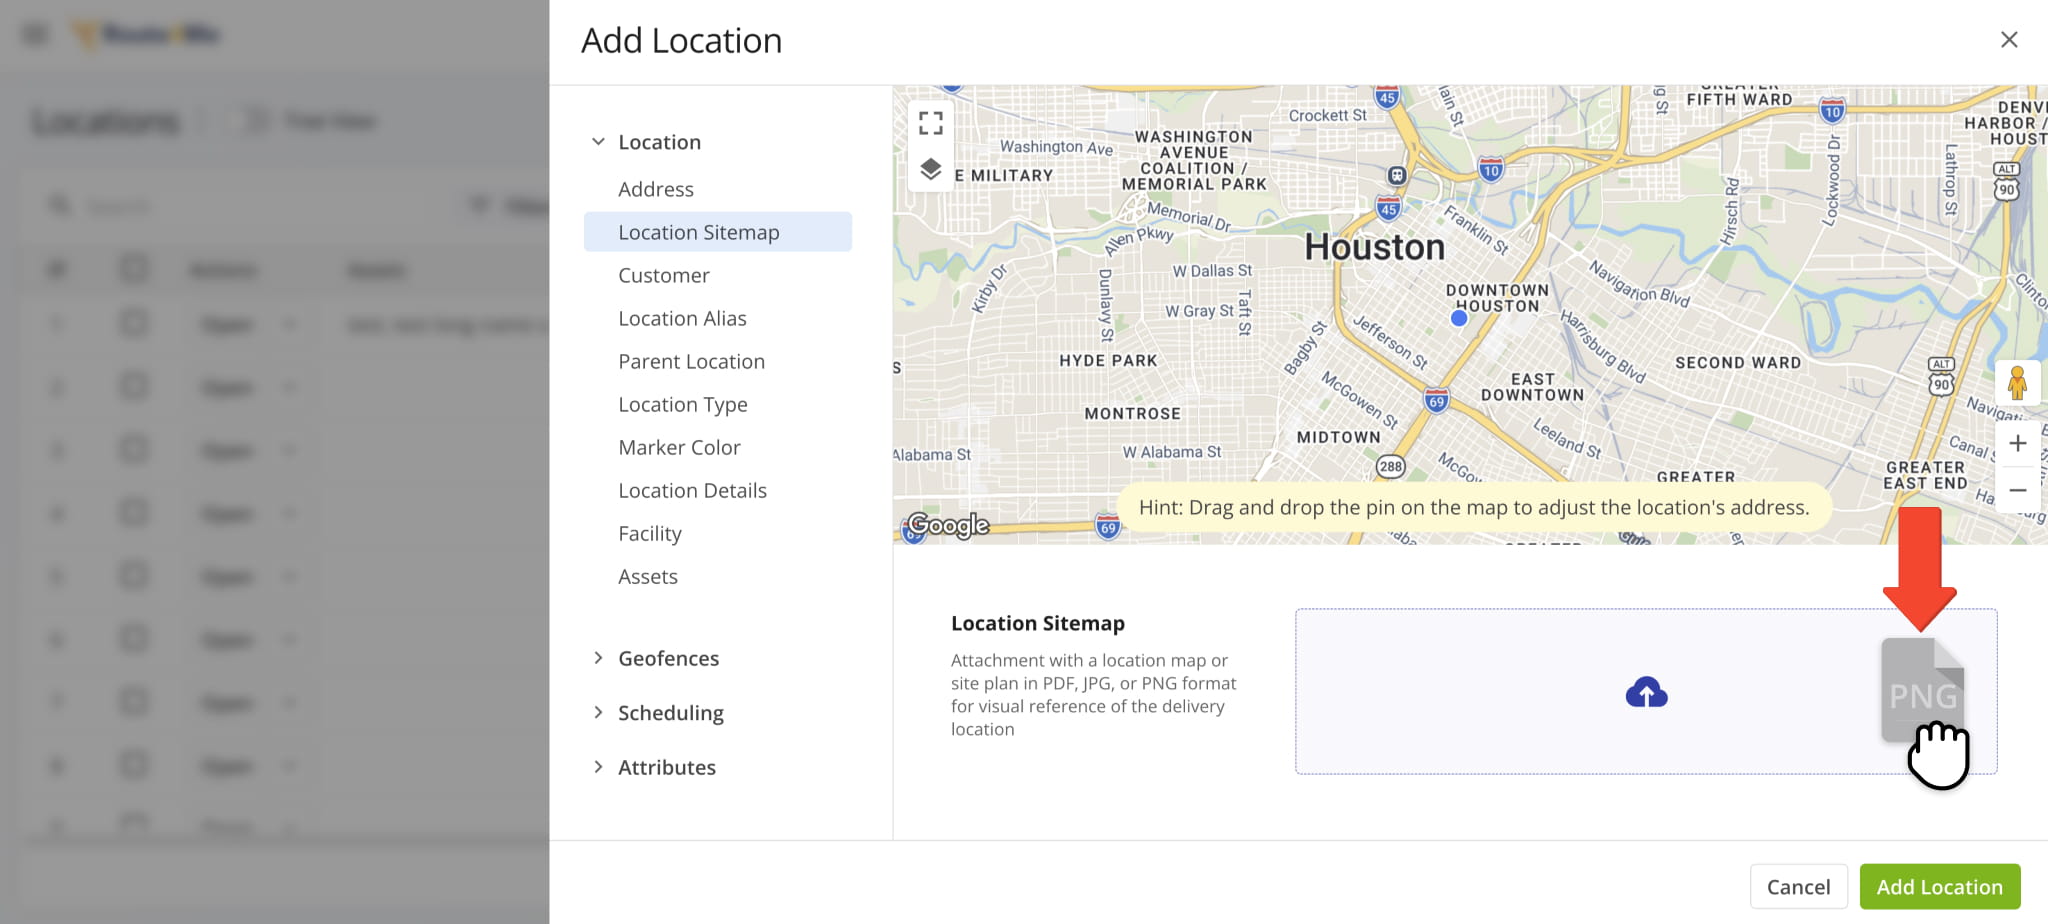
You can upload Sitemap files when adding and editing Customer Locations. To do so, go to the “Location Sitemap” section in the Location Settings panel. Then, simply drag and drop a PDF, JPG, or PNG file in the upload field.
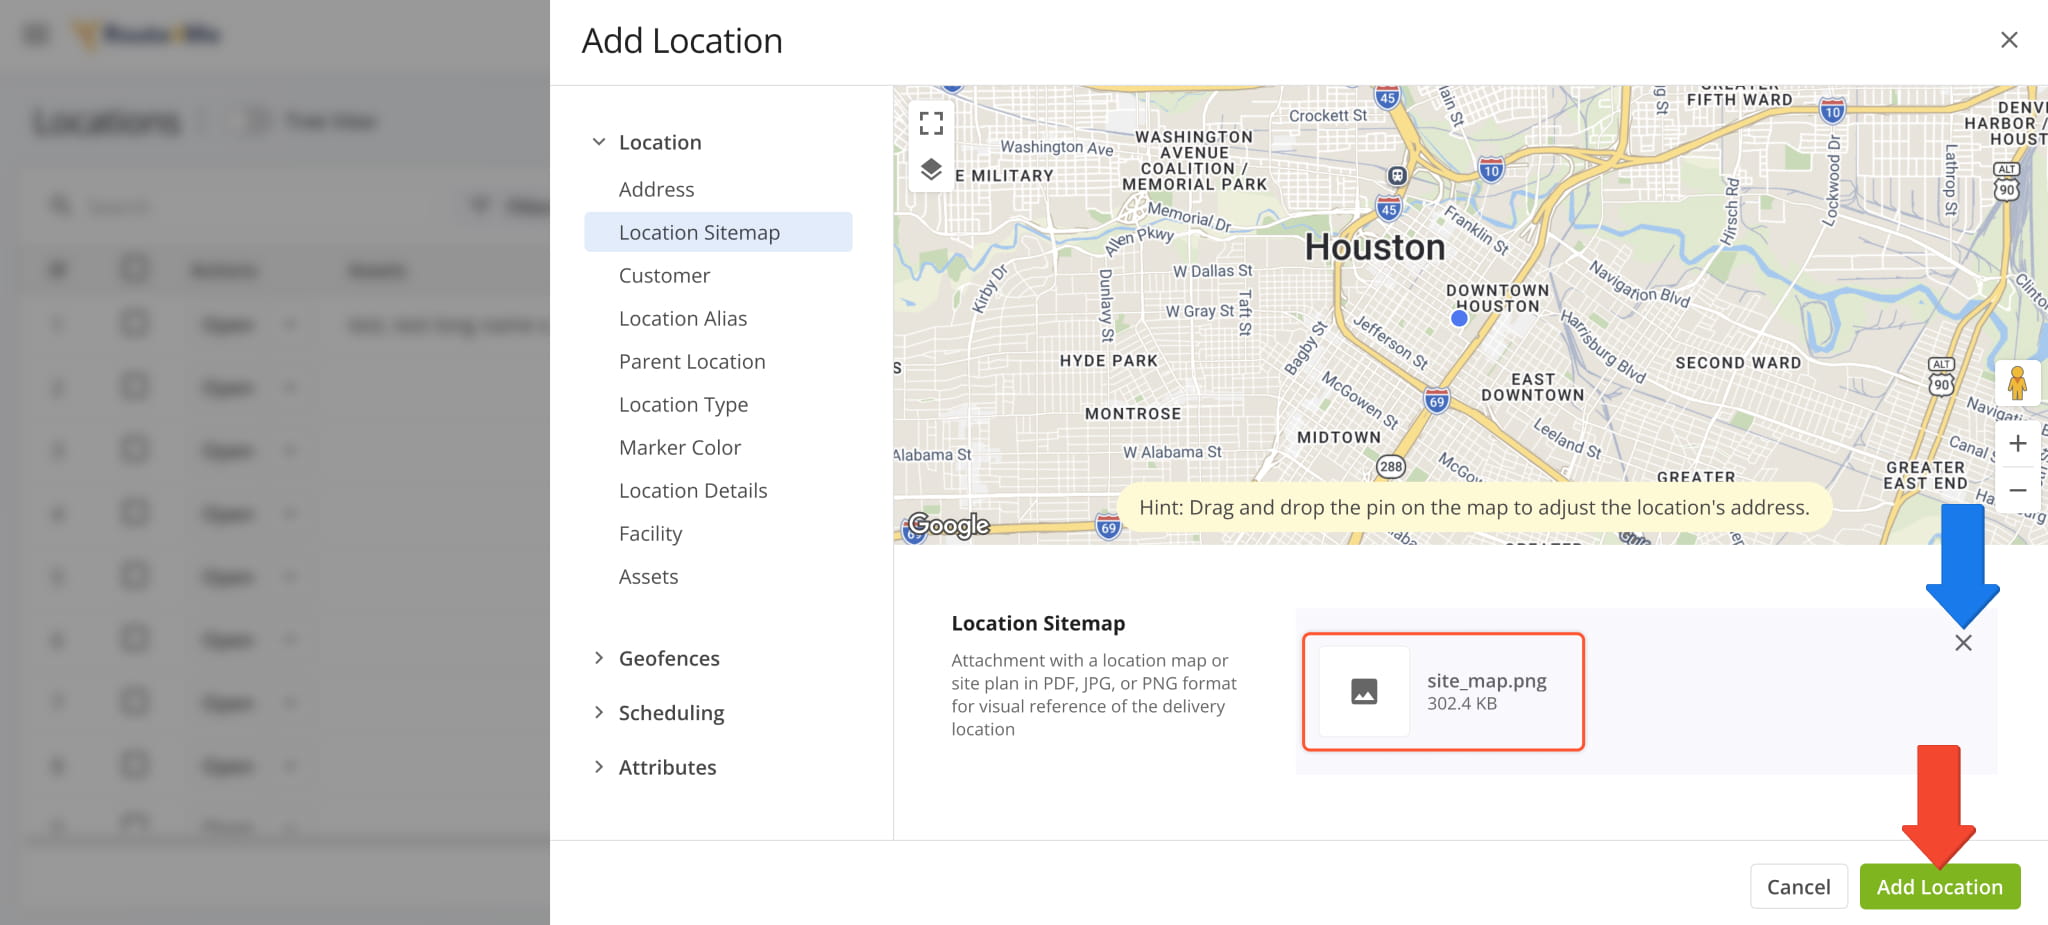
The field will show your uploaded file. If you want to remove or replace it, click the X Button to remove the file. To save your settings and associate the Sitemap with the Location, click “Add Location” when creating or “Save” when editing a Location.
See Location Sitemaps In Planned Routes On The Web And Mobile App
When you plan routes with Locations that have Sitemaps, the sitemap files and images will be associated with the corresponding route destinations. You can preview Sitemaps in the Route Editor by clicking on a Destination to open its Destination Info. Then, in the “Address” section, you’ll find the “Location Sitemap” field with a “Preview” link for the respective Location Sitemap.
You can also find the Sitemap’s unique ID by clicking a Destination on the map. Sitemap images are automatically available to assigned Users in the “Site Map” section of the Mobile App’s Destination Info screen.
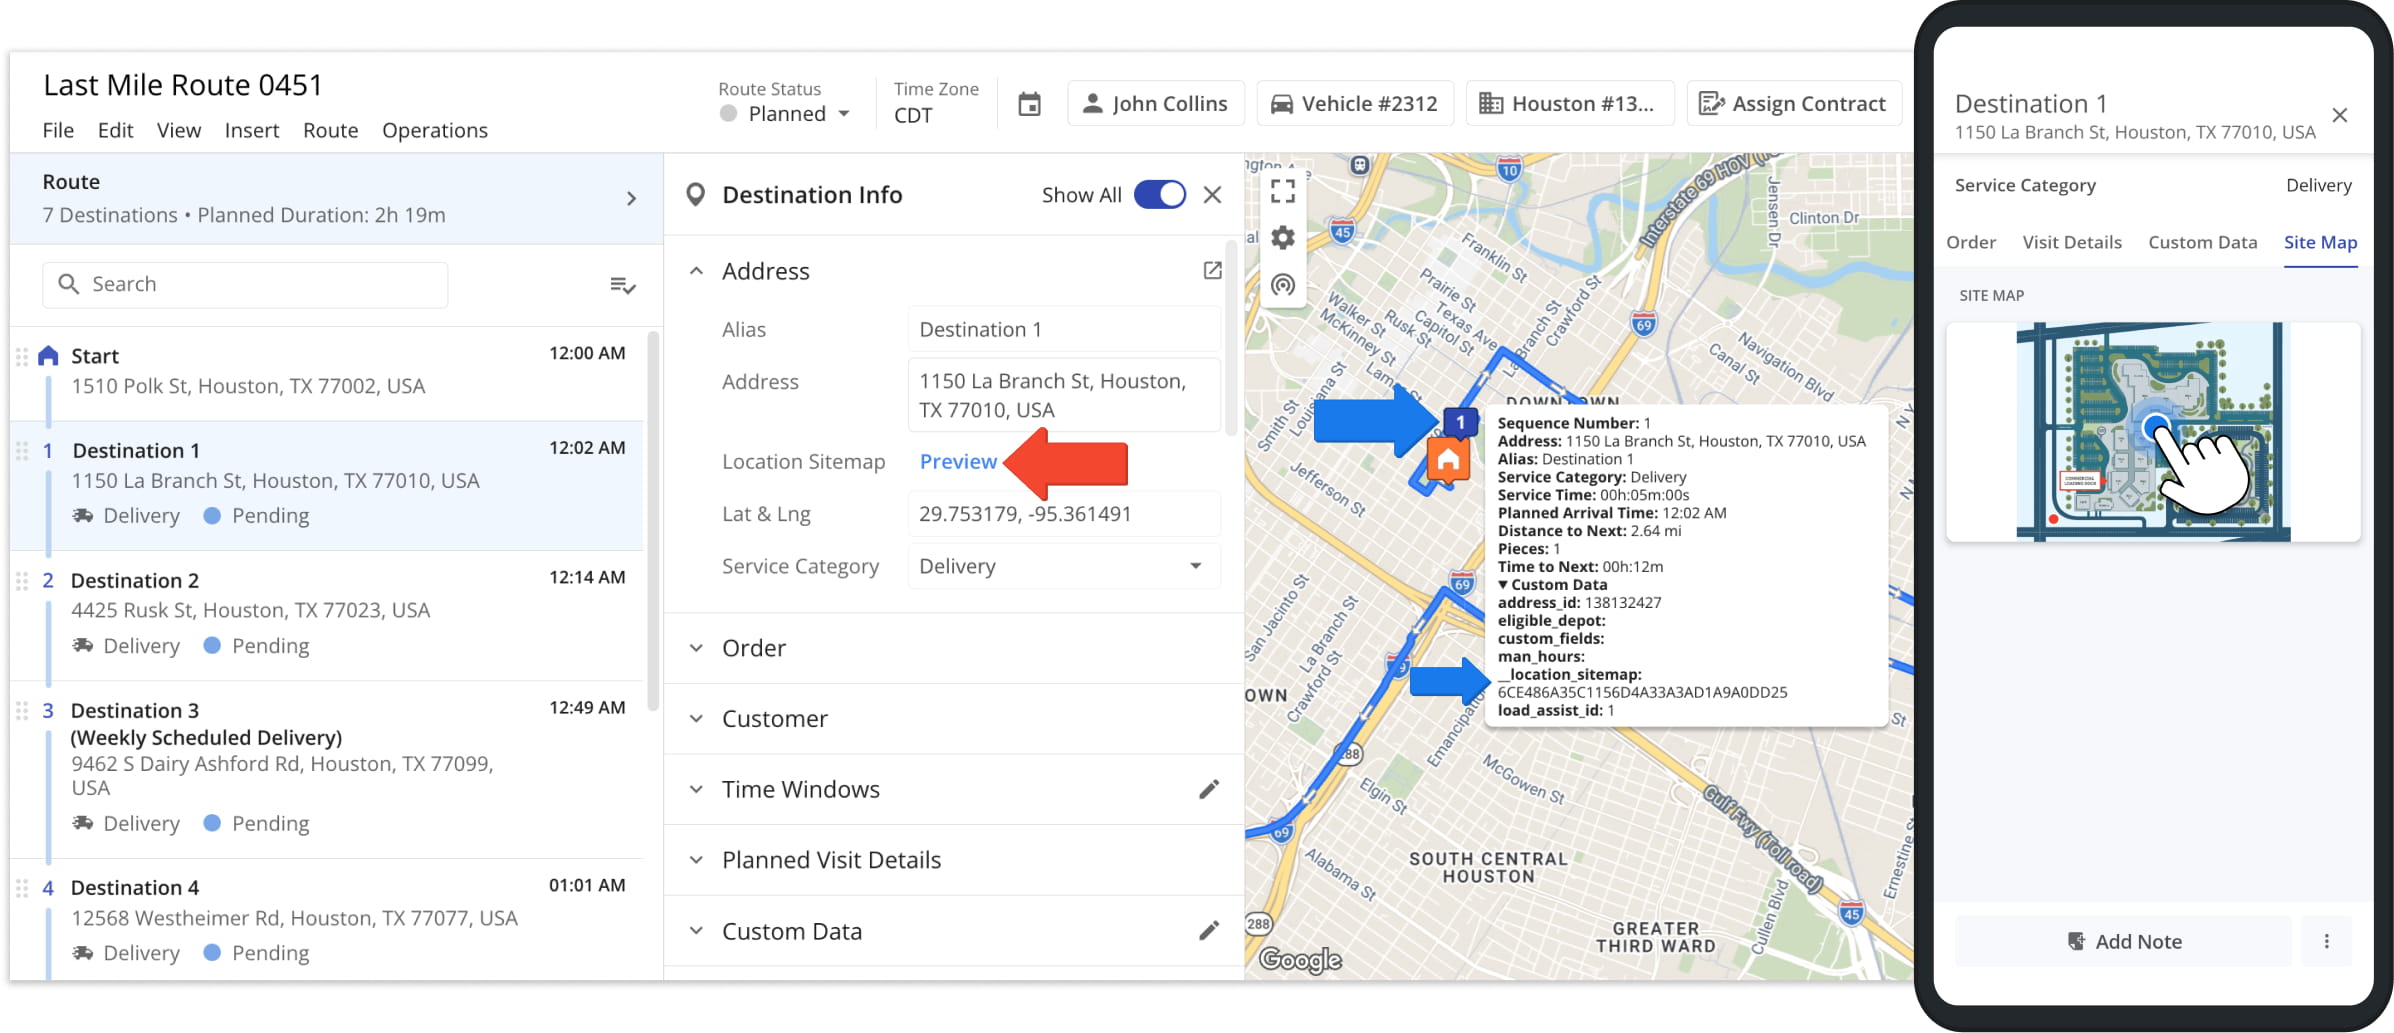
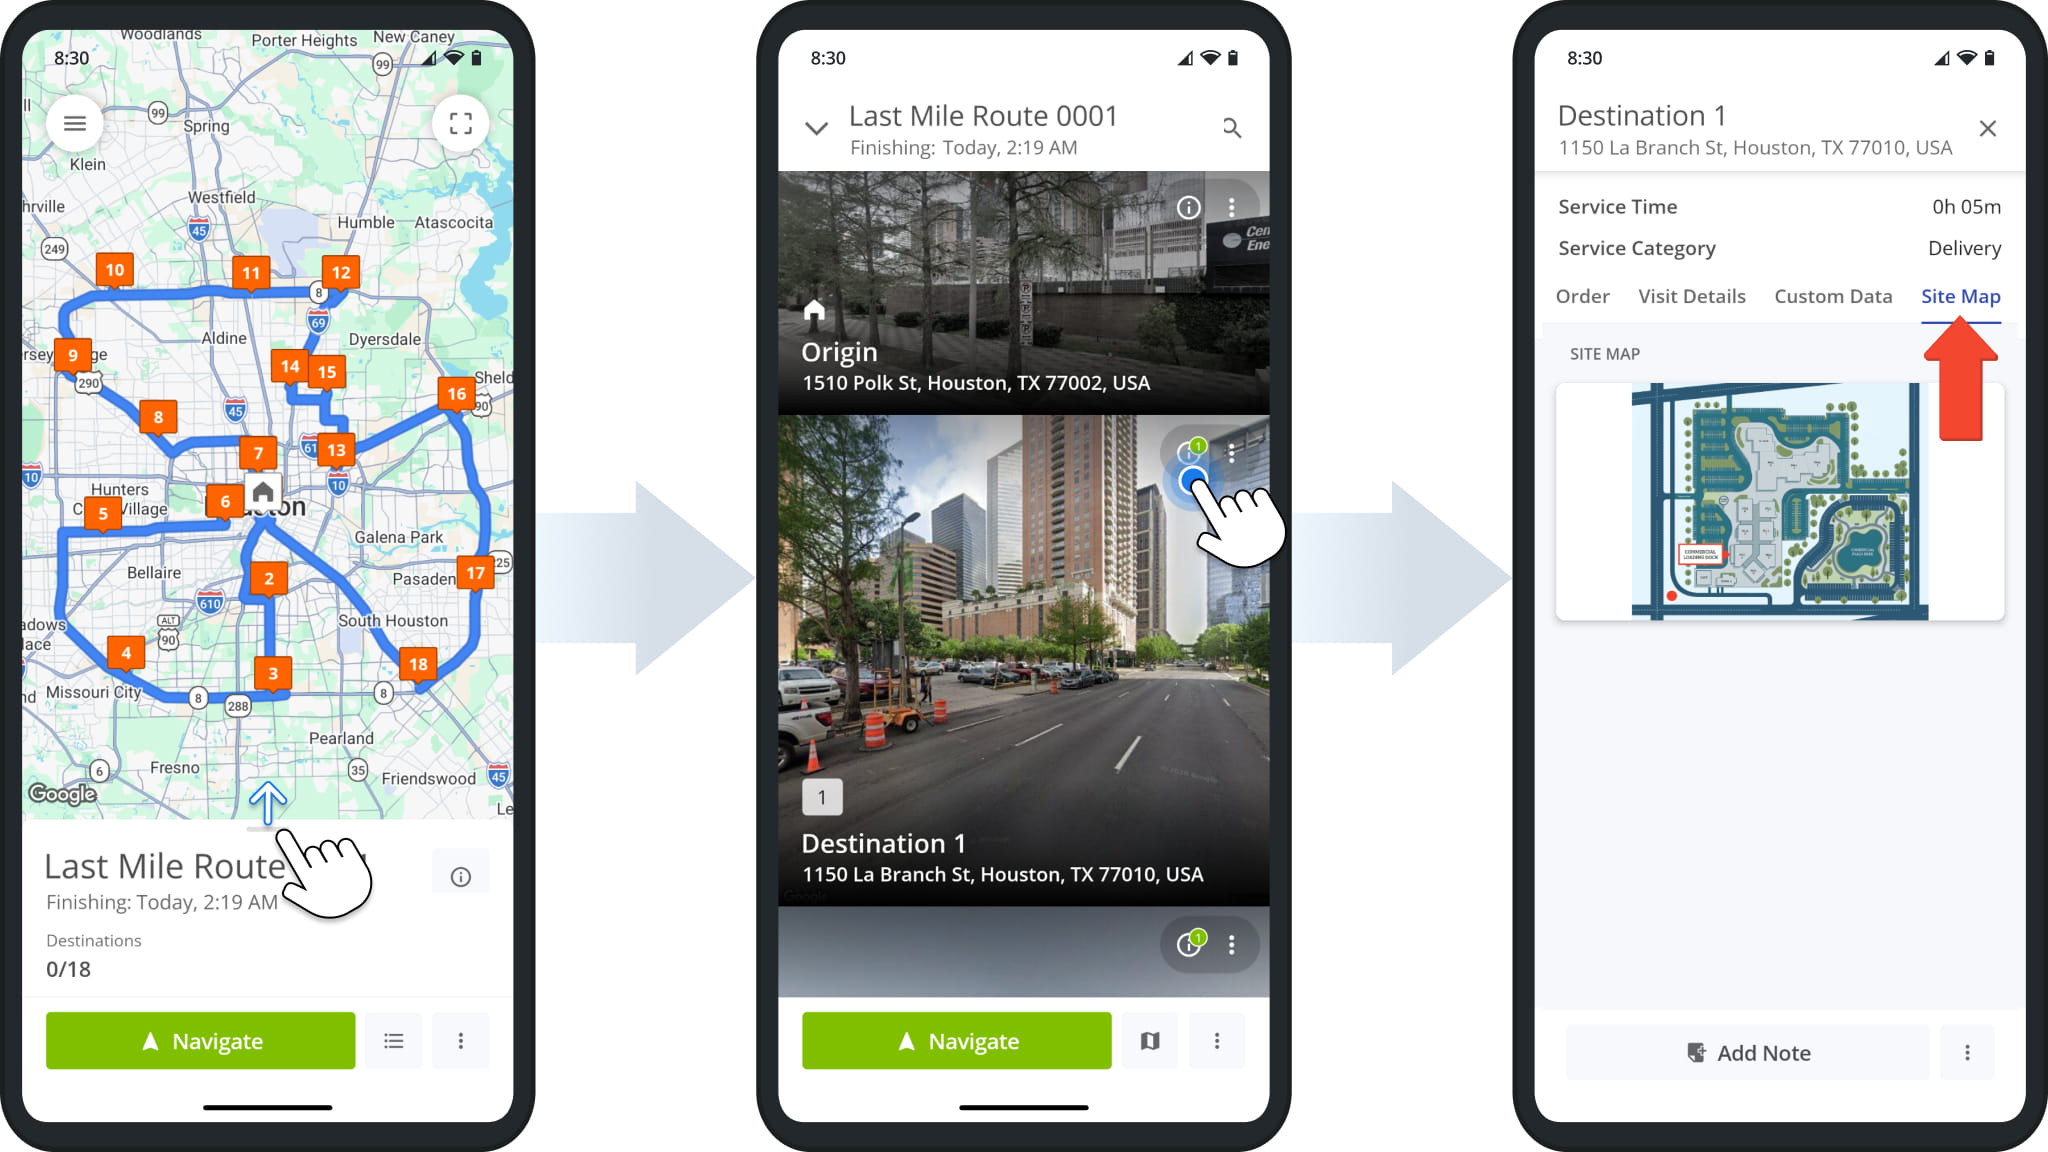
To see site maps on the Mobile Route App, open a route, swipe up to see its Destinations, and click the Information Icon to open the Destination Info screen. Then, go to the “Site Map” tab, and you’ll see the Destination’s corresponding Location Sitemap.
Visit Route4Me's Marketplace to Check out Various Modules and Add-Ons:
- Route Optimization
Time Windows
- Operations
Advanced Team Management Add-On
About author: Kristian Andreev

