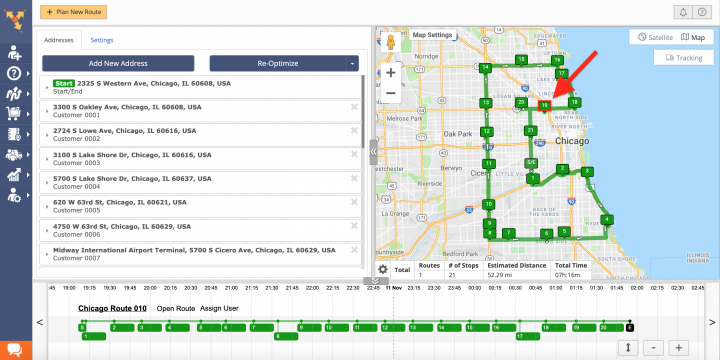
Open And Manage Single Driver Route Optimizations
When you plan and optimize a new route using the Route4Me Web Platform and Android or iOS mobile apps, Route4Me automatically creates a unique optimization that is linked to this route and saves the corresponding optimization with all its parameters into your Account Optimizations List. Your Account Optimizations can be used for re-optimizing planned routes, optimizing multiple routes at a time, restoring deleted routes with the exact same optimization settings, and more. The Single Driver Multi-Point Route optimization is designed specifically for planning and optimizing a single most optimal route for one driver (learn more). When you plan and optimize a new route using the Single Driver Route optimization, the system automatically creates a single unique optimization that is linked to this route.
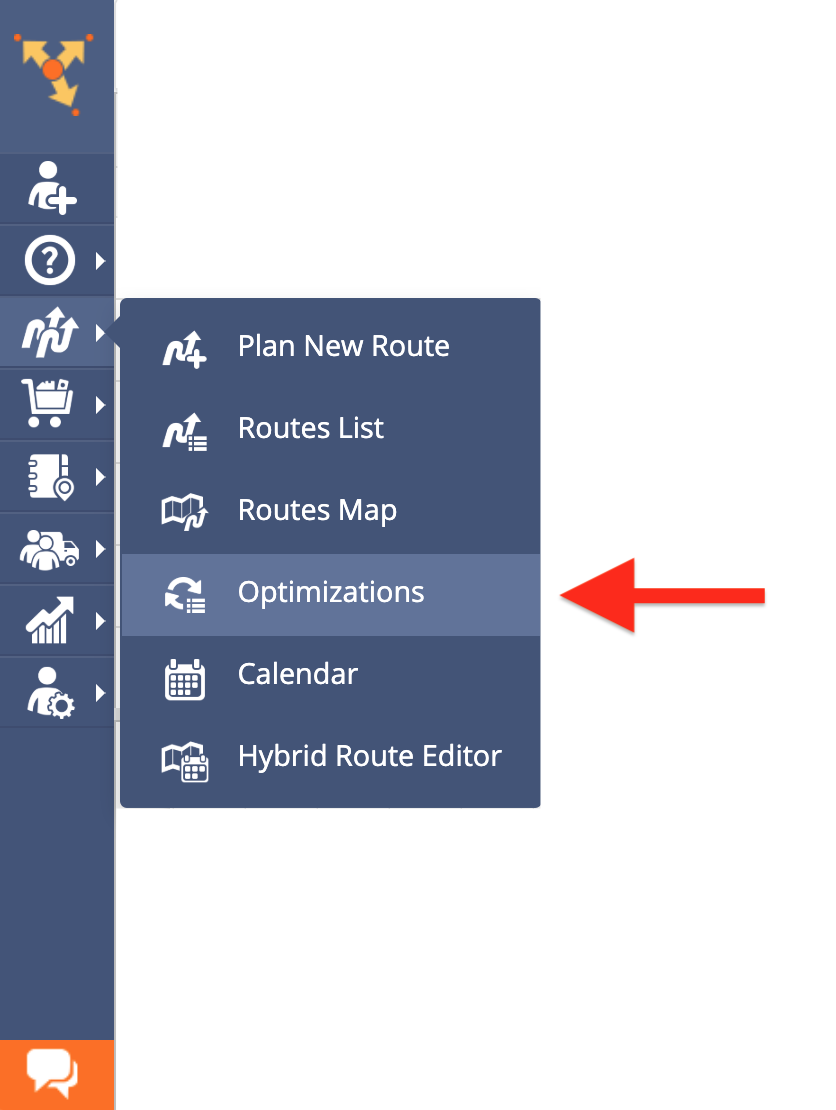
To open your Account Optimizations List, go to “Optimizations” from the navigation menu.
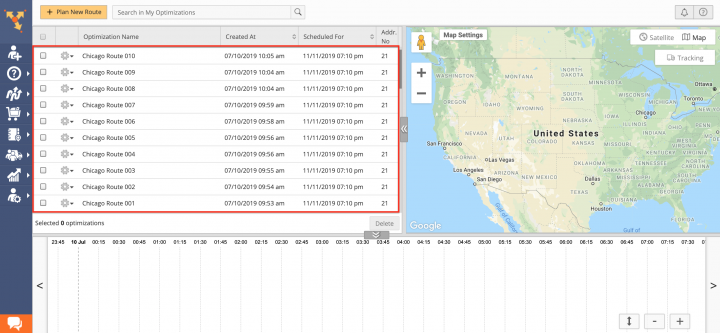
When you plan routes using the Single Driver Route optimization, each planned route creates a single unique optimization in the system. All optimizations are saved in your Account Optimizations List, where they can be viewed, modified, and re-optimized accordingly (learn more).
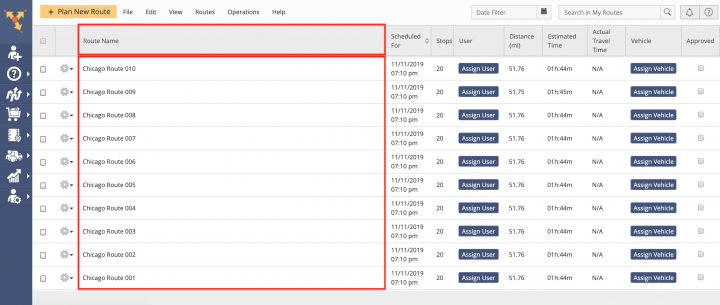
By default, each Single Driver Route optimization inherits the same name as its linked route, once the latter is planned. For example, if you plan a route named “Chicago Route 010,” then the system will create the corresponding optimization for this route with the exact same name.
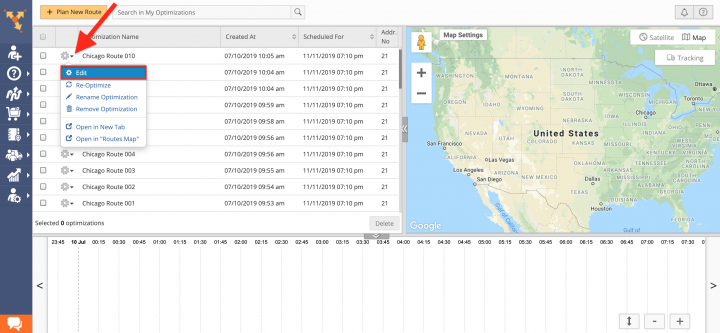
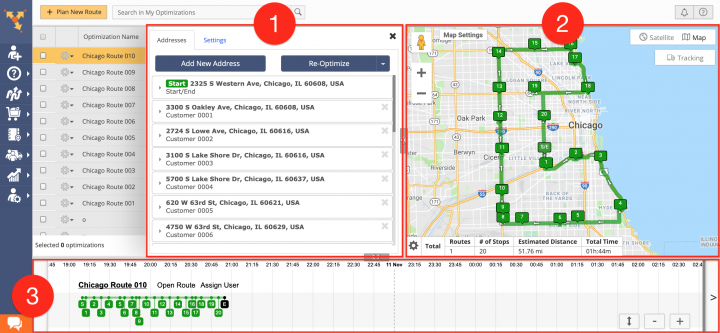
To quick edit a particular Single Driver Route optimization, first, click on the gear icon next to it and then select “Edit” from the menu.
When editing an optimization in your Account Optimizations List, you can view and edit the following settings:
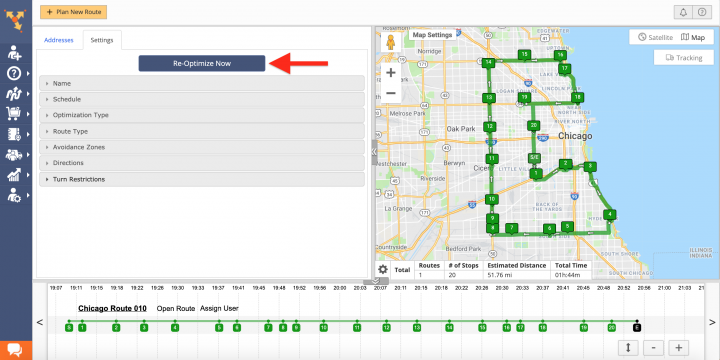
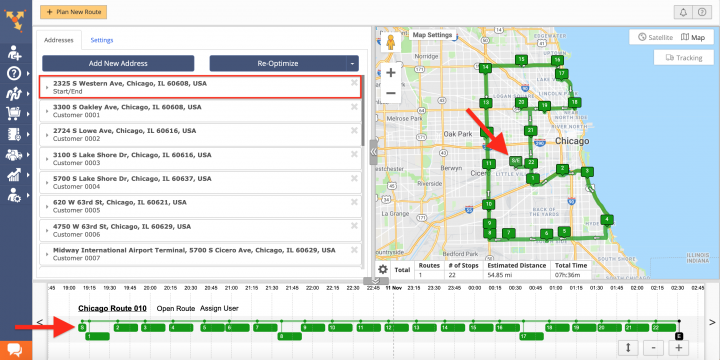
- In the “Addresses” tab, you can view and edit the details of each stop/address in the given optimization. In the “Settings” tab, you can change the settings of the optimization, as well as re-optimize it to apply all changes to the linked route(s).
- You can view the selected optimization on the interactive map, where you can right-click on stops to modify them. On the interactive map, you can also use the Summary Table to view all available aggregated metrics for the given optimization.
- You can view the opened optimization using the timeline.
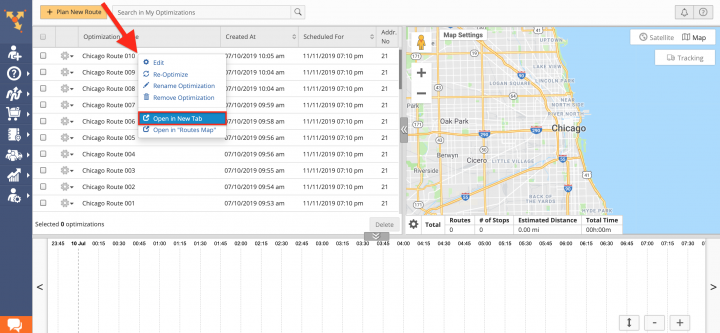
For more convenience, you can open your optimizations in separate tabs so that you can work in more detail with each optimization. To open a particular Single Driver Route optimization in a new tab, first, click on the gear icon next to this optimization (or right-click on the optimization) and then select the “Open in New Tab” option from its menu.
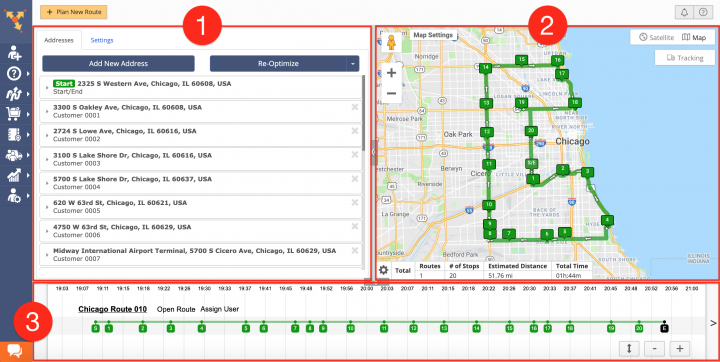
When editing an optimization in a new tab, you can view and edit the following settings:
- In the “Addresses” tab, you can view and edit the details of each stop/address in the opened optimization. In the “Settings” tab, you can change the settings of the optimization, as well as re-optimize it to apply all changes to the linked route(s).
- You can view the selected optimization on the interactive map, where you can right-click on stops to modify them. On the interactive map, you can also use the Summary Table to view all available aggregated metrics for the given optimization.
- You can view the opened optimization using the timeline.
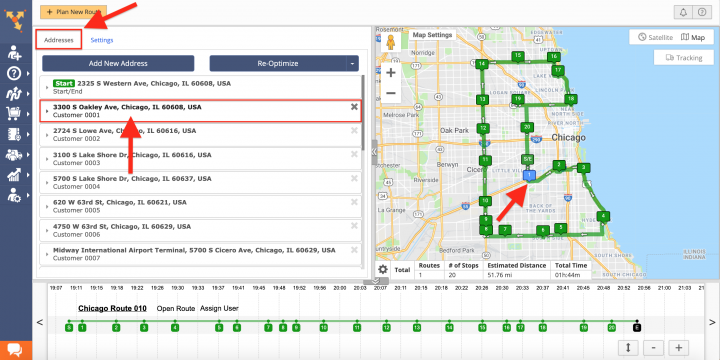
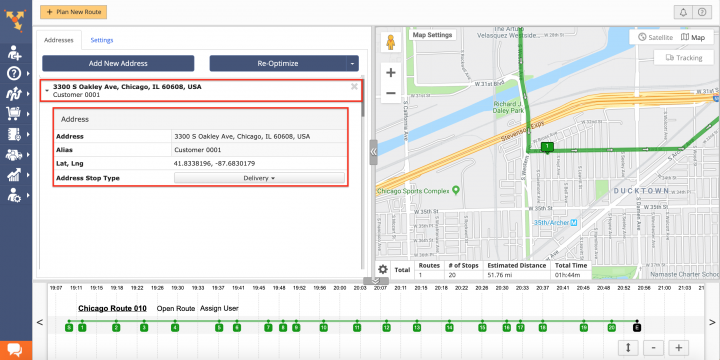
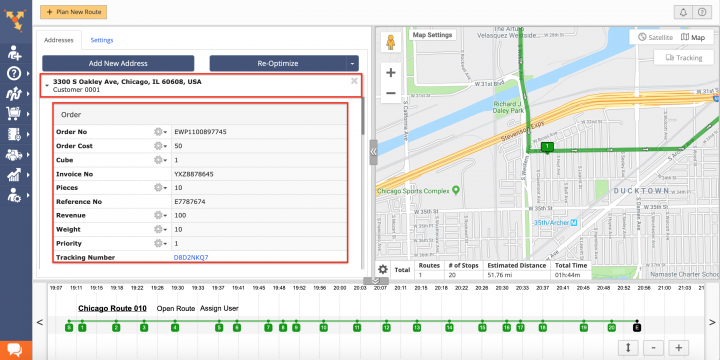
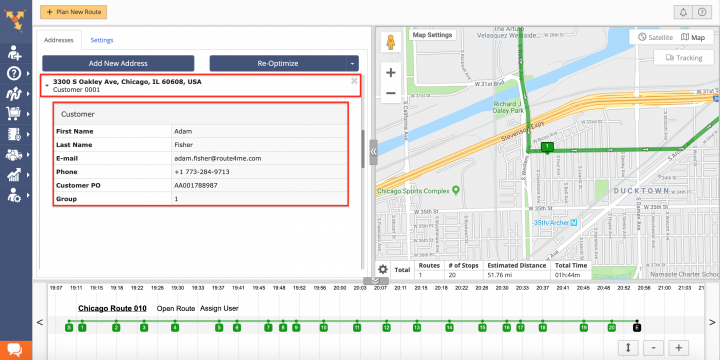
In the “Addresses” tab, you can view and edit the details of each stop/address in the opened optimization. To do so, first, click on the stop/address that you want to modify to open its menu. Alternatively, right-click on the stop/address that you want to edit on the interactive map and then select “Modify Stop” from its menu.
In the “Address” section of the selected optimization stop, you can view and edit the stop’s address, alias, as well as its latitude and longitude coordinates. The “Address” section also displays the stop’s type that can be adjusted (Delivery, Pickup, Break, Meetup, Visit, Service, Drive-By).
In the “Order” section of the selected optimization stop, you can view and edit the stop’s order details (i.e., Pieces, Weight, Cube, Revenue, Priority, etc.).
In the “Customer” section of the selected optimization stop, you can view and edit the available contact information of the prospect that is associated with this stop.
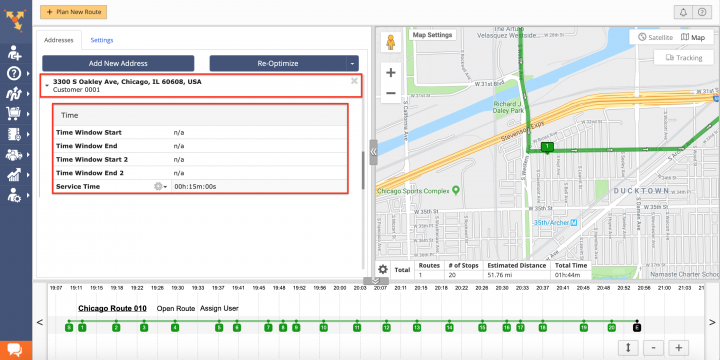
NOTE: When planning routes with the Single Driver Route optimization, time windows are not available. To learn more about using time windows when planning routes with the Multiple Drivers Route optimization, visit this page.
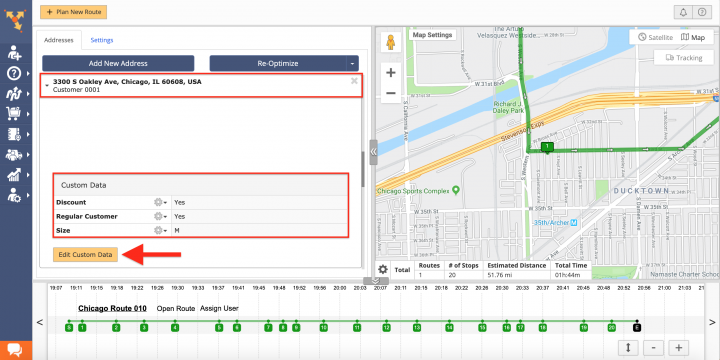
In the “Custom Data” section of the selected optimization stop, you can view and edit the available custom data that is already attached to the stop, as well as add new custom data fields and values (learn more).
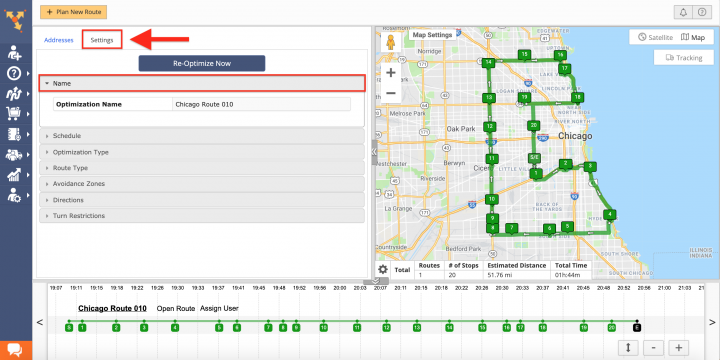
In the “Settings” tab of the opened optimization, you can adjust the optimization settings and then apply all changes to the associated route. In the “Name” section of the “Settings” tab, you can edit the name of the optimization. Changing the name of a particular optimization does not affect the name of its linked route and vice versa.
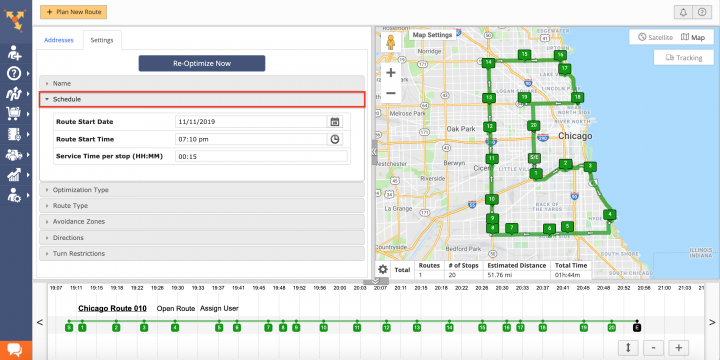
In the “Schedule” section of the “Settings” tab, you can reschedule the optimization for another date and time, as well as edit/define the service time for all stops in this optimization.
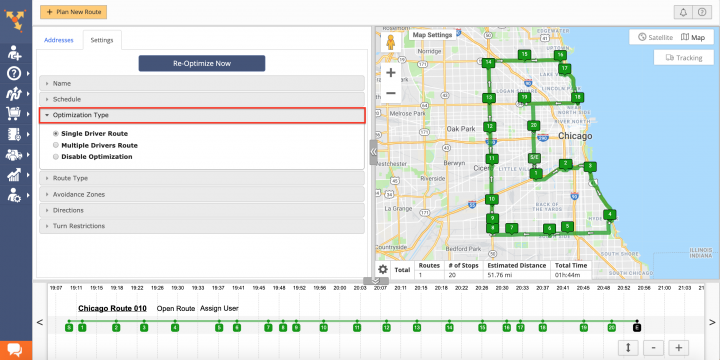
In the “Optimization Type” section of the “Settings” tab, you can change the type of the opened optimization: Single Driver Route, Multiple Drivers Route, Balanced Team Route, or Disable Optimization.
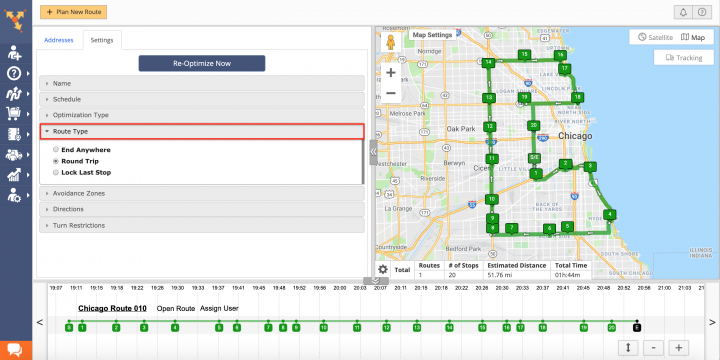
In the “Route Type” section of the “Settings” tab, you can choose where to end the optimization:
- End Anywhere: The system automatically chooses the most efficient and optimal stop for ending the optimization.
- Roundtrip: The optimization ends at the same stop/address where it starts.
- Lock Last Stop: The optimization ends at the current last stop.
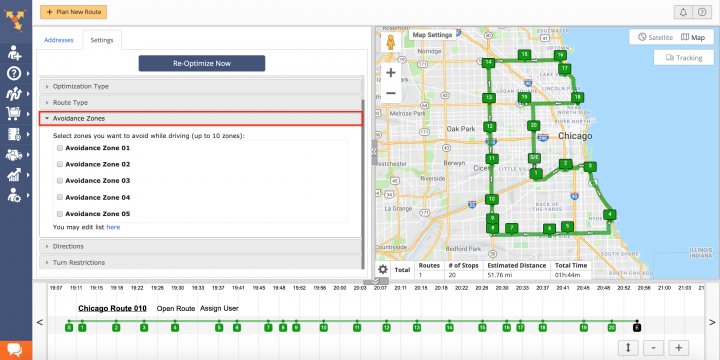
In the “Avoidance Zones” section of the “Settings” tab, you can select one of the available Avoidance Zones that will be taken into account when the given optimization is re-optimized. To learn more about creating and using Avoidance Zones, visit this page.
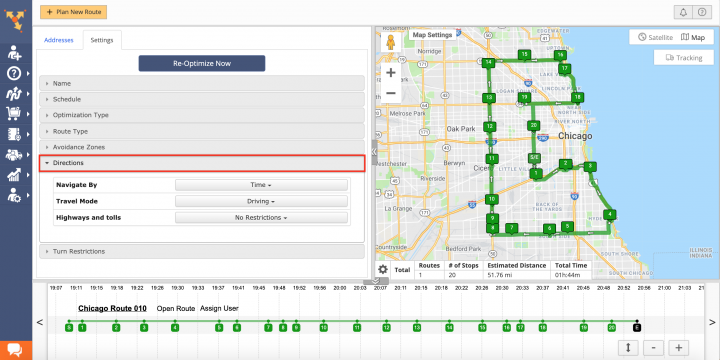
In the “Directions” section of the “Settings” tab, you can adjust the navigation type and travel mode for the optimization, as well as define which roads you want the optimization to avoid (learn more).
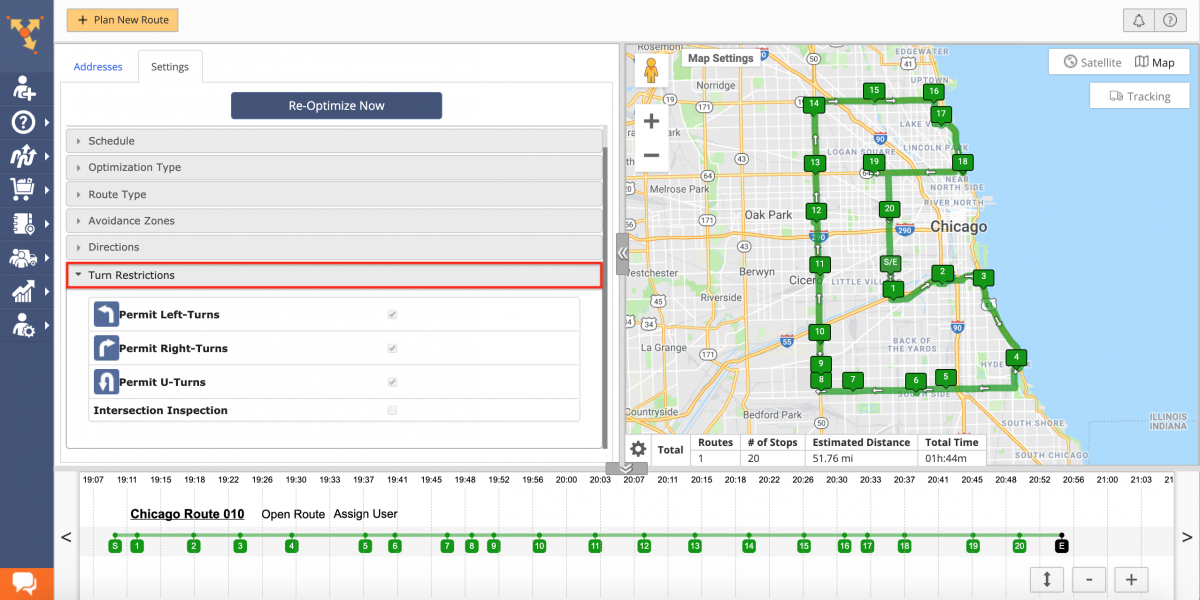
In the “Turn Restrictions” section of the “Settings” tab, you can enable or disable left-turns, right-turns, and u-turns for the given optimization (learn more).
To apply all adjusted settings to the optimization, click on the “Re-Optimize Now” button in the “Settings” tab. NOTE: Once the optimization is updated and re-optimized, all optimization changes are automatically applied to its linked route.
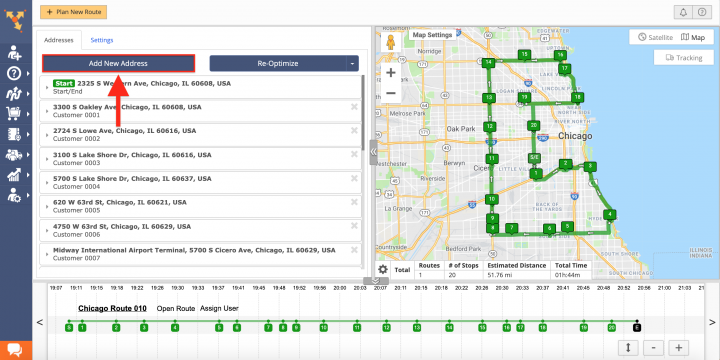
To insert one or multiple addresses into the optimization, first, click on the “Add New Address” button in the “Addresses” tab.
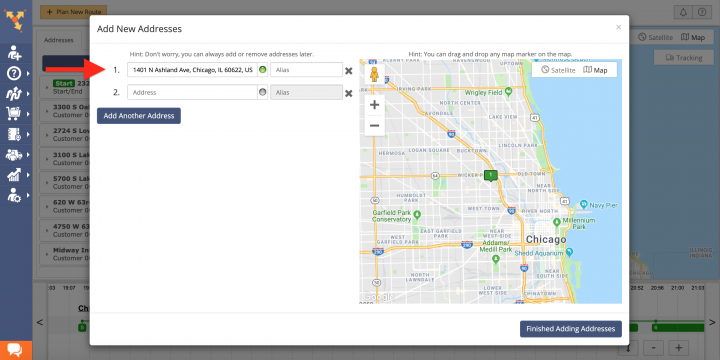
After that, use the Interactive Map Editor for adding one or multiple addresses to the optimization (learn more).
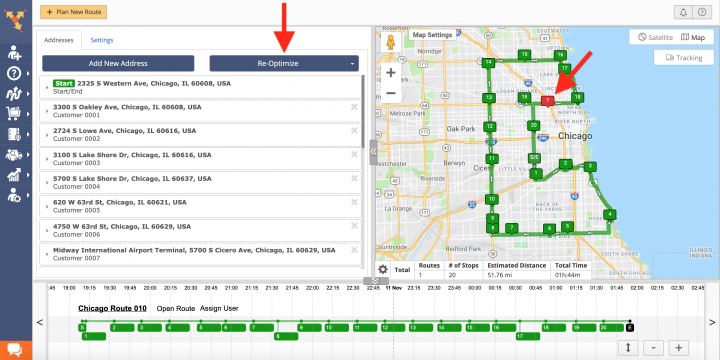
After that, click on the “Re-Optimize” button to include the added address into the optimization.
Once the optimization is re-optimized, the added address is automatically placed at the most efficient sequence position in the given optimization.
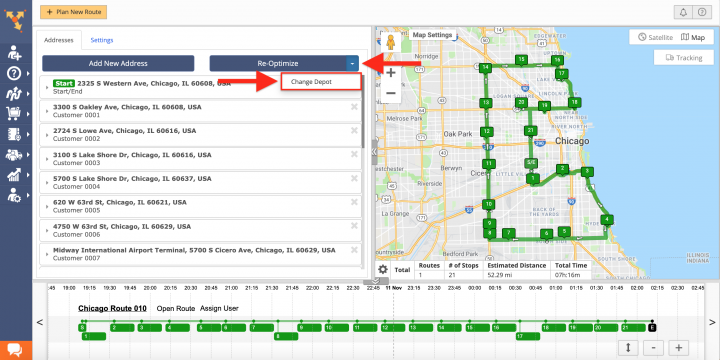
To change the address of the depot from which the optimization starts, first, click on the corresponding drop-down list next to the “Re-Optimize” button and then select “Change Depot” respectively.
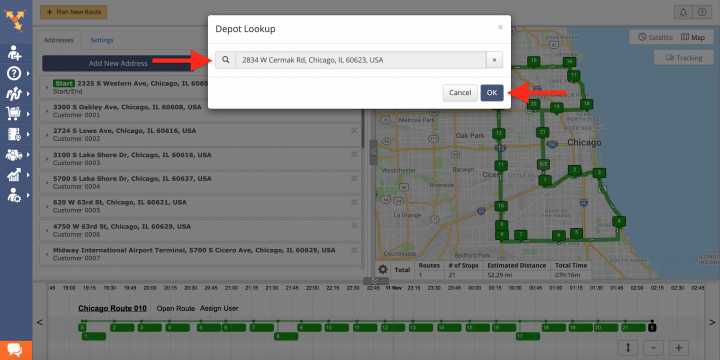
Next, input the address of the new depot into the corresponding field and then click “OK” to apply the changes.
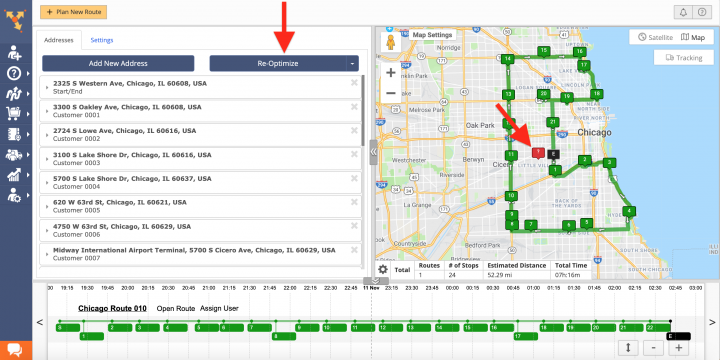
After that, click on the “Re-Optimize” button to re-optimize the optimization and reset the depot address for the given optimization.
Once the optimization is re-optimized, the optimization’s “Start” stop is reset to the new depot address.
Visit Route4Me's Marketplace to Check Out More Add-Ons and Modules:
- Route Optimization
Address Book and Territories Planning
- Operations
Custom Data Add-On
