Add And Manage Vehicles – Route4Me Last Mile Fleet Management Guide
With Route4Me’s last mile route optimization and fleet management software, you can easily create and coordinate a fleet of cars, vans, trucks, trailers, semis, heavy equipment, and any other vehicles. Depending on your Route4Me account-level permissions, you can add vehicles manually, import telematics vehicles, dispatch routes to vehicles, and assign vehicle attributes and profiles. Use this guide to help you create and manage your last mile fleet vehicles.
Table of Contents
Add New Vehicles – Create Fleet Vehicle Profiles
To add vehicles to your Route4Me account, you can either manually enter individual vehicle details or import GPS data from your telematics providers. For manual entry, simply fill out the required fields with each vehicle’s details. To add multiple vehicles simultaneously, import telematics data directly from your telematics provider, enabling seamless integration and fleet expansion.
Create Vehicles – Manually Add Individual Vehicles To Your Fleet
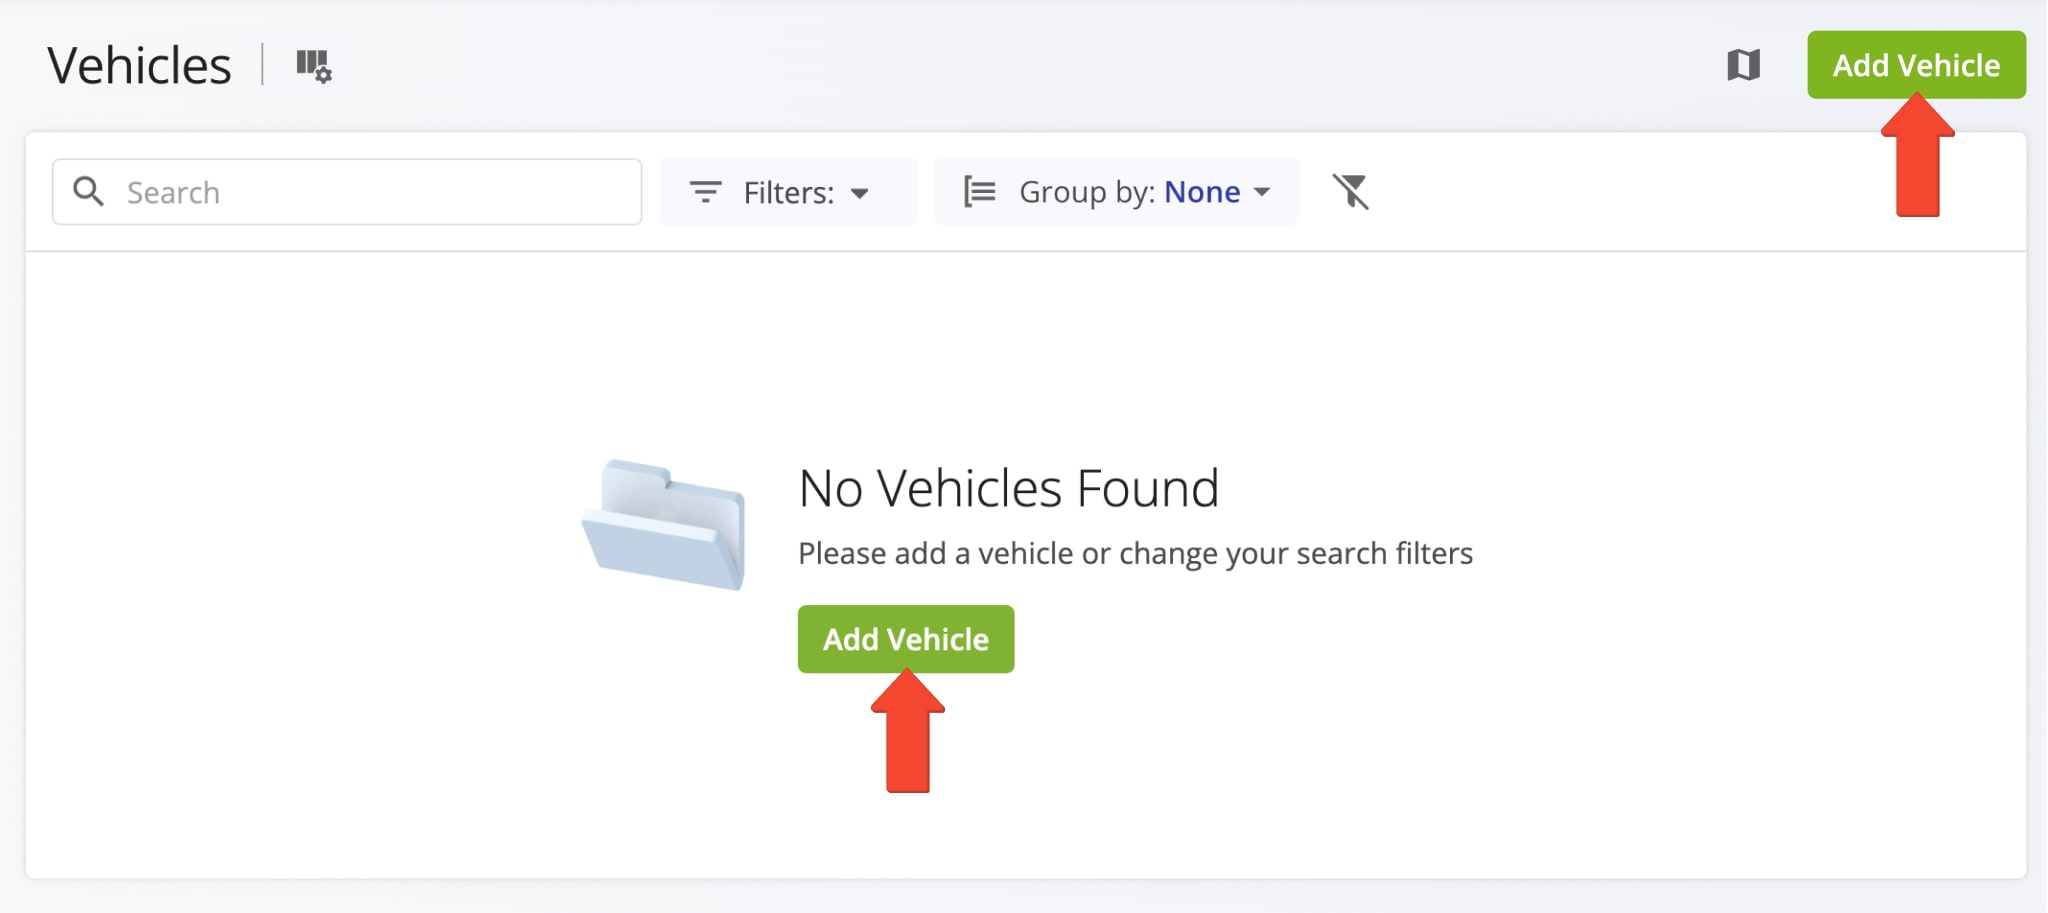
To manually add a vehicle to your fleet, go to “Team & Equipment” > “Vehicles” in the Navigation Menu. Then, click “Add Vehicle”.
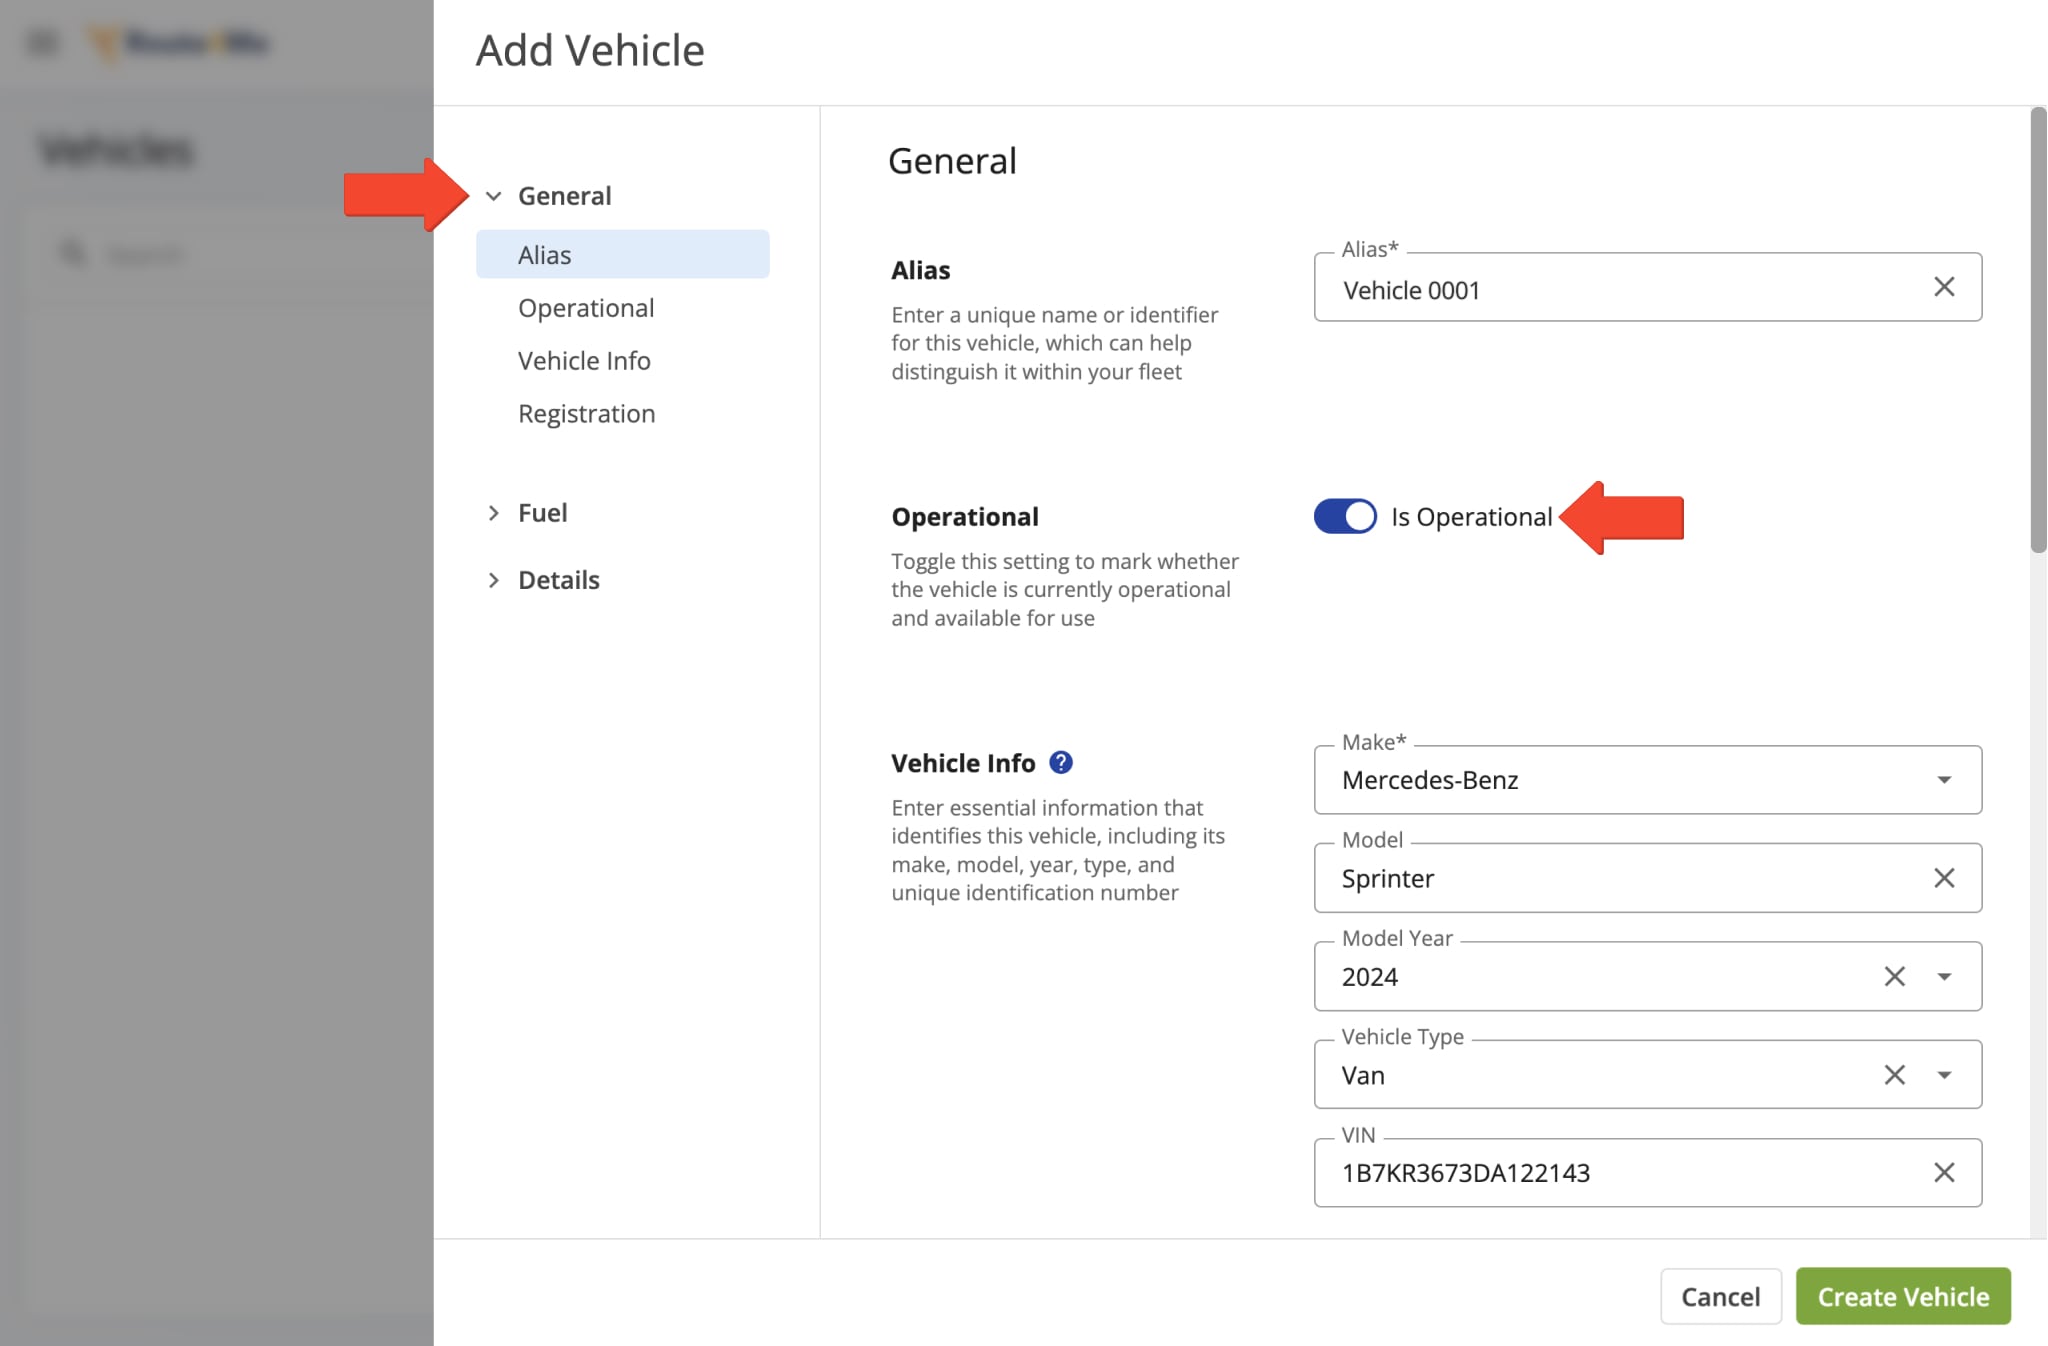
Fill out the vehicle’s general profile information, ensuring you set its status to “Is Operational” to make it available for route dispatch. When set to “Is Operational”, the vehicle appears in your list of assignable vehicles for routes. You can find further guidance on filling out general profile information below.
| Profile Section | Description |
|---|---|
| Alias | Assign a unique name to the vehicle, making it easy to identify and locate within your fleet when assigning it to routes. |
| Operational | Indicate if the vehicle is currently operational and available for use. |
| Vehicle Info | Provide key details like make, model, year, type, and unique ID to identify and distinguish the vehicle within your fleet. |
| Registration | Provide vehicle registration details, including tag (license plate number), country of registration, and year of purchase, to track regulatory specifics for that vehicle. |
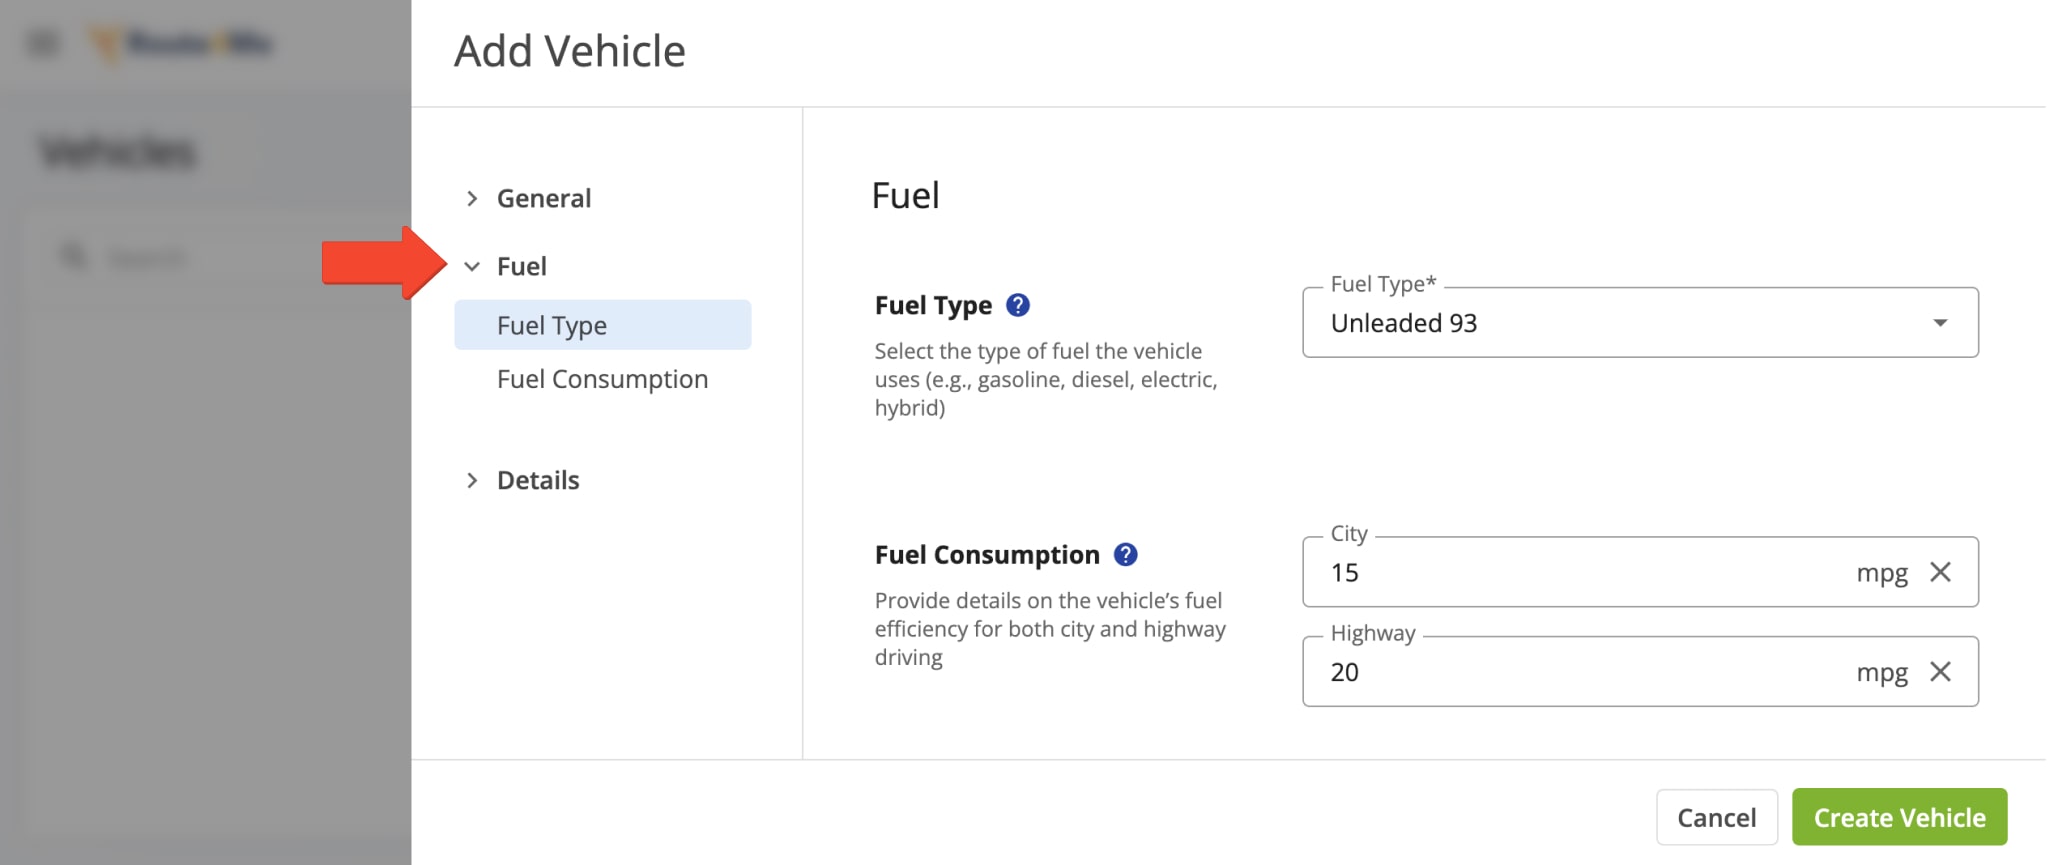
Then, provide fuel details. You can use this information to manage and reduce fleet fuel costs and promote fleet fuel efficiency.
| Profile Section | Description |
|---|---|
| Fuel Type | Specify the vehicle’s fuel type (e.g., gasoline, diesel, electric, hybrid), which can be factored into cost and consumption calculations. |
| Fuel Consumption | Specify the vehicle’s city and highway fuel efficiency, which can be used to calculate fuel costs and plan fuel stops based on the route type. |
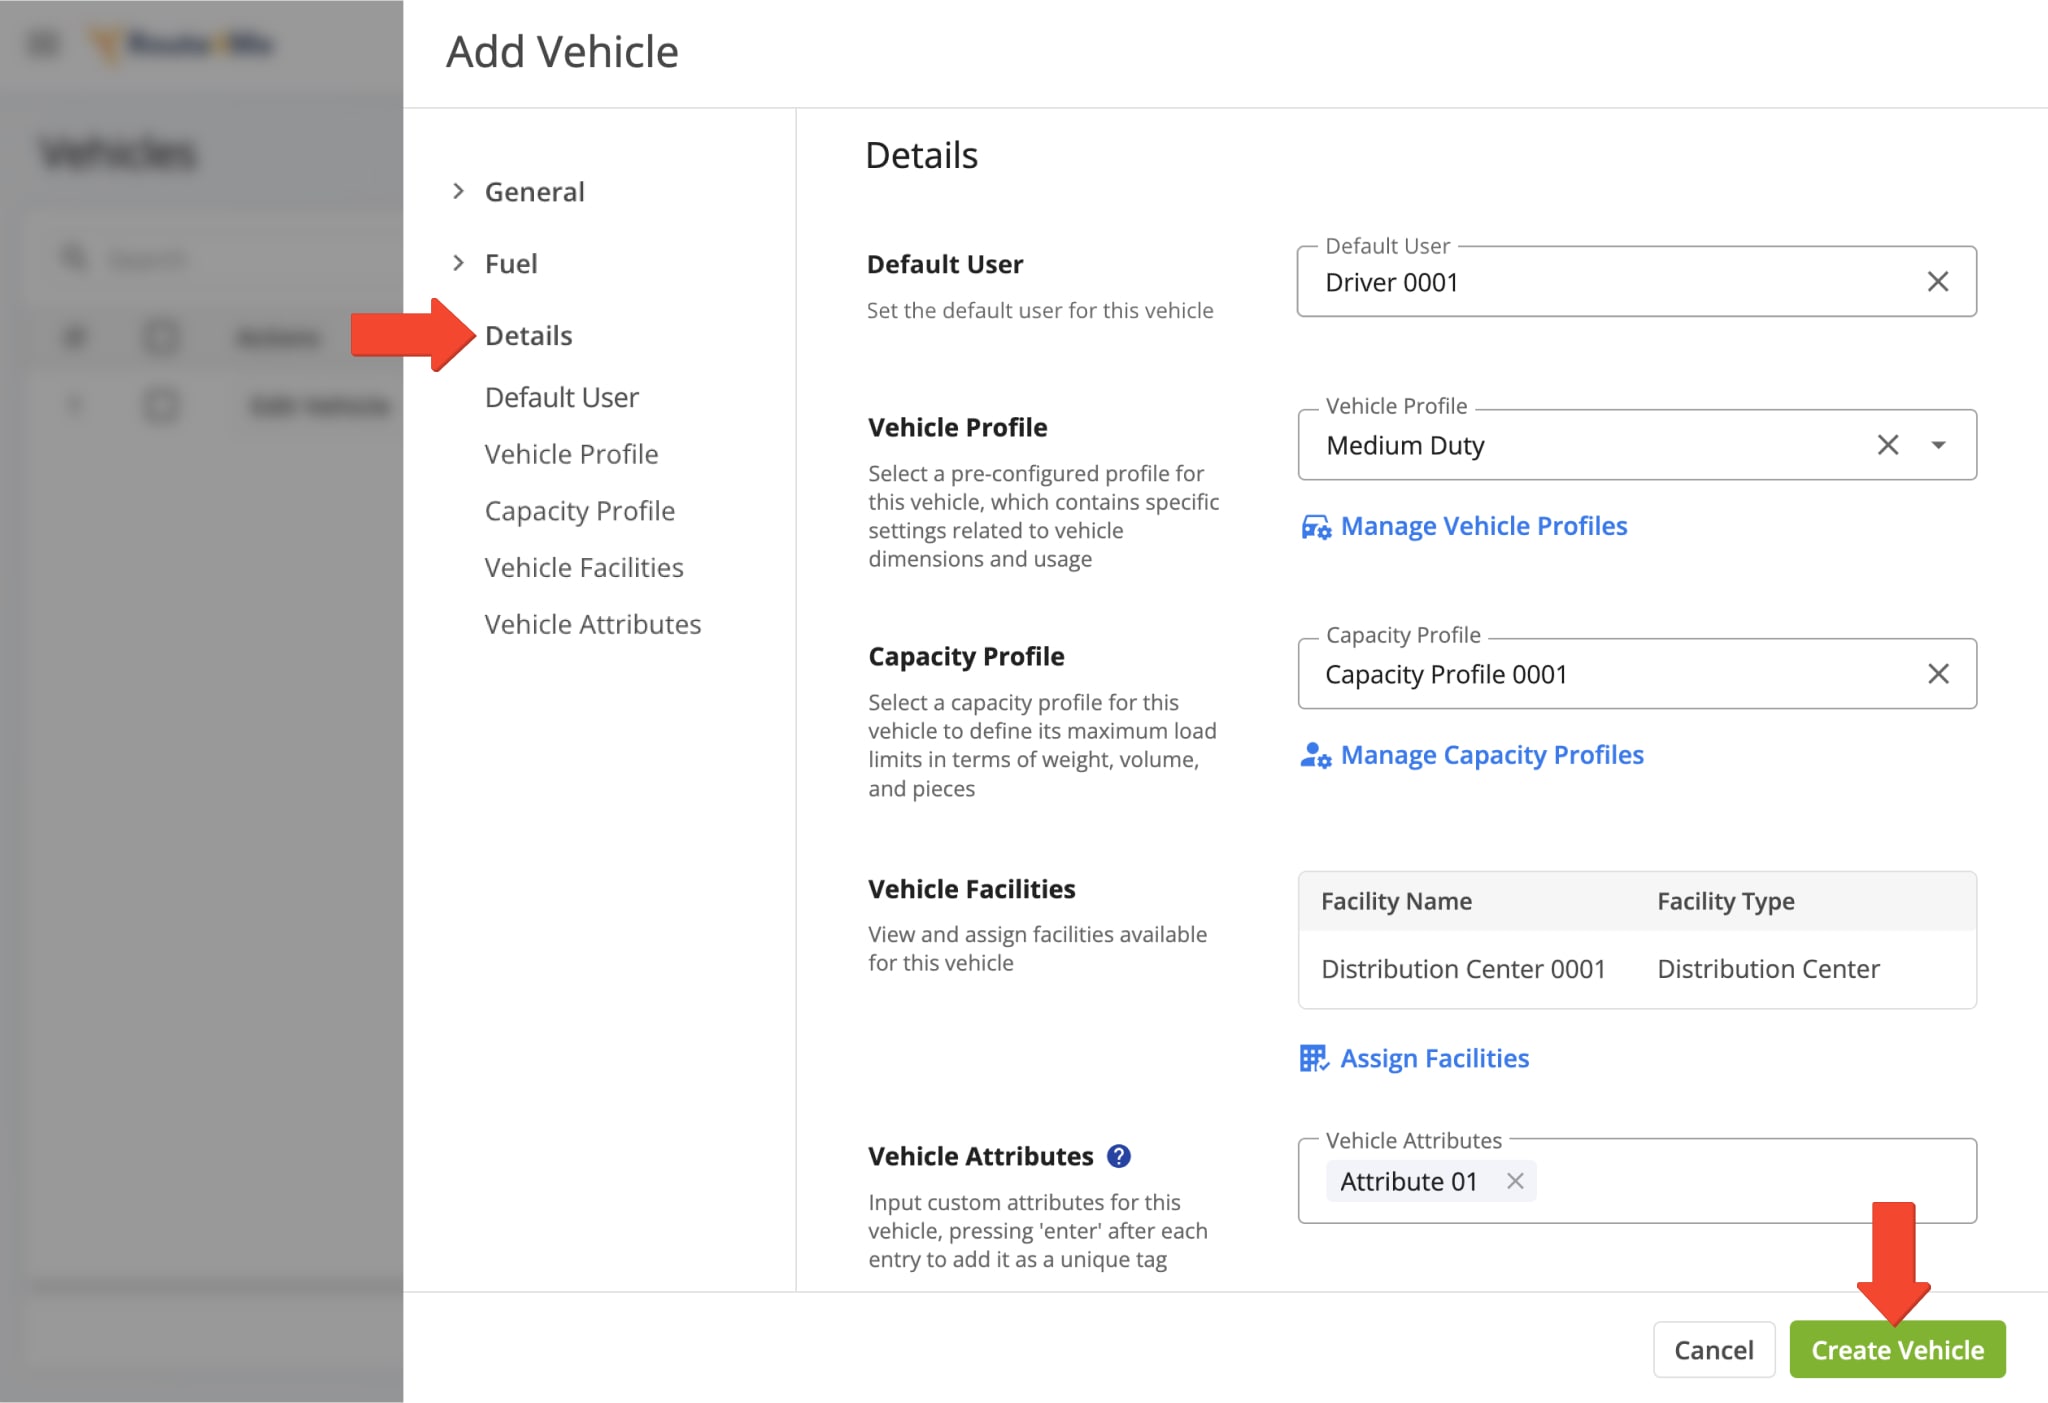
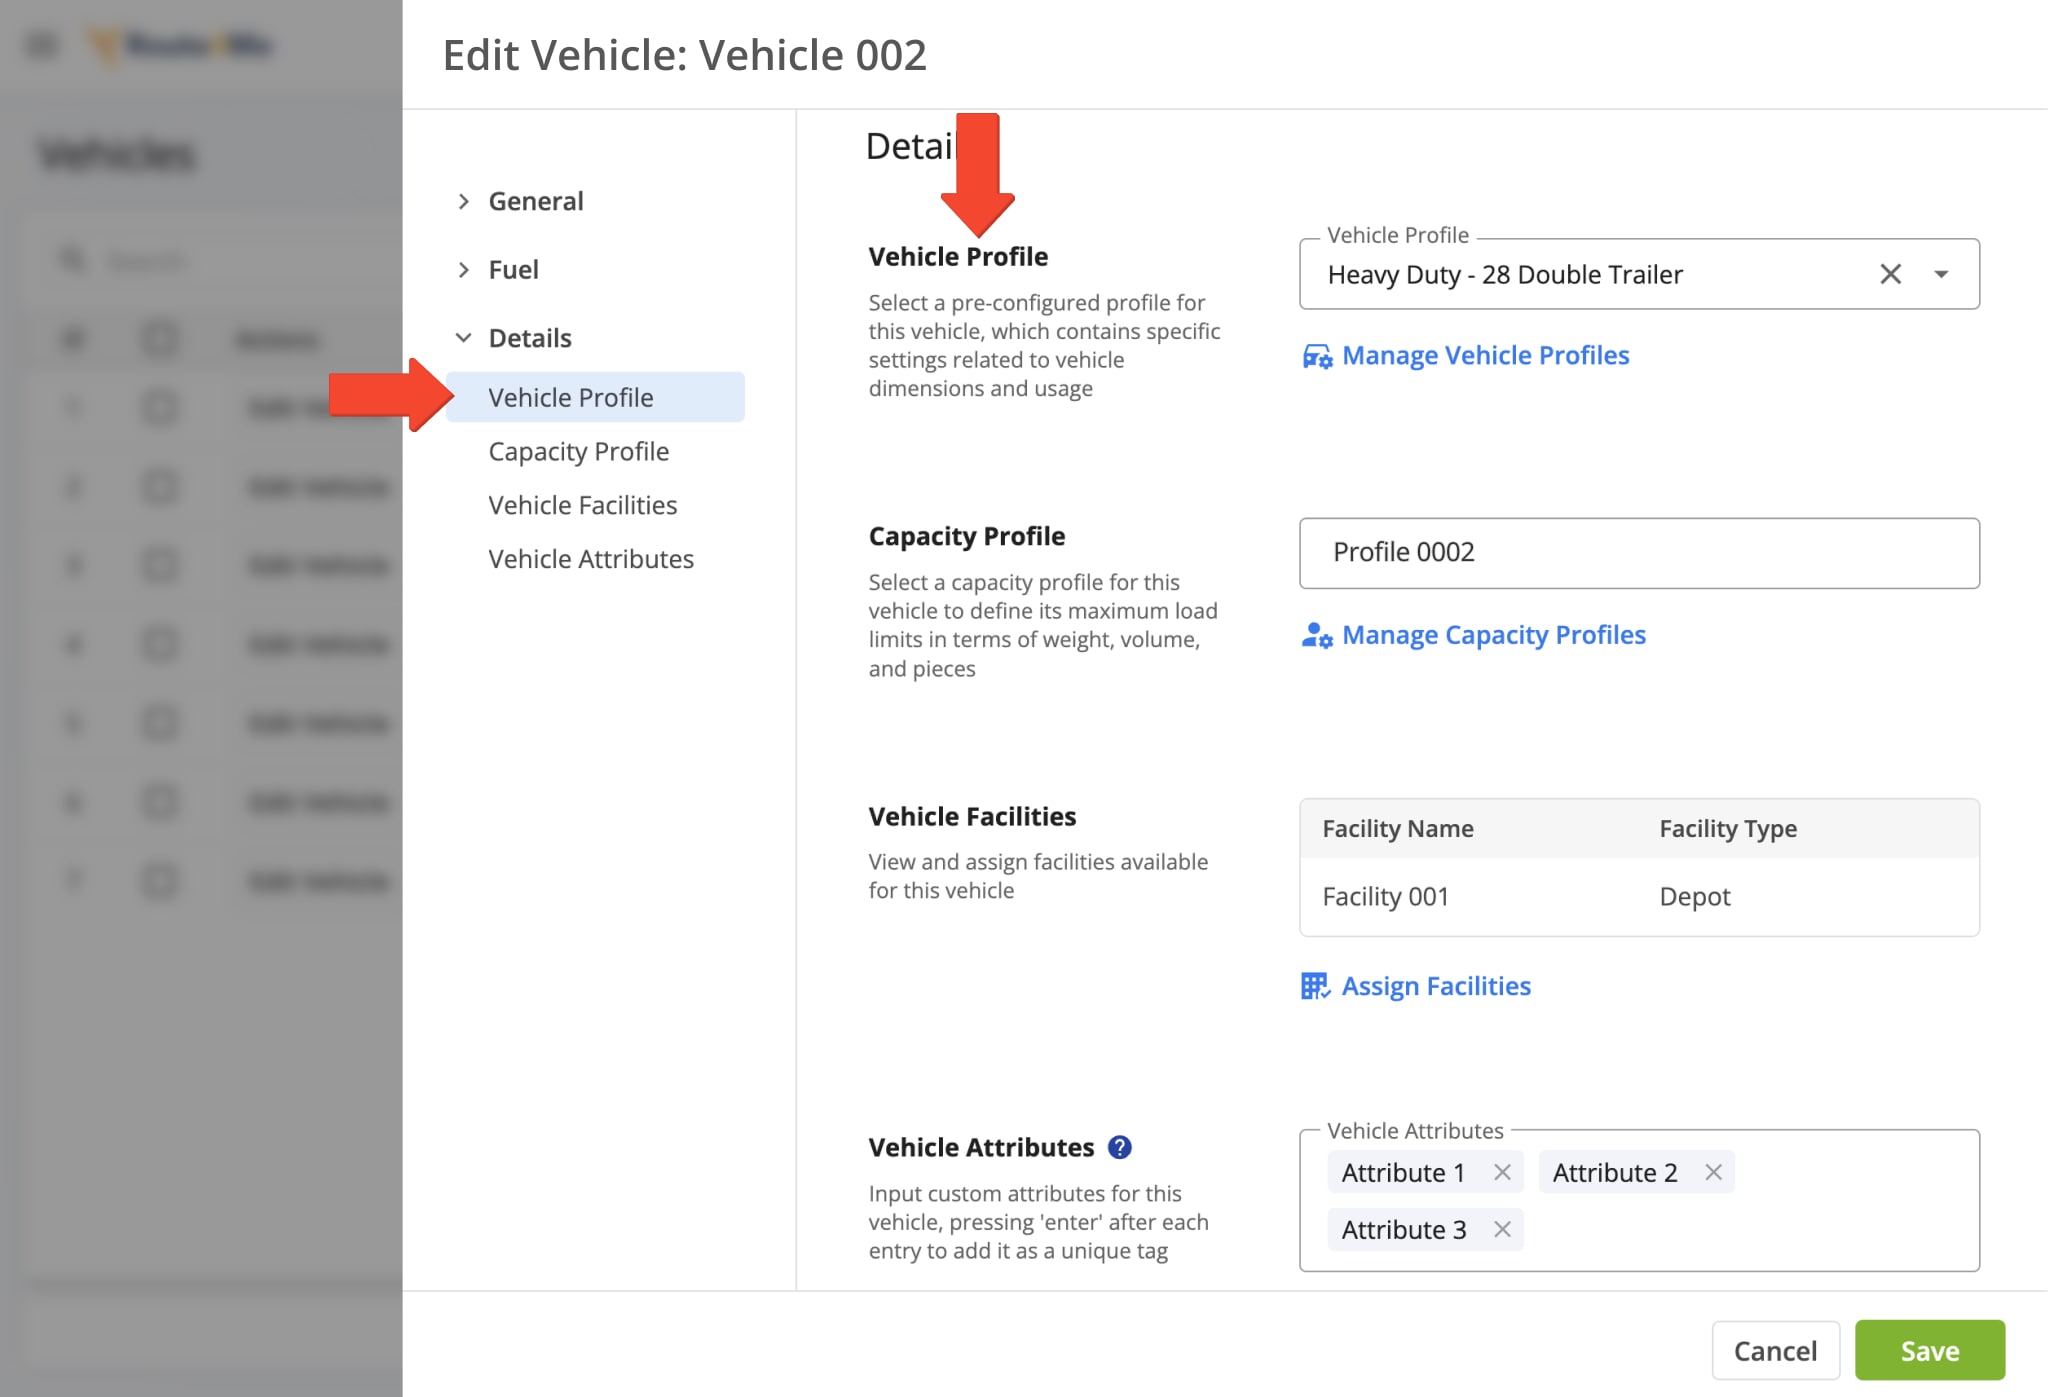
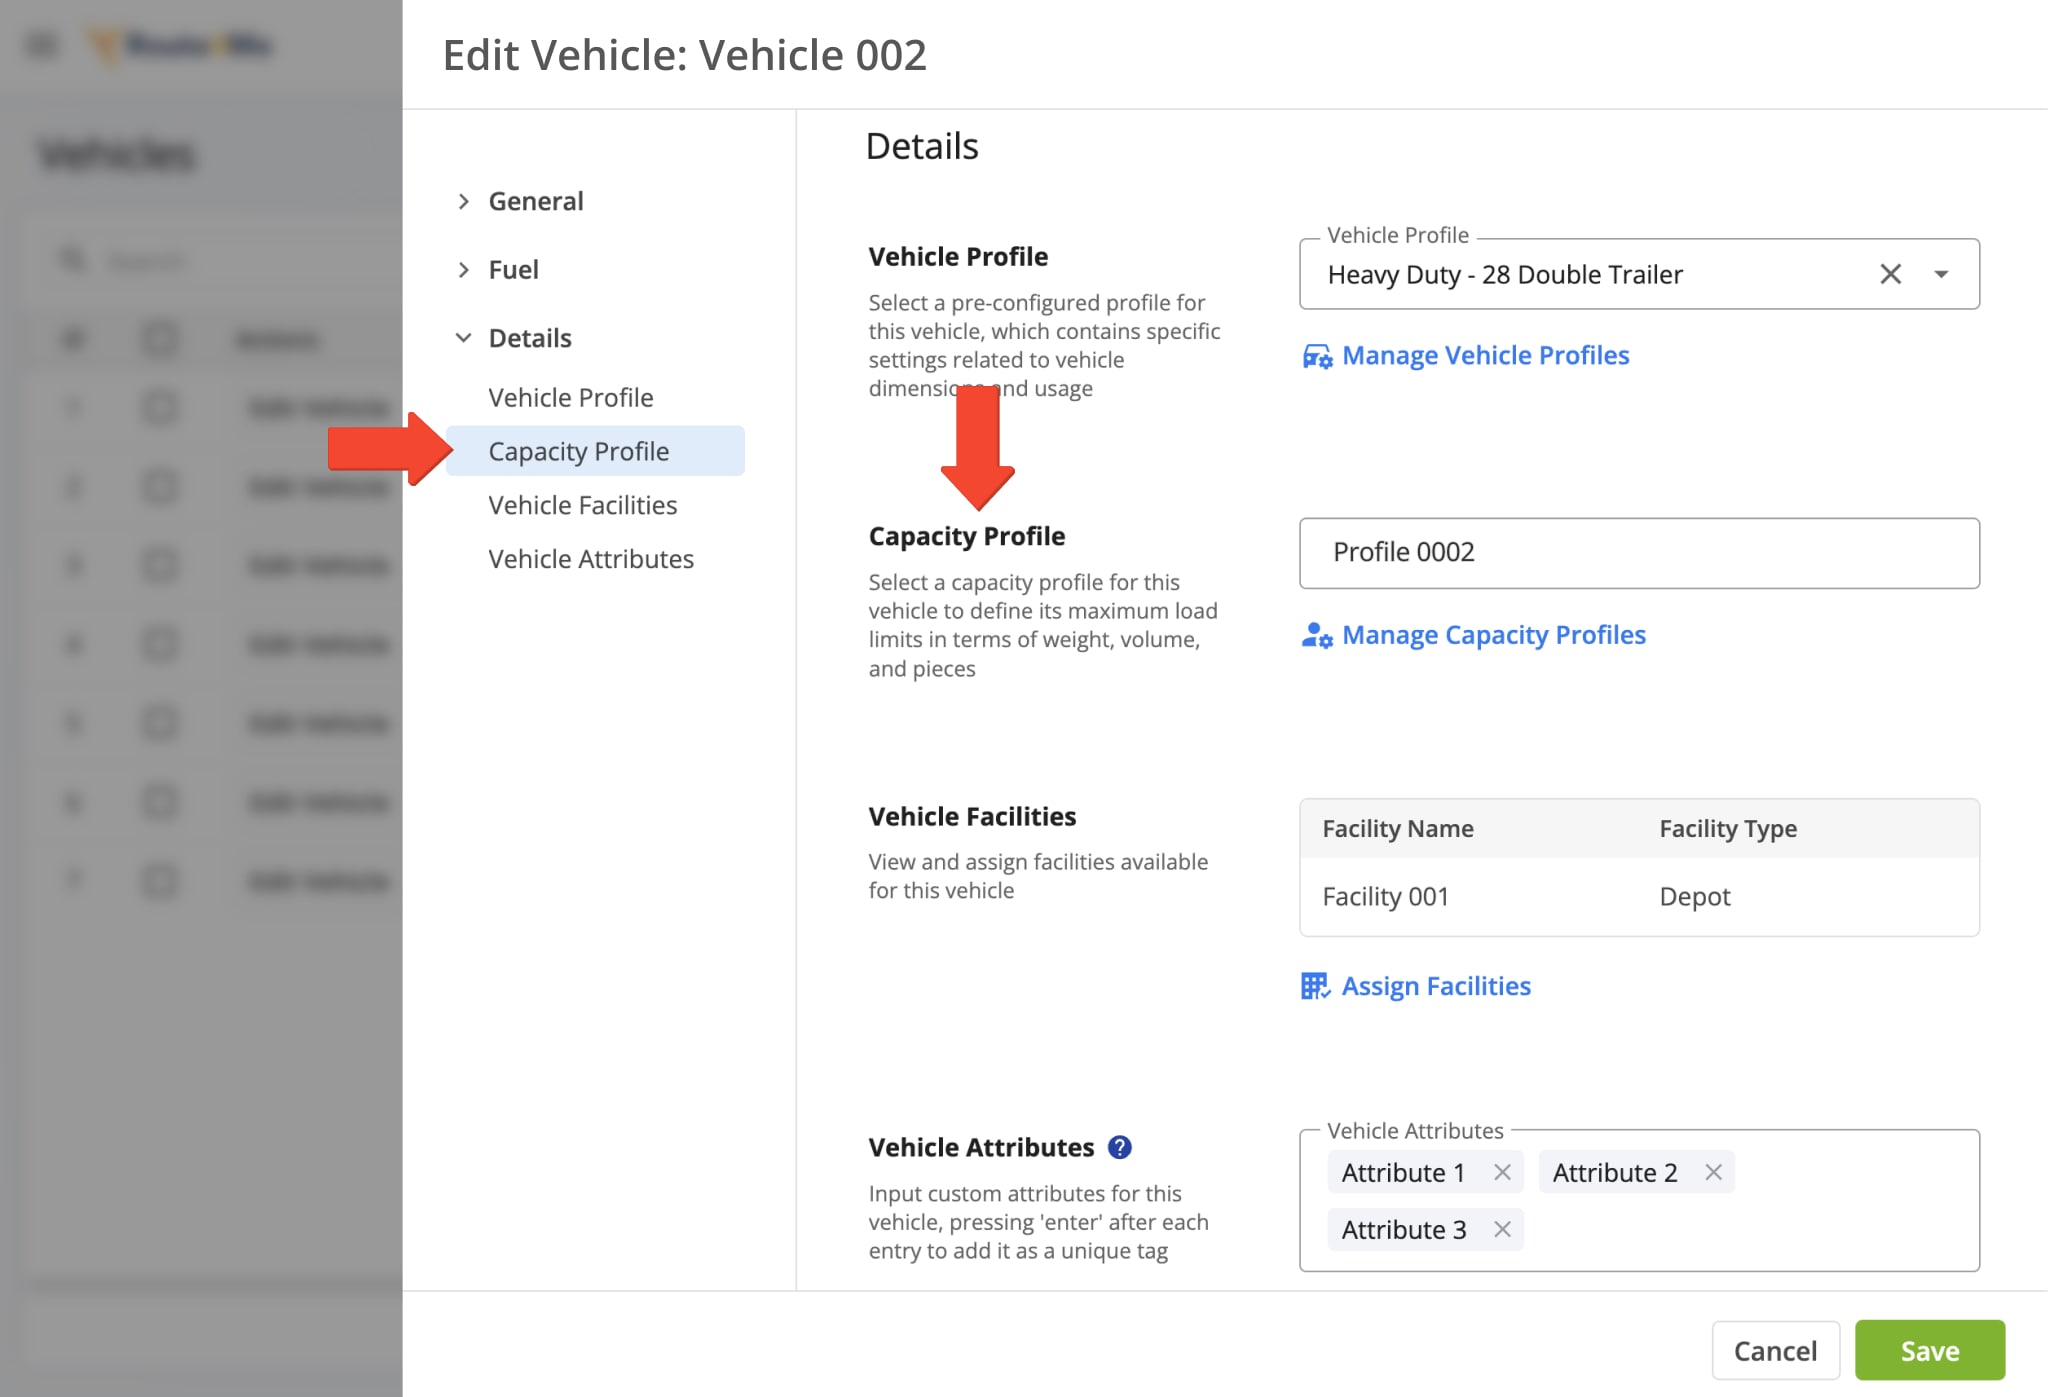
Lastly, if you have these specific features enabled in your Route4Me account, you can provide details related to the vehicle’s dimensions and usage, maximum load limits, assigned facilities, and unique attributes. Click “Create Vehicle” to finalize.
| Profile Section | Description |
|---|---|
| Default User | Set the user that will be associated with the vehicle by default. |
| Vehicle Profile | Used for commercial vehicle routing. Select pre-configured vehicle dimensions and usage settings. Define any specialized regulations or restrictions such as those found in Hazmat vehicle routing profiles. |
| Capacity Profile | Optimize mixed fleet routing by specifying each vehicle’s maximum load capacity in weight, volume, and number of pieces, ensuring no vehicle is underloaded or overloaded. |
| Vehicle Facilities | Assign vehicle facilities, ensuring that all routes are optimized for proximity to key locations such as warehouses, distribution centers, services hubs, and more. |
| Vehicle Attributes | Align Driver Skills with the Vehicle Attributes of your fleet. This ensures that a field employee with a given expertise and a vehicle with specific capabilities are assigned to the right destinations, optimizing efficiency and accuracy. |
Add Telematics Fleet Vehicles To Route4Me Via Telematics Gateway
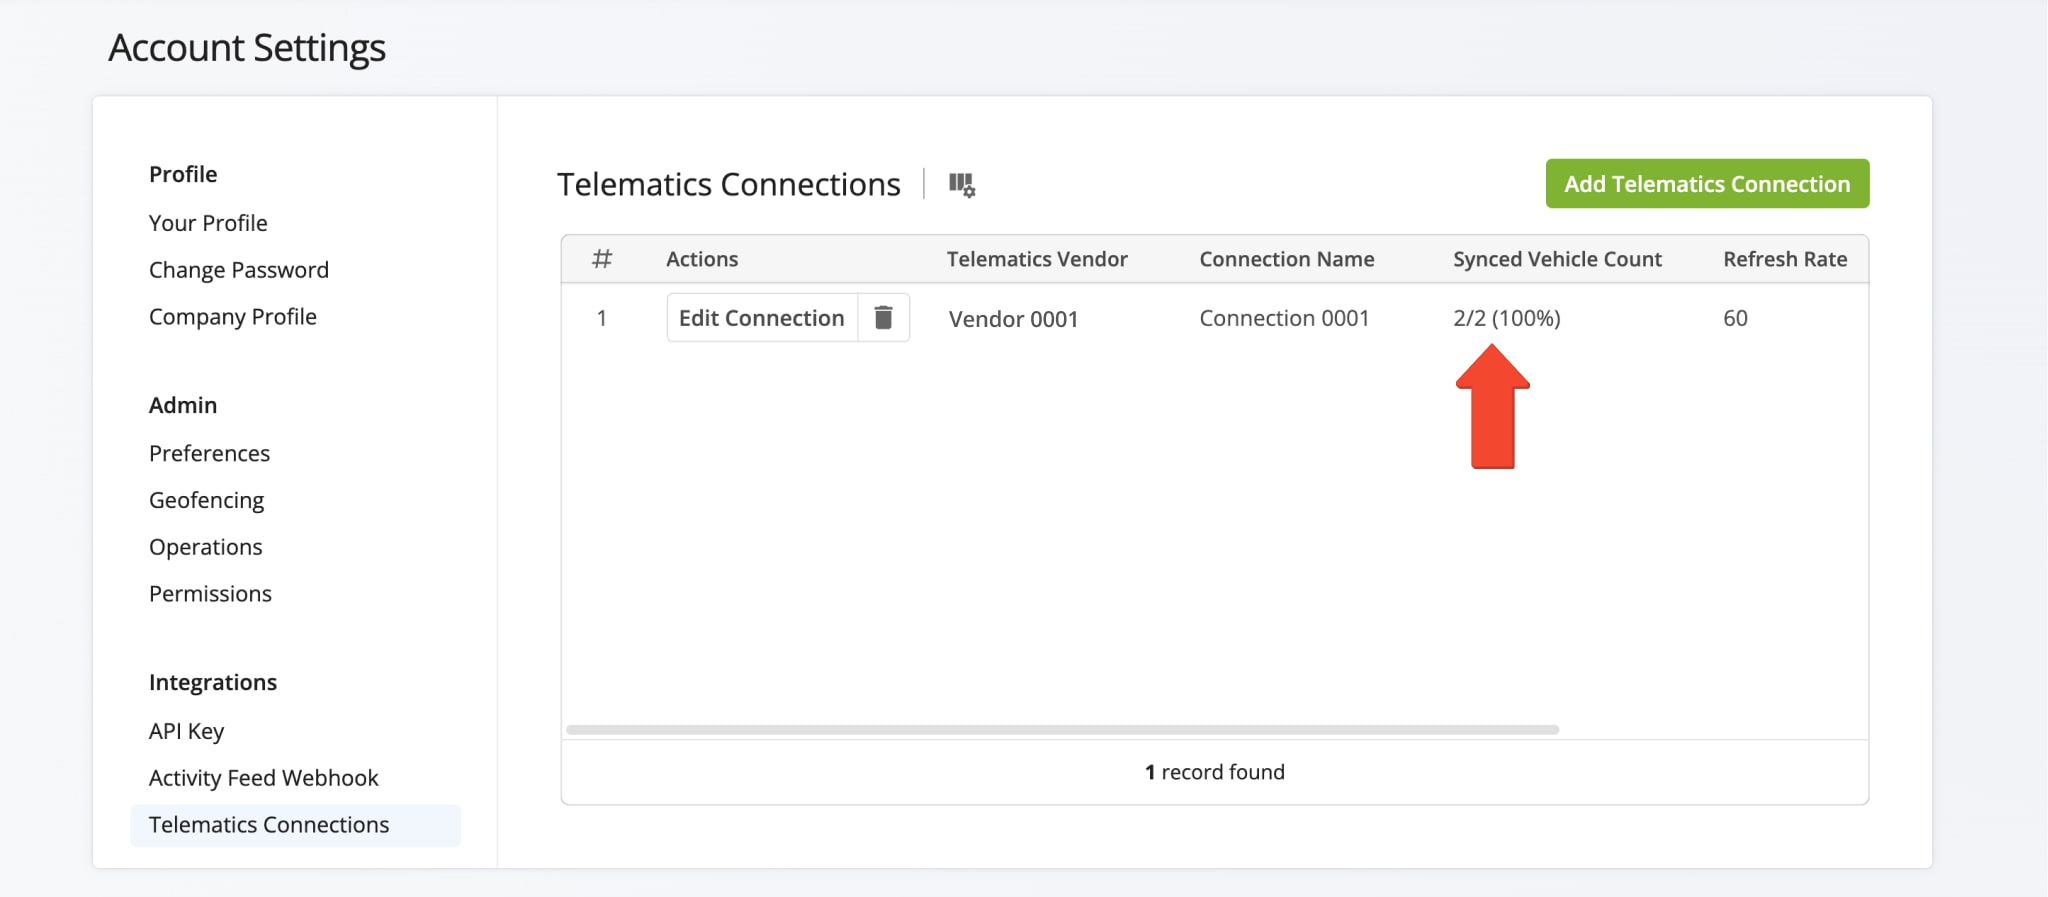
To bulk import multiple vehicles, start by establishing a telematics connection between your telematics provider and your Route4Me account. To do this, go to “Telematics Connections” in your “Organization Settings“.
Once you’ve added a connection, Route4Me will automatically sync your telematics vehicles and their data.
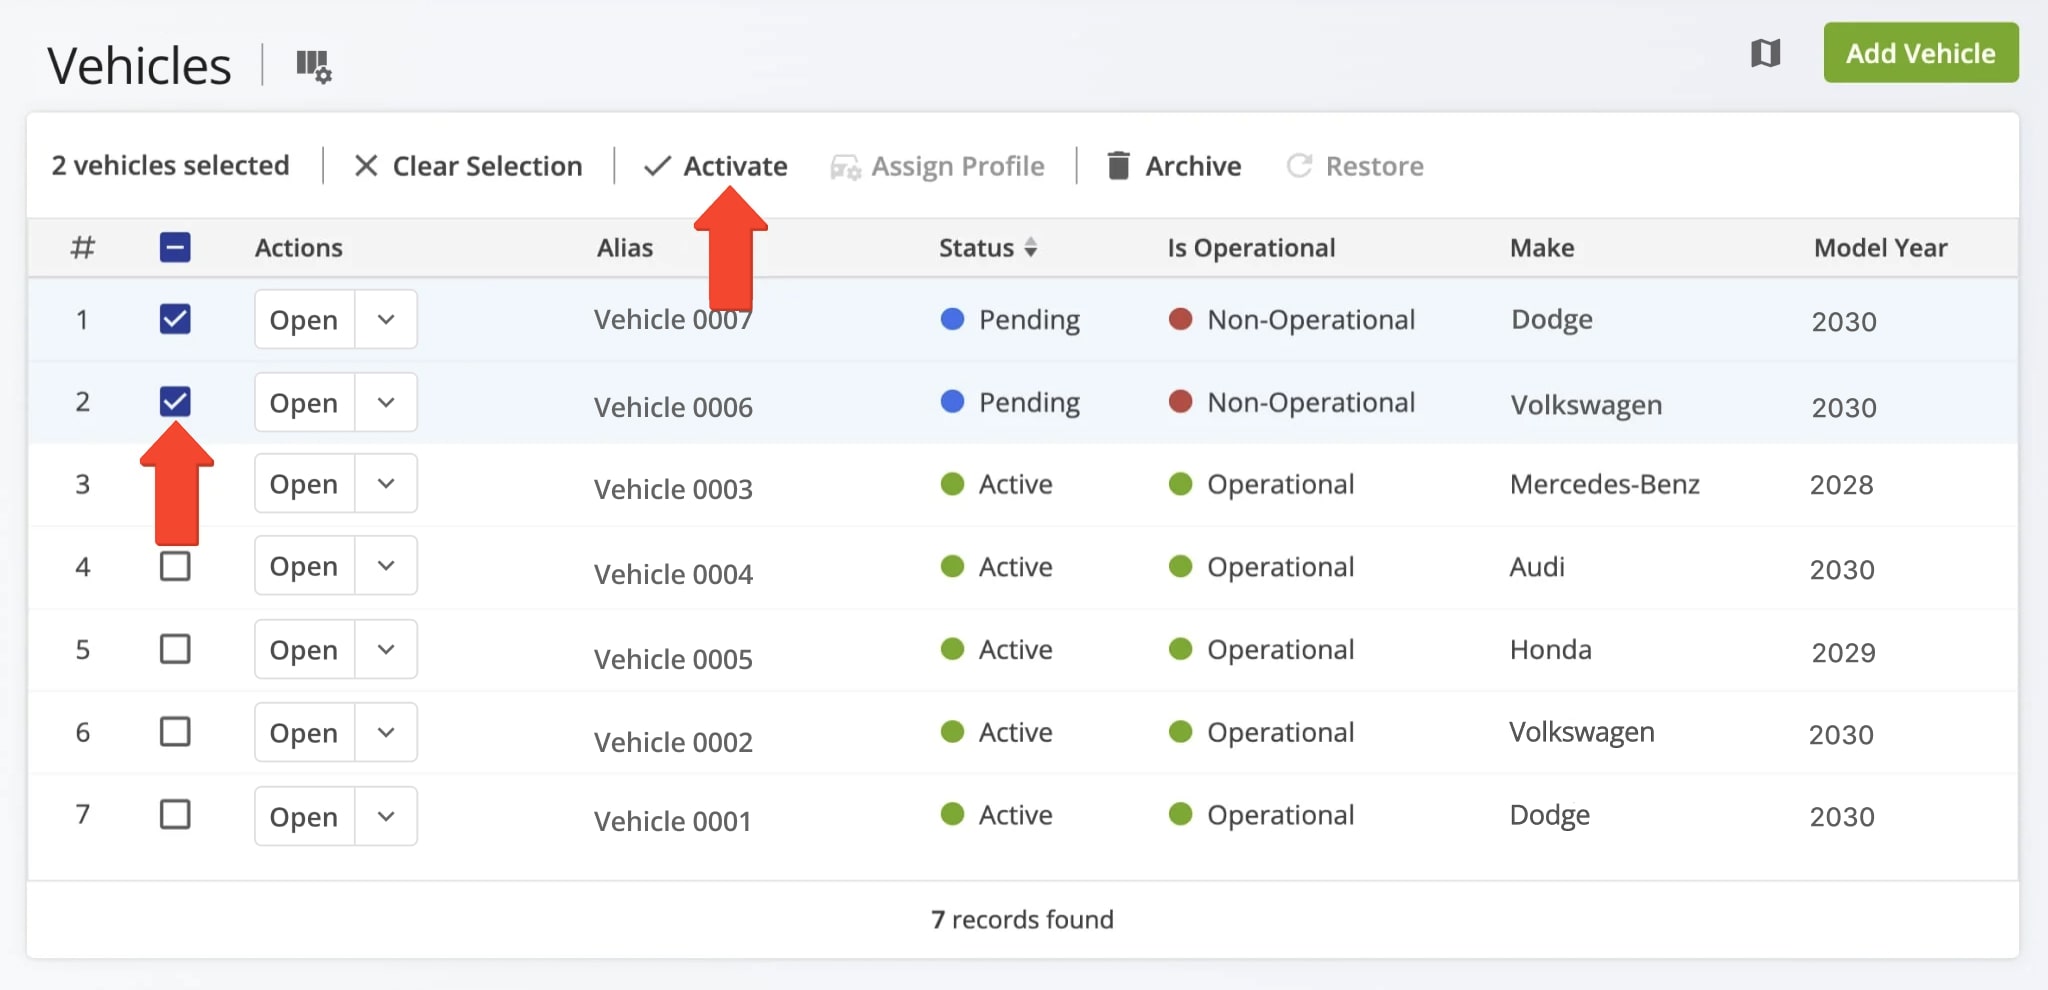
To activate these vehicles, go to “Team & Equipment” > “Vehicles” in the Navigation Menu. They will appear as “Pending” and “Non-Operational” in the Vehicles List. Check the box next to the vehicles you want to activate and click the “Activate” button.
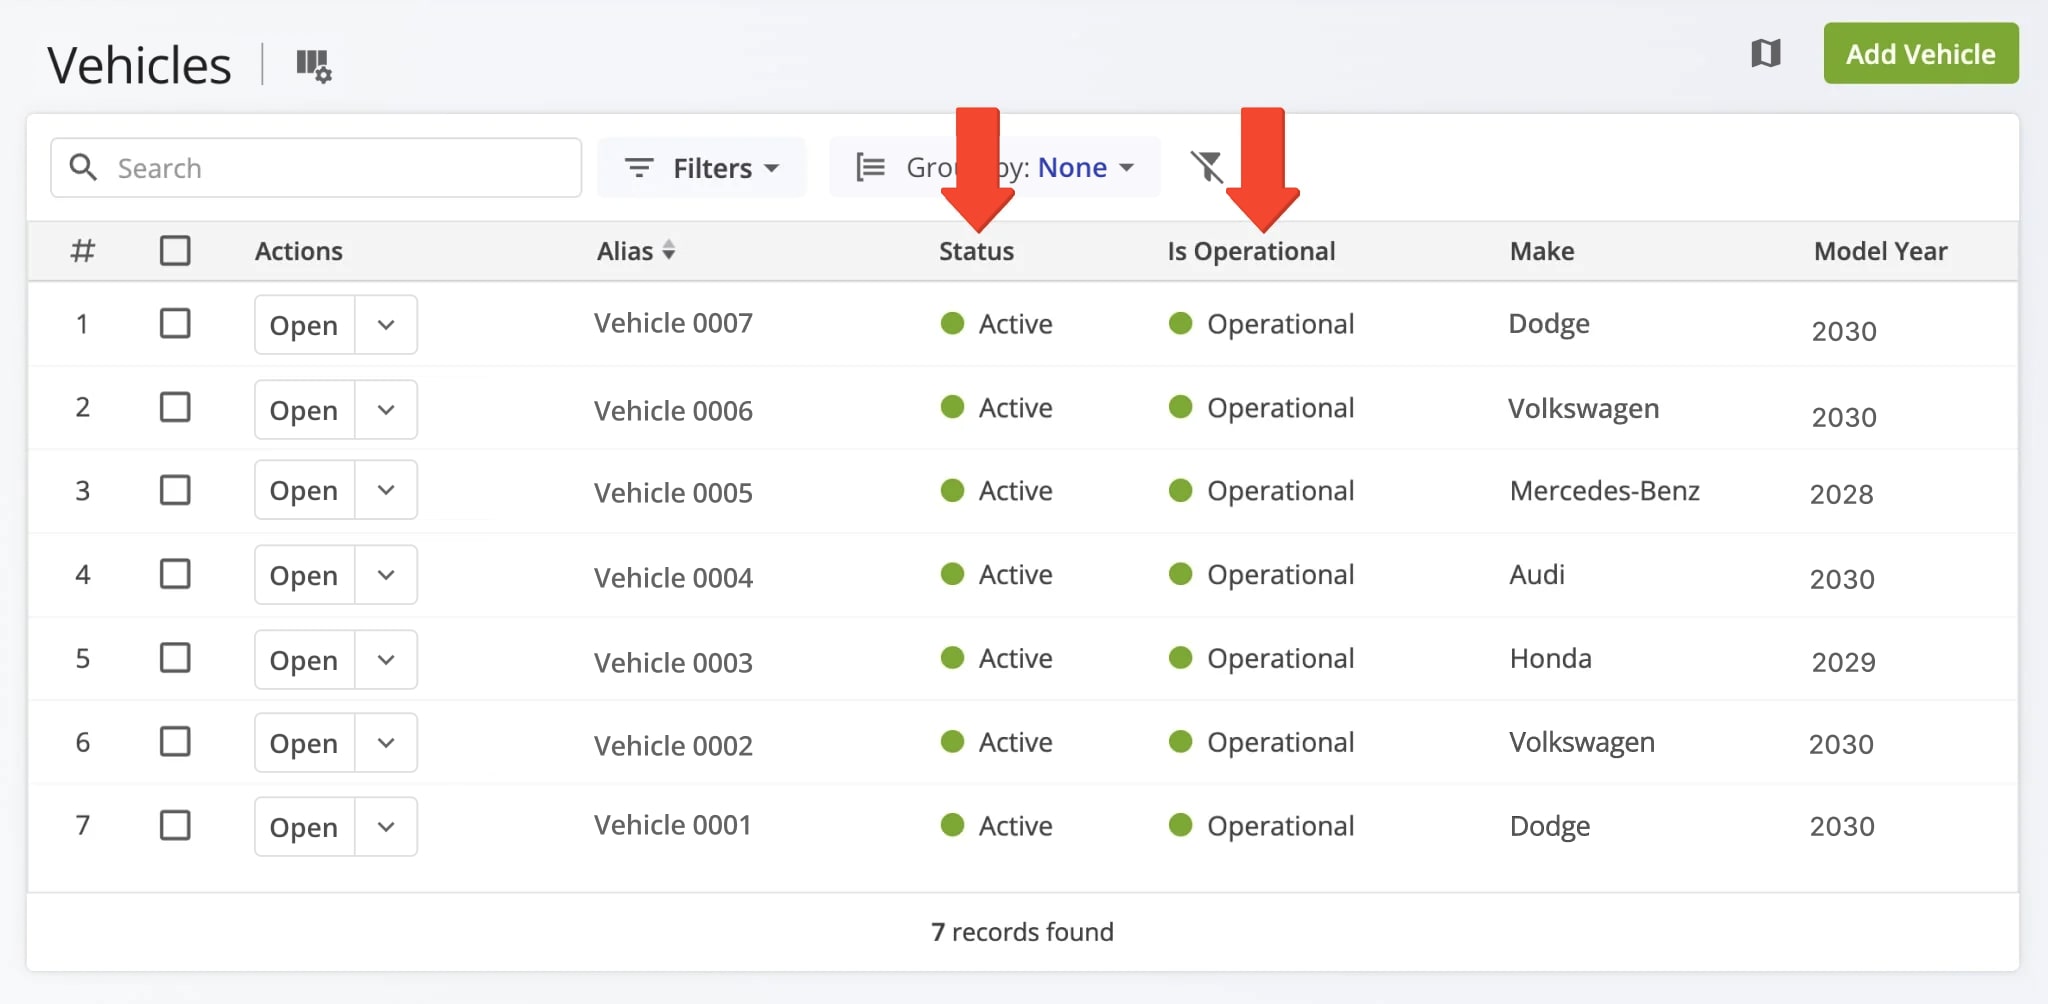
Once activated, they will appear as “Active” and “Operational”. Then, you can assign your vehicles to routes. Learn more about the benefits of establishing telematics connections in your Route4Me account.
Vehicles Map – View Fleet Vehicles On Map With Live Location Updates
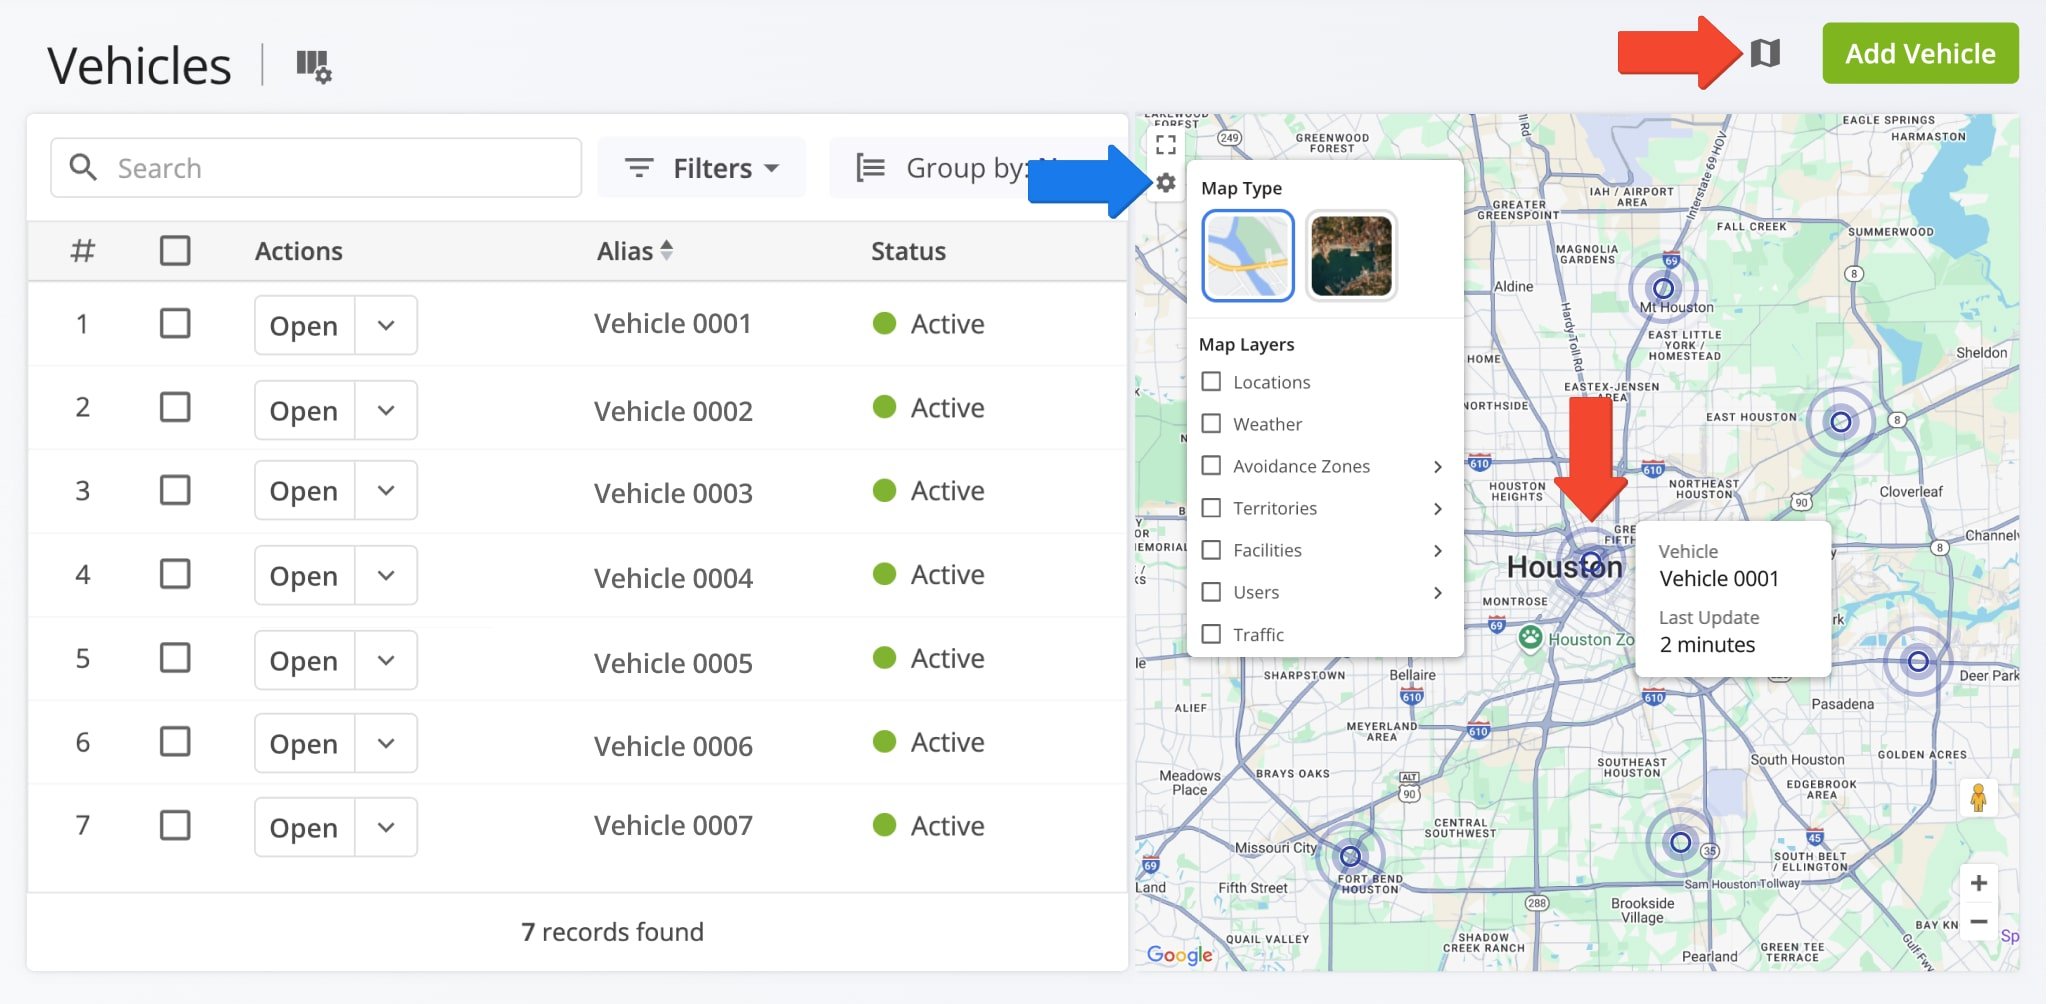
Route4Me enables you to see your active vehicles on the map with GPS location updates. To do so, simply click the Vehicles Map button in the top-right. Then, hover over a vehicle location on the map to see which vehicle it corresponds to and when its position was last synched with Route4Me’s dispatch and tracking software.
The Vehicles Map uses the same Google Maps controls you’re familiar with. Furthermore, click the Gear Icon to open map settings such as switching between a satellite and regular map, real-time traffic information, routing Avoidance Zones, and view your custom Address Territories. Additionally, learn more about real-time GPS asset tracking.
Assign Vehicles To Routes – Dispatch Routes To Vehicles
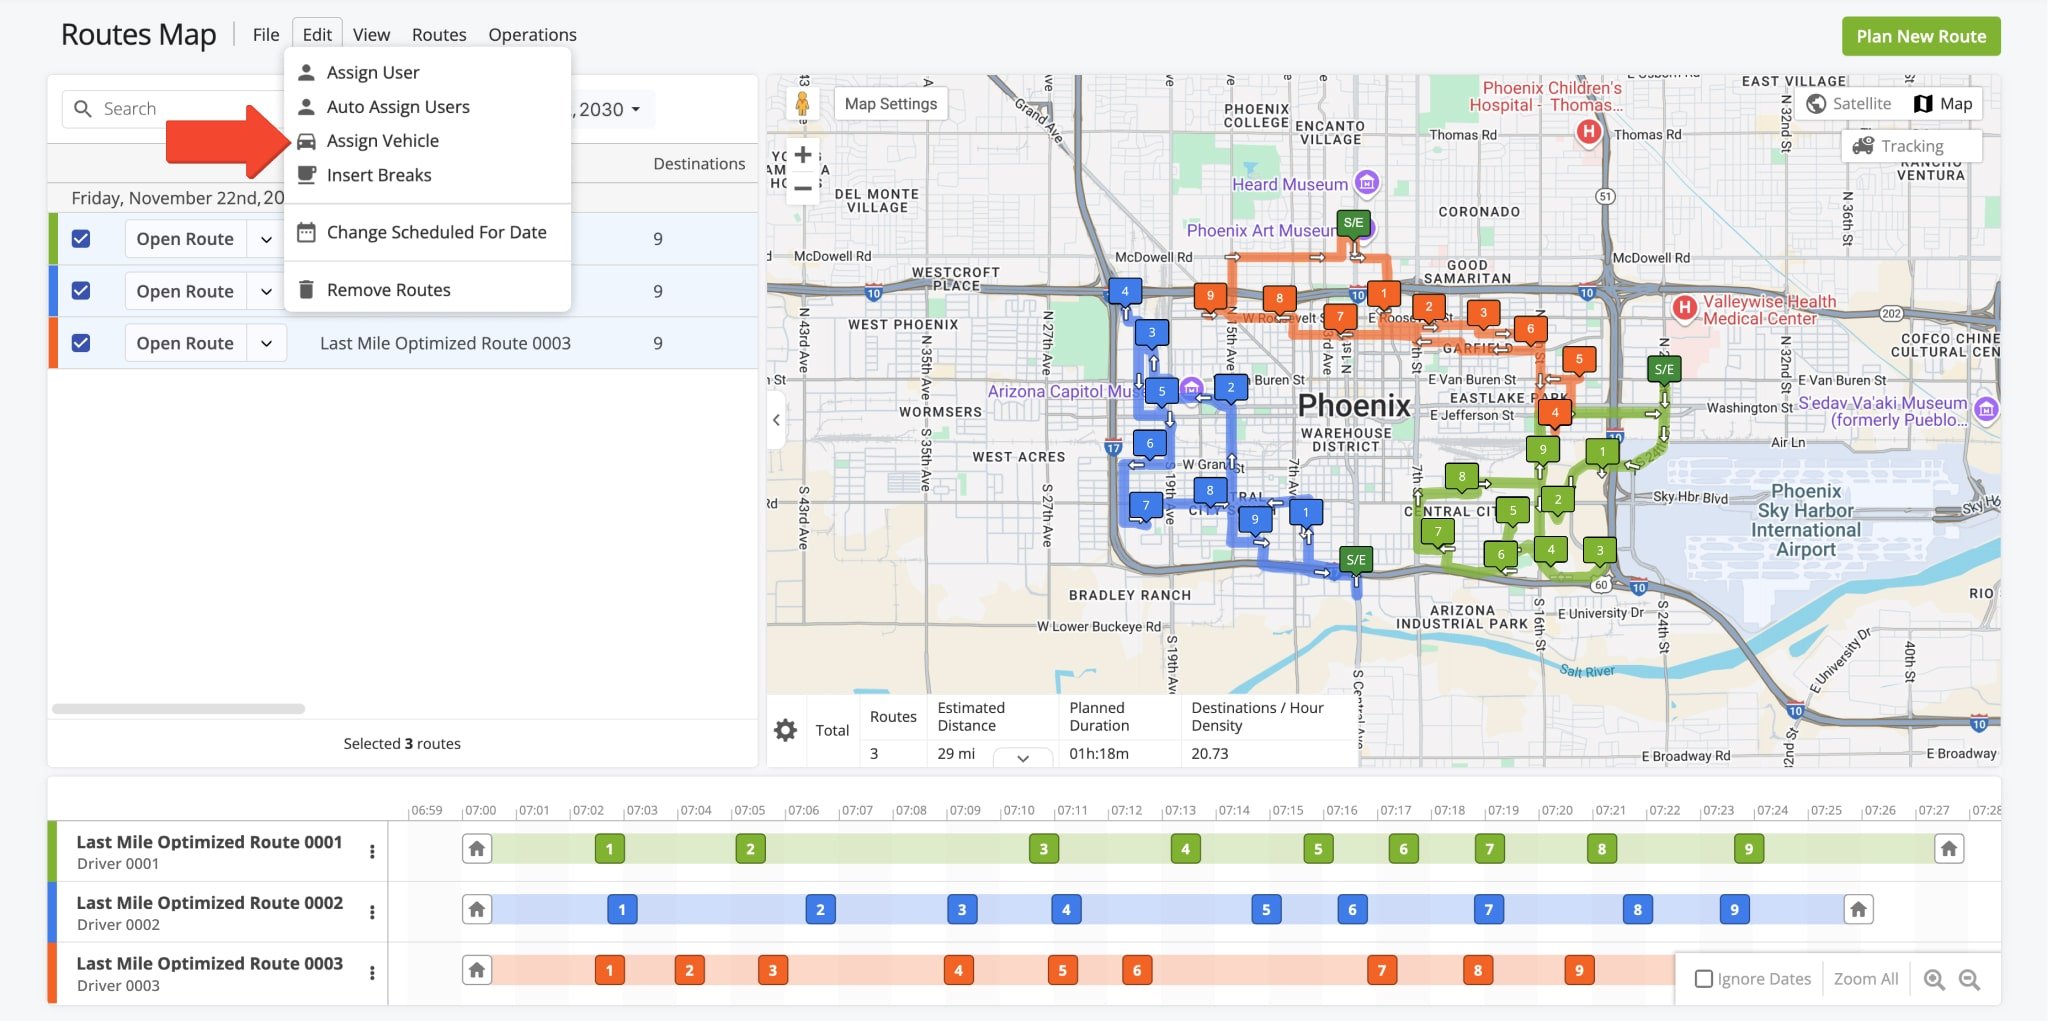
You can assign a vehicle to a route after you’ve added it to your account. You can assign it before planning a route (manually or through Optimization Profiles) and, once optimized, the route will be automatically dispatched to the assigned vehicle. Or you can assign vehicles to already planned routes via Route4Me’s Route Editor, Routes Map, or Routes List.
When you assign a vehicle to a route, the route is automatically dispatched to the vehicle. After dispatching the route, you can track the vehicle in real-time and view its GPS route tracking history.
Fleet Management – Manage And Edit Vehicles
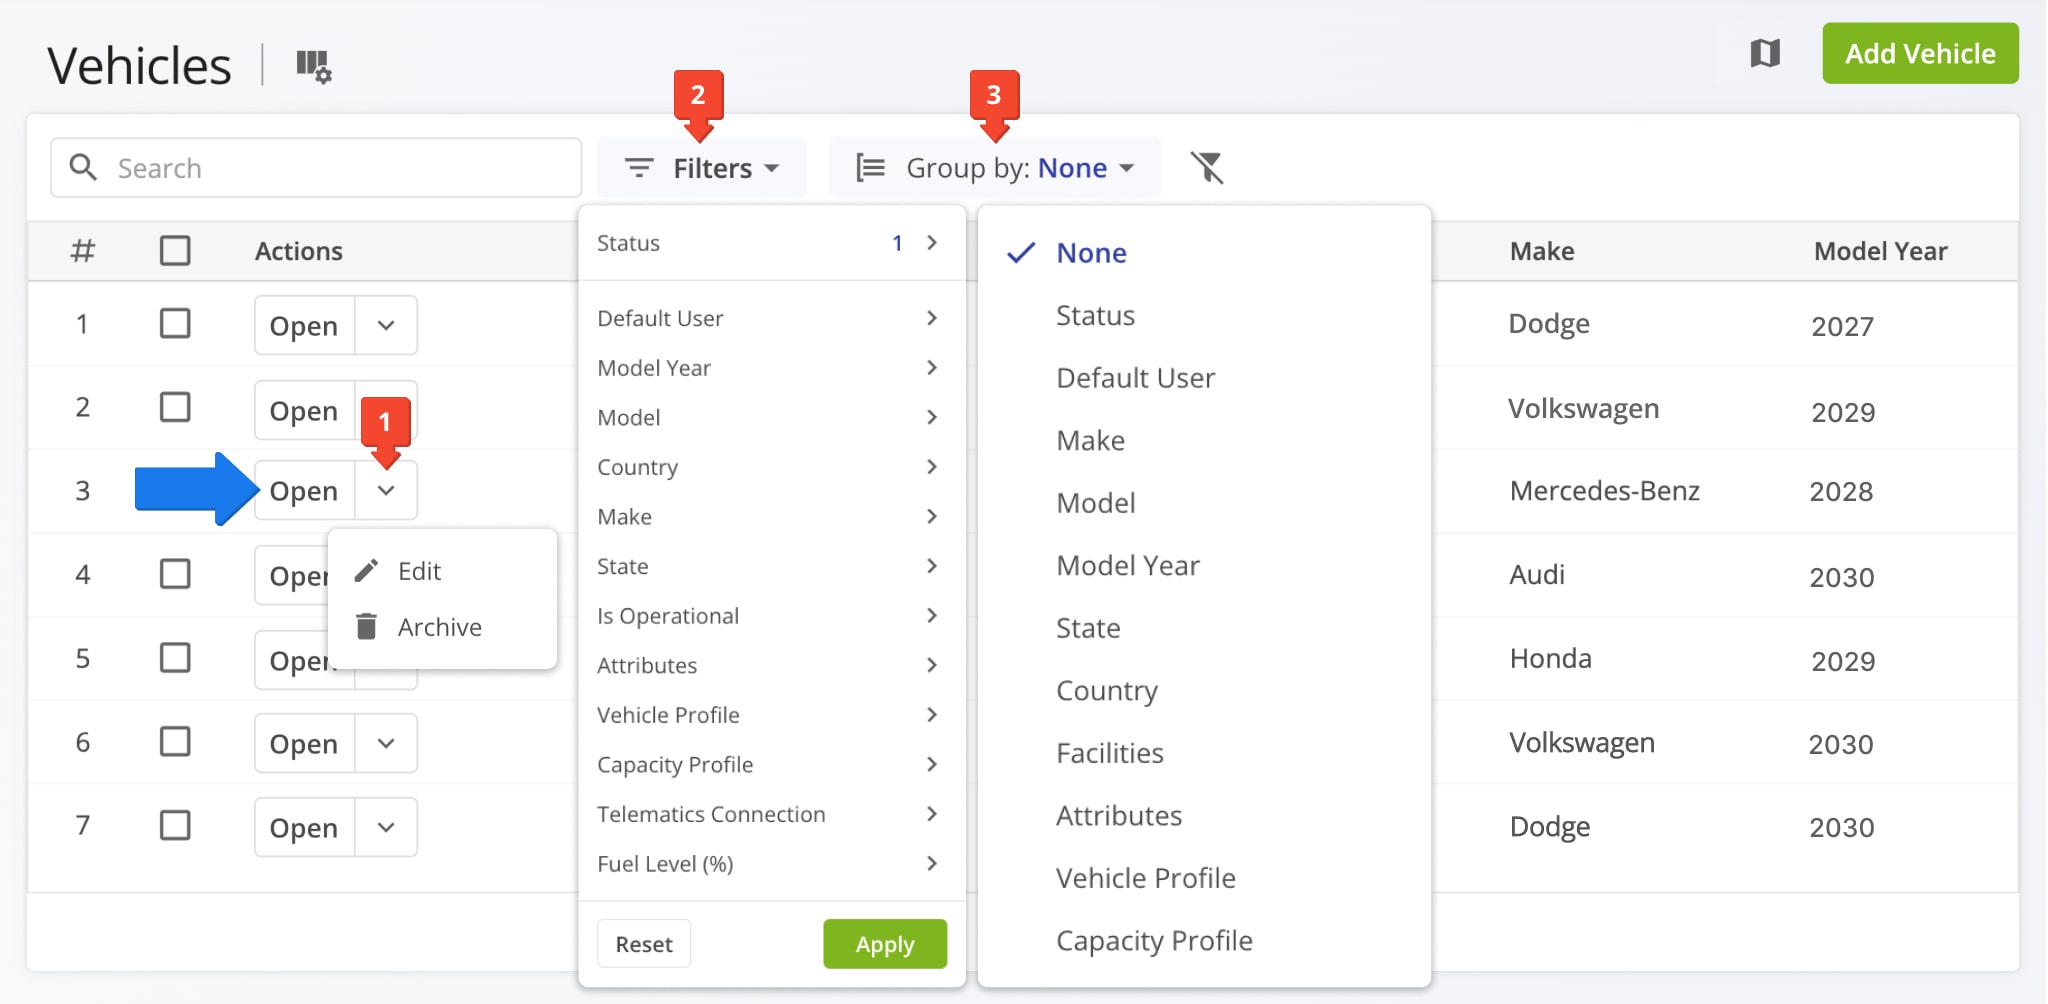
To view and manage vehicles on your account, go to “Team & Equipment” > “Vehicles” from the Navigation Menu. From here, you can:
- Click the Down Arrow and select “Edit” to edit vehicle settings or “Arhive” to remove the vehicle from the list.
- Click the “Filters” button to filter vehicles by status and Telematics Connection.
- Click the “Group by” button to group vehicles by their attributes.
Learn more about filters and grouping options in the table below. Additionally, you can click the “Open” next to a vehicle to go to its Vehicle Snapshot. Depending on your account-level permissions, you may have access to differen vehicles. Learn more about Vehicle Management Permissions by User Type.
| Filter | Description |
|---|---|
| Status | Current status of vehicles. |
| Default User | Set the user that will be associated with the vehicle by default. |
| Model Year | Year the vehicle’s design or version was manufactured. |
| Model | Specific vehicle design or model. |
| Country | Nation where the vehicle is registered. |
| Make | Brand or manufacturer of the vehicle. |
| State | State where the vehicle is registered. |
| Is Operational | Indicate if the vehicle is currently operational and available for use. |
| Attributes | Custom Vehicle Attributes used for Driver Skill and Vehicle Attributes destination matching and route planning. |
| Vehicle Profile | Vehicle’s dimensions and usage settings, as well as any specialized regulations or restrictions associated with the vehicle. |
| Capacity Profile | Vehicle’s maximum load capacity in weight, volume, and number of pieces. |
| Fuel Level (%) | Last synched vehicle fuel level percentage. |
| Telematics Connection | Filter vehicles on your account according to the Telematics Connection they’re imported from. |
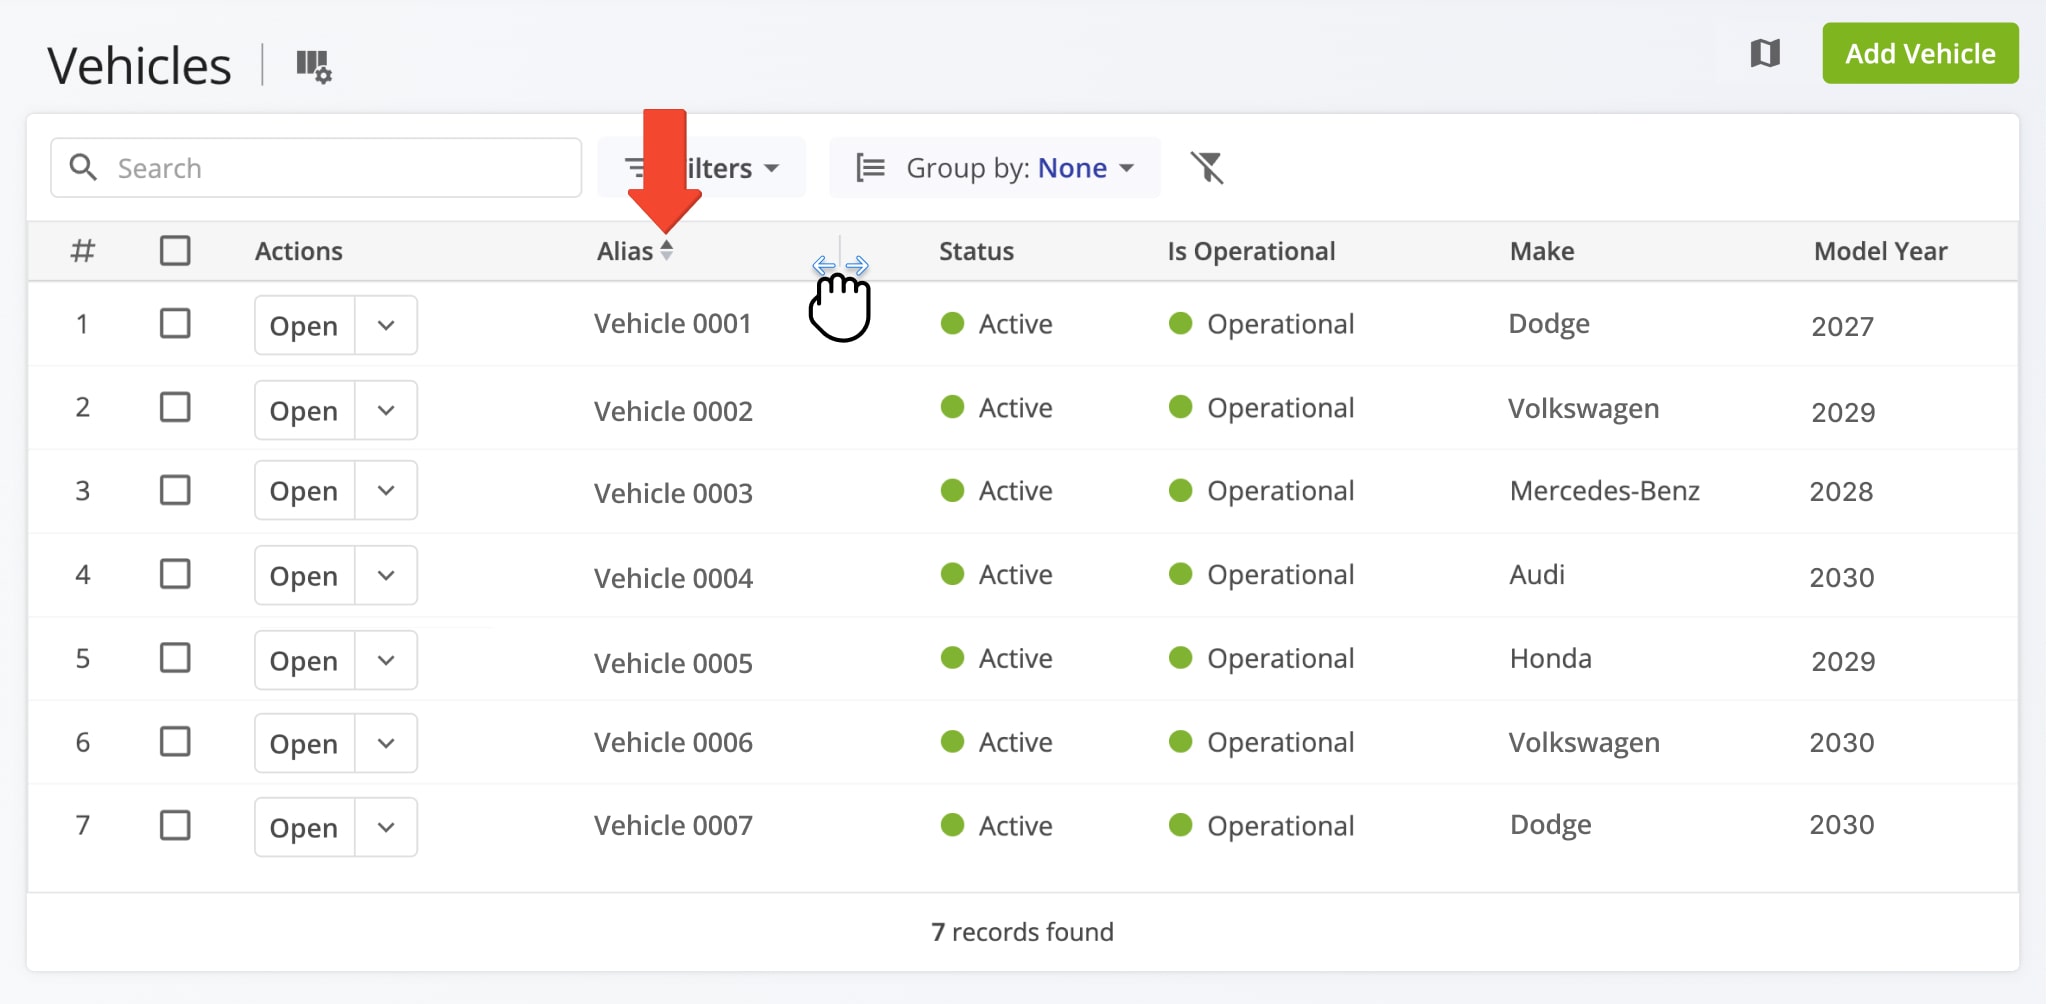
Use the width slider to adjust the width of a column. Click the arrow next to a column heading to sort the list by that column.
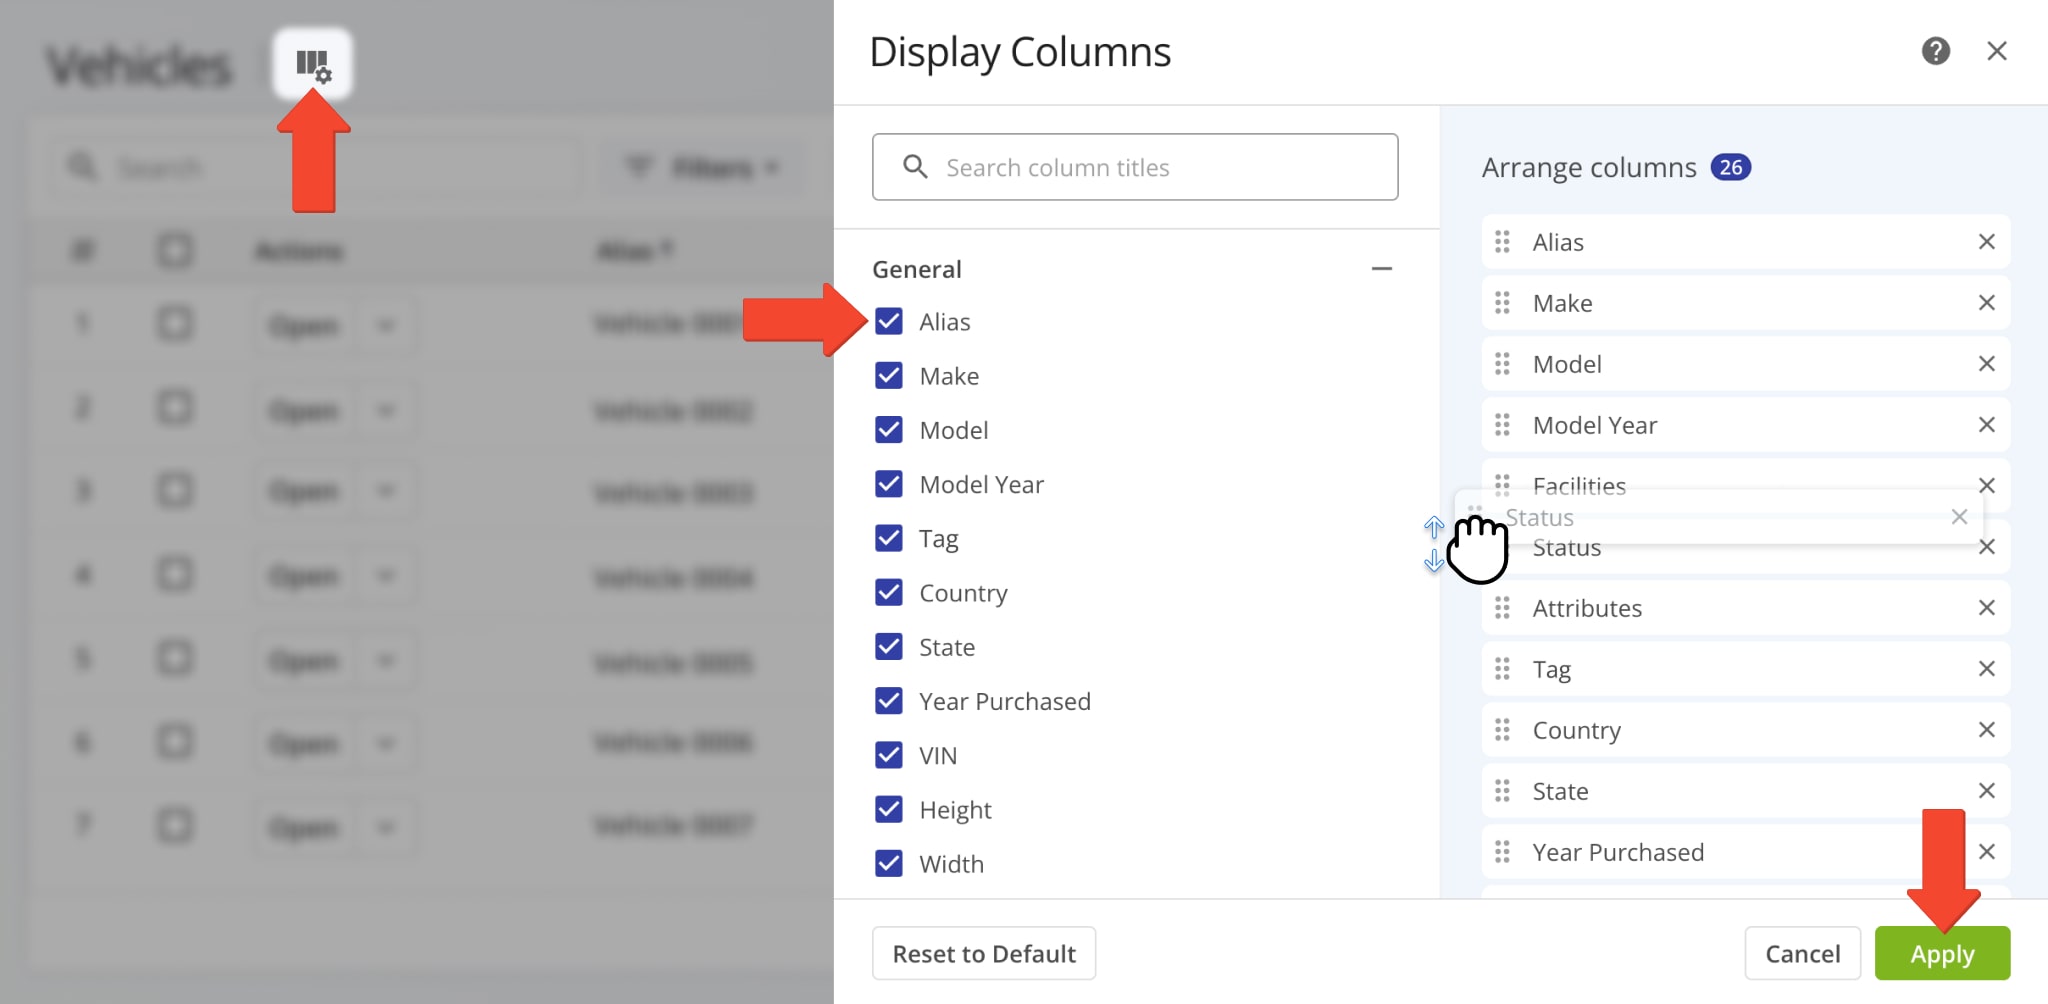
To customize the columns shown in your Vehicles List, click the Display Columns button in the top-left. Then, check the boxes next to the columns you want to enable. You can re-arrange columns on the right of the Display Columns panel by dragging column names. Finally, click “Apply” to save your Display Columns settings. Find more information about columns in the table below.
| Column | Description | |
|---|---|---|
| General | ||
| Alias | Unique name assigned to the vehicle, making it easy to identify and locate within your fleet when assigning it to routes. | |
| Make | Brand or manufacturer of the vehicle. | |
| Model | Specific vehicle design or model. | |
| Model Year | Year the vehicle’s design or version was manufactured. | |
| Tag | Vehicle’s unique license plate number, issued for identification. | |
| Country | Nation where the vehicle is registered. | |
| State | State where the vehicle is registered. | |
| Year Purchased | Year the vehicle was bought. | |
| VIN | Vehicle Identification Number, a unique code used to identify the vehicle. | |
| Height | Maximum height of the vehicle. | |
| Width | Maximum width of the vehicle. | |
| Trailer/Straight Length | Total length of the vehicle or trailer. | |
| Total Weight | Vehicle’s total weight. | |
| Max Weight per Axle Group | Maximum weight that can be carried by each axle group of the vehicle, measured. | |
| Vehicle Profile | Vehicle’s dimensions and usage settings, as well as any specialized regulations or restrictions associated with the vehicle. | |
| Capacity Profile | Vehicle’s maximum load capacity in weight, volume, and number of pieces. | |
| Is Operational | Indicate if the vehicle is currently operational and available for use. | |
| Facilities | Account Facilities associated with vehicles. | |
| Attributes | Custom Vehicle Attributes used for Driver Skill and Vehicle Attributes destination matching and route planning. | |
| Default User | Set the user that will be associated with the vehicle by default. | |
| Source Telematics Vehicle ID | Unique identifier of the vehicle in the Telematics Connection it was imported from. | |
| Source Telematics Connection | Provider or Telematics Connection the vehicle was imported into or synced with your Route4Me account. | |
| Fuel | ||
| Fuel Type | Vehicle’s fuel type (e.g., gasoline, diesel, electric, hybrid). | |
| Fuel Consumption City | Vehicle’s fuel efficiency for city driving. | |
| Fuel Consumption Highway | Vehicle’s city fuel efficiency for highway driving. | |
| Registration Information | ||
| Status | Indicates if the vehicle is “Active”, able to be managed and assigned; “Pending”, imported and requiring activation; or “Archived”, deactivated but able to be restored. | |
Assign Final Mile Fleet Vehicles To Facilities
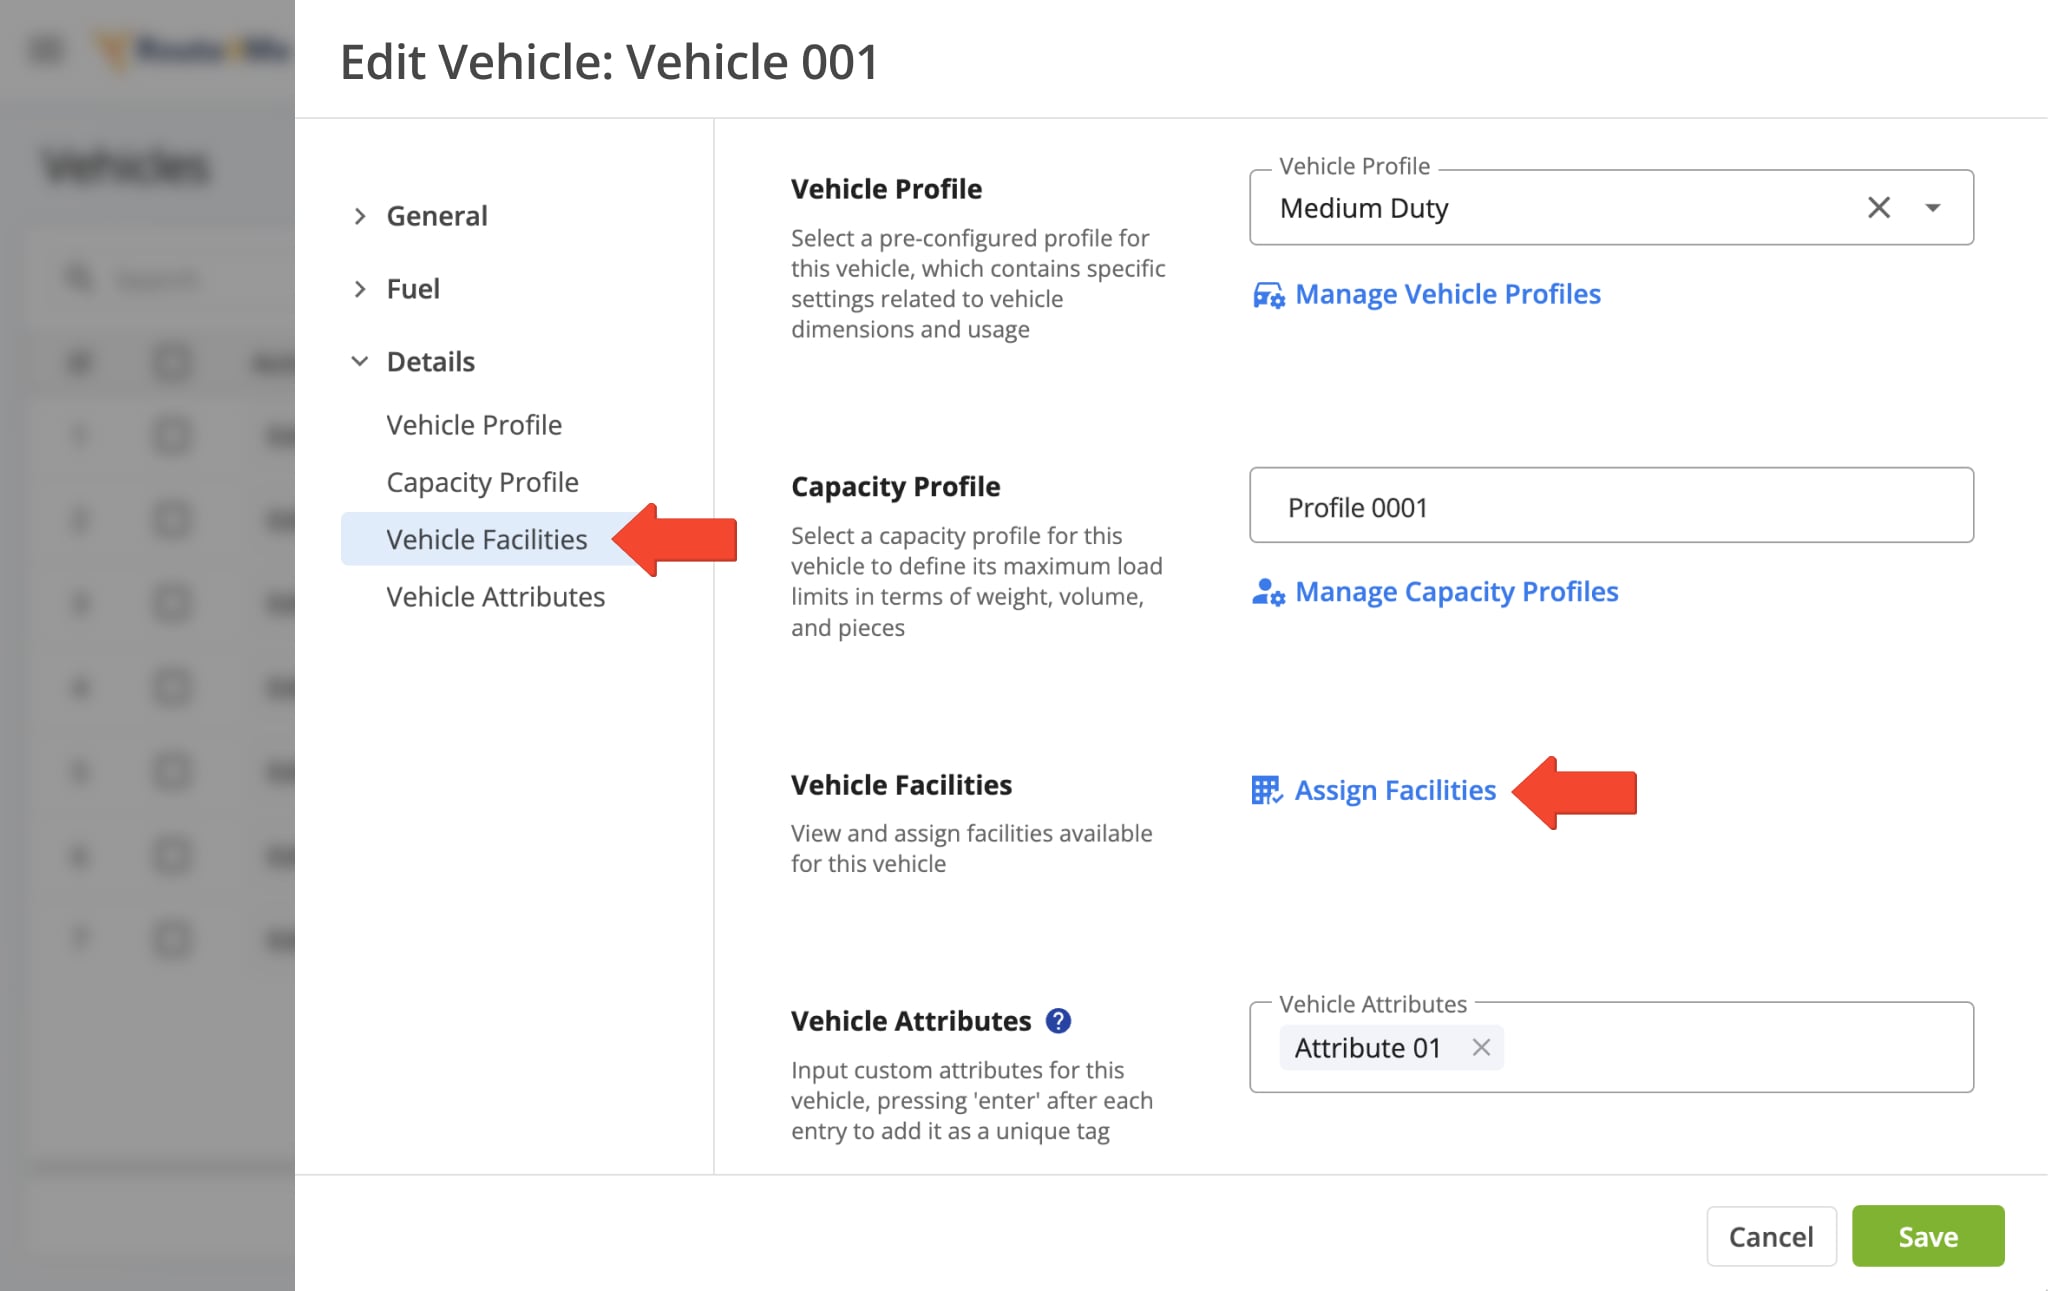
From your Vehicles Page, you can assign vehicles to facilities. To do this, click the “Edit Vehicle” button, then click “Vehicle Facilities” located under “Details“. After, click “Assign Facilities“.
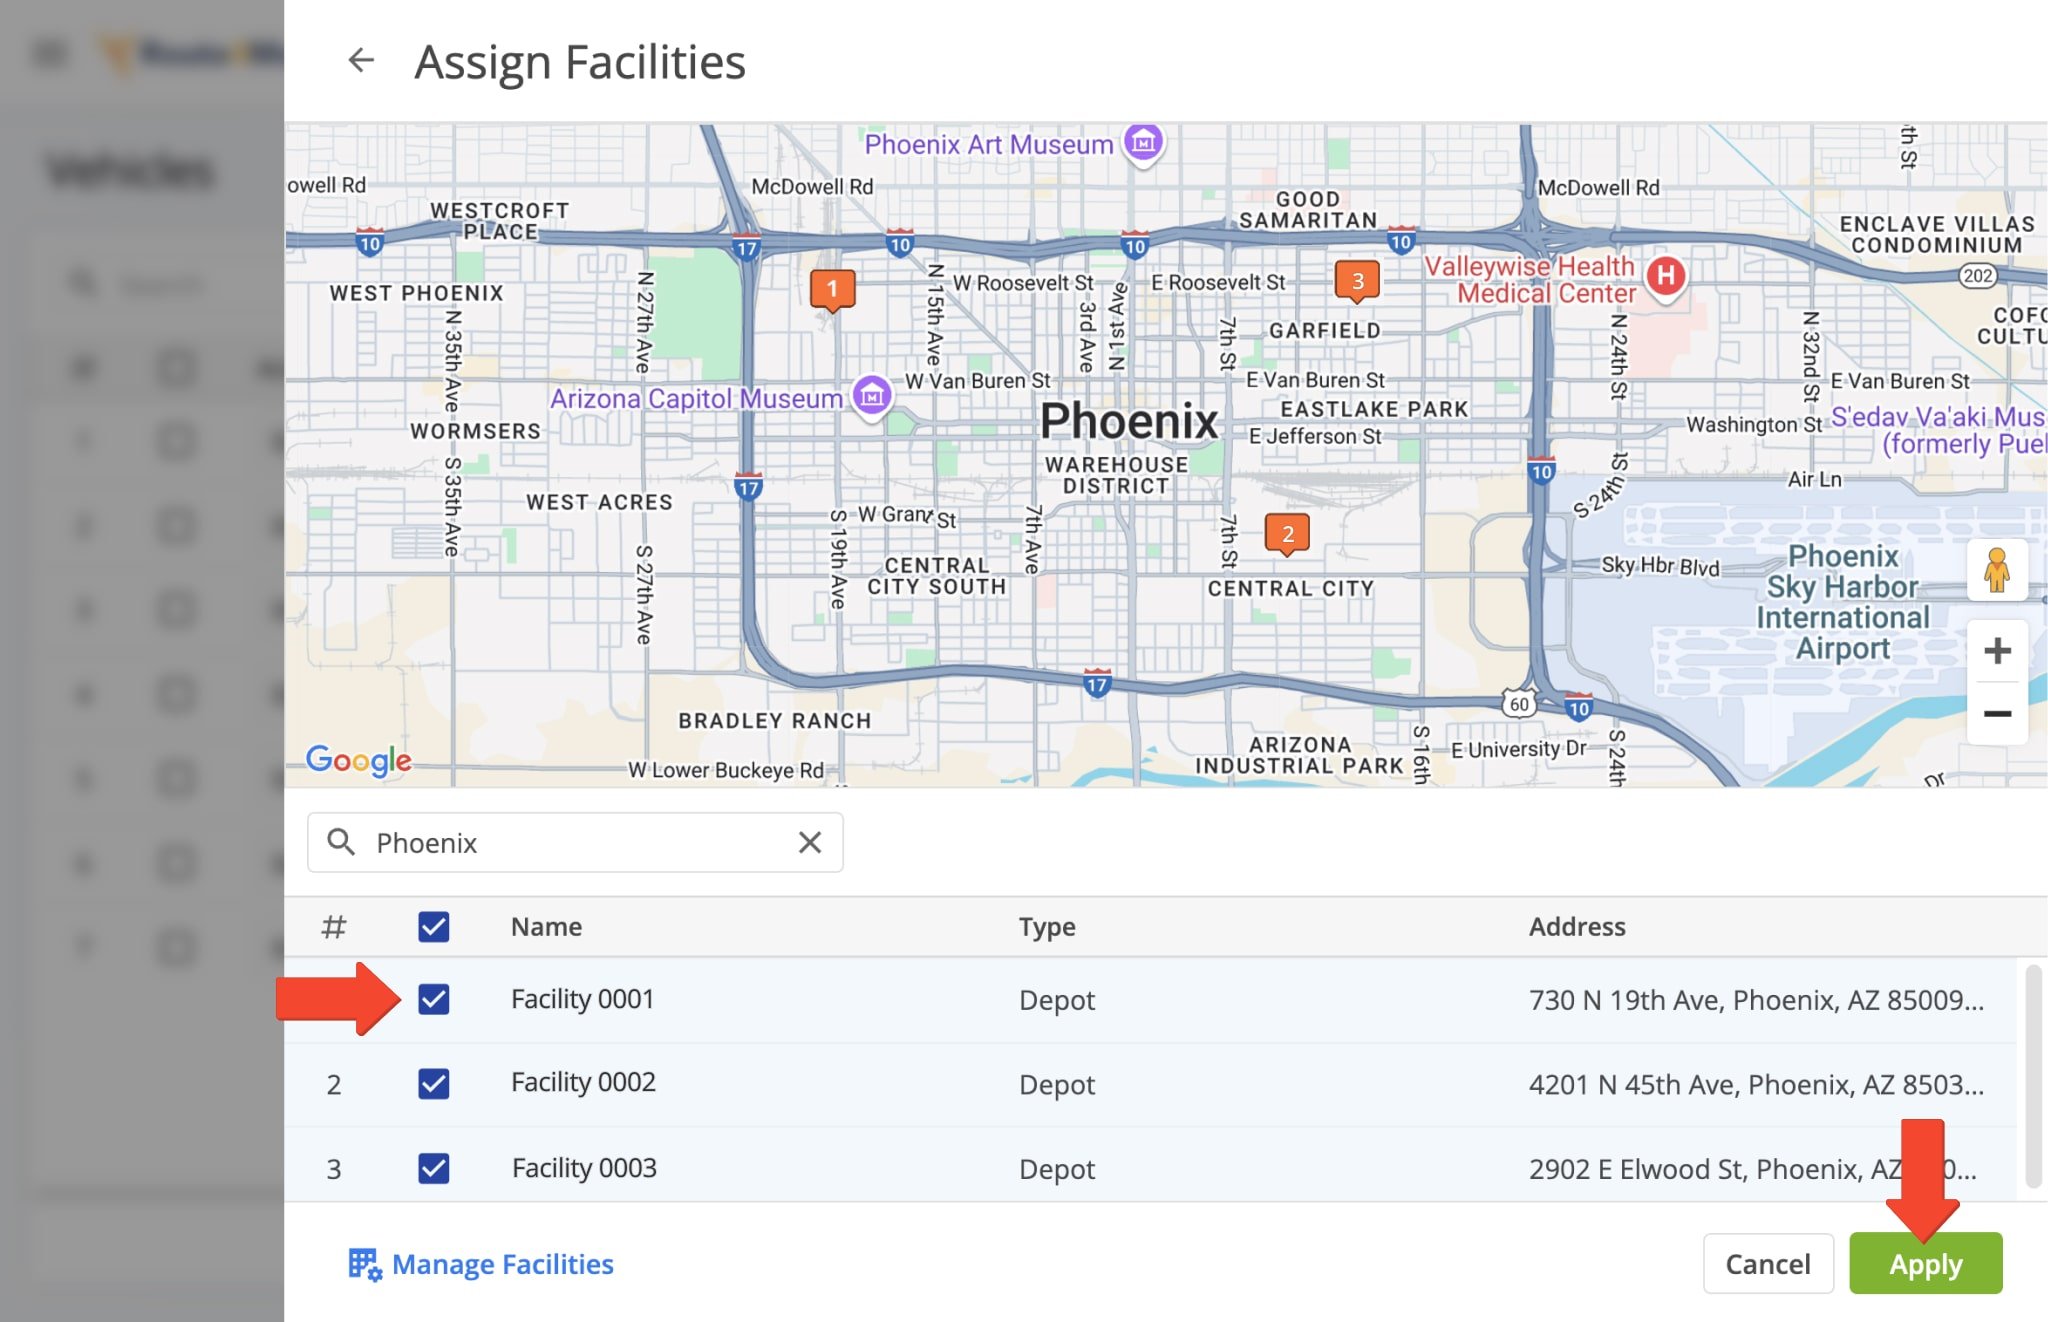
Select the specific facility you would like to assign to the vehicle, then click “Apply“. NOTE: You can assign a vehicle to multiple facilities for greater fleet management flexibility, allowing deployment from various locations as needed.
Assign Vehicle Attributes And Profiles
Route4Me’s route optimization software includes powerful features to make last mile route planning more efficient, reliable, and compliant. For instance, Vehicle Attributes for Driver Skills Routing ensure the right driver and vehicle are matched to meet specific location needs. Commercial Vehicle Profiles help you stay compliant with road regulations, avoiding fines and safety risks. Meanwhile, Capacity Profiles optimize mixed fleet vehicle load capacity.
Vehicle Attributes – Add Vehicle Attributes For Drivers Skills Routing
Route4Me’s Driver Skills and Vehicle Attributes feature enables you to quickly optimize thousands of addresses by matching field employee skills and fleet vehicle attributes to each location’s requirements. You can ensure the right team member and vehicle are always assigned to the right destination.
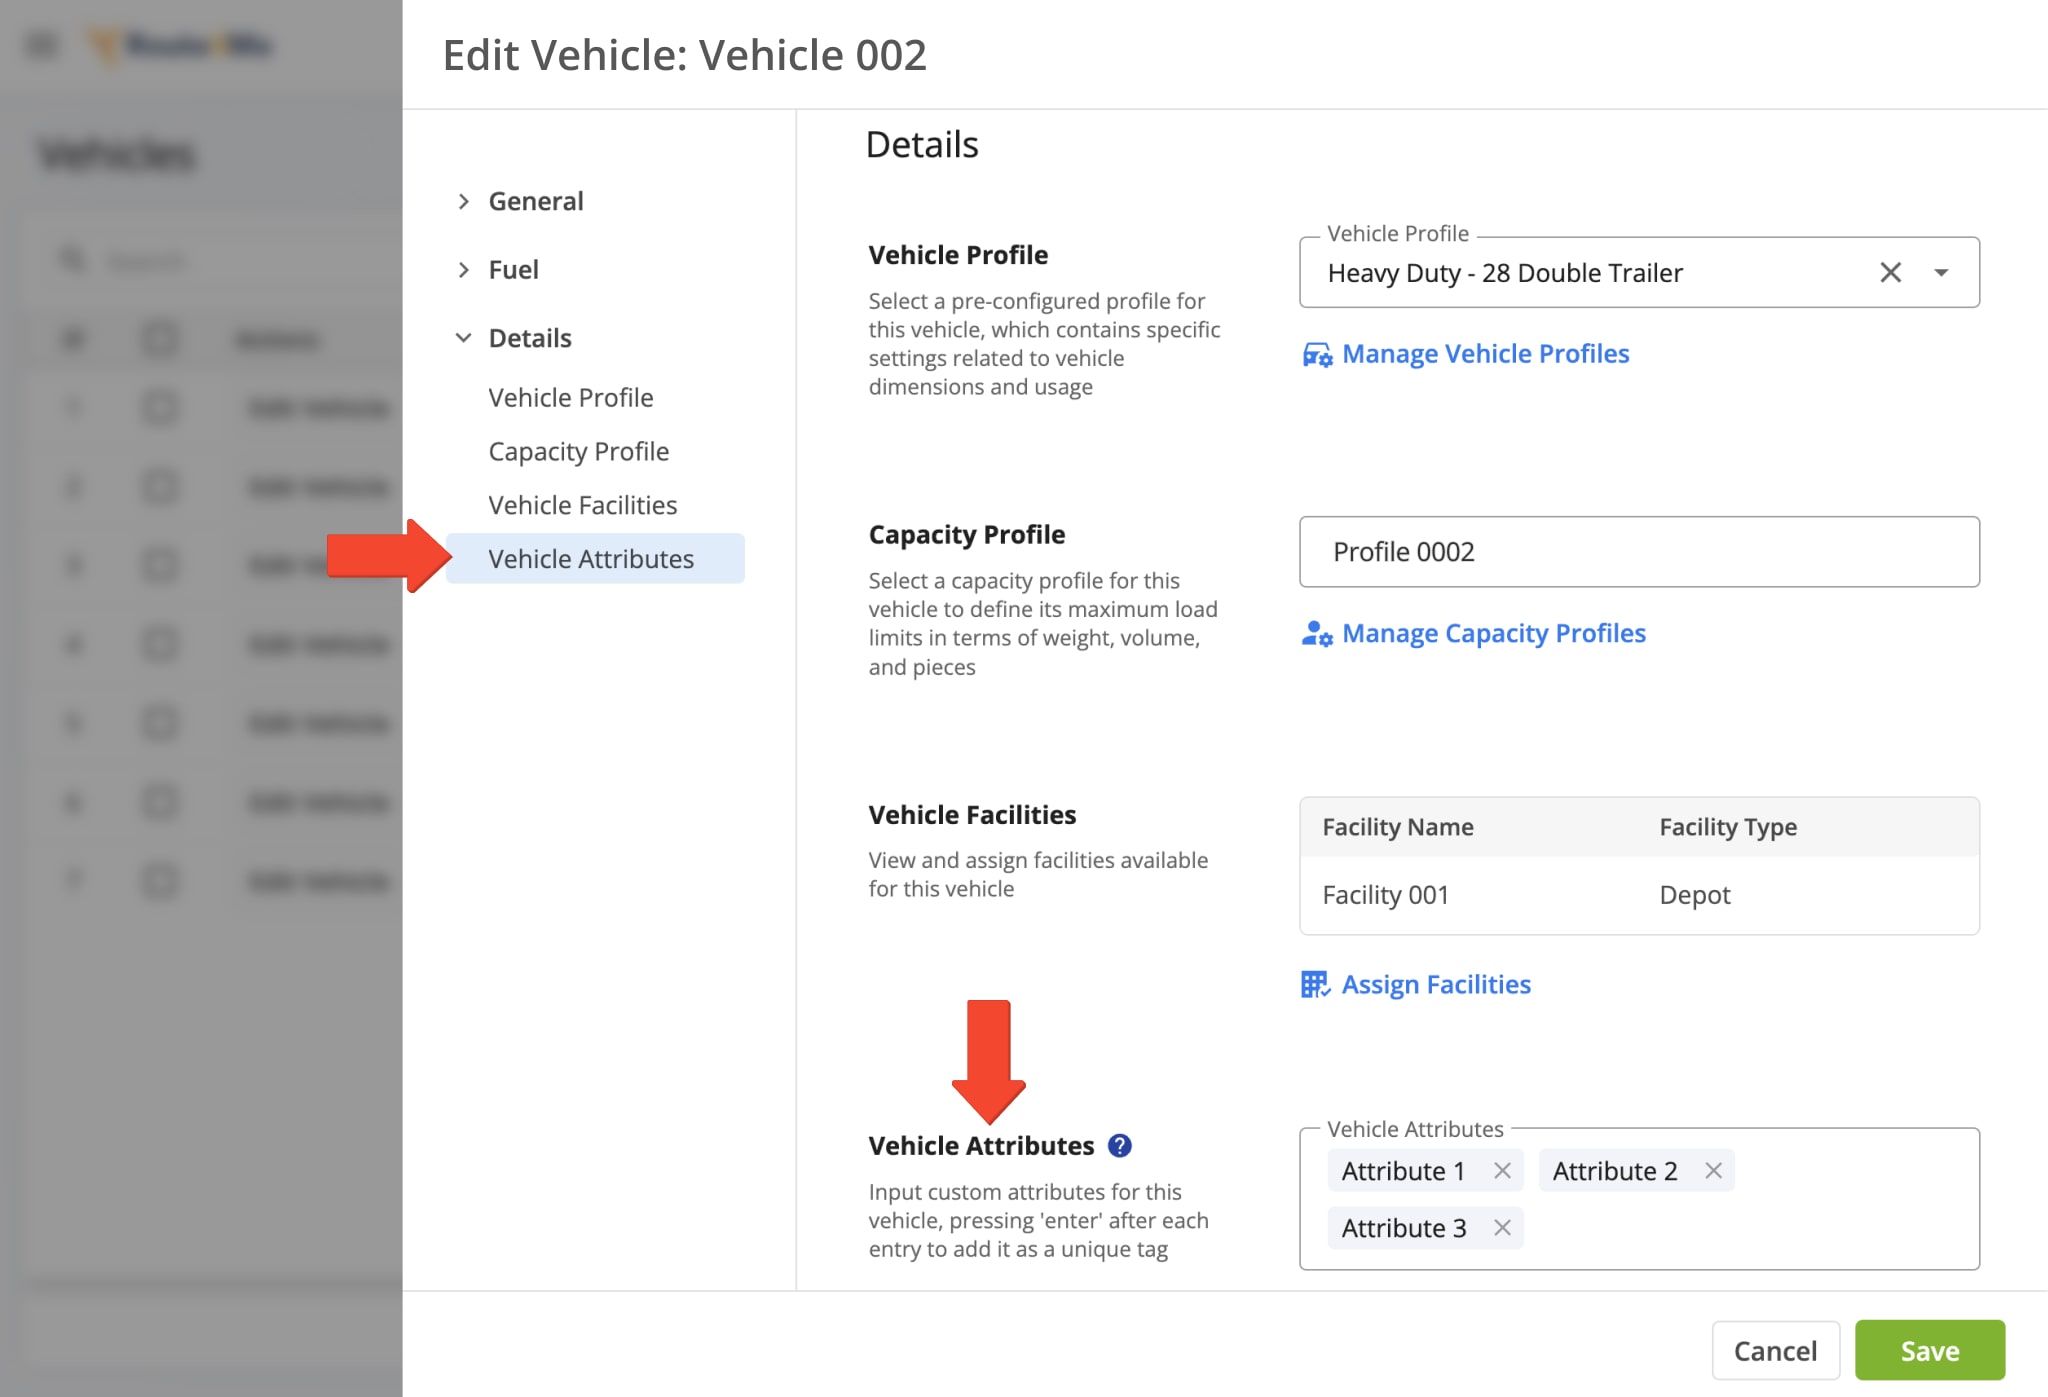
You can assign Vehicle Attributes when adding a new vehicle or when editing an existing vehicle already in your Vehicle List. When the vehicle’s attributes match an address’s requirements, it can be automatically assigned to that address. Learn more about adding Drivers Skills and Vehicle Attributes for improved Mixed Fleet Route Optimization.
Vehicle Profile – Add Commercial Vehicle Profile For Commercial Routing
Different countries and states enforce road restrictions for commercial vehicles, including limitations based on weight, size, hazardous materials, and bridge or tunnel access. Violating these rules can endanger public safety and result in hefty fines.
To mitigate risks and avoid inefficient commercial routing, you can configure a fleet with specific parameters for light, medium, and heavy-duty vehicles. When adding or editing a vehicle, you have the ability to define a Vehicle Profile for your fleet to ensure operational efficiency and safety. Learn more about commercial vehicles and truck routing with Vehicle Profiles.
Capacity Profile – Add Vehicle Capacity Profiles For Mixed Fleet Routing
Large and medium-sized businesses often use mixed fleets of cars, vans, and trucks to meet diverse last-mile routing needs. Route4Me’s Mixed Fleet Route Planning Add-On enables you to optimize routes for vehicles with varying load capacities and destination requirements.
When adding or editing a vehicle, you can select for each vehicle a pre-defined Capacity Profile based on a vehicle’s load capacity for weight, volume, number of items, or maximum allowed revenue. Learn more about mixed fleet route optimization with custom vehicle Capacity Profiles.
Visit Route4Me's Marketplace to Check out Associated Modules:
- Route Optimization
Commercial Vehicle & Truck Routing
- Route Optimization
Mixed Vehicles Routing
- Route Optimization
Field-Services / Field-Marketing / Field-Sales Delivery Management
