Complete Orders – Dispatch Order Routes, Load & Unload Orders, Complete Order Tasks, Monitor Order Progress
Route4Me’s ERP Order Management and Routing System helps medium and large last mile businesses import orders from CRMs, then sort, process, route, and complete millions of orders efficiently. Managers, route planners, sorters, dispatchers, and drivers can plan and dispatch routes, load and unload orders with the in-app barcode scanner, collect proof of service , and track order analytics. This guide explains how to complete orders, including planning and dispatching routes, completing them as a driver, reviewing and rescheduling orders, and analyzing order performance.
Table of Contents
Plan And Optimize Order Routes And Dispatch Order Routes To Drivers
After adding, importing, sorting, and scheduling orders, route planners can use detailed order filters to quickly find the correct orders, even among millions, and plan routes.
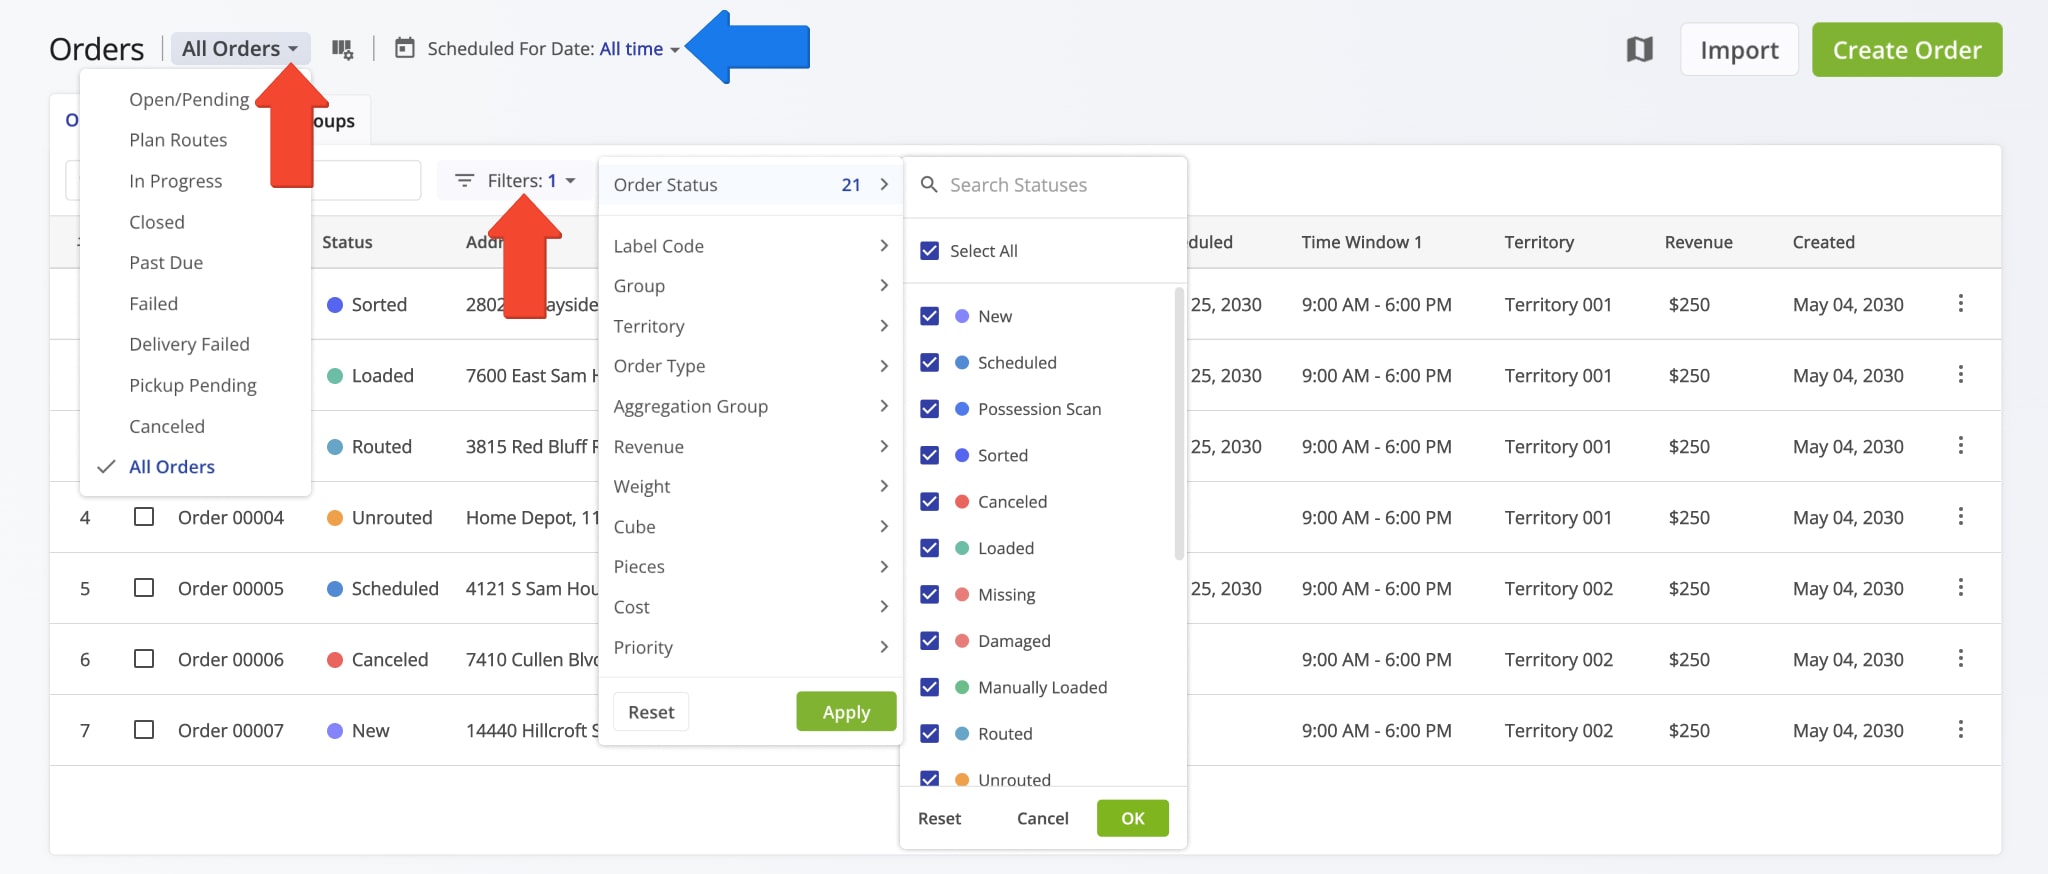
From the Navigation Menu, click “Business Operations” > “Orders” to open your Orders List. You can filter orders by “Scheduled For Date” or “Order Status“, and Orders List View Modes enable you to group statuses by their purpose.
For example, the “Plan Routes” View Mode includes the Sorted and Scheduled statuses for planning new routes or inserting orders into existing routes.
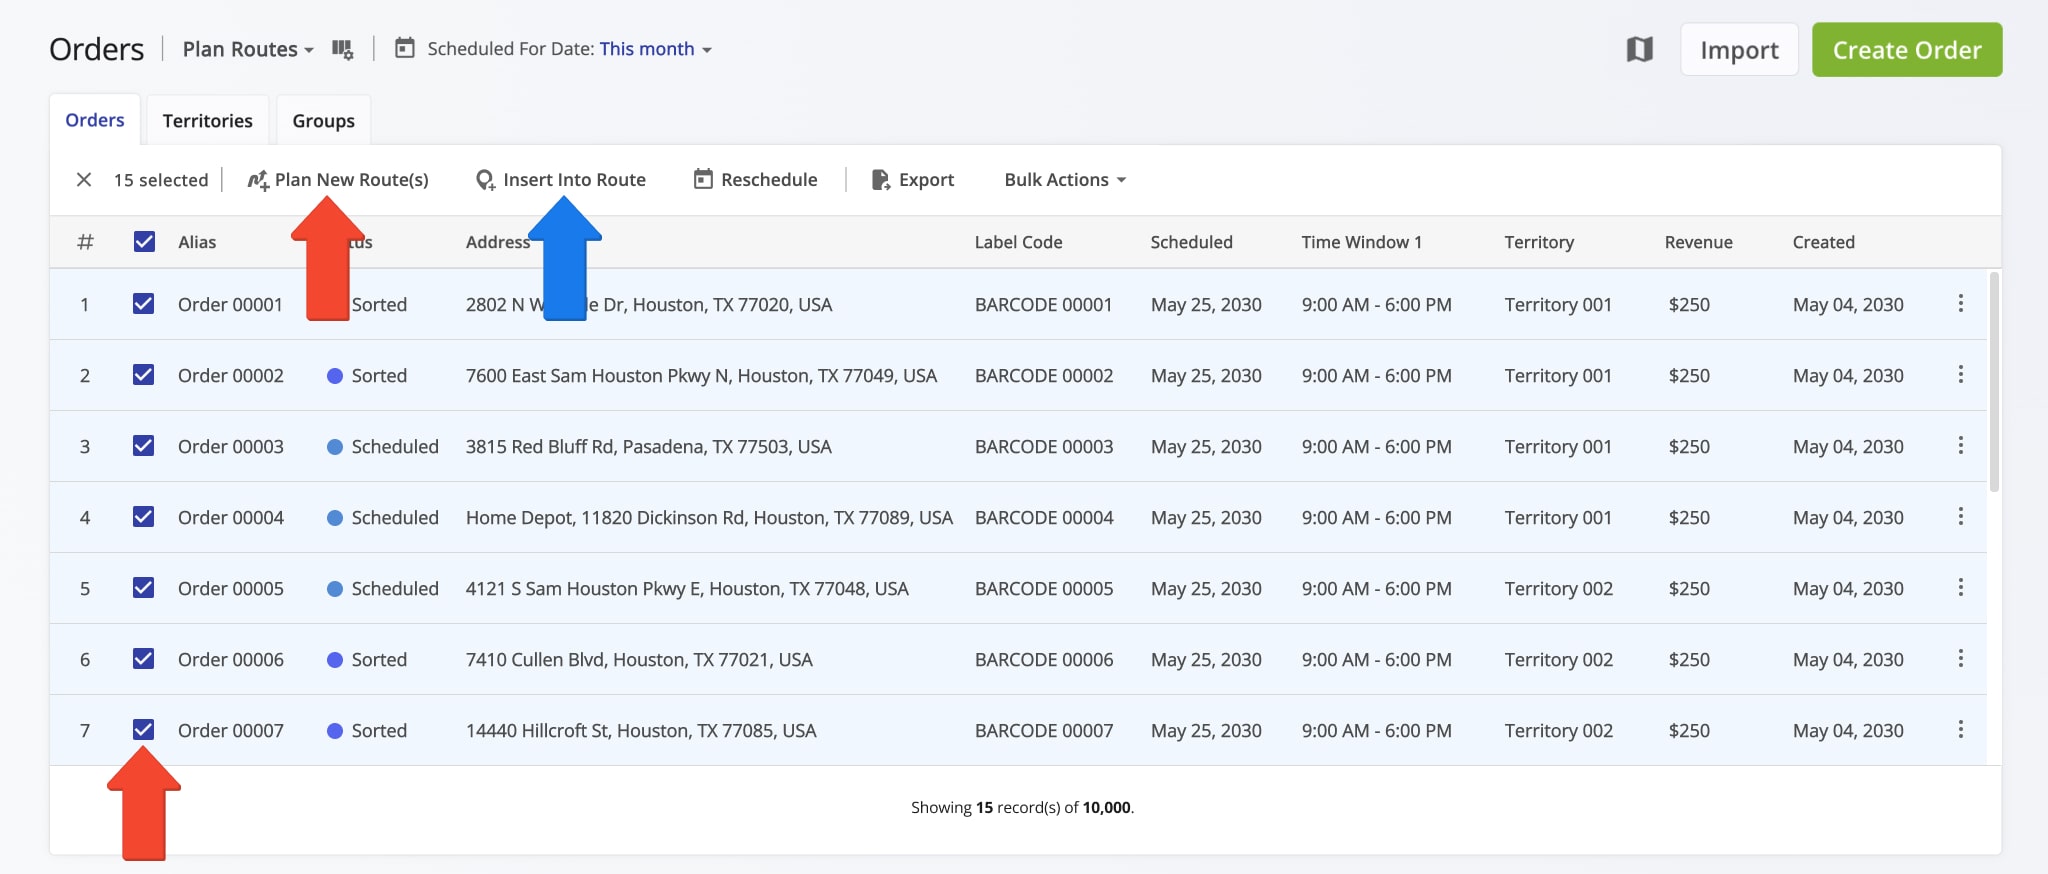
Select the orders you want to route by checking the boxes next to them. To select all filtered orders, check the box at the top of the list, then click the “Plan New Route(s)” button to create a route with the selected orders.
You can also insert orders into existing routes, such as when an order is rescheduled or was not included in a previous route.
Orders with the Scheduled, Sorted, Missing, or Unrouted status can be inserted into planned routes by selecting them and clicking “Insert Into Route”. NOTE: Lean more about how to plan and optimize routes from the Orders List.
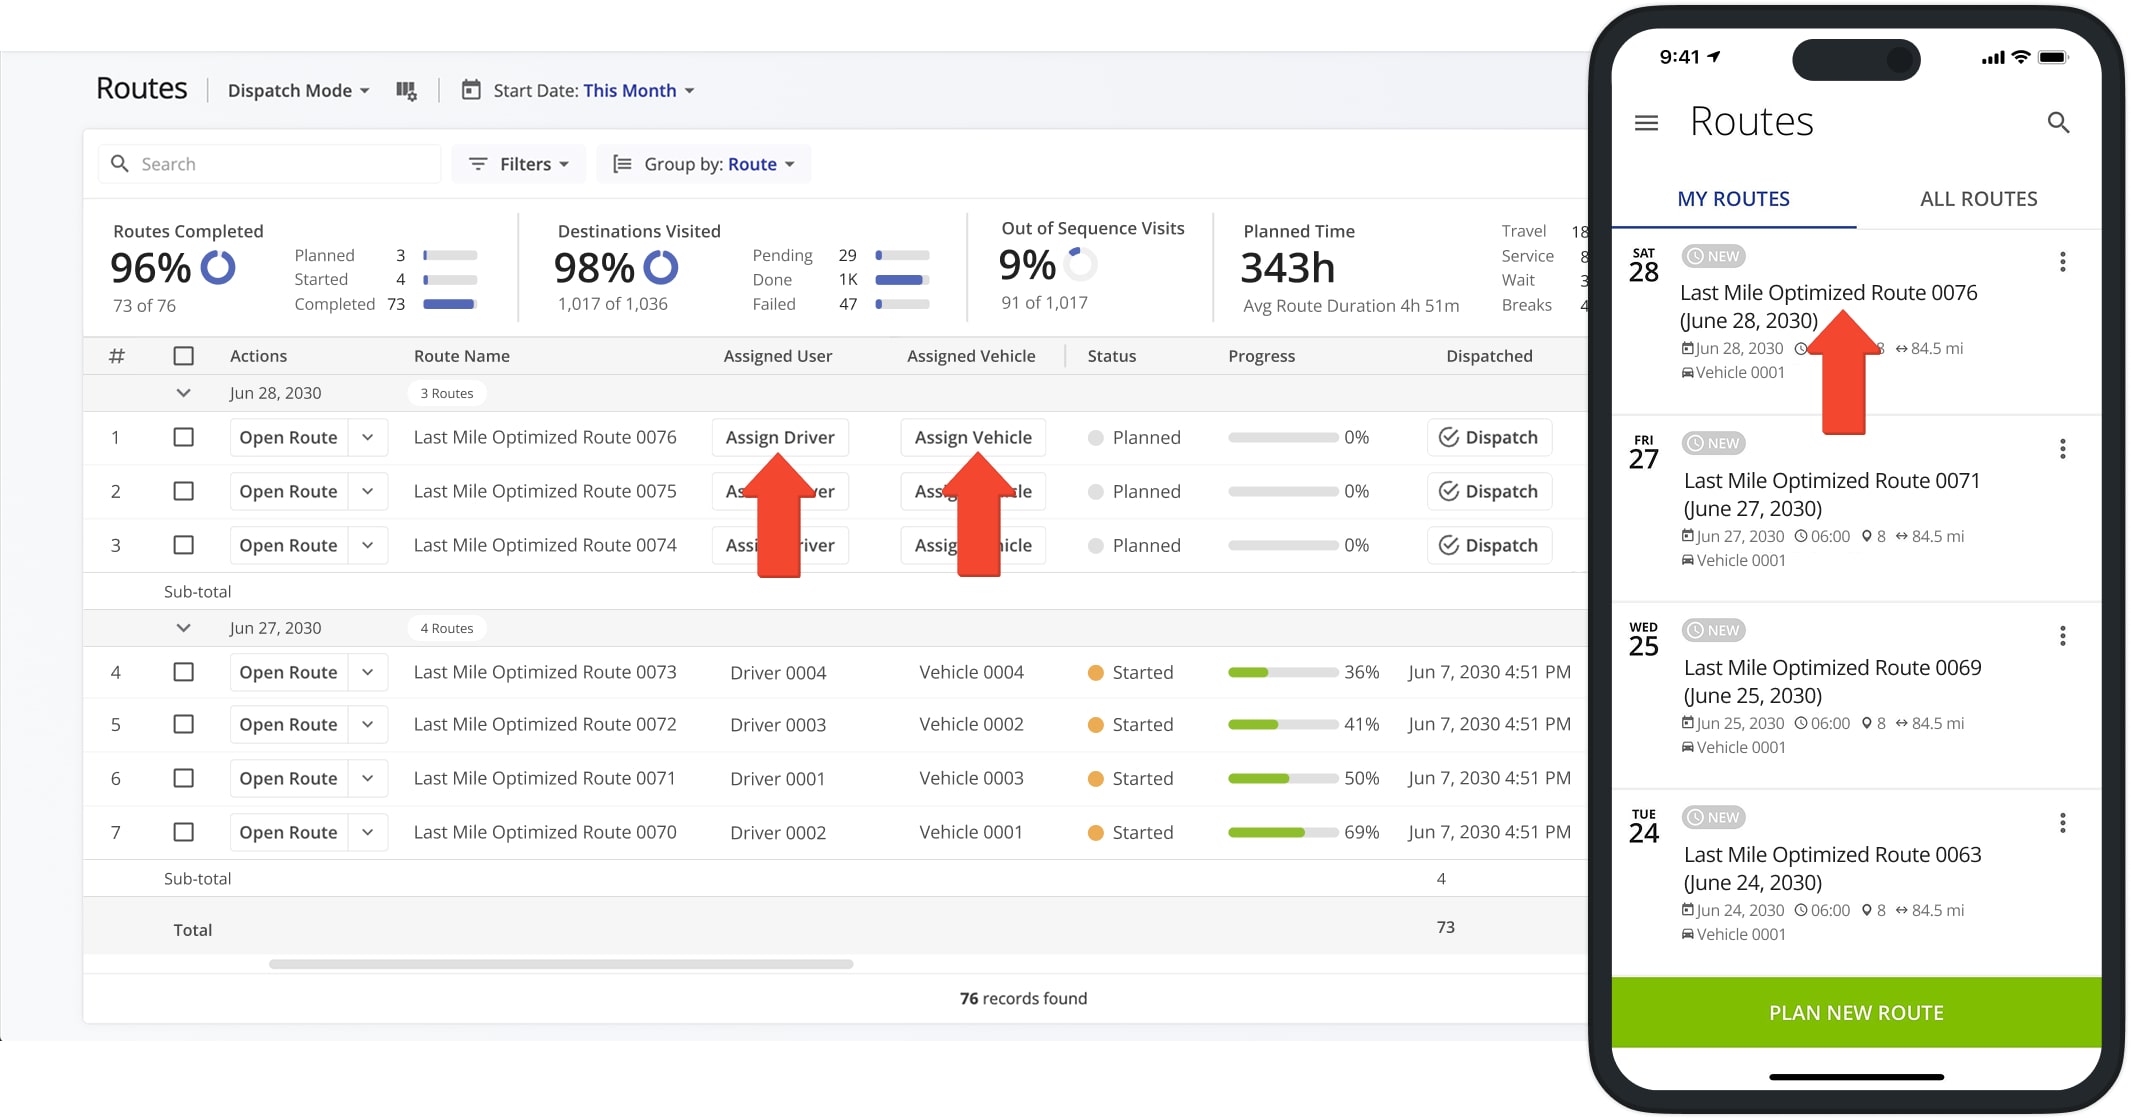
Dispatchers can then send optimized routes to drivers and vehicles. When using Optimization Profiles, routes are automatically dispatched to the driver and vehicle specified in the profile. To dispatch manually, assign a driver or vehicle to the route.
Once assigned, the driver can open and complete the route using Route4Me’s Mobile Driver App. As drivers progress, order statuses update in real time.
For example, when orders are loaded, the route status changes to “Started”. When unloaded, their status updates accordingly.
Load Orders – Scan And Load Orders Using The Label Scanner
To scan order barcodes and load orders on a route, open the Route4Me Android Order Routing App or iPhone Order Route Planner. Tap the Menu icon in the top left, then go to Routes.
Select your preferred route and tap the “Start Loading” button to open the label scanner and begin scanning orders. These steps are the same whether you use your device camera or a connected Bluetooth scanner.
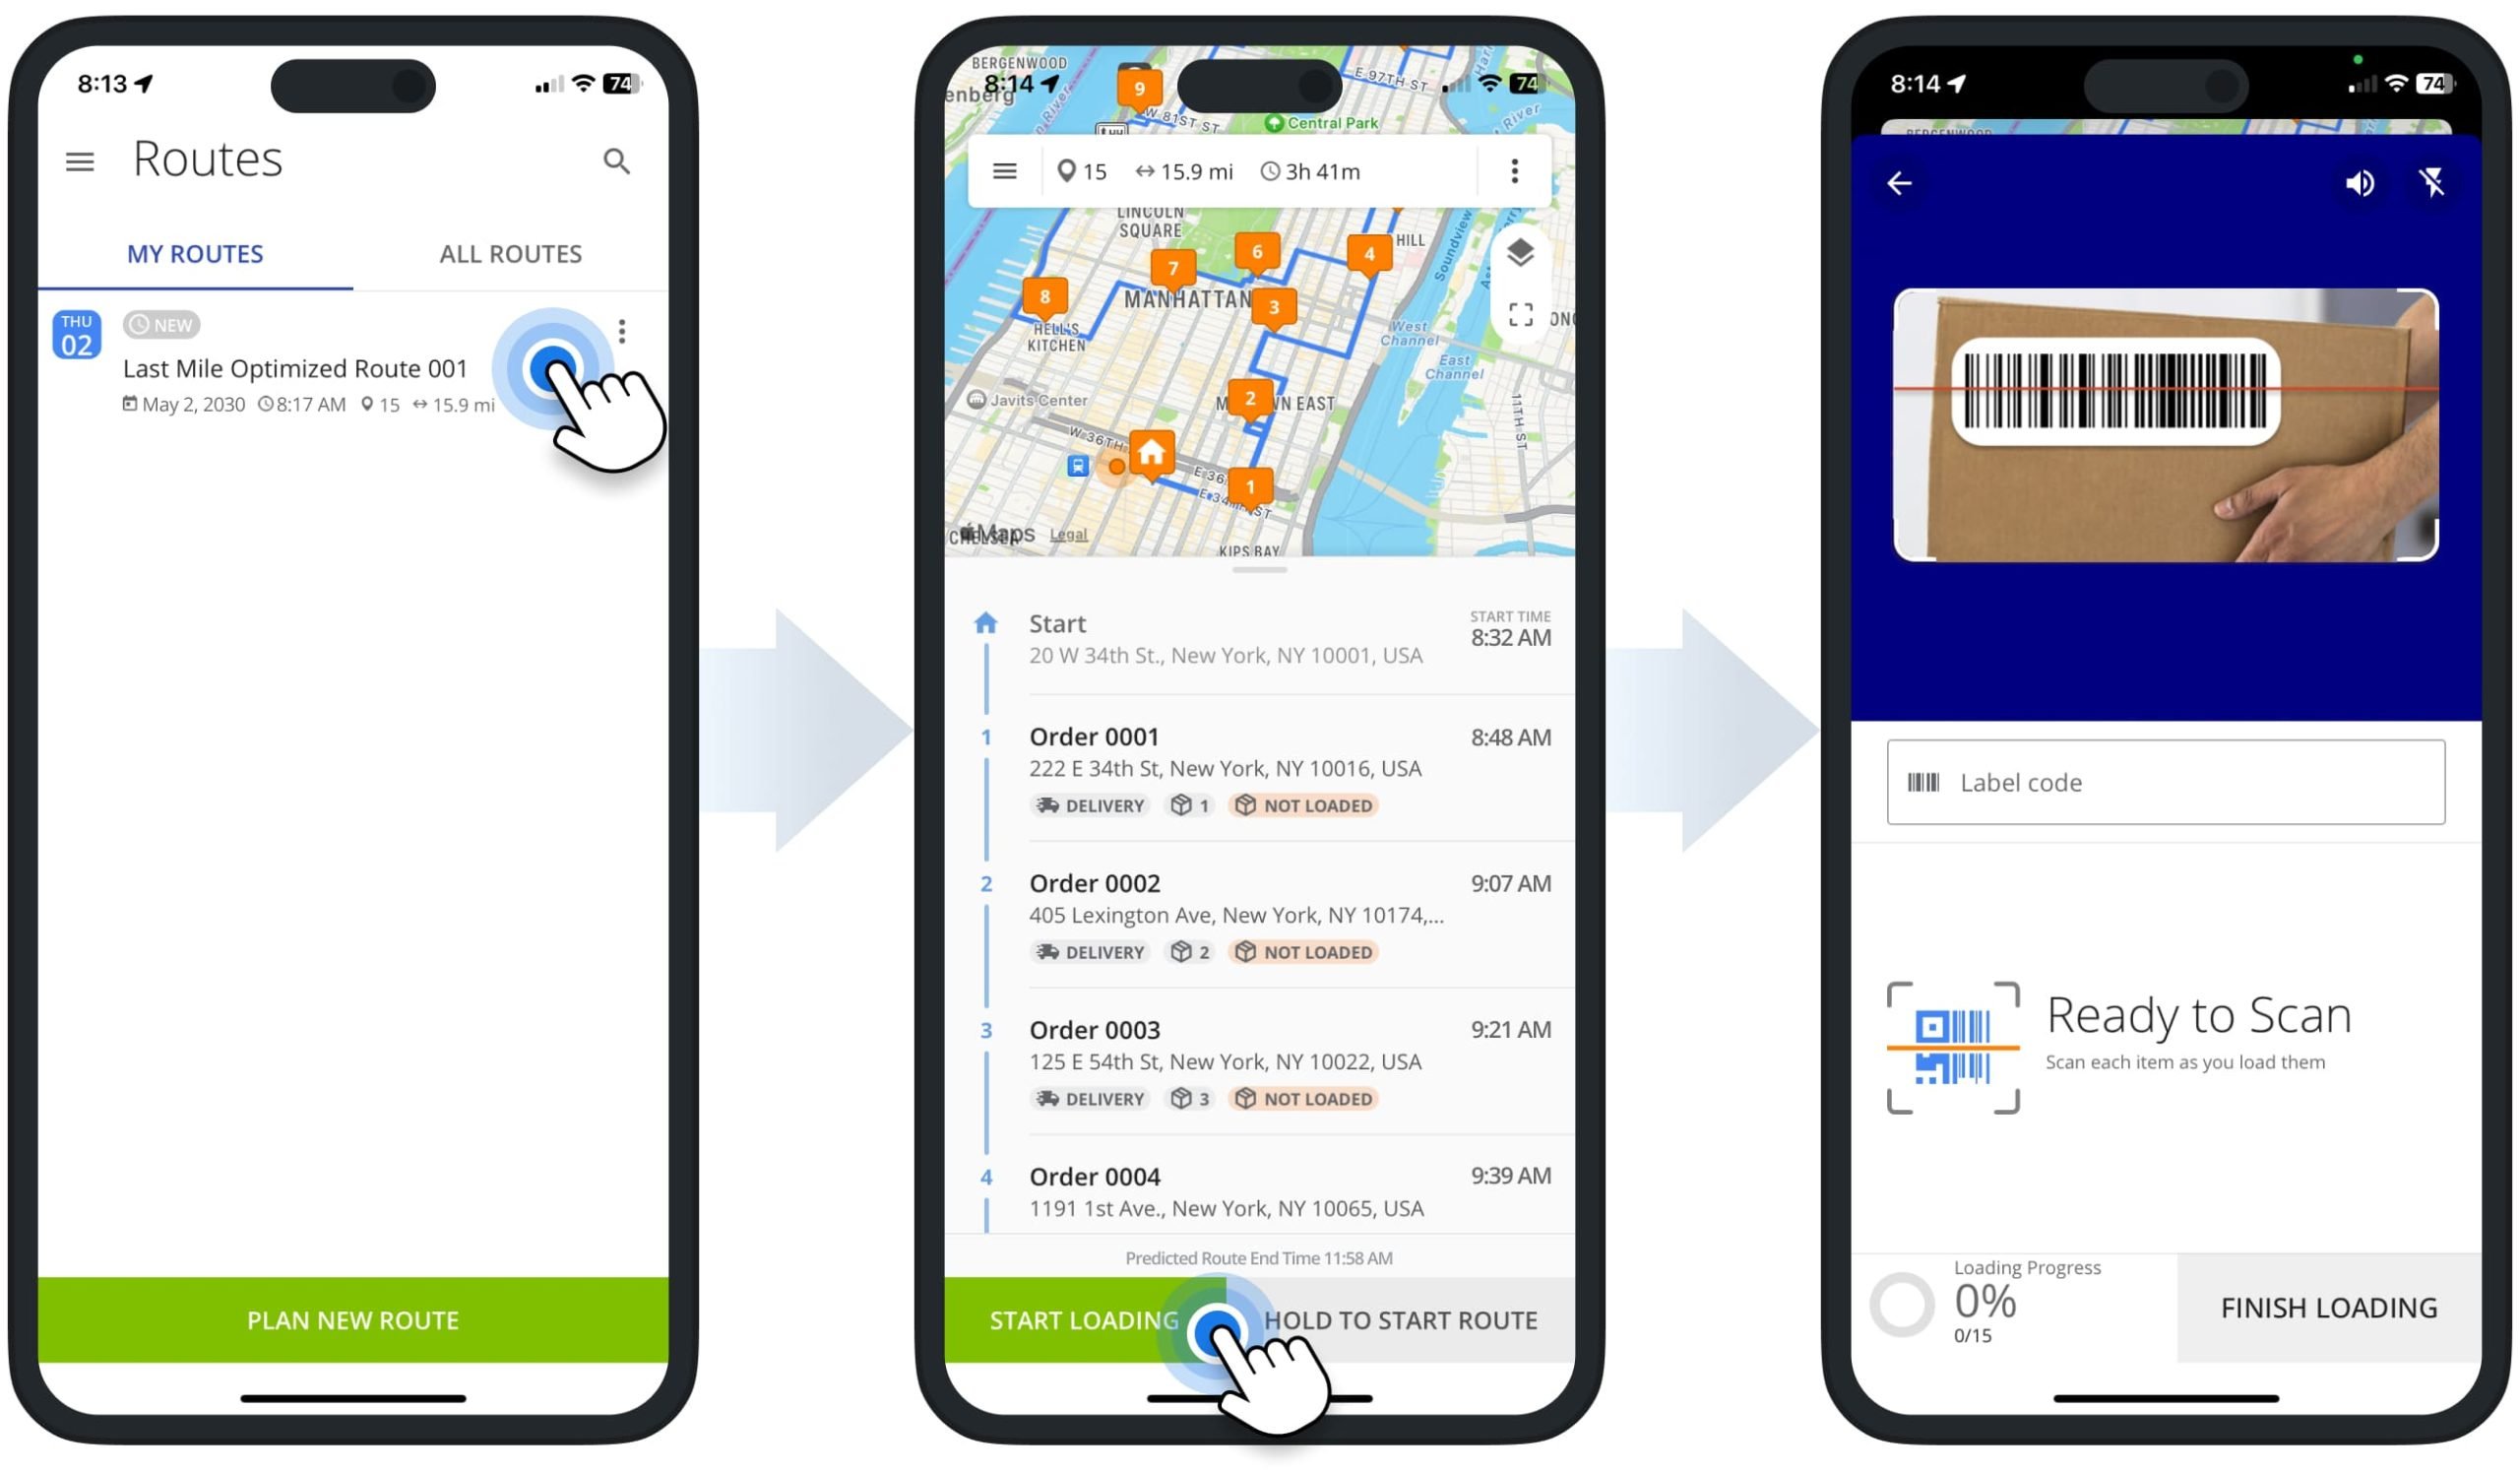
Loaded Orders – Scan Labels And Load Orders On Routes
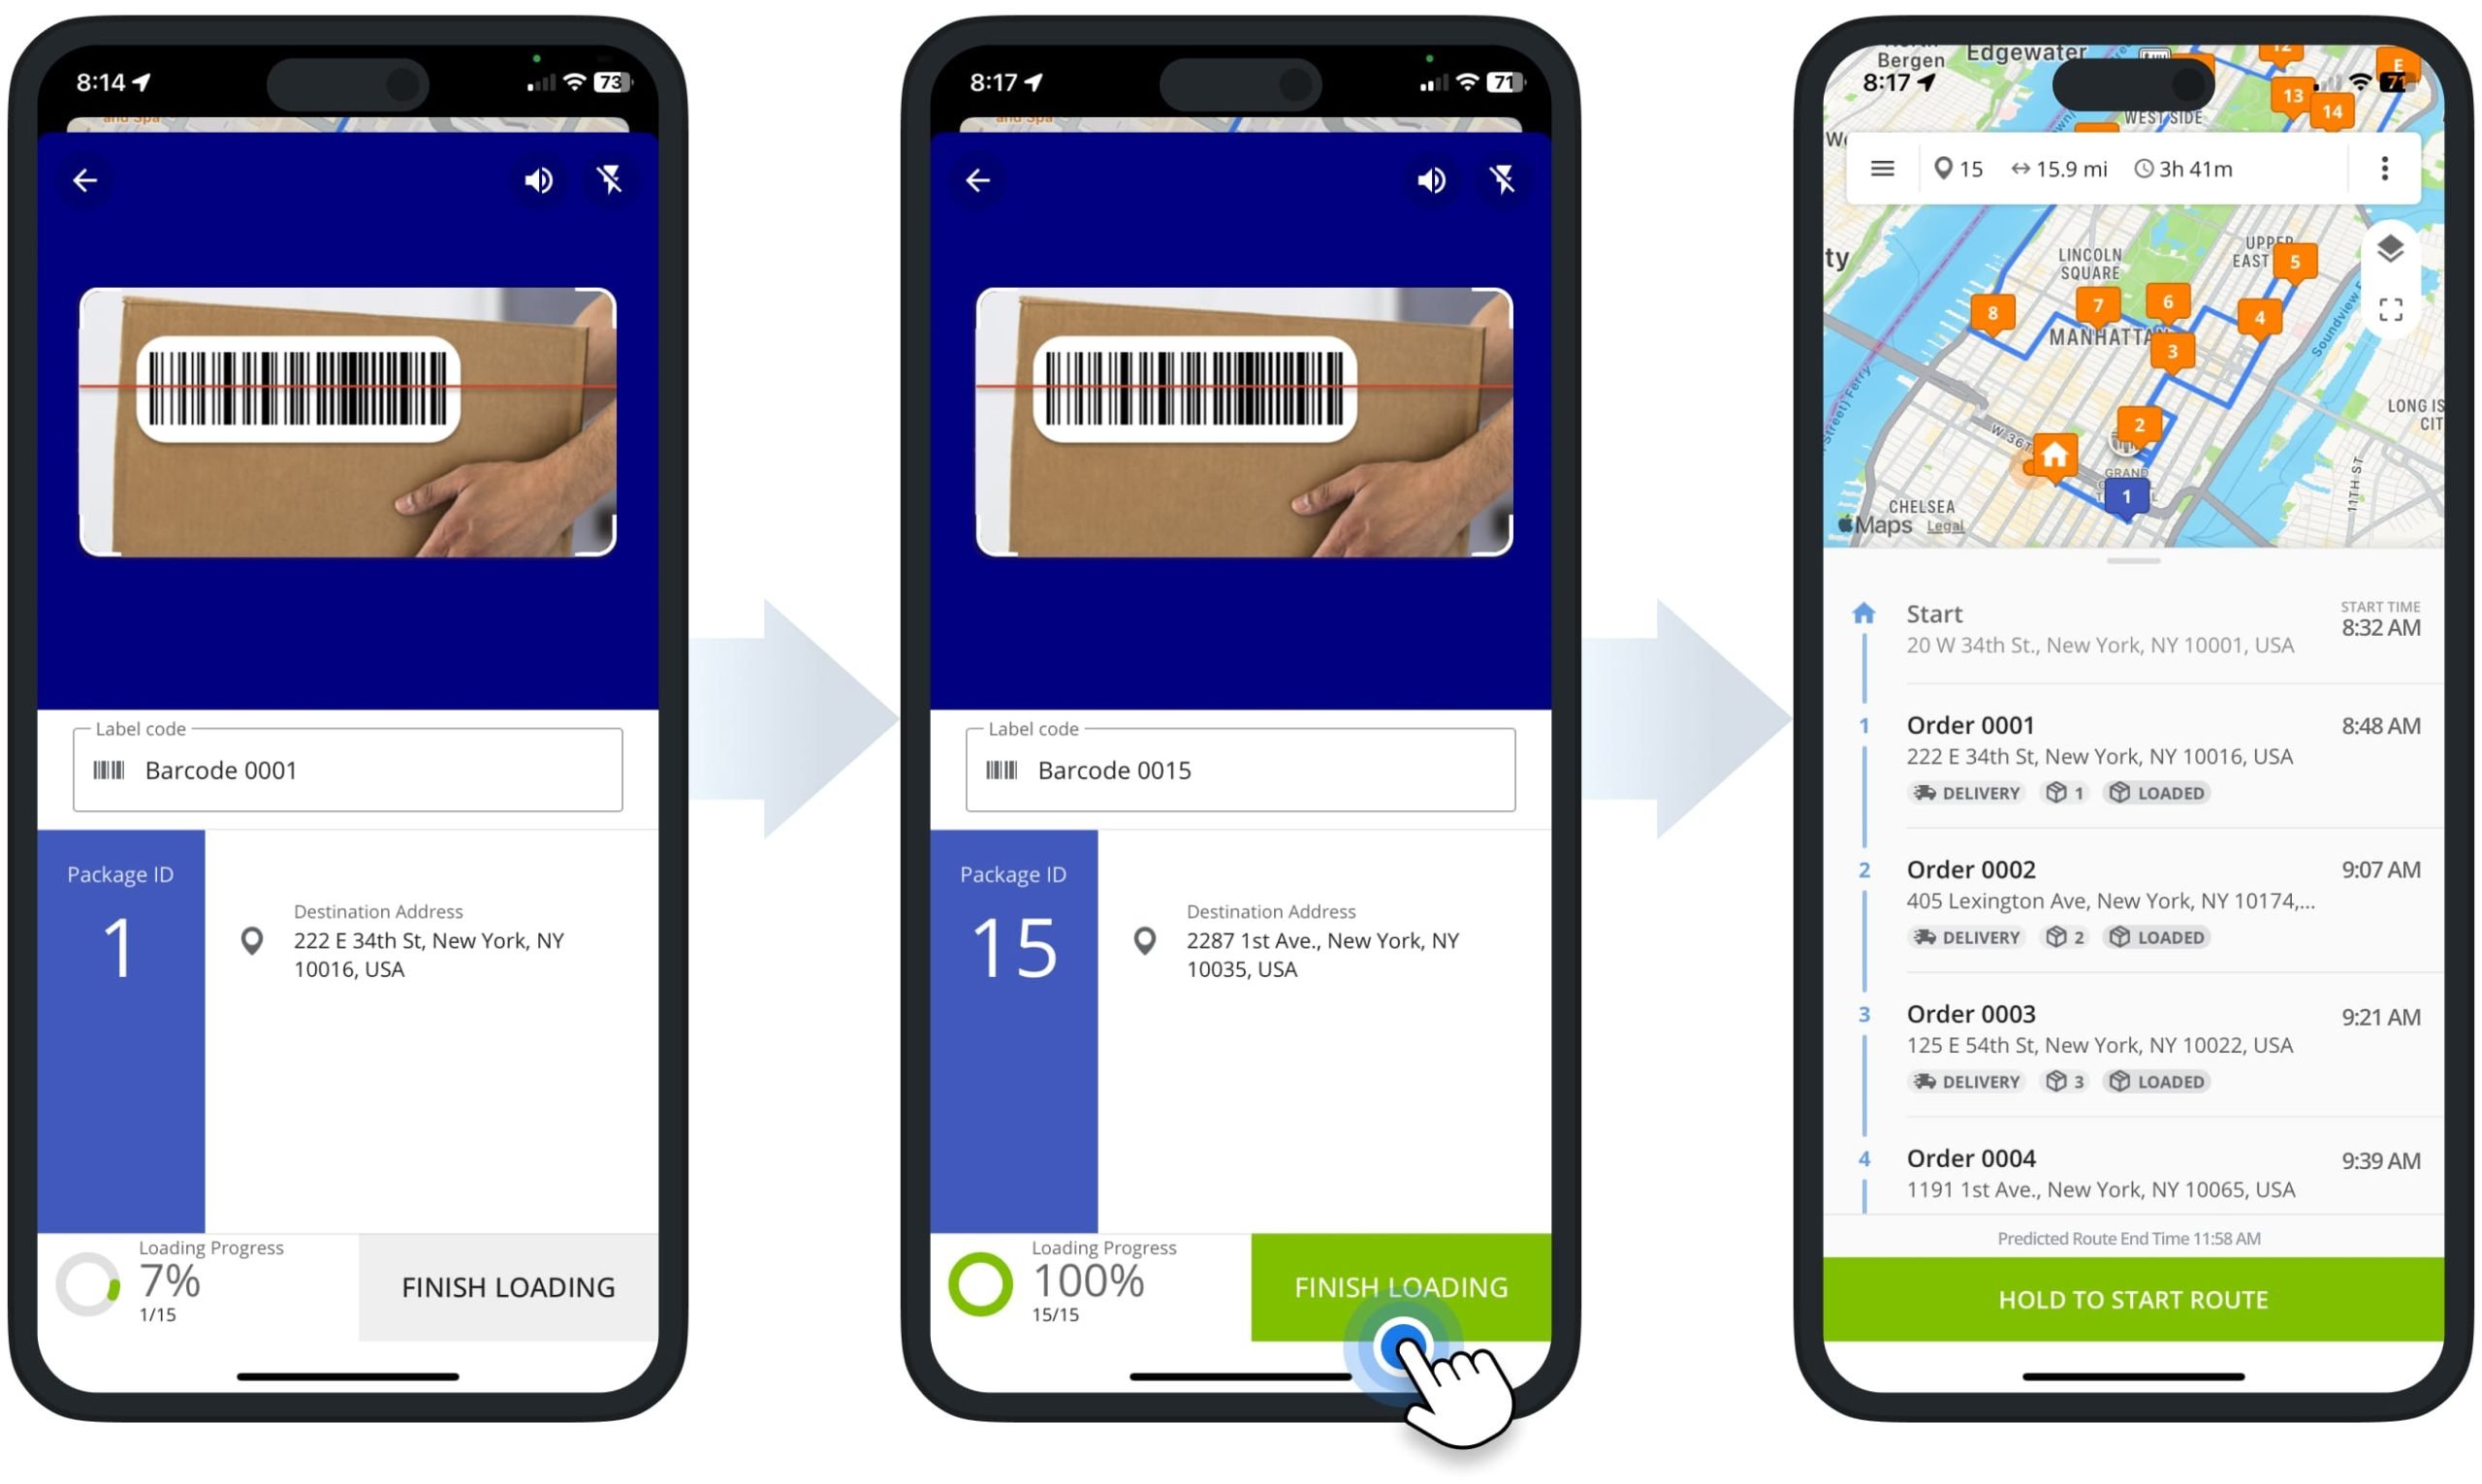
Next, scan the barcodes on the orders to be loaded. You can continuously scan labels without closing the scanner. As you scan, the app displays the number and percentage of loaded orders, along with each order’s Package ID, barcode data, and address.
The Package ID is a unique serial number assigned to the order’s destination in the scan sequence. After scanning all required orders, the green “Finish Loading” button will appear. Tap it to complete the process.
The route screen will then show a “Loaded” status next to each correctly loaded destination.
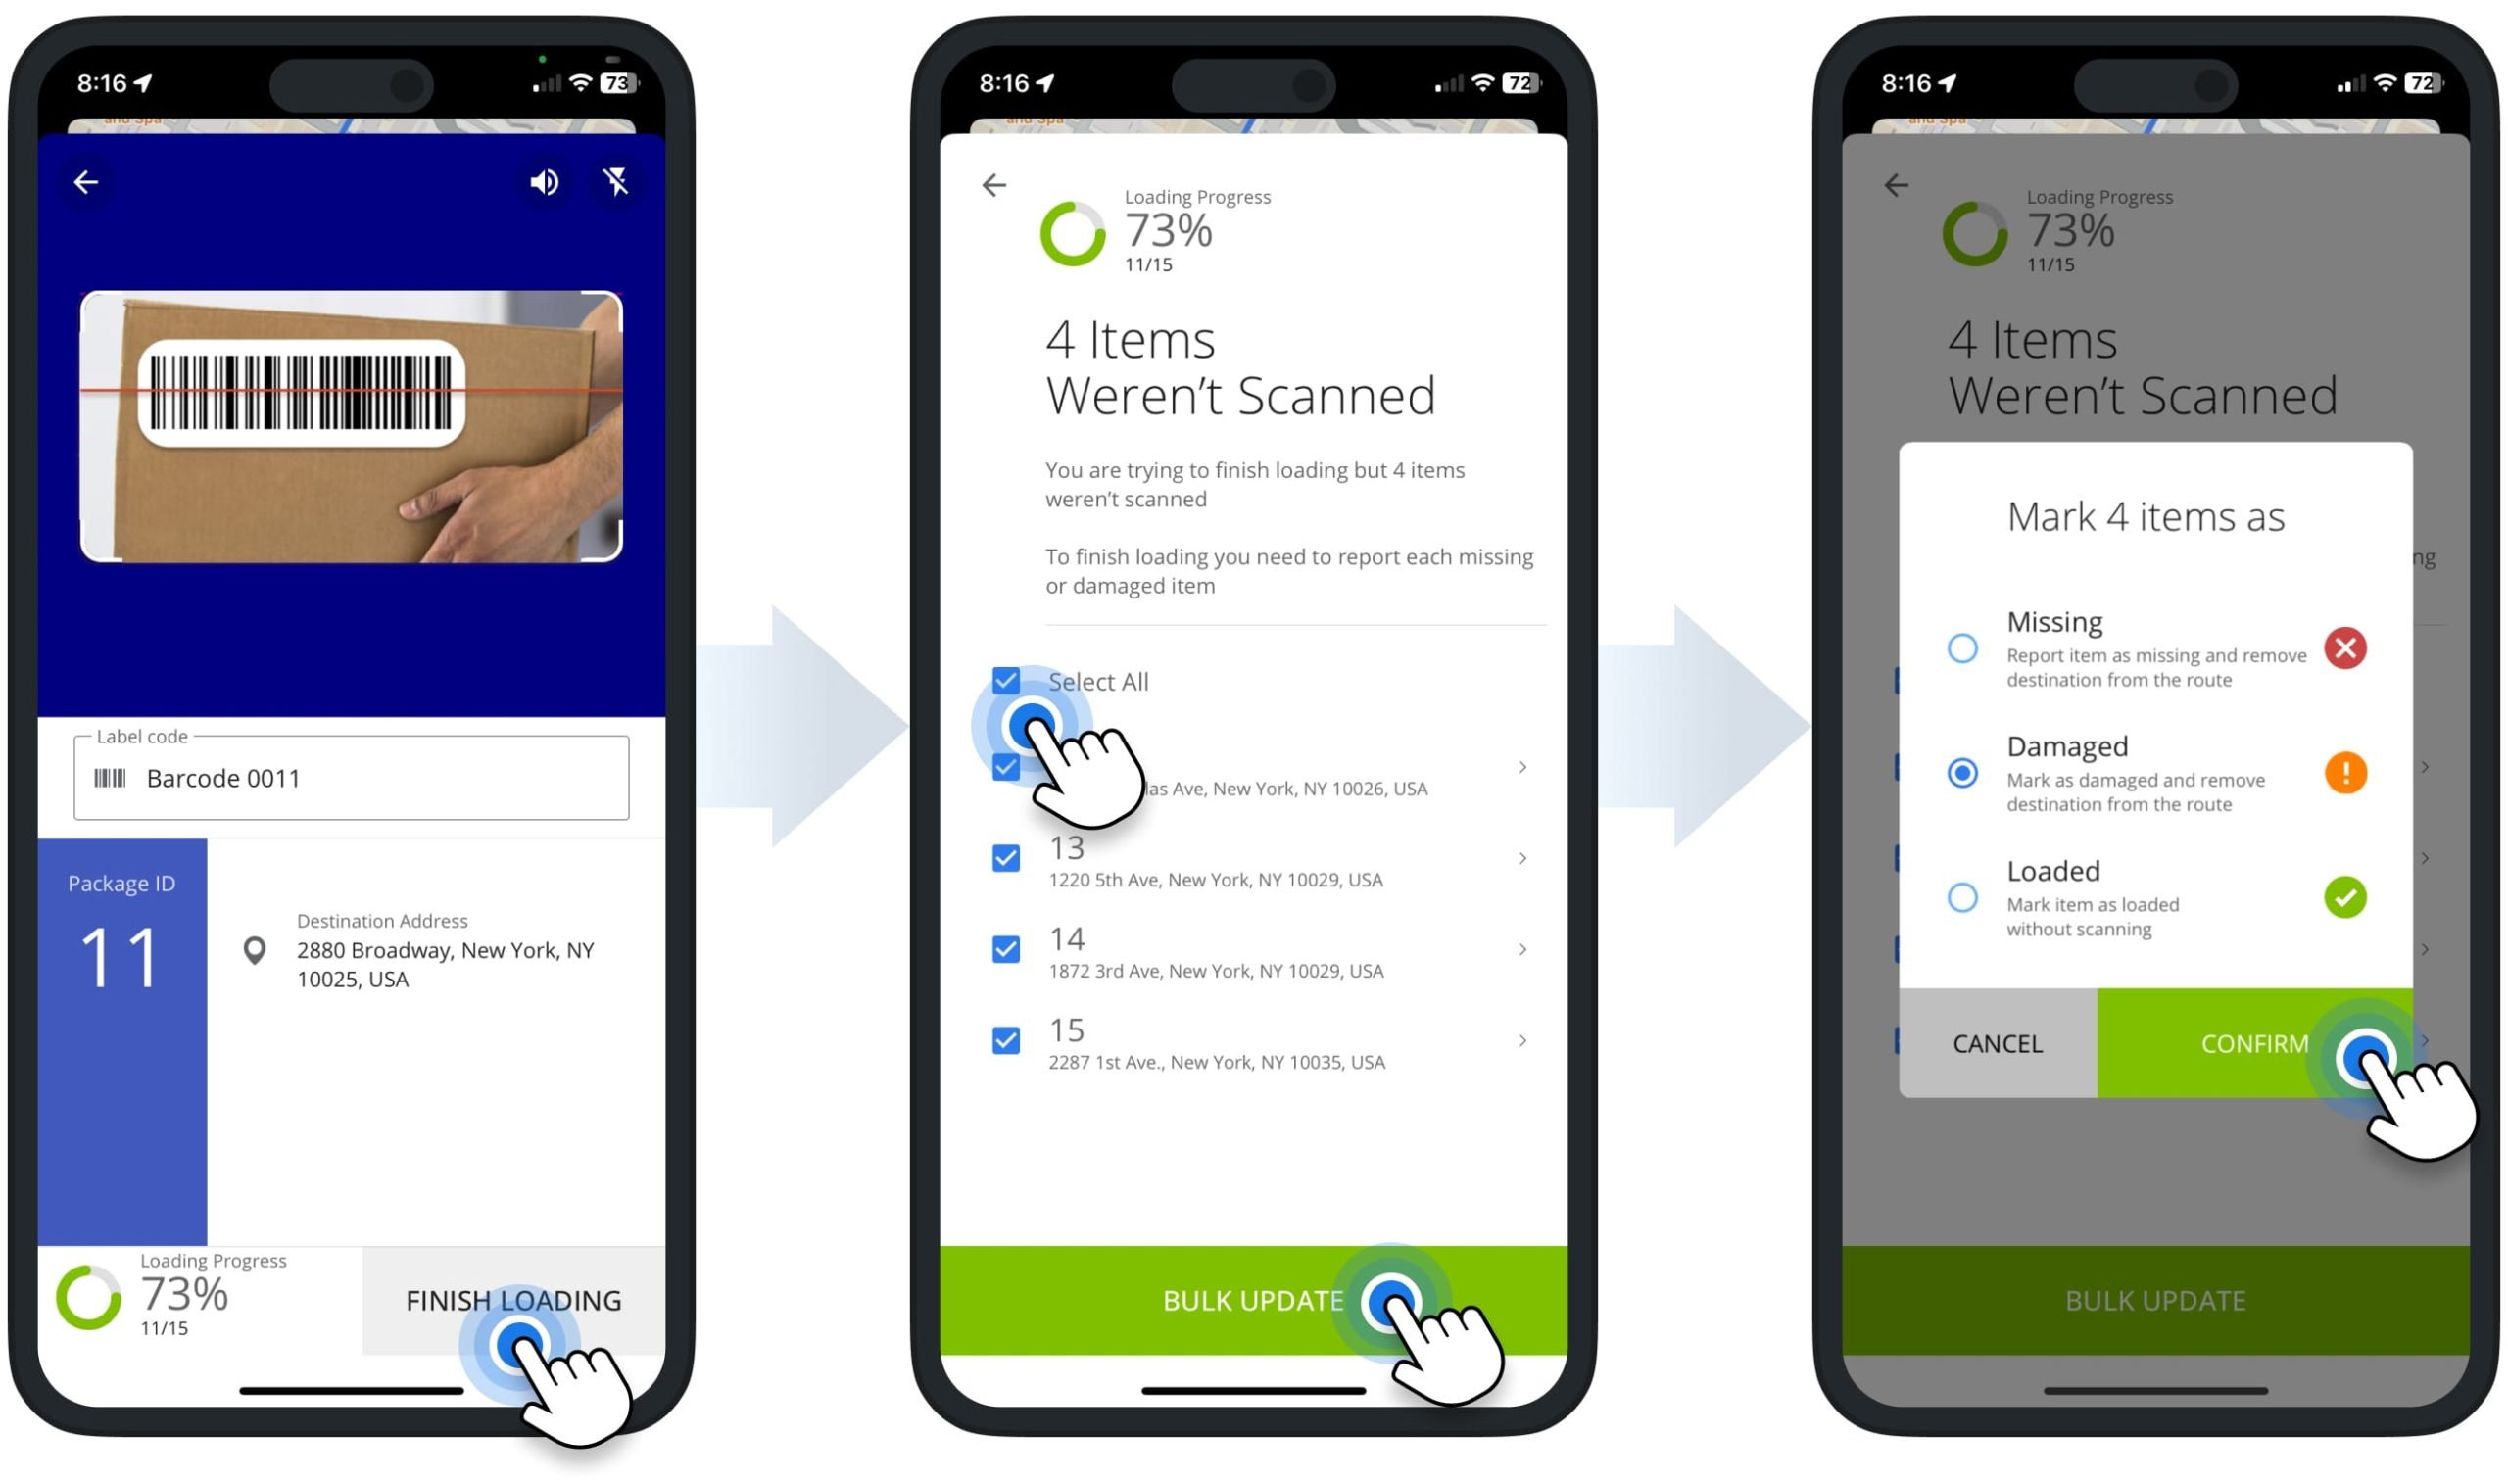
Not Scanned – Report Missing And Damaged Orders
You can finish loading without scanning all orders by tapping the grey “Finish Loading” button. The app will then display all unscanned orders on the route.
Tap each order’s Package ID to report it as “Missing”, “Damaged”, or “Loaded” without scanning. You can also select and report multiple orders at once.
NOTE: Reporting an order as “Missing” or “Damaged” automatically removes its destination from the route.
Start Routes – Start And Navigate Routes To Unload And Deliver Orders
After scanning and loading orders, verify the “Loaded” status next to each destination. Then, tap and hold the “Hold to Start Route” button to begin.
Once the route is started, its start time and date are automatically updated to the current time and date.
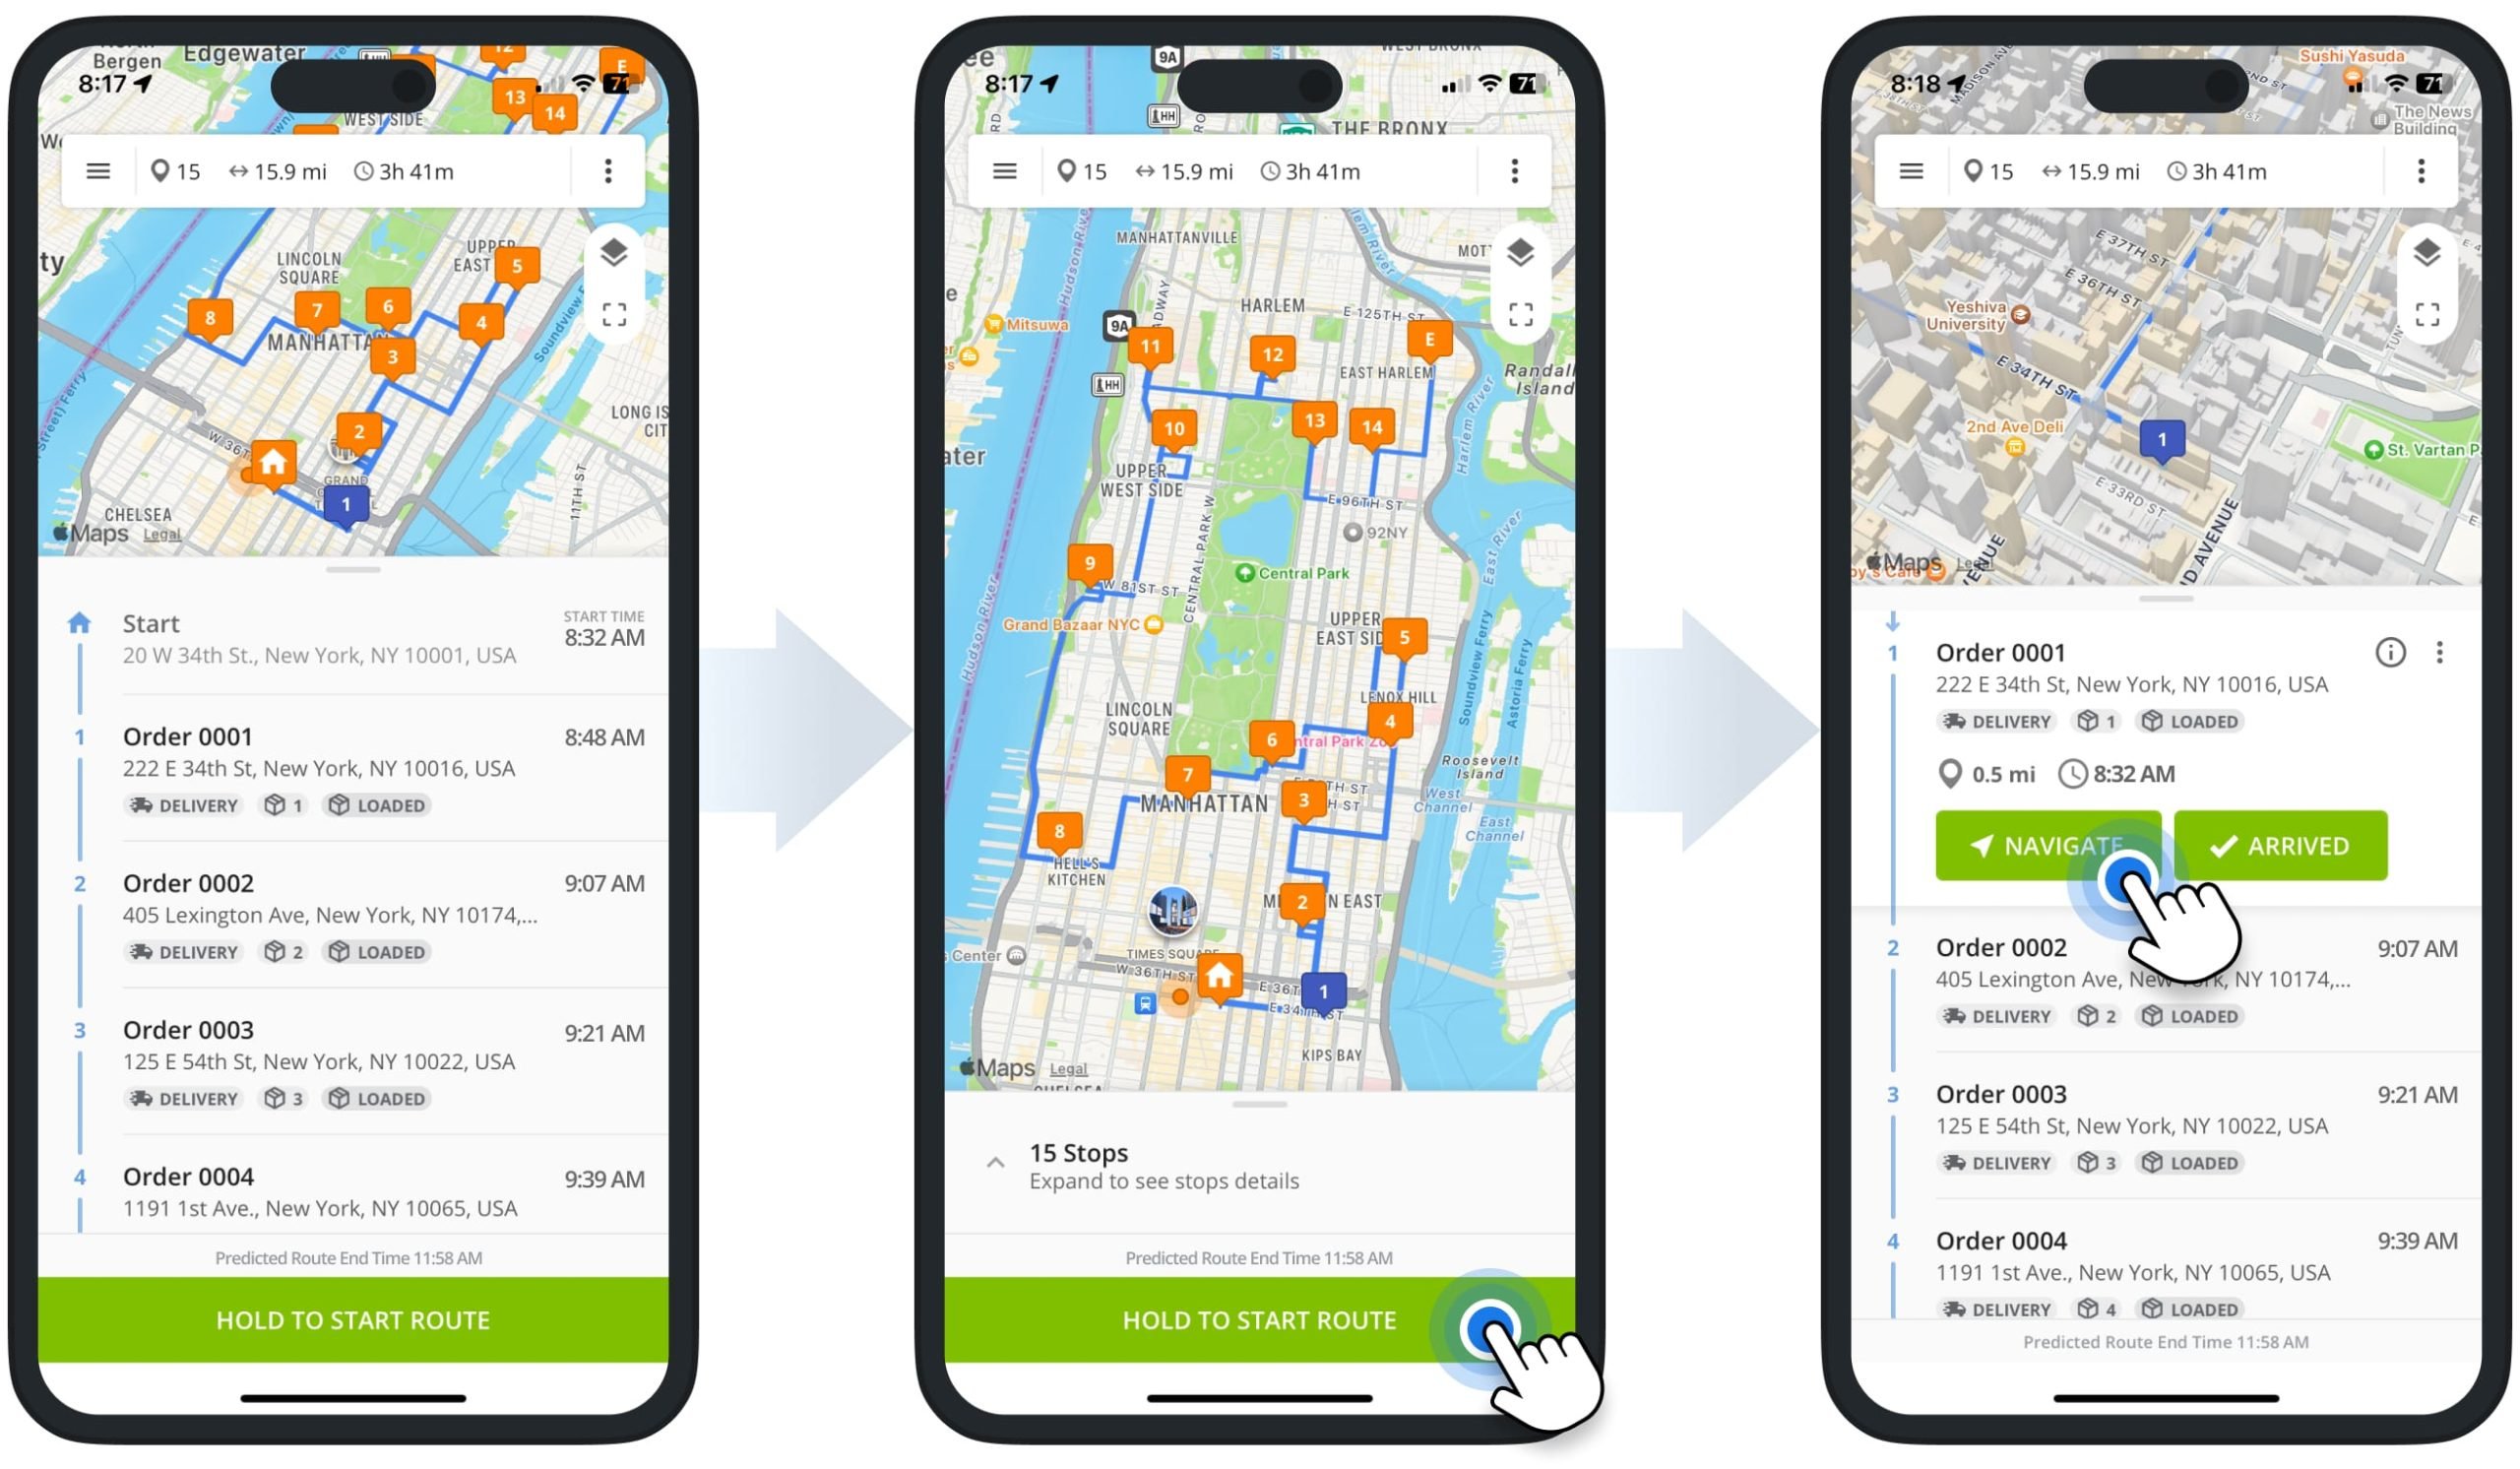
Navigate to each address on the route using In-App Voice-Guided Navigation or third-party apps like Google Maps route planner, Apple Maps route planner, and Waze.
To start navigation from your current location, tap the “Navigate” button next to the destination and choose your preferred app, or the default app will launch automatically.
You can select and customize your default navigation app in the app’s settings.

Unload Orders, Set Destination Statuses And Complete Mandatory Tasks
When you arrive at a route address, to unload the respective order, tap the “Arrived” button followed by the “Set Status” button. Then, complete required Mandatory Tasks to unload the order.
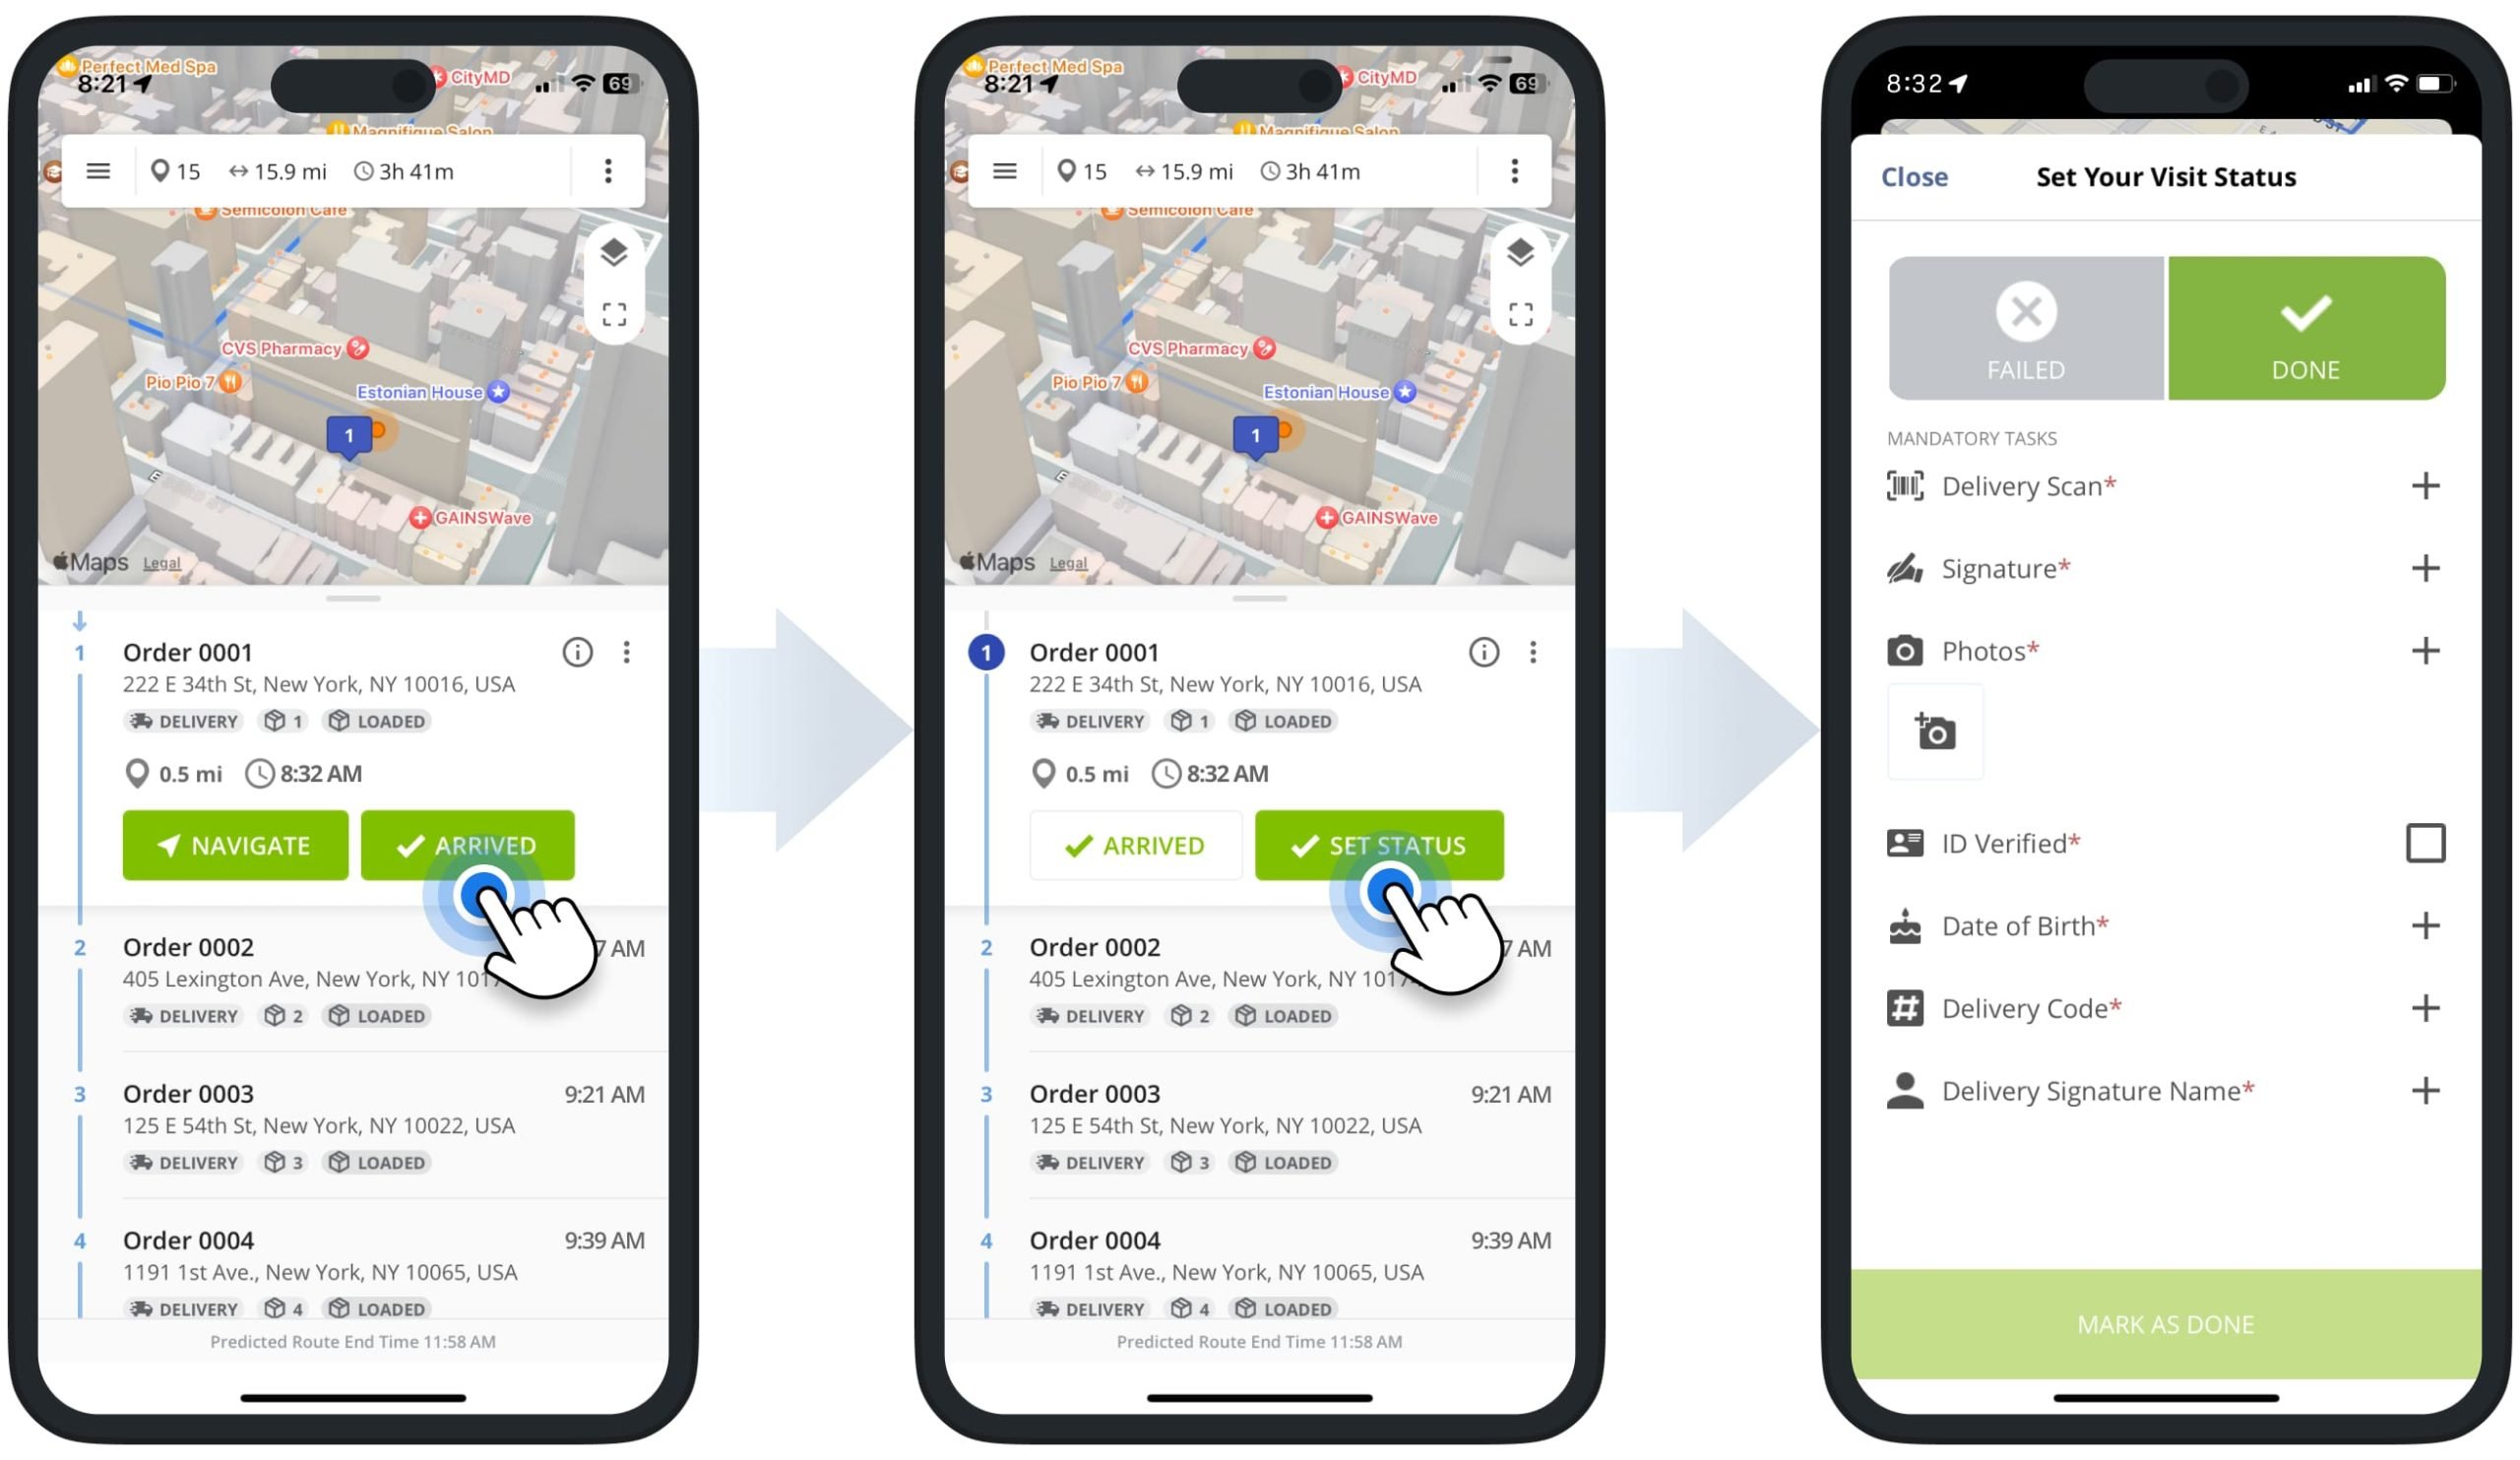
Done Status – Unload Order And Complete Workflow Mandatory Tasks
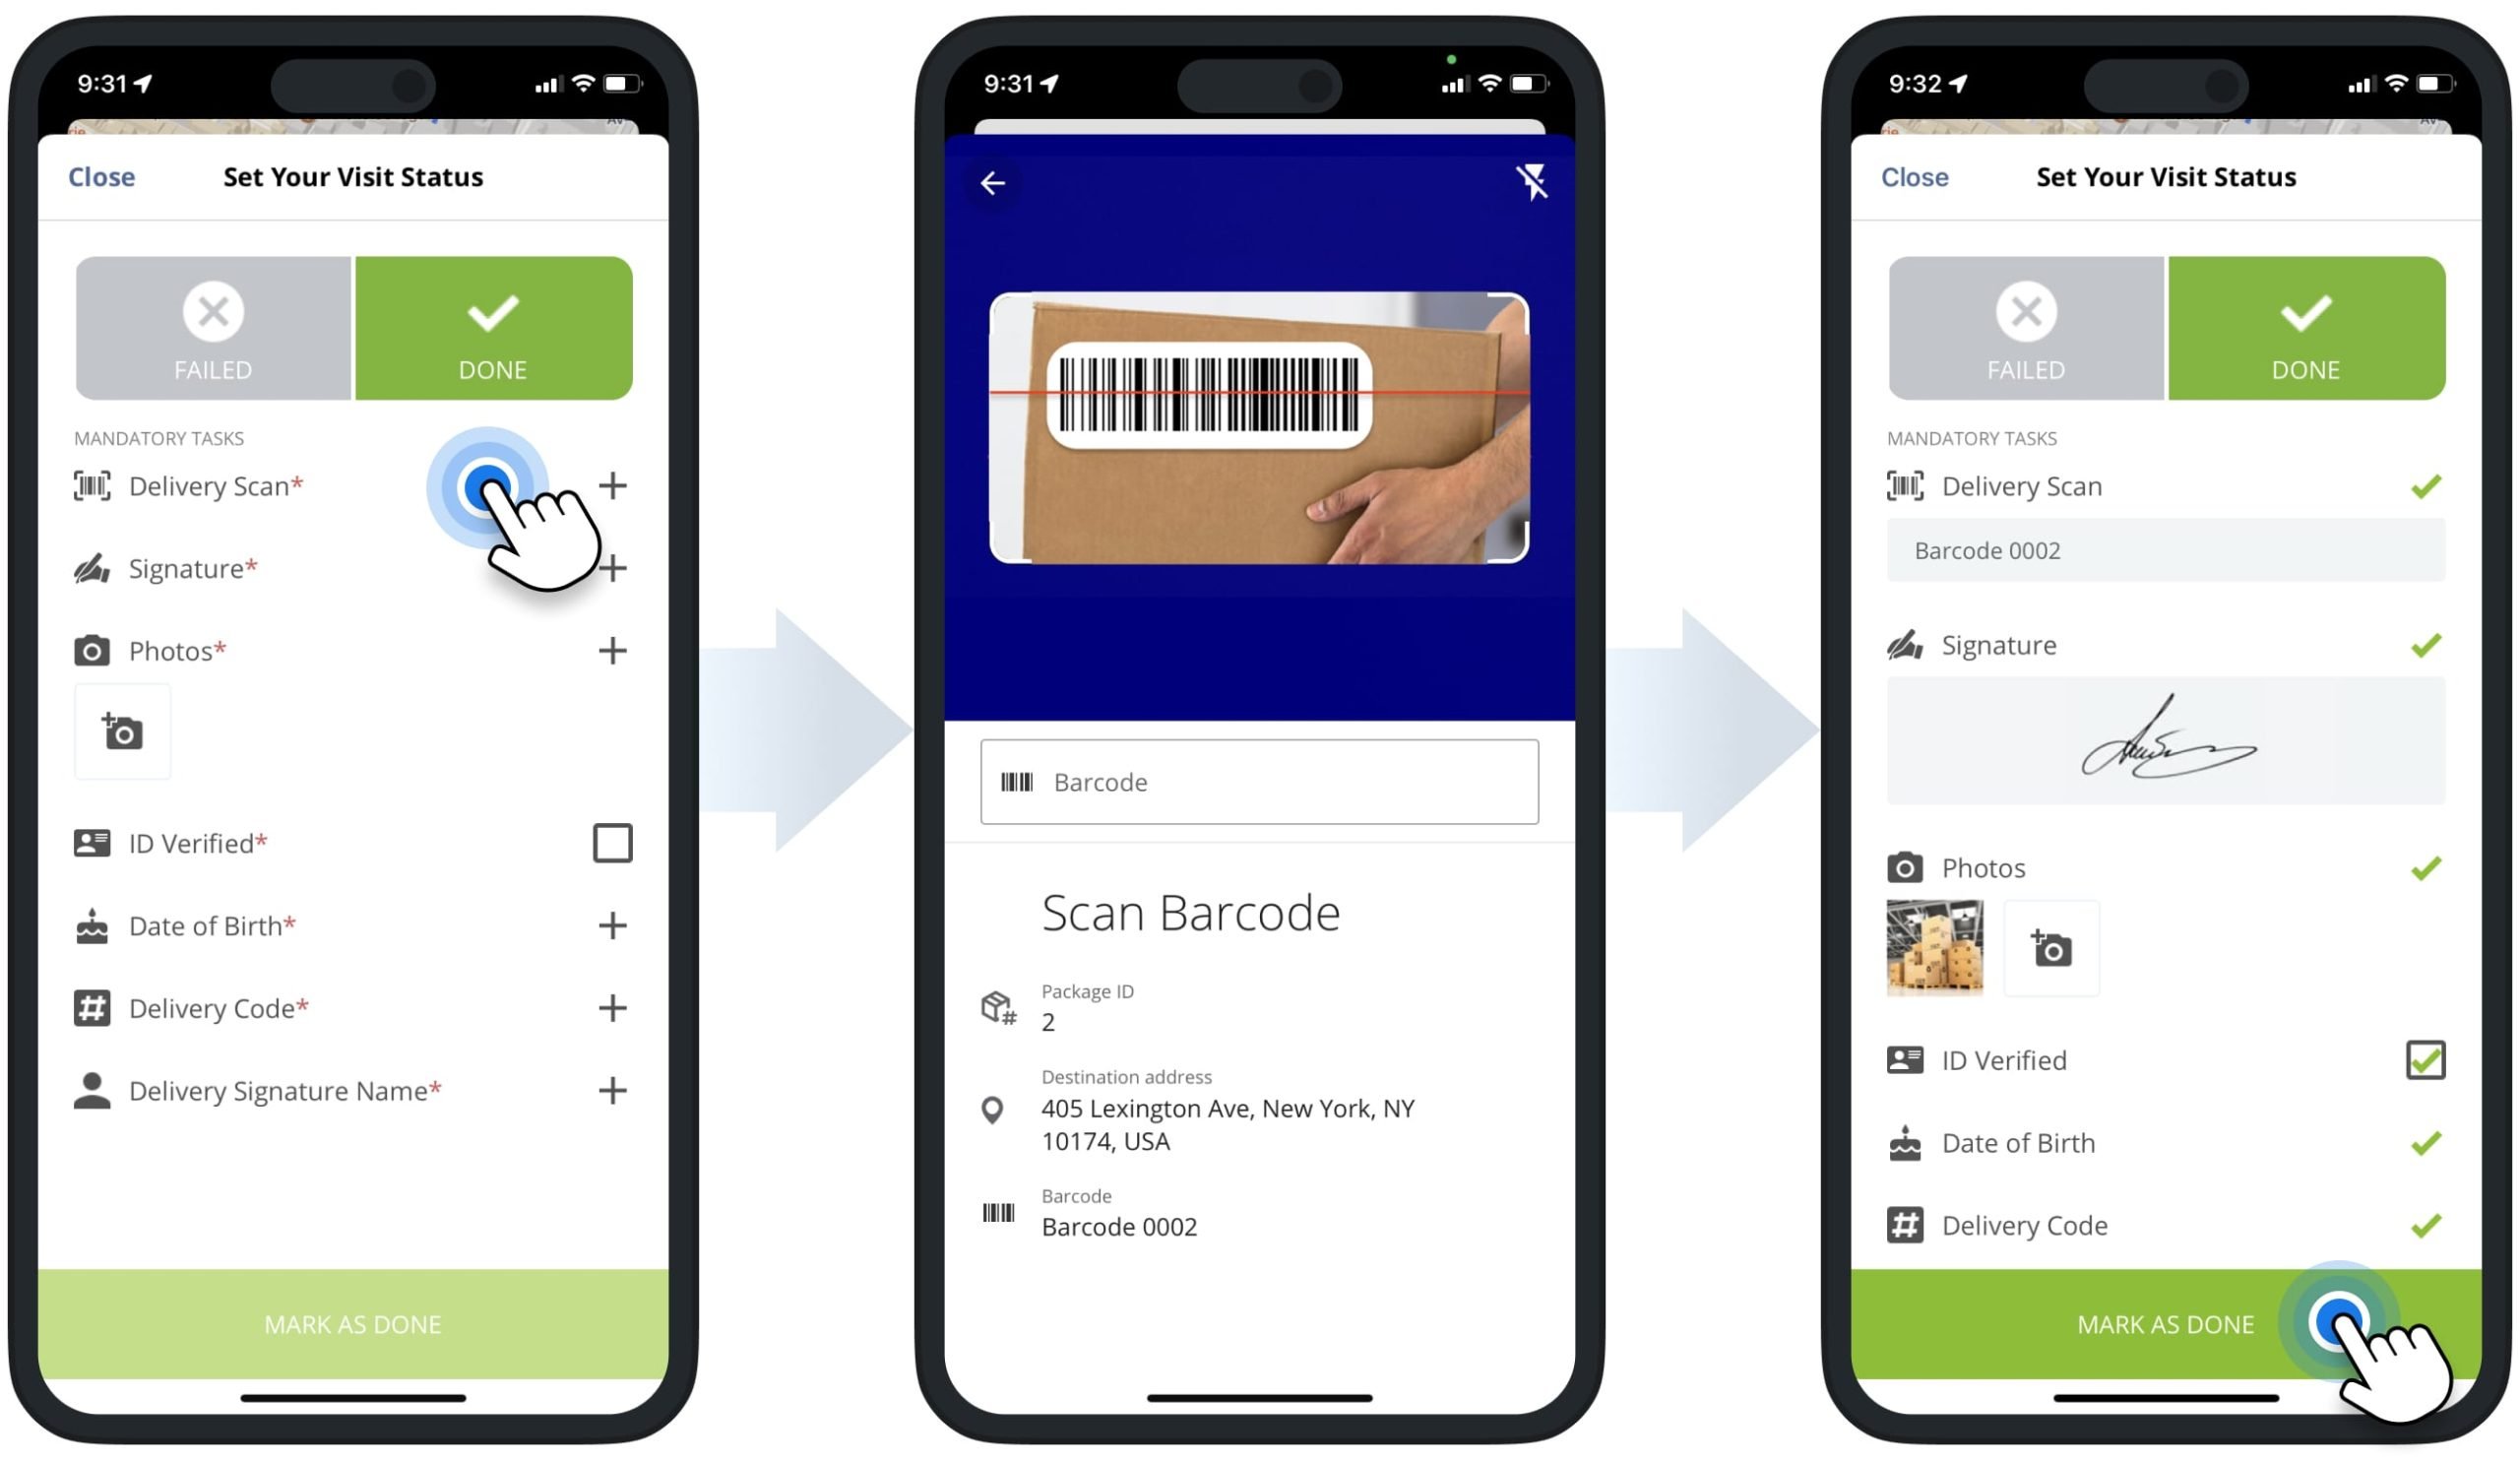
To unload an order and mark the destination as “Done“, select the “Done” status. Then tap “Delivery Scan” and scan the order’s barcode with the label scanner.
Complete all Mandatory Tasks, such as capturing an e-signature, attaching a receipt photo, or verifying ID, to finish unloading. NOTE: Learn more about completing Proof of Delivery Workflows in the Route4Me Mobile Route Planner app.
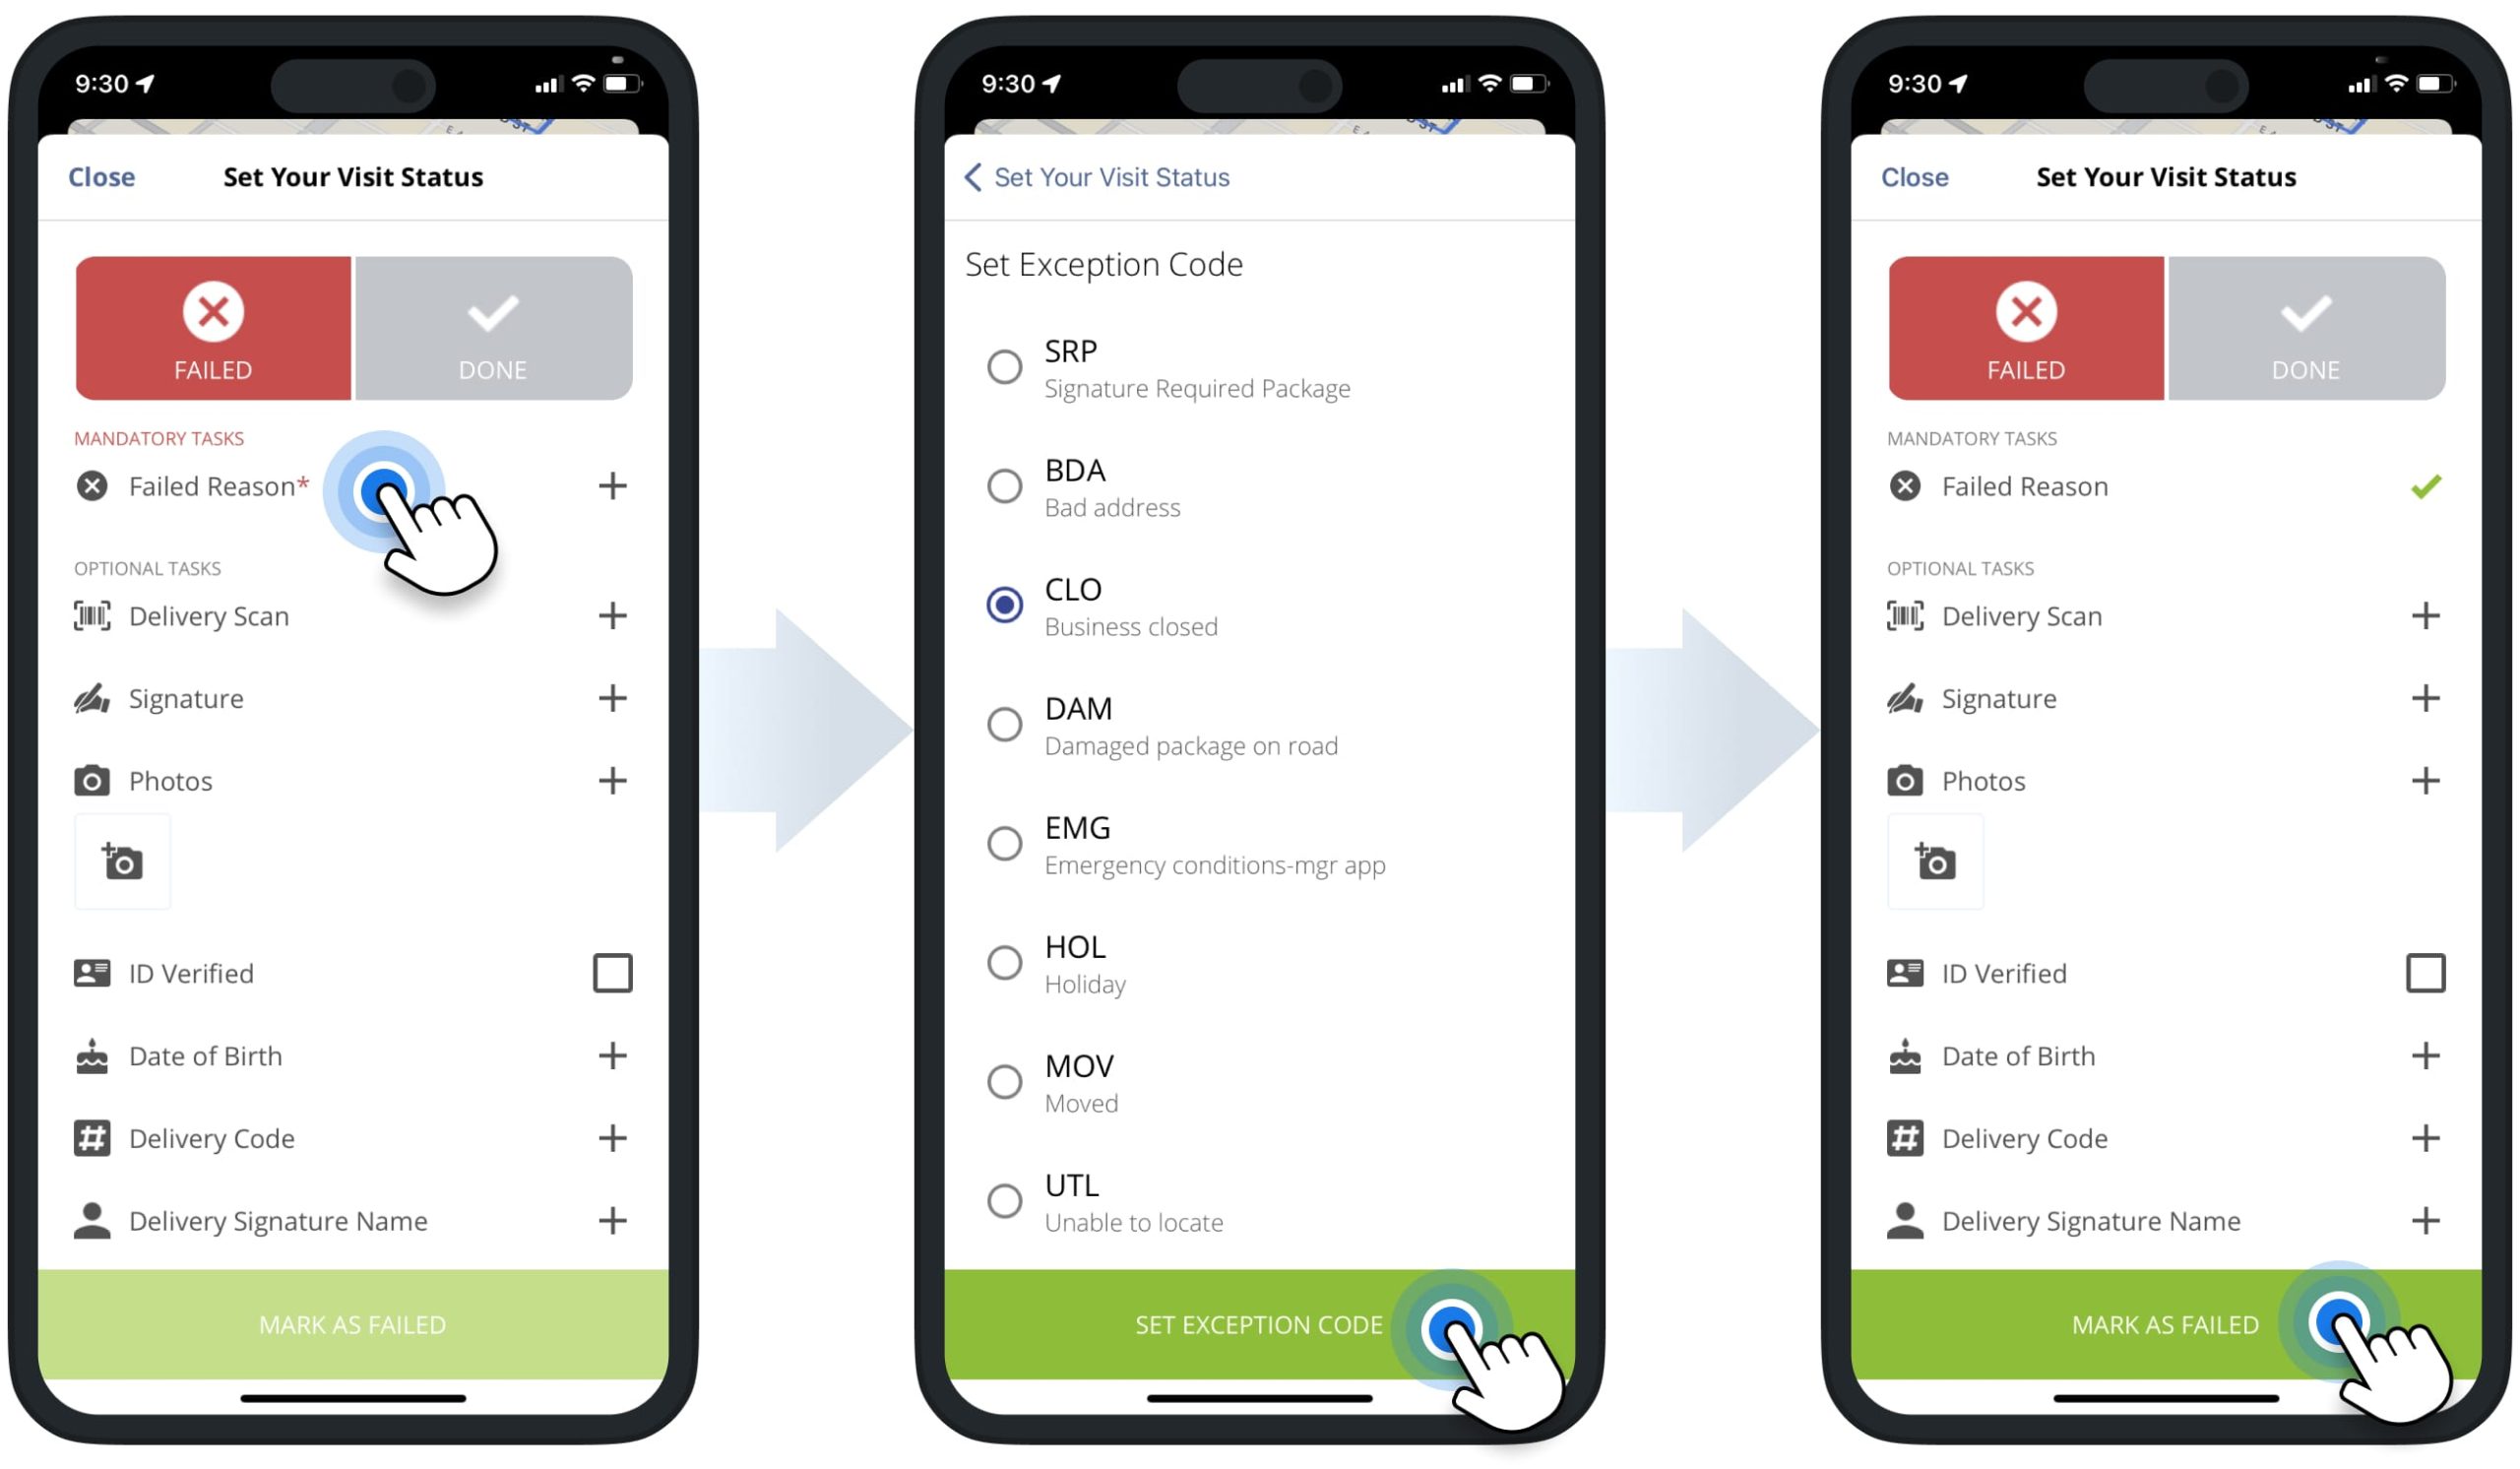
Failed Status – Can’t Unload Order And Order Failed Reason
If an order can’t be unloaded at its address, mark the destination as “Failed“. Select the “Failed” status and tap “Failed Reason“. Then, choose the appropriate reason followed by “Set Exception Code“. To confirm, tap “Mark as Failed“.
End Route And Check Route Summary With Route KPIs
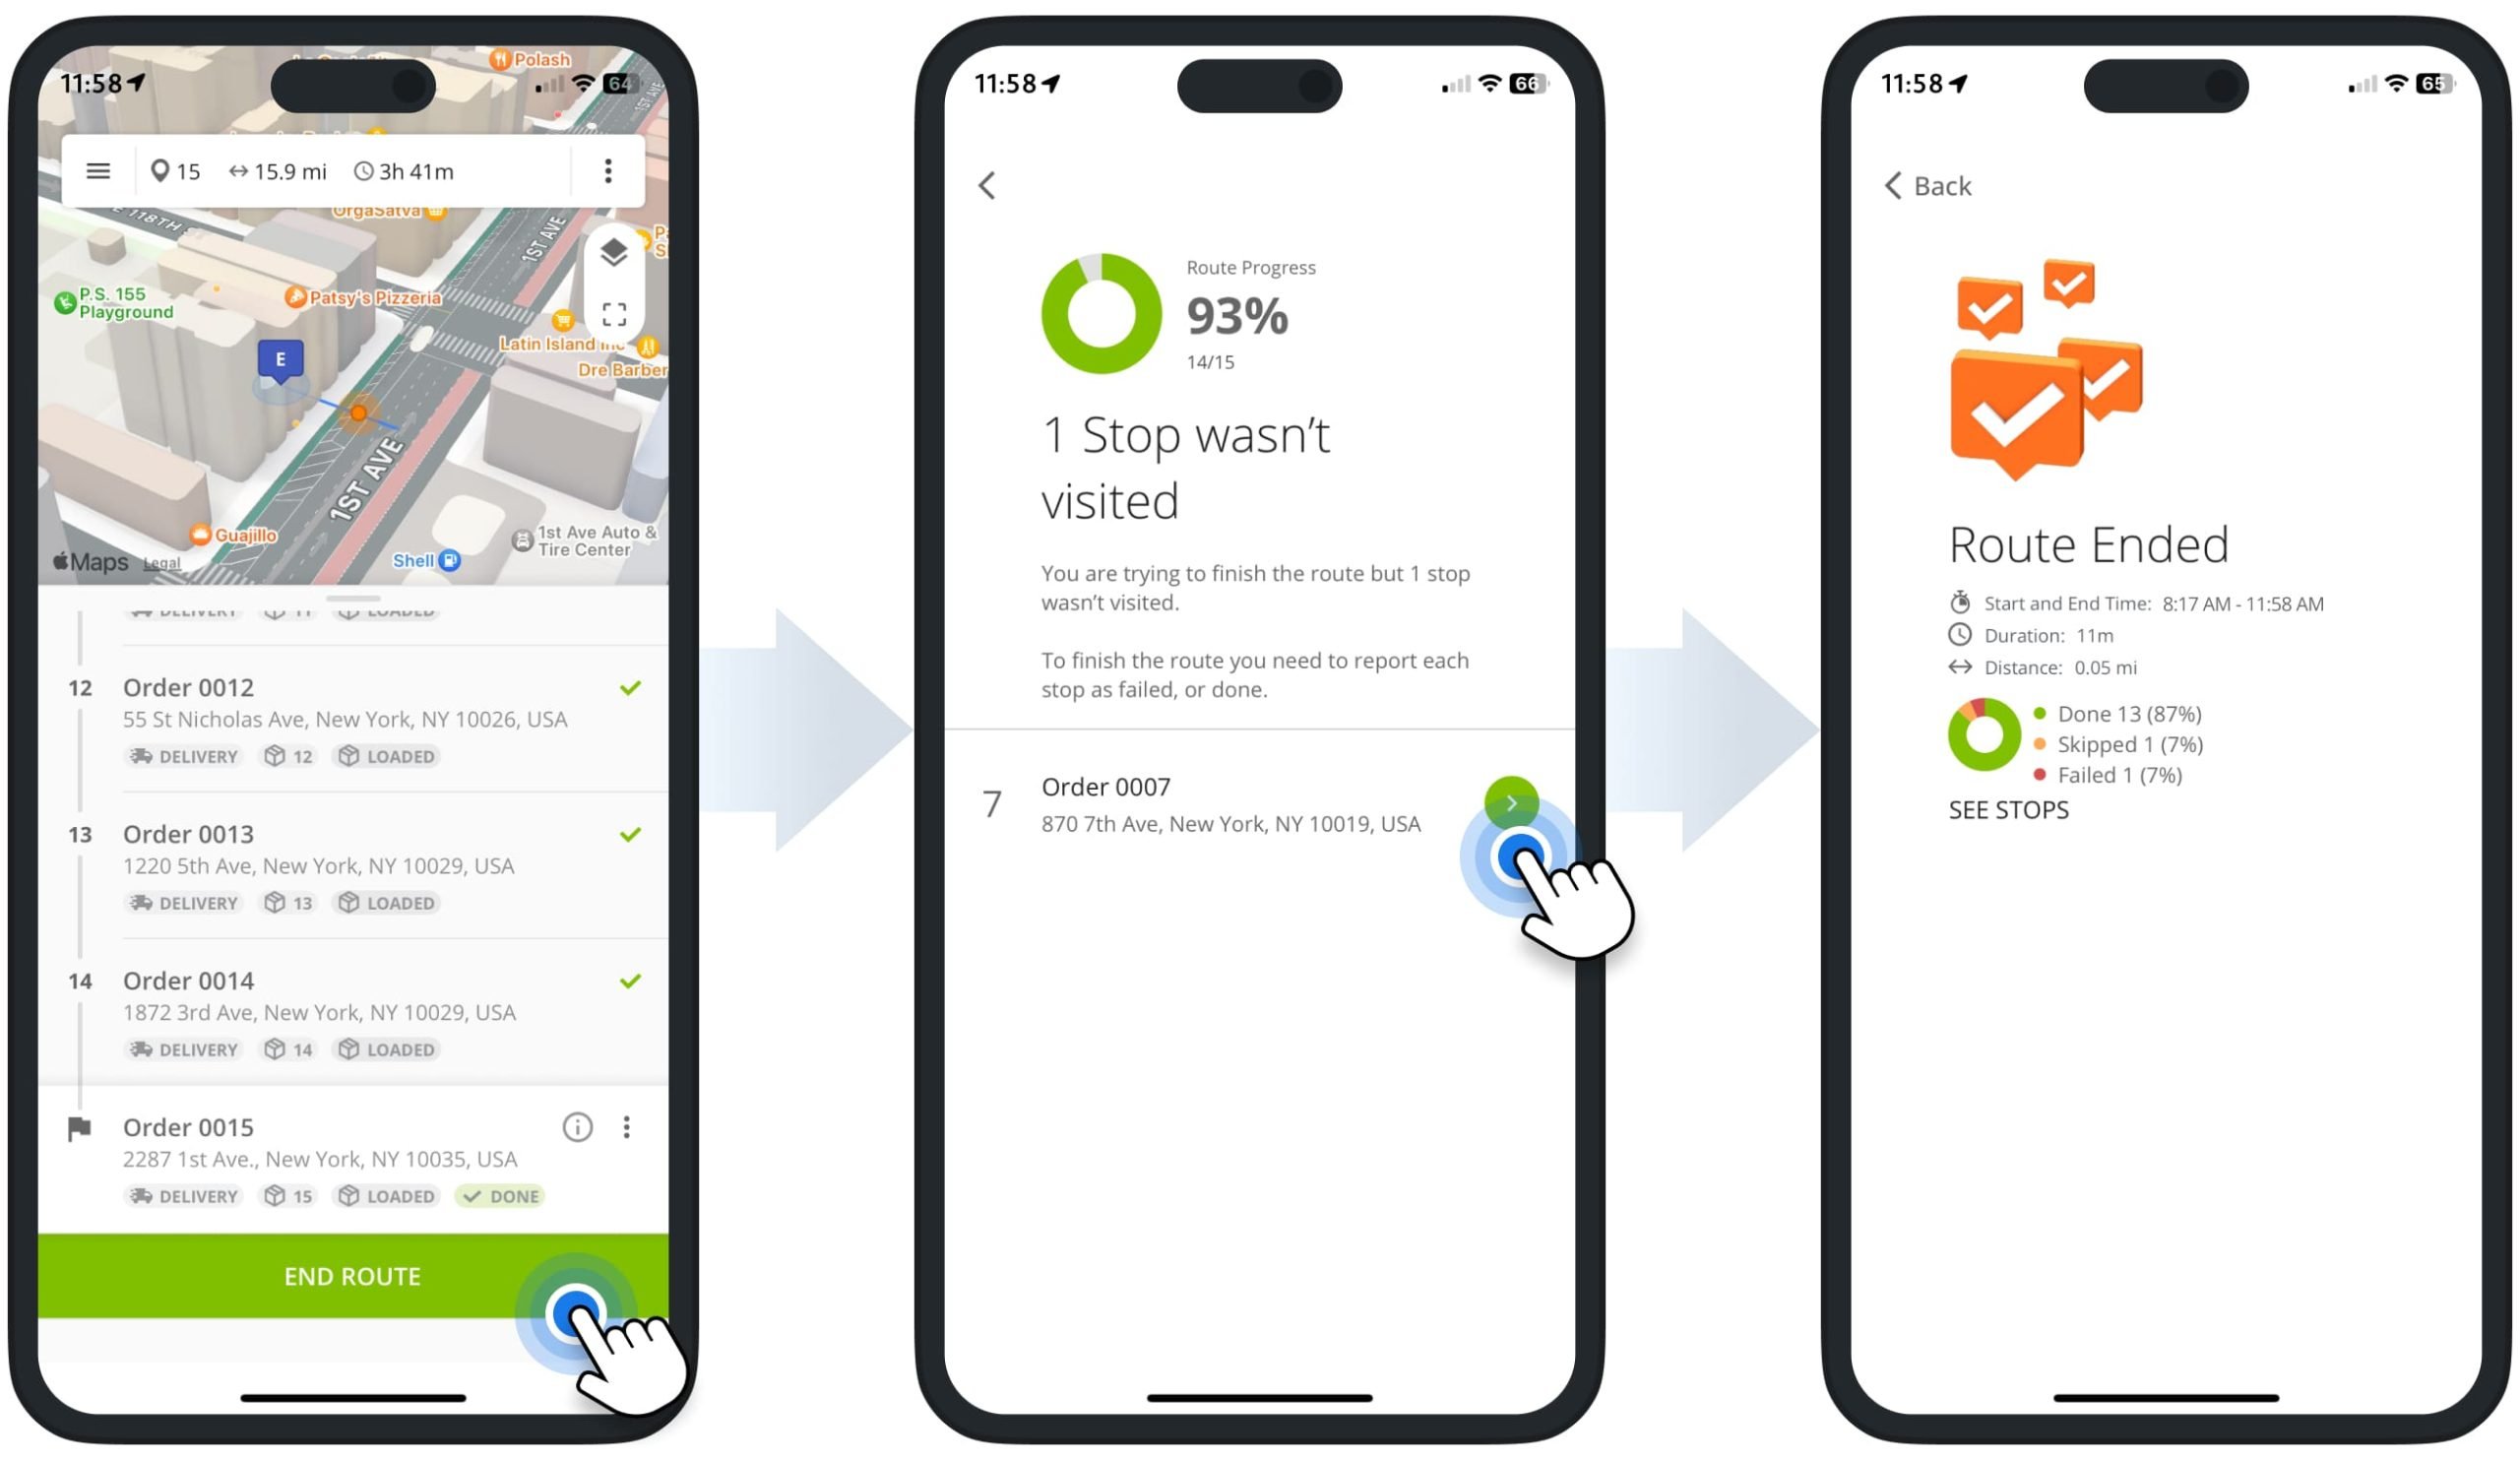
After unloading the final order and marking it as “Done“, the app automatically prompts you to end the route. You can also end the route manually by tapping “End Route” at the bottom of the address list.
If any destinations don’t have a status, Route4Me will display them before ending the route. Tap each destination, set the appropriate status, and then end the route.
Once completed, the app displays a route summary with key KPIs, including total distance traveled, time spent, number of visited addresses, destination status ratio, and more.
Check Completed Orders And Reschedule Failed And Canceled Orders
Once the route is completed and orders are marked as “Closed“, “Failed“, or “Skipped“, managers, route planners, and other Route4Me User Types can view detailed order history, export analytics, reschedule “Failed” and “Skipped” orders, and more.
Order History – View Chronological Order Action History
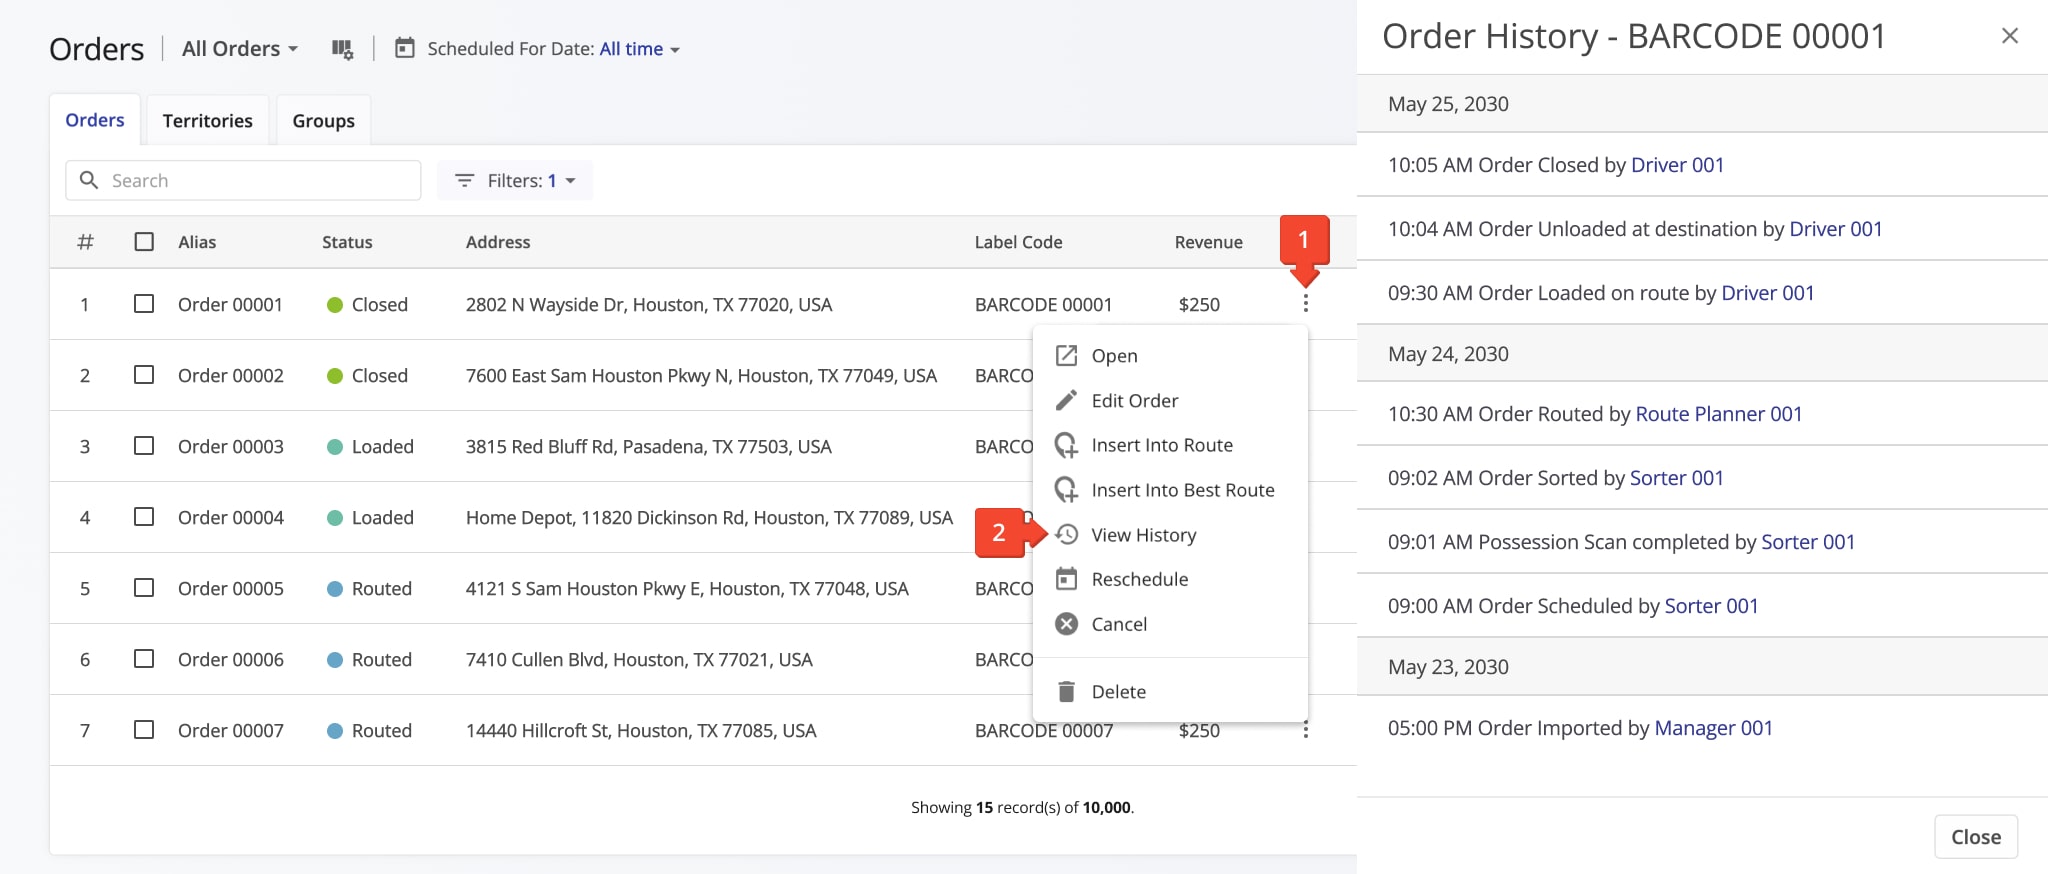
To view a detailed chronological history of an order, go to “Operations” > “Orders” in the Navigation Menu. Click the Three-dot Icon next to the desired order and select “View History”.
The “Order History” panel displays all actions for that order, grouped by date and listed chronologically, along with the user and timestamps. You can see when and by whom the order was created, imported, scheduled, routed, and more.
Export Orders – Download Orders Reports And Statistics In Spreadsheet
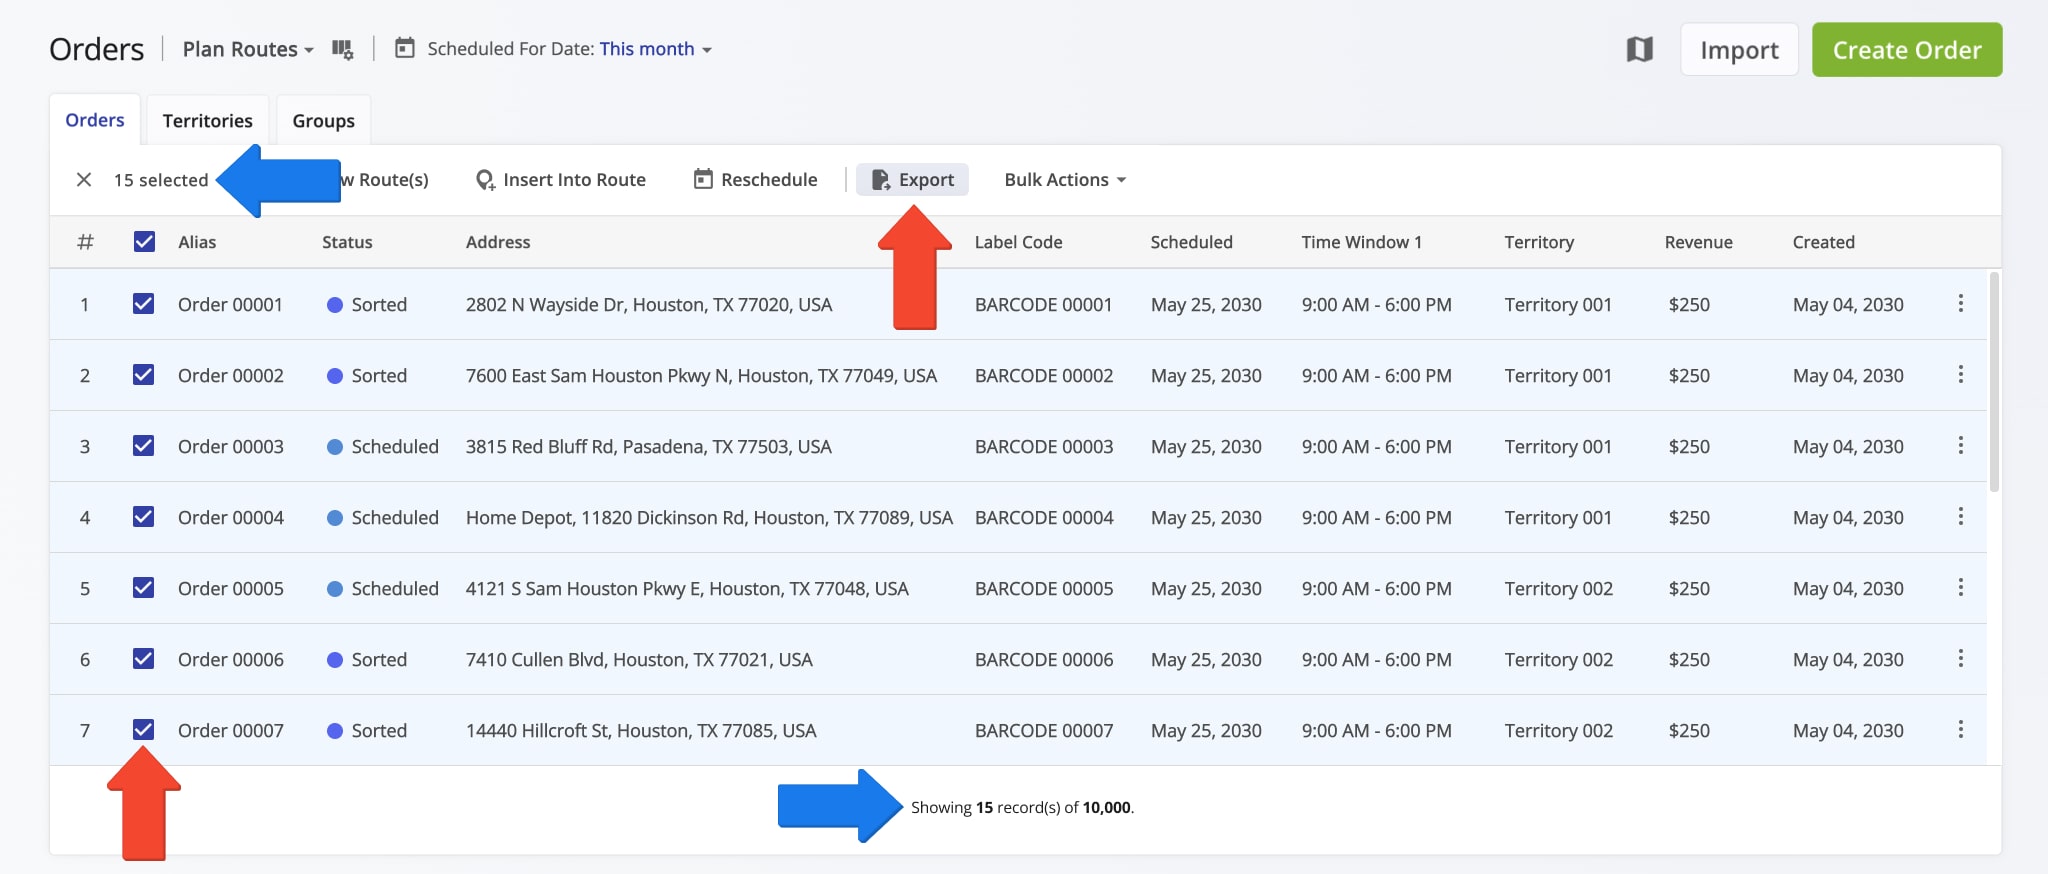
To export multiple orders, select them by checking the boxes next to each order. The bottom of the Orders List shows how many orders match your filters and are displayed on the page.
If you want to export all filtered orders (which can total in the millions), check the box at the top of the list. Then click “Export”. NOTE: For more details, see our guides on filtering orders and exporting order data and analytics.
Reschedule Orders – Schedule Unsuccessful Orders For Route Planning
If a driver can’t unload an order, reach the destination, or contact the recipient, they mark the destination as “Failed” or “Skipped“. Route4Me allows you to easily reschedule these orders for future route planning and optimization.
To reschedule, select the desired “Failed” and “Skipped” orders by checking the boxes next to them, then click “Reschedule” in the actions bar above the Orders List. In the “Change Schedule” panel, select or enter a new date for the rescheduled orders.
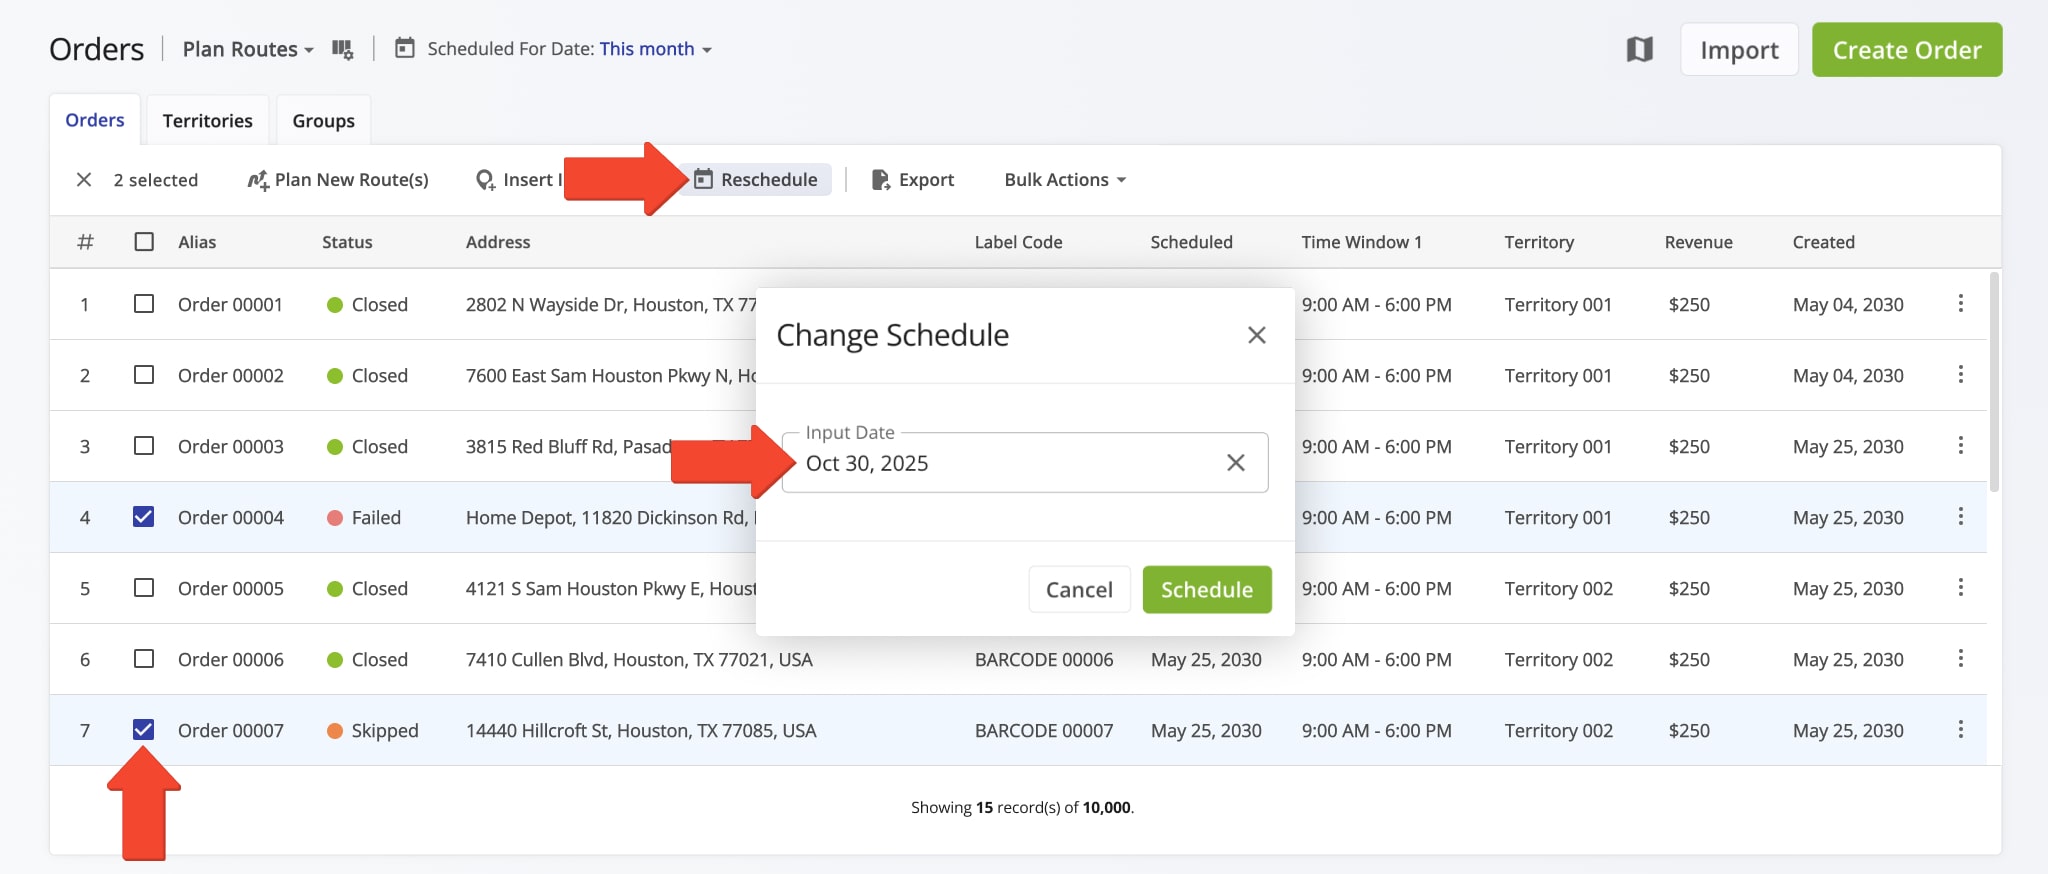
The status of these orders will update to “Scheduled“, and their scheduled date will change to the selected date. NOTE: For more details, see our guide on managing managing orders and order statuses.

Visit Route4Me's Marketplace to Check out Associated Modules:
- Operations
Custom Data Add-On
- Operations
Advanced Team Management Add-On
About author: Alex Yasko
Alex Yasko is the Go-to-Market Product Manager and Information Architecture Manager at Route4Me. With thousands of hours of experience, Alex specializes in breaking down complex last-mile optimization and routing scenarios into simple, actionable instructions, helping last-mile businesses streamline their operations effortlessly.