Start, Navigate And Complete Routes – iOS iPhone Route Planner App
Route4Me’s iOS iPhone Route Planner provides seamless continuity throughout the entire multi-stop route planning, optimization, navigation, and visitation process. In this guide, you can learn how to start scheduled routes, share route ETAs, use Route4Me’s In-App Voice-Guided Navigation, add stop statuses, collect electronic proof of delivery (POD), visit (POV), or service (POS), complete routes, check route KPIs, and more. Additionally, you can learn how to use Google Maps route planner, Apple Maps route planner, and Waze route planner apps to navigate Route4Me sequenced routes.
NOTE: Depending on your account settings, you can have a different set of features available on your Route4Me iOS iPad and iPhone Route Optimization app. To enable specific features, please Contact Route4Me’s Support Team. Additionally, learn more about the difference between Route4Me’s Mobile and Marketplace Subscriptions and the features they support.
Table of Contents
Quick Steps to Start, Navigate and Complete Multi-Stop Routes
Navigating and completing multi-stop routes with Route4Me’s iOS iPad and iPhone Routing app is fast and simple. Follow these quick steps to open, start, navigate, and complete your Route4Me optimized last-mile routes. First, go to “Routes” in the app’s main menu to open the preferred route. Next, tap and hold the “Hold to Start Route” button to start your route.
After that, tap the “Navigate” button next to the stop that you want to visit from your current location. Next, select “In-App Navigation” to use Route4Me’s Integrated Voice-Guided GPS Navigation and proceed to navigate the route. Alternatively, you can use Apple Maps, Google Maps, Waze, HERE WeGo, CoPilot, Uber, and other GPS navigation apps.
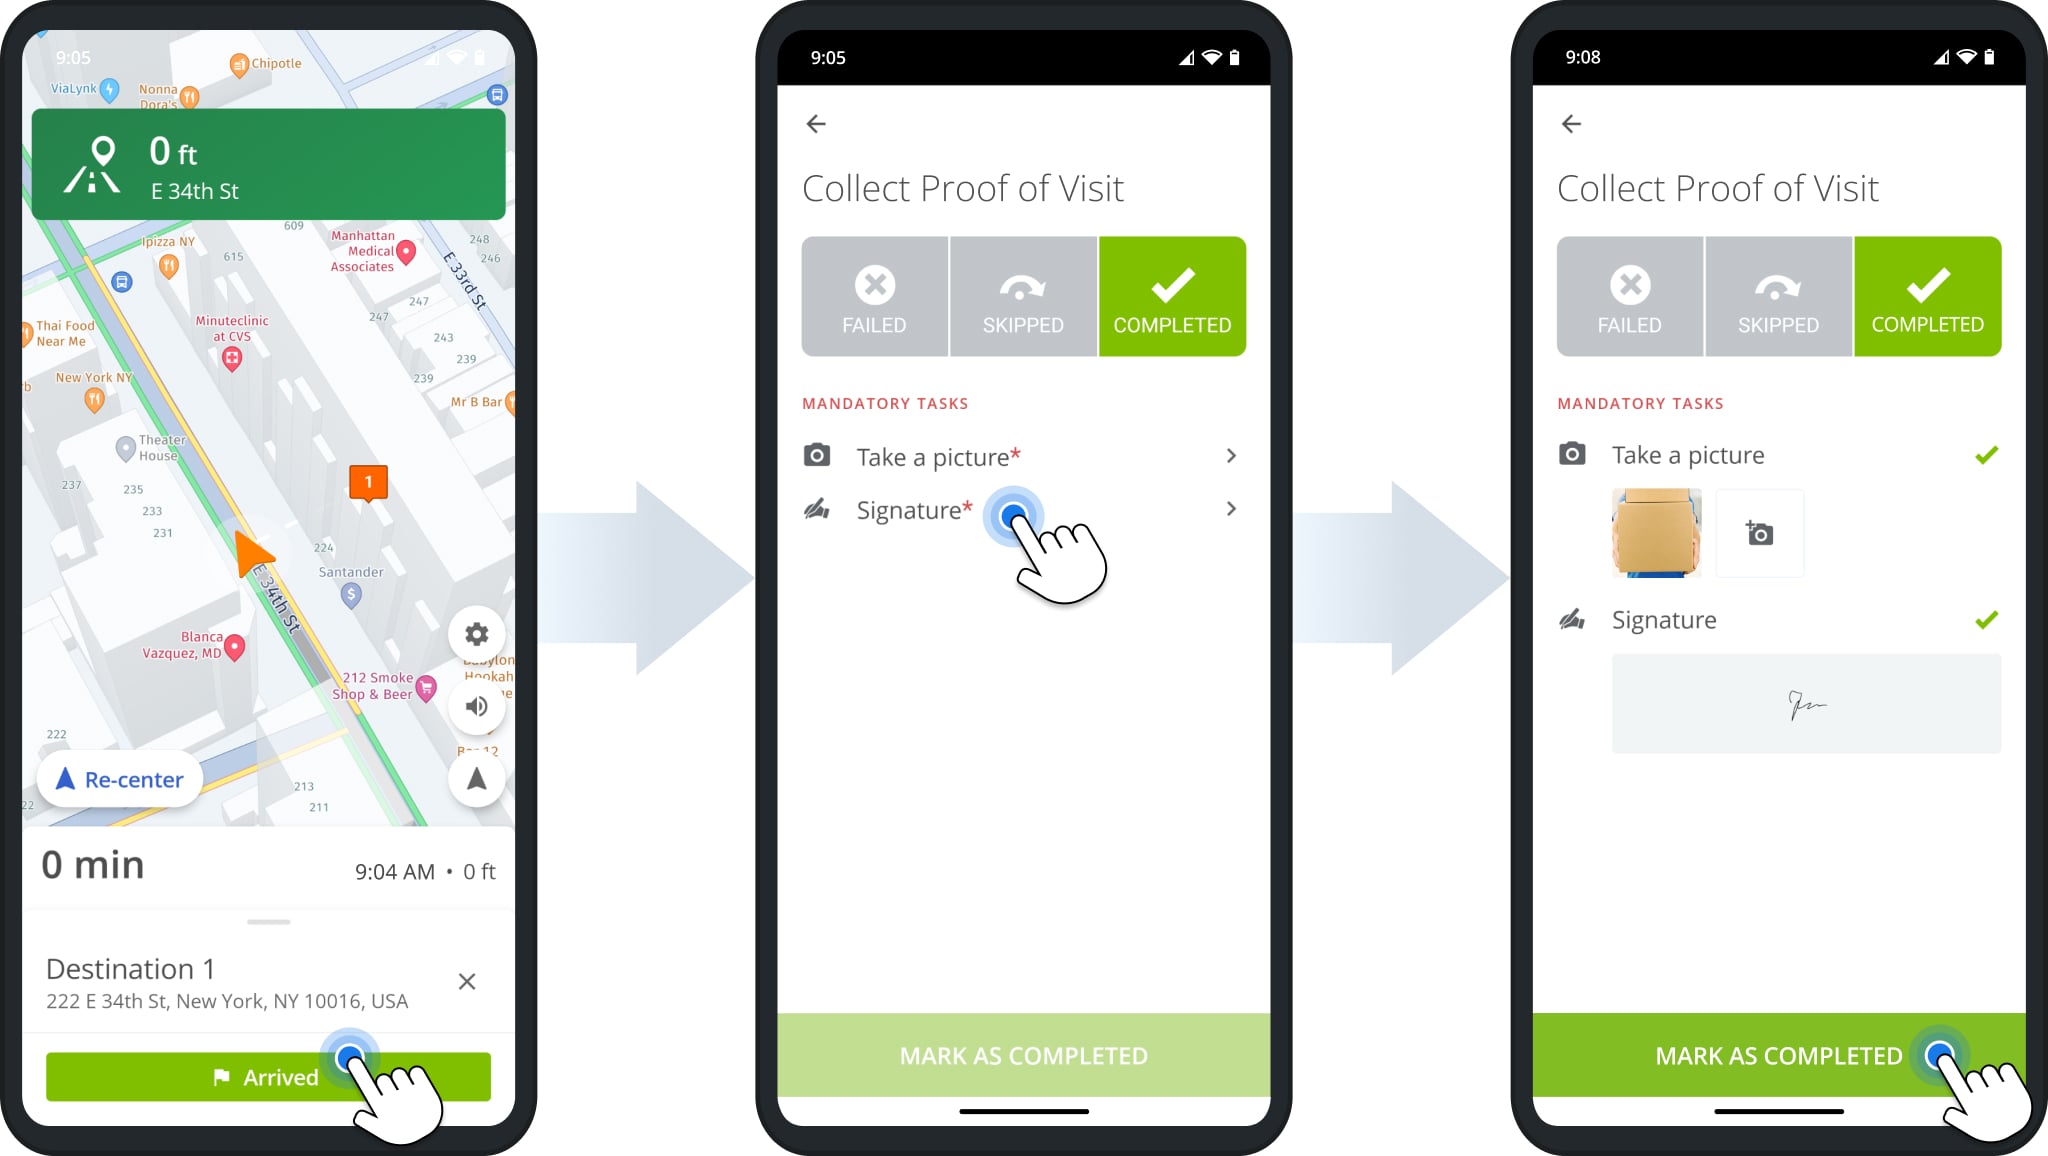
When you arrive at route stops, you can add statuses and attach various types of proof of visit, delivery, or service. To do so, tap the “Arrived” and then the “Set Status” button. Next, select the preferred stop status. After that, you can attach an e-signature, photo, video, text note, and other data to the stop.
After visiting all stops on your route, the reliable delivery routing software will automatically prompt you to end the route. If you have stops without a status (not visited stops), you can add statuses to these stops to end the route. Furthermore, once you finish the route, Route4Me will provide a detailed route summary with route performance KPIs, showing the total route duration, traveled distance, actual route start and end times, the ratio of completed and failed stops, etc.
Routes List Visibility and Access – My Routes and All Routes
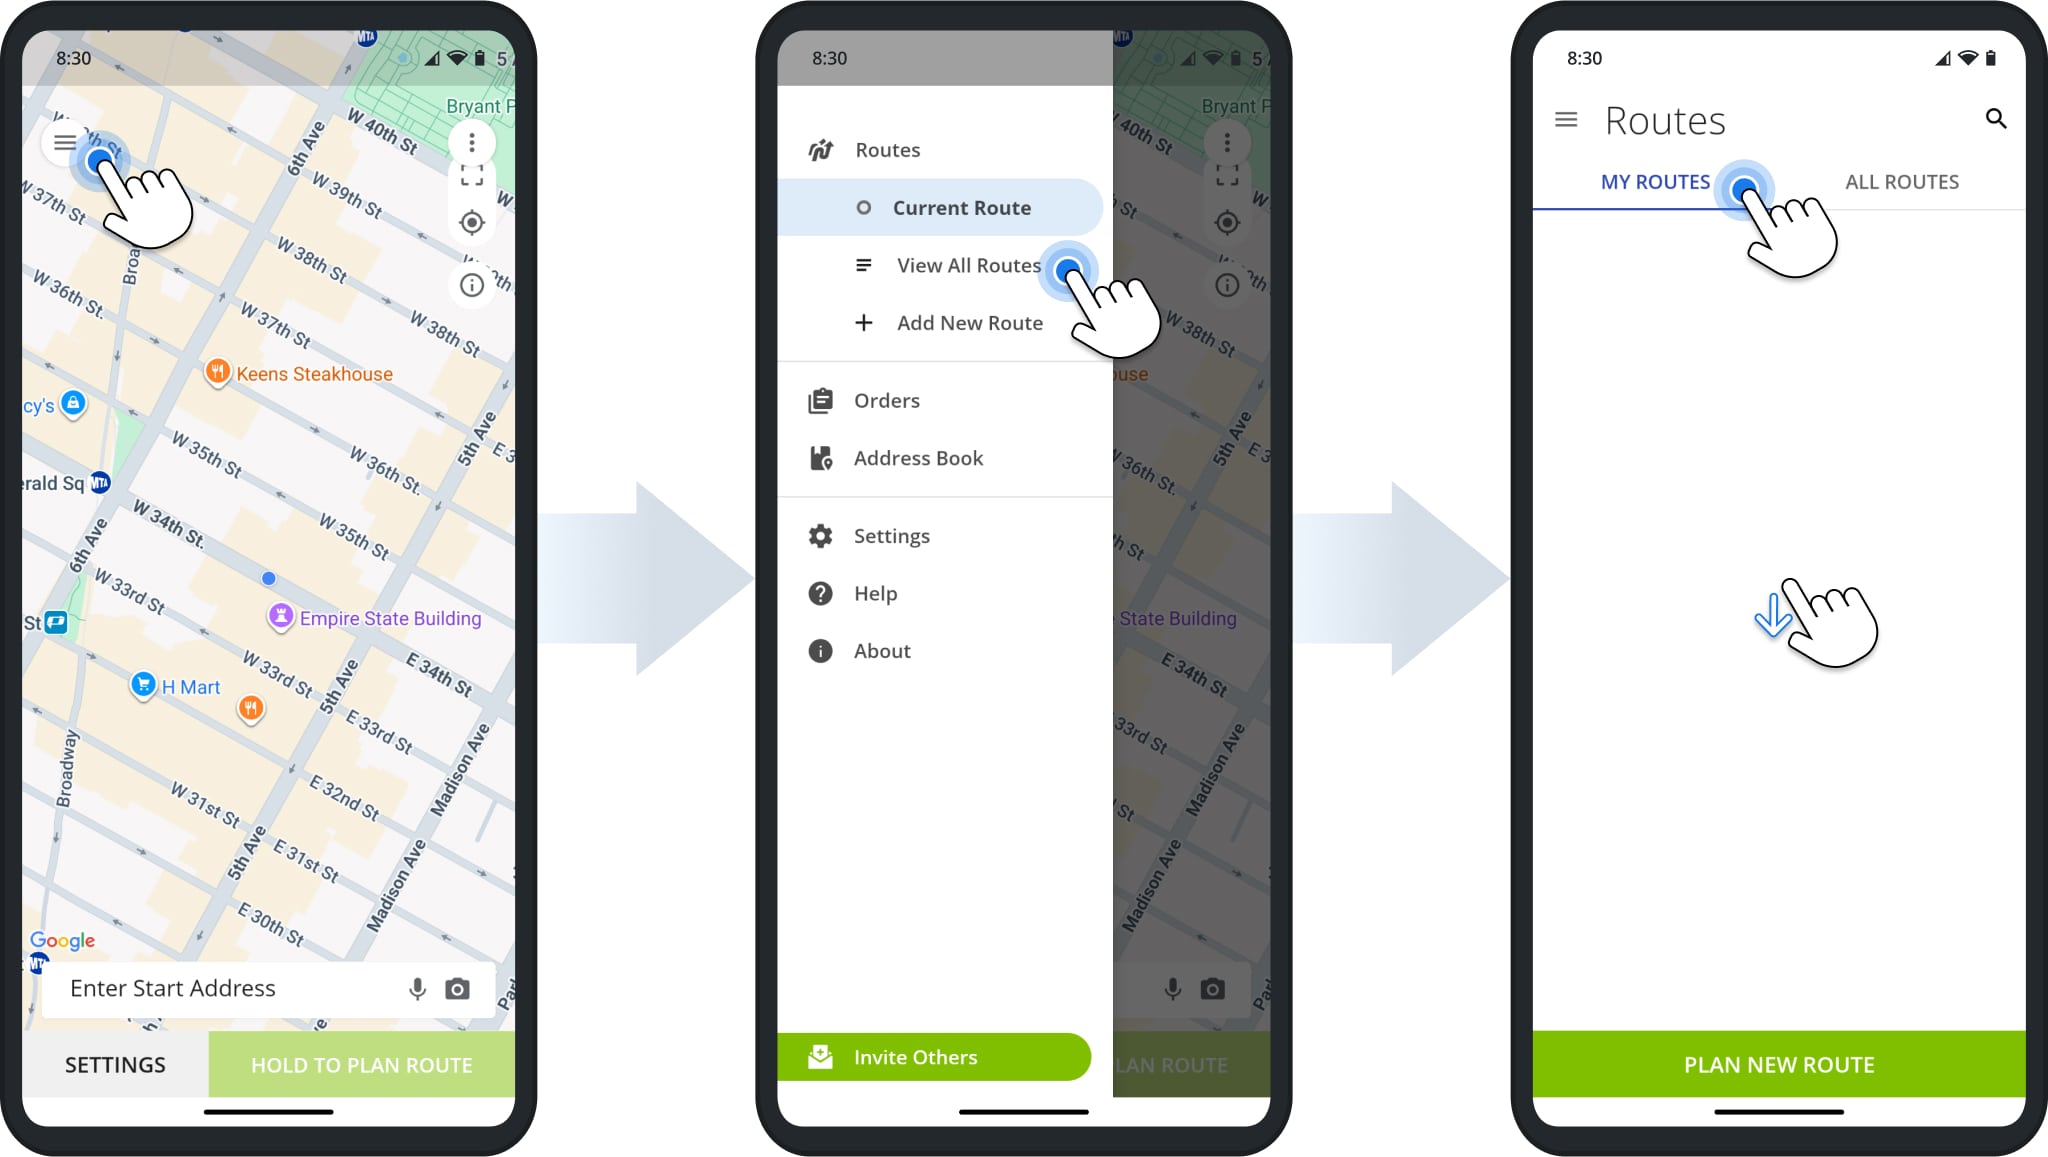
To open your business route optimization software Routes List, go to “Routes” in the app’s main menu. Depending on your subscription and user type, you can have access to your routes only, as well as the routes of other team members. In the “My Routes” tab, you can access the routes you planned, and routes you are assigned to. In the “All Routes” tab, you can access the routes you and your sub-users planned, and routes you and your sub-users are assigned to.
Additionally, learn more about Route4Me’s User Types and Account-Level Permissions, Marketplace vs Mobile Subscriptions, and Route Management on Route4Me’s iOS Route Planner App.
Start Routes on Route4Me’s iOS iPhone Muti-Stop Route Planner App
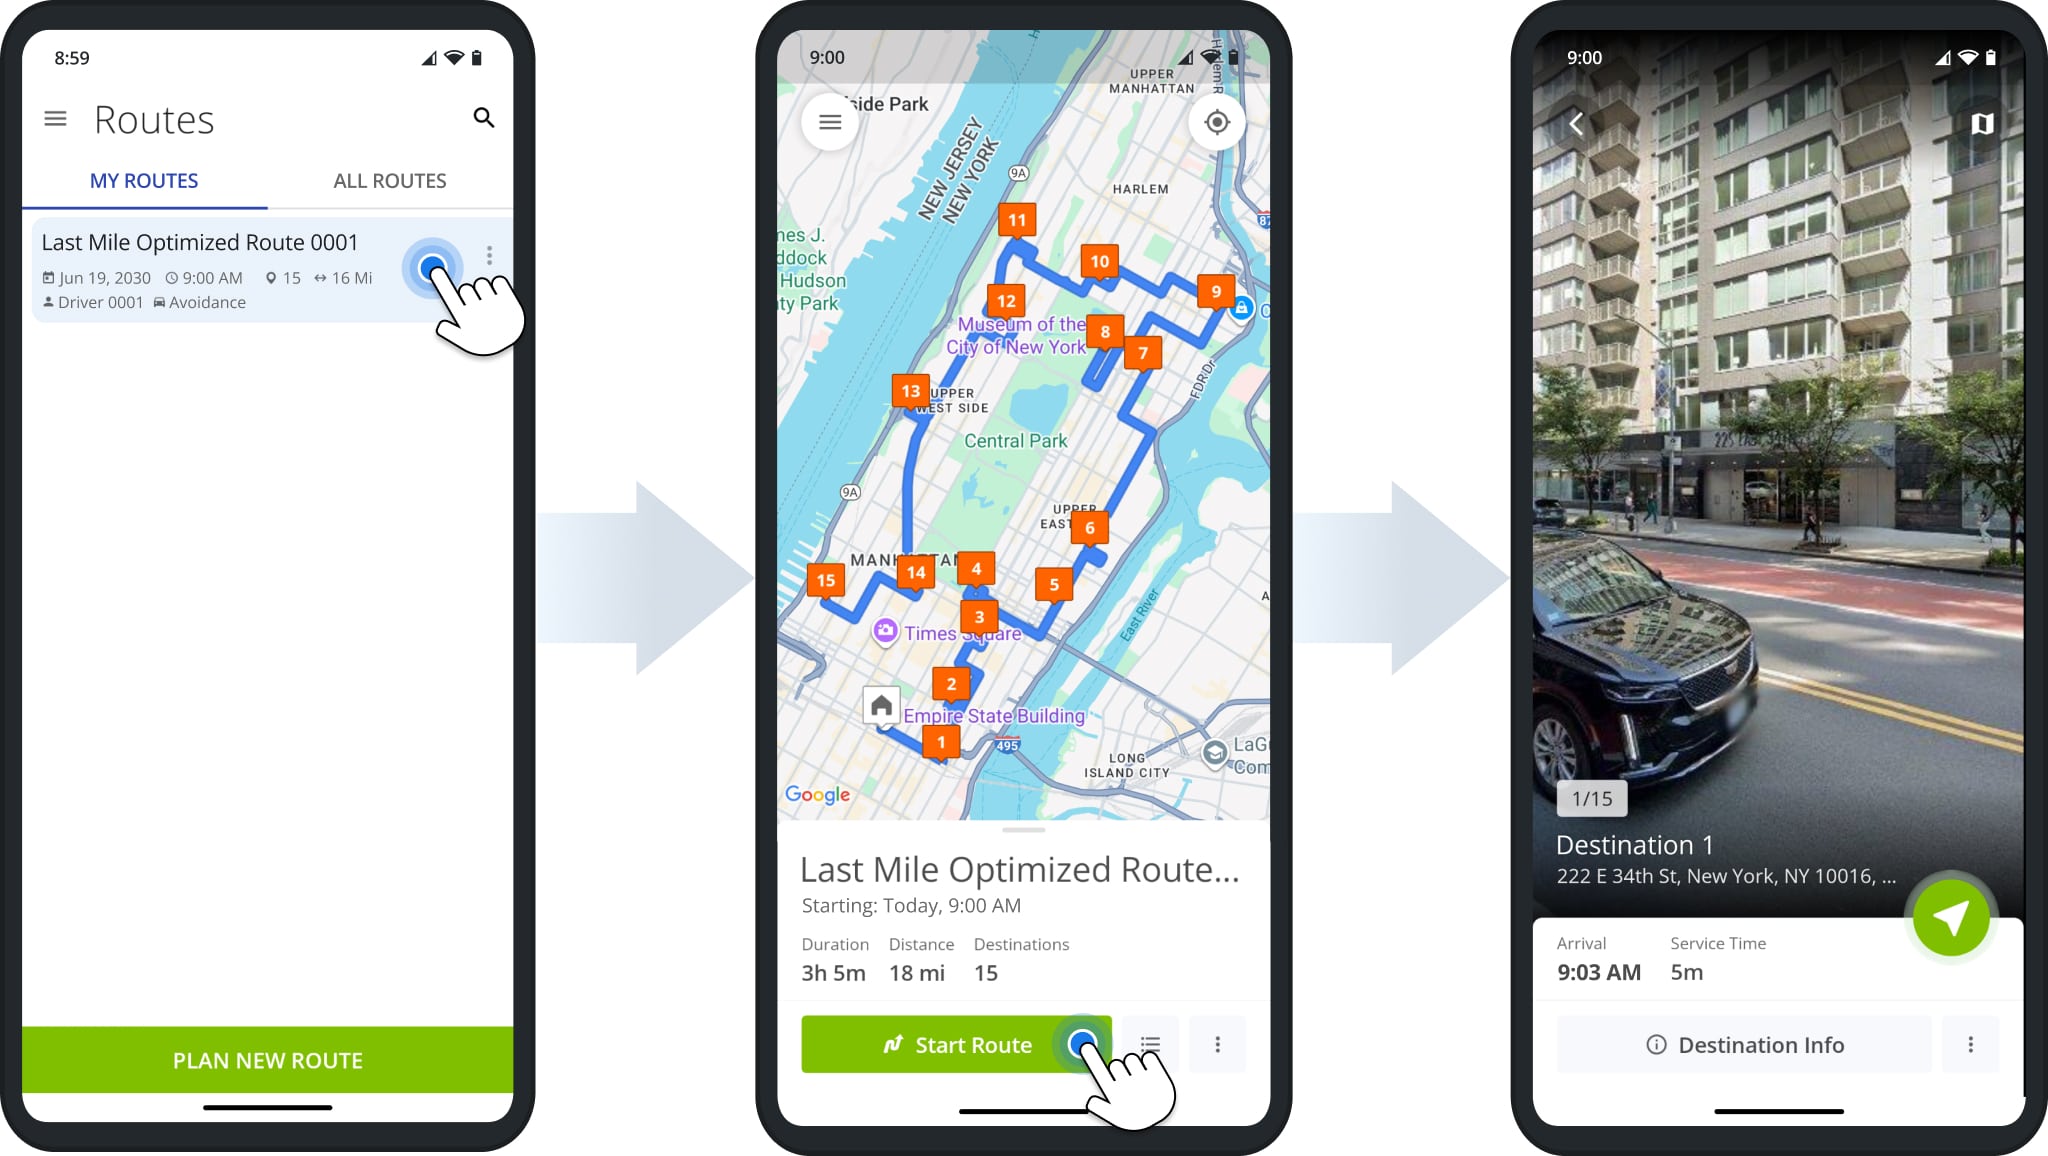
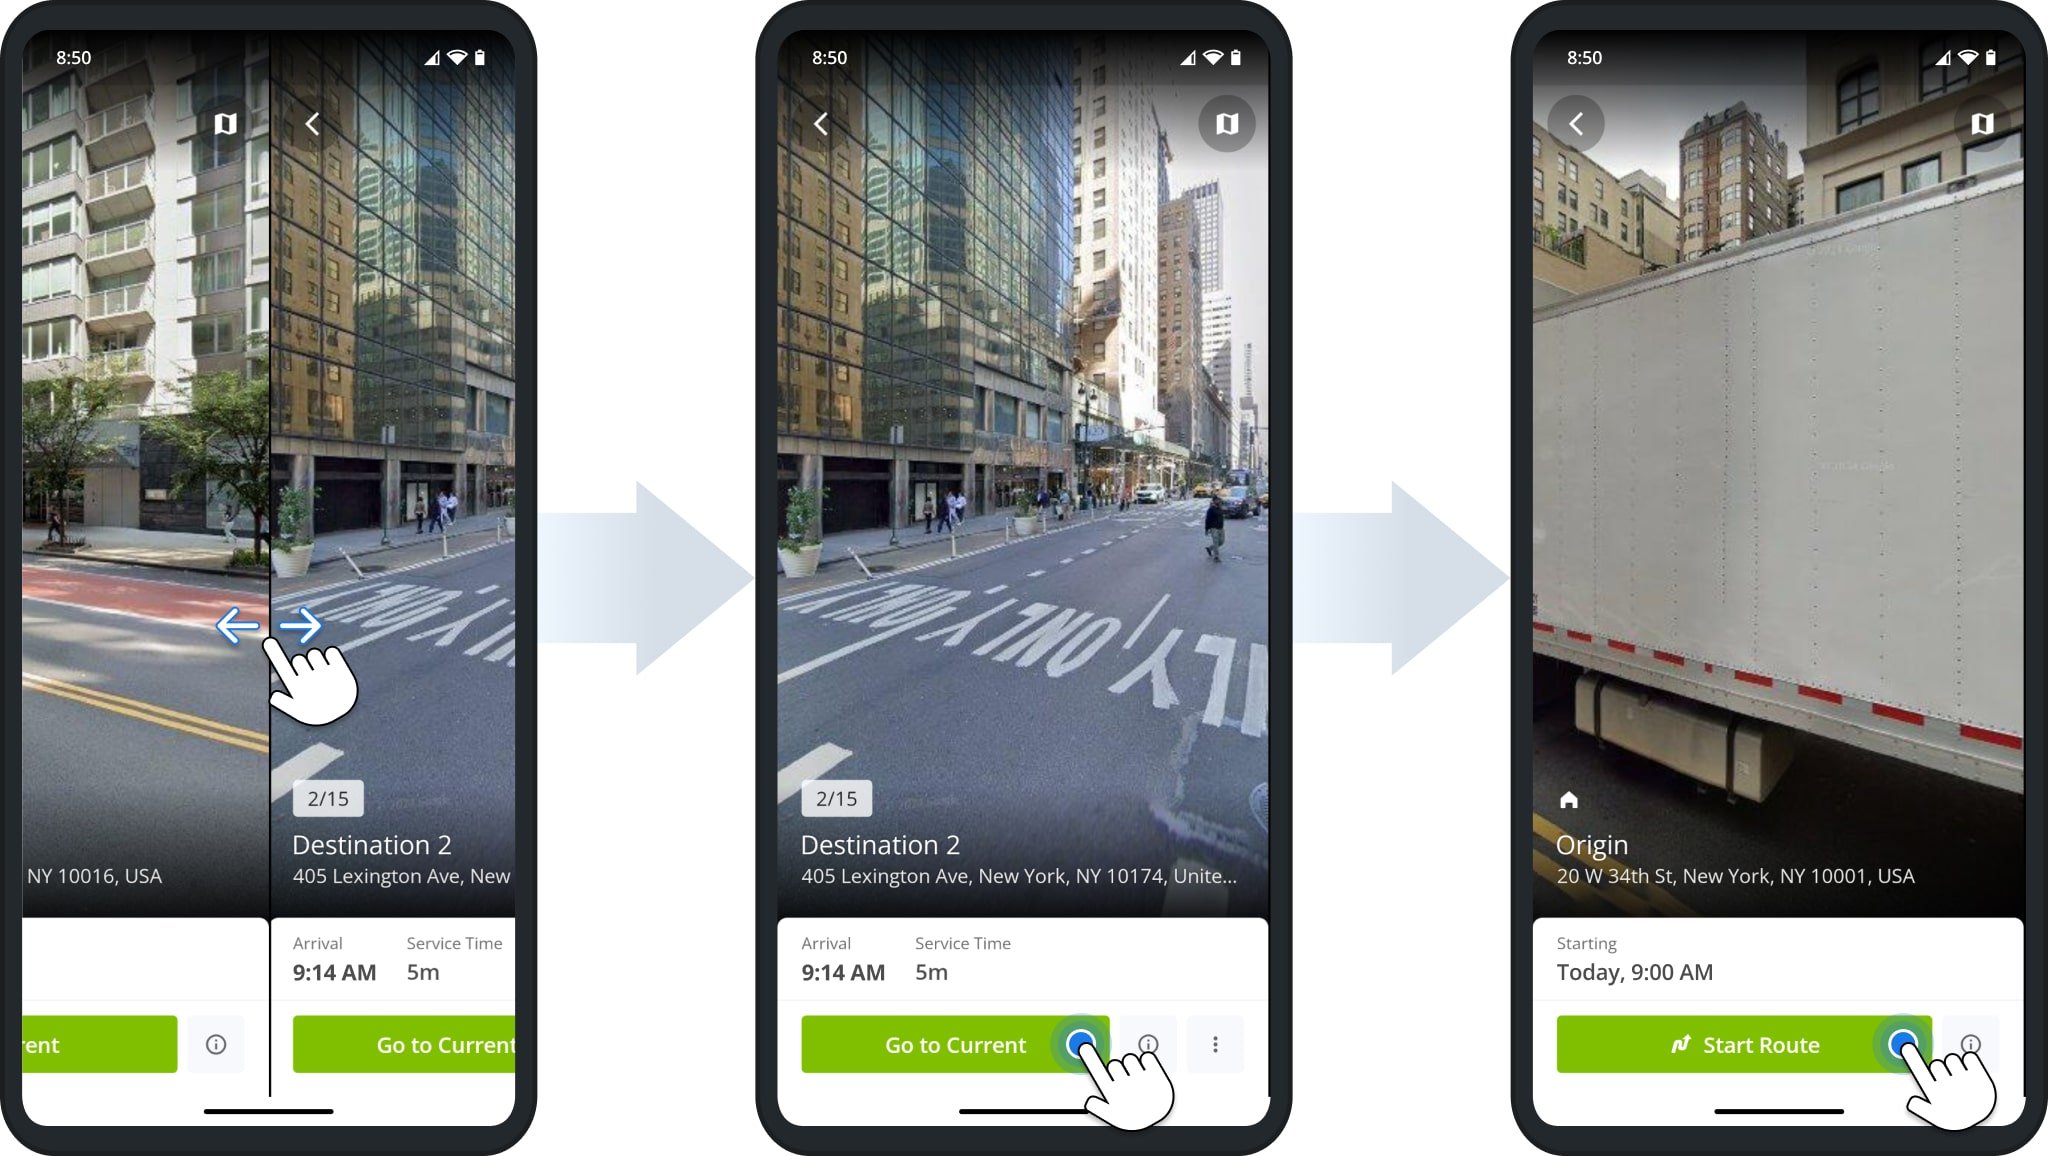
First, go to “Routes” in the last mile routing app‘s main menu and then open the preferred route. At the top of the opened route, you can check such route details as route start time, distance, number of stops, predicted route duration, and more.
Next, tap and hold the “Hold to Start Route” button to start your route. Equally important, when you start a scheduled route, the app automatically updates the route’s start date and time to the current date and time.
Share ETA – Send SMS with Estimated Time of Arrival to Customers
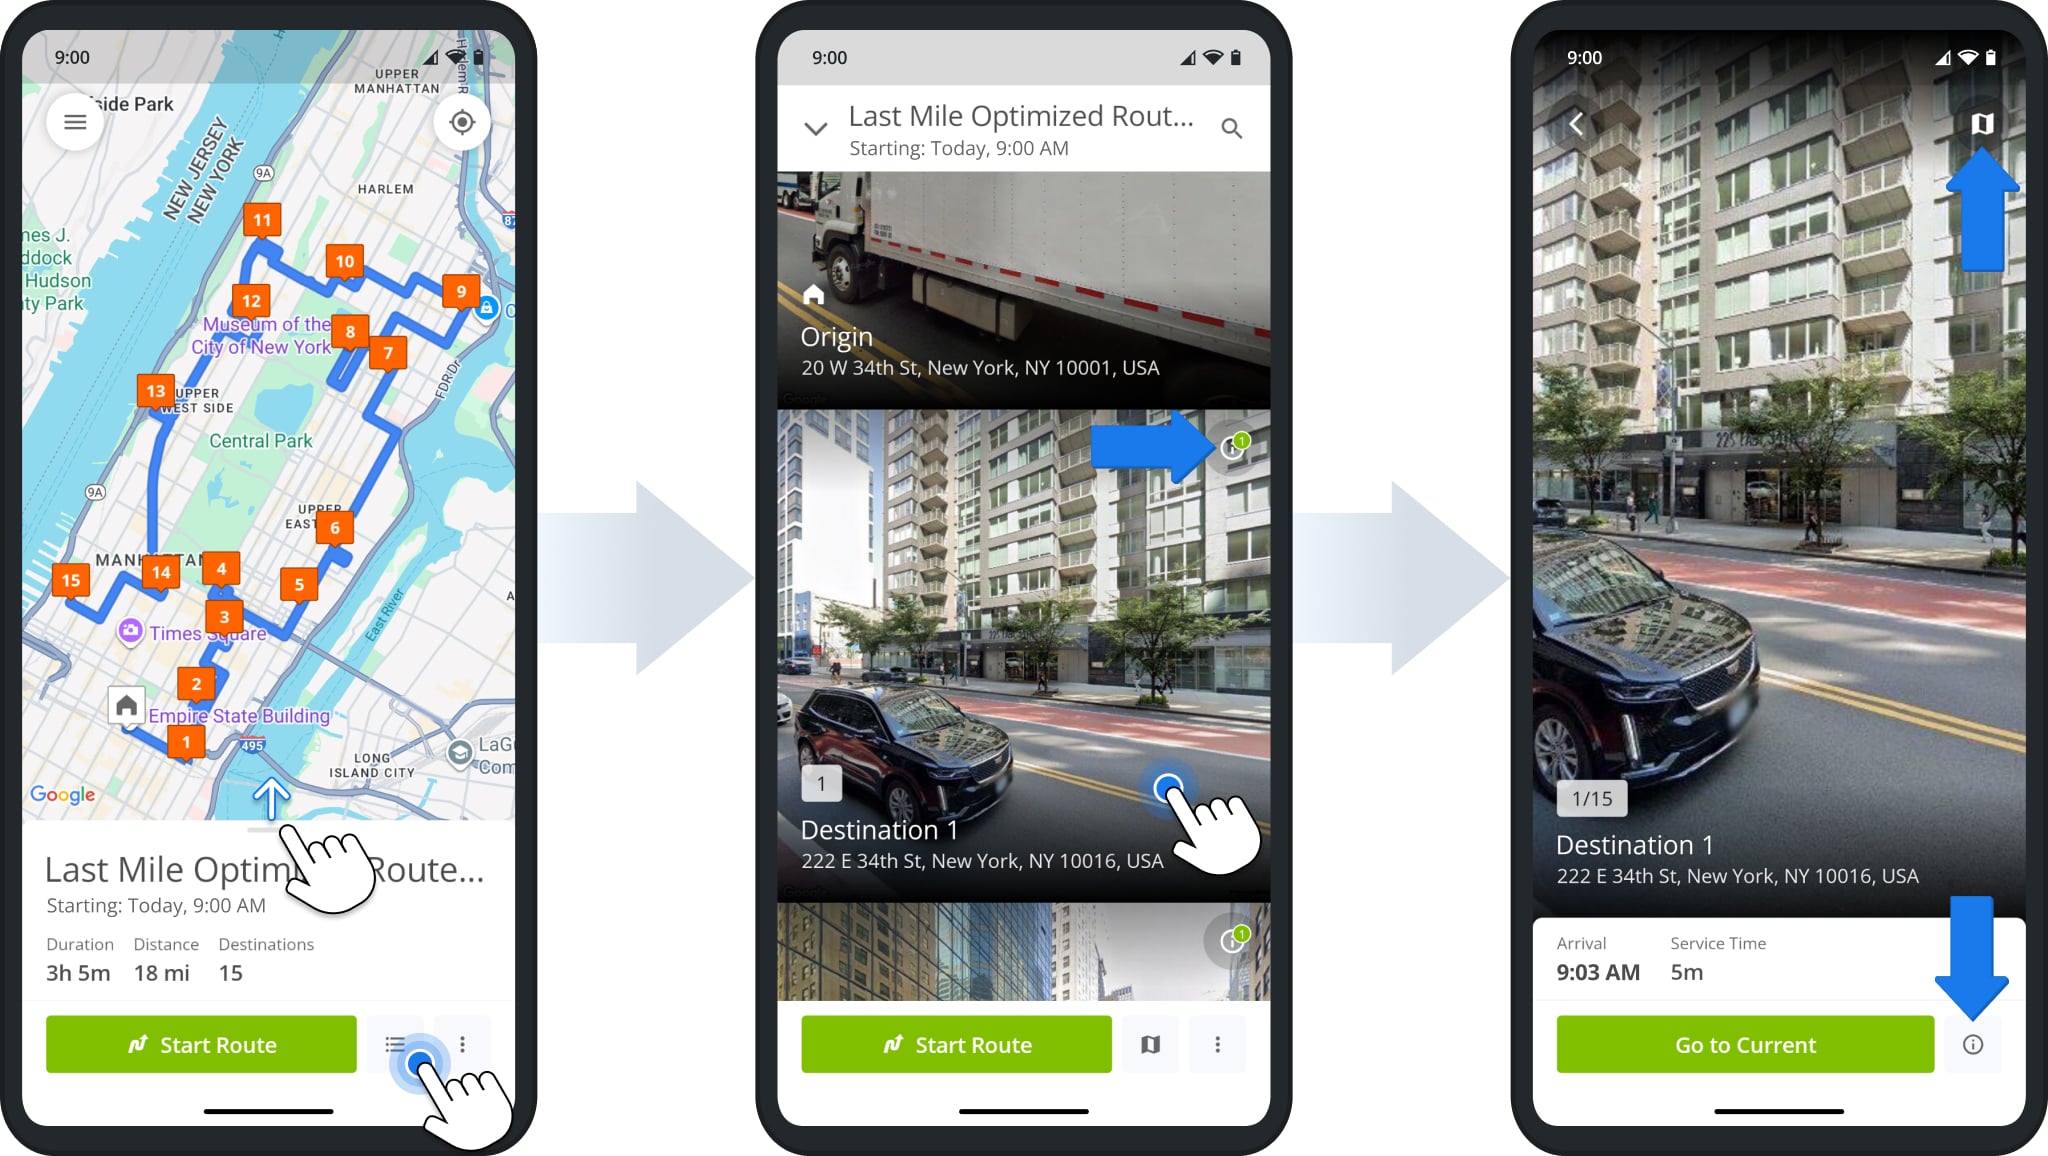
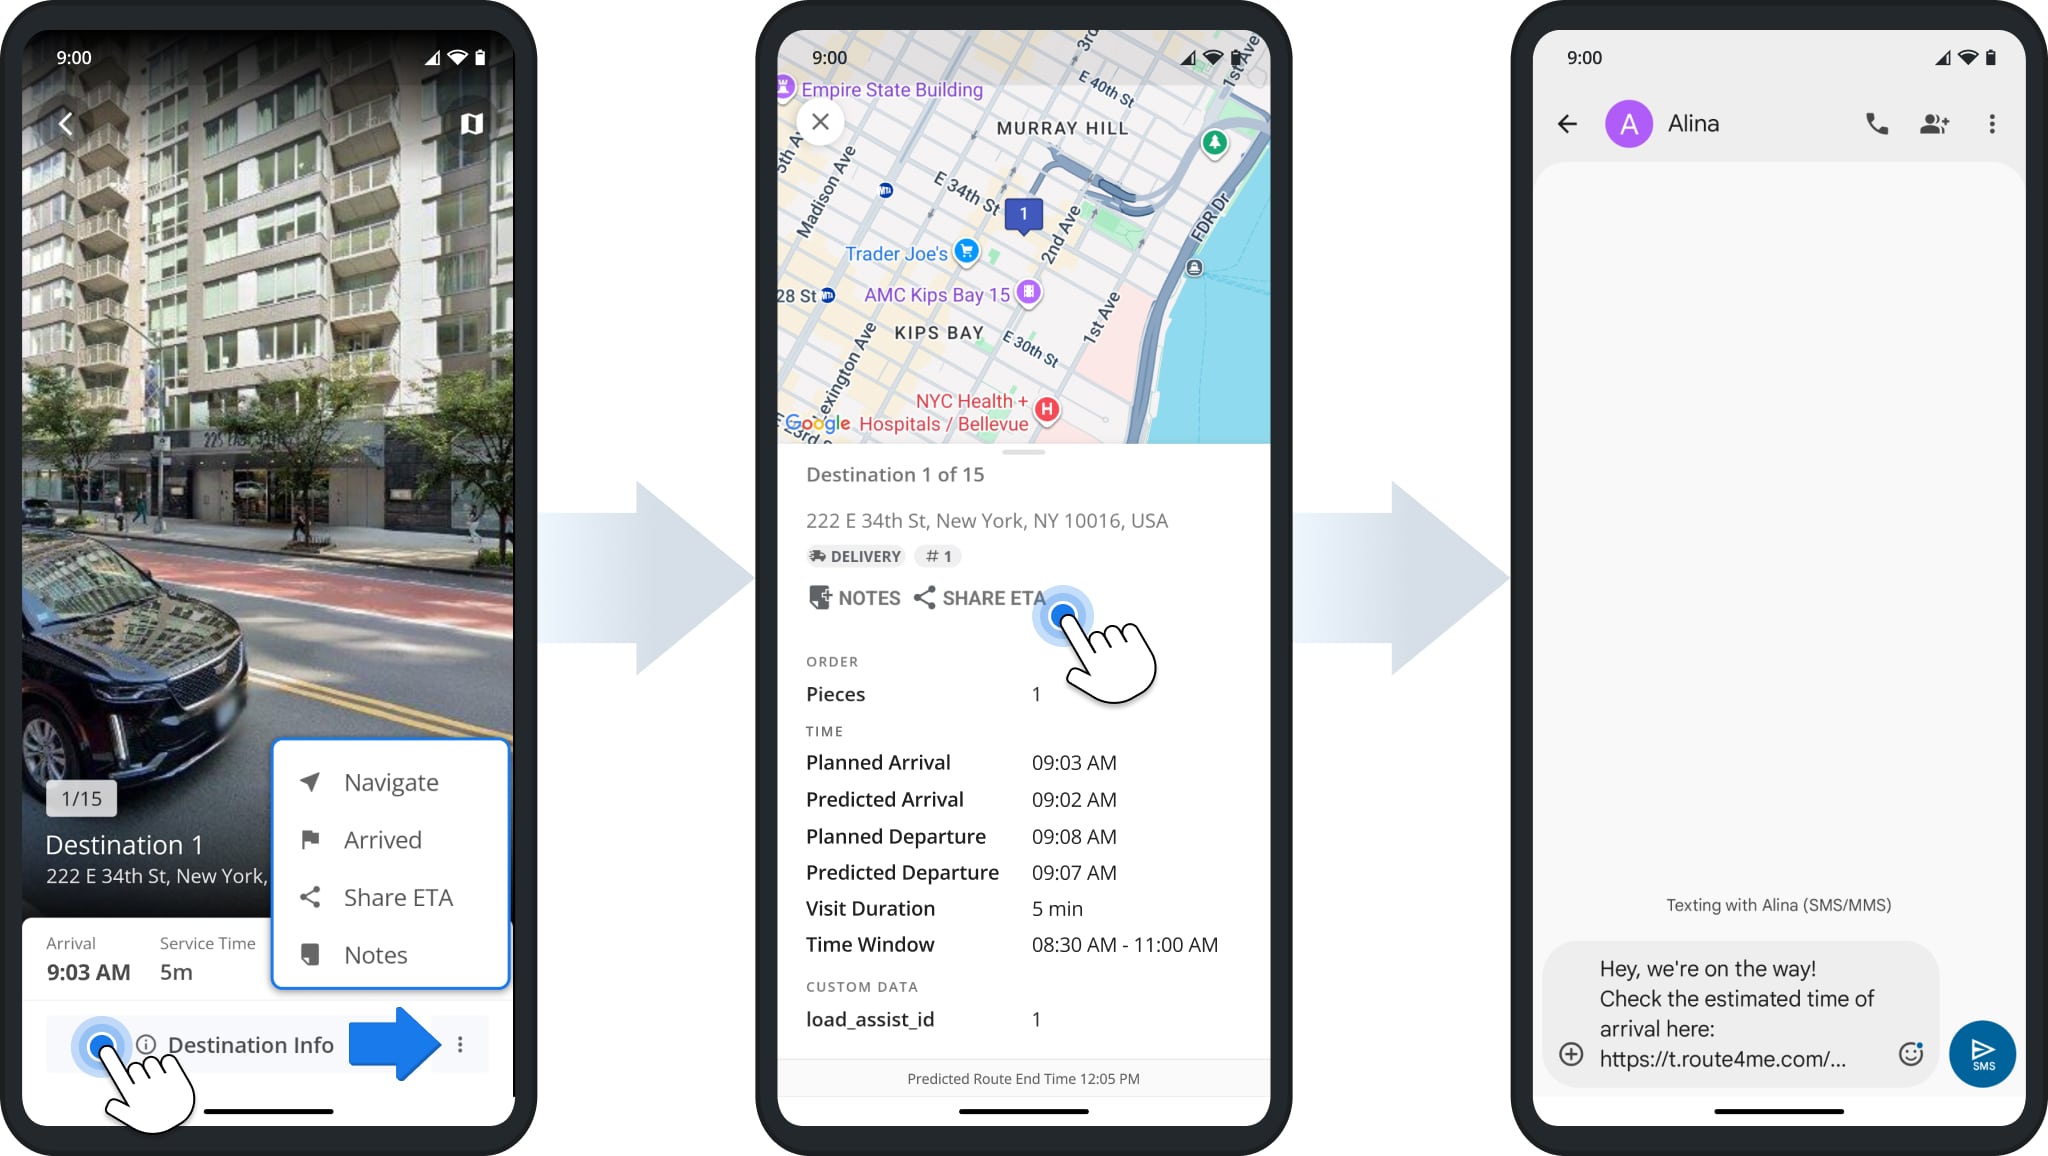
After starting your route, you can navigate to route stops to complete the route. For your and your customers’ convenience, you can share your estimated arrival time with customers before you start navigating to their location. To do so, tap the three dots menu icon next to the preferred route stop and then select “Share ETA” from the menu. Alternatively, tap the information icon next to the stop and then tap the “Share ETA” button.
Next, the reliable delivery routing software will automatically prepopulate a text message with a link to Route4Me’s Order Tracking Portal and the respective order tracking number for the phone number associated with the route stop. Accordingly, the recipient can then use the received link to open their order on Route4Me’s Order Tracking Portal and check the driver’s ETA.
NOTE: Route4Me only generates the Order Tracking Link and prepopulates the SMS text message for your convenience. After that, you can send prepopulated messages based on your mobile carrier’s standard messaging charges.
In-App Voice-Guided Navigation – Route4Me Integrated GPS Navigation
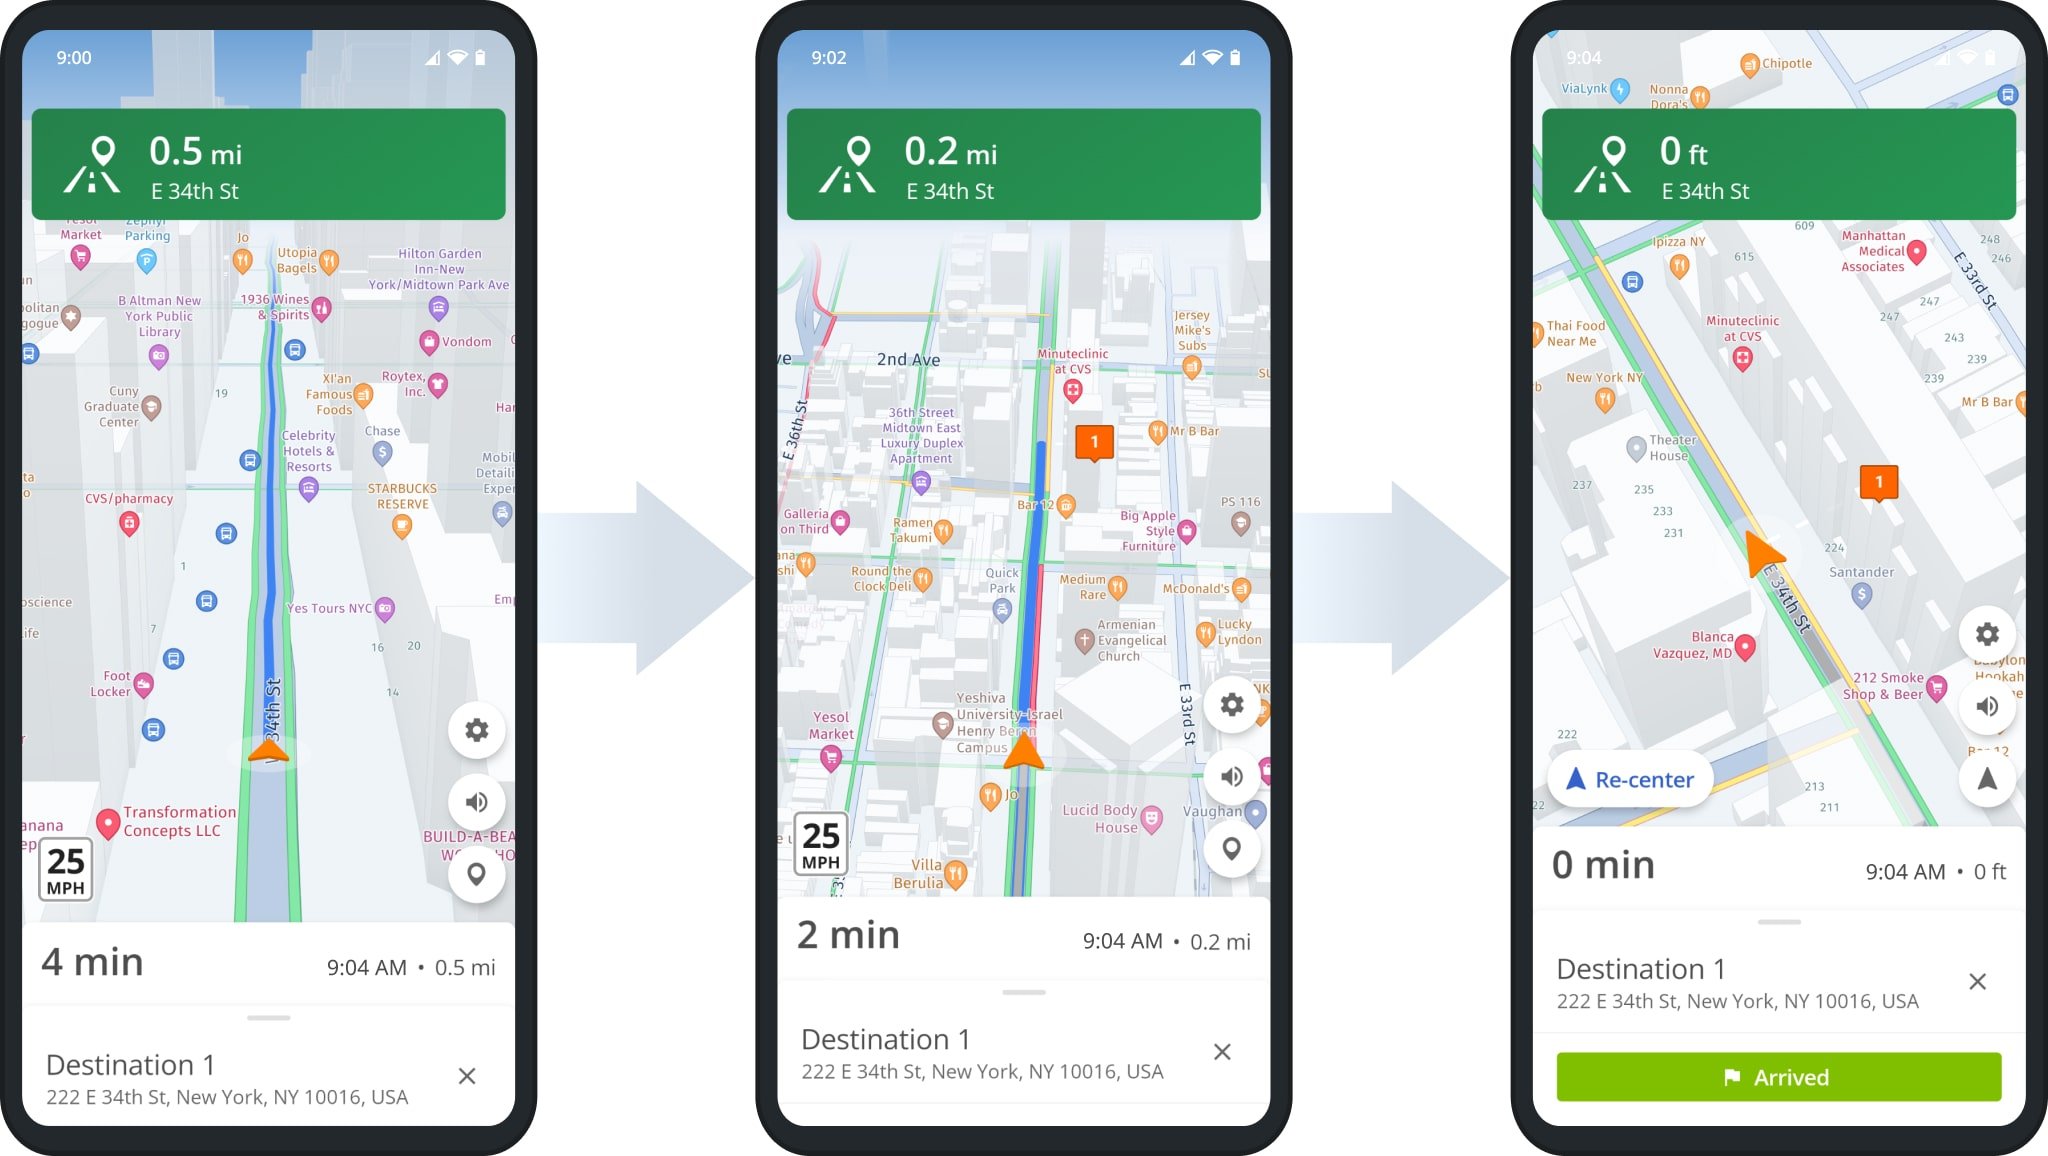
To start navigating to a route stop from your current location, tap the “Navigate” button next to the preferred stop. Next, you can select the “In-App Navigation” option to use Route4Me’s Integrated Voice-Guided GPS Navigation. Additionally, you can also navigate Route4Me sequenced routes using Google Maps, Apple Maps, Waze, CoPilot, and even ridesharing apps such as Uber.
Route4Me’s In-App navigation features voice-guided driving directions for driver safety, cycling and walking directions, adjustable 2D and 3D maps, dynamic ETAs, live traffic updates, and more. Additionally, you can use pinch gestures to zoom in and out on the navigation map and change the map angle and type.
To mute or unmute driver navigation directions, tap on the speaker button. Moreover, at the bottom of the navigation screen, you can check the dynamic estimated time of arrival, which can change depending on the live traffic and other conditions. Additionally, learn more about Using Route4Me’s Integrated Voice-Guided GPS Navigation.
Google Maps Route Planner GPS Navigation for Route4Me Sequenced Routes
To use Google Maps Route Planner Navigation, tap the “Navigate” button next to the preferred route stop and then select the “Google Maps” option. Next, Route4Me will automatically send the stop’s address to the Google Maps navigation app. After that, you can preview your Google Maps route and then start navigating.
Apple Maps Route Planner GPS Navigation for Route4Me-Sequenced Routes
To use Apple Maps Route Planner Navigation, tap the “Navigate” button next to the preferred route stop and then select the “Apple Maps” option. Next, Route4Me will automatically send the stop’s address to the Apple Maps navigation app. After that, you can preview your Apple Maps route and then start navigating.
Waze Driving Directions and Live Traffic GPS Route Navigation
To use Waze Driving Directions and Live Traffic GPS Route Navigation, tap the “Navigate” button next to the preferred route stop and then select “Waze“. Next, Route4Me will automatically send the stop’s address or GPS coordinates to the Waze GPS navigation app. After that, you can preview your Waze route and then start navigating.
Navigation Settings on Route4Me’s iOS iPhone Route Planner App
To adjust your navigation settings, go to “Settings” in the app’s main menu and then go to the “Default Navigation Settings” section. To set the default navigation app, go to “Navigation App“. To use Route4Me’s Integrated Voice-Guided GPS Navigation, switch on the “In-App Navigation” toggle. Alternatively, switch off the “In-App Navigation” toggle and then select Google Maps, Apple Maps, Waze App, CoPilot, or Uber. Accordingly, when you navigate to a route stop, Route4Me will automatically send route stop addresses or coordinates to your default navigation app.
To navigate to stop addresses or GPS coordinates (latitude and longitude), go to “Navigate To” and then select the preferred option. For example, some route navigation apps like Google Maps provide better navigation results when navigating by address. In contrast, other navigation apps can use GPS coordinates to generate more precise navigation directions. Furthermore, you can use location GPS coordinates to navigate to locations that don’t have an address.
Stop Statuses – Set Route Stop Statuses on iPhone Route Planning App
As you navigate your route and arrive at route stops, you can add completion and progress statuses to your stops. First, tap the “Arrived” and then the “Set Status” button on the route stop. After that, select the preferred stop status and then tap the respective “Mark As” button. Accordingly, the assigned stop statuses are displayed next to respective stops in the route’s stops list and are automatically synched to your business route optimizer account. Additionally, learn more about Route Stop Status on Route4Me’s iOS Route Planning App.
Proof of Visit, Delivery, and Service – E-Signatures, Photos, Videos, Attachments
Furthermore, after selecting a stop status, you can attach proof of visit, delivery, or service to the stop. By default, you can attach such proof of visit as Text Notes, Electronic Signatures, Photos, and Videos. To view the data attached to the stop, tap the info icon next to the stop and then tap the “Notes” button. Additionally, learn more about Attaching Proof of Visit, Delivery, and Service to Route Stops.
Barcode Scanner – Attach Barcodes as Custom Data to Route Stops
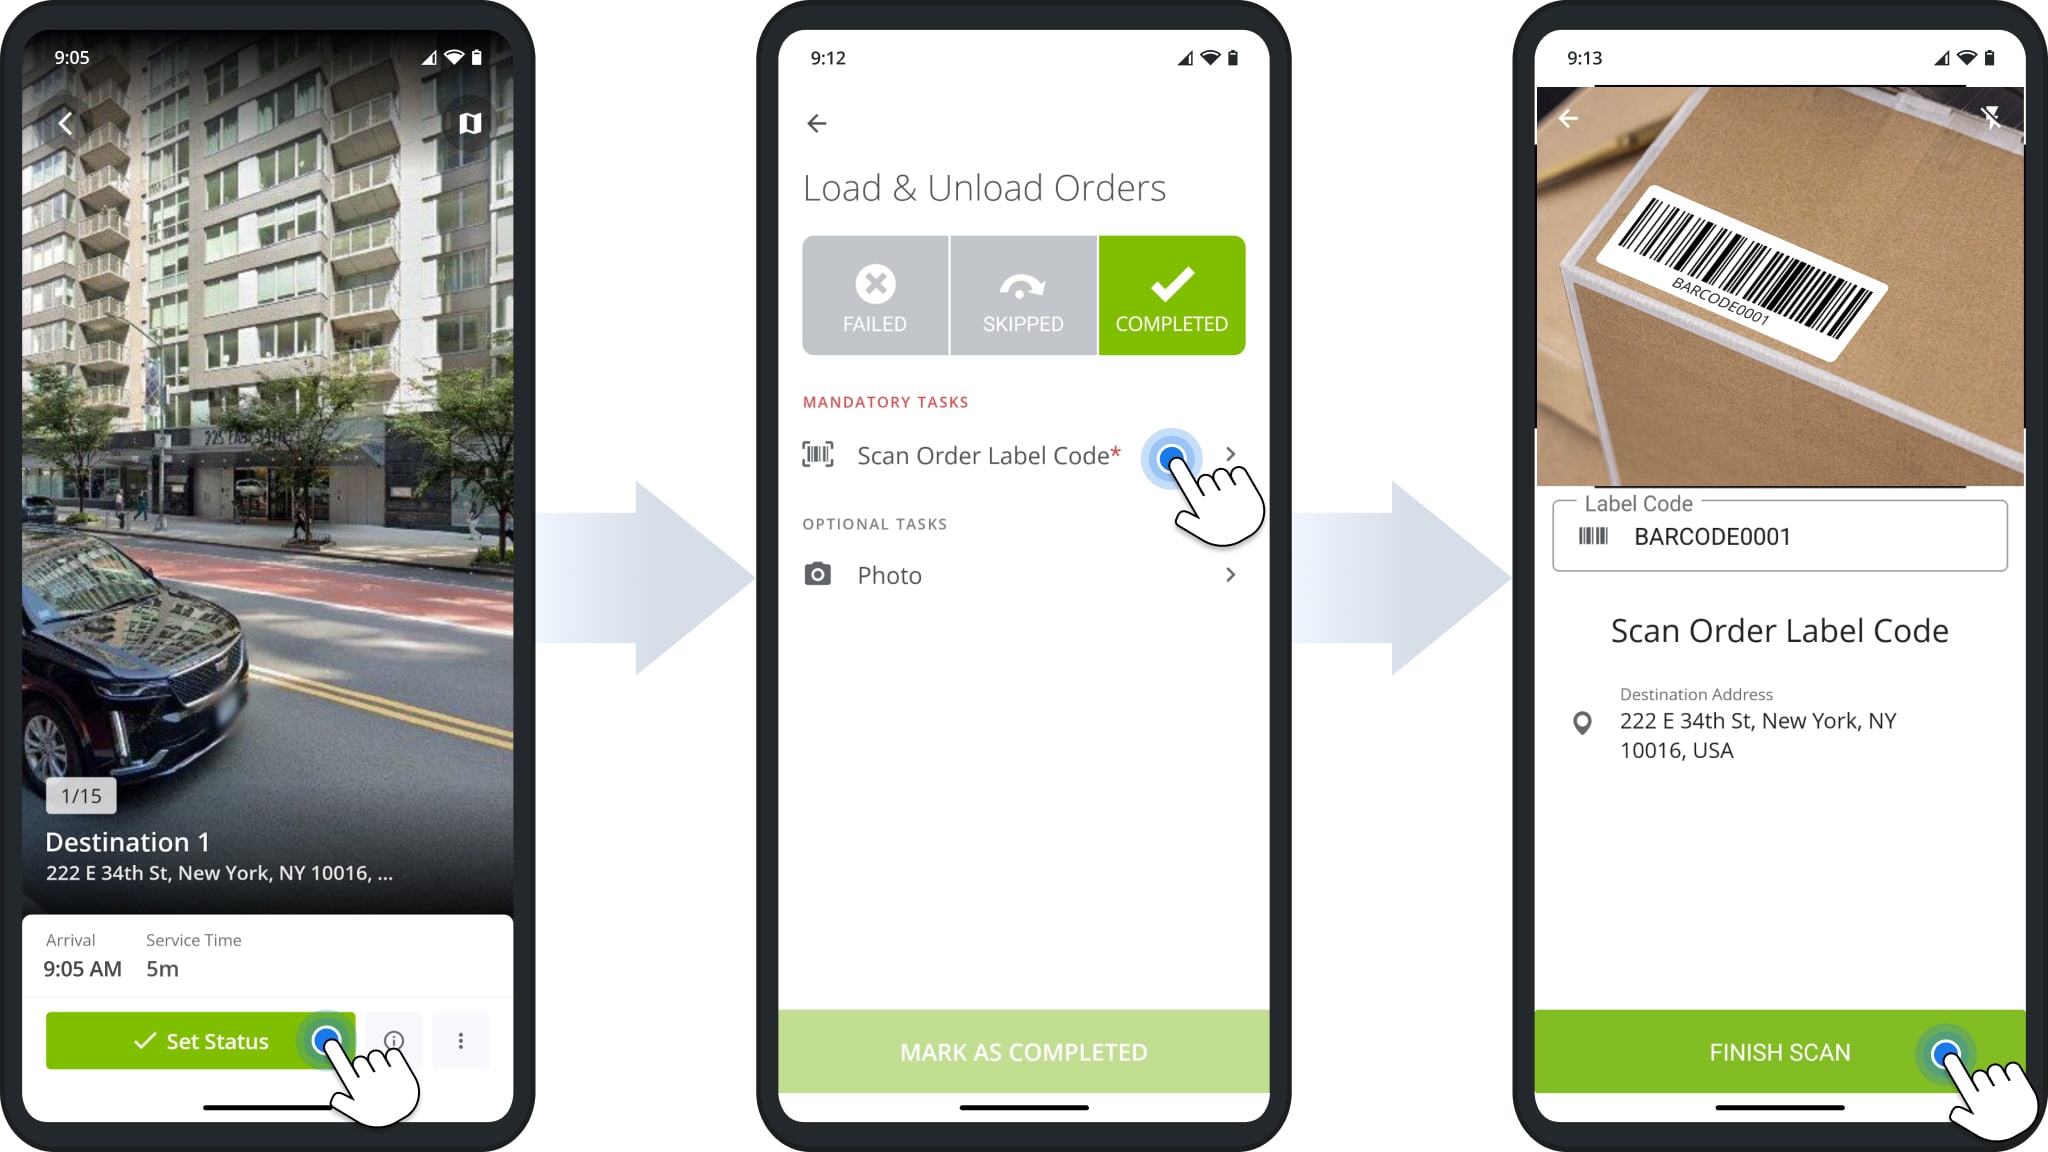
Moreover, you can use the integrated barcode scanner to scan barcodes and attach barcode data to stops. To do so, tap the three dots menu icon next to a stop and then select “Scan Barcode“. Next, use your camera as a barcode scanner to scan the barcode. After that, the app will automatically detect and attach the scanned barcode data to the stop as Custom Data.
To check the attached barcode data, tap the information icon next to the route stop and then check the “Custom Data” section. Additionally, learn more about Route4Me’s iOS iPhone Route Planner In-App Barcode Scanner and Custom Data Add-On.
End and Complete Route – Route Summary and Route KPIs
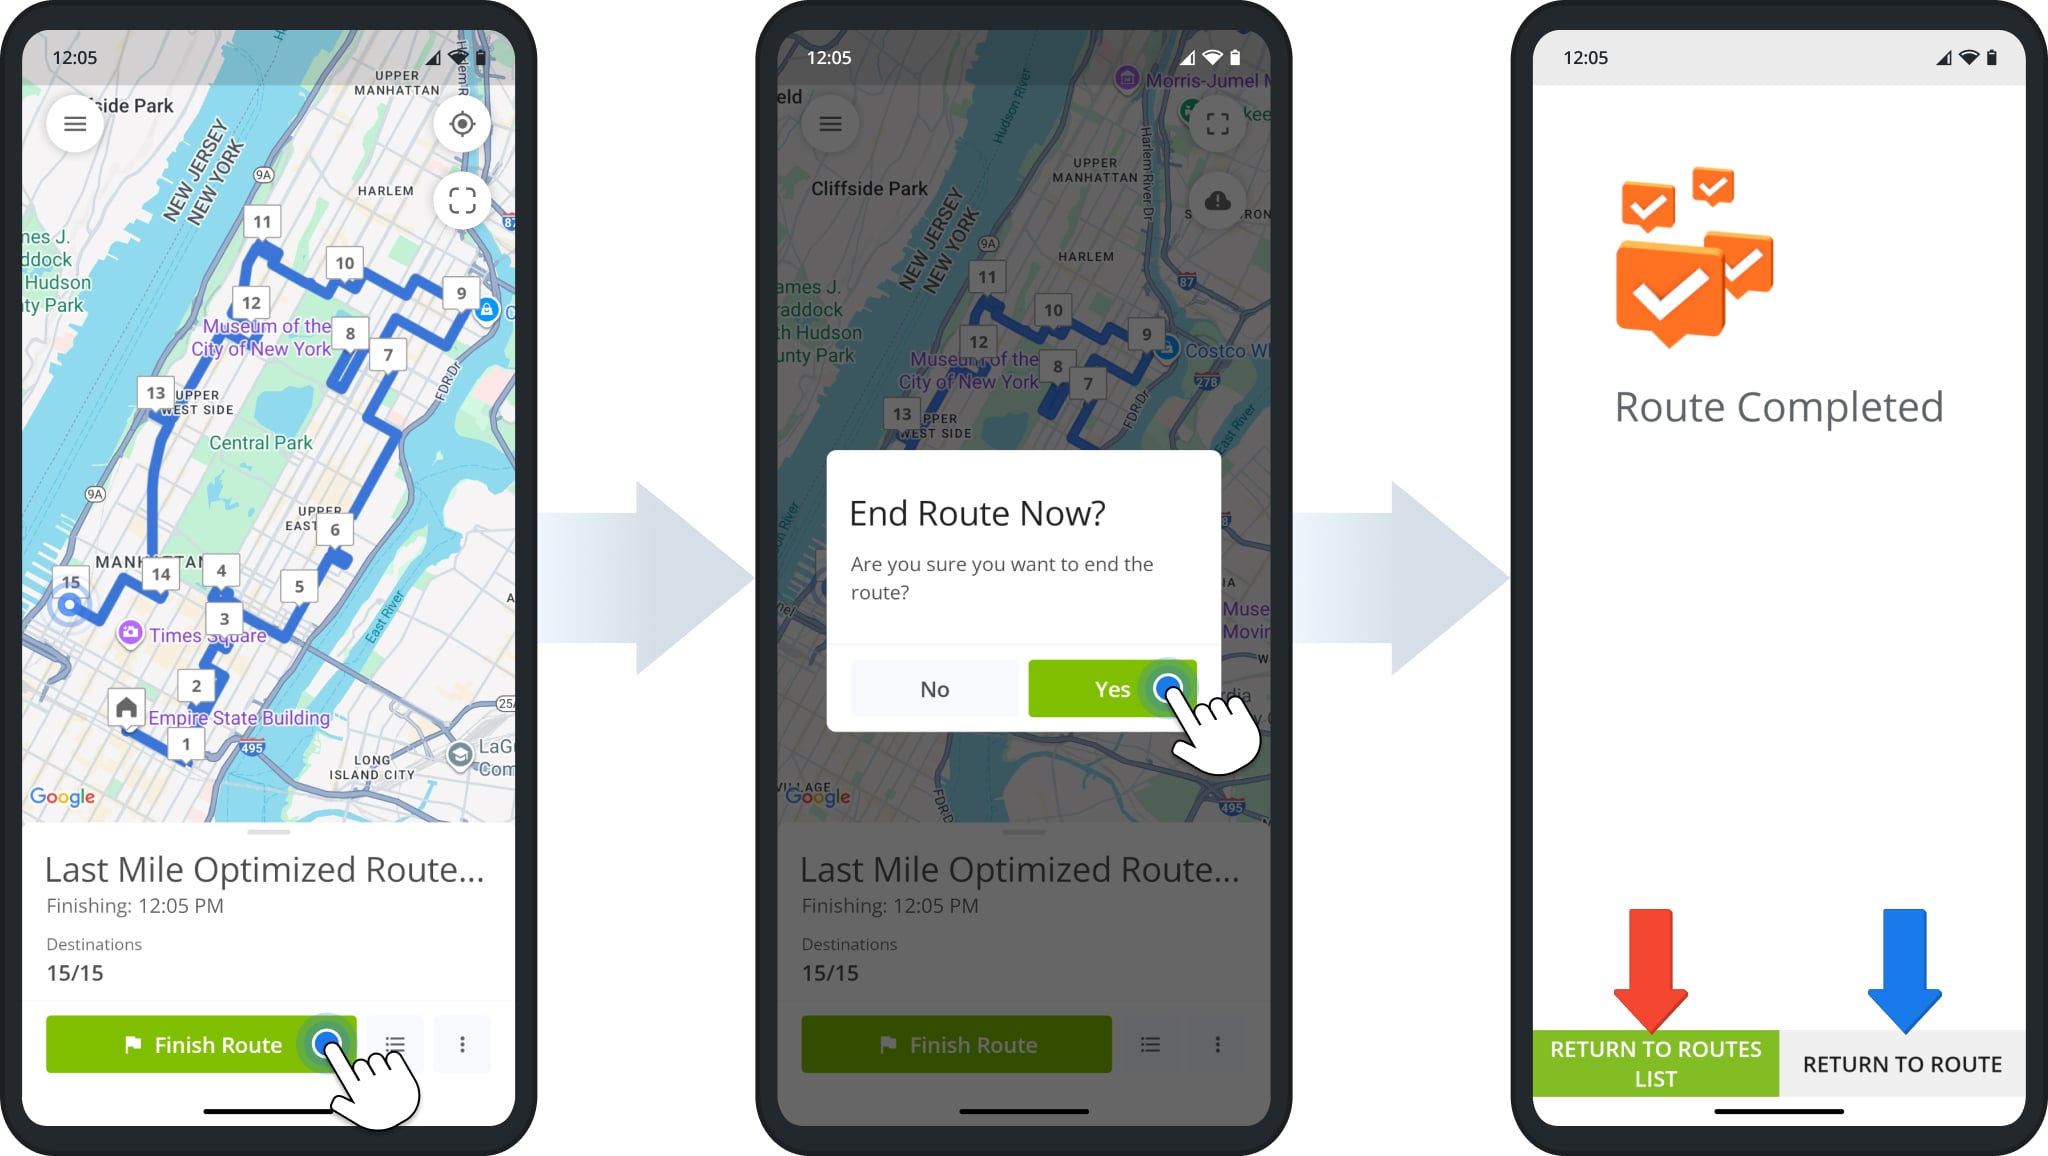
When you visit and add a status to the last stop on your route, Route4Me’s reliable route optimization software automatically prompts you to end the route. Additionally, you can manually end the route by tapping the “End Route” button at the bottom of the stops list. When you have stops without a status (not visited stops), the app will provide the list of the respective stops. Accordingly, to complete the route, add statuses to the rest of the stops and attach additional notes and data if needed.
Once you add statuses to all stops and end the route, Route4Me’s reliable route management software will provide a detailed route summary with route performance KPIs. Specifically, the total route duration, traveled distance, actual route start and end times, the ratio of completed and failed stops, etc. Accordingly, the status of the ended route will be automatically updated to “Finished” in your Route4Me Routes List.
Equally important, once you end the route, editing the route and its stops will be automatically disabled. To edit the ended route, tap the “Resume Route” button at the bottom of the route’s stops list.
Mobile to Web Real-Time Route Status and POD Synchronization
Furthermore, Route4Me’s Marketplace Subscriptions support real-time route data synchronization between the best iPhone Route Planner mobile app and Route4Me’s Web Platform. Specifically, as drivers start, navigate, and complete routes using the mobile app, Route4Me automatically synchronizes stop statuses, proof of visit and delivery, route progress status, and other changes and updates with Route4Me’s trusted route planner software in real-time, and vice versa. Additionally, learn more about Route4Me’s Team User Types and Dispatching Routes to Mobile Route Planner Driver Apps.
Visit Route4Me's Marketplace to Check out Associated Modules:
- Operations
Custom Data Add-On
- Operations
Advanced Team Management Add-On