Route Notes – Add Notes To Destinations in Web Routing Editor
Route4Me’s Web Platform provides multiple ways to effortlessly add notes to your multi stop routes and share them in real-time. Route4Me’s Android and iOS route planner apps ensure instant data synchronization with the Web Platform and enable you to increase the security of your operations. Added notes can contain electronic proof of delivery (POD) and proof of service in the form of captured signatures of your customers (Sign on Glass), images, delivery statuses, video, and audio files, as well as other valuable data. Adding notes also helps to document crucial information about the performed routing activities and make sure that you are always on the same page with your team members and customers. Route4Me allows you to customize your notes to perfectly accommodate your routing and business needs.
Table of Contents
Viewing and Adding Notes in the Routes List
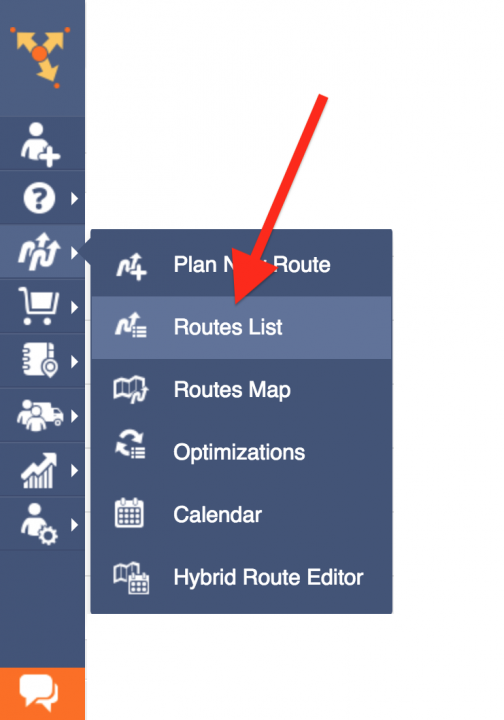
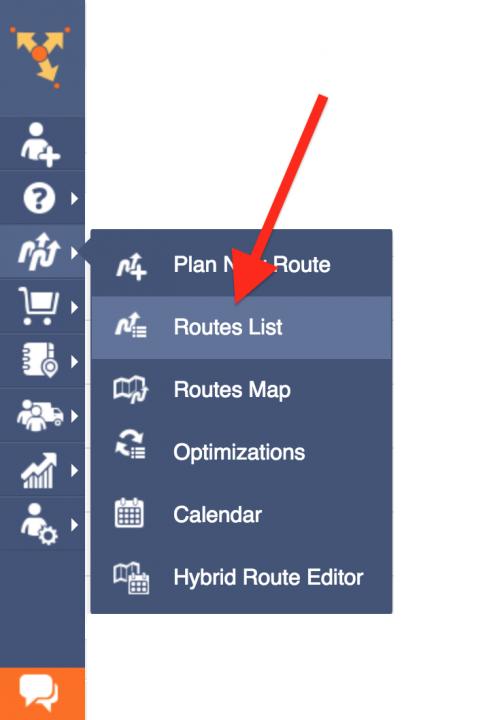
To view collected electronic proof of delivery files and add notes to your routes from your Routes List, first, go to Routes List from the navigation menu.
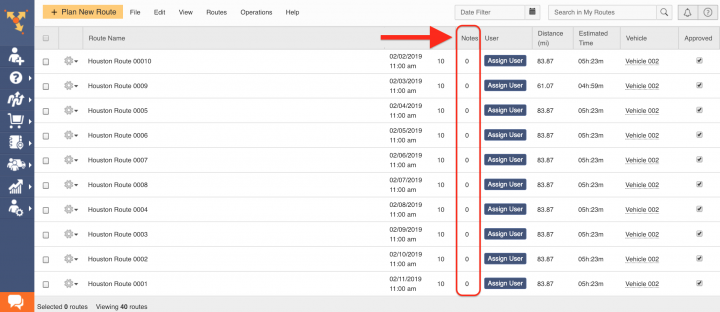
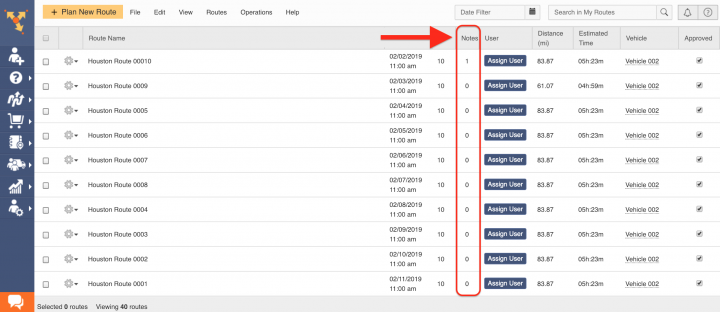
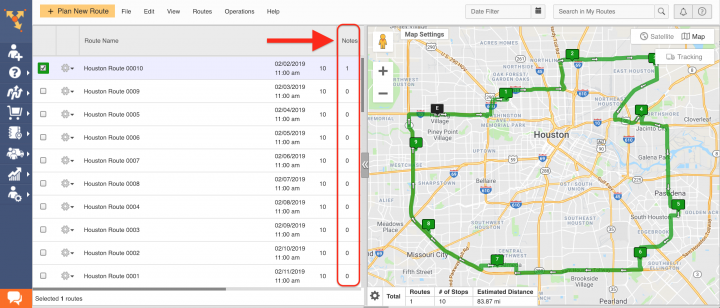
The Notes column in your Routes List shows which routes contain attached electronic proof of delivery notes and the number of the attached notes respectively. You can adjust the header in your Routes List in case it does not display the Notes column.
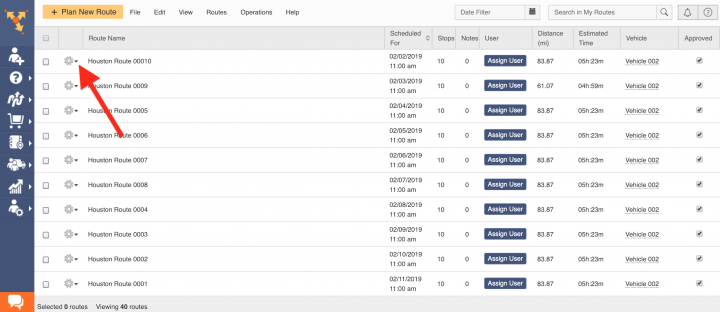
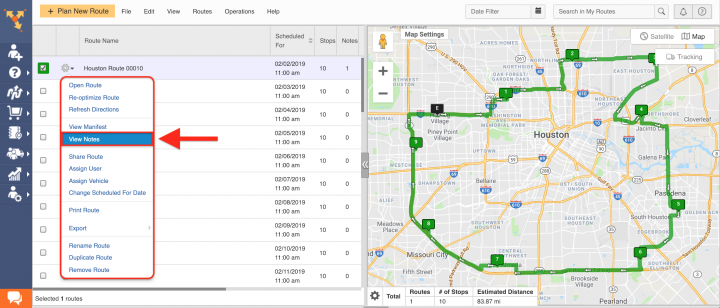
Next, click on the gear icon next to a particular route to view its attached electronic proof of delivery notes or add new notes to it respectively.
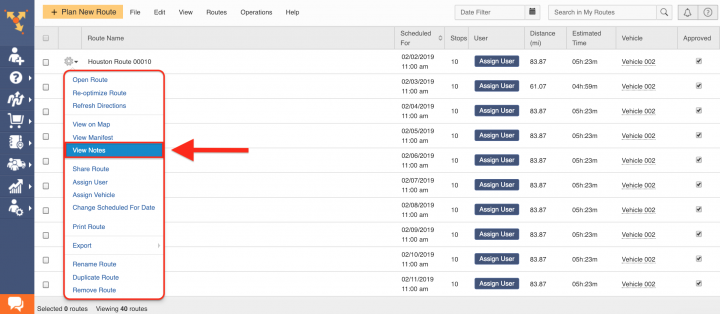
Then, select View Notes from the route’s options menu. The View Notes option brings up the Manage Route Notes window that allows you to view the already added electronic proof of delivery or proof of service notes as well as add new notes to the corresponding route.
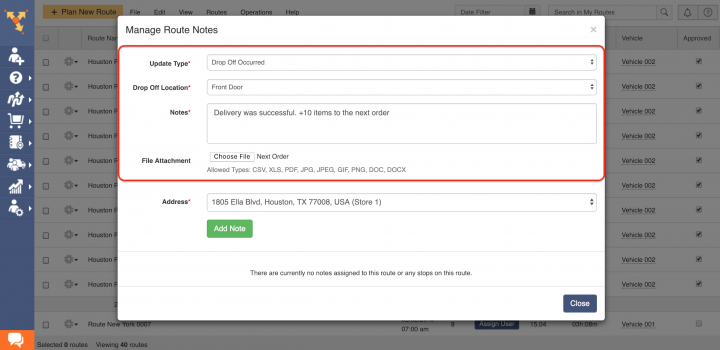
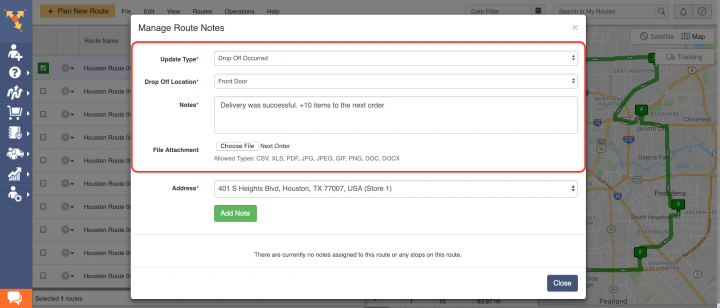
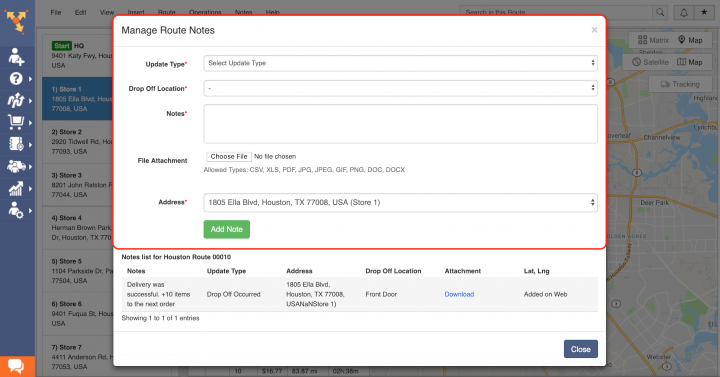
To add a new electronic proof of delivery note or additional order details to the route, first, fill out the note’s data in the corresponding fields. Next, click on the Choose File button to upload and attach an image, video, or audio file to the note (max. 50MB for images and 200MB for videos and audio files). Please note that you can attach only one image, video, or audio file per one note. If you need to attach more than one media file, you can add multiple notes. The fields in the Manage Route Notes window may differ depending on the custom settings of your notes.
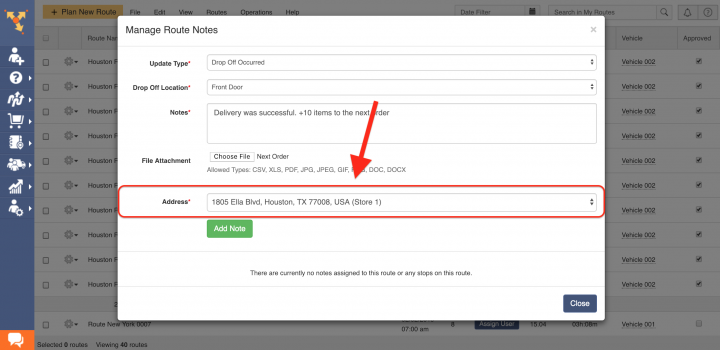
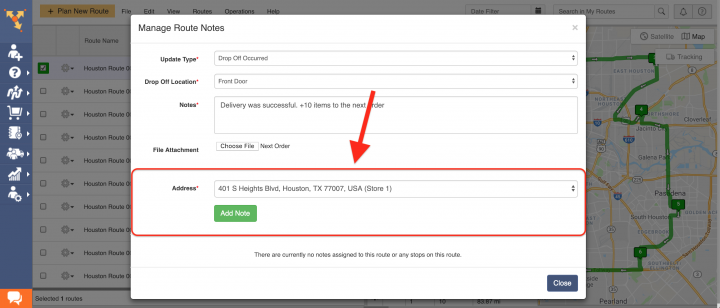
Then, in the Address drop-down list, select the address of the stop on the corresponding route to which you want to add the note.
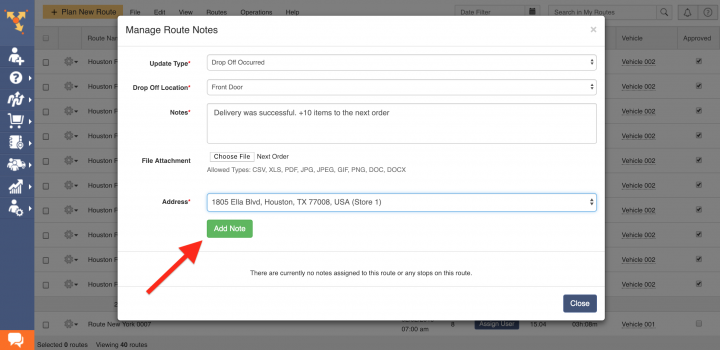
Finally, click on the Add Note button to attach the note to the route.
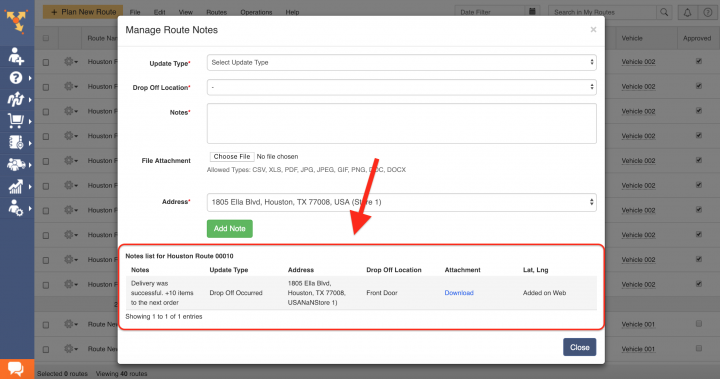
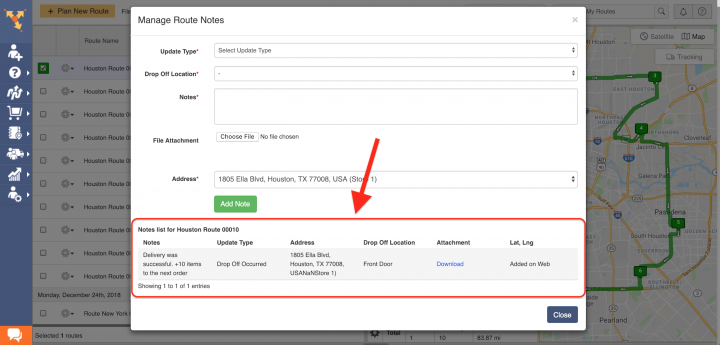
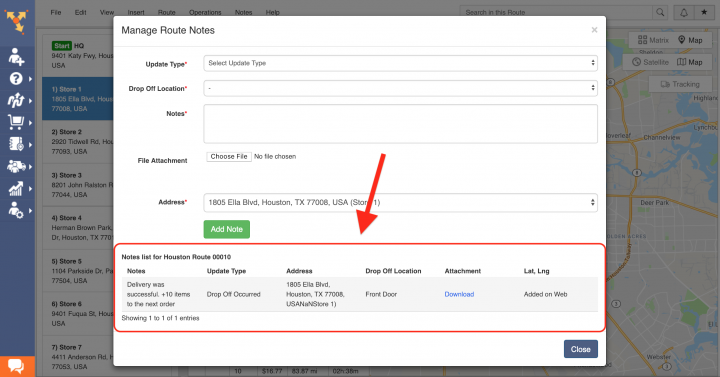
Once the note is added to the route, it is displayed at the bottom of the Manage Route Notes window. The Manage Route Notes window allows you to view the already added notes as well as add new notes to the corresponding route.
After adding the note to the route, it is also displayed so in the Notes column of your Routes List.
Viewing and Adding Notes in the Routes Map
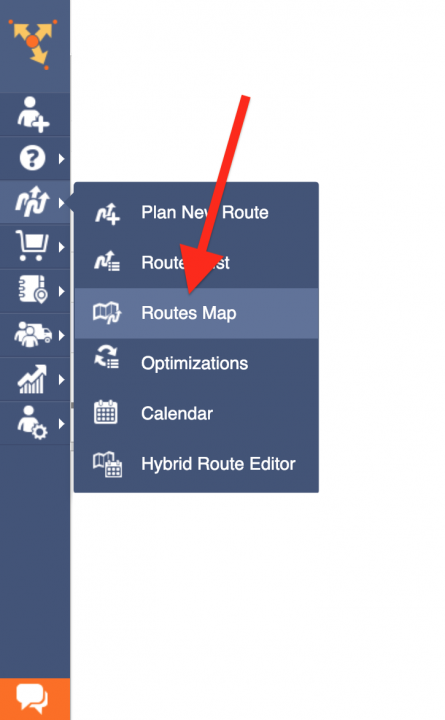
To view and add notes to your routes from the Routes Map, first, go to Routes Map from the navigation menu.
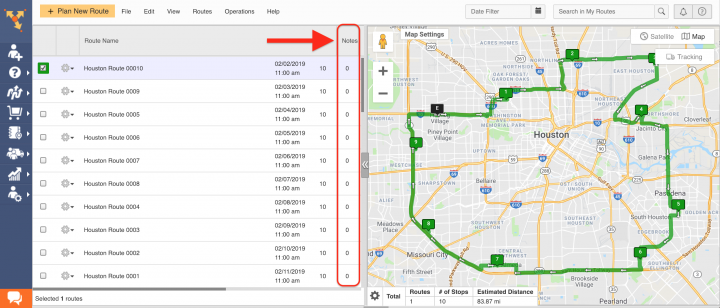
The Notes column in the Routes Map shows which routes contain attached notes and the number of the attached notes respectively. If the header in the Routes Map does not display the Notes column, right-click on the header and select the corresponding column from the list.
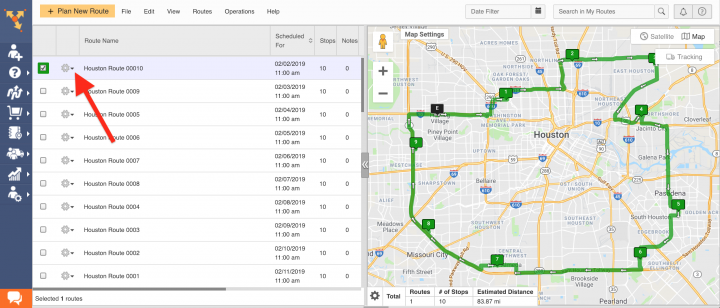
Next, click on the gear icon next to a particular route to view its attached notes or add new notes to it respectively.
Then, select View Notes from the route’s options menu. The View Notes option brings up the Manage Route Notes window that allows you to view the already added notes as well as add new notes to the corresponding route.
To add a new note to the route, first, fill out the note’s data in the corresponding fields. Next, click on the Choose File button to upload and attach an image, video, or audio file to the note (max. 50MB for images and 200MB for videos and audio files). Please note that you can attach only one image, video, or audio file per one note. If you need to attach more than one media file, you can add multiple notes. The fields in the Manage Route Notes window may differ depending on the custom settings of your notes.
Then, in the Address drop-down list, select the address of the stop on the corresponding route to which you want to add the note. Finally, click on the Add Note button to attach the note to the route.
Once the note is added to the route, it is displayed at the bottom of the Manage Route Notes window. The Manage Route Notes window allows you to view the already added notes as well as add new notes to the corresponding route.
After adding the note to the route, it is also displayed so in the Notes column of the Routes Map.
Viewing and Adding Notes in the Route Editor
To view and add notes to a particular route in the Route Editor, first, go to Routes List from the navigation menu.
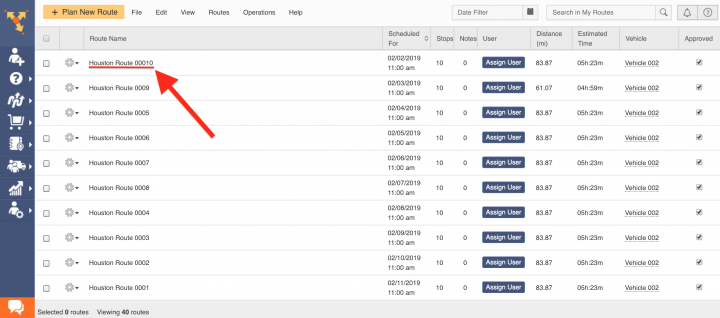
Next, click on the preferred route to open it in the Route Editor and view its attached notes or add new notes to it respectively.
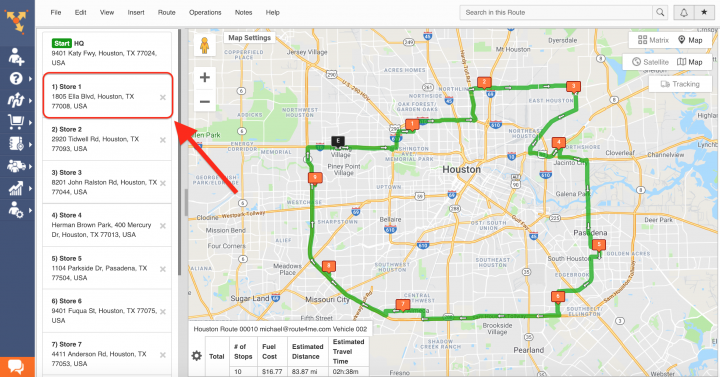
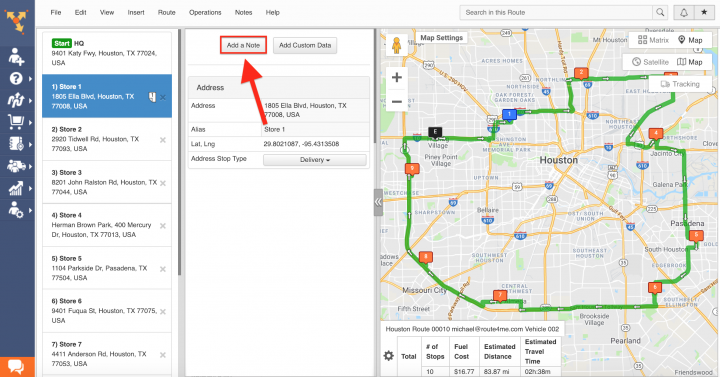
To add a new note to a particular stop on the route opened in the Route Editor, first, click on the corresponding stop to open its menu.
At the top of the stop’s menu, click Add a Note respectively.
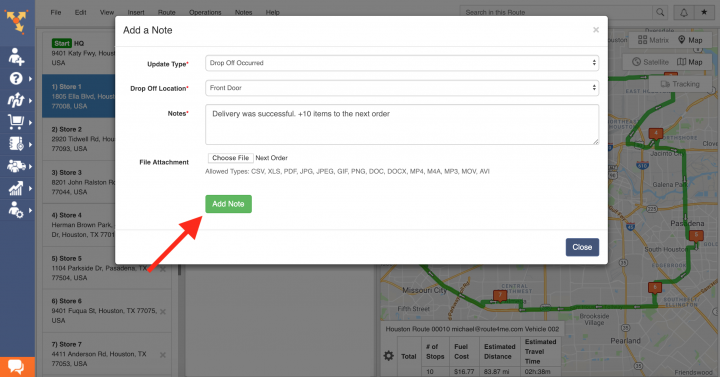
After that, first, fill out the note’s data in the corresponding fields. Next, click on the Choose File button to upload and attach an image, video, or audio file to the note (max. 50MB for images and 200MB for videos and audio files). Please note that you can attach only one image, video, or audio file per one note. If you need to attach more than one media file, you can add multiple notes. The fields in the Add a Note window may differ depending on the custom settings of your notes. Finally, click on the Add Note button to attach the note to the stop.
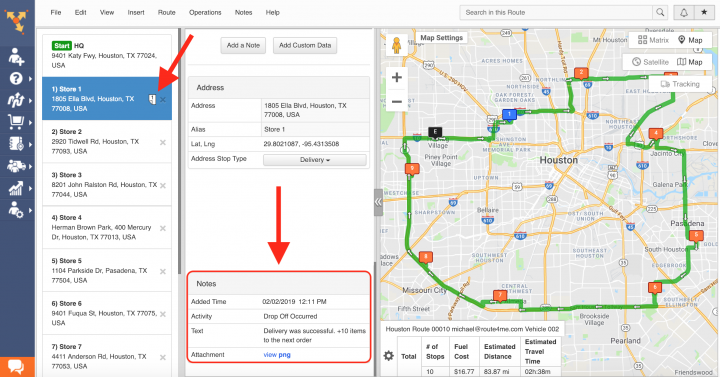
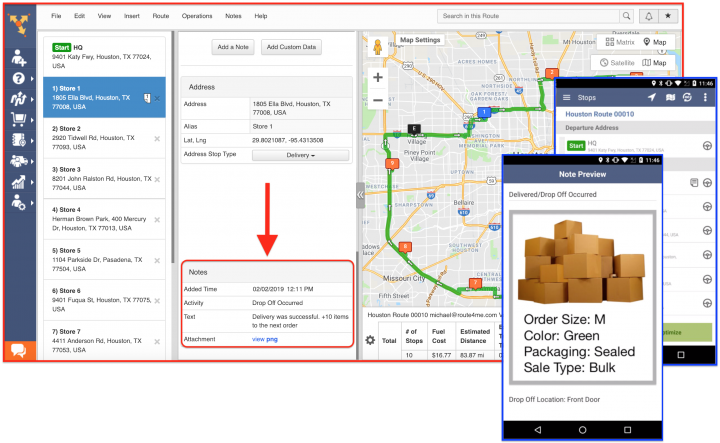
Once the note is added to the stop, in the Route Editor, a note icon with a number is displayed next to the corresponding stop on the route. To view the content of the note(s) attached to the stop, scroll down to the Notes section at the bottom of the stop’s menu.
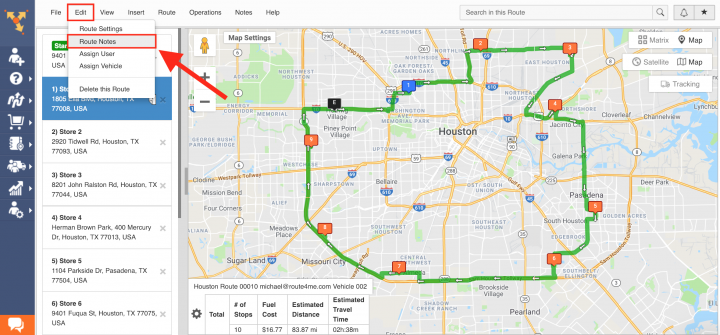
To view all notes attached to the route that is opened in the Route Editor, first, click Edit in the toolbar, and then select Route Notes respectively.
All notes attached to the corresponding route are displayed at the bottom of the Manage Route Notes window. The Manage Route Notes window allows you to view the already added notes as well as add new notes to the corresponding route.
To add a new note to the corresponding route from the Manage Route Notes window, first, fill out the note’s data in the corresponding fields. Next, click on the Choose File button to upload and attach an image, video, or audio file to the note (max. 50MB for images and 200MB for videos and audio files). Then, in the Address drop-down list, select the address of the stop on the corresponding route to which you want to add the note. Finally, click on the Add Note button to attach the note to the selected stop.
All notes added to the stops on your routes are instantly synchronized across all Android, iOS, and computer-devices that are associated with your Route4Me account.
Visit Route4Me's Marketplace to Check out Associated Modules:
- Operations
Custom Data Add-On
- Operations
Advanced Team Management Add-On
