Assign Vehicles To Routes – Dispatch Routes To Vehicles
With Route4Me’s last mile optimization and fleet management software, you can easily coordinate a fleet of vehicles, including cars, trucks, trailers, and heavy equipment. Vehicles can be manually added or integrated directly from supported telematics systems. Once added, you can assign them to routes, track GPS locations, and monitor their performance via Route4Me’s Telematics Gateway. For detailed instructions on assigning vehicles to routes, refer to this guide. NOTE: If a vehicle is missing when assigning a route, ensure the “Is Operational” box is checked in the vehicle’s profile.
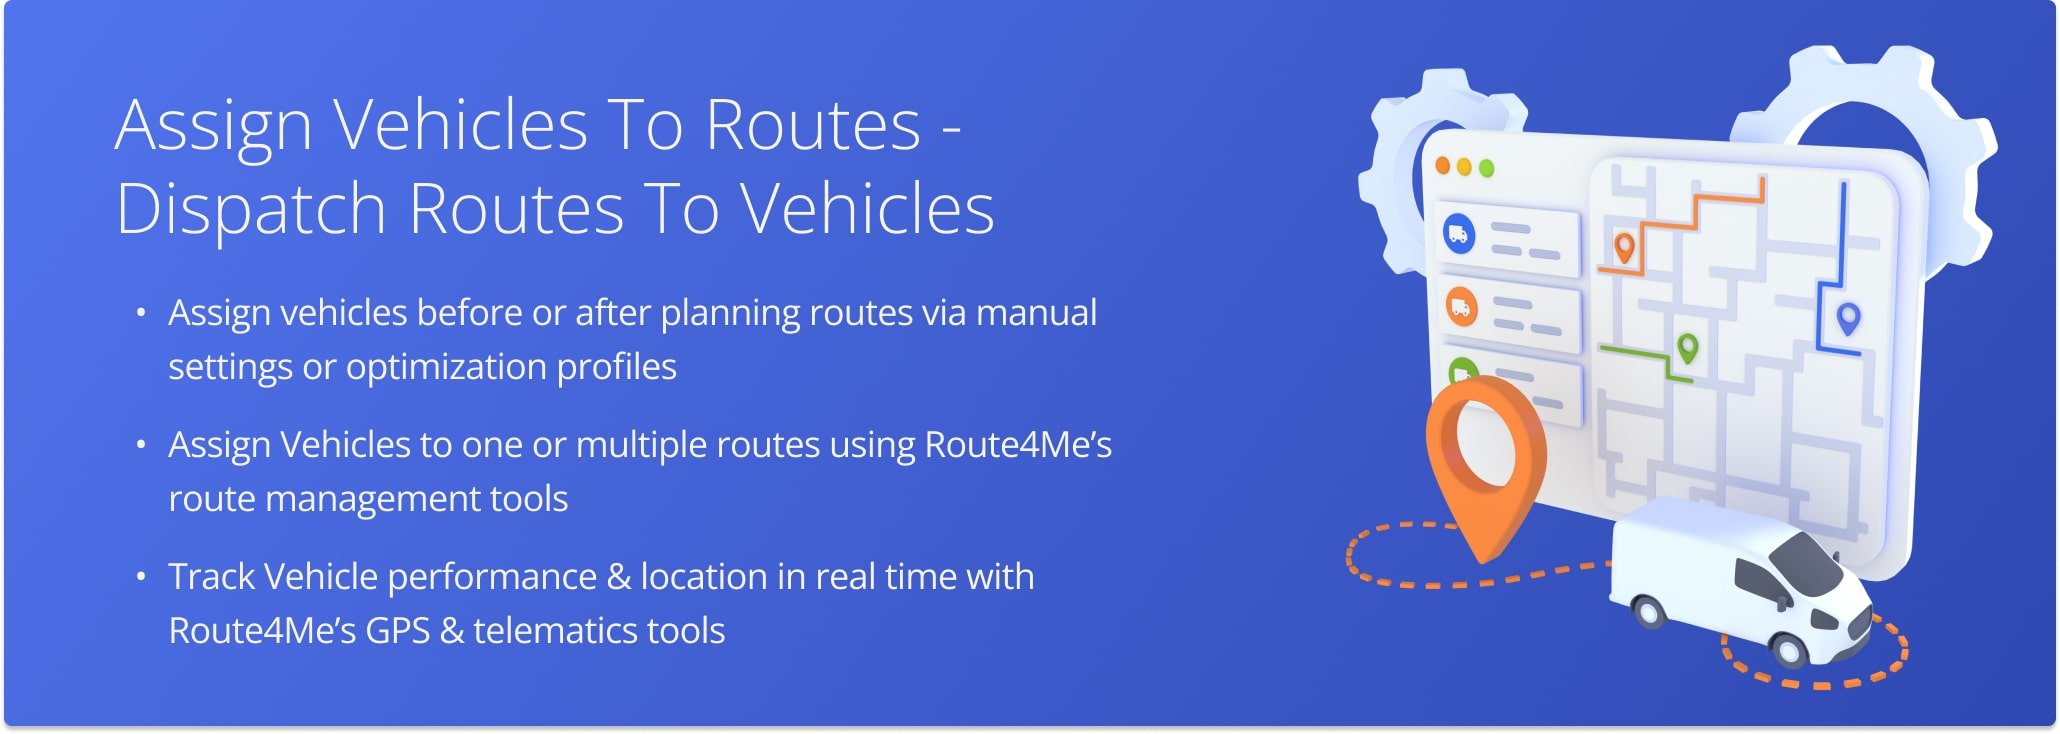
Table of Contents
Assign Vehicles To Routes Before Optimization
You can assign Vehicles to routes before they’ve been optimized. Use Optimization Profiles to automate assignments or manually adjust settings for greater customization.
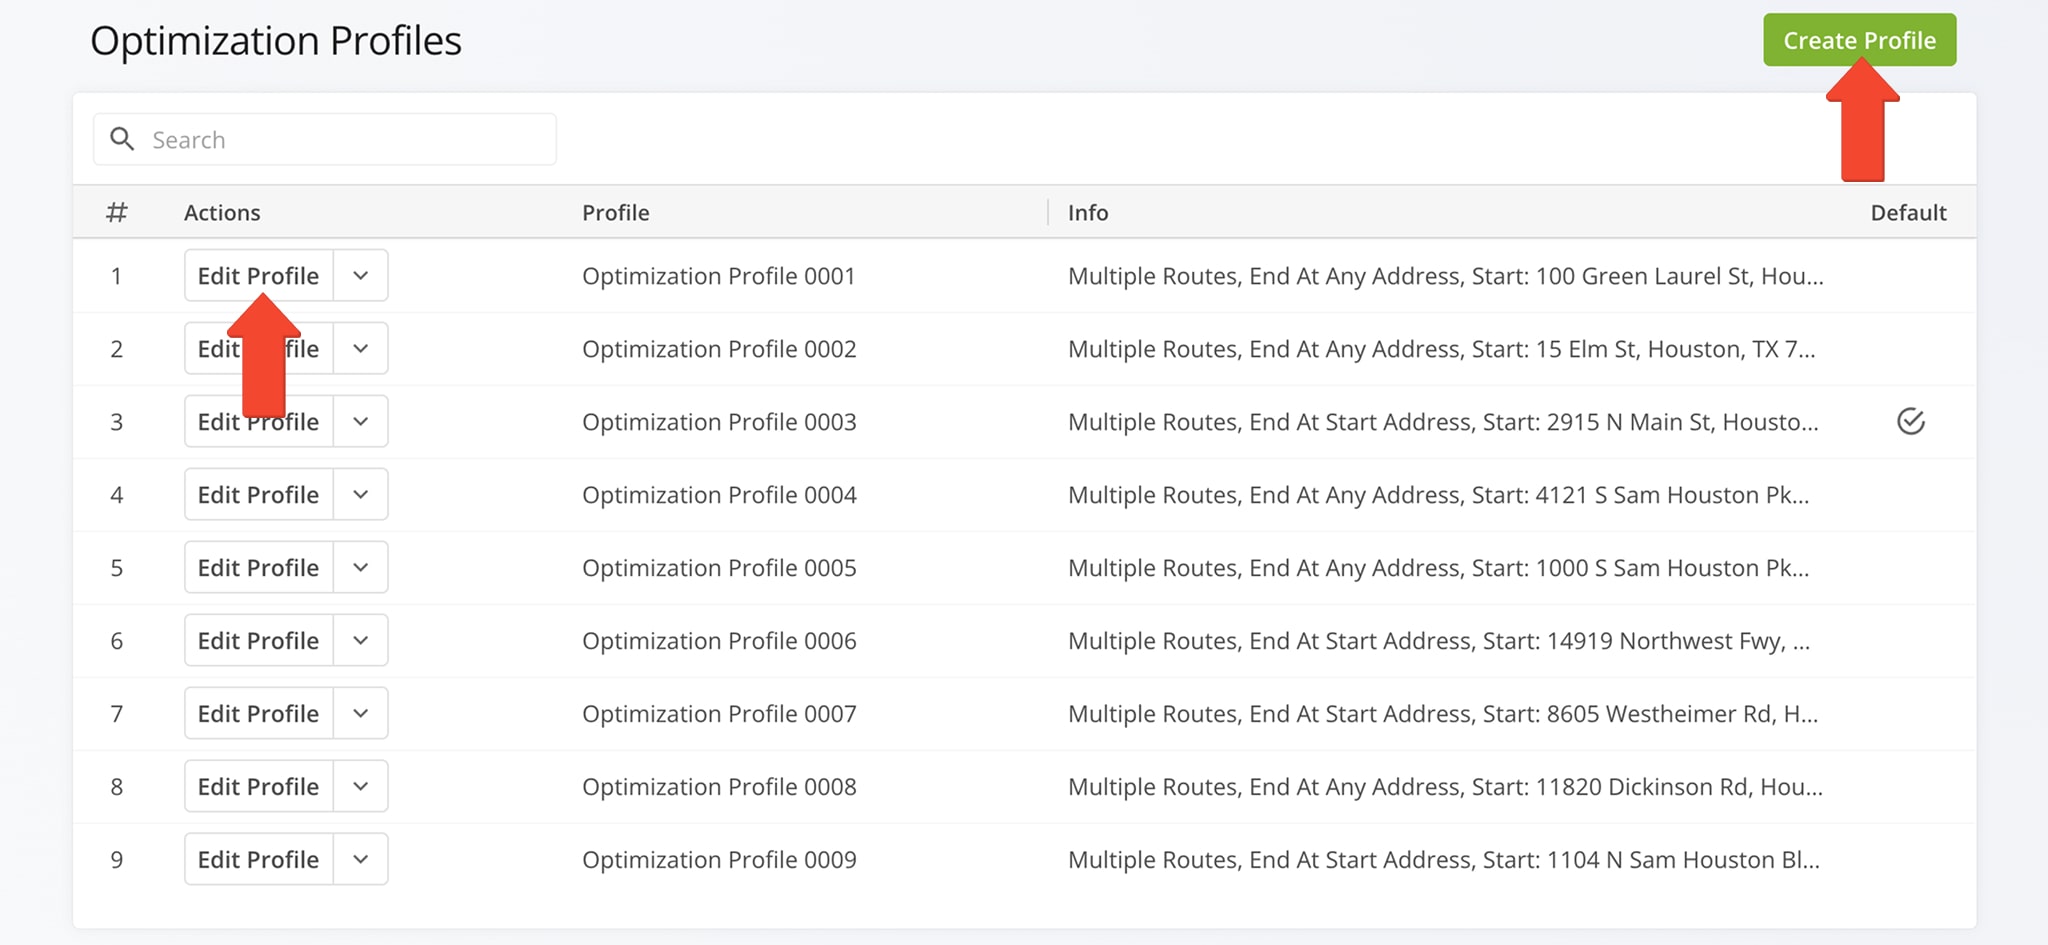
Optimization Profiles – Automate Assigning Vehicles To Routes
Optimization Profiles help you quickly assign Vehicles to multiple routes, saving time and improving route management efficiency.
Go to “Optimization Settings” > “Optimization Profiles” in the Navigation Menu. Then, click the “Create Profile” button to create a new Optimization Profile or click “Edit Profile” to modify an existing one.
Open Your Optimization Profiles
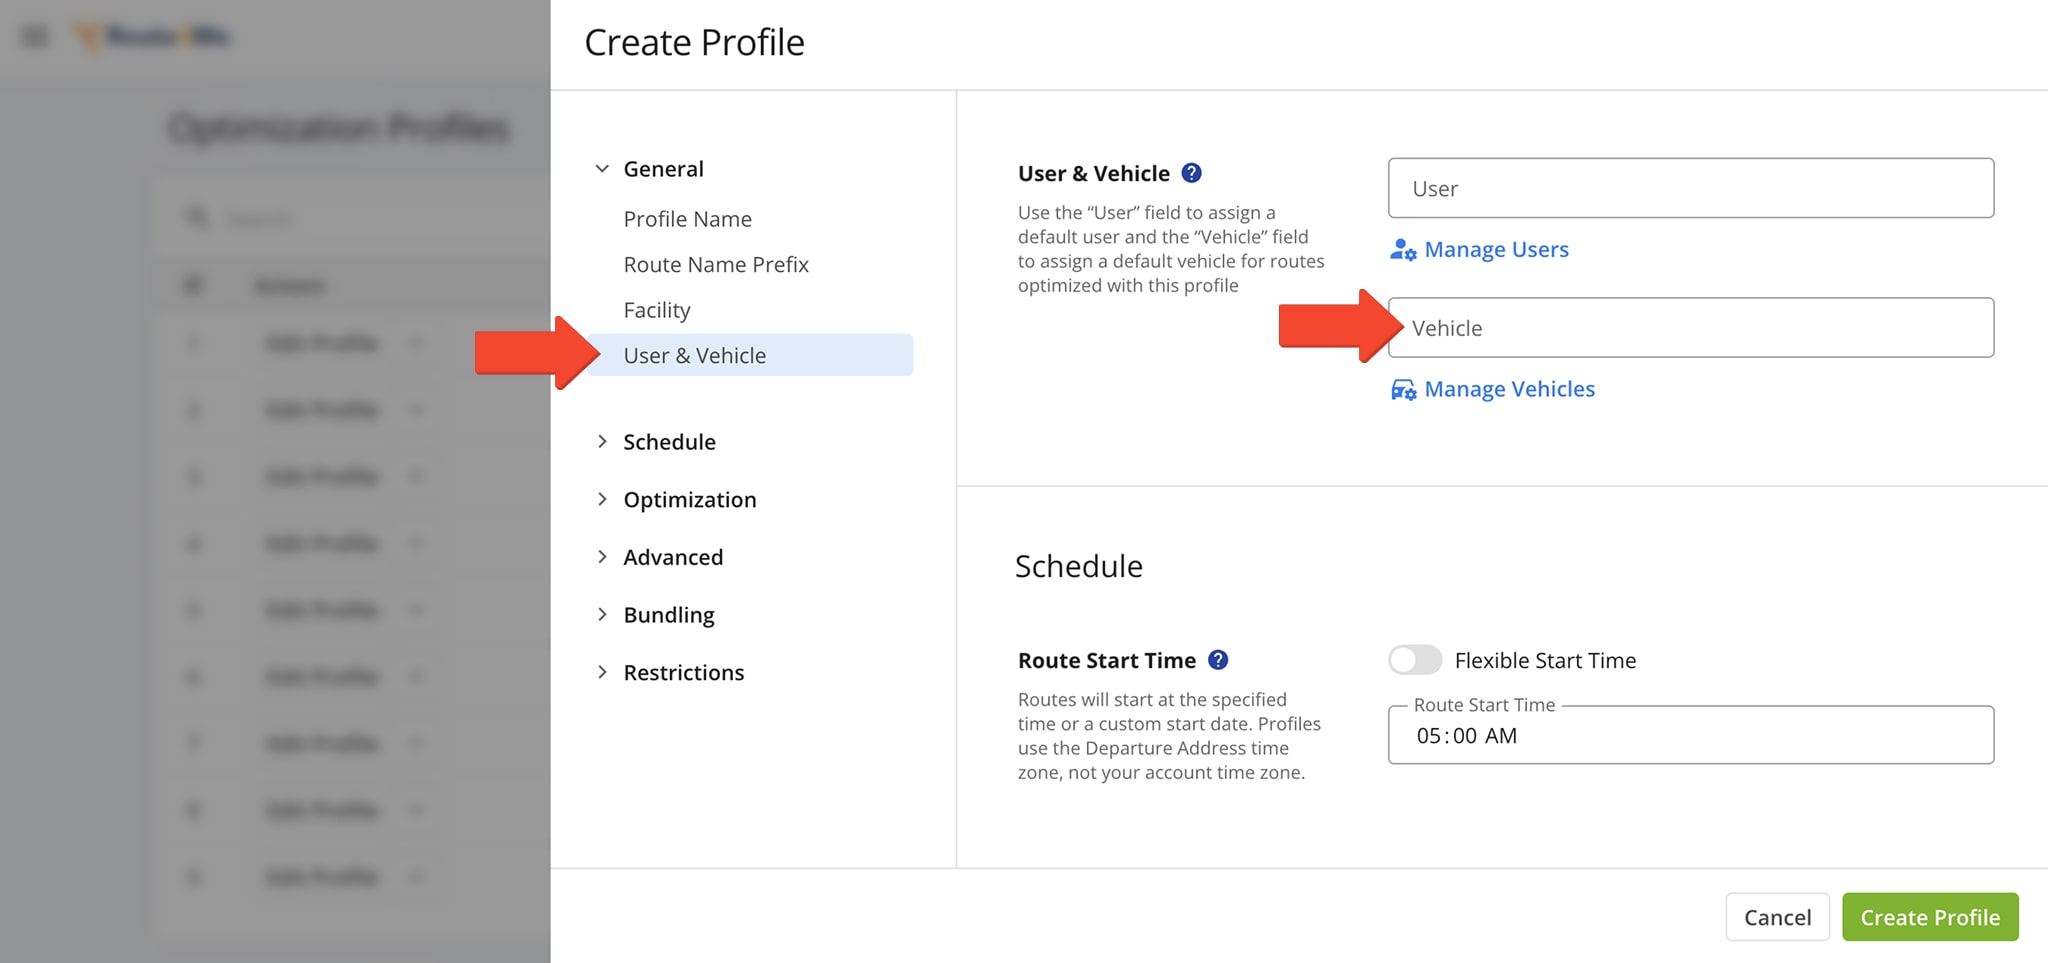
From the “Create Profile” editor panel, click “User & Vehicle” beneath the “General Tab“. Then, in the “Vehicle” field, enter the name of a Vehicle. When you apply this Optimization Profile to a route, the selected Vehicle will be automatically assigned.
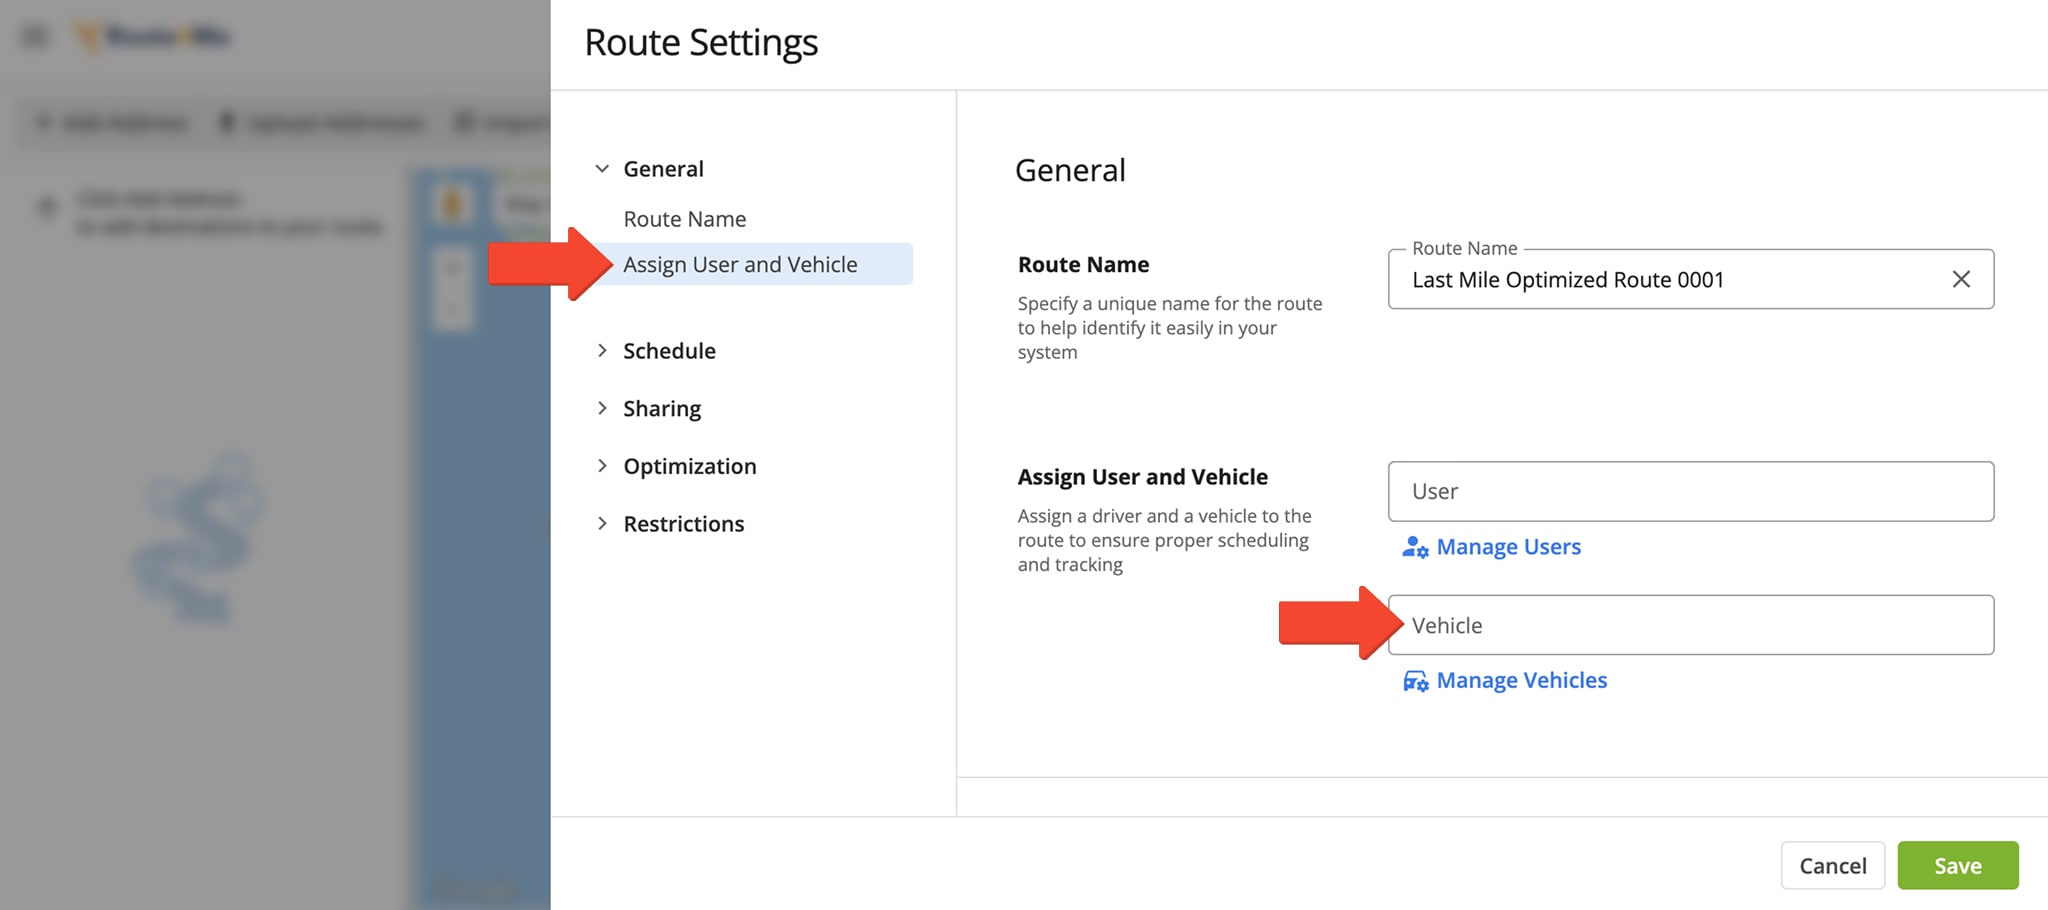
Manual Route Settings – Customize Assigning Vehicles To Routes
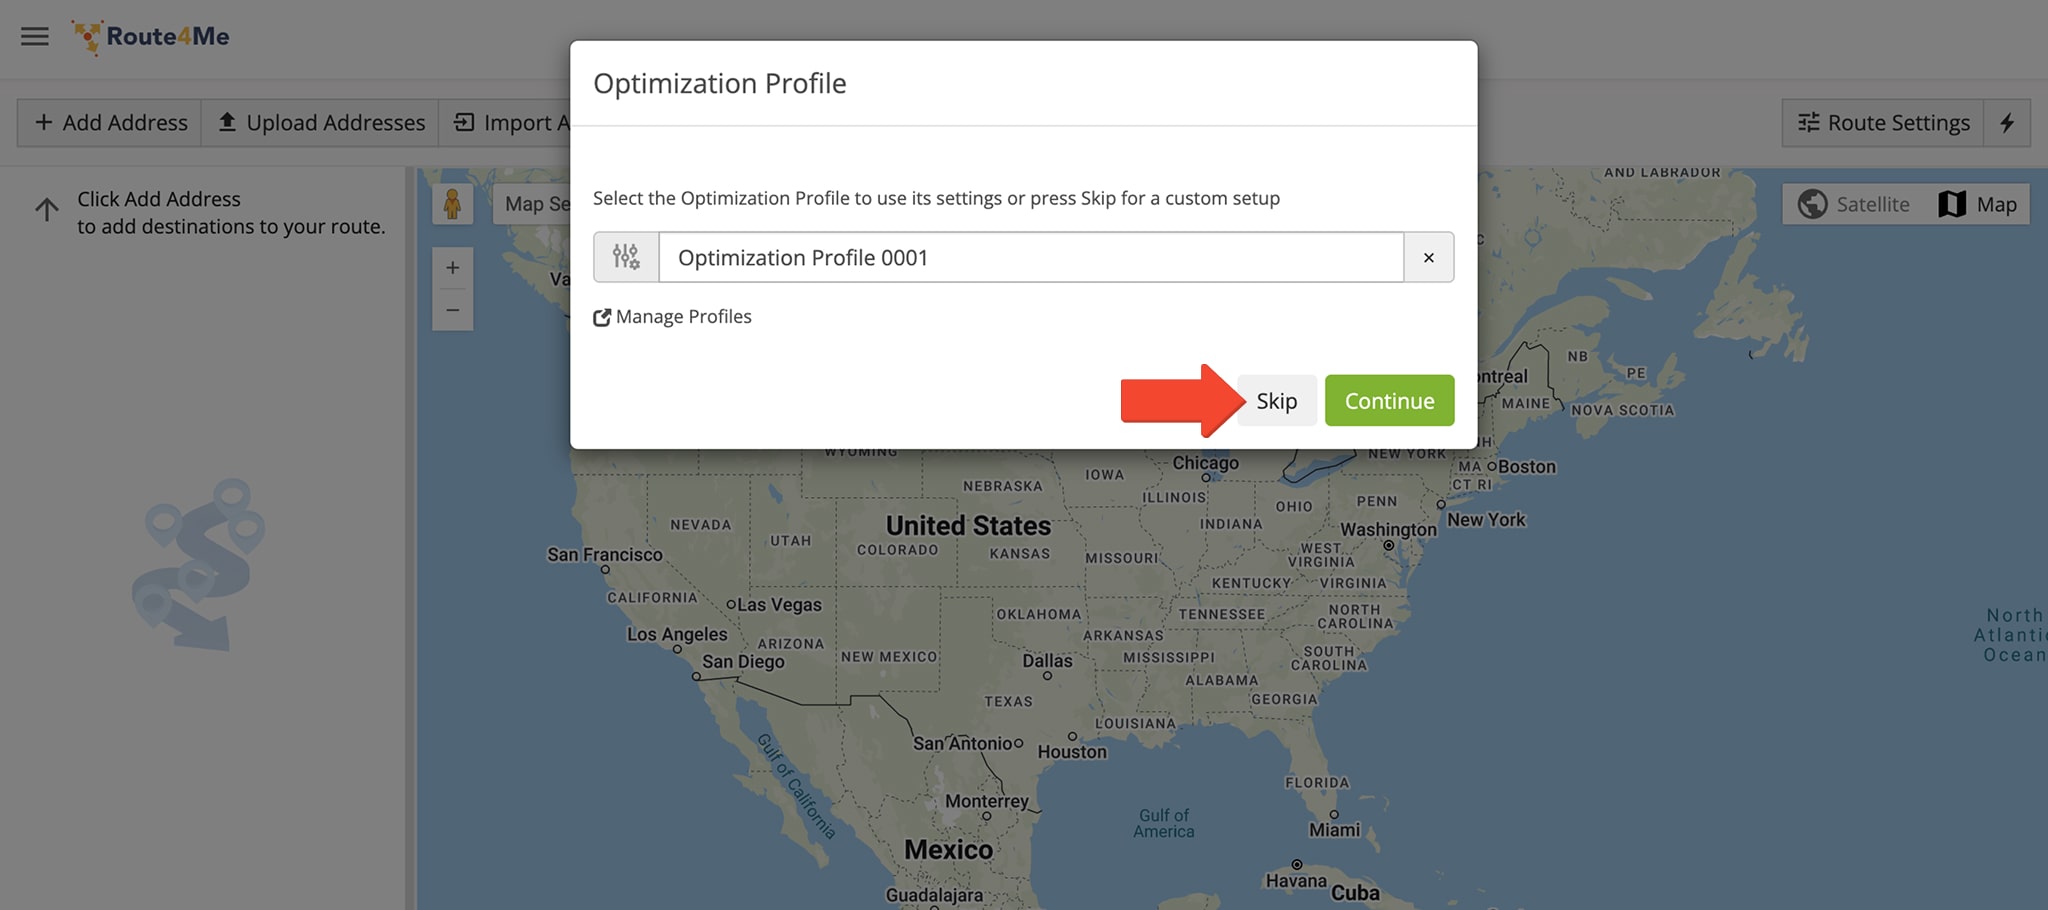
You can also manually assign Drivers and Users to routes as you plan them. To do this, go to “Dynamic Routing” > “Plan New Route” in the Navigation Menu. Choose your route planning method, then click “Skip” to customize the route’s optimization settings.
From the “Route Settings” editor panel, click “Assign User and Vehicle” under the “General” tab. Then, enter the Vehicle’s Alias into the “Vehicle” field. The selected Vehicle will be automatically assigned to the route.
NOTE: For more on assigning aliases to Vehicles, see our guide on how to add and manage Vehicles.
Assign Vehicles To Planned And Optimized Routes
You can easily dispatch routes by assigning Vehicles to individual or multiple routes. This can be done directly from the Routes List, Route Editor, or Routes Map, giving you flexibility in how you manage your fleet.
Dispatch Vehicles From The Routes List
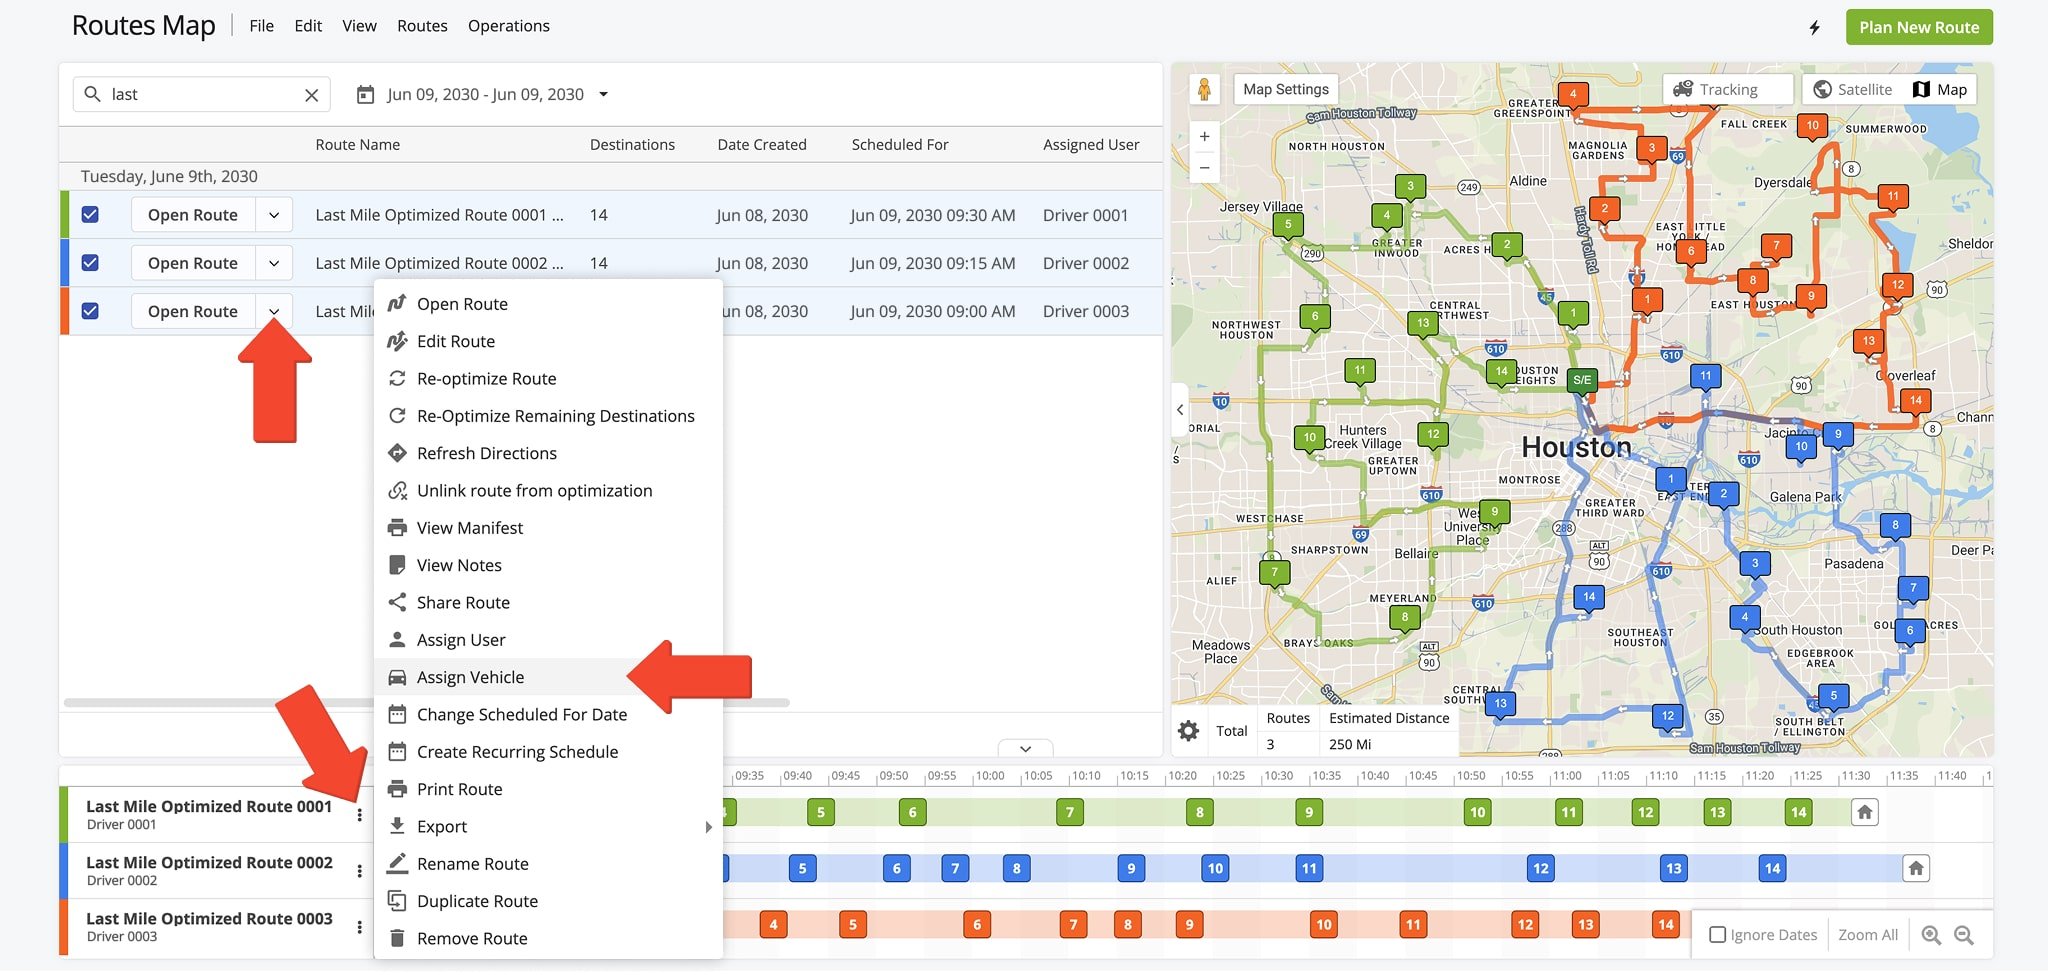
To open your Routes List, go to “Dynamic Routing” > “Routes” in the Navigation Menu. Next to the route you wish to dispatch, click the “Open Route” button, followed by “Assign Vehicle“.
Alternatively, click the “Assign Vehicle” button in the “Assigned Vehicle” column. The selected Vehicle’s alias automatically appears in the “Assigned Vehicle” column.
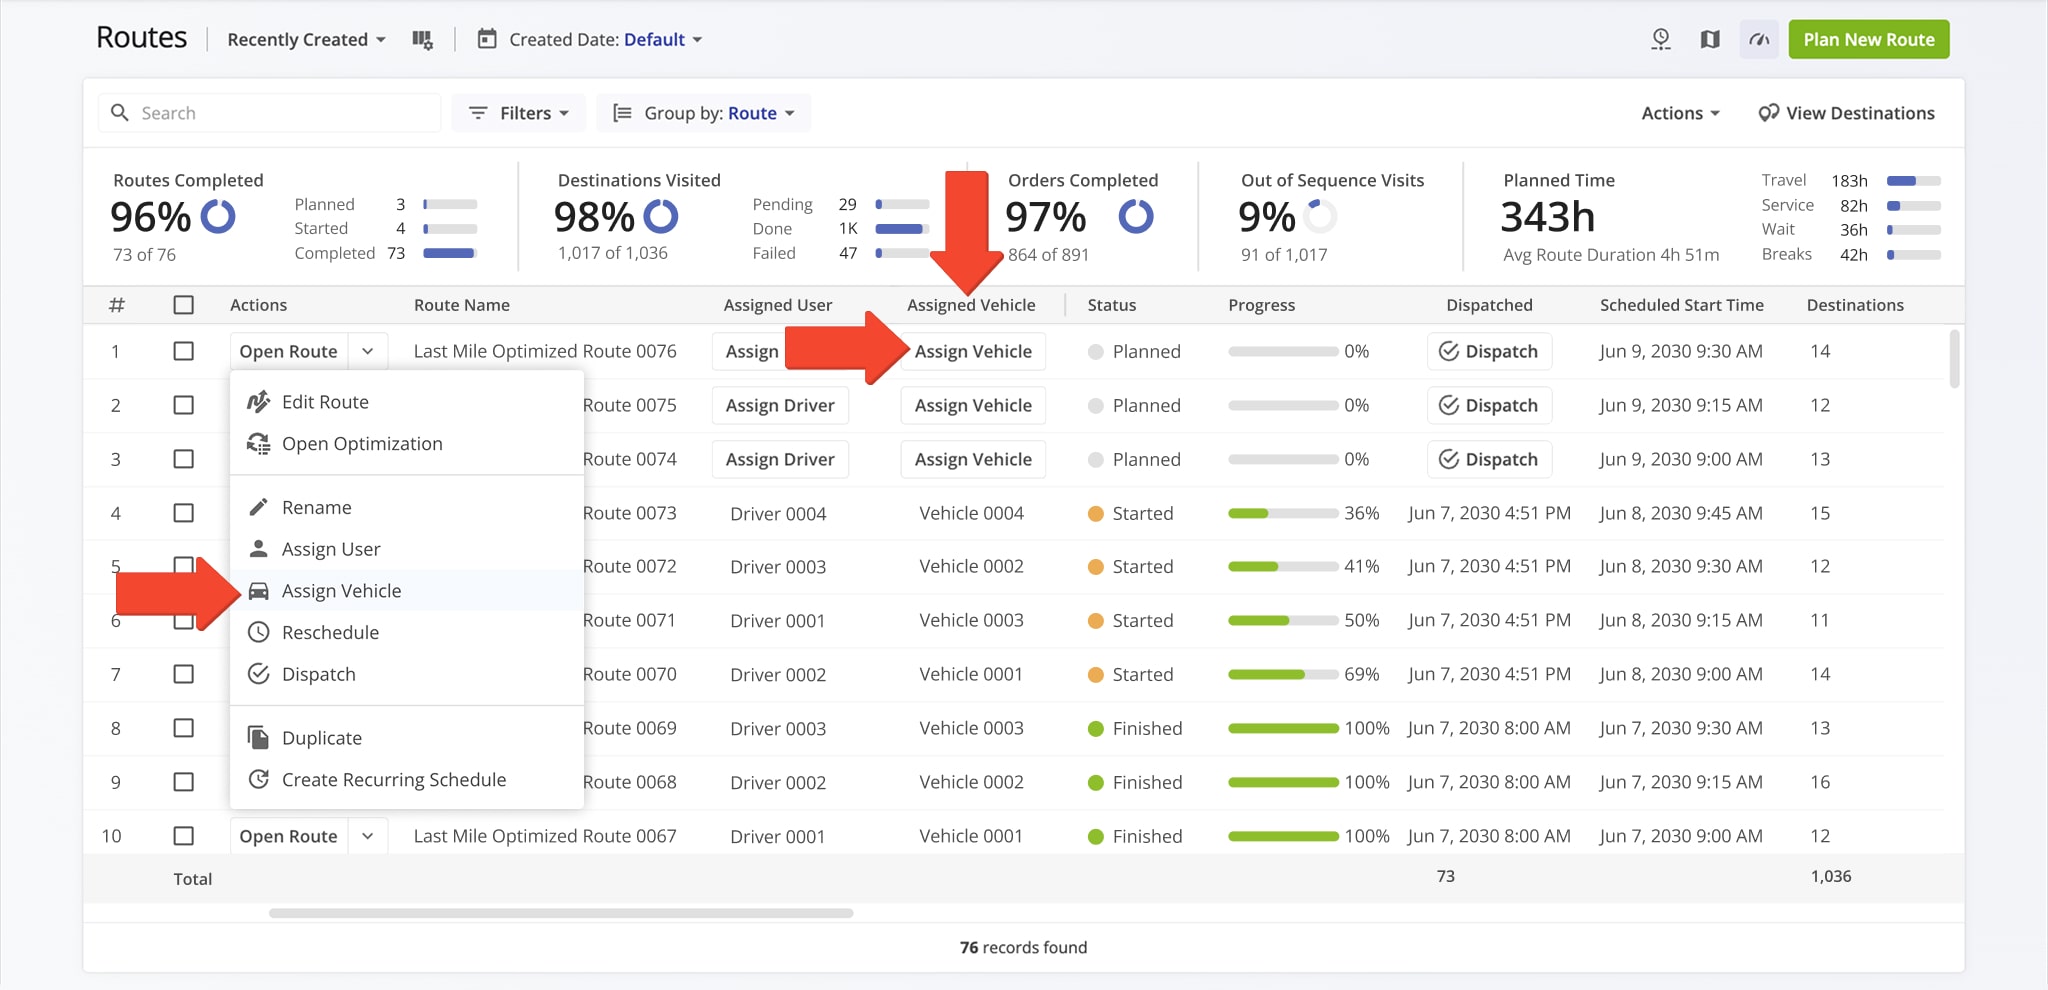
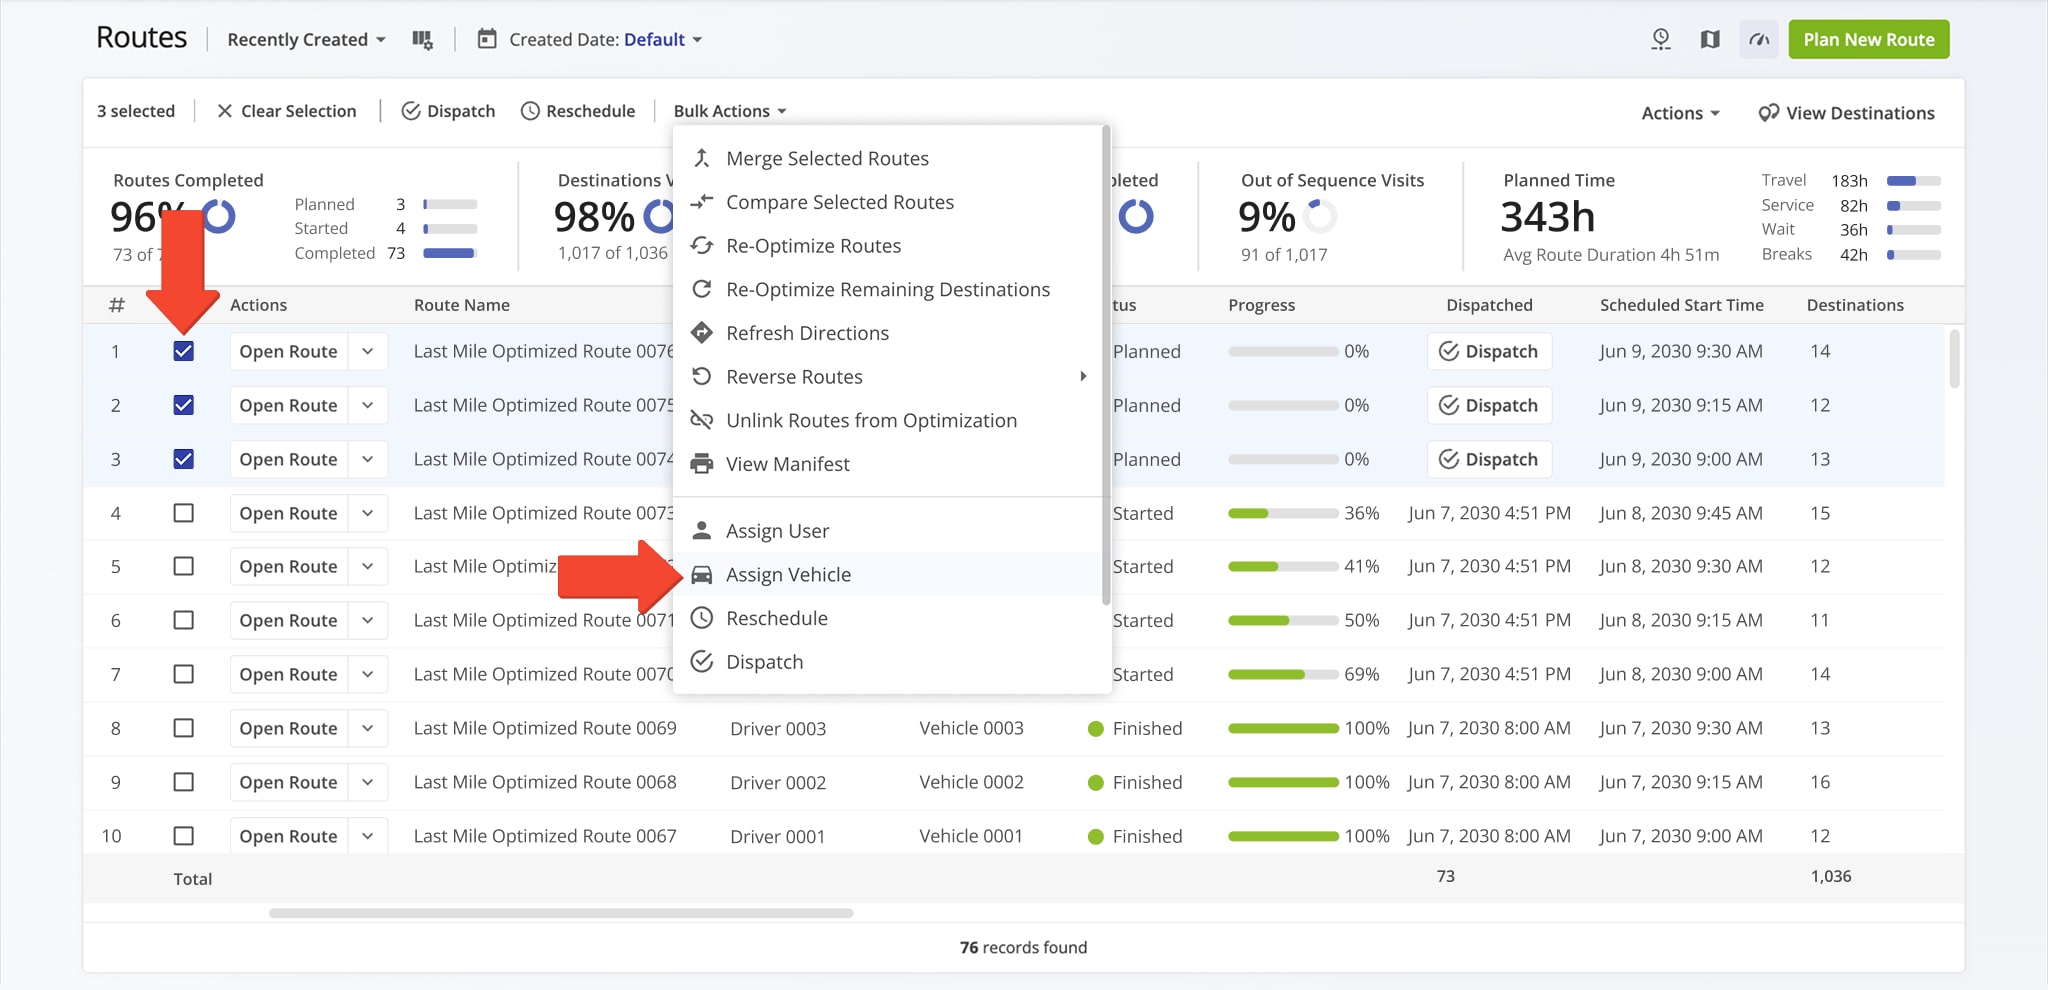
You can also assign a Vehicle to multiple routes with a single click. To do this, check the boxes next to the routes you wish to dispatch. Then, under “Bulk Actions“, select “Assign Vehicle“.
The Vehicle will be automatically assigned to all of the routes you’ve selected.
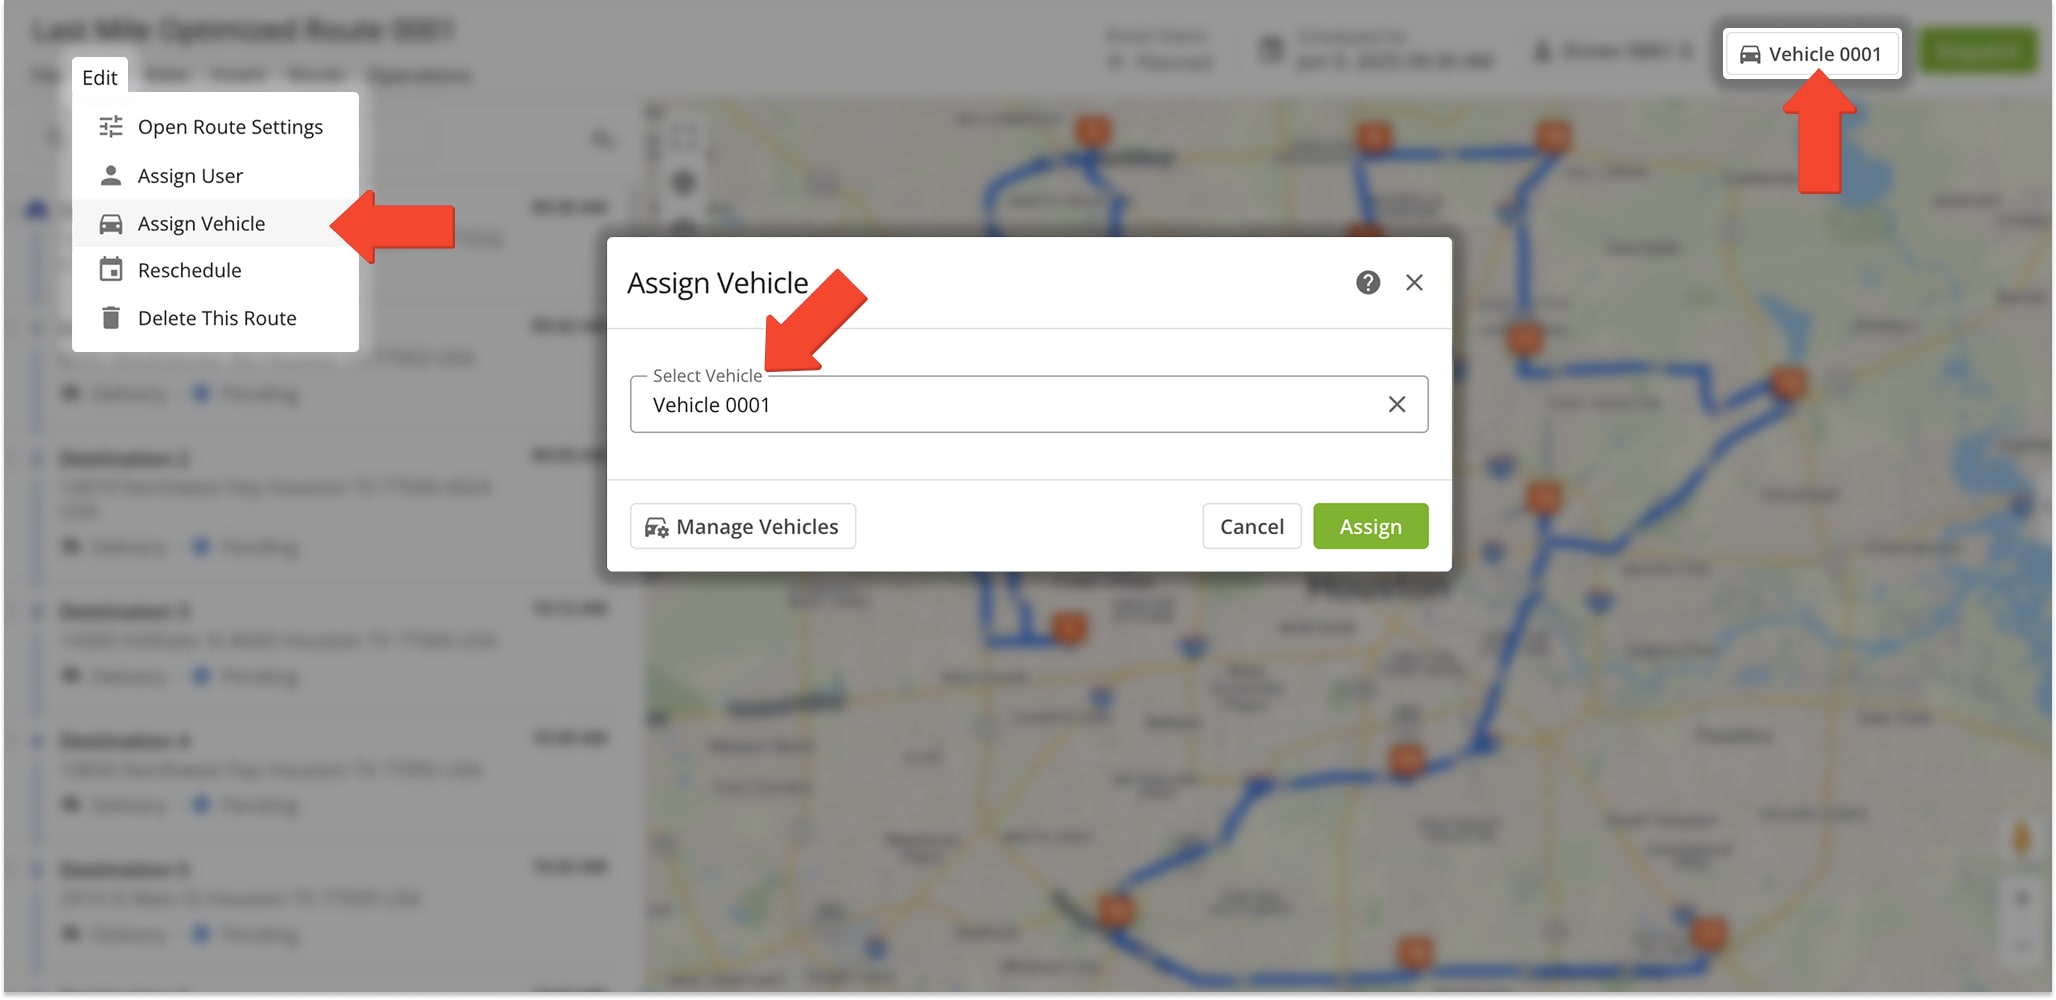
Dispatch Vehicles From The Route Editor
From the Route Editor, open “Edit” > “Assign Vehicle” in the Toolbar. Then, in the pop up window, enter the Vehicle’s alias. Once assigned, the Vehicle’s alias will appear in the “Assigned Vehicle” field above the map.
Dispatch Vehicles From The Routes Map
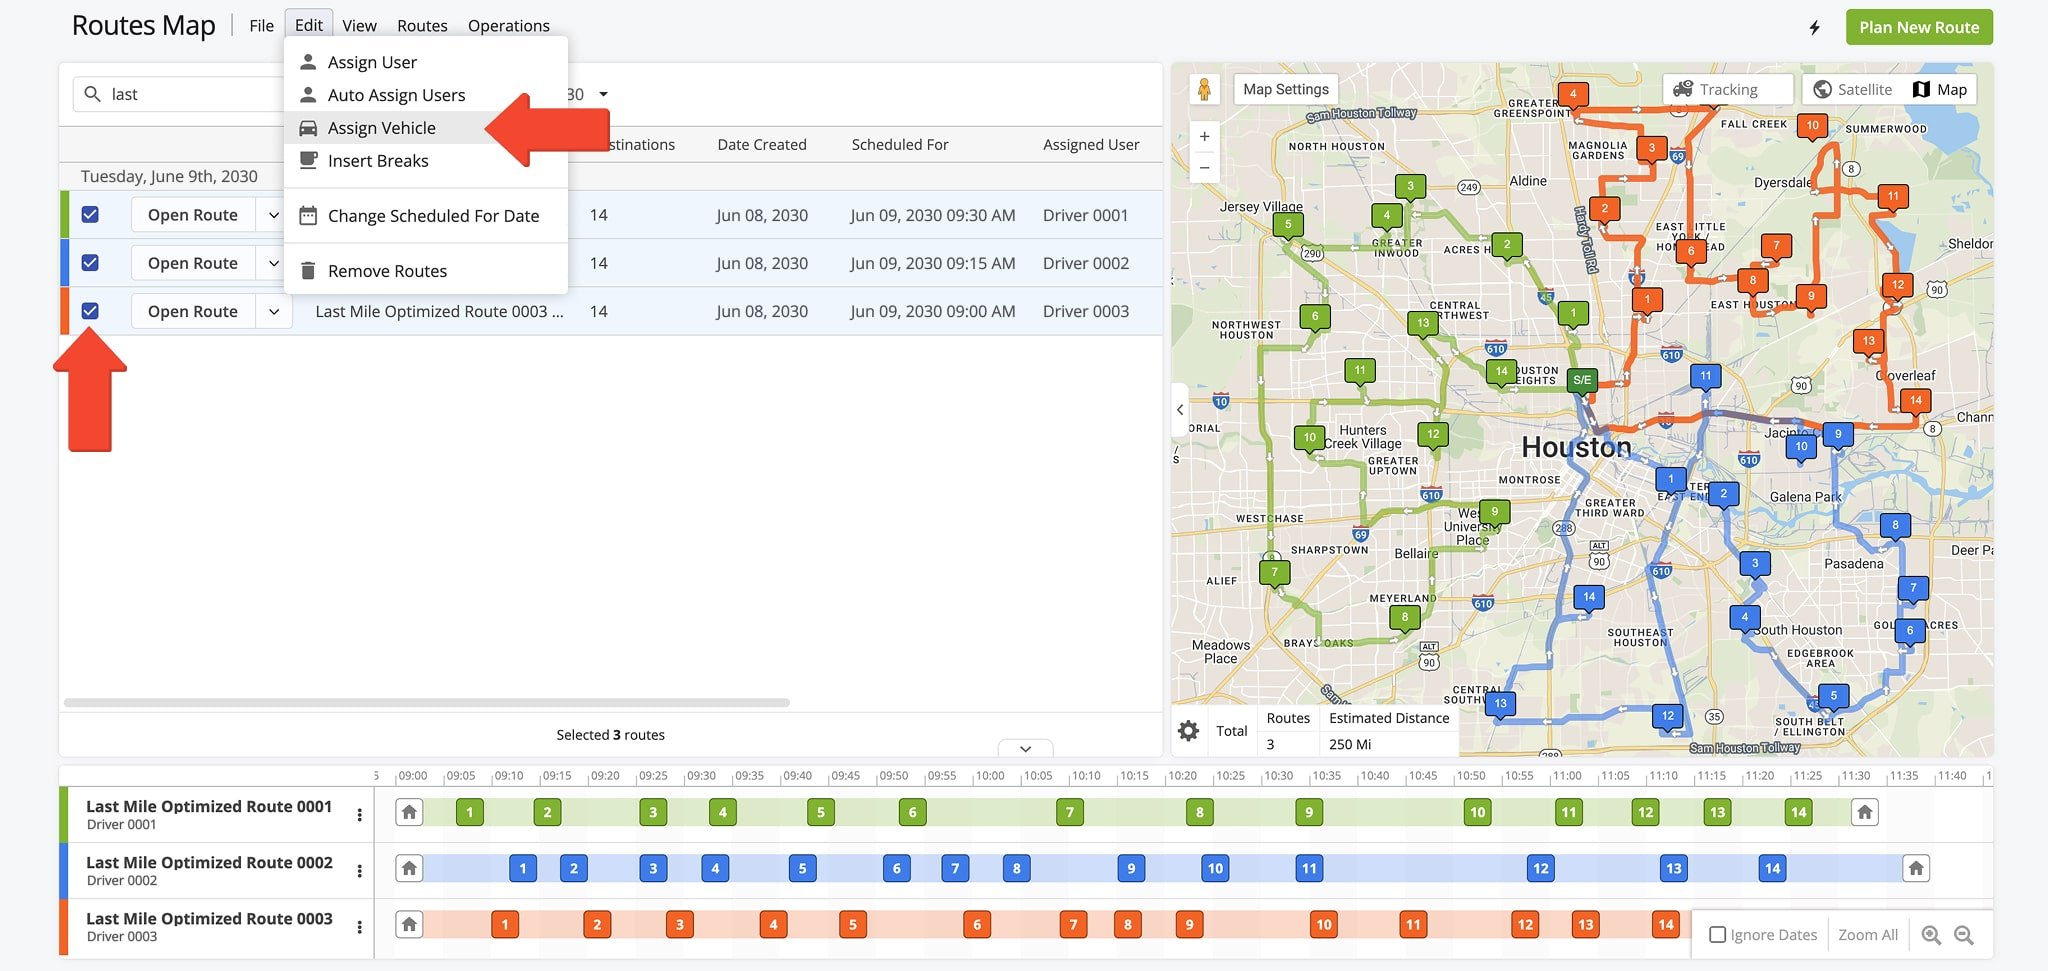
To open your Routes Map, go to “Dynamic Routing” > “Routes Map” in the Navigation Menu. Then, click the Down Arrow button next to route you wish to dispatch, followed by “Assign Vehicle“.
Alternatively, click the Three-dot icon next to the route in the Timeline and select “Assign Vehicle“. The system will automatically assign the Vehicle to the route.
Open Your Routes Map
You can also assign a Vehicle to multiple routes with a single click. To do this, check the boxes next to the routes you wish to dispatch. Then, select “Assign Vehicle” under “Edit” in the Toolbar.
The Vehicle will be automatically assigned to all of the routes you’ve selected.
Use Assignment Dashboard To Assign Vehicles To Routes
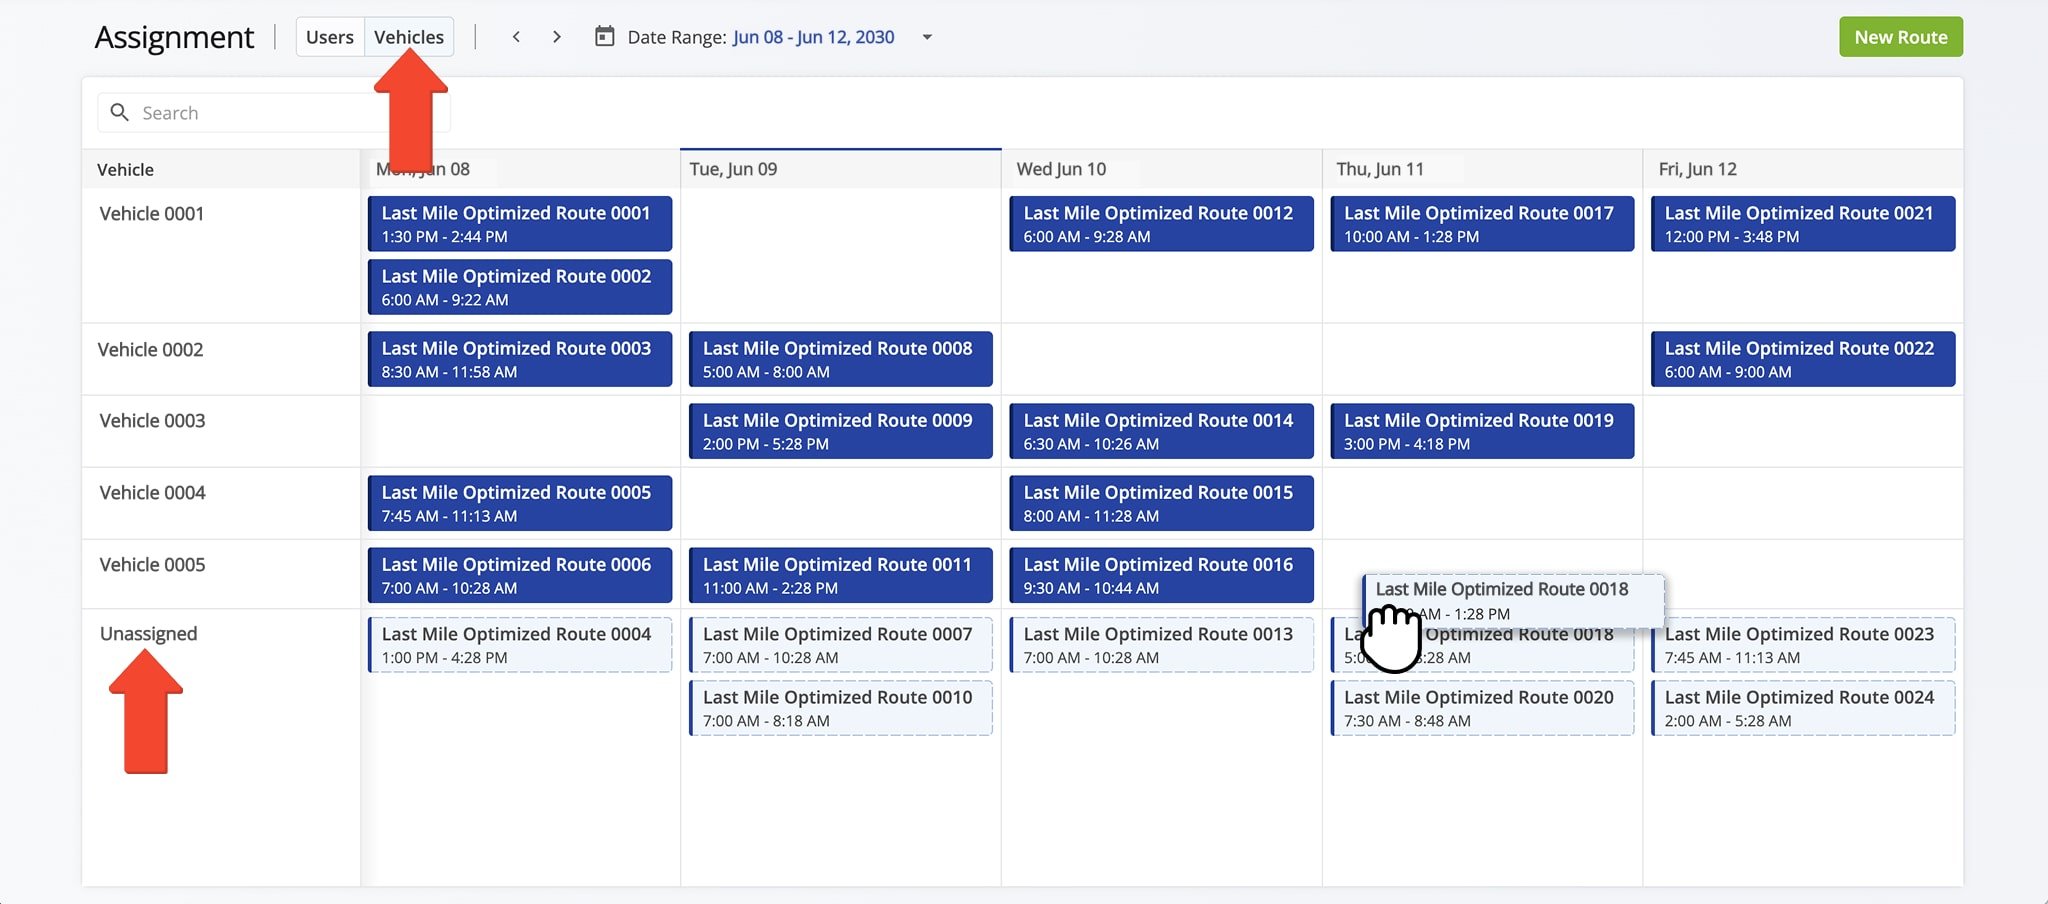
Your Assignment Dashboard centralizes route and Vehicle management, making it easy to assign Vehicles to routes. To access your Assignment Dashboard, go to “Dispatch & Tracking” > “Assignment Board” in the Navigation Menu.
On the Vehicles screen, the “Unassigned” section shows routes you’ve not yet dispatched. To assign a route to a Vehicle, just drag and drop it into a Vehicle’s schedule, and the system will update automatically. NOTE: Learn more about your Assignment Dashboard.
Open Your Assignment Dashboard
Track Vehicles Assigned To Routes – Monitor Vehicles With Real-Time GPS
Route4Me’s real-time GPS tracking lets you monitor the location of Vehicles. You can view their current location, tracking history, and route compliance.
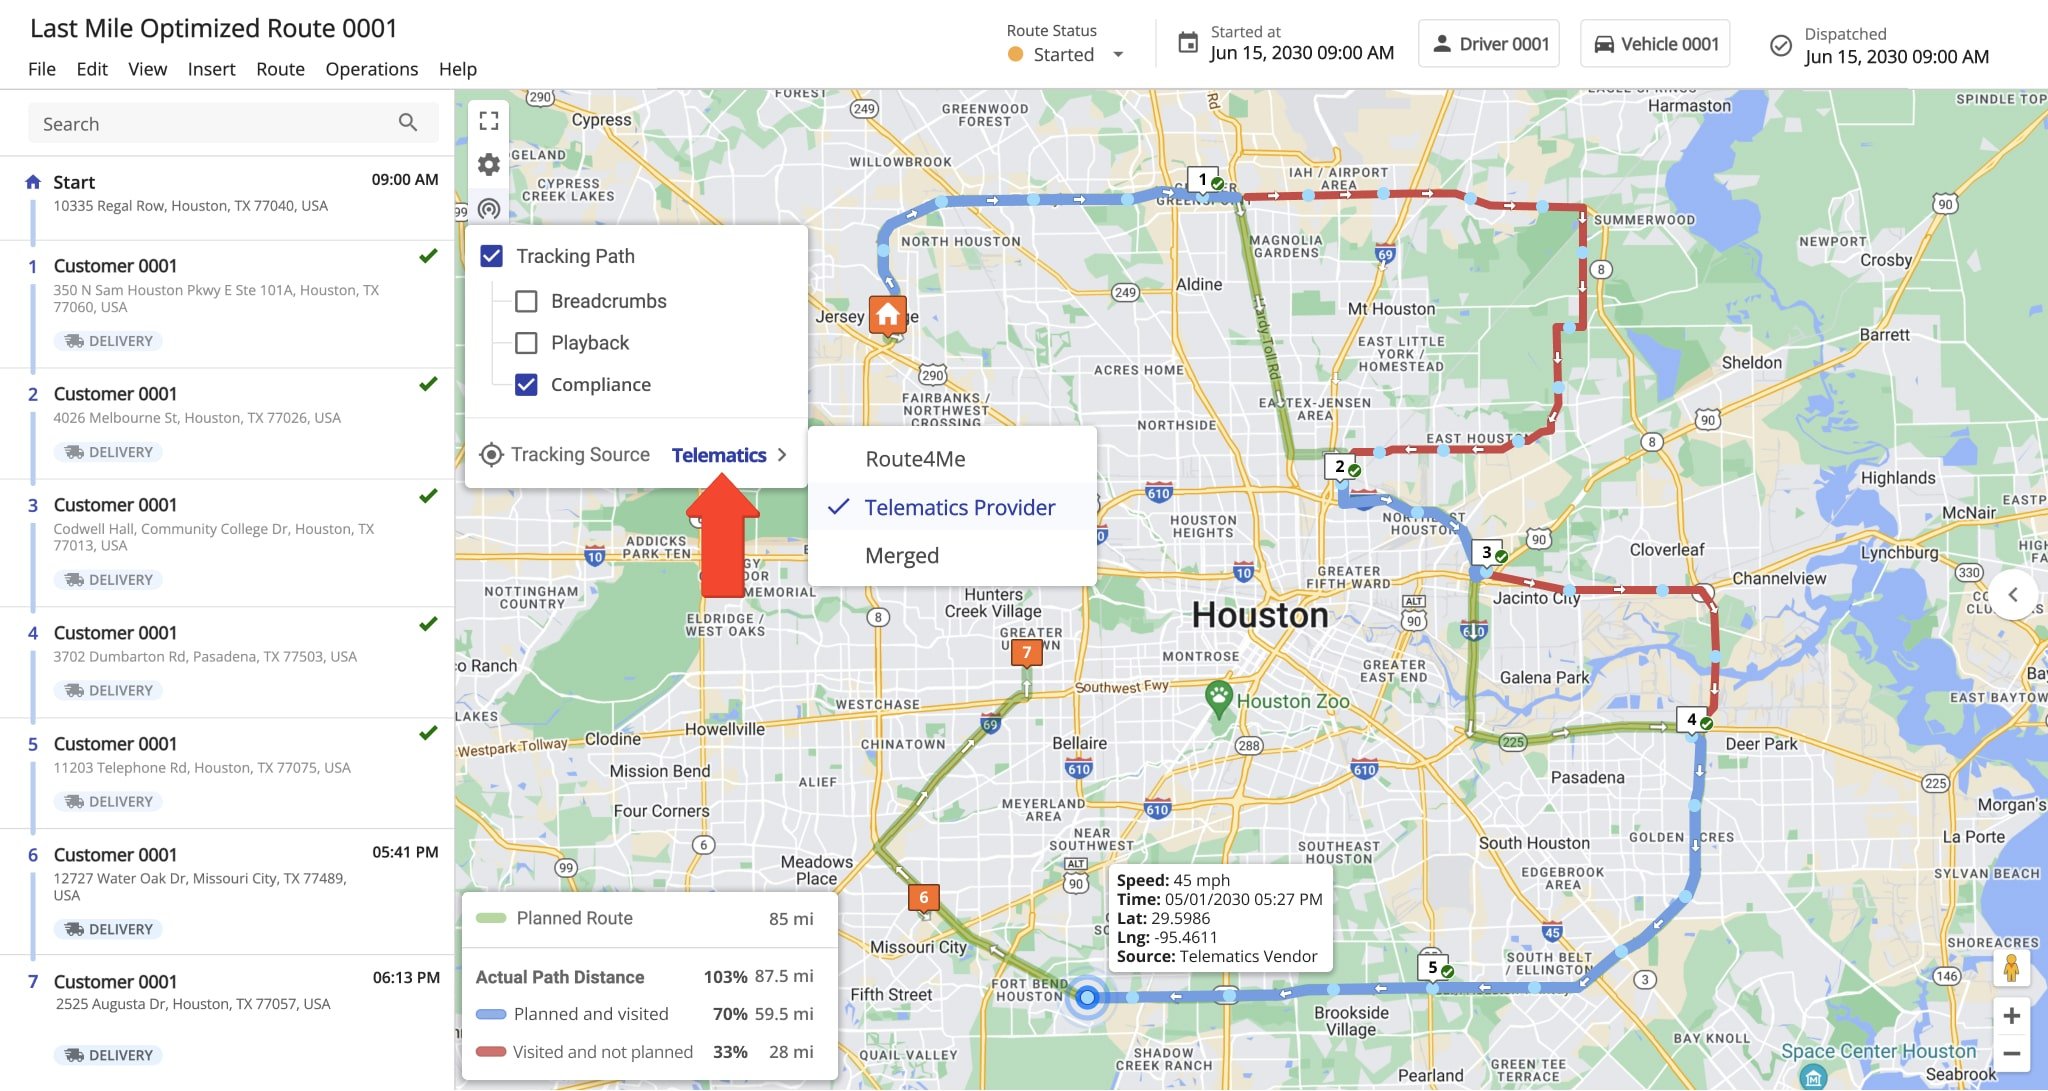
To track in the Route Editor, click the Tracking Button and select your Telematics Provider as the Tracking Source. The Route4Me Mobile App syncs location data with your account, but the Driver you are tracking must have the app open in order for you to receive real-time updates. NOTE: Learn more about GPS tracking.
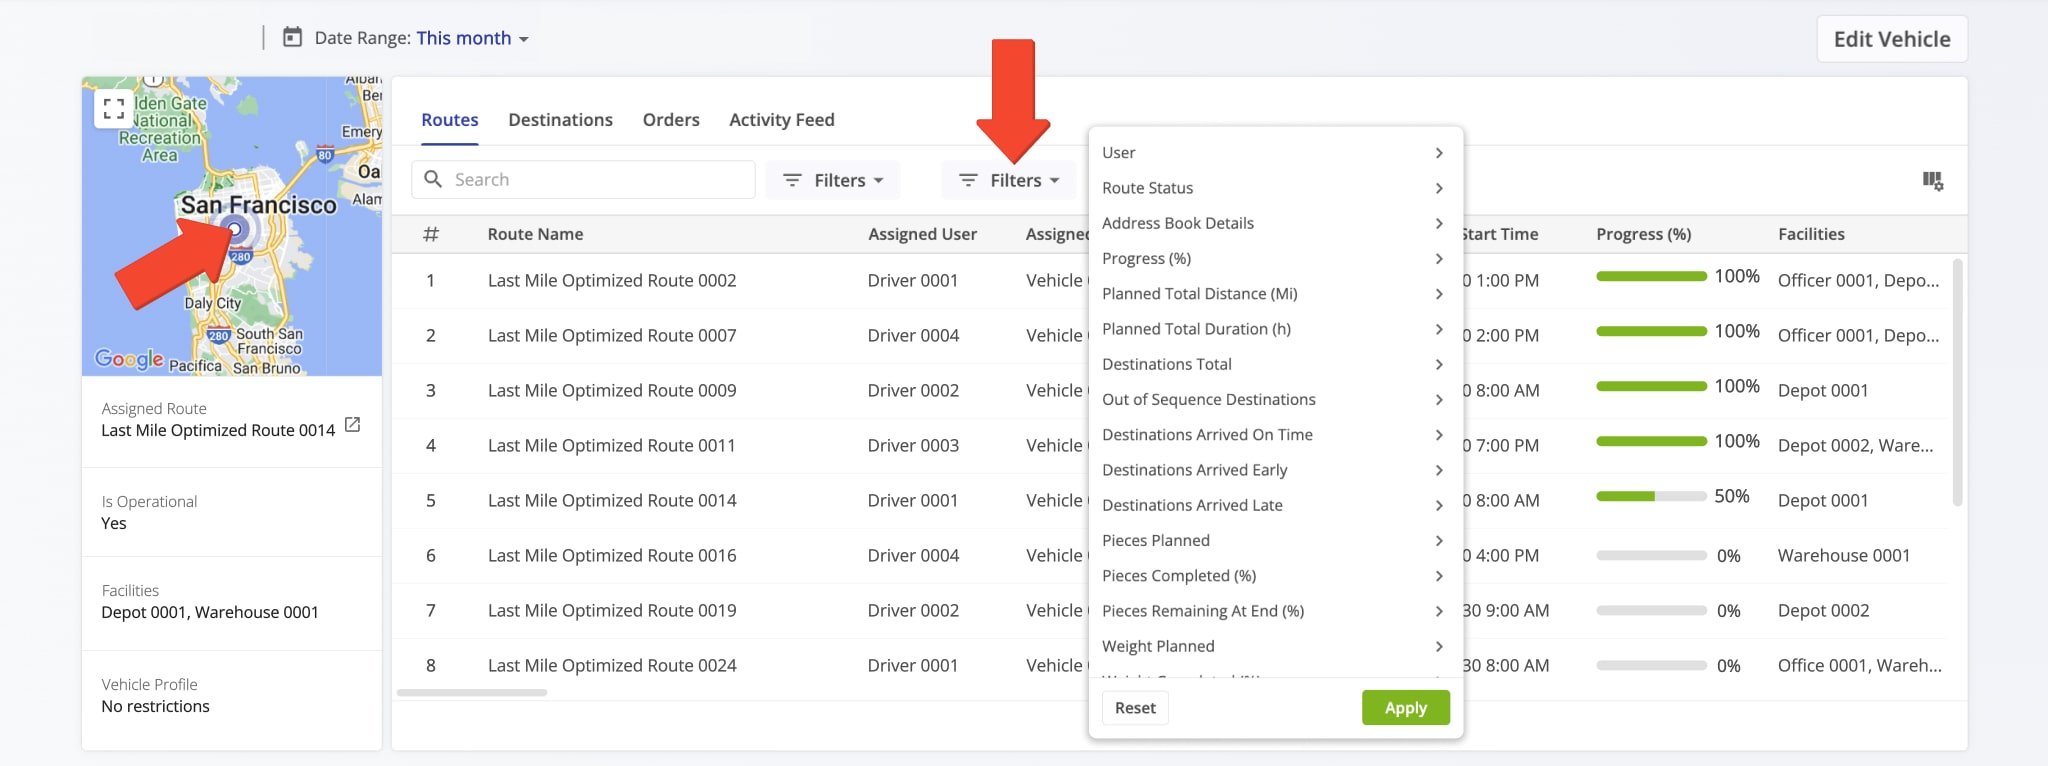
In addition, the Vehicle’s Snapshot shows the Vehicle’s last synced location and combines key metrics in one view to help you track Vehicle performance and utilization. Filter the Snapshot to focus on relevant data and make informed decisions that improve last mile operations. NOTE: Learn more about Vehicle Snapshots.
Visit Route4Me's Marketplace to Check out Associated Modules:
- Operations
Advanced Team Management Add-On
- Operations
Audit Logging and Activity Stream