Routes Timeline – Visualize, Monitor, And Analyze Route Sequences
The Routes Timeline gives enterprise businesses a clear visual overview of their routes, showing the sequence and scheduled times of all stops. It helps teams monitor performance, optimize last mile routing, and quickly identify potential conflicts, ensuring operations run smoothly across all types of routes. Learn more about your Routes Timeline in this guide.
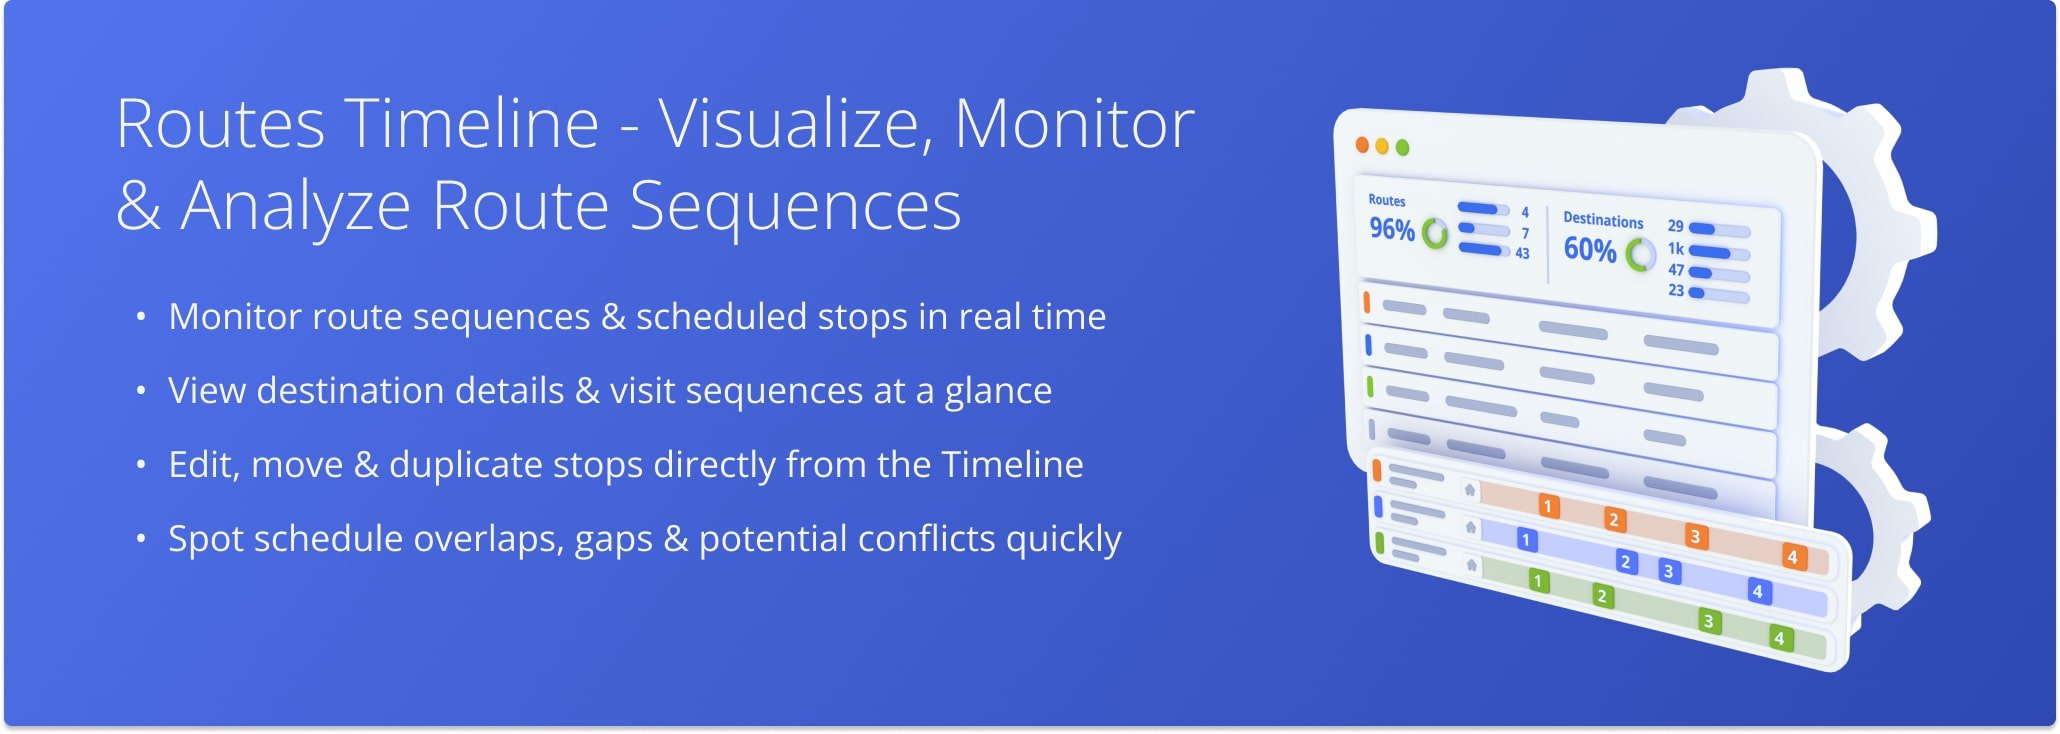
Table of Contents
Routes Timeline – Open, Navigate, And Explore Routes
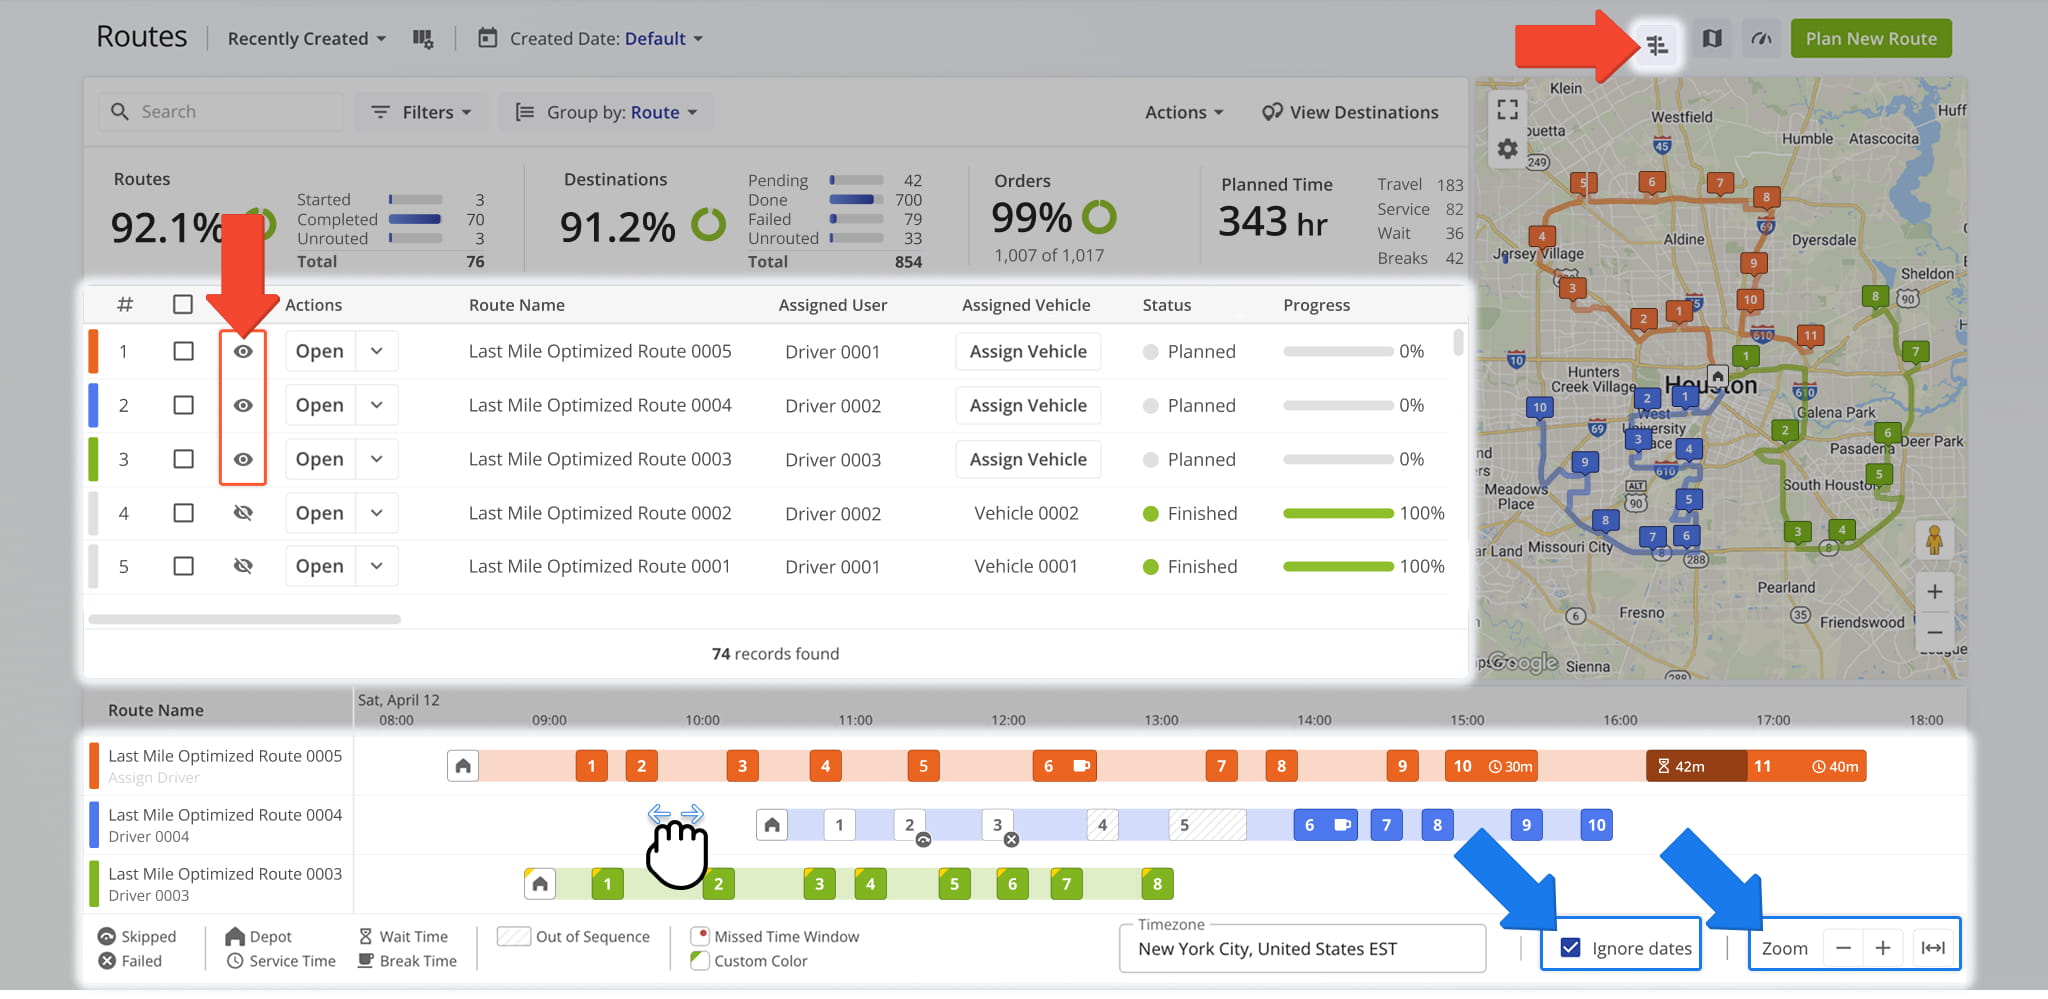
To begin, open your Routes Page. Go to “Dynamic Routing” > “Routes” from the Navigation Menu or click the button below. Then, to open the Routes Timeline, click the Timeline Icon in the top-right corner of your Routes Page.
To display routes on the Timeline, click the Eye icon next to them. Selected routes appear on the Timeline based on their scheduled start times.
Once routes are visible, use drag, scroll, or zoom controls to navigate the Timeline. To view routes from multiple dates together, enable “Ignore Dates” at the bottom of the page. The “Zoom” options allow you to expand or narrow the displayed time range.
Timeline View – Monitor, Inspect, And Analyze Routes And Stops
The Timeline dynamically reflects your selected routes and updates automatically as filters or searches are applied. Hover over any route or destination to view its key details. The table below summarizes all destination details available through the Timeline:
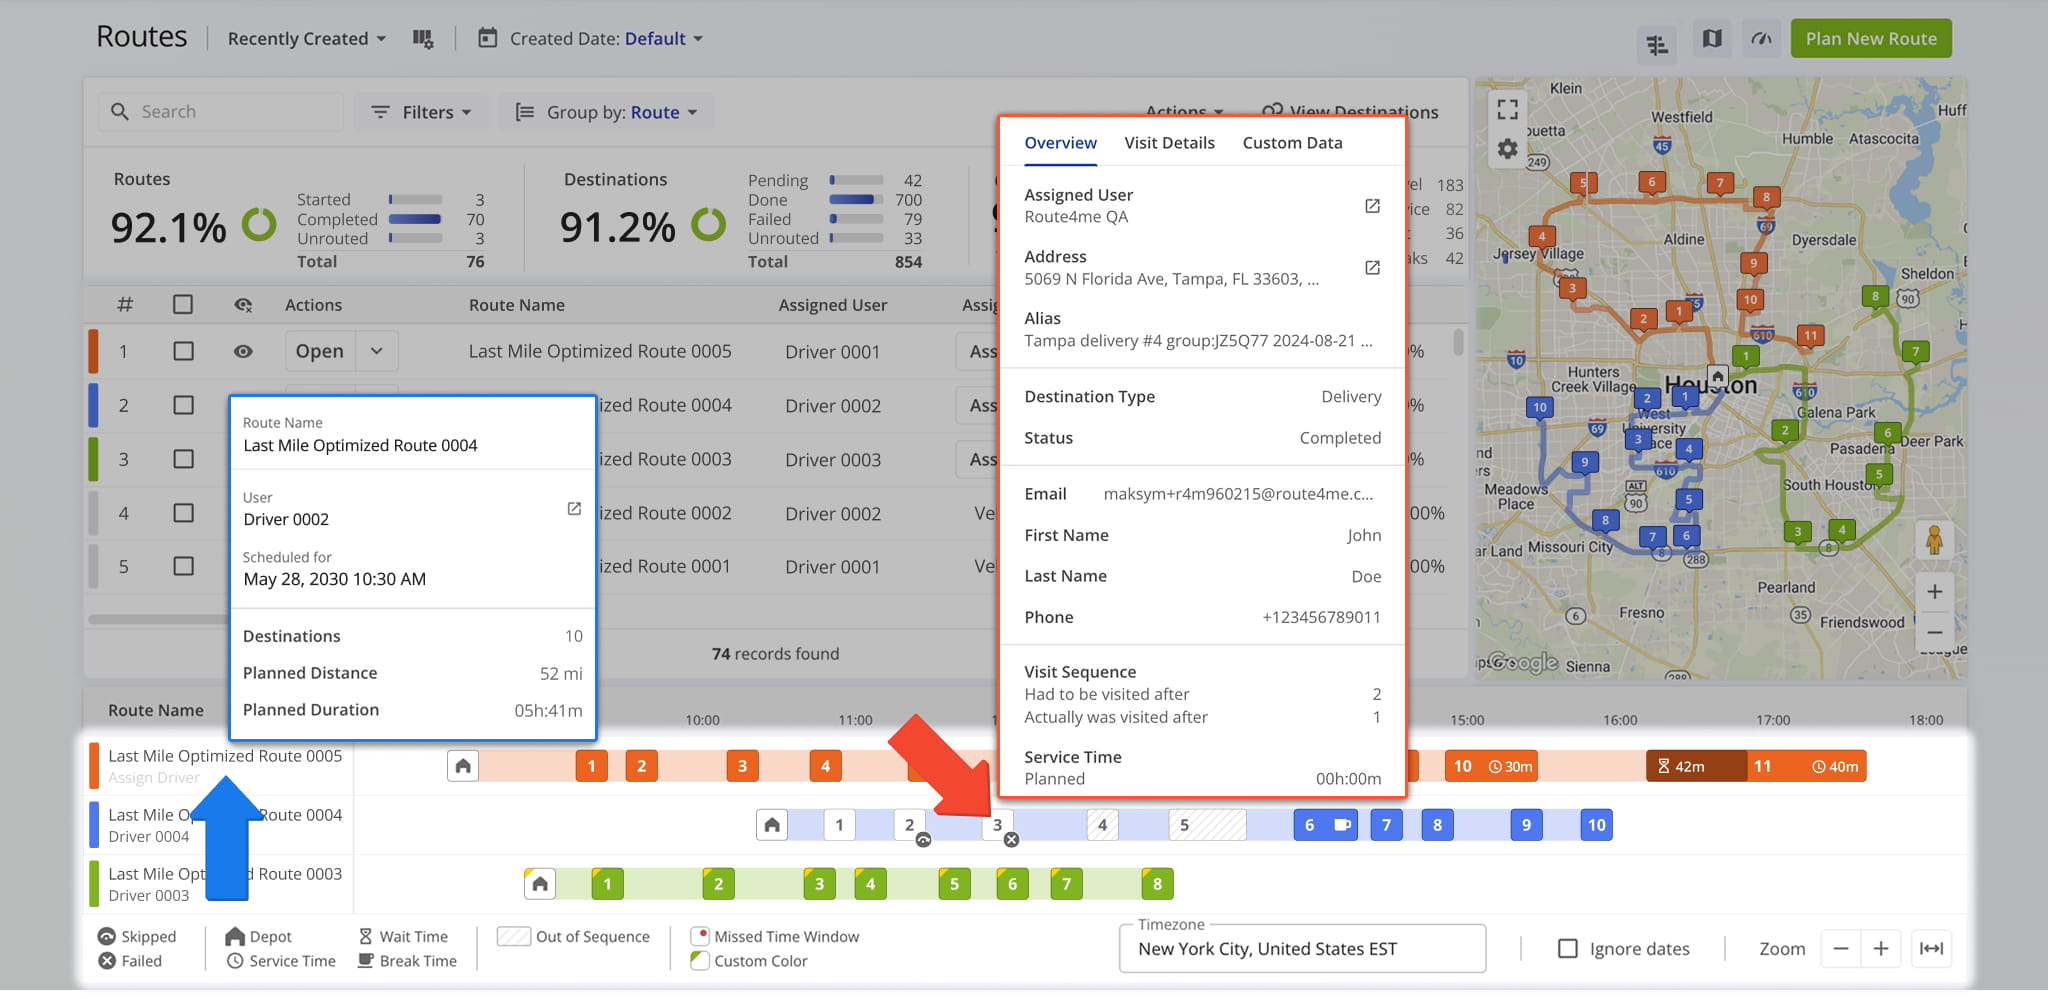
| Destination Details | Description | |
|---|---|---|
| Overview | ||
| Assigned User | Team member responsible for completing the destination. | |
| Assigned Vehicle | Vehicle designated for the stop. | |
| Address | Customer address of the destination. | |
| Alias | Alternative name for the destination. | |
| Destination Type | Purpose of the stop, such as delivery, pickup, or drop-off. | |
| Status | Current visit status: Pending, Completed, Failed, or Skipped. | |
| Customer First Name | First name of the contact associated with the destination. | |
| Customer Last Name | Last name of the contact associated with the destination. | |
| Customer Email | Email address used for notifications and contact related to the destination. | |
| Customer Phone | Phone number associated with the destination contact. | |
| Visit Sequence | Displays the planned visit order compared to the actual visit order to show sequencing changes if any. | |
| Service Time | Planned duration to complete the stop; also shows actual time spent on-site after completion. | |
| Visit Details | ||
| Planned Arrival & Departure | Scheduled arrival and departure times based on route planning parameters. | |
| Predicted Arrival & Departure | System-estimated arrival and departure times calculated during route execution. | |
| Reported Arrival & Departure | Arrival and departure times manually reported by the assigned user via the Route4Me mobile driver app. | |
| Detected Arrival & Departure | Automatically detected arrival and departure times based on GPS location data. | |
| Custom Data | ||
| Custom Data | Custom destination fields such as latitude and longitude, barcode values, order groups, and other user-defined data. See our dedicated Custom Data article for more on adding Custom Data to route destinations. | |
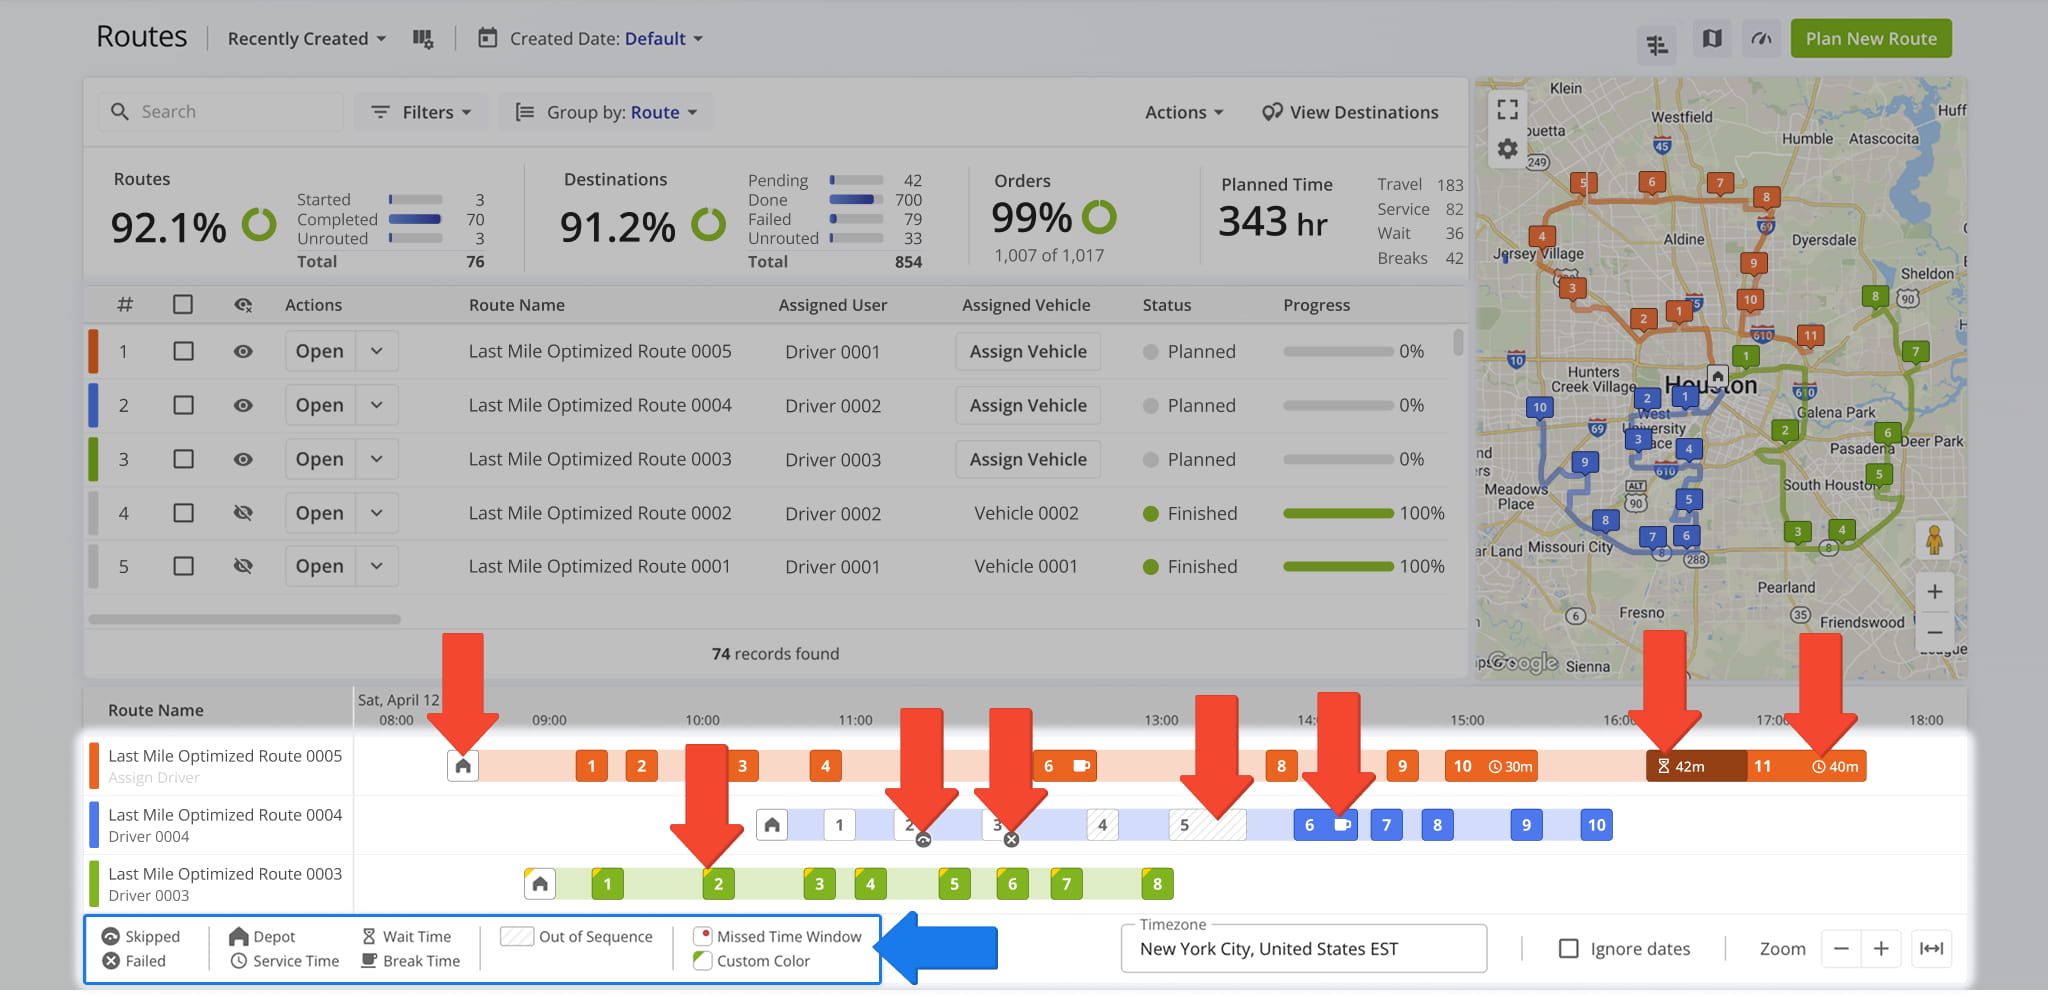
The Timeline’s visual layout helps teams quickly identify scheduling gaps, overlaps, and other issues across routes and destinations, providing early insight into potential operational conflicts.
Icons and color coding displayed directly on destinations within the Timeline highlight important stop-level details such as skipped or failed destinations, wait times, service durations, and other routing events.
The table below explains what each Icon and color coding represents so you can quickly interpret activity at a glance:
| Visual Indicator | Description |
|---|---|
| Skipped | Jumping Arrow Icon indicates destination was skipped during route execution, so you quickly identify stops that were not completed as planned. |
| Failed | “X” Icon shows destination was attempted but marked as failed, making it easier for you to investigate delivery or service issues. |
| Depot | House Icon identifies the route’s depot or start/end location, providing clear visibility into where routes begin or conclude. |
| Service Time | Clock Icon displays the time spent servicing the destination, helping you compare planned versus actual service durations. |
| Wait Time | Hourglass Icon indicates time spent waiting at the destination, highlighting potential inefficiencies or scheduling delays. |
| Break Time | Coffee Cup Icon marks driver break periods, helping ensure compliance with break policies and accurate time tracking. |
| Out Of Sequence | Slanted gray lines indicate the destination was completed out of the planned order, helping you spot deviations from the optimized route. |
| Missed Time Window | A small red dot shows the destination was serviced outside its planned time window, making it easier to spot scheduling issues or delays. |
| Custom Color | Colored Corner on the destination reflects a custom stop color, helping teams visually group destinations. |
Manage Destinations On Timeline – Edit, Move, And Duplicate Stops
Right-click a destination to access various management options. From the pop up menu, you can update the destination status, change its sequence position, duplicate the stop, locate it on the map, and more. The table below outlines all available actions.
Destinations can also be reordered or moved between routes using drag-and-drop. This allows you to quickly adjust stop sequences or rebalance routes without leaving the Timeline. NOTE: After making adjustments, re-optimize to ensure the most efficient top sequence.
Combined with the Timeline’s visual overview, these tools help you optimize route sequencing, avoid scheduling conflicts, and manage stops efficiently from a single screen.
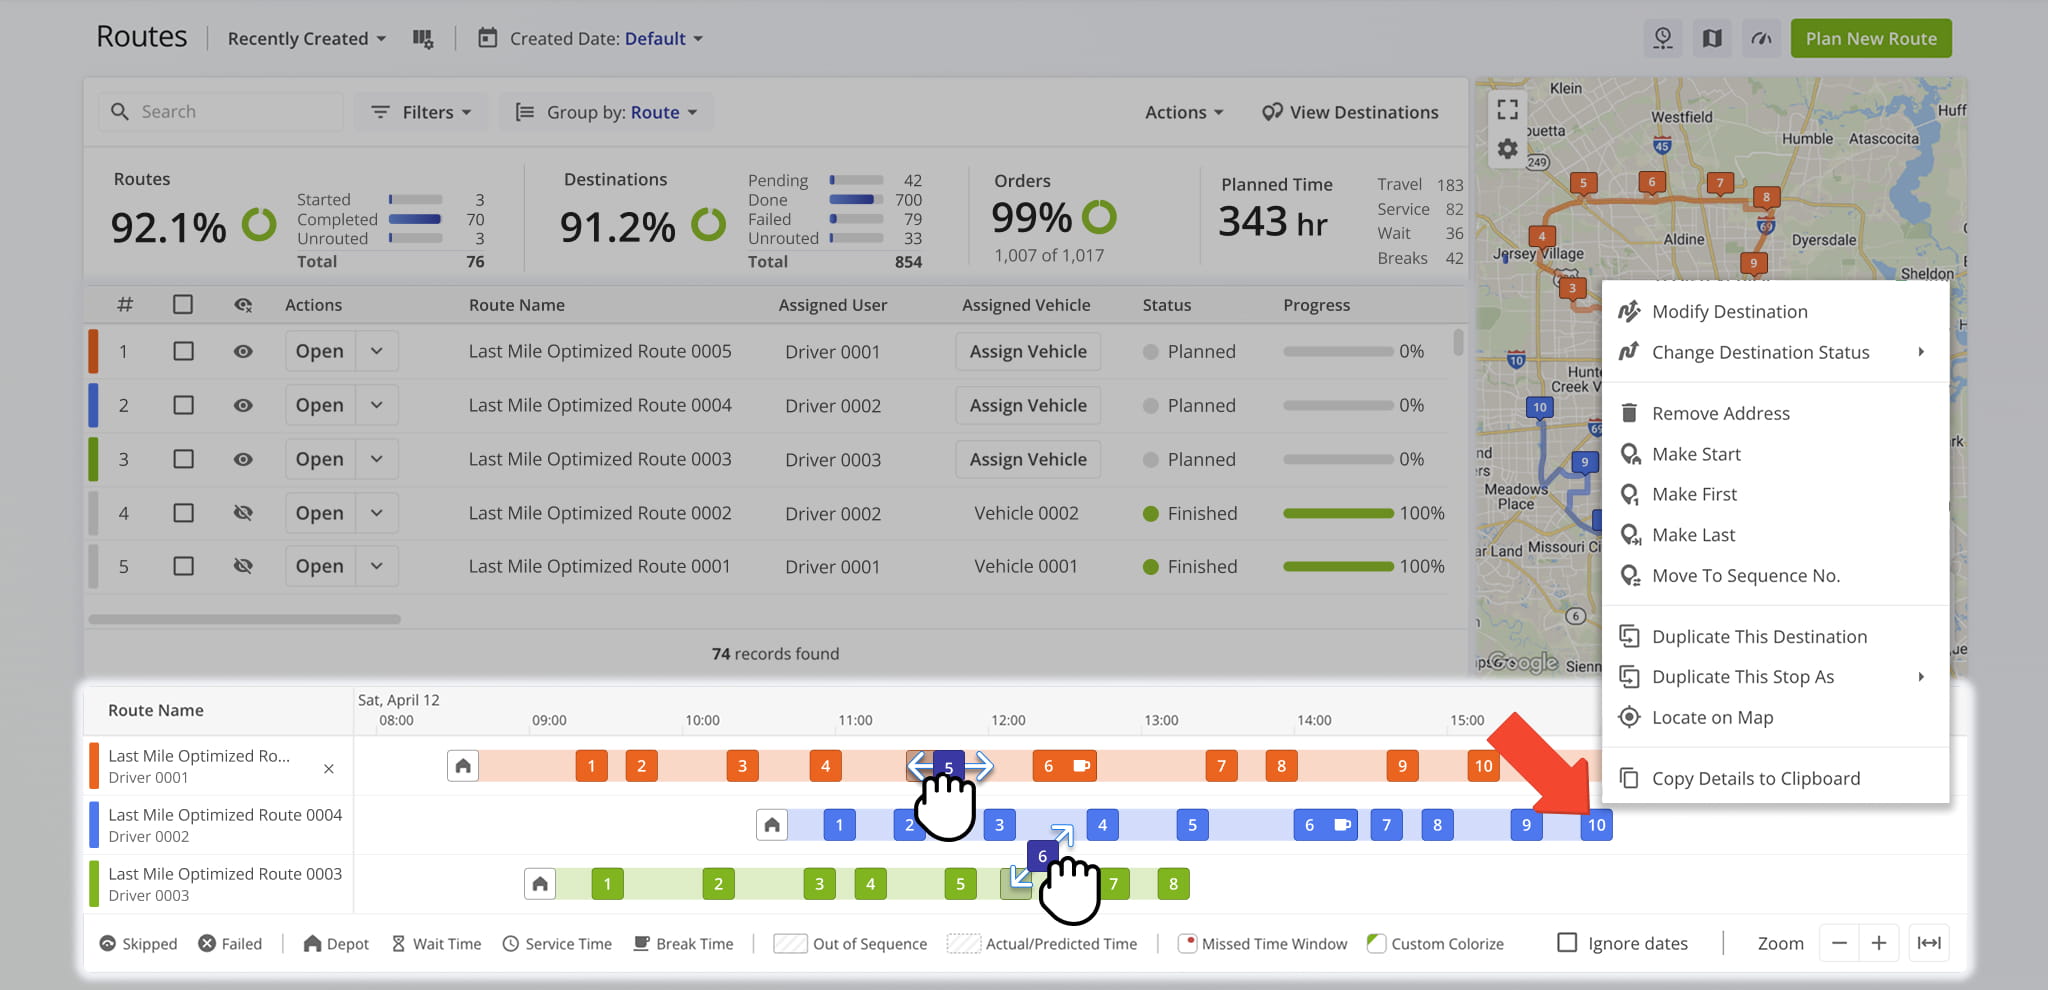
| Destination Action | Description |
|---|---|
| Modify Destination | Edit stop details such as address, order details, planned visit details, and custom data. |
| Change Destination Status | Update the visit status to Done, Failed, or Skipped. |
| Remove Address | Delete the destination from the route. |
| Make Start | Set the destination as the starting point of the route. |
| Make First | Move the destination to the first position in the route sequence. |
| Make Last | Move the destination to the last position in the route sequence. |
| Move To Sequence Number | Place the destination at a specific position within the current route sequence or sequence it within a different planned route. |
| Duplicate This Destination | Create an exact copy of the destination within the same route. |
| Duplicate This Stop As | Create a copy of the destination and assign it a specific stop type, such as Pickup, Delivery, Break, Meetup, Service, Visit, or Drive By. |
| Copy Details To Clipboard | Copy customer or stop information for use elsewhere, such as emails or spreadsheets. |
Visit Route4Me's Marketplace to Check out Various Modules and Add-Ons:
- Route Optimization
Time Windows
- Operations
Advanced Team Management Add-On