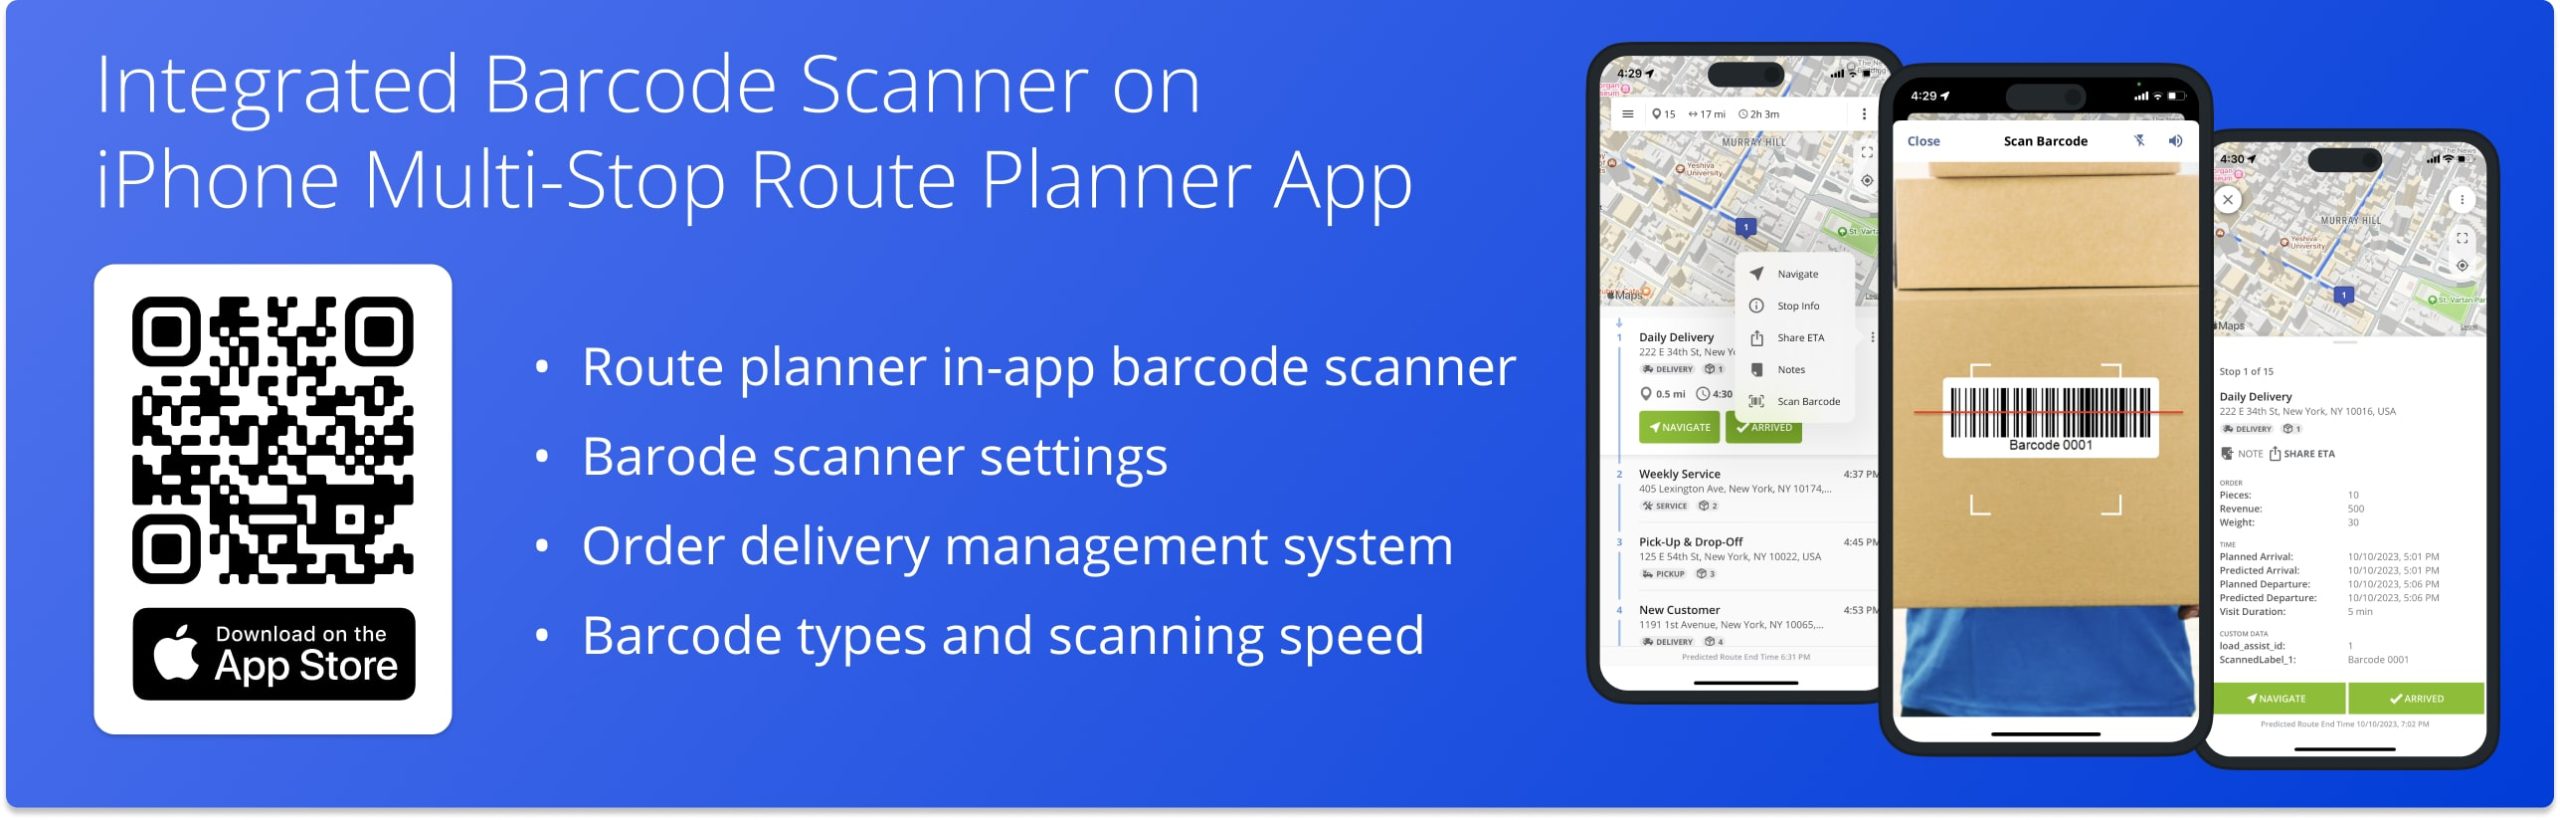
Barcode Scanner, Supported Barcodes And Scanning Speed – iOS iPhone Route Planner App
Route4Me’s iPhone Route Planner app provides seamless continuity throughout the entire process of planning and optimizing multi-stop routes, navigating, and completing routes. Additionally, you can add proof of delivery, visit, or service to your stops. Furthermore, Route4Me’s mobile apps feature an integrated label scanner. In this guide, you can learn to use the in-app barcode scanner, supported barcode types, scanning speed, and Route4Me’s Order Delivery Management System.
NOTE: Depending on your account settings, you can have a different set of features available on your Route4Me iPad iOS iPhone Route Optimization app. To enable specific features, please Contact Route4Me’s Support Team. Additionally, learn more about the difference between Route4Me’s Mobile and Marketplace subscriptions and the features they support.
Table of Contents
Using In-App Label Scanner on iOS iPhone Route Planner App
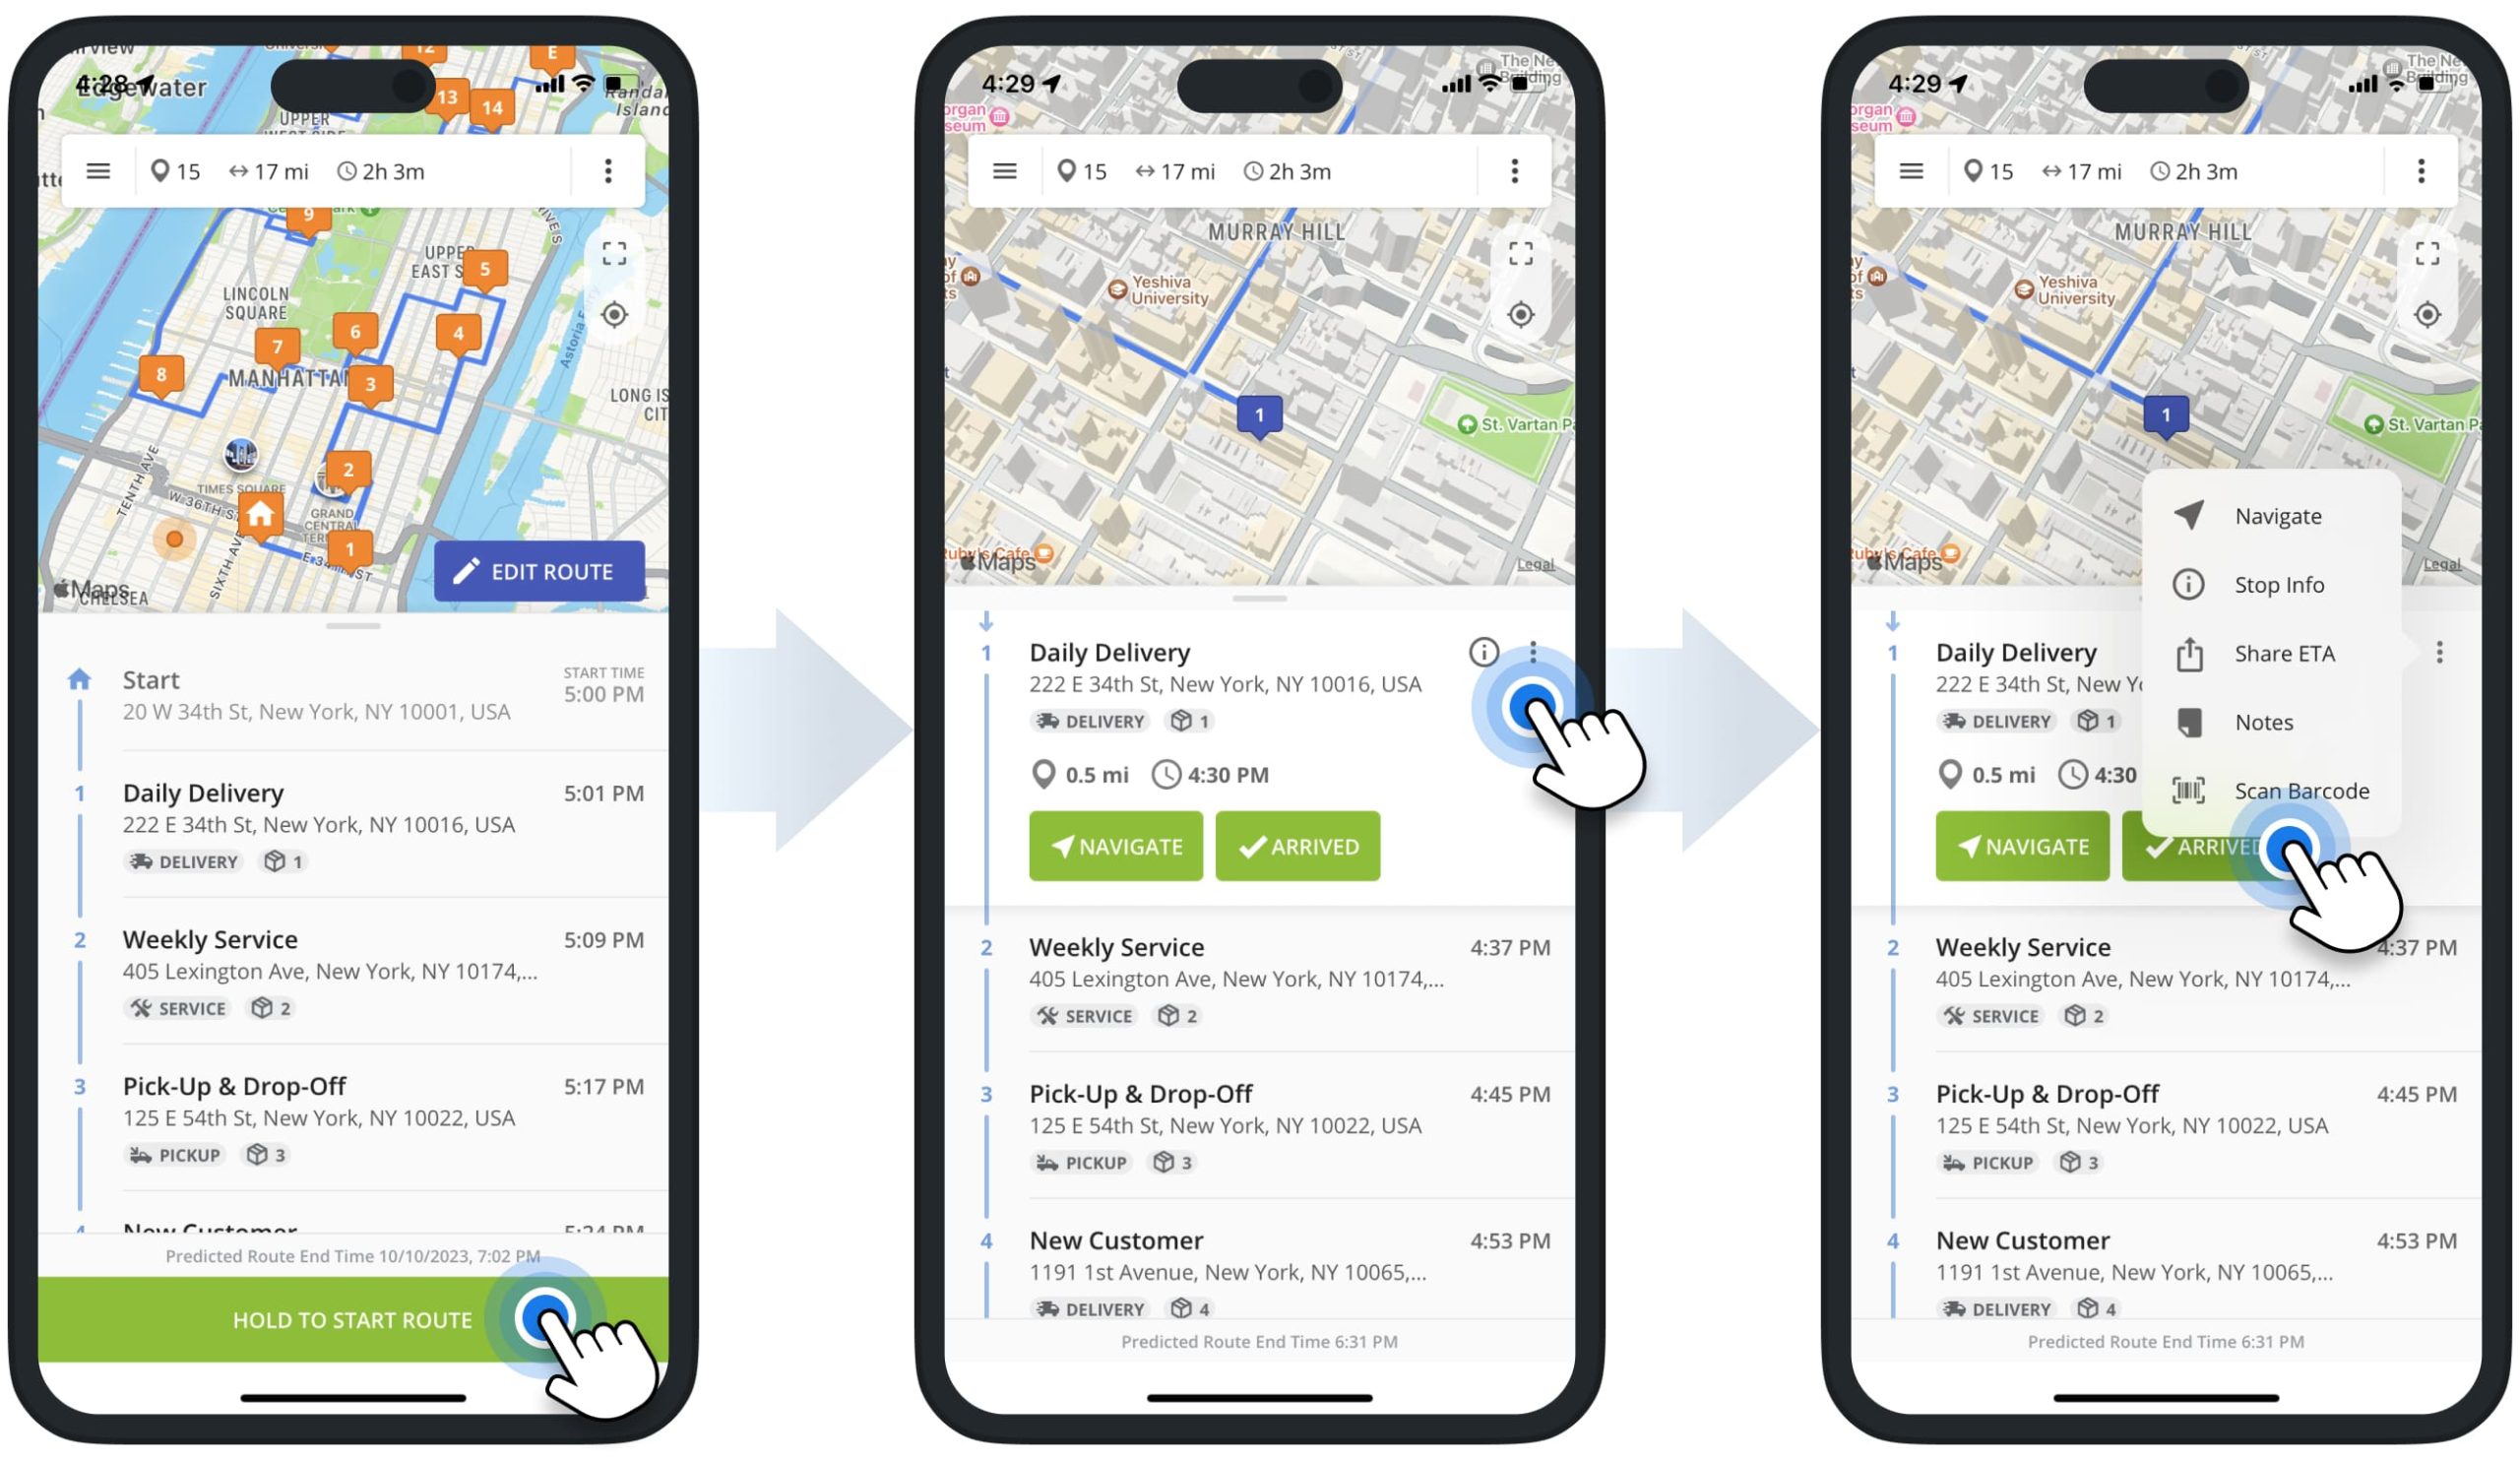
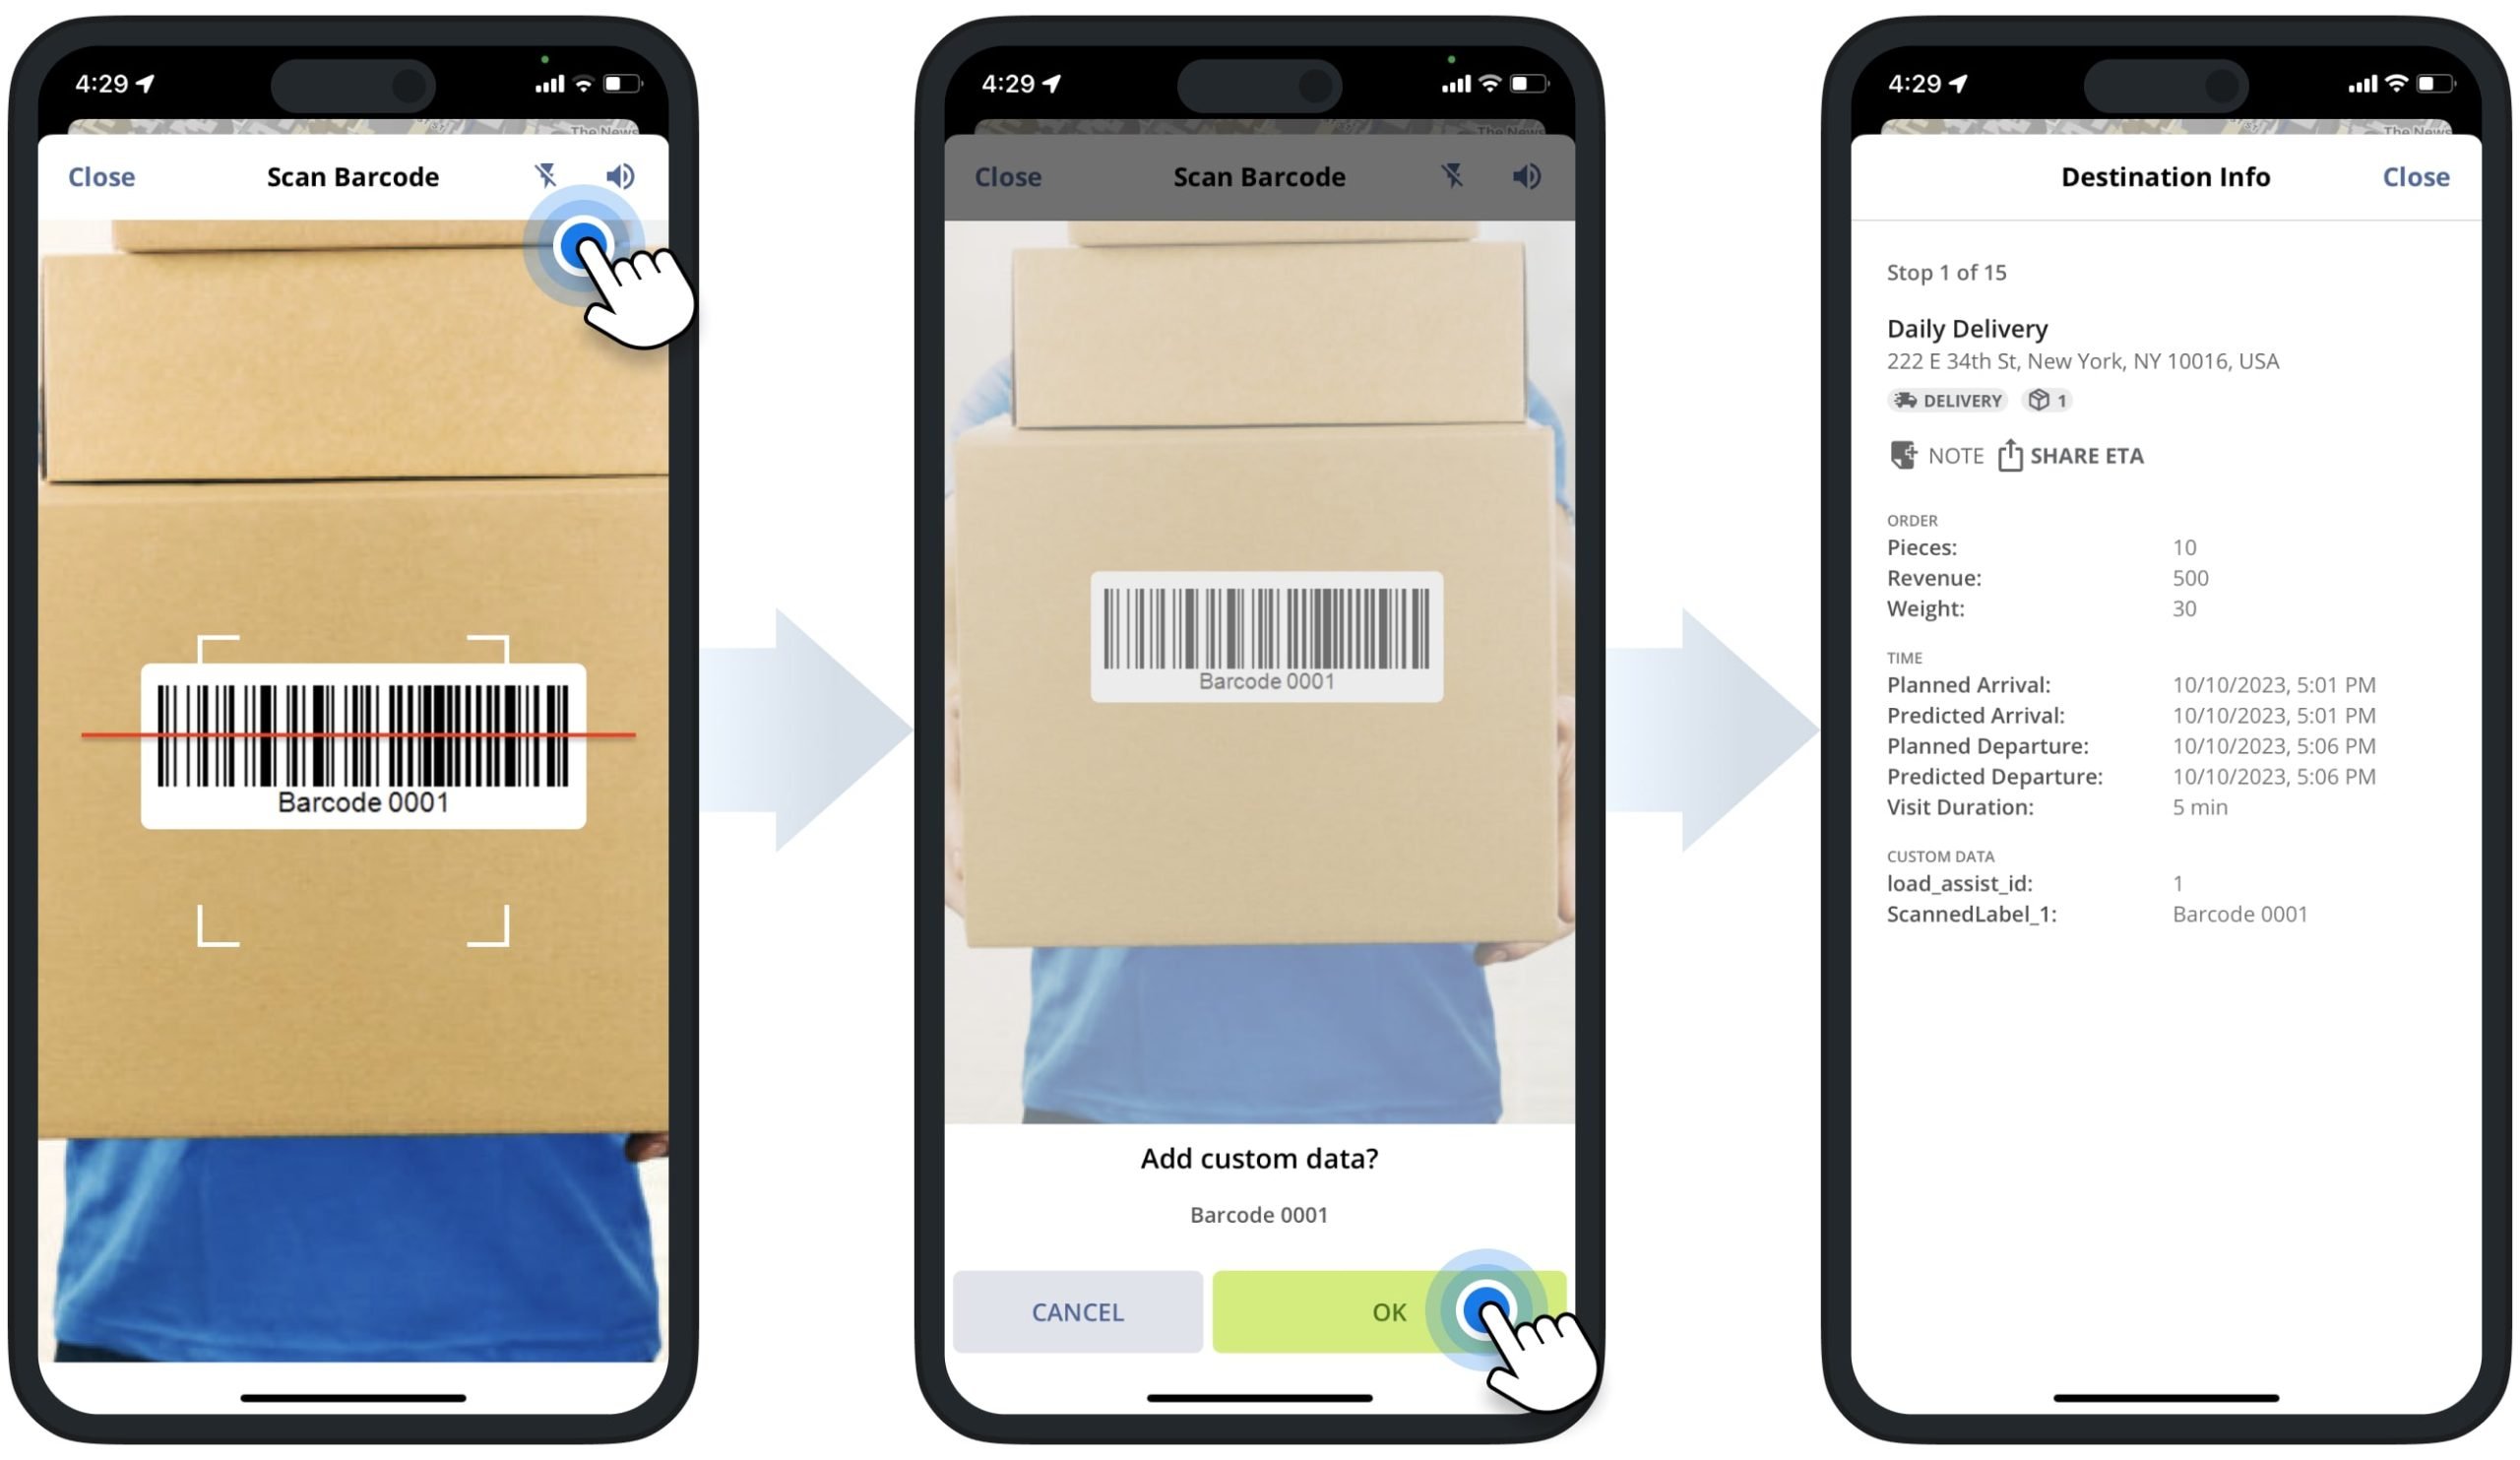
You can use the barcode scanner to attach barcode data to route stops as Custom Data. To do so, go to “Routes” in the app’s main menu and open the preferred route. Next, tap and hold the “Hold to Start Route” button to start the route. After that, tap the preferred route stop, tap the Three-Dot Icon, and select “Scan Barcode” from the menu.
Additionally, learn more about Starting, Navigating, and Completing Routes on the Route4Me iPhone Route Planner app.
Next, use the camera on your device to scan the label. Once the app detects the barcode, confirm to save the scanned barcode, and the app will automatically attach the barcode data to the stop as Custom Data.
Accordingly, you can scan and attach multiple barcodes to the same stop as separate Custom Data.
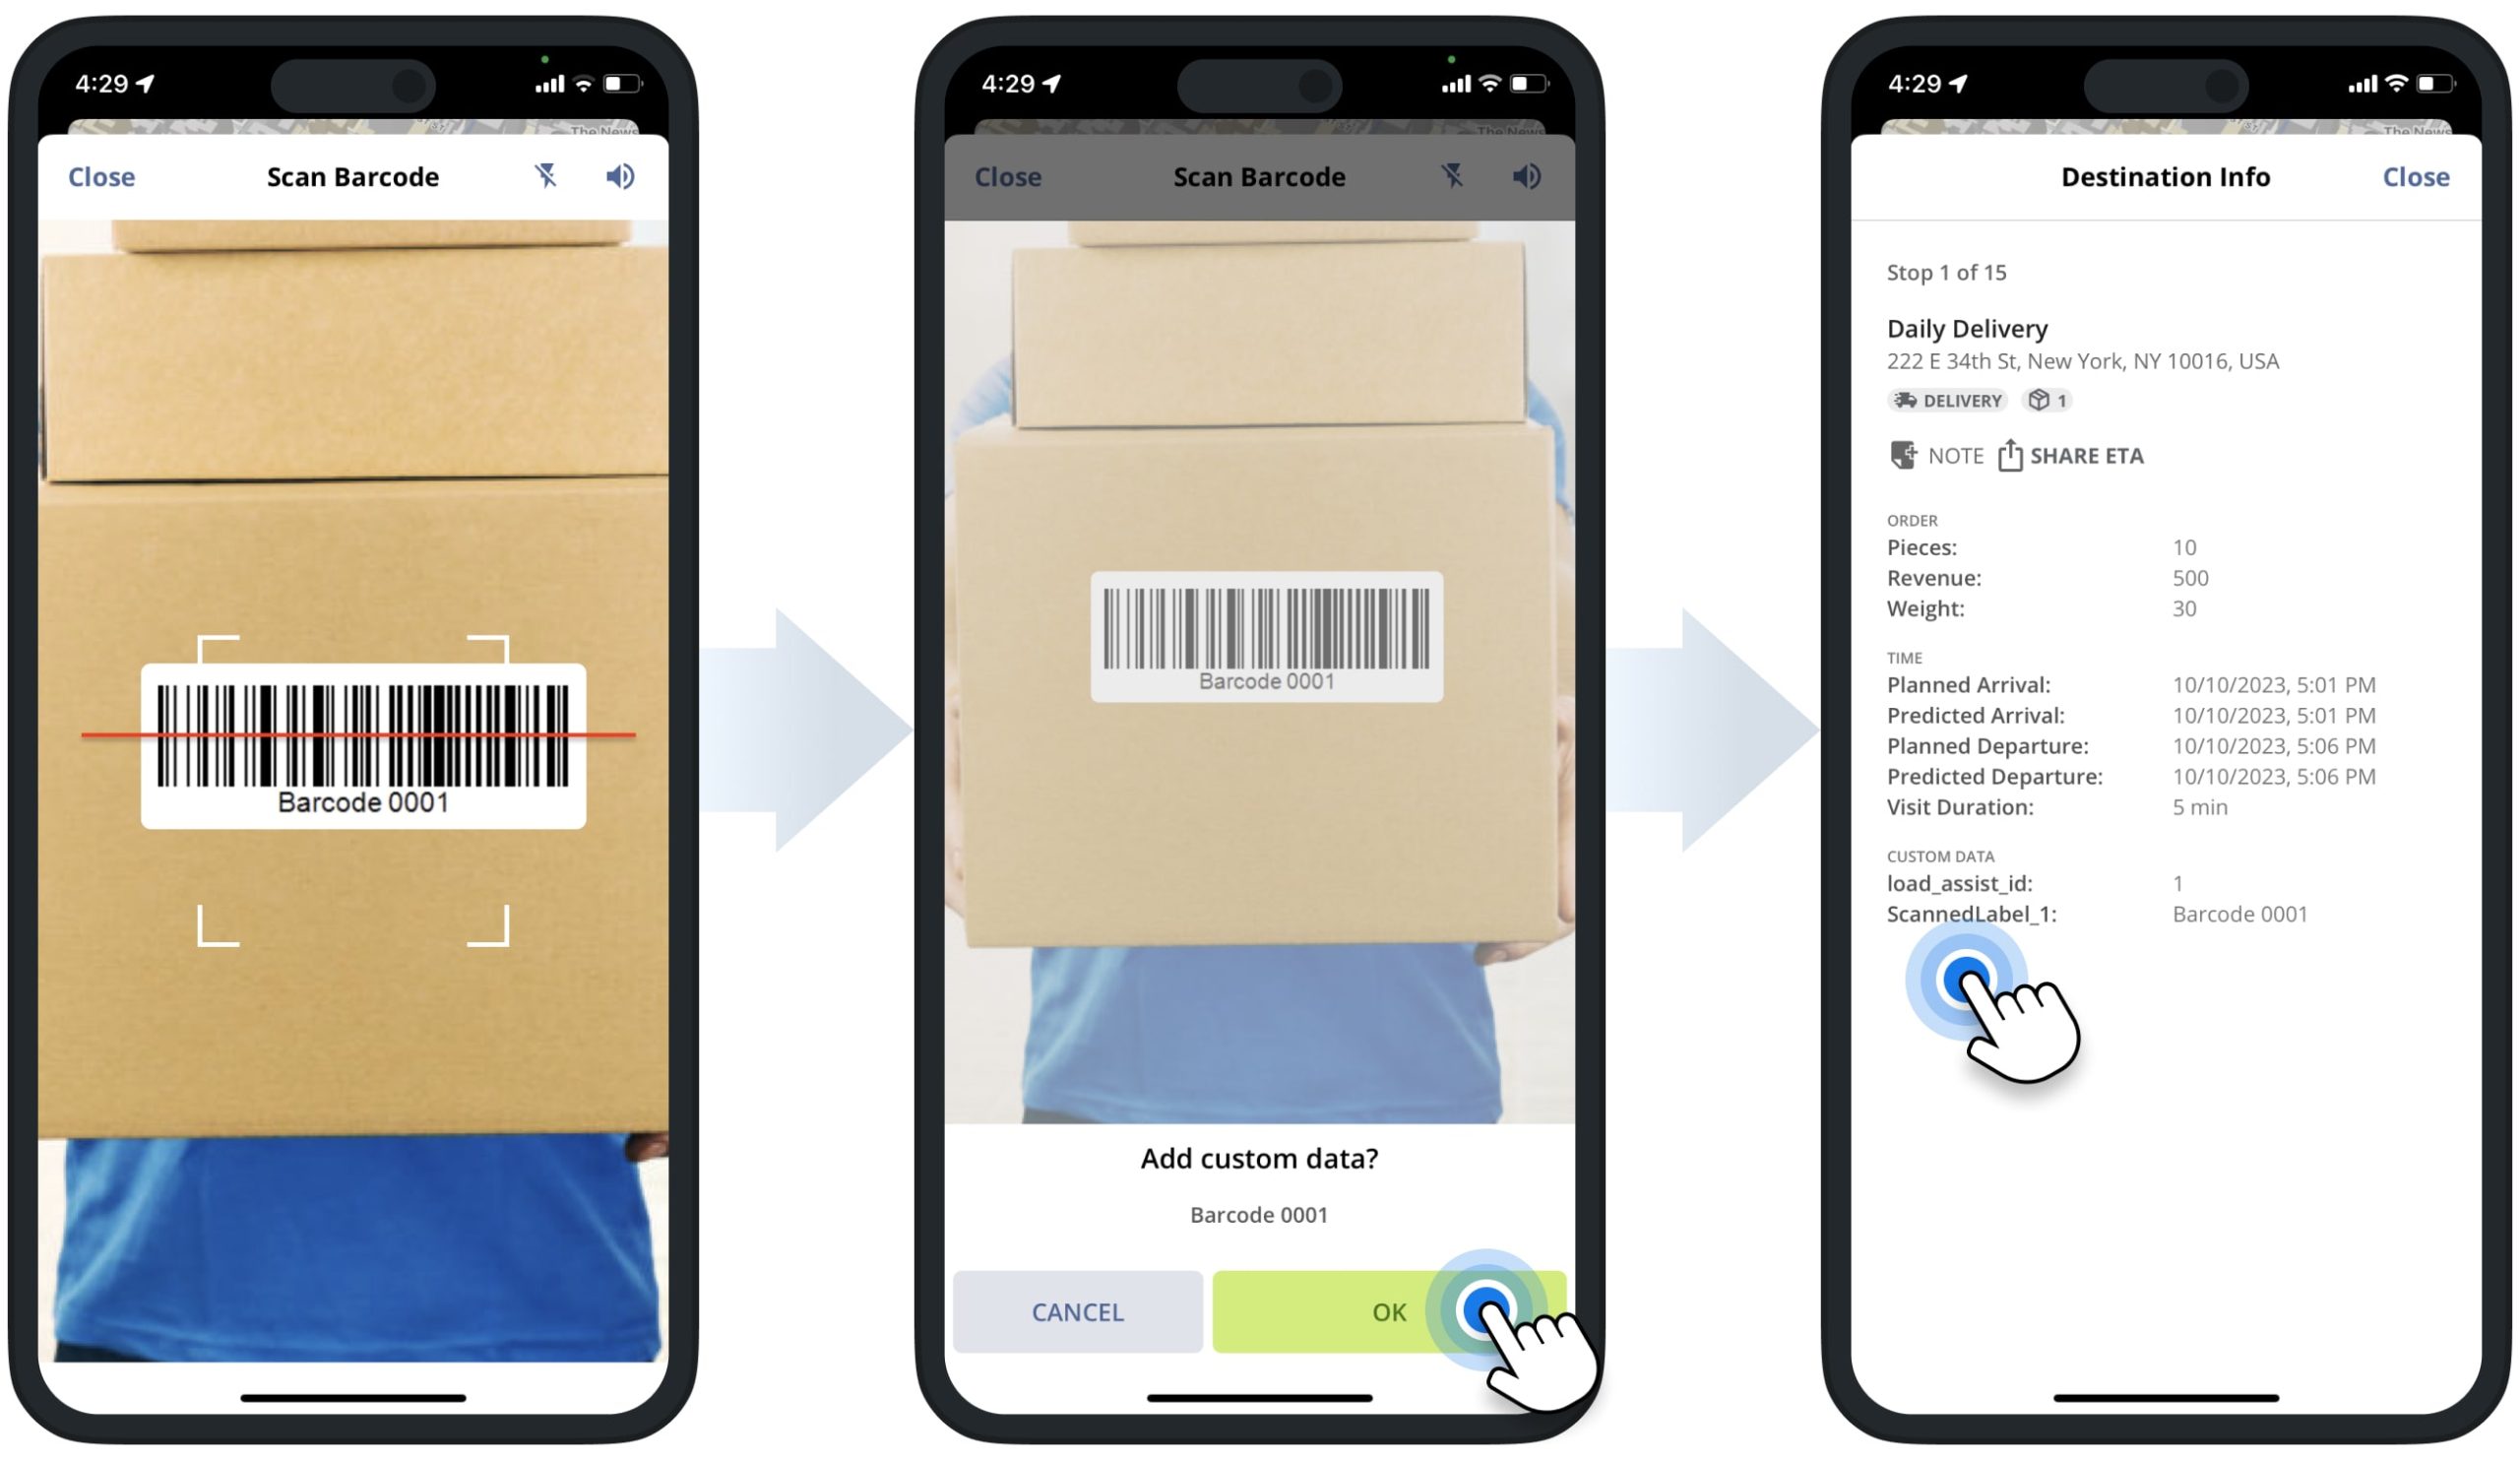
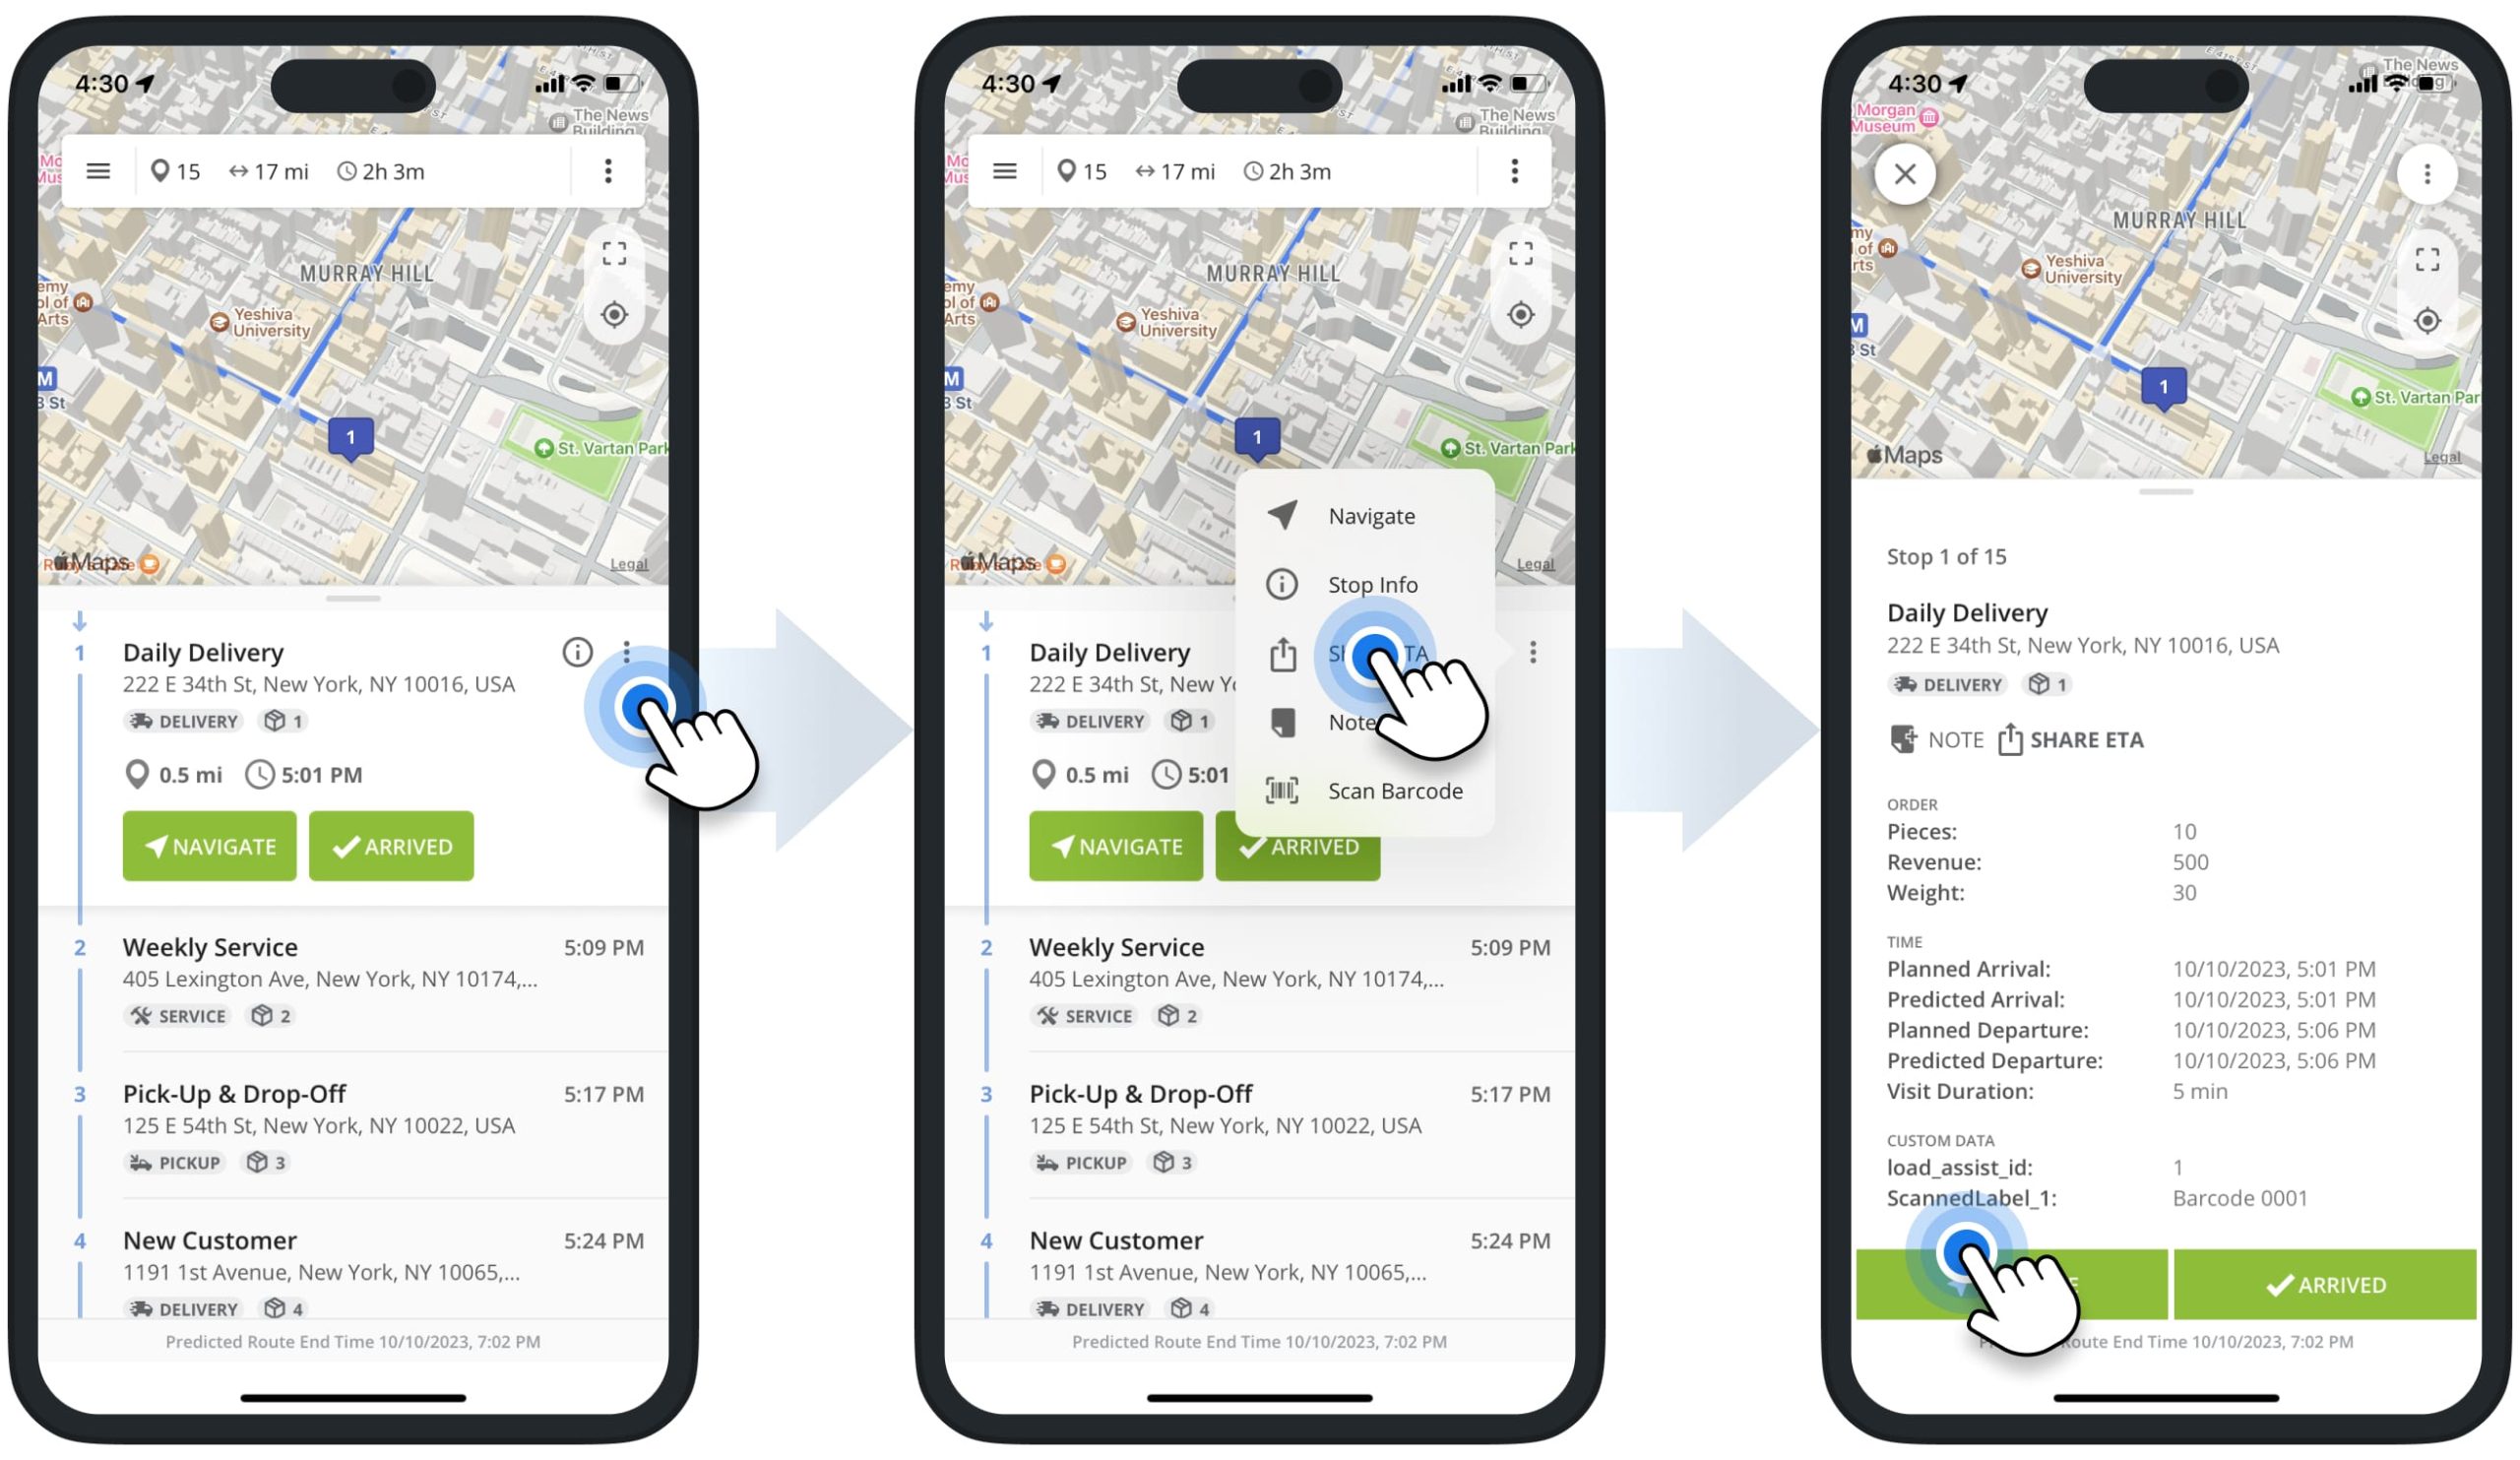
To check the label data attached to a route stop, tap the preferred stop on the opened route. Next, tap the Information Icon and then select “Stop Info” from the menu. After that, scroll to the “Custom Data” section, where all attached barcode data is labeled as “ScannedLabel” with the respective number. Additionally, learn more about Route4Me’s Custom Data Add-On.
Label Scanner Settings on iPhone and iPad Route Planner App
After launching the barcode scanner in your iPhone or iPad Route Planner app, you can switch on the flashlight by tapping the Flashlight Icon. Additionally, you can enable and disable the barcode scanner sound by tapping the Speaker Icon.
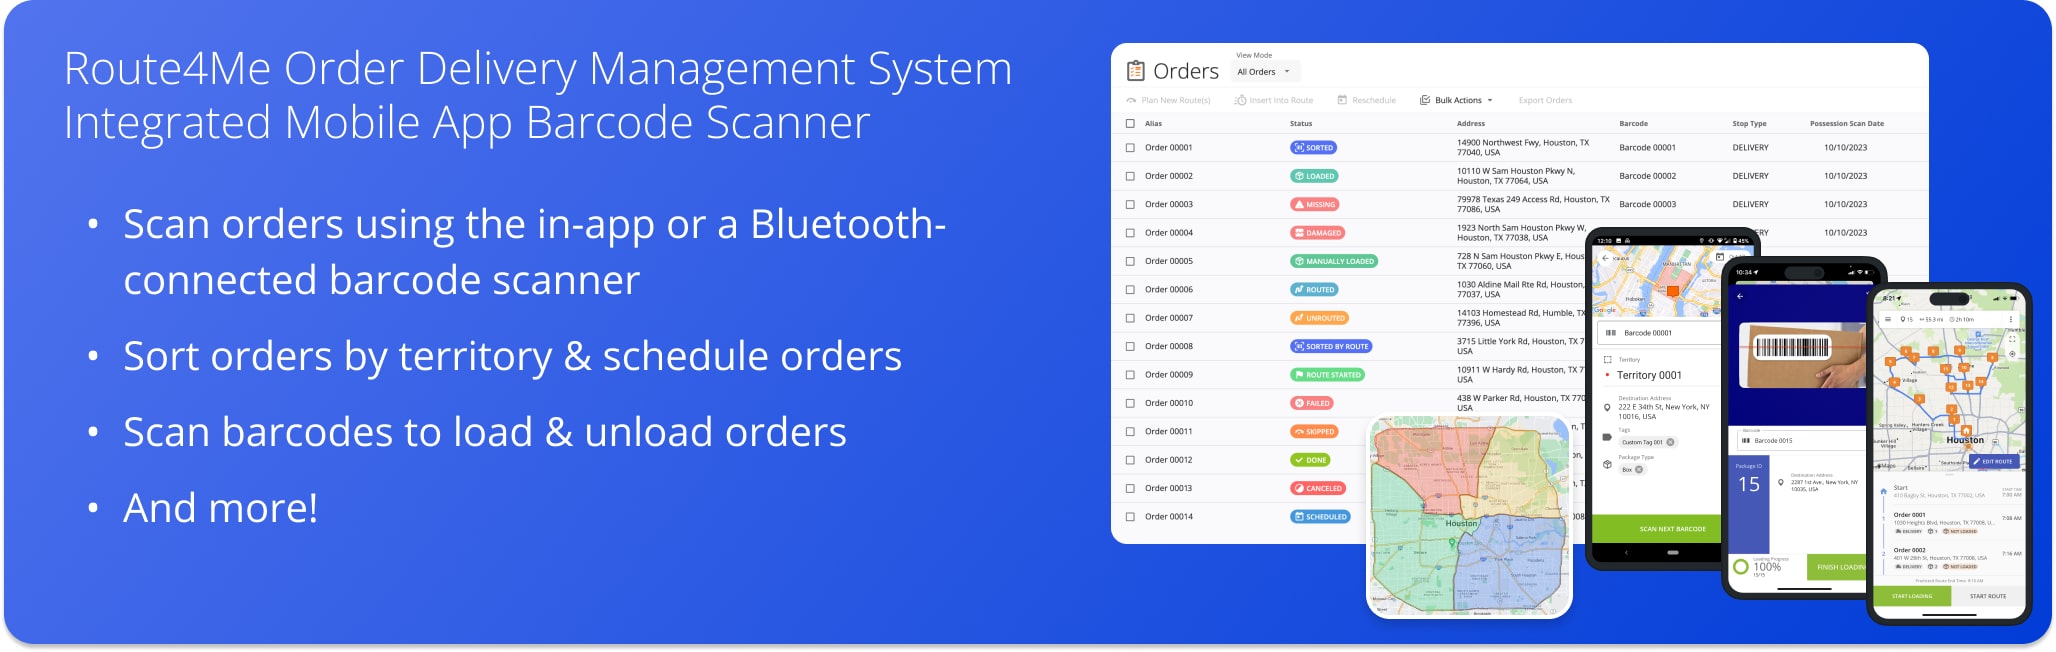
Order Delivery Management System and Mobile App Label Scanner
Route4Me’s Order Delivery Management System enables you to easily import, store, manage, and optimize routes with hundreds of thousands of customer orders. You can quickly and efficiently add, sort, and deliver orders by simply scanning a barcode from a package. For your convenience, Route4Me’s iOS and Android Mobile Route Planner apps feature an integrated barcode scanner that also supports connectivity with various commercial Bluetooth barcode scanners.
Additionally, learn more about the Inbound Scan, Sorted, Loaded and Unloaded, and other Scanning Types. To use Route4Me’s Order Delivery Management System, please Contact Route4Me’s Support Team.
Supported Barcodes and Scanning Speed on iOS Route Planner App
With Route4Me’s iOS Mobile Route Optimization app, you can easily scan barcodes from box labels, e-ink labels, digital labels, and other surfaces. Furthermore, the barcode scanner can easily detect and capture data from almost all barcode types available on the market. Below, you can find the list of the supported barcode types and the average scanning speed of Route4Me’s barcode scanner compared to most third-party scanners and route planner apps.
| Route4Me Supported Barcodes | Route4Me Scanning Speed | Third-Party Routing Apps Scanning Speed |
|---|---|---|
| Aztec Code | under 1 second | 2 to 5 seconds |
| Codabar | under 1 second | 2 to 5 seconds |
| Code 128 | under 1 second | 2 to 5 seconds |
| Code 39 | under 1 second | 2 to 5 seconds |
| Code 39 mod 43 | under 1 second | 2 to 5 seconds |
| Code 93 | under 1 second | 2 to 5 seconds |
| EAN-8 | under 1 second | 2 to 5 seconds |
| EAN-13 | under 1 second | 2 to 5 seconds |
| DataMatrix | under 1 second | 2 to 5 seconds |
| GS1 DataBar | under 1 second | 2 to 5 seconds |
| GS1 DataBar Expanded | under 1 second | 2 to 5 seconds |
| GS1 DataBar Limited | under 1 second | 2 to 5 seconds |
| ITF Code | under 1 second | 2 to 5 seconds |
| ITF14 | under 1 second | 2 to 5 seconds |
| Micro PDF417 | under 1 second | 2 to 5 seconds |
| Micro QR | under 1 second | 2 to 5 seconds |
| PDF417 | under 1 second | 2 to 5 seconds |
| QR Code | under 1 second | 2 to 5 seconds |
| UPC-E | under 1 second | 2 to 5 seconds |
NOTE: Your barcode scanning speed may vary depending on the make, model, and camera quality of your device, barcode quality, and other hardware and software parameters.
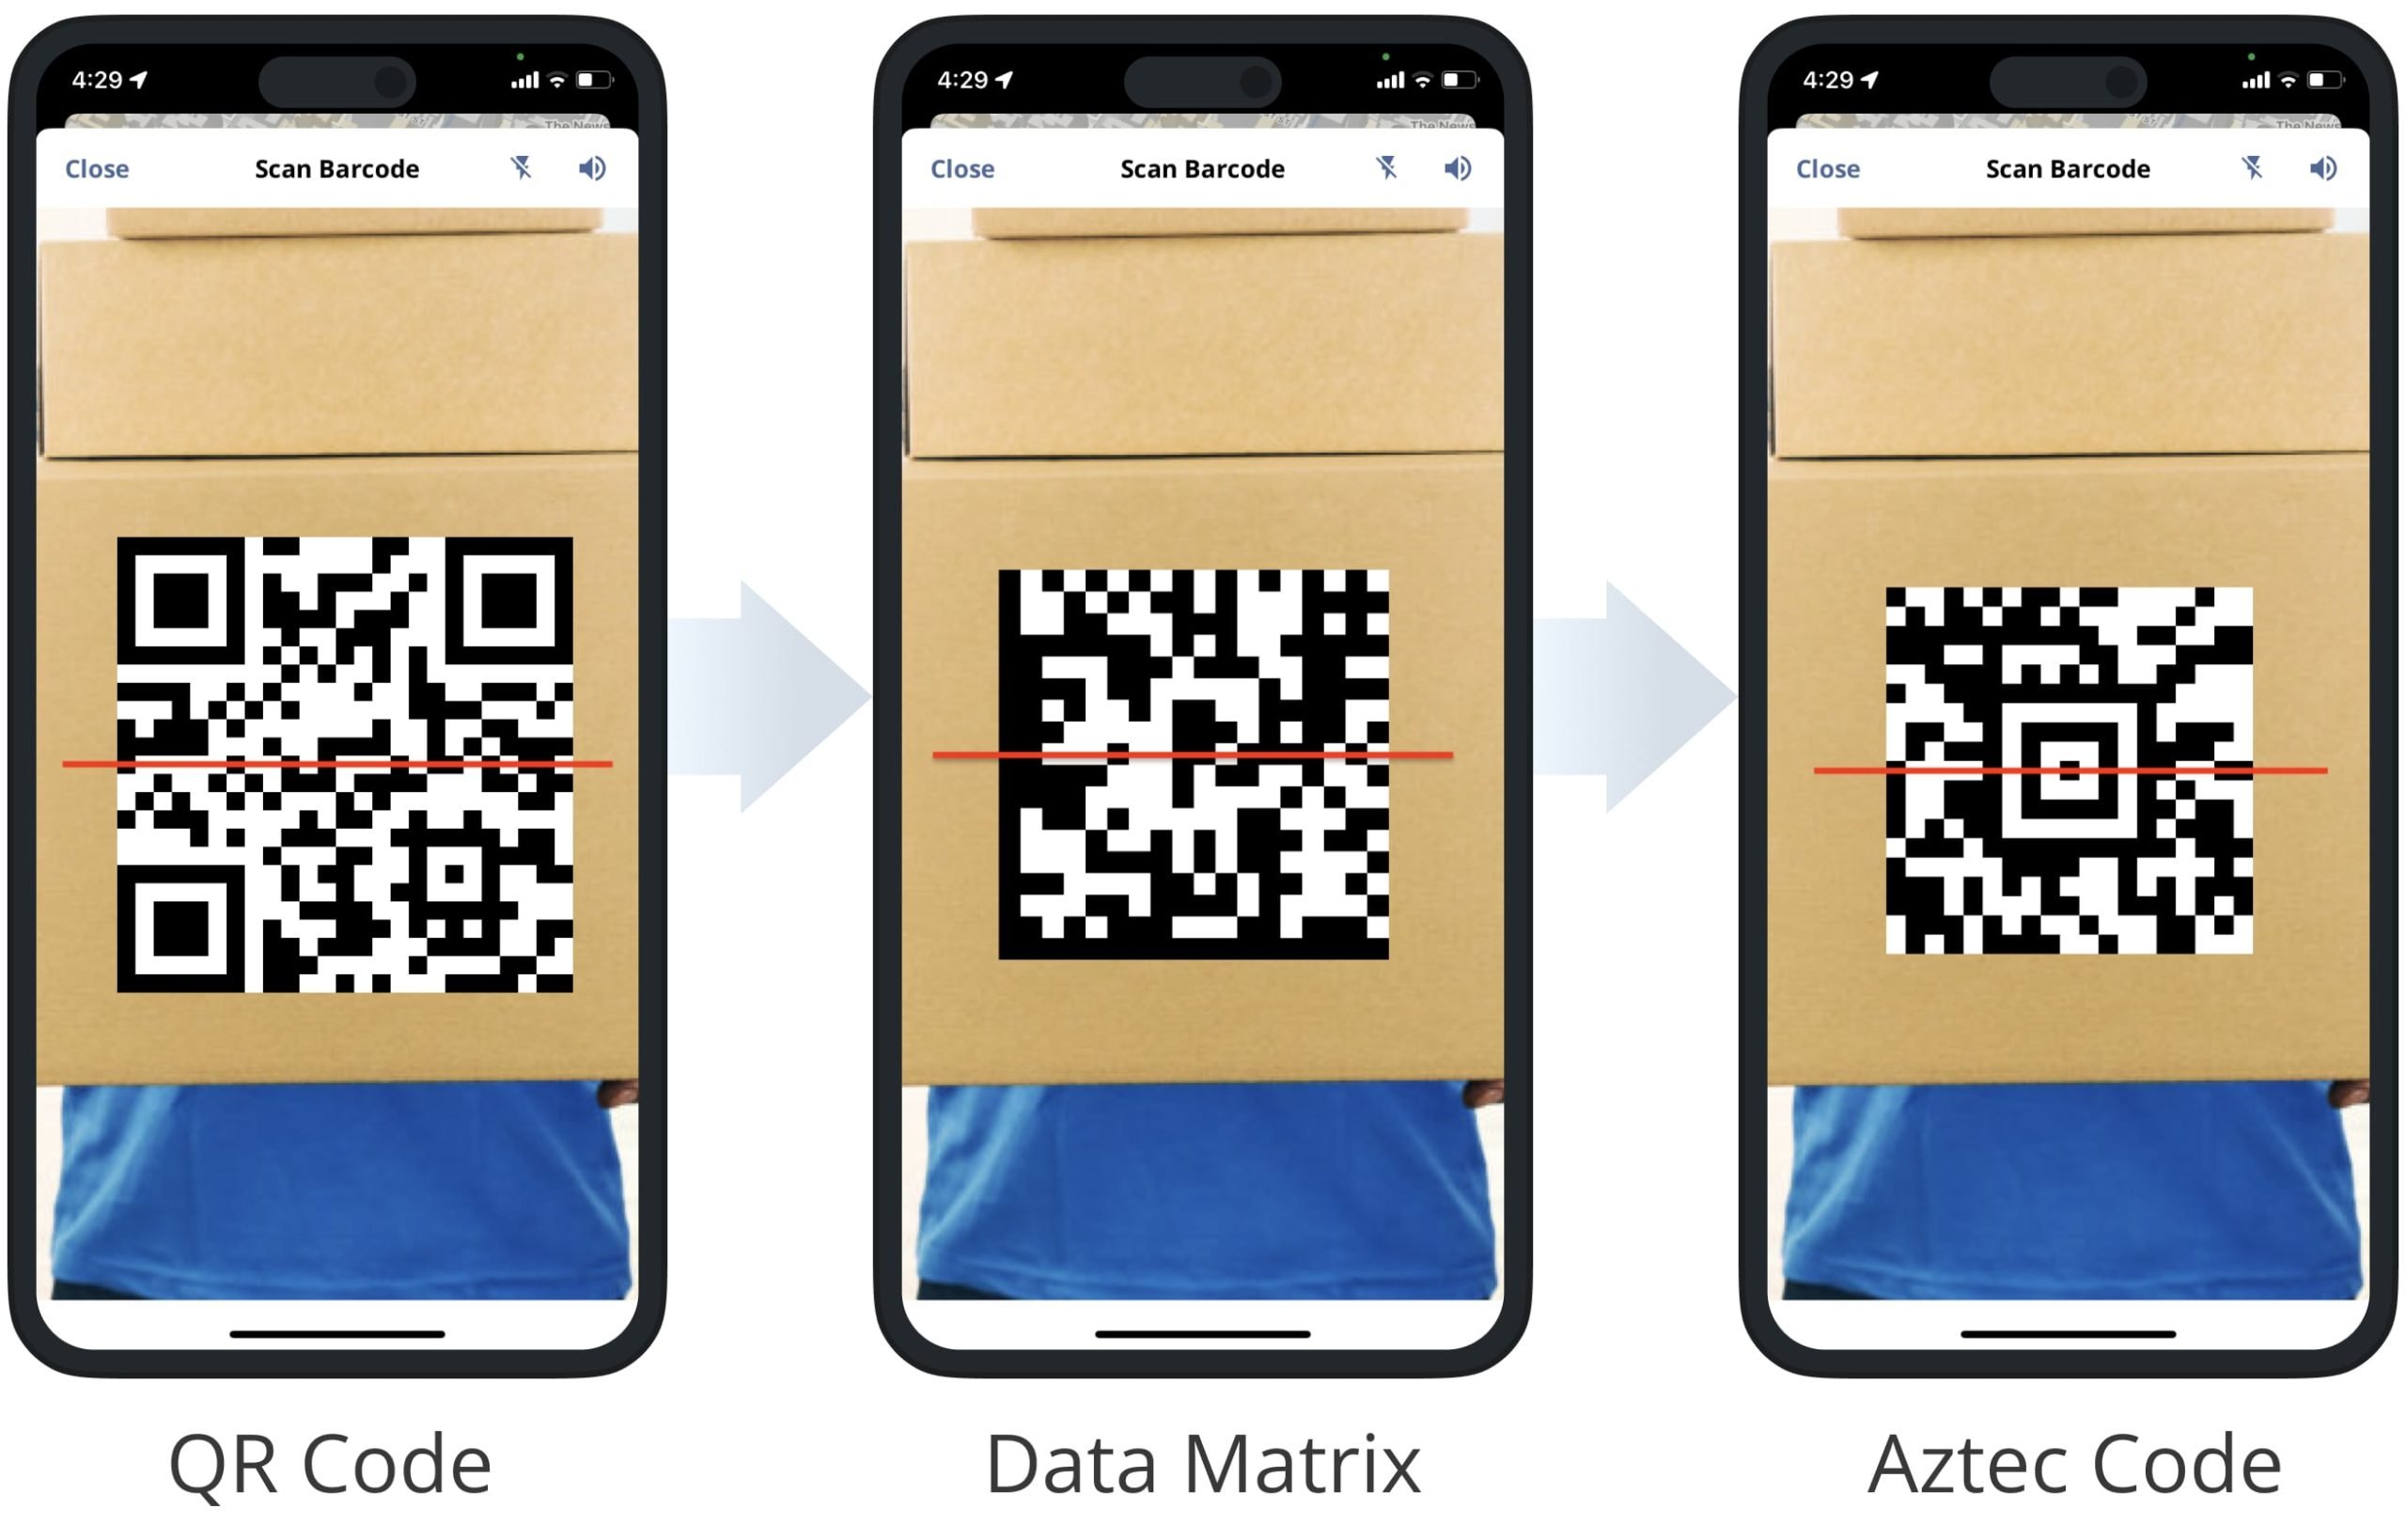
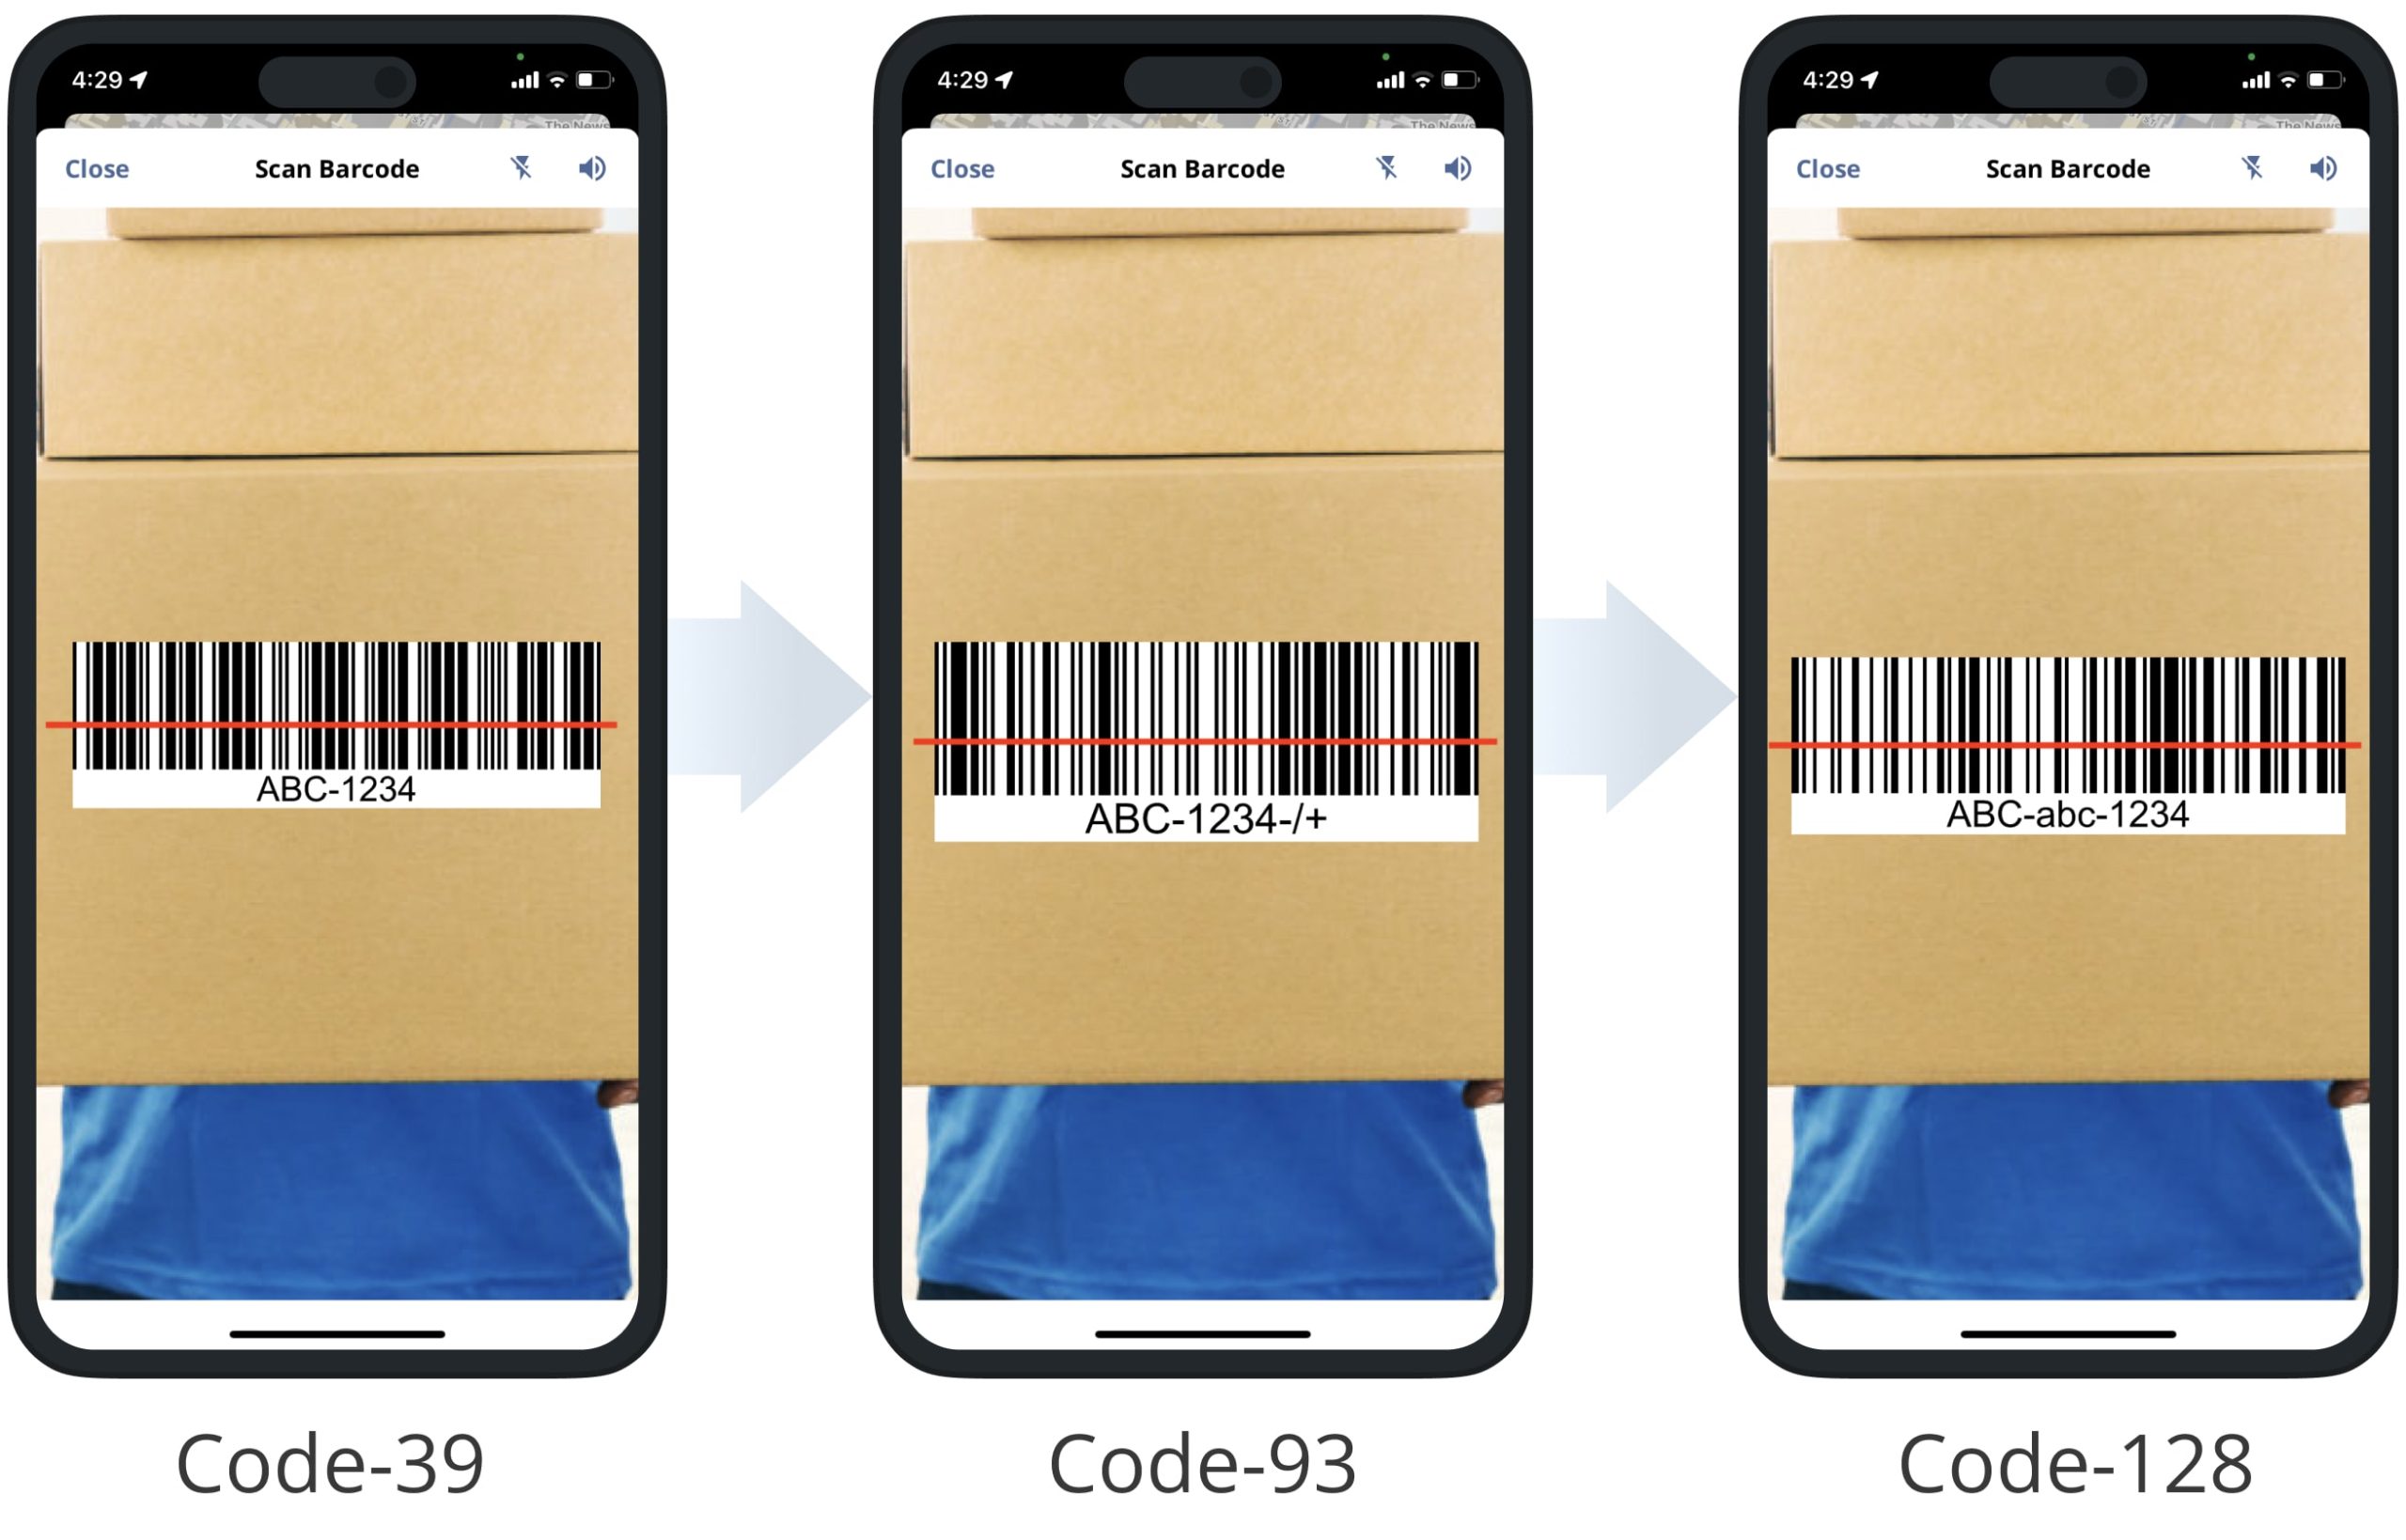
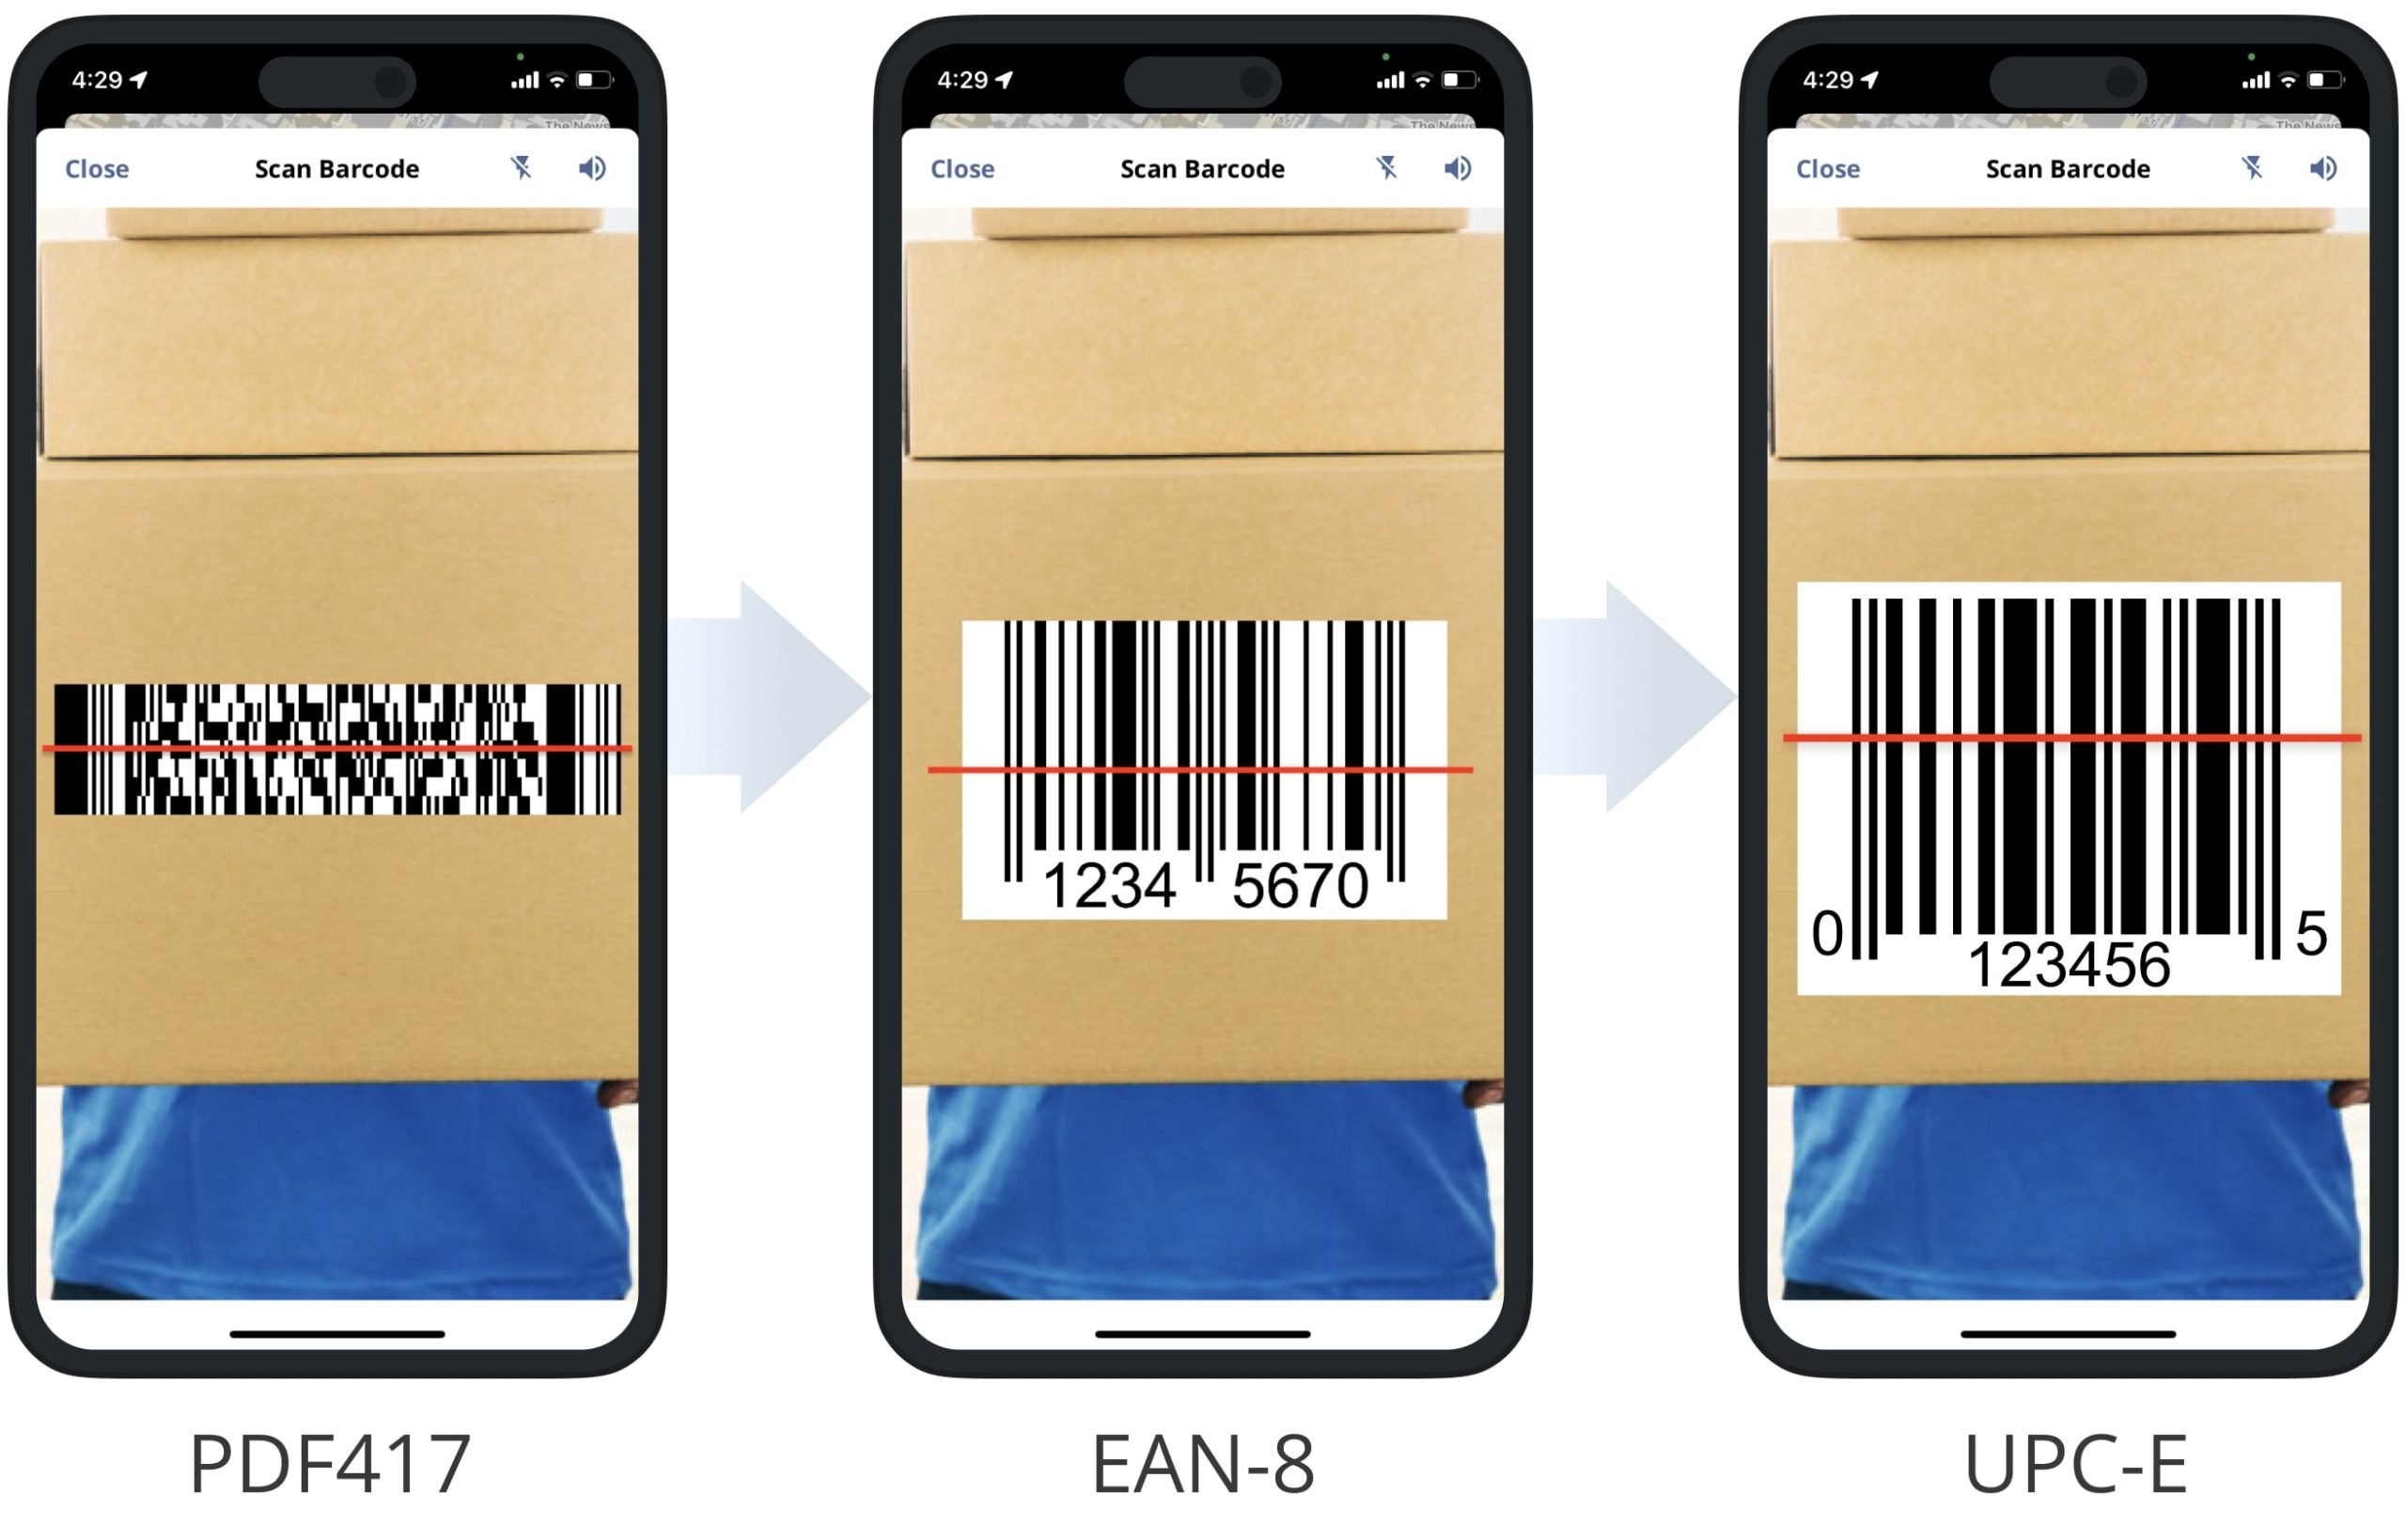
Below, you can find samples of some of the barcode types supported by Route4Me’s in-app barcode scanner.
Specifically, QR Codes, Data Matrix codes, and Aztec Code are some of the supported barcode types.
Additionally, Route4Me’s integrated barcode scanner supports Code-39, Code-93, and Code-128 barcodes.
Furthermore, you can also scan PDF417, EAN-8, UPC-A barcodes, and more with Route4Me’s in-app barcode scanner.
Visit Route4Me's Marketplace to Check out Associated Modules:
- Operations
Custom Data Add-On
- Operations
Advanced Team Management Add-On
About author: Alex Yasko
Alex Yasko is the Go-to-Market Product Manager and Information Architecture Manager at Route4Me. With thousands of hours of experience, Alex specializes in breaking down complex last-mile optimization and routing scenarios into simple, actionable instructions, helping last-mile businesses streamline their operations effortlessly.