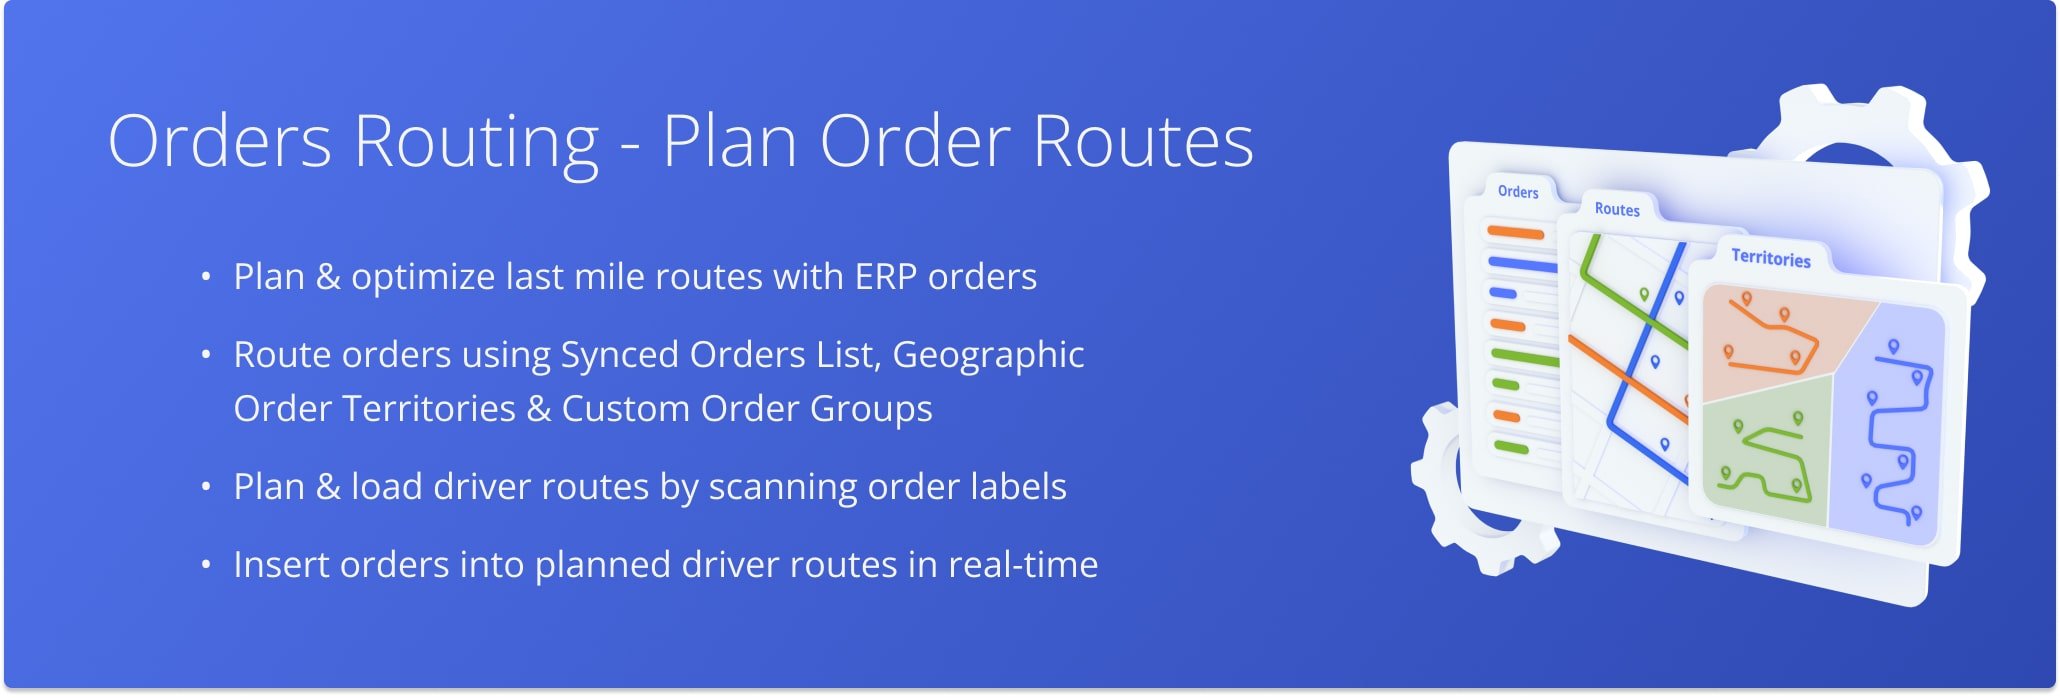
Order Routing – Plan Routes With Orders List, Order Territories, Order Groups And App Scanner
Route4Me’s ERP Order Management System lets you import orders from CRMs and other systems, then manage, plan, and optimize routes with millions of customer orders. You can create routes directly from the Orders List, use Order Territories to avoid overlap, and group orders by attributes using Order Groups. The system also allows you to filter and sort orders to plan separate or combined routes, including those based on geography or grouping. Additionally, you can scan barcodes to plan routes or use the Orders Map for visual planning. This guide covers all these options to help you streamline order route planning.
NOTE: Depending on your account configurations, available features may vary. To enable or disable specific features, please contact your Routing Expert or Route4Me’s Support Team.
Table of Contents
Orders List Routing – Plan New Routes And Insert Orders Into Planned Routes
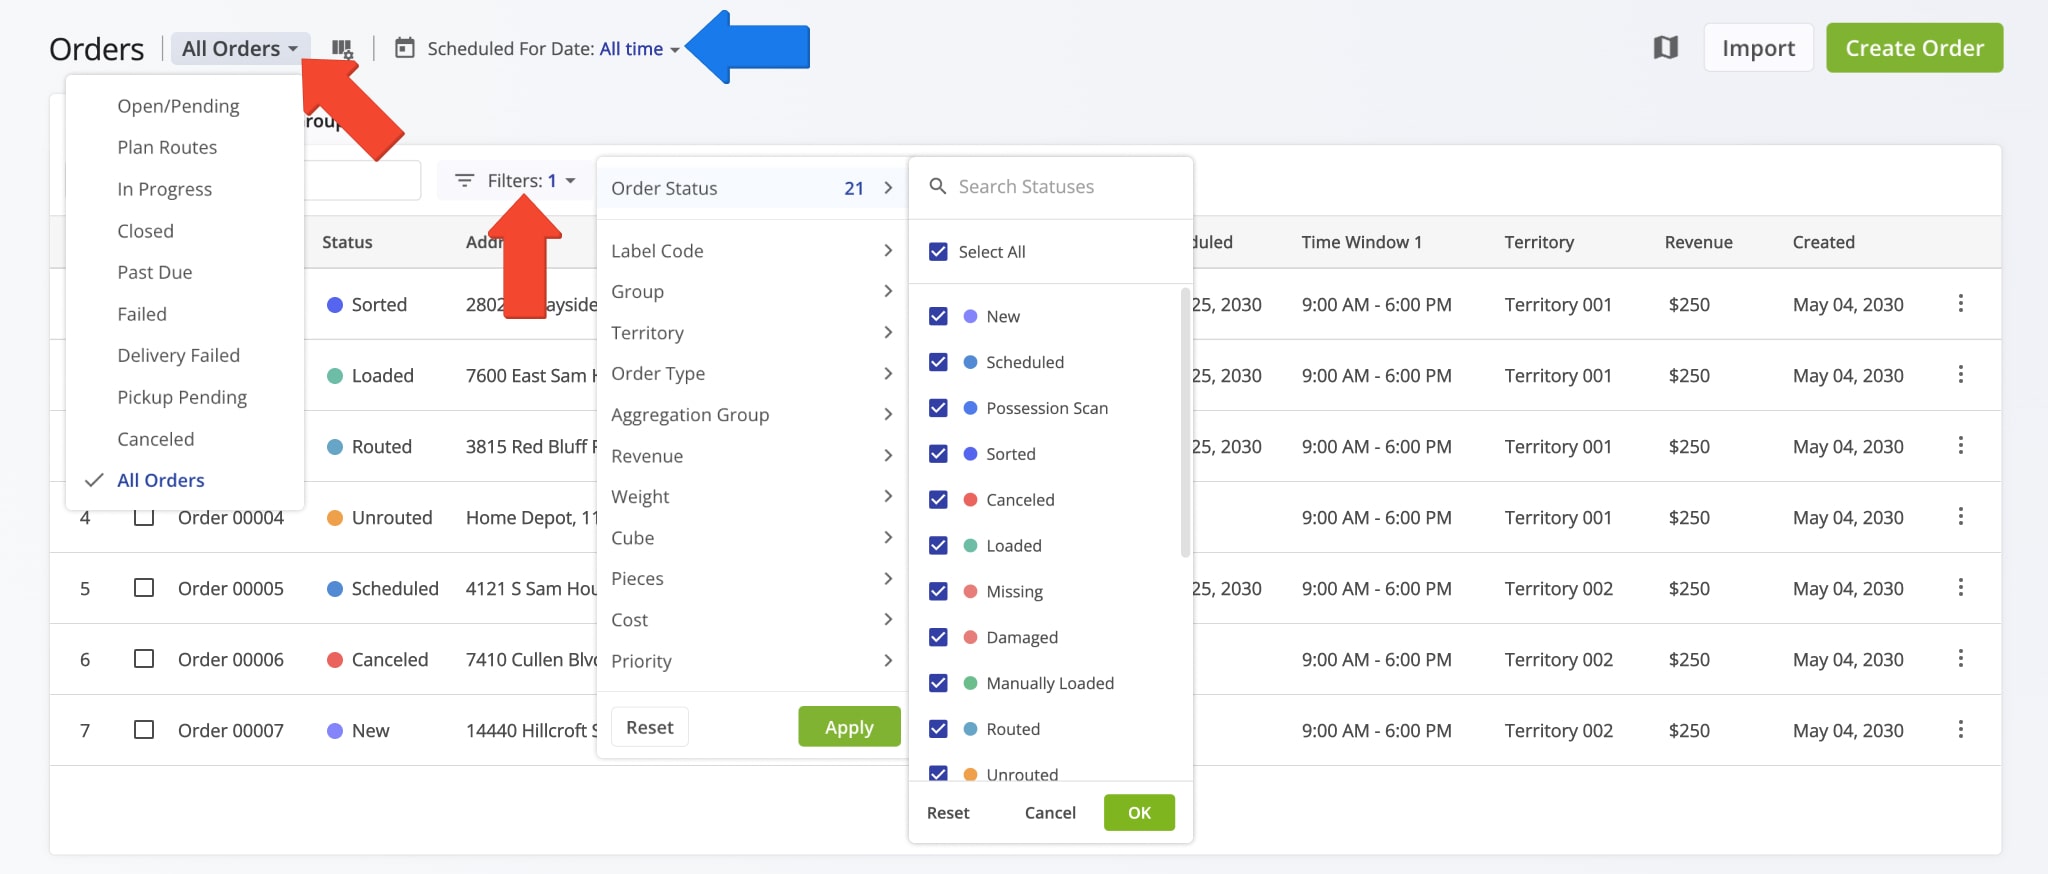
After you add and import orders, then sort and schedule them, you can filter them to plan routes more efficiently. Route4Me’s detailed filters let you filter millions of orders by attributes like “Scheduled For Date” and Order Status.
To access your Orders List, click “Business Operations” > “Orders” in the Navigation Menu. Then, use View Modes to group orders by purpose. For example, the “Plan Routes” mode shows Sorted and Scheduled orders ready for routing.
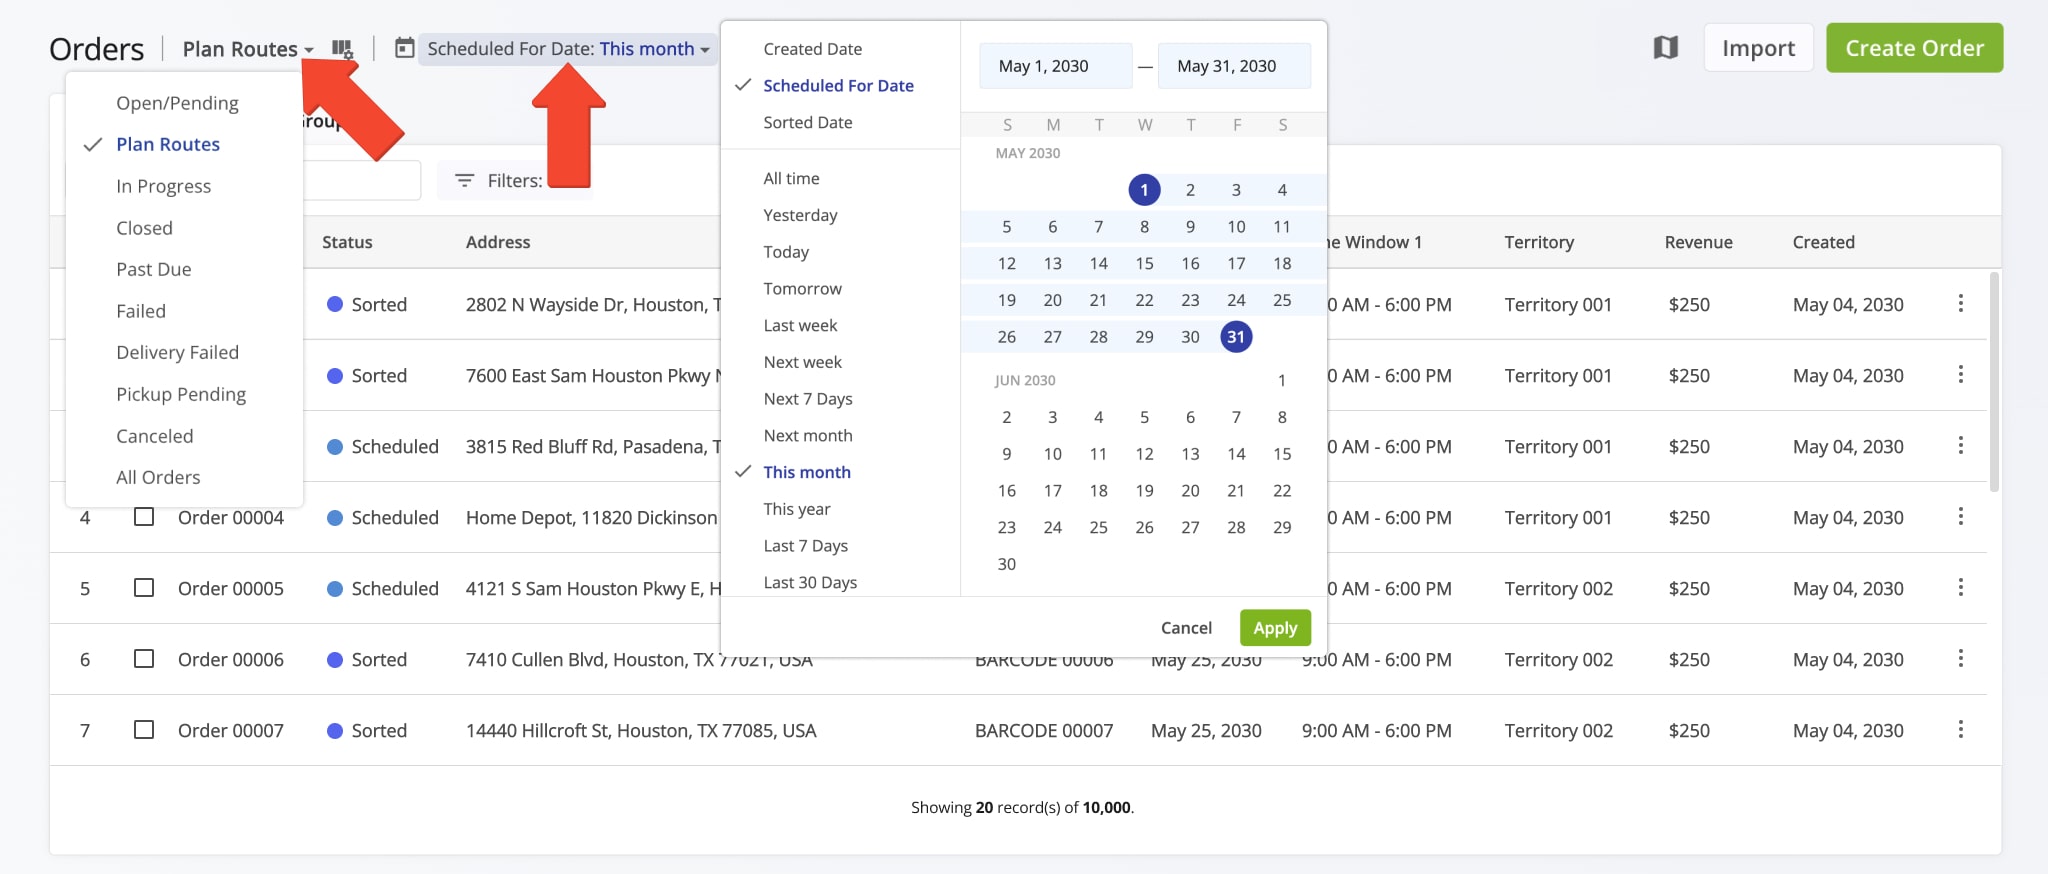
To plan routes with orders from the Orders List, they must have the “Scheduled” or “Sorted” status. First, filter orders by date by selecting the preferred date or date range in the “Scheduled For Date” field. Then, select the “Plan Routes” View Mode.
Then, click “Filters” and filter orders by the “Scheduled” and “Sorted” order statuses and any other preferred filters.
NOTE: Each View Mode shows specific order statuses. The “Plan Routes” mode shows only “Scheduled” and “Sorted” orders, as only these can be used for route planning. Learn more about the supported statuses for each View Mode later in this guide.

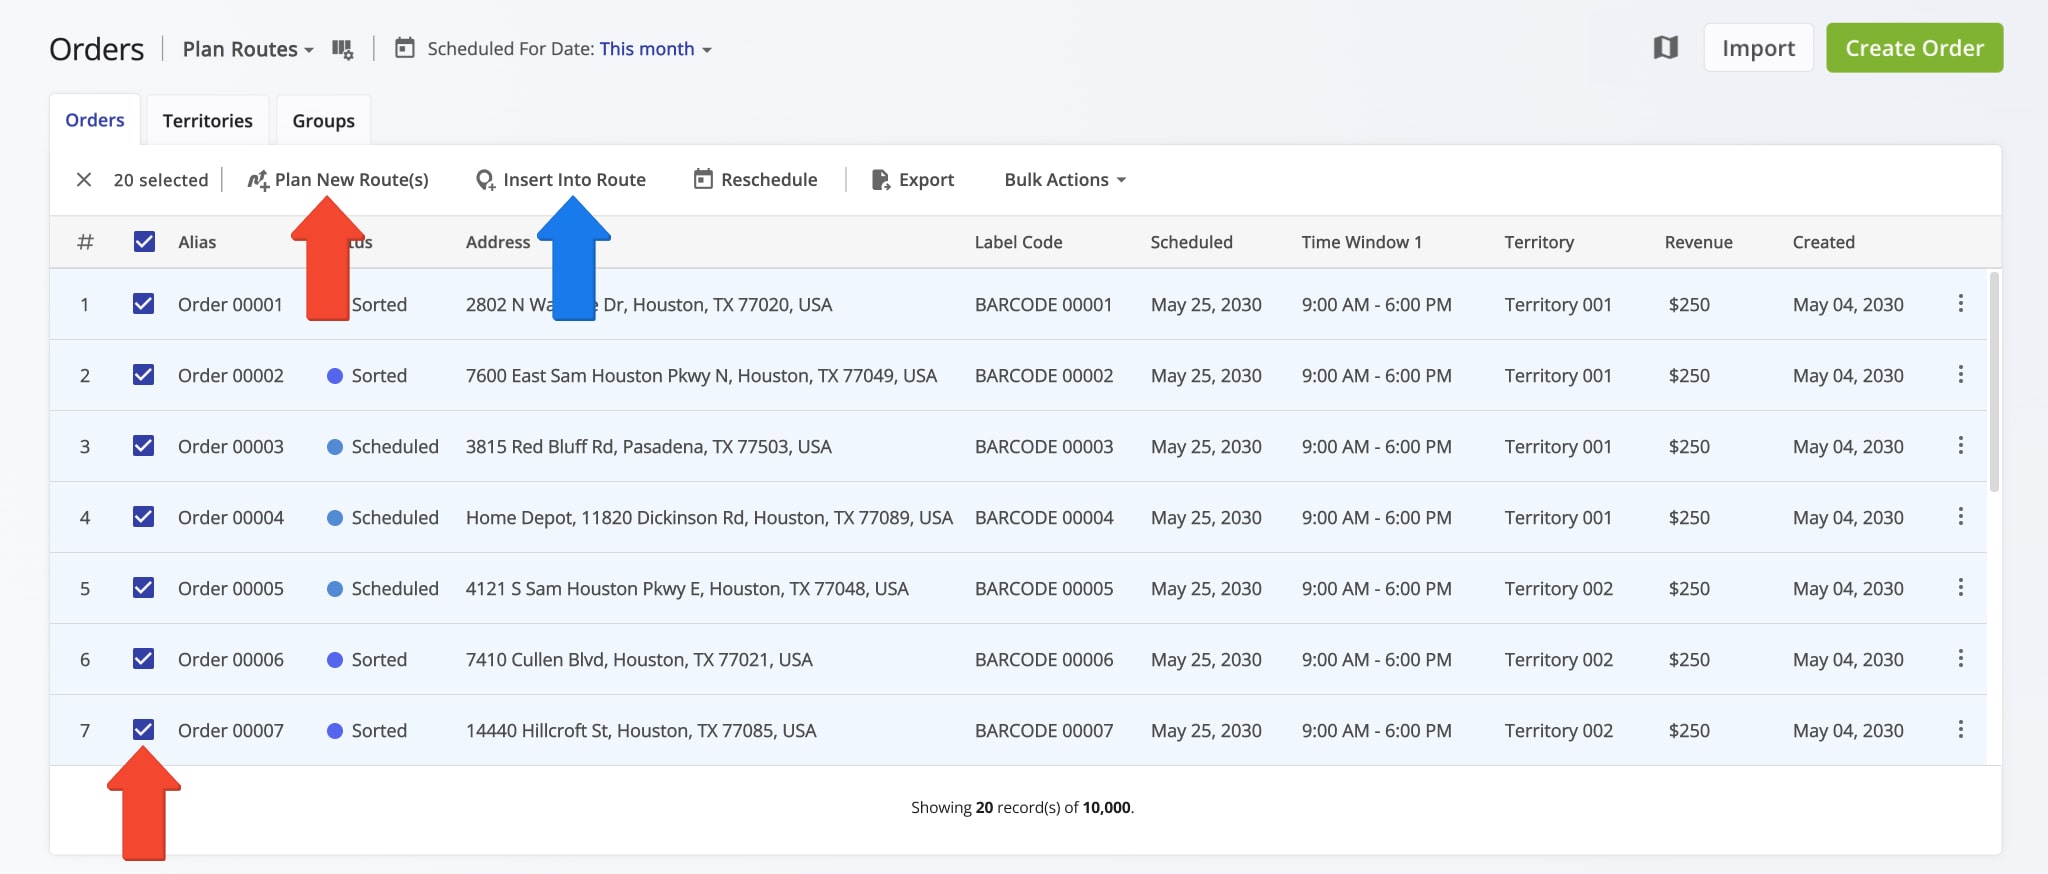
Next, select the orders you want to route by checking the boxes next to them, or select all filtered orders using the top check box. Then, click “Plan New Route(s)” to plan a route with the selected orders.
You can also insert orders into already planned routes if, for example, an order was rescheduled or missed. “Scheduled“, “Sorted“, “Missing“, or “Unrouted” statuses can be inserted by selecting them and clicking “Insert Into Route“.
NOTE: Learn more about planning routes from the Orders List.
Orders Map Routing – Plan Order Routes On Interactive Orders Map
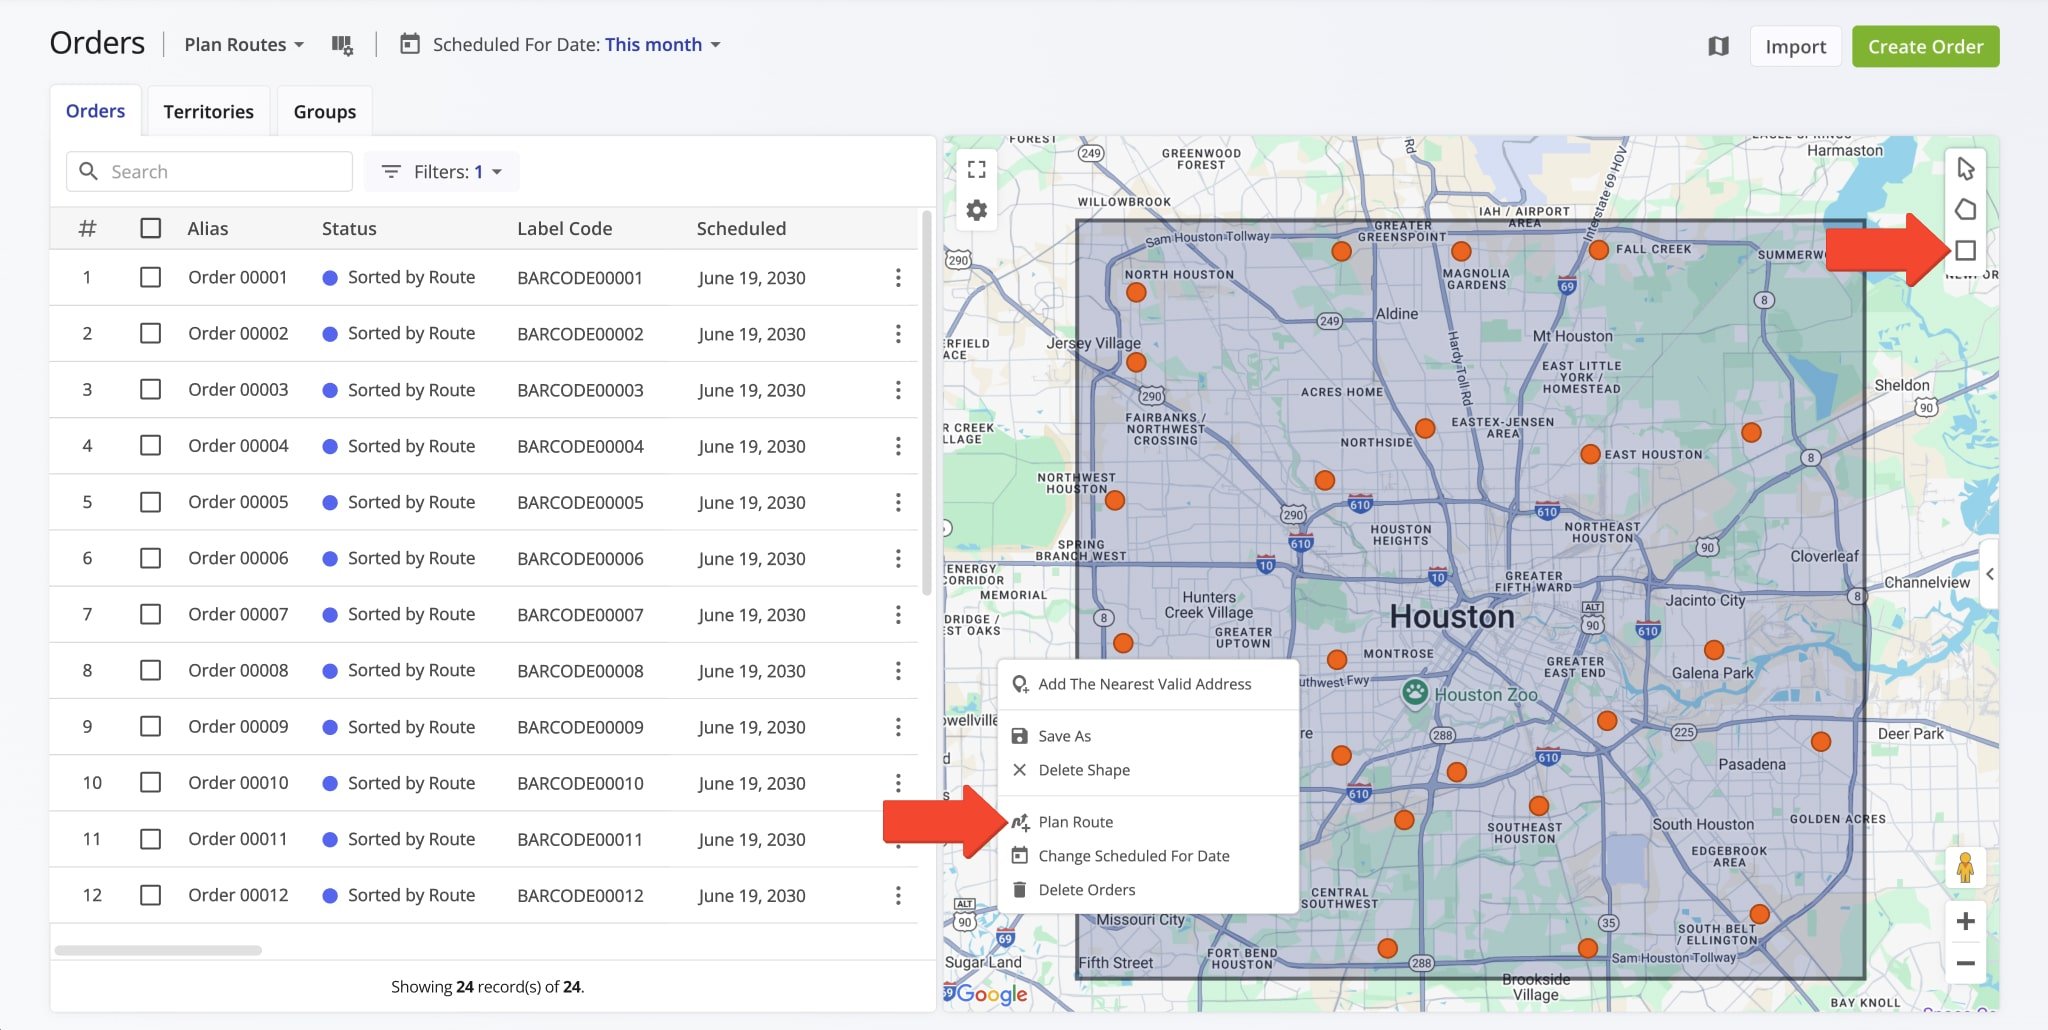
The interactive Orders Map helps you easily plan order routes by drawing shapes around orders on the map. Click the Polygon or Rectangle button, or right-click anywhere on the map to choose a shape tool.
Then, draw a shape around the orders you want to include in a route. Right-click the shape and select “Plan Route”. Route4Me will open the Route Planning screen and automatically import the selected orders into a new route.
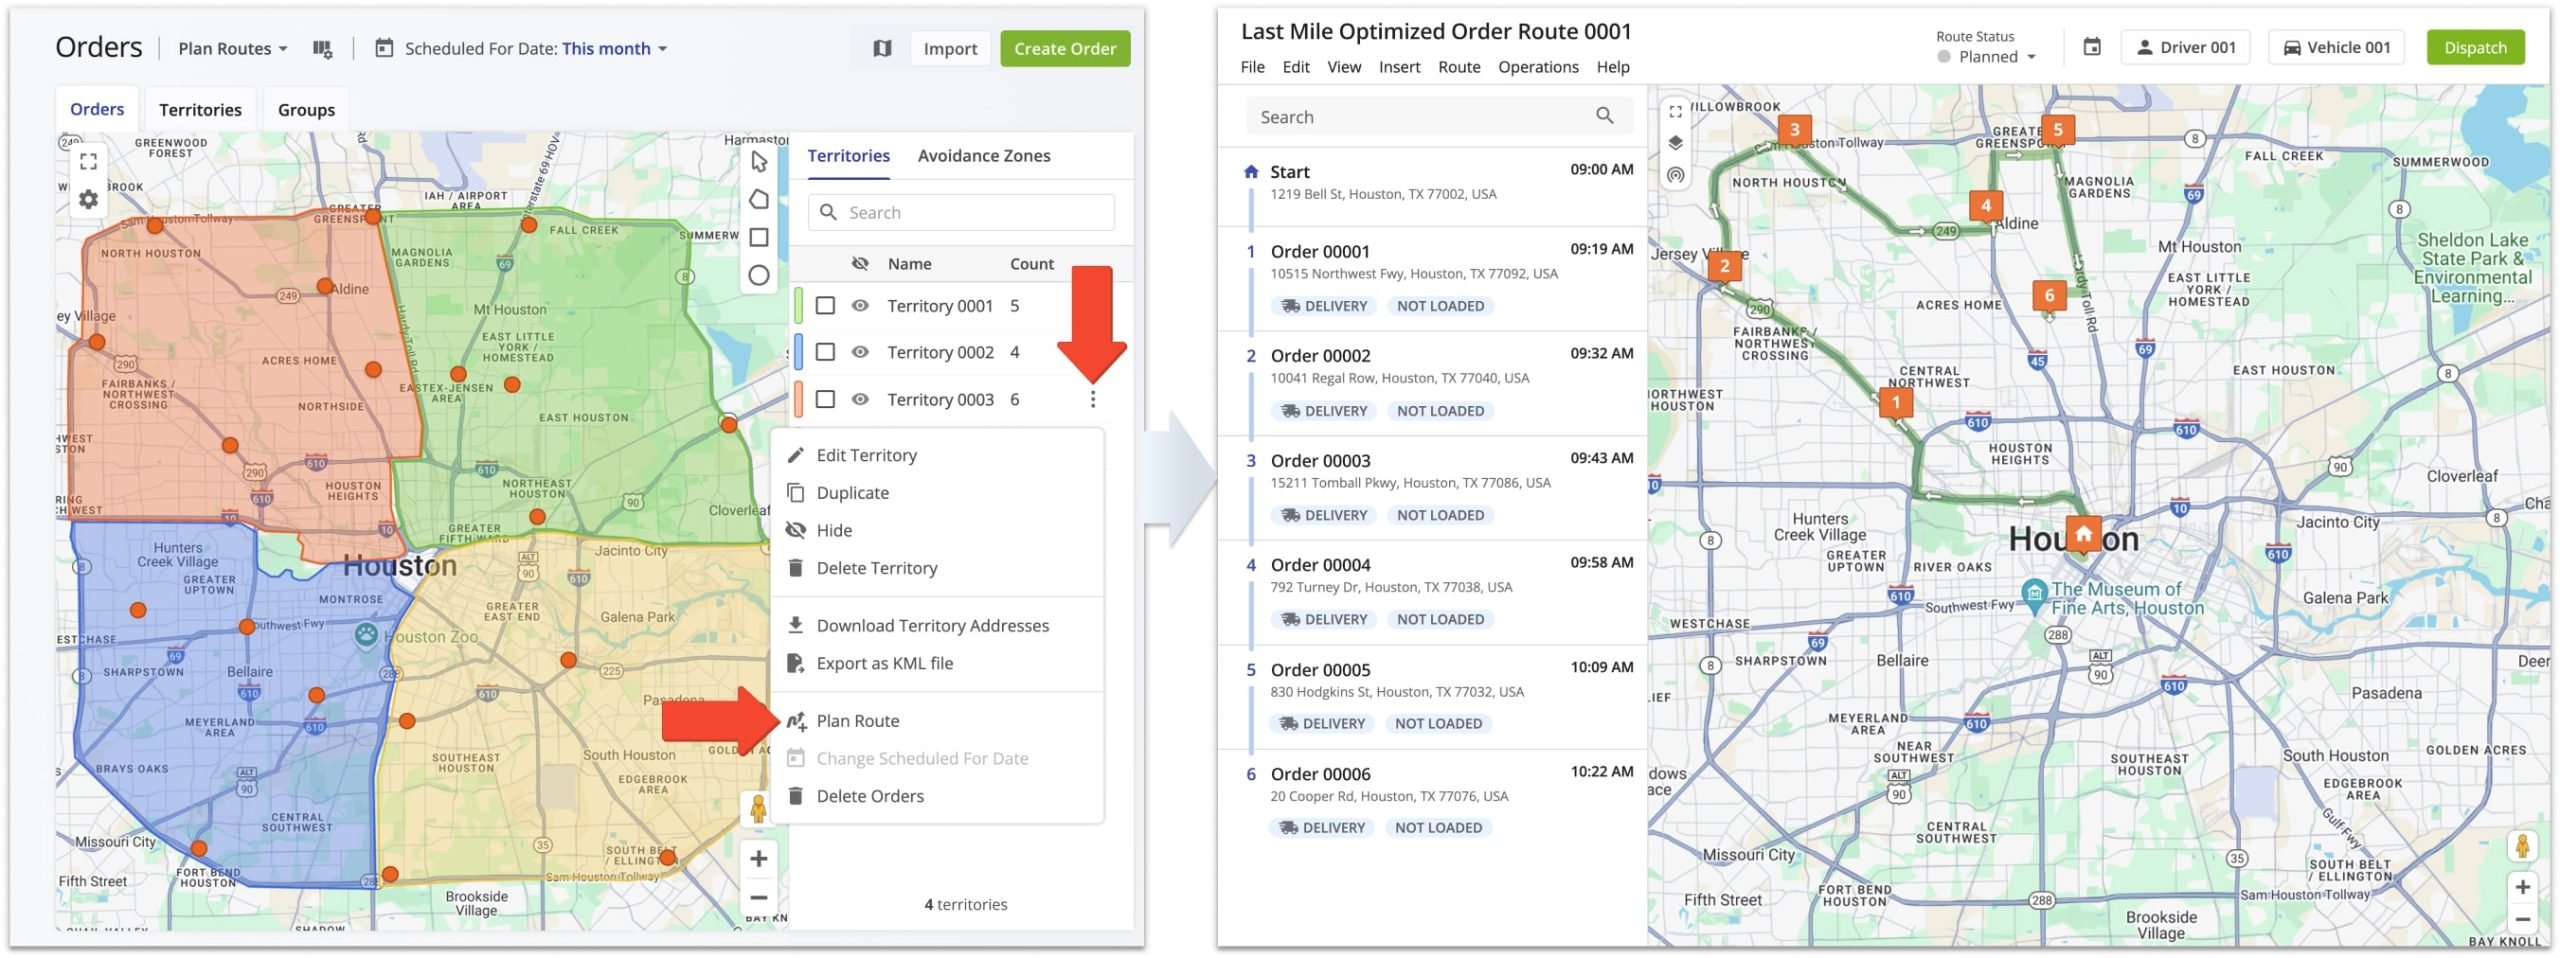
Plan Routes With Territories On The Orders Map
You can create and route Order Territories on the Orders Map directly on the Orders Map. To plan a route, click the Three-dot Icon next to a Territory and select “Plan Route“.
Route4Me will import the selected orders into a new route, then open it in the Route Editor. You can also plan separate routes for multiple territories or combine multiple territories into one route via the Orders Map.
Order Territories Routing – Plan Routes With Orders In Geographical Territories
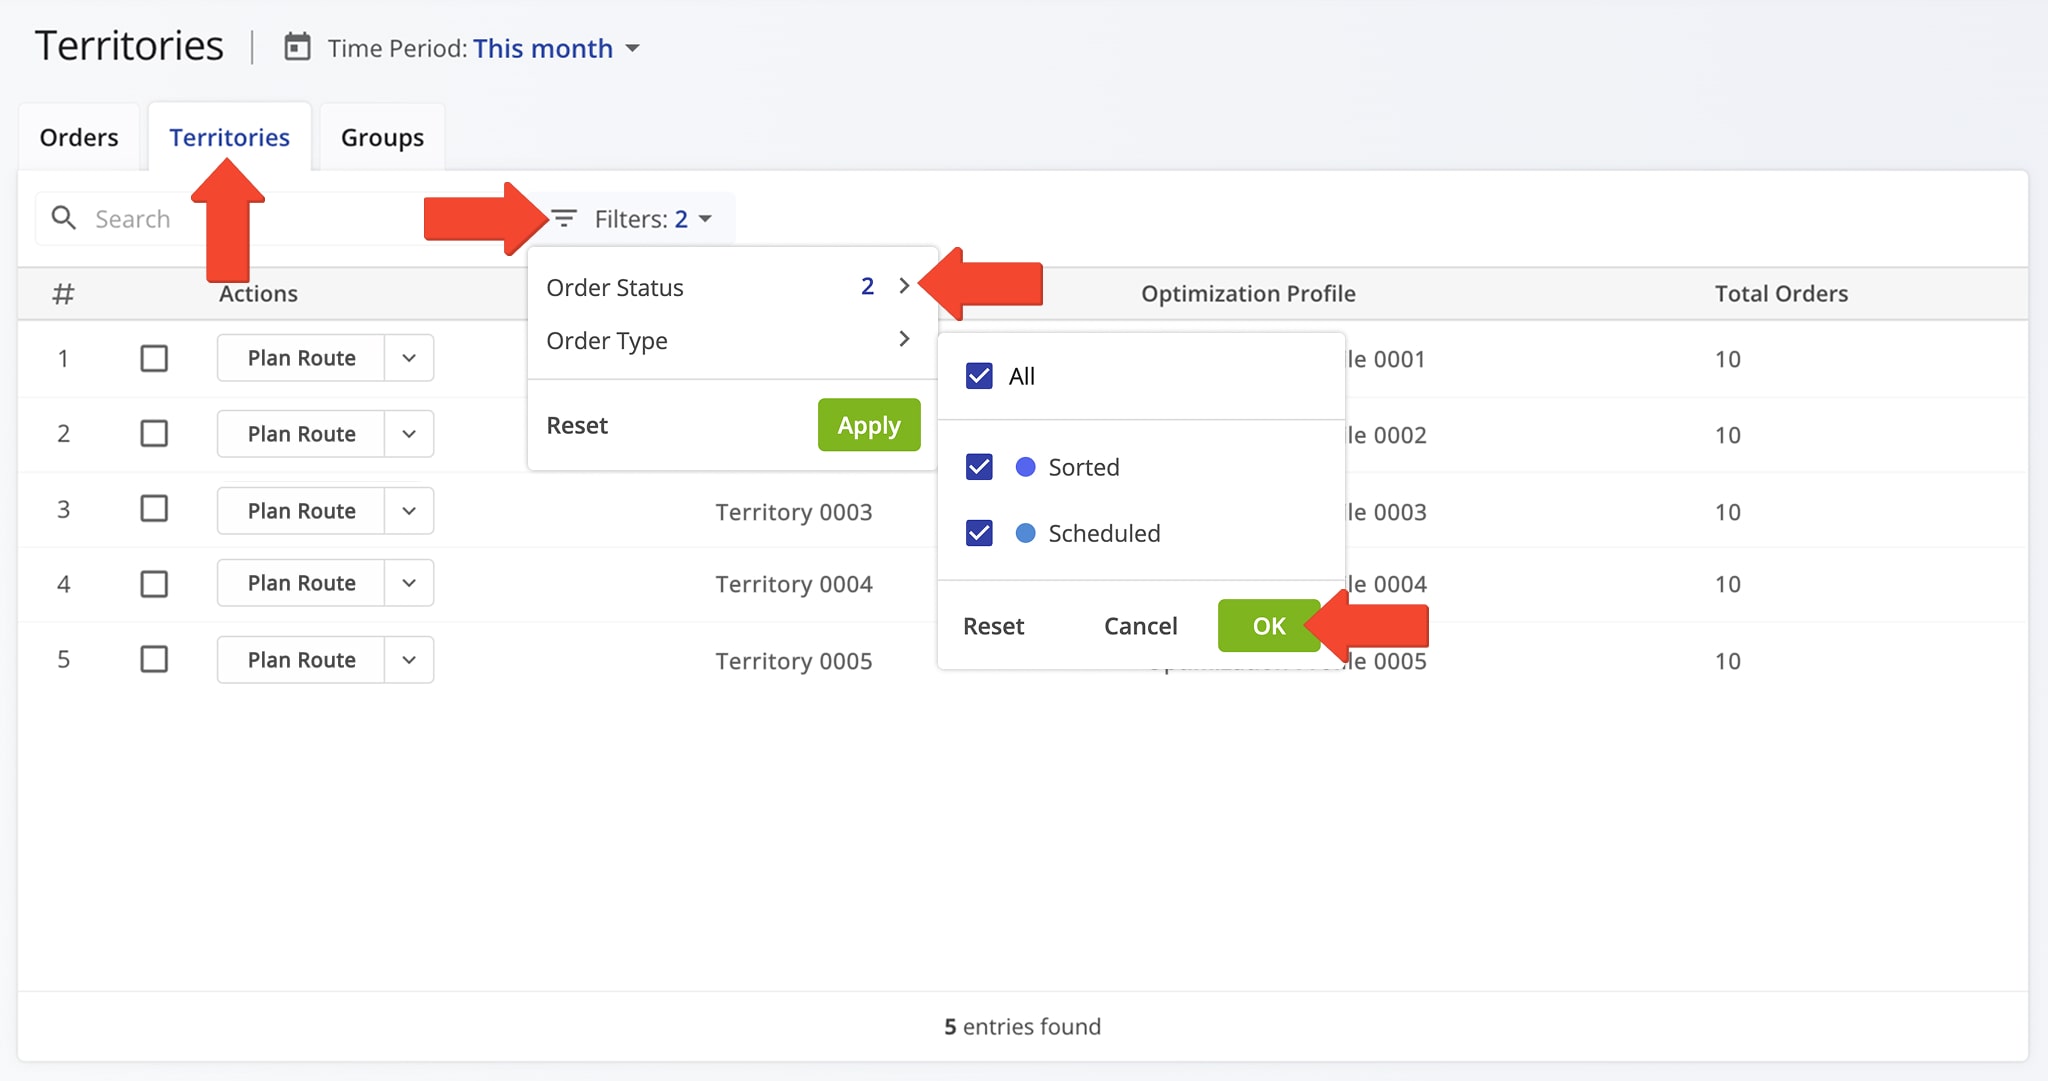
To plan routes with Order Territories, click the “Territories” tab to the right of the “Orders” tab. Use the “Time Period” field to filter by date, then click “Filters” to sort by “Order Status“ and “Order Type”.
Only orders with “Sorted” or “Scheduled” status can be used for route planning. After filtering, the “Total Orders” column will show how many orders in each Territory match your filters.
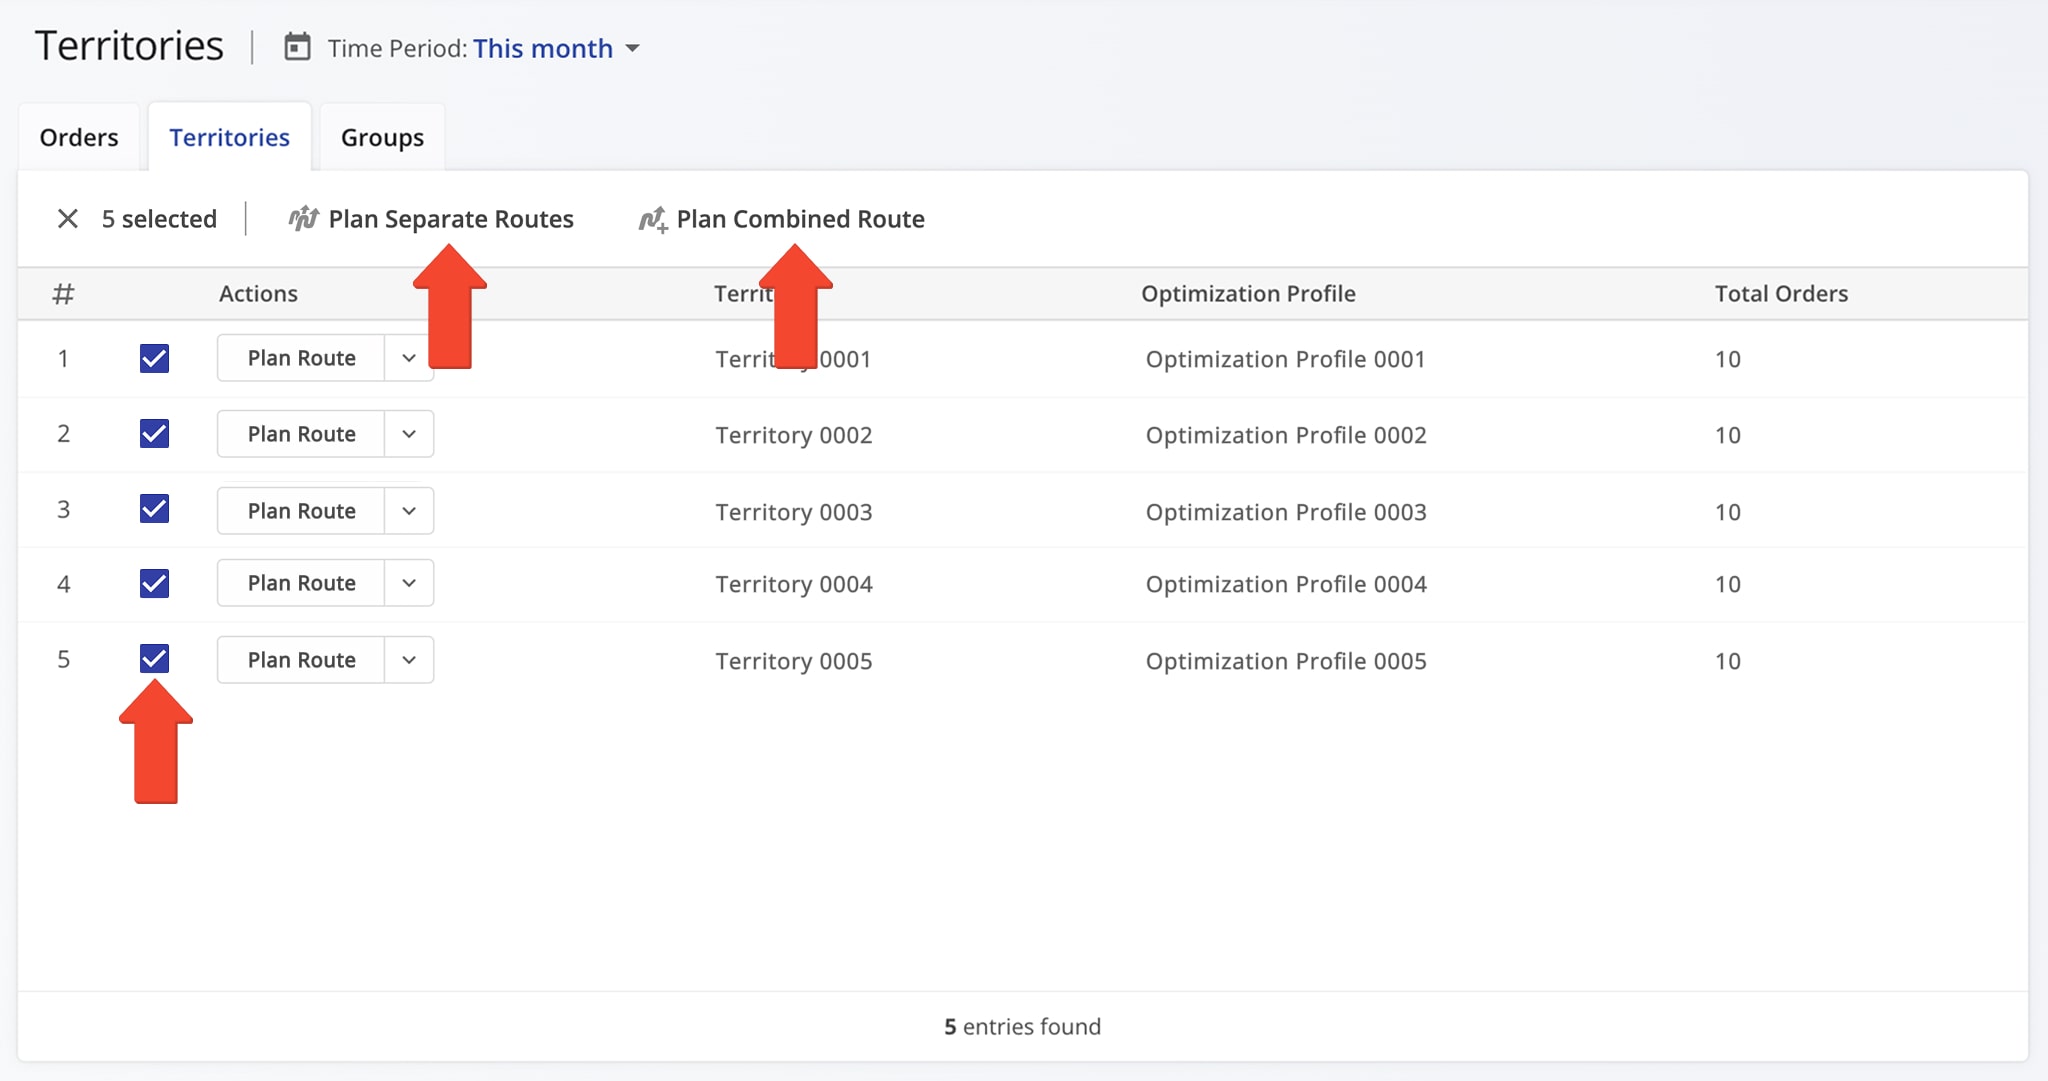
Next, select one or multiple Territories by checking the boxes beside them, then choose a routing option:
- Plan Combined Route: Plan a single route with all orders from the selected Territories.
- Plan Separate Routes: Plan separate routes with orders from each individual Territory without overlapping other Territories.
NOTE: Learn more about creating custom geographical Territories and planning routes using Order Territories.
Order Groups Routing – Plan And Optimize Routes With Order Groups
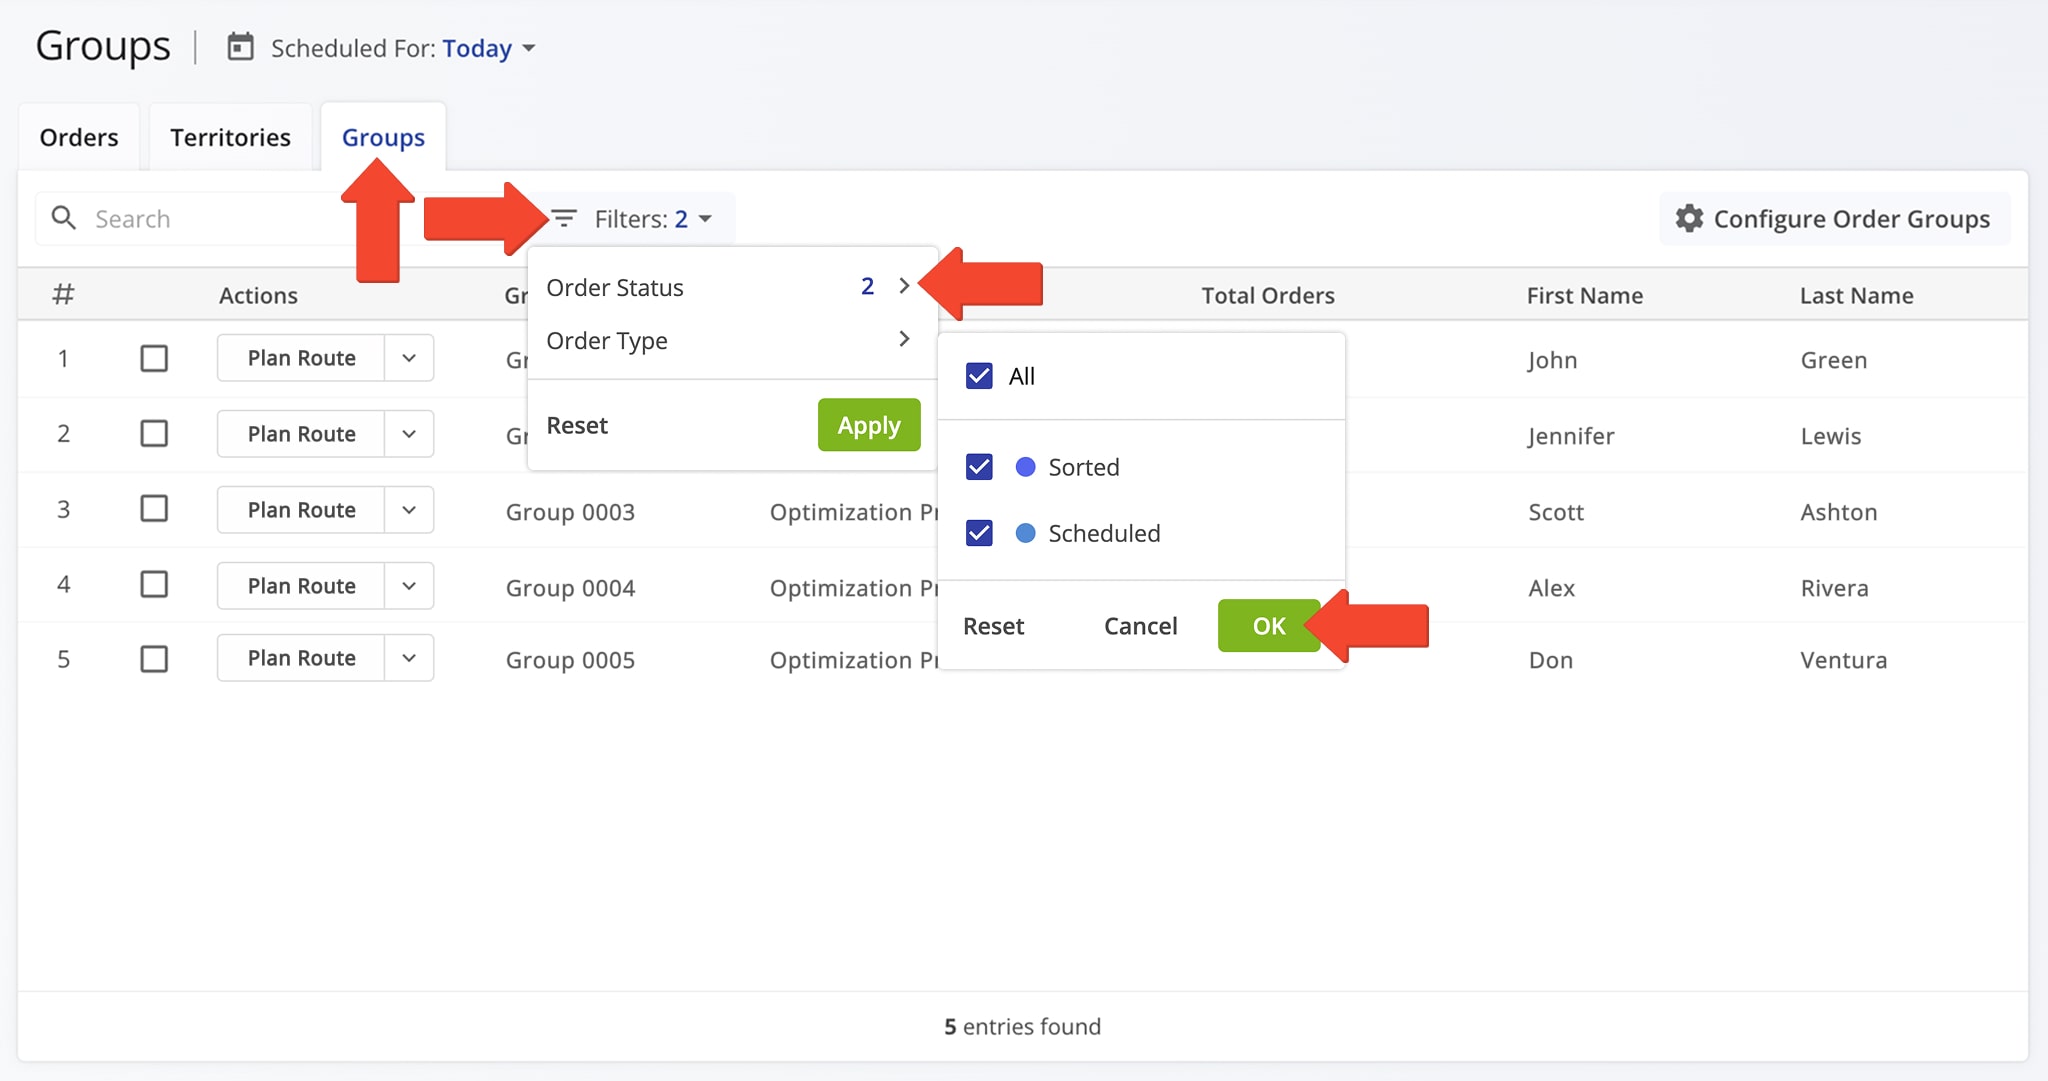
To plan routes with Order Groups, click the “Group” tab to the right of the “Territories” tab. Filter dates using the the “Scheduled For” field, then click “Filters” to sort by “Order Status“ and “Order Type”.
Only “Sorted” and “Scheduled” orders can be used for route planning. The “Total Orders” column will show how many orders in each Group match your filters.
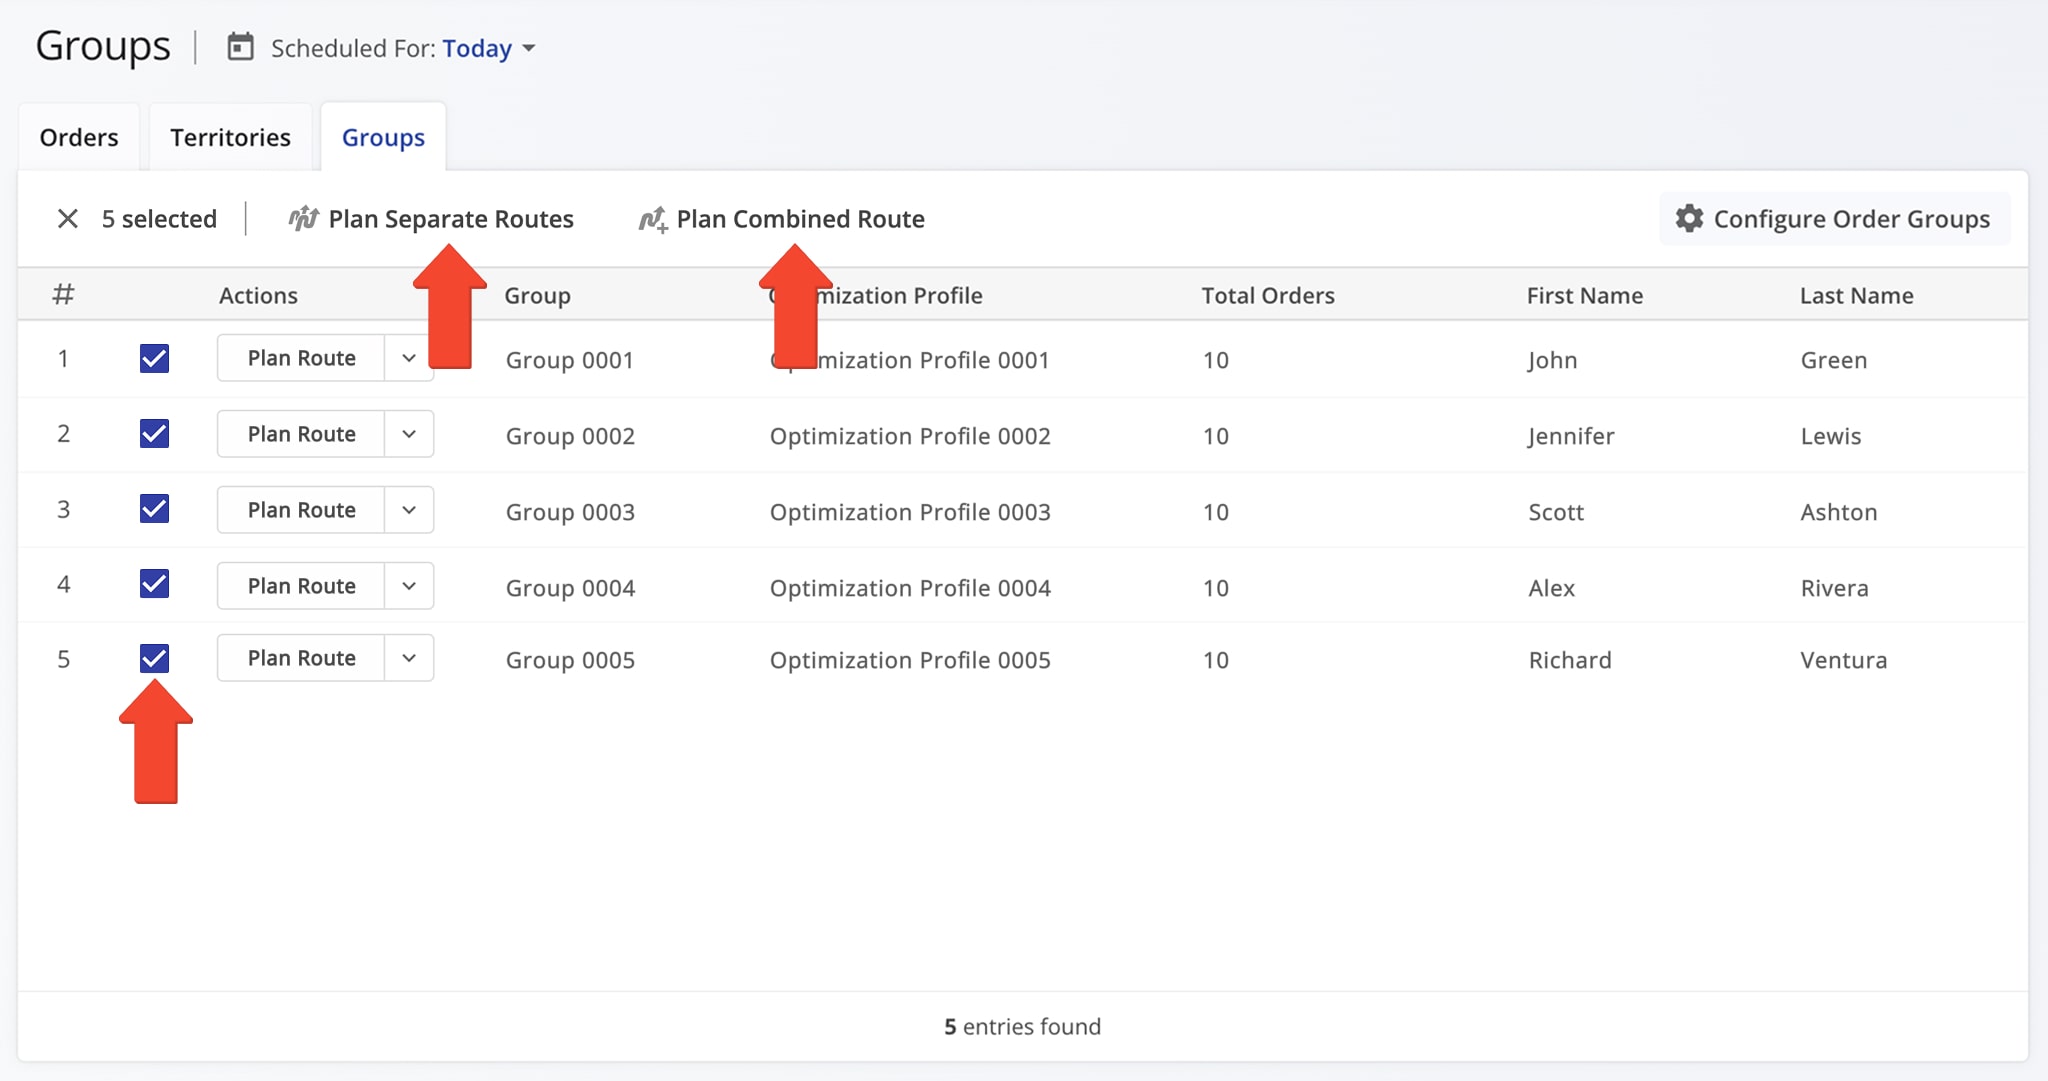
Next, select one or multiple Groups by checking the boxes beside them, then choose a routing option:
- Plan Combined Route: Plan a single route with all orders from the selected Groups.
- Plan Separate Routes: Plan separate routes with orders from each individual Group without including orders from other Groups.
NOTE: Learn more about grouping orders by shared attributes like ZIP code or group ID and planning routes using Order Groups.
Grab & Go – Scan Order Labels To Plan Routes With Mobile App
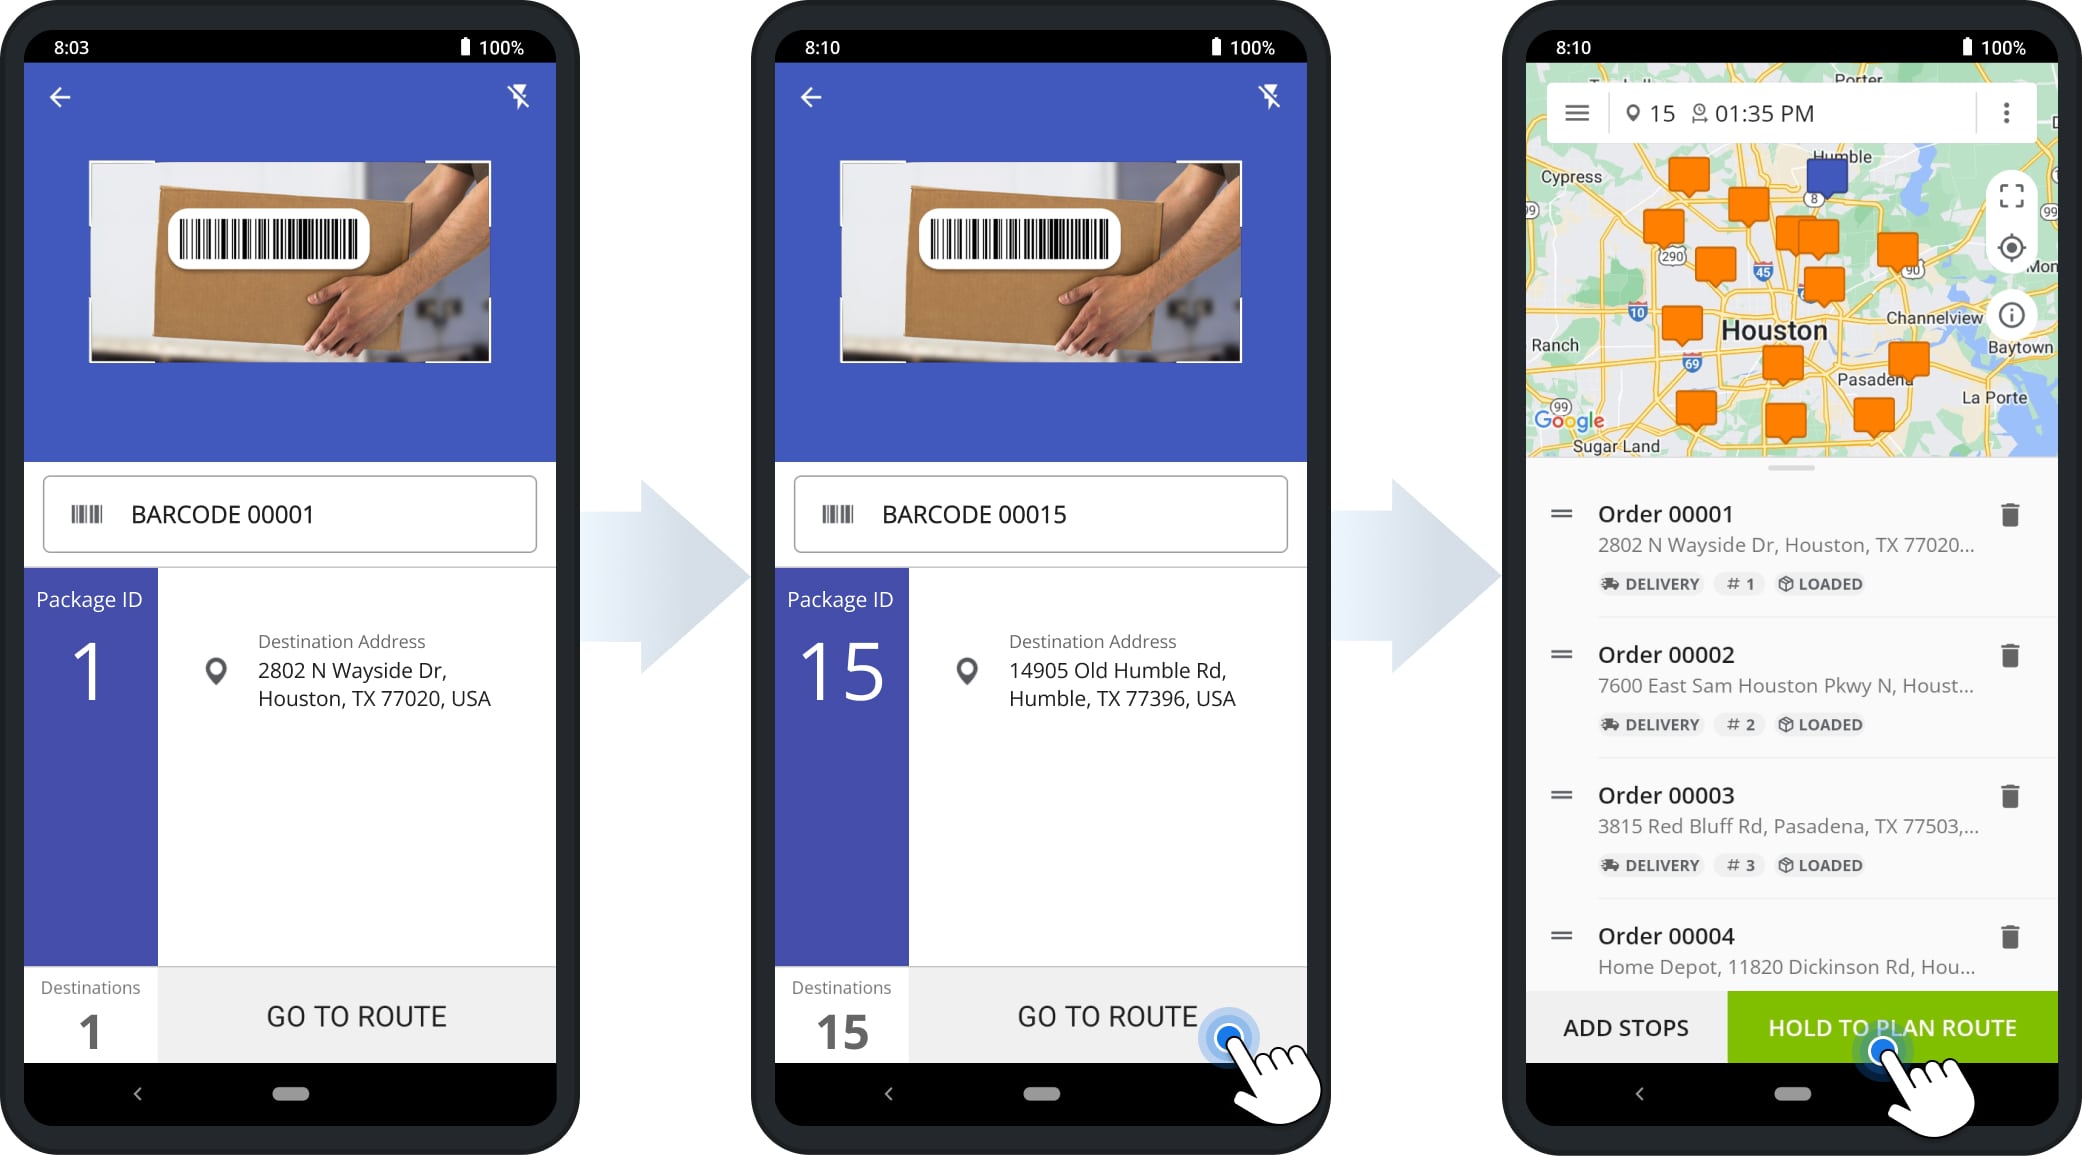
The Grab & Go mobile driver order routing feature lets drivers scan order labels with the in-app barcode scanner to add addresses, optimize order routes, and complete deliveries.
To us it, click “Routes” in the app’s Navigation Menu, then tap “Add New Route” followed by “Add Stops” to launch the scanner. Drivers can scan barcodes to add each order’s address as a stop.
Once all orders are scanned and confirmed, drivers can start the route, navigate to destinations, complete deliveries, collect proof of delivery or service, and more.
Visit Route4Me's Marketplace to Check out Associated Modules:
- Operations
Advanced Team Management Add-On
- Operations
Custom Data Add-On