Share Routes – Grant View-Only Access To Routes Via Email Or Link
Enterprise teams often need to share route information without granting full access. Whether for delivery detail confirmation or operational visibility, Route4Me allows you to share routes securely with view-only permissions. Routes can be sent by email or shared through a public link while protecting sensitive data. This flexibility supports teams using last-mile optimization software to collaborate across drivers, customers, and partners.
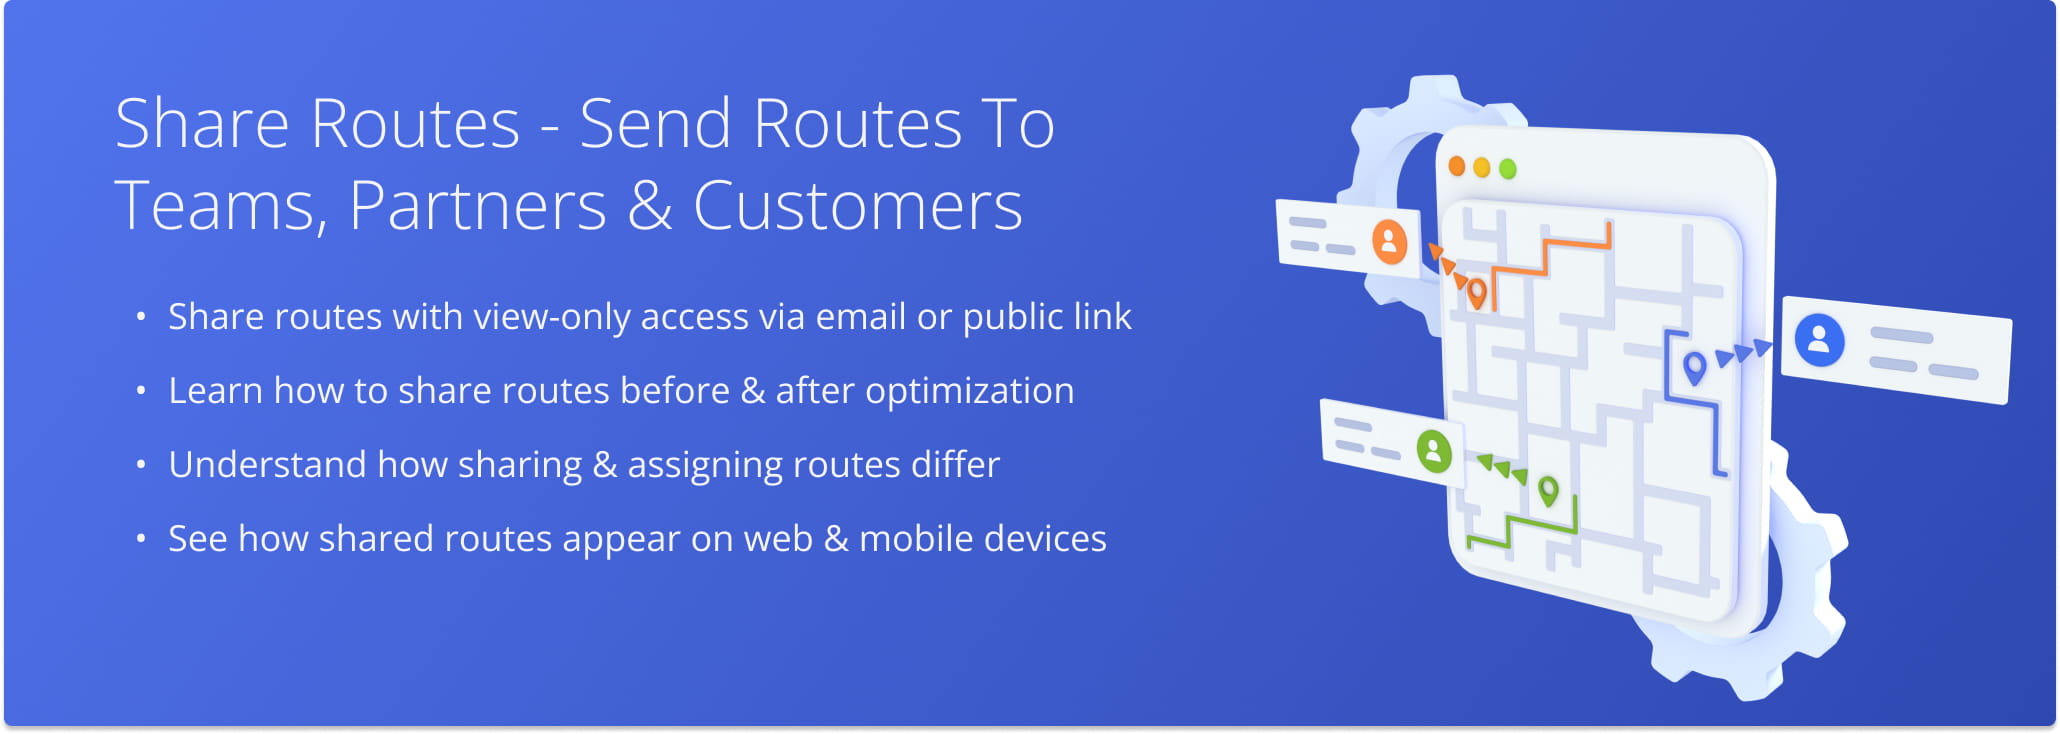
Table of Contents
Share Routes Before Optimization – Set Up Sharing In Route Settings
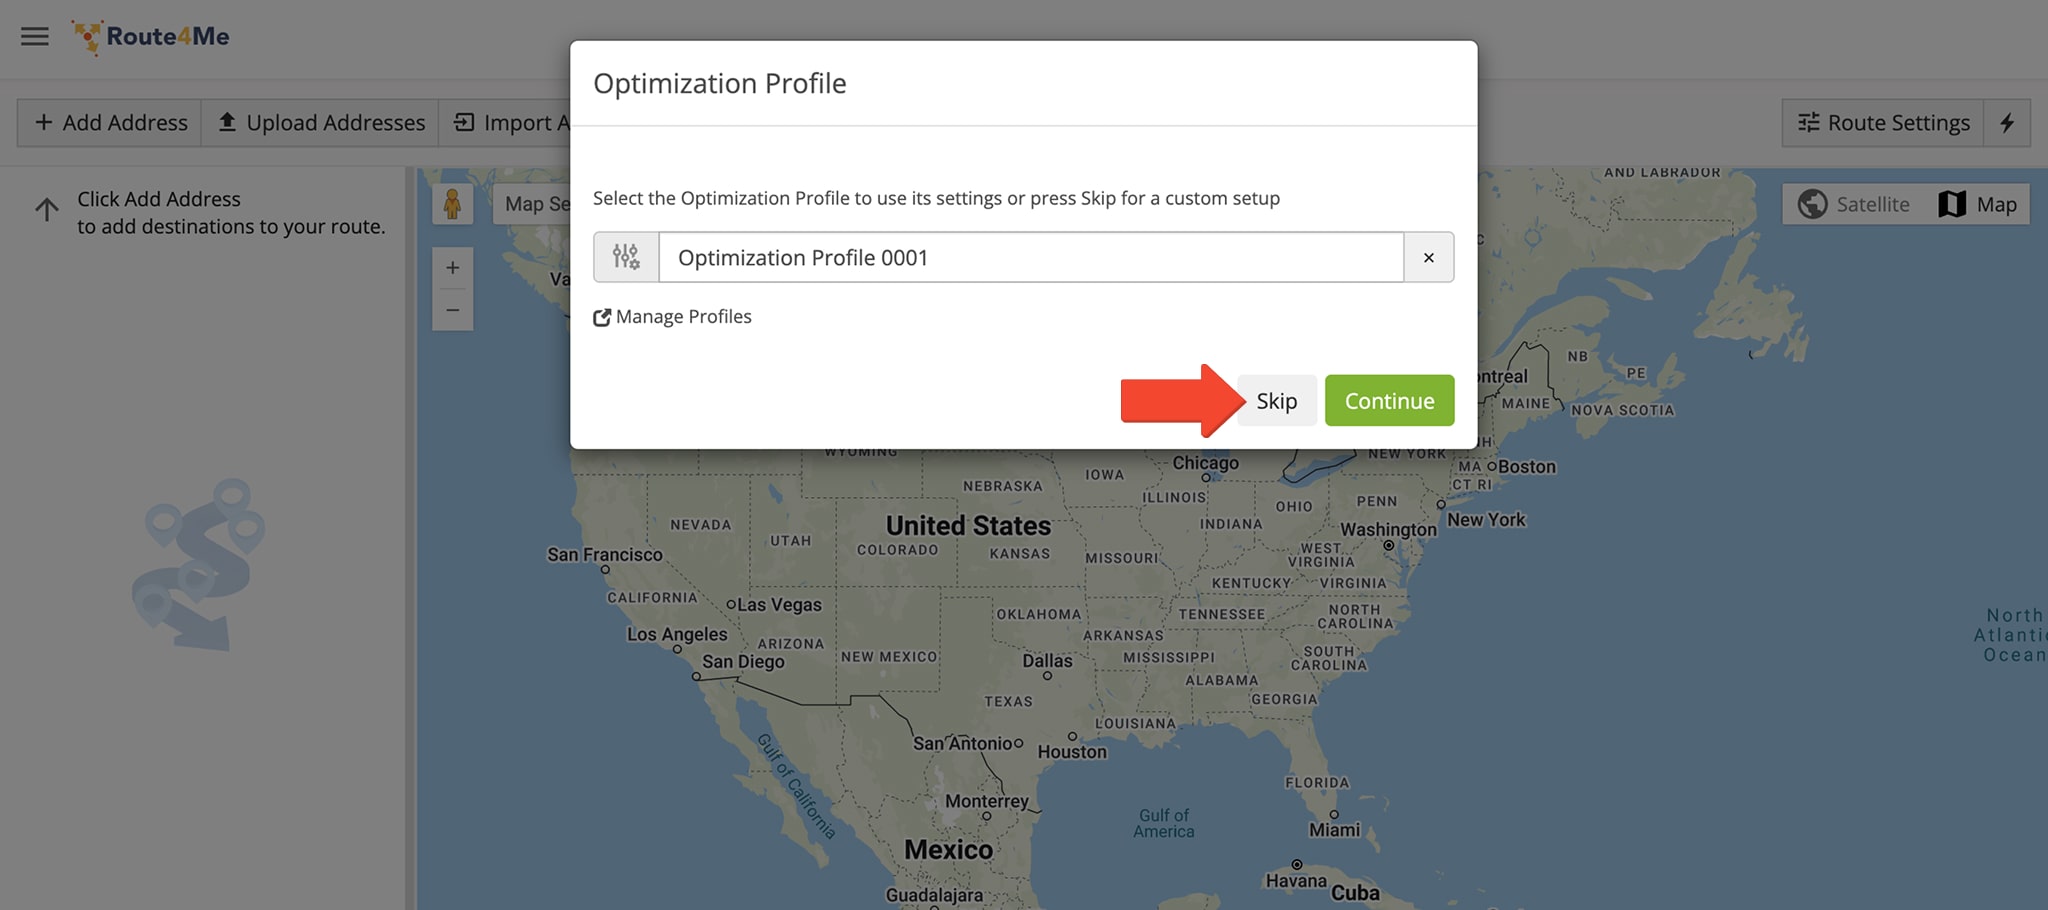
While planning routes, you can choose to automatically share them once they are planned and optimized. To do this, go to “Dynamic Routing” > “Plan New Route” in the Navigation Menu.
Choose your route planning method, then click “Skip” to customize the route’s optimization settings.
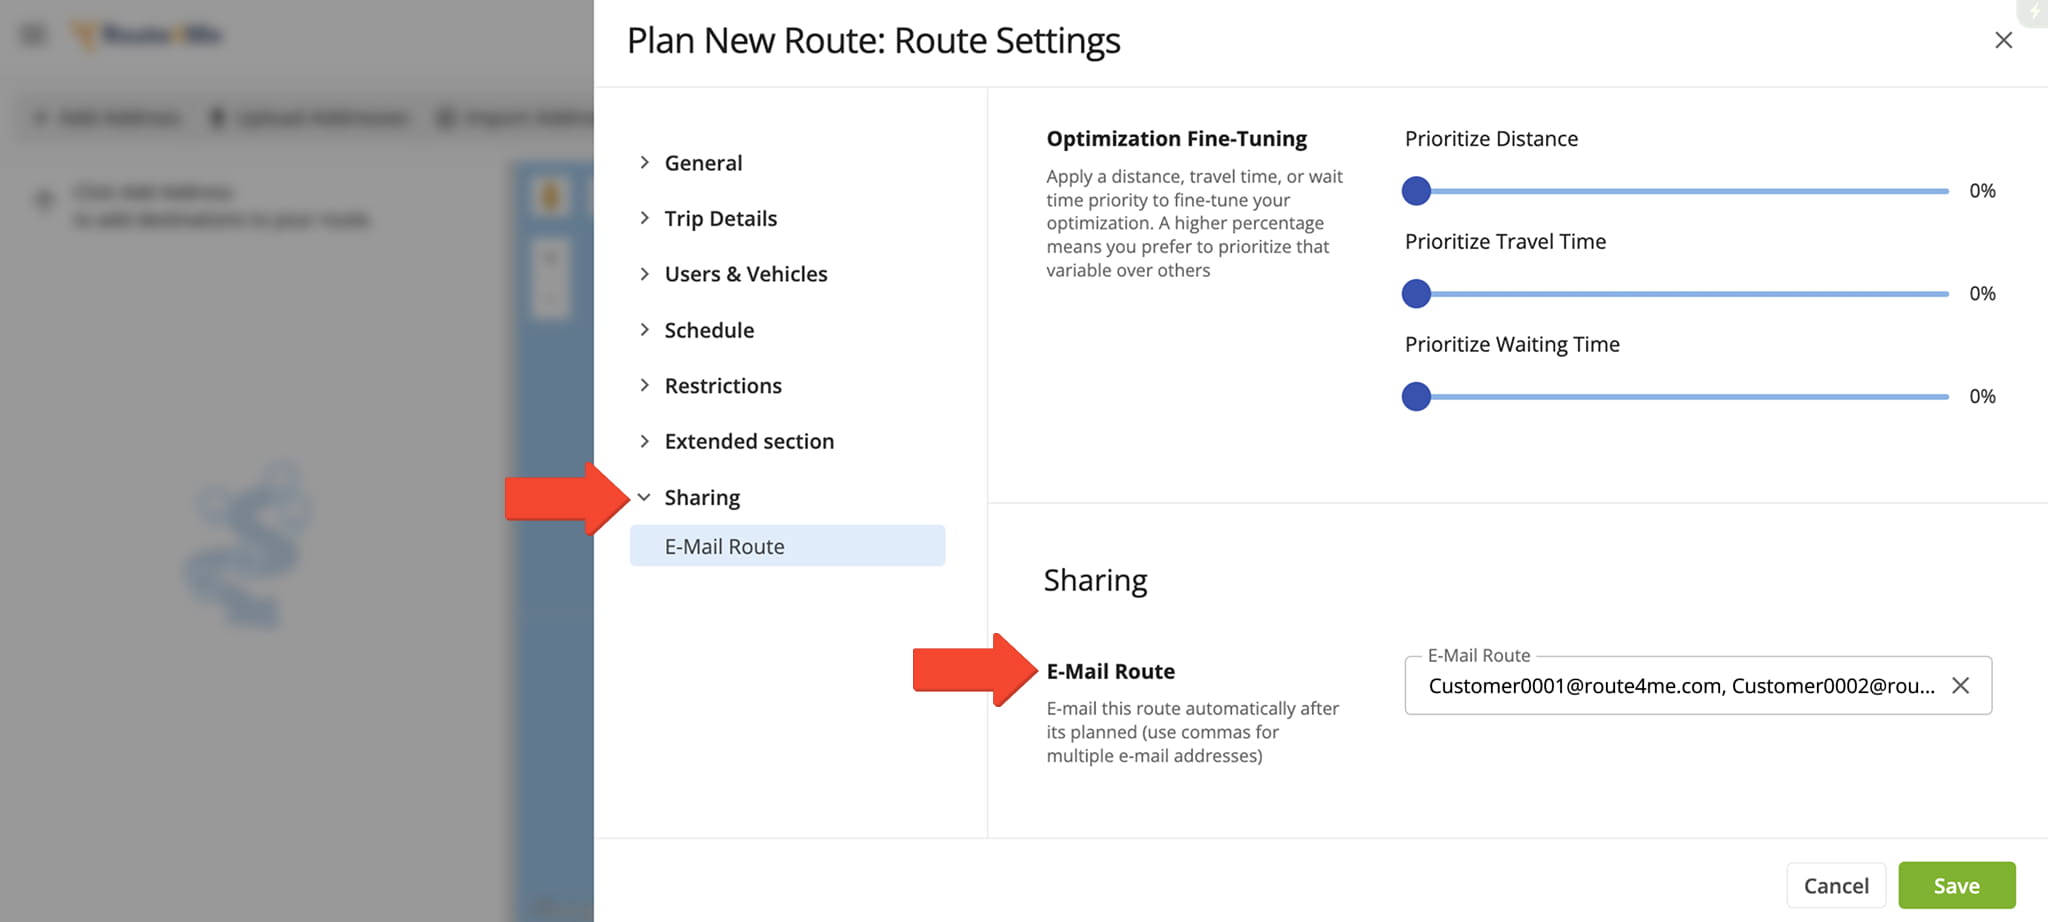
In the “Route Settings” editor panel, click the “Sharing” tab. Then, enter the email addresses of the individuals you wish to share the route with, separating each address with a comma.
Share Routes After Optimization – Send Routes To Team Members Or Partners
From The Routes Page
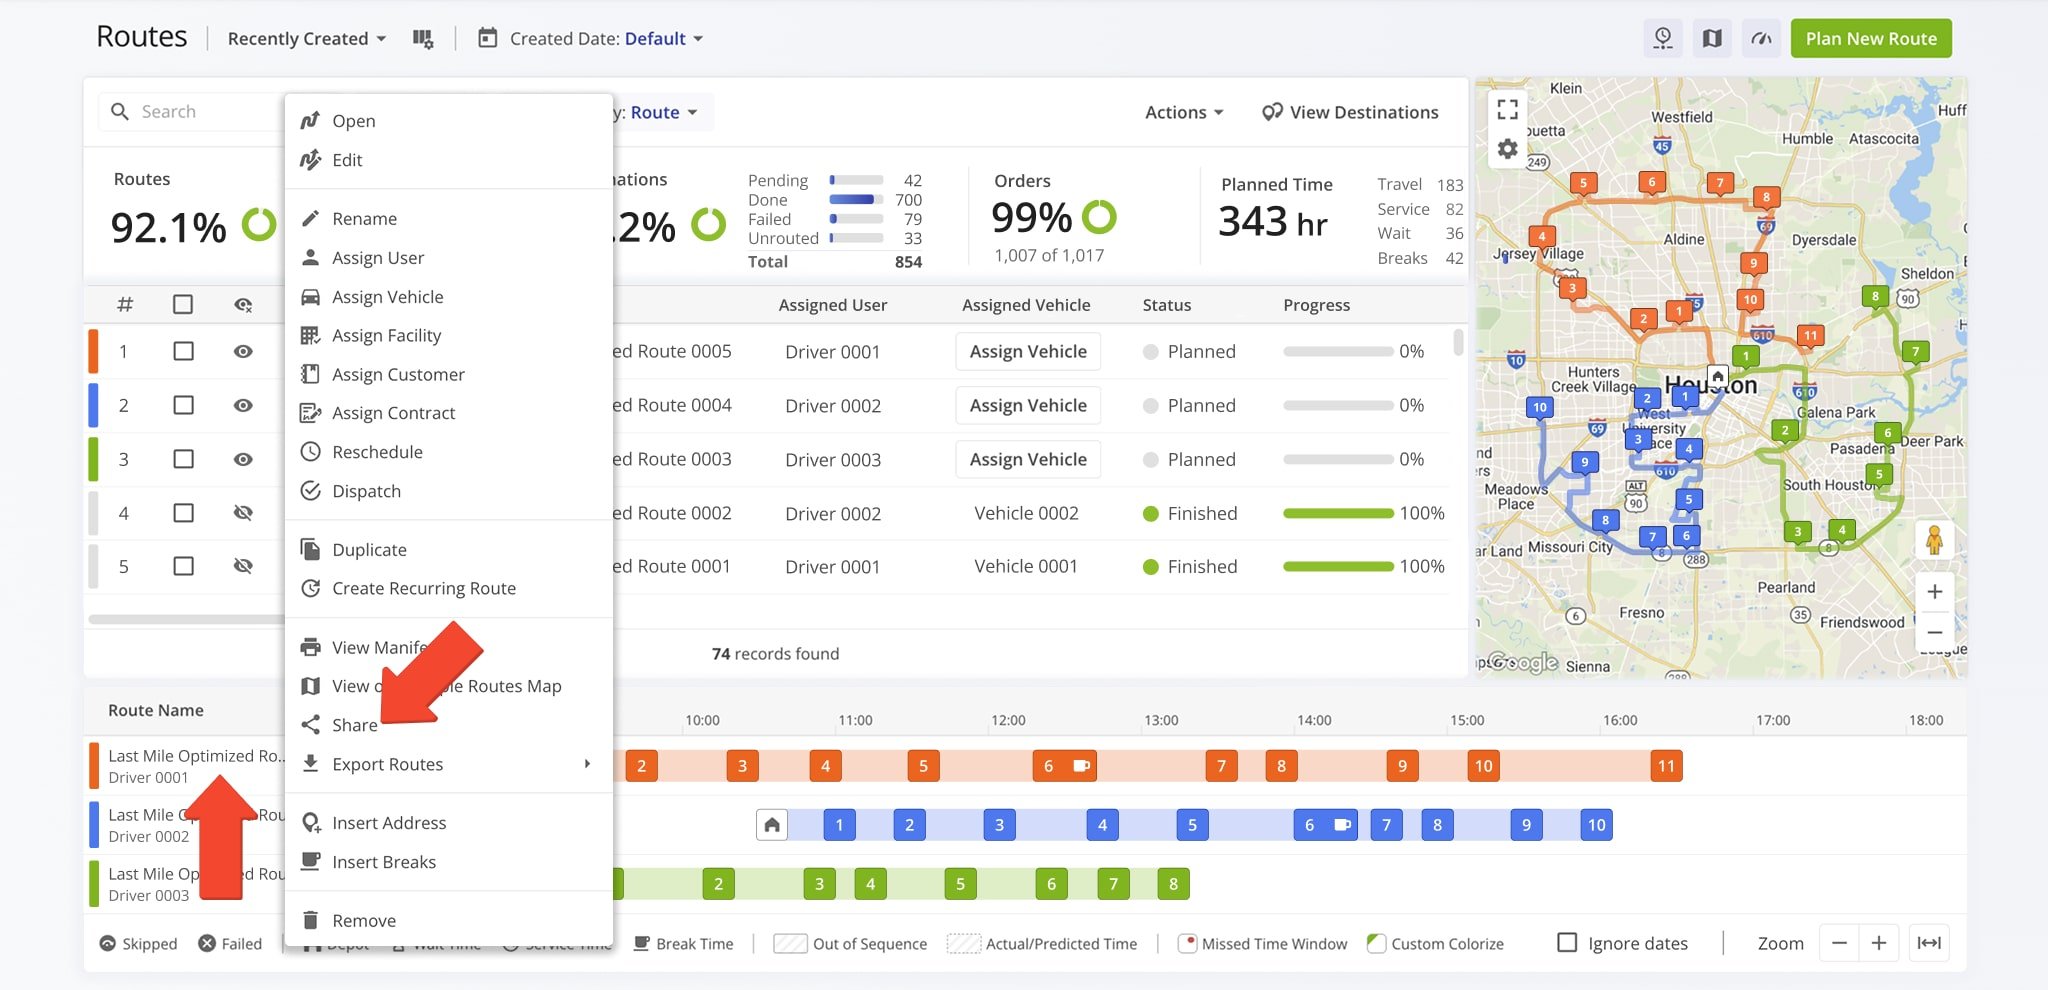
To share a route from your Routes List, go to “Dynamic Routing” > “Routes” from the Navigation Menu.
Locate the route you want to share, click the Down Arrow next to it, and select “Share“. Then, choose team members from the drop-down menu to send a link to the route via email.
If you don’t have an email address for a recipient, select “Copy Link” to generate a read-only link that you can share.

You can also share a route from the Routes Timeline. Just right click a route and select “Share“.
From there, pick team members from the drop-down menu to email a link to the route, or choose “Copy Link” to generate a read-only version for recipients without an email address.
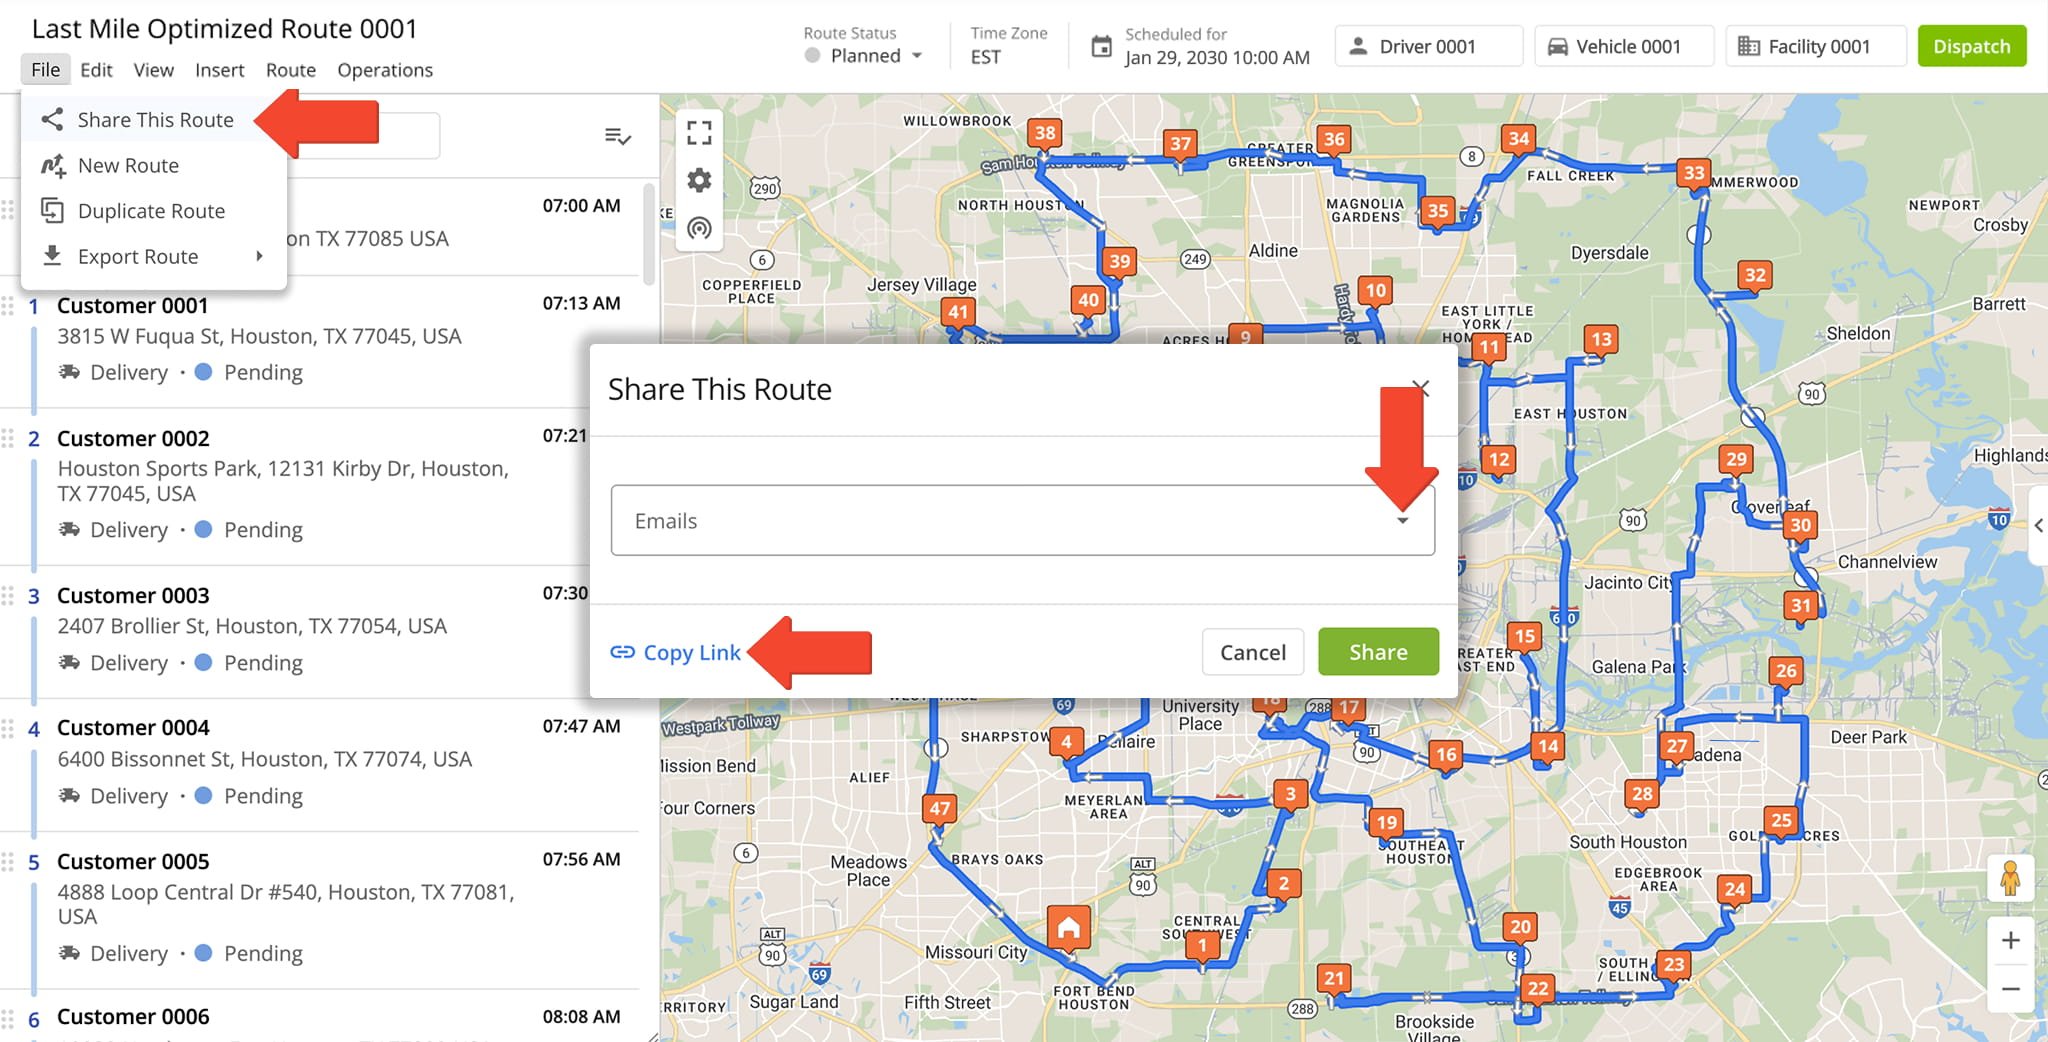
From The Route Editor
From the Route Editor, click “File” in the Toolbar, then select “Share This Route“. In the pop up window, select one or more email addresses from the drop down list or click “Copy Link” to share the route with individuals not included in the list.
Sharing Vs. Assigning Routes – Key Differences
Sharing and assigning routes serve different purposes.
Assigning a route allows others – such as your team members – to manage, edit, and complete the route, depending on their User Permission Settings. NOTE: Learn more about assigning Users to routes.
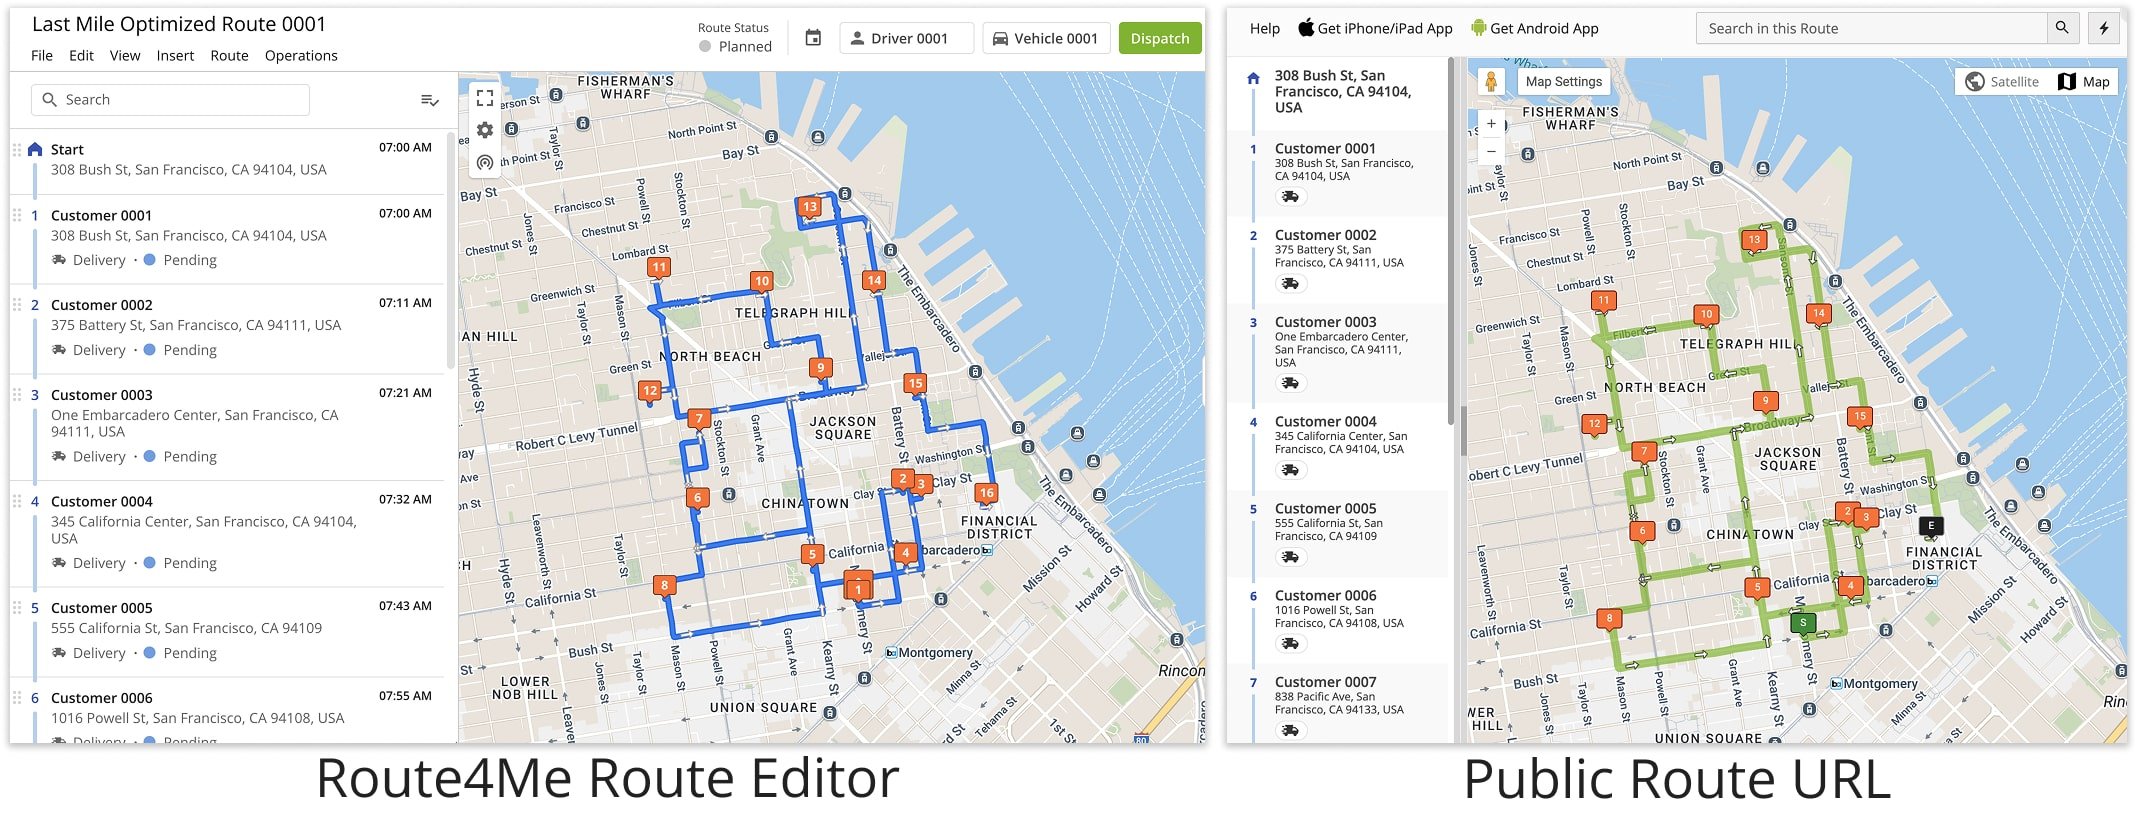
On the other hand, when you share a route, you’re providing a public link – usually to customers or business associates without a Route4Me account – that lets others view, but not edit, a route.
Viewing Shared Routes On Web Vs. Mobile
Viewing Shared Routes On The Web
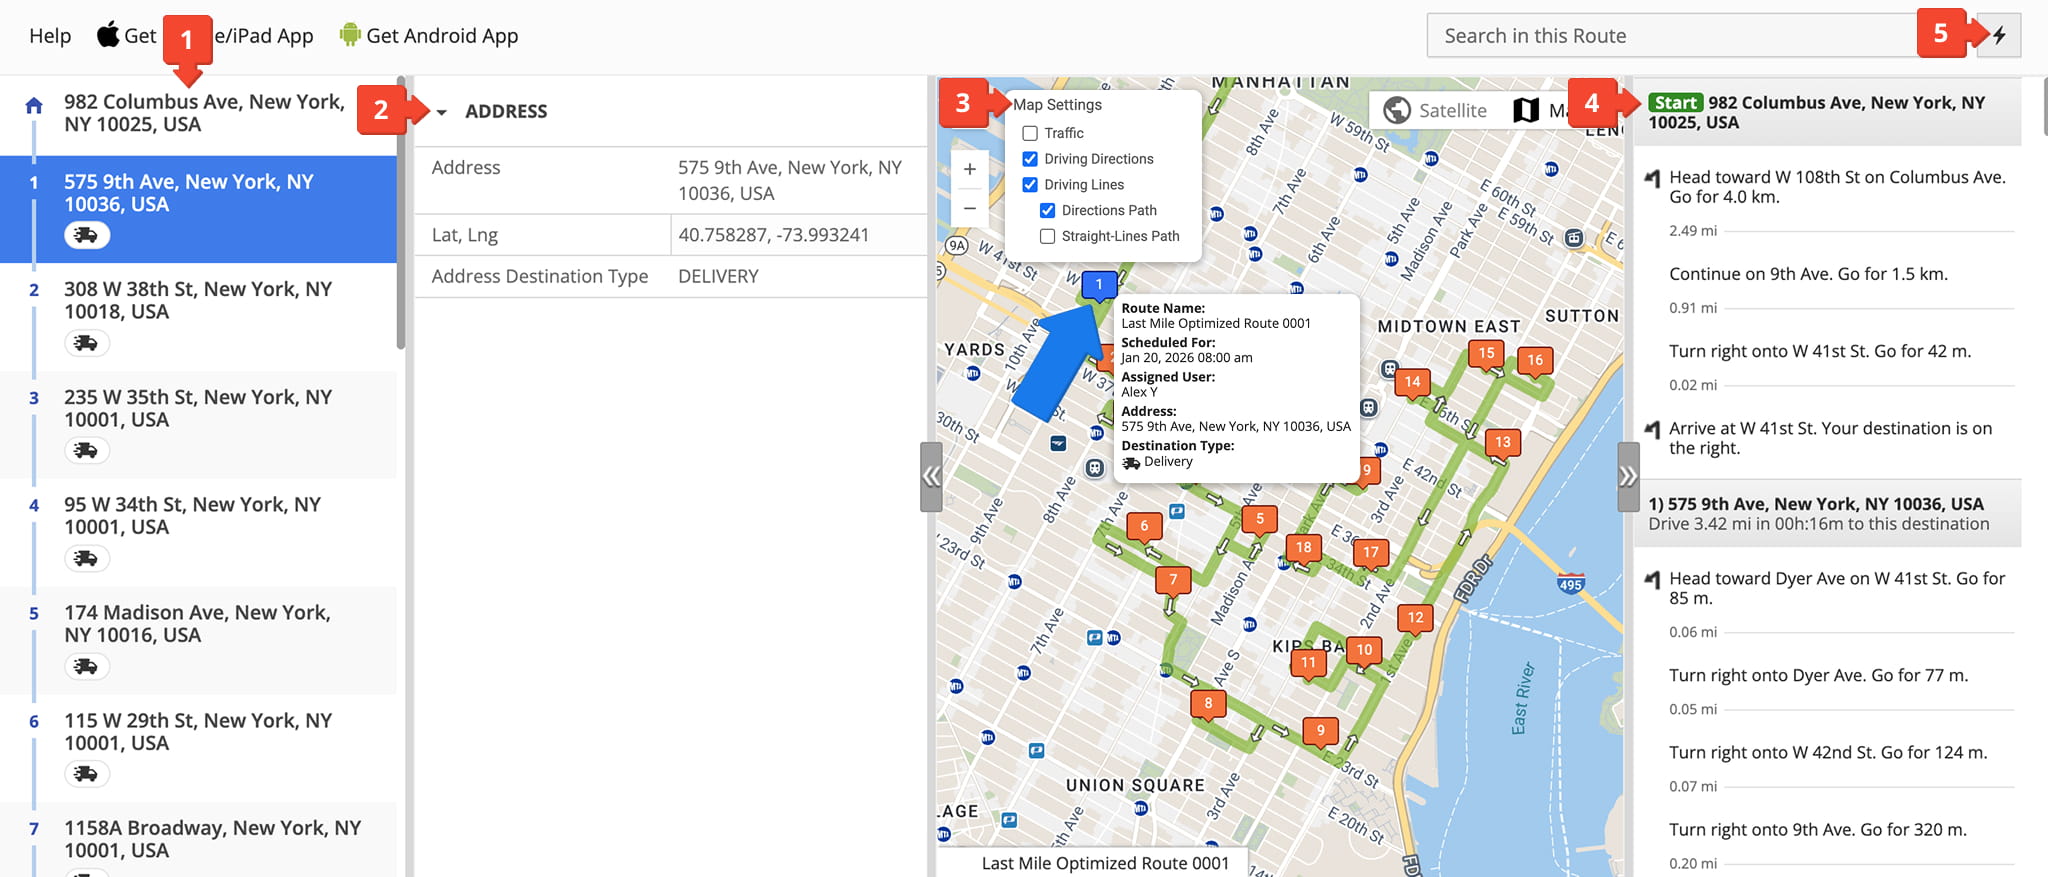
Shared, read-only routes include several tools that help others view route details. When viewed on the web, they will see:
- A full destinations list allowing them to view every stop on the route.
- An address detail panel that provides stop-specific information such as address coordinates and address type.
- An interactive map where they can view a route with customized map settings and click on destinations to access additional information.
- Comprehensive turn-by-turn driving directions for the entire route.
- A Quick Actions menu from which they can access assistance from the Route4Me Support Portal or Customer Support Team.
Viewing Shared Routes On Mobile
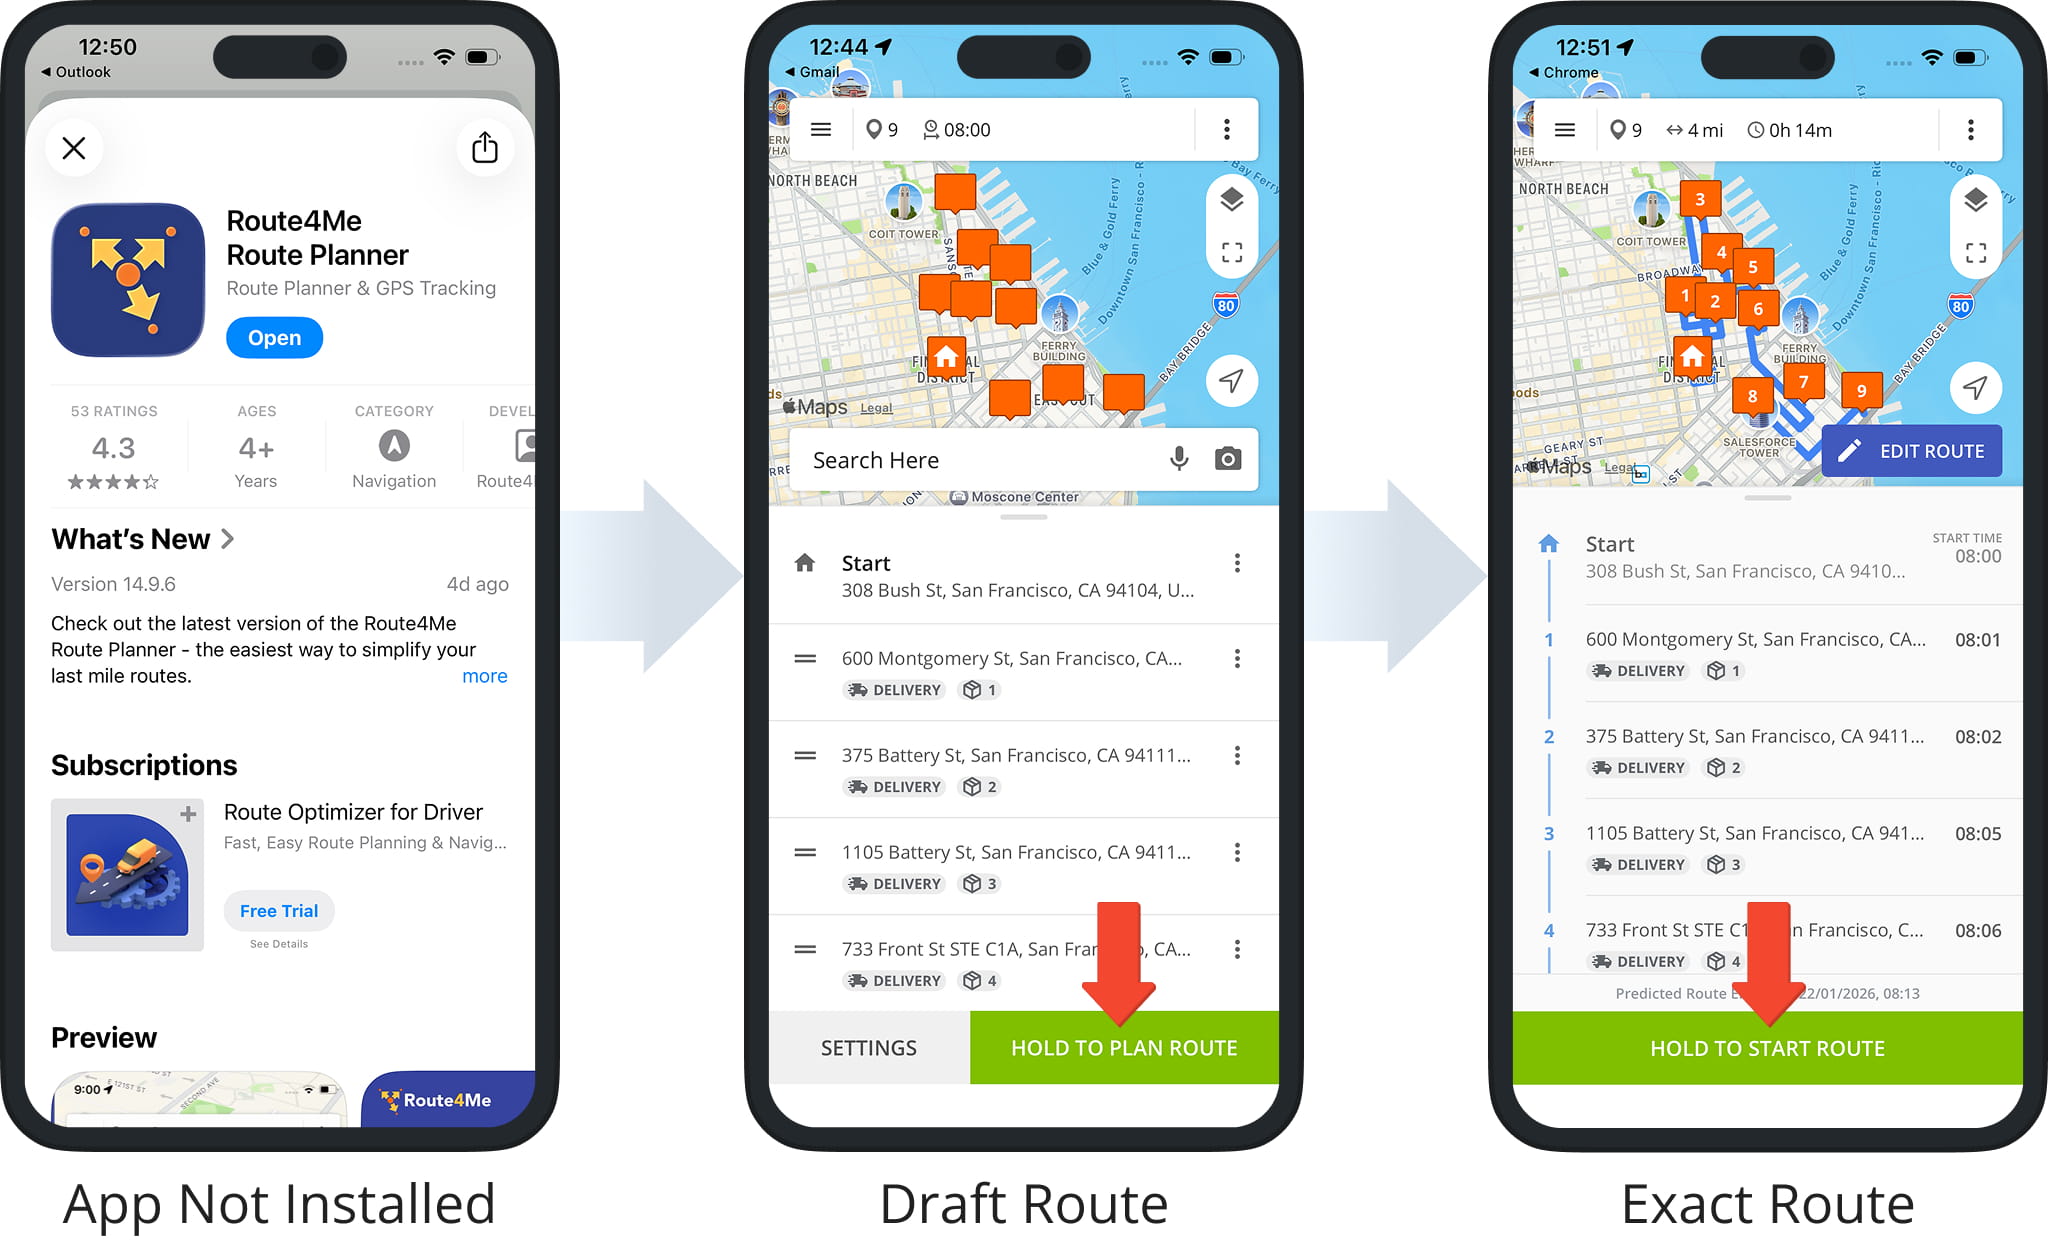
When the shared route link is opened on a mobile device, the behavior depends on whether the Route4Me app is installed and whether the user has permission to access the route.
- If the Route4Me app is not installed, the user will be prompted to download the app.
- If the Route4Me app is installed but the user does not have access to the route, the link opens a draft route that is prefilled with the same destinations and ready for optimization.
- If the Route4Me app is installed and the user does have access, the link opens the exact shared route for viewing and completion.
Visit Route4Me's Marketplace to Check out Associated Modules:
- Route Optimization
Mixed Vehicles Routing
- Route Optimization
Route Optimization for Multiple Drivers Without Advanced Constraints
- Route Optimization
Commercial Vehicle Route Planning
About author: Daniel Archer
With a background in pedagogy and writing instruction, Daniel is a former tenured English Instructor who, after nearly 20 years of teaching, transitioned into content strategy and leading writing teams for global brands. Now, as Technical Documentation Manager at Route4Me, he translates complex logistics technology into clear, accessible content that empowers users.