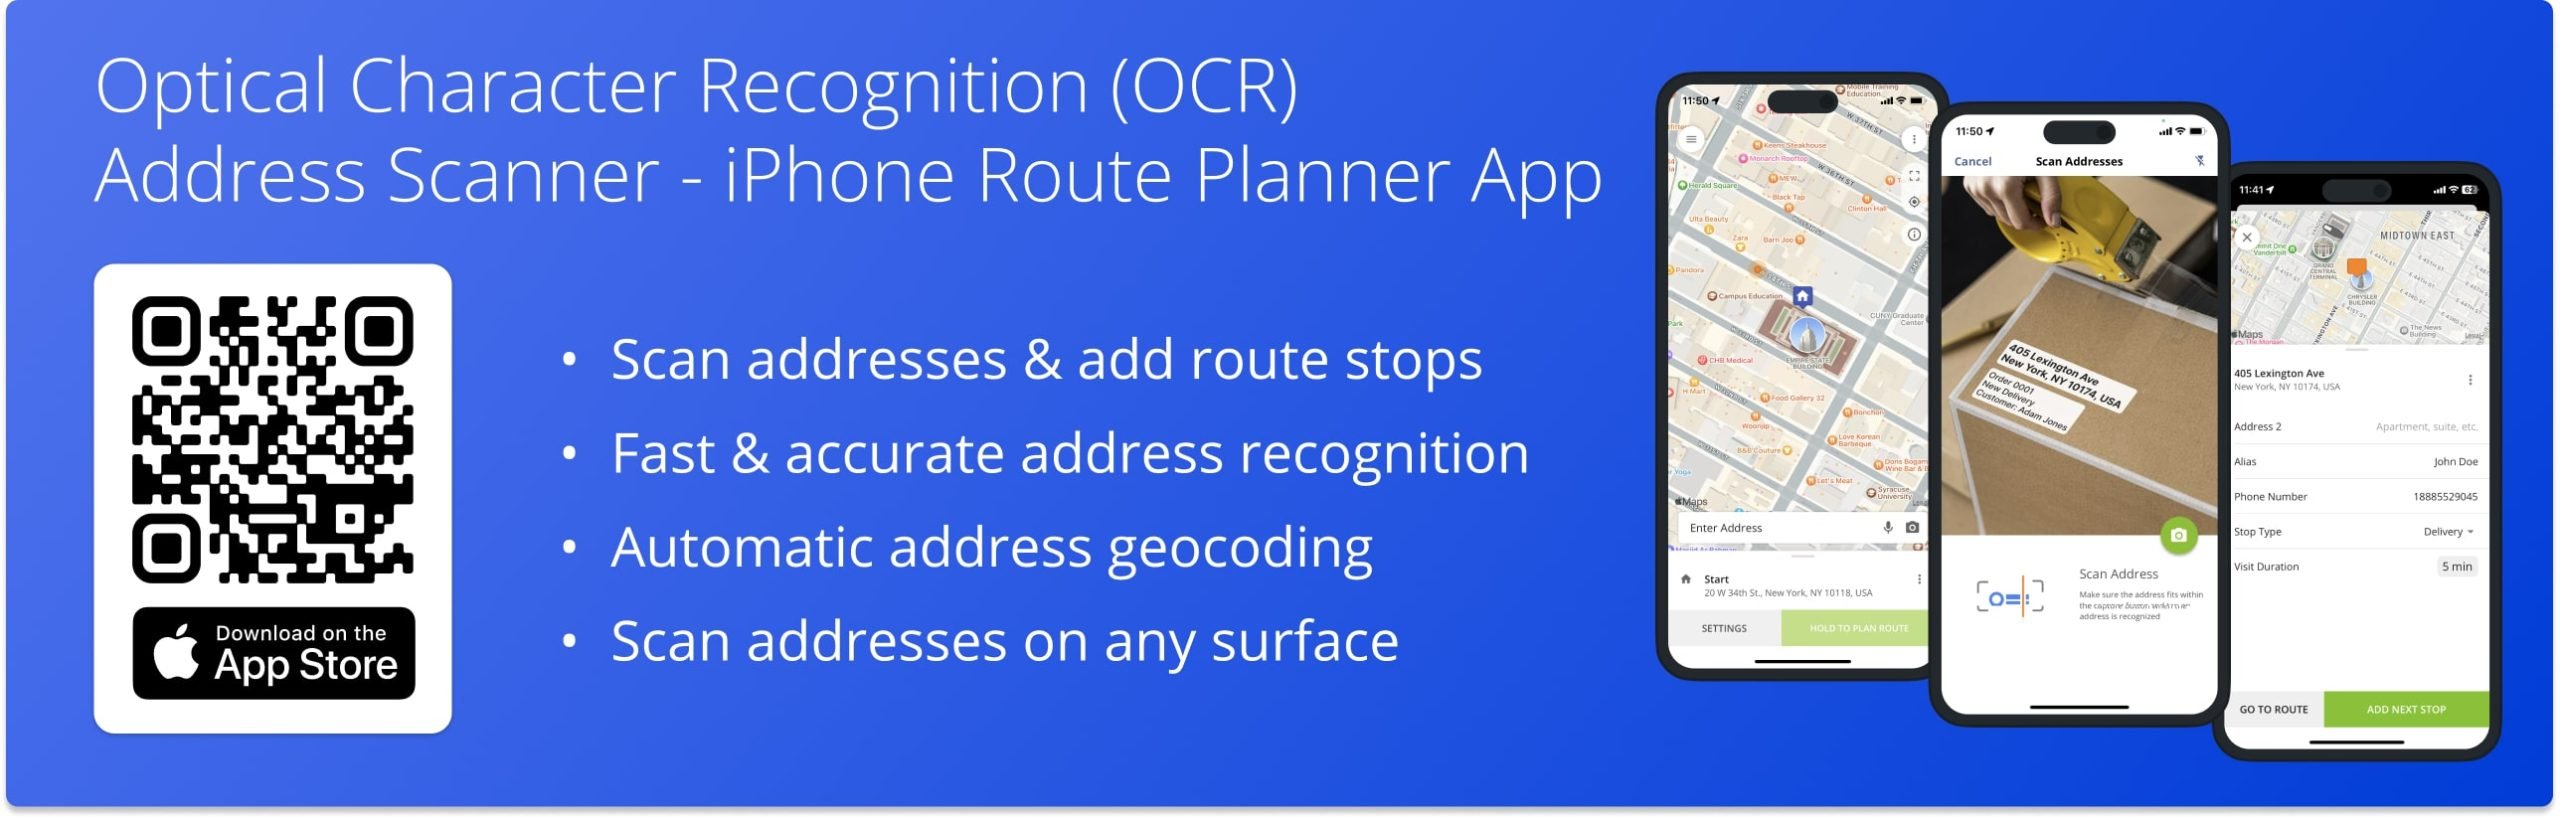
Address Scanner – iOS iPhone Route Planner App Optical Character Recognition (OCR)
Route4Me’s iPhone Route Planner app provides seamless continuity throughout the entire multi-stop route planning, optimization, navigation, and visitation process. For your convenience and efficiency, Route4Me’s iPad and iPhone Route Optimization app features an integrated optical character recognition (OCR) address scanner. Instead of manually entering each address, you can quickly and easily add hundreds of addresses by simply scanning them from any surface.
The address scanner is integrated, so you don’t need any additional scanner apps, OCR software, document scanner apps, or cam scanners for mobile scanning and text recognition. Furthermore, the scanner can easily recognize addresses from multi-line texts, different fonts, or handwritten addresses, and automatically suggest validated and geocoded address options.
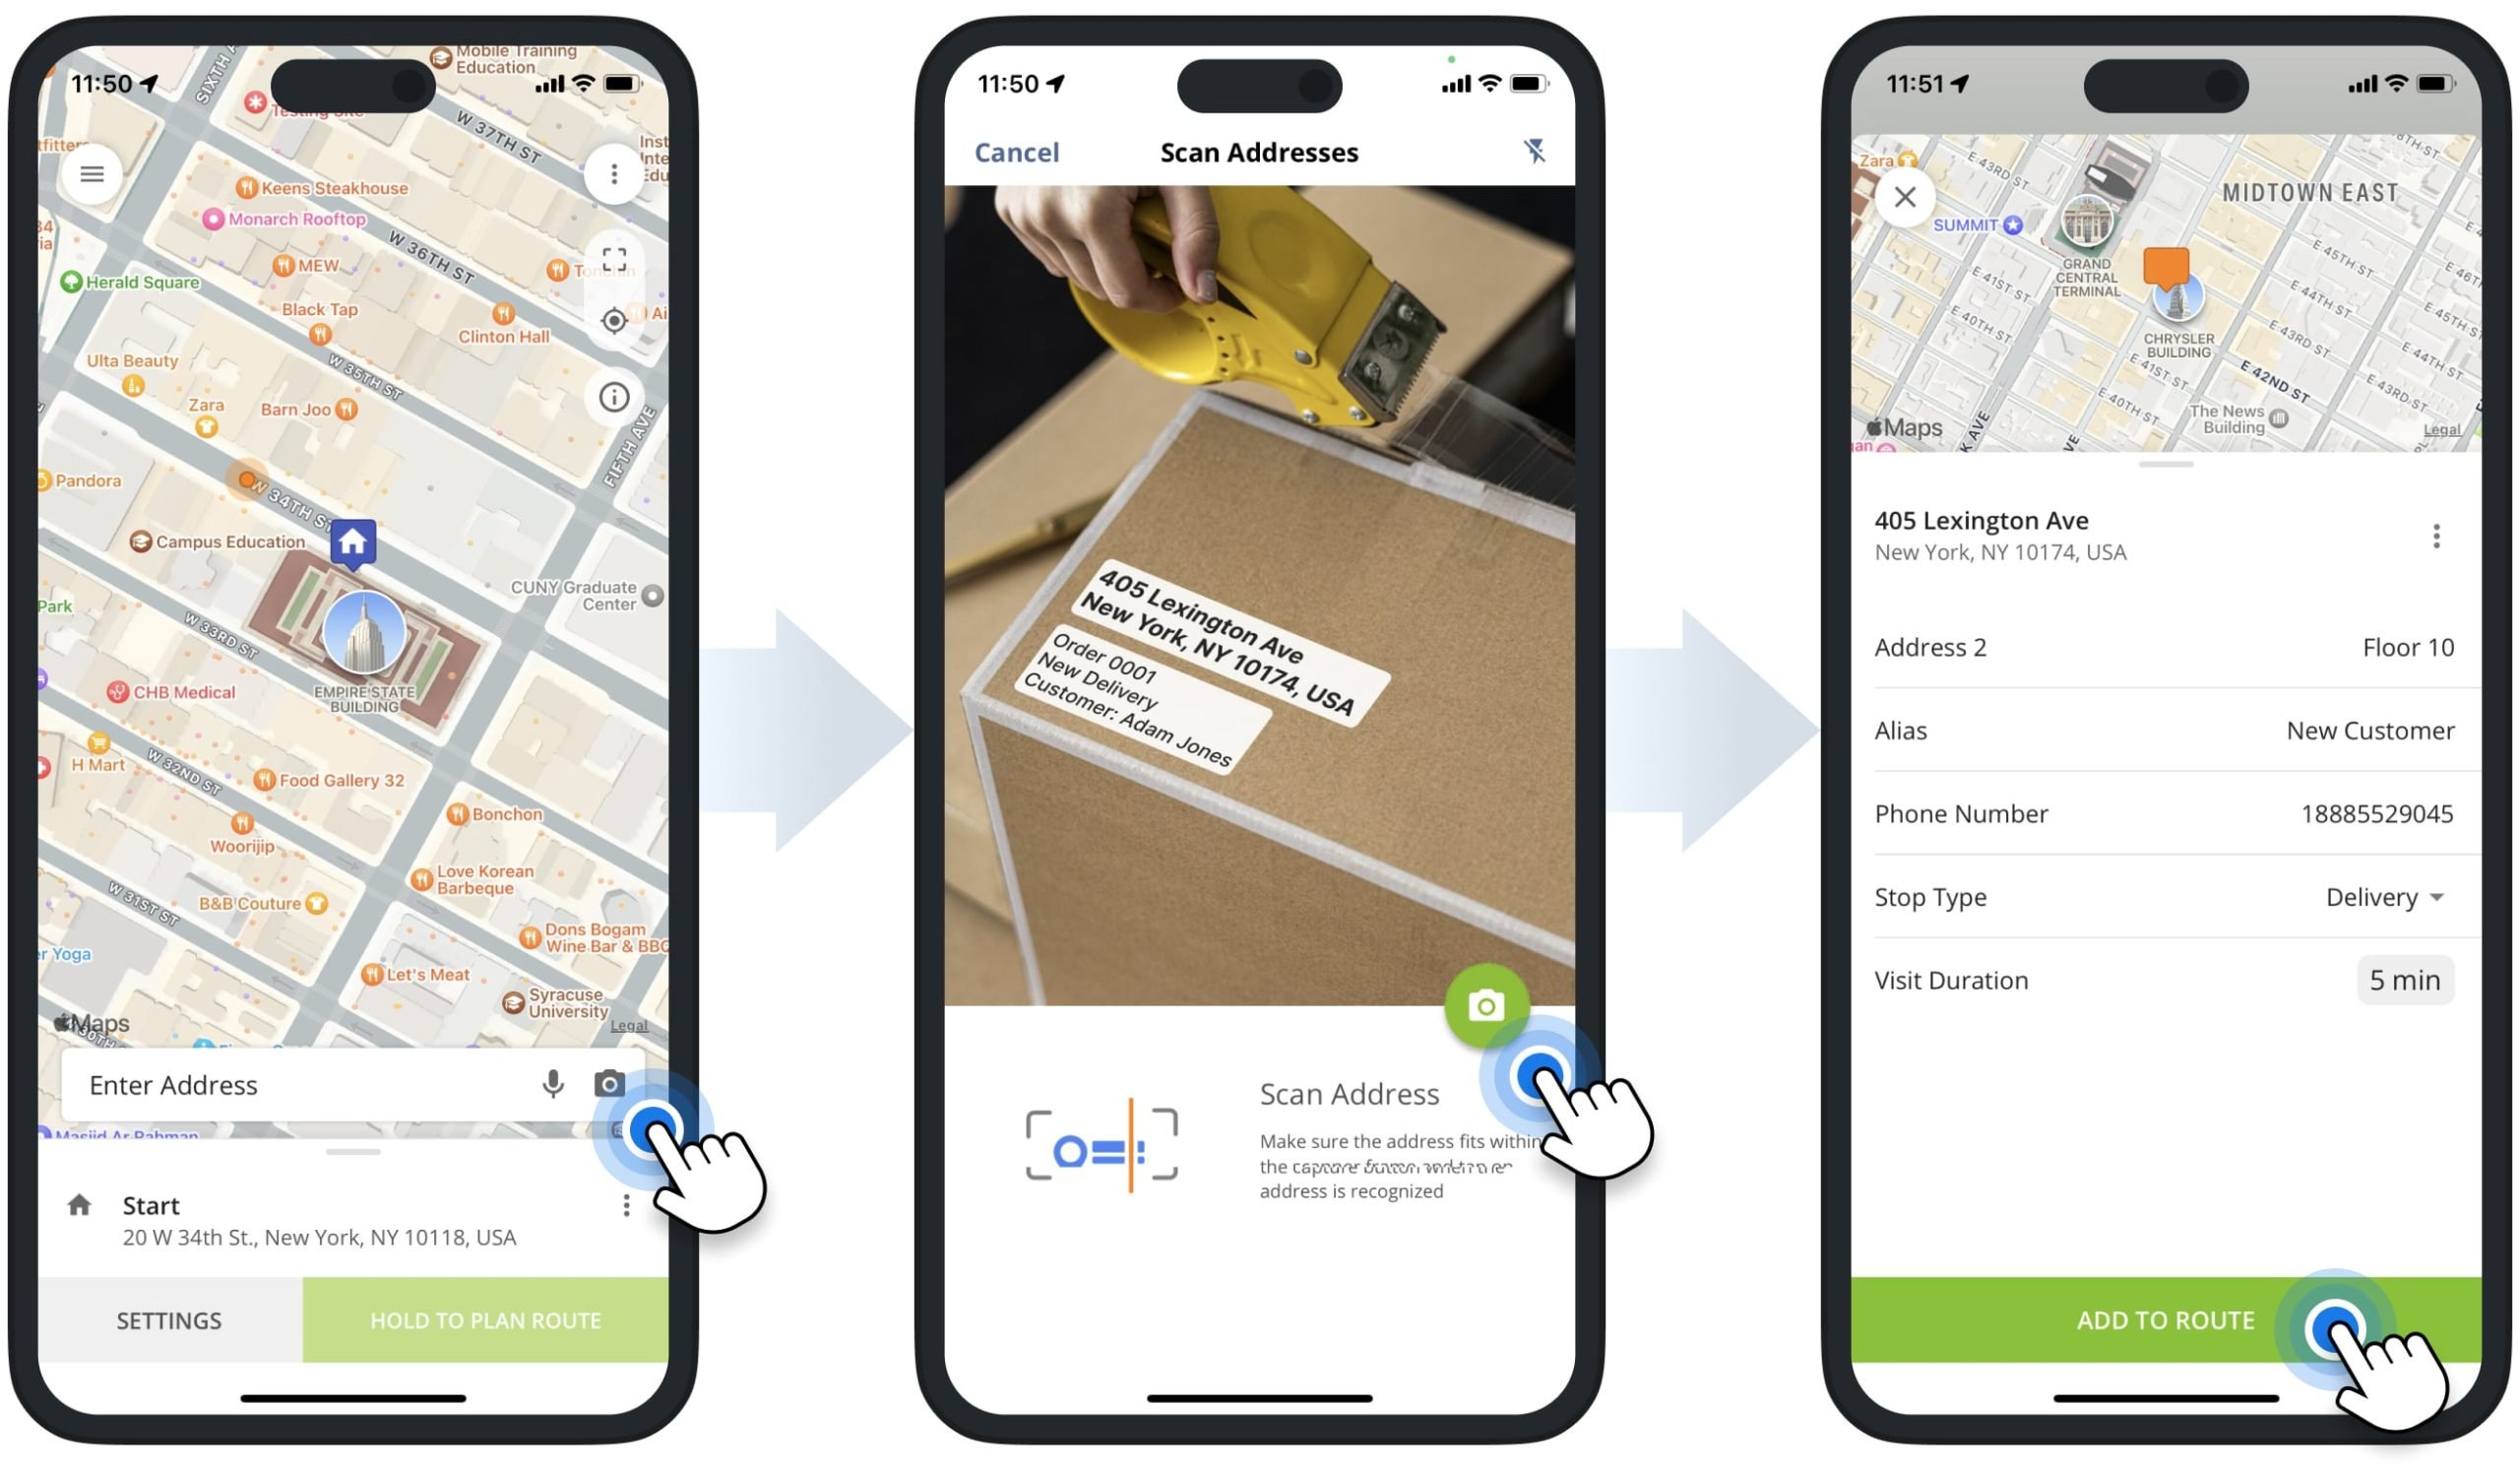
To use the OCR address scanner for adding addresses to a new route, open the app’s main menu and tap the “Add New Route” button. Next, schedule the route, specify the route’s optimization settings, and then tap the “Done” button. After that, tap the camera icon next to the “Enter Start Address” or “Enter Address” field. Additionally, learn more about planning routes and route settings on Route4Me’s iOS Route Planner app.
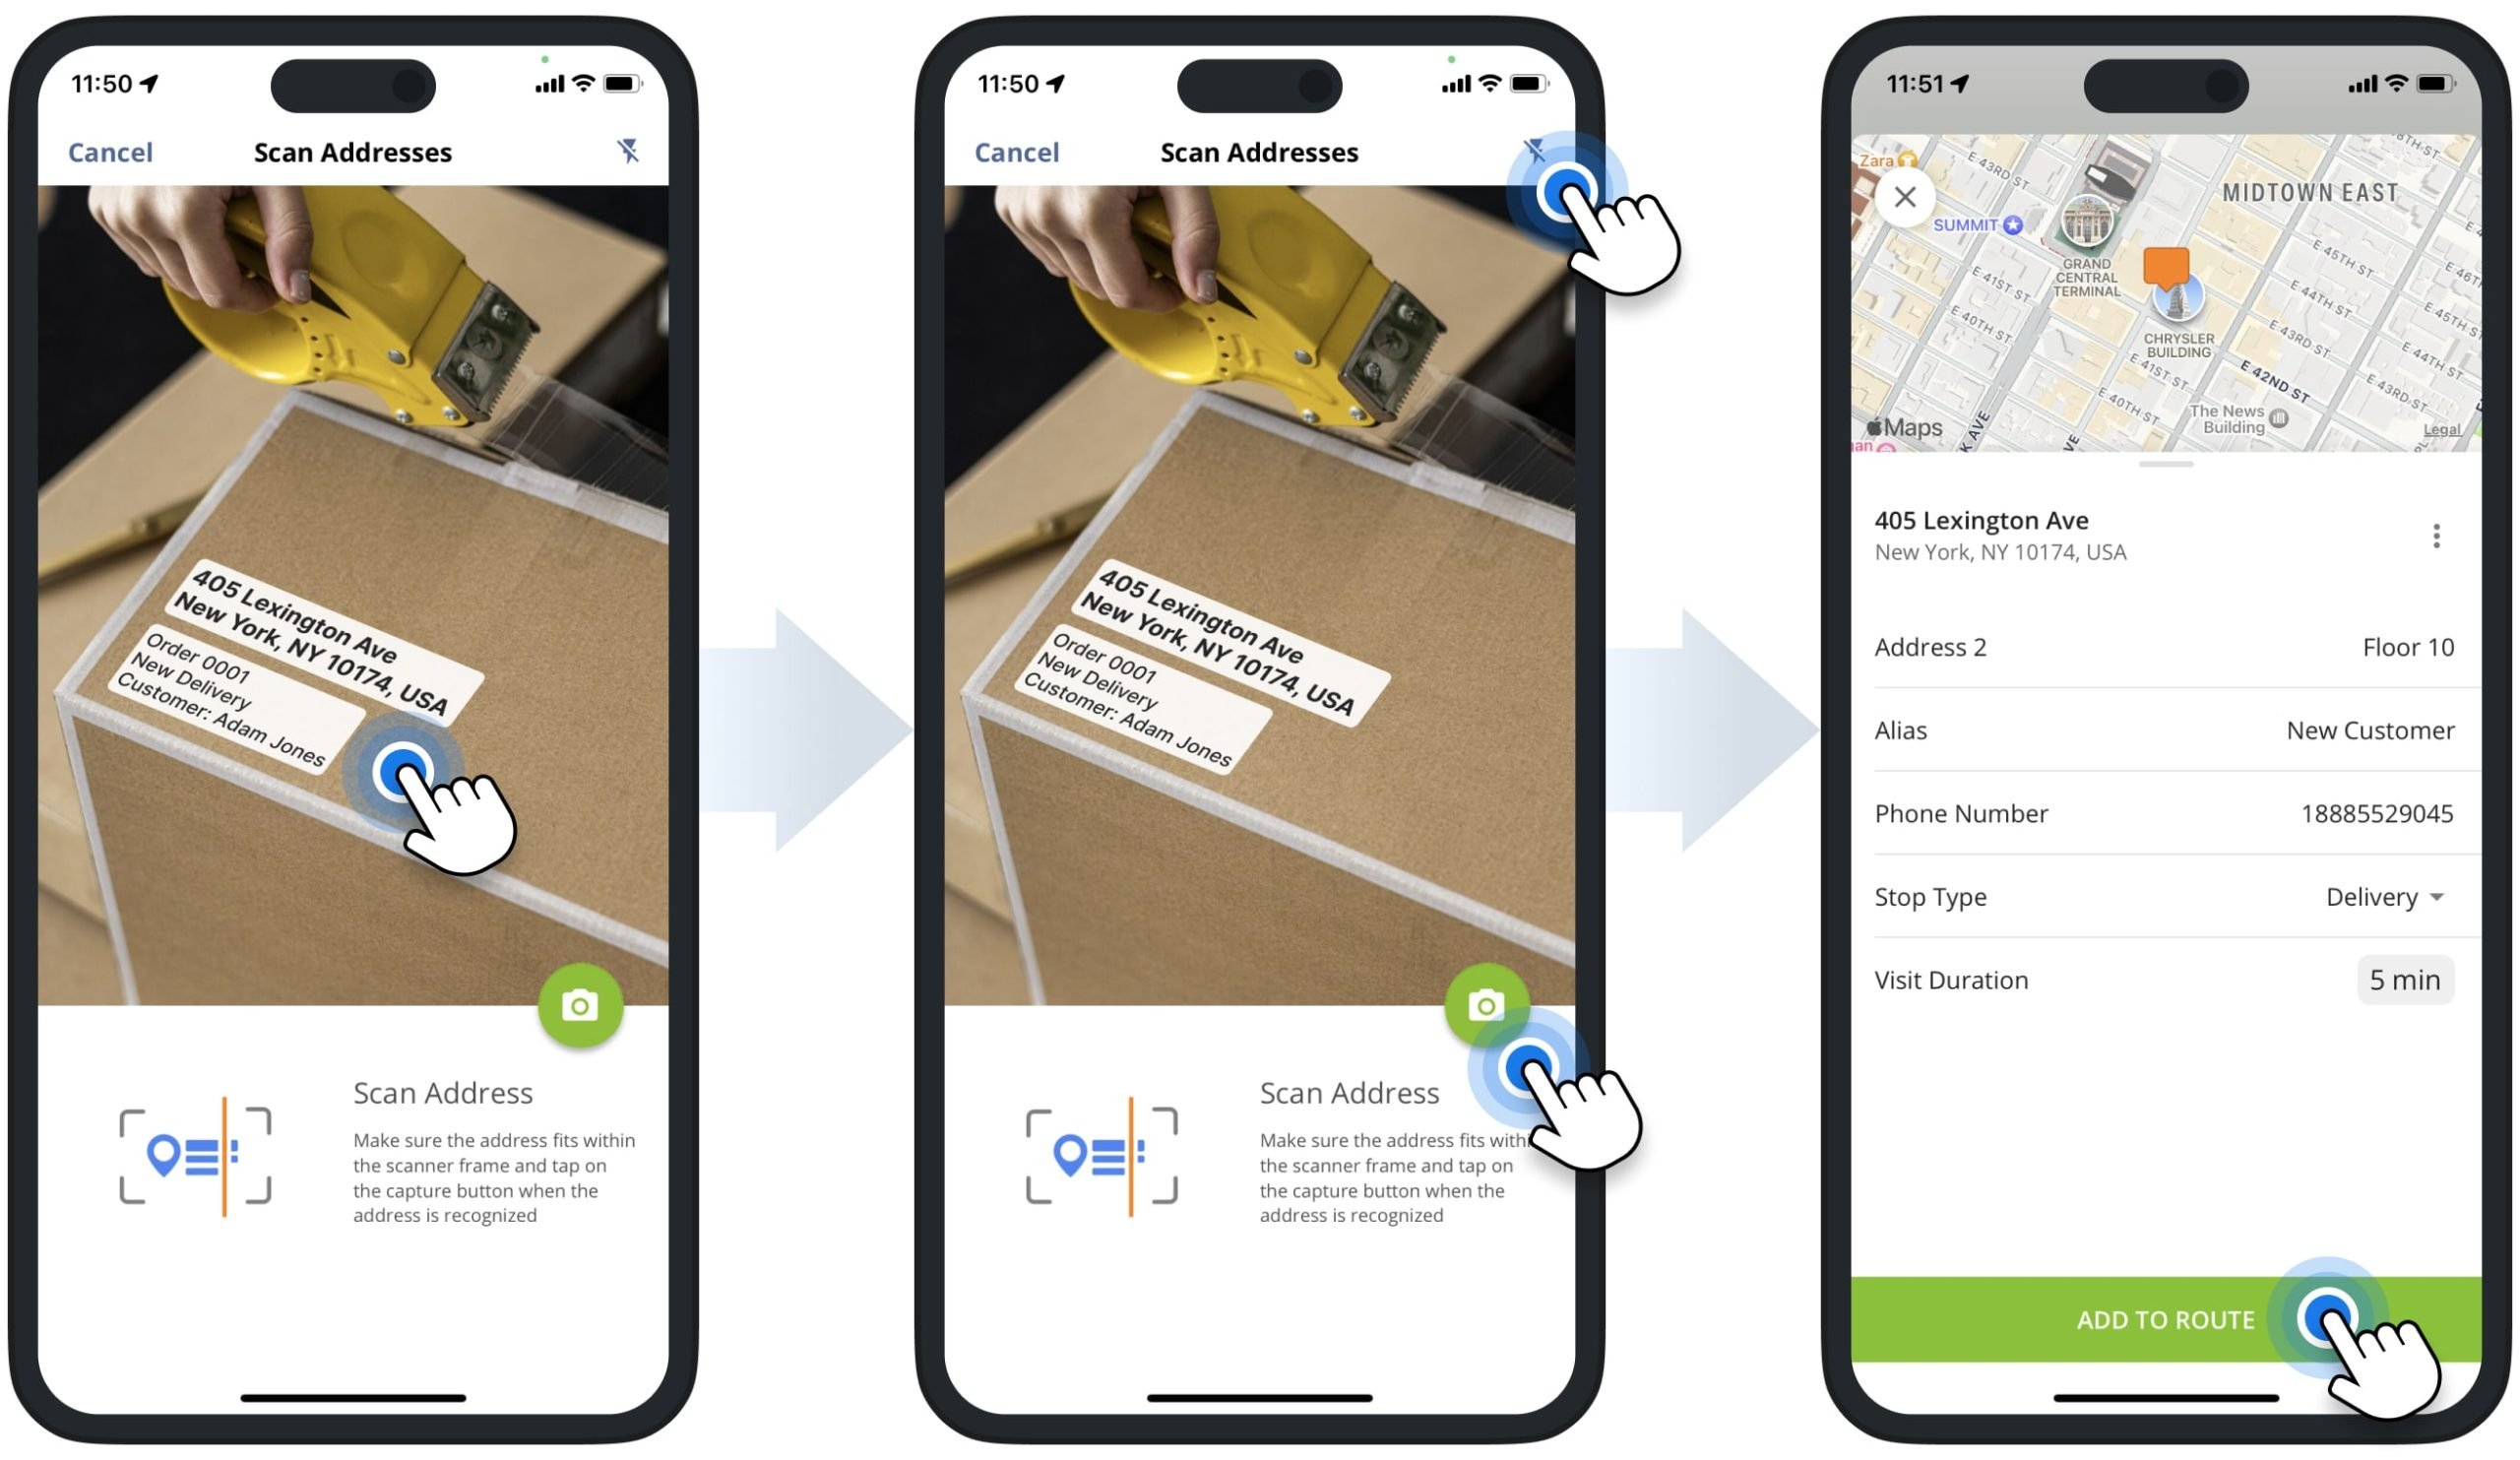
Next, point your device’s camera at the address and then tap the camera icon to capture the detected and highlighted address. After that, Route4Me will automatically validate and geocode the address and suggest one or multiple address options. Accordingly, you can edit the address and add additional address details.
To use the OCR address scanner for inserting addresses into a planned route, tap the three-dots menu icon in the top right corner of the opened route. Next, tap the camera icon to launch the scanner and then use it to scan the addresses. Additionally, learn more about adding addresses and inserting stops into planned routes using Route4Me’s iOS iPhone Route Planning app.
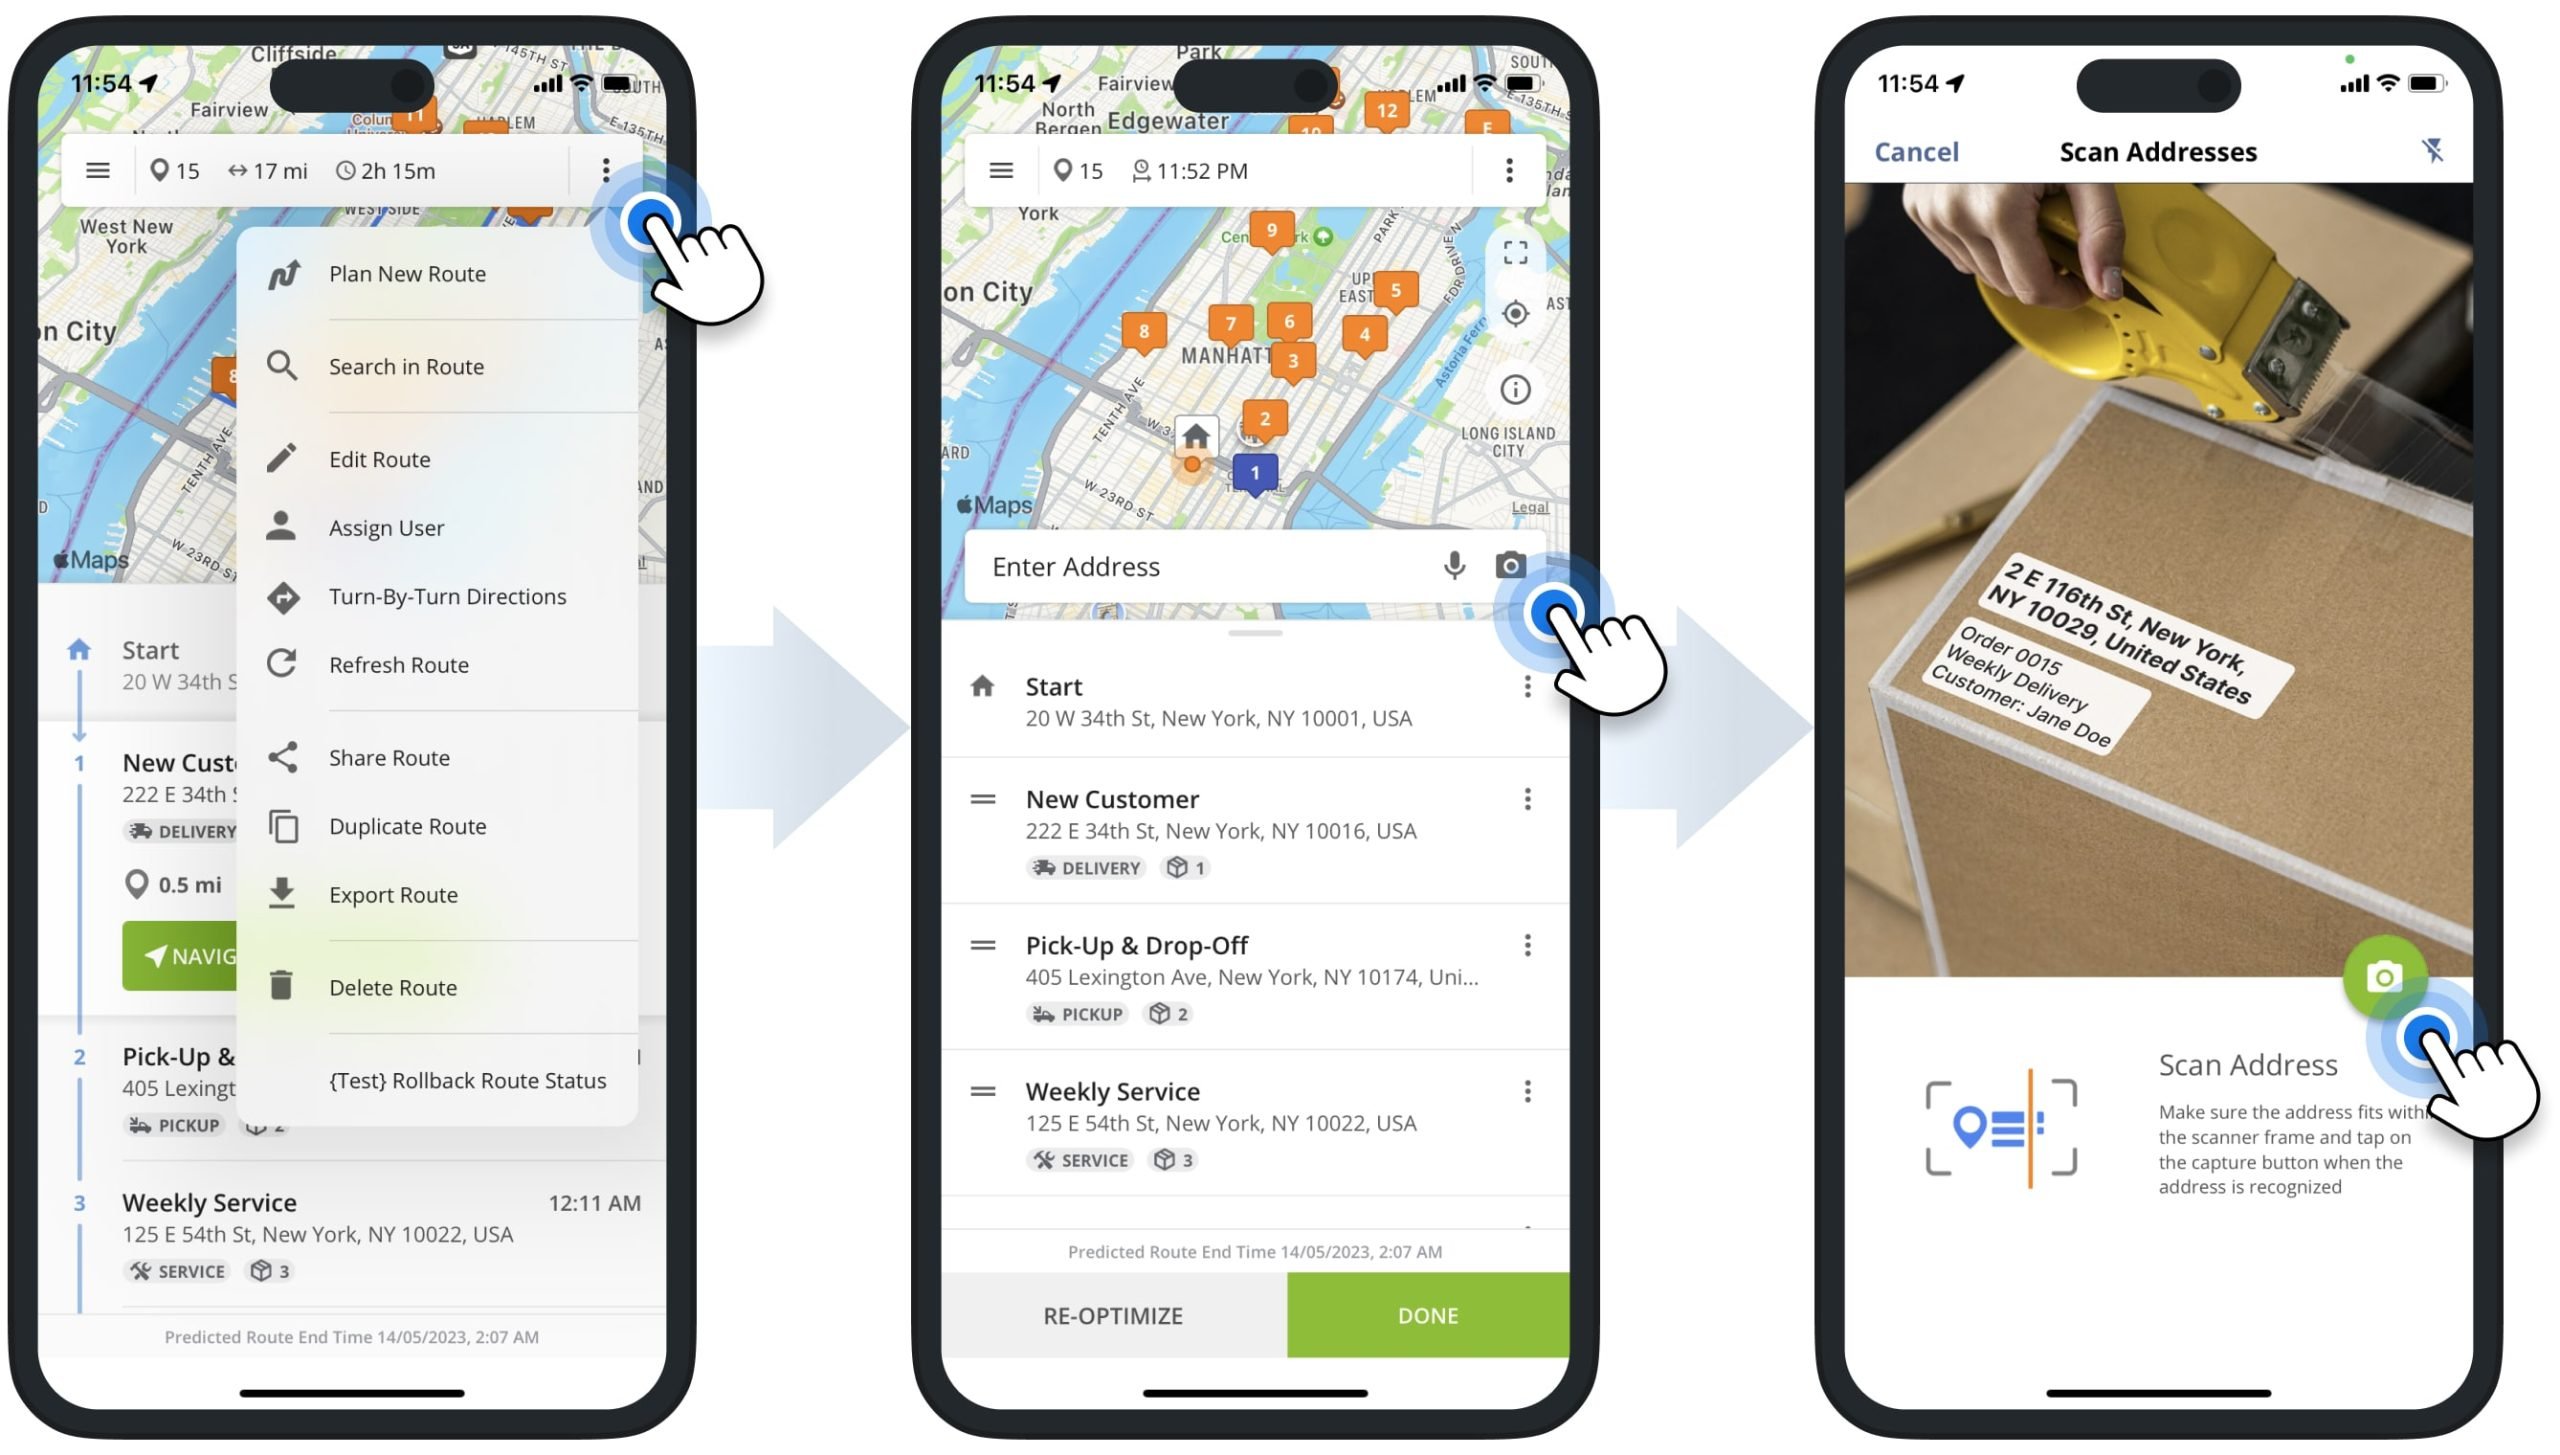
Route4Me’s in-app OCR data extraction scanner can detect and recognize addresses from different surfaces, texts, lists, maps, etc. Equally important, when simultaneously scanning multiple addresses, the app automatically recognizes all valid addresses and suggests the available address options. Additionally, you can tap the flashlight icon in the top right corner of the scanner’s screen to enable the flashlight on your device when scanning addresses.
Visit Route4Me's Marketplace to Check out Associated Modules:
- Operations
Custom Data Add-On
- Operations
Advanced Team Management Add-On
About author: Alex Yasko
Alex Yasko is the Go-to-Market Product Manager and Information Architecture Manager at Route4Me. With thousands of hours of experience, Alex specializes in breaking down complex last-mile optimization and routing scenarios into simple, actionable instructions, helping last-mile businesses streamline their operations effortlessly.