Return To Sender – Scan Label Codes To Process Orders For Return To Sender
Route4Me’s ERP Order Management and Routing System helps medium and large last mile businesses import orders from CRMs and other systems to sort, route, and complete millions of orders efficiently. However, some orders may arrive incorrect or damaged, requiring a return to the sender or point of origin. In this guide, you’ll learn how team members can use Route4Me’s Android and iPhone Routing App with the in-app or a connected Bluetooth scanner to identify return orders.
Table of Contents
Enable Return To Sender Order Scanning On Your Route4Me Account
To enable the return order feature, contact the Route4Me Support Team. Once enabled, users with the proper permissions can use the in-app barcode scanner or a connected Bluetooth scanner to assign the “Return to Sender” status to orders.
Return Order Scanning Permissions – Enable Order Return Scanning For Sorters And Other User Types
When the “Return to Sender” feature, which allows scanning labels and barcodes to mark return orders, is enabled on your account, you can adjust the associated user permissions when creating a new user or editing an existing one.
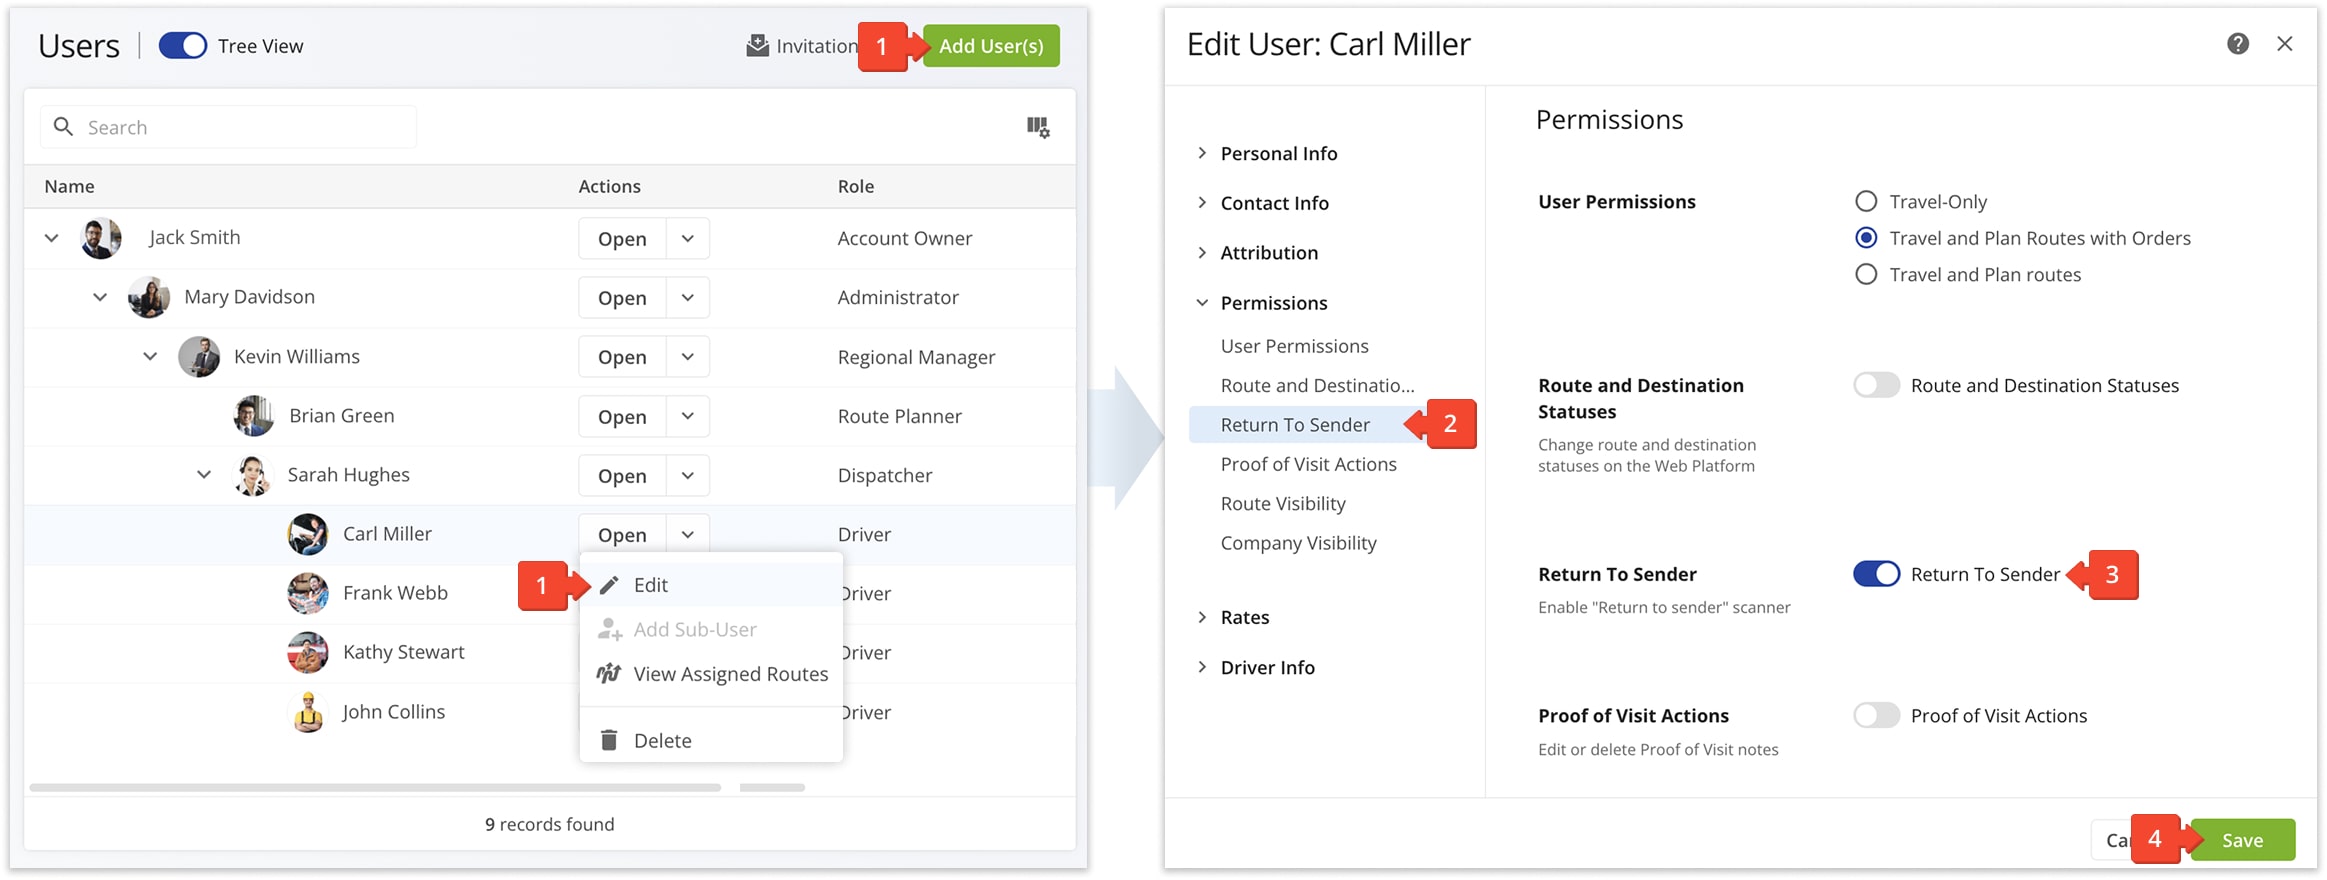
If Grab & Go order routing is also enabled, its permissions can be managed on the same page. To update these settings, go to “Team & Equipment” > “Users” in the Navigation Menu, then:
- Click “Add User(s)” to create a new user profile, or the Down Arrow button > “Edit” to update an existing user.
- Click the “Return To Sender” tab under “Permissions“.
- Toggle “Return to sender”.
- Click the “Save” button.
After saving, the user can scan labels and barcodes in the mobile app to mark orders as “Return to Sender“. You can enable this permission for Sorters, Drivers, and any other user type on your last-mile routing team.
Scan Return Orders – Use In-App Barcode Scanner To Mark Return To Sender Orders
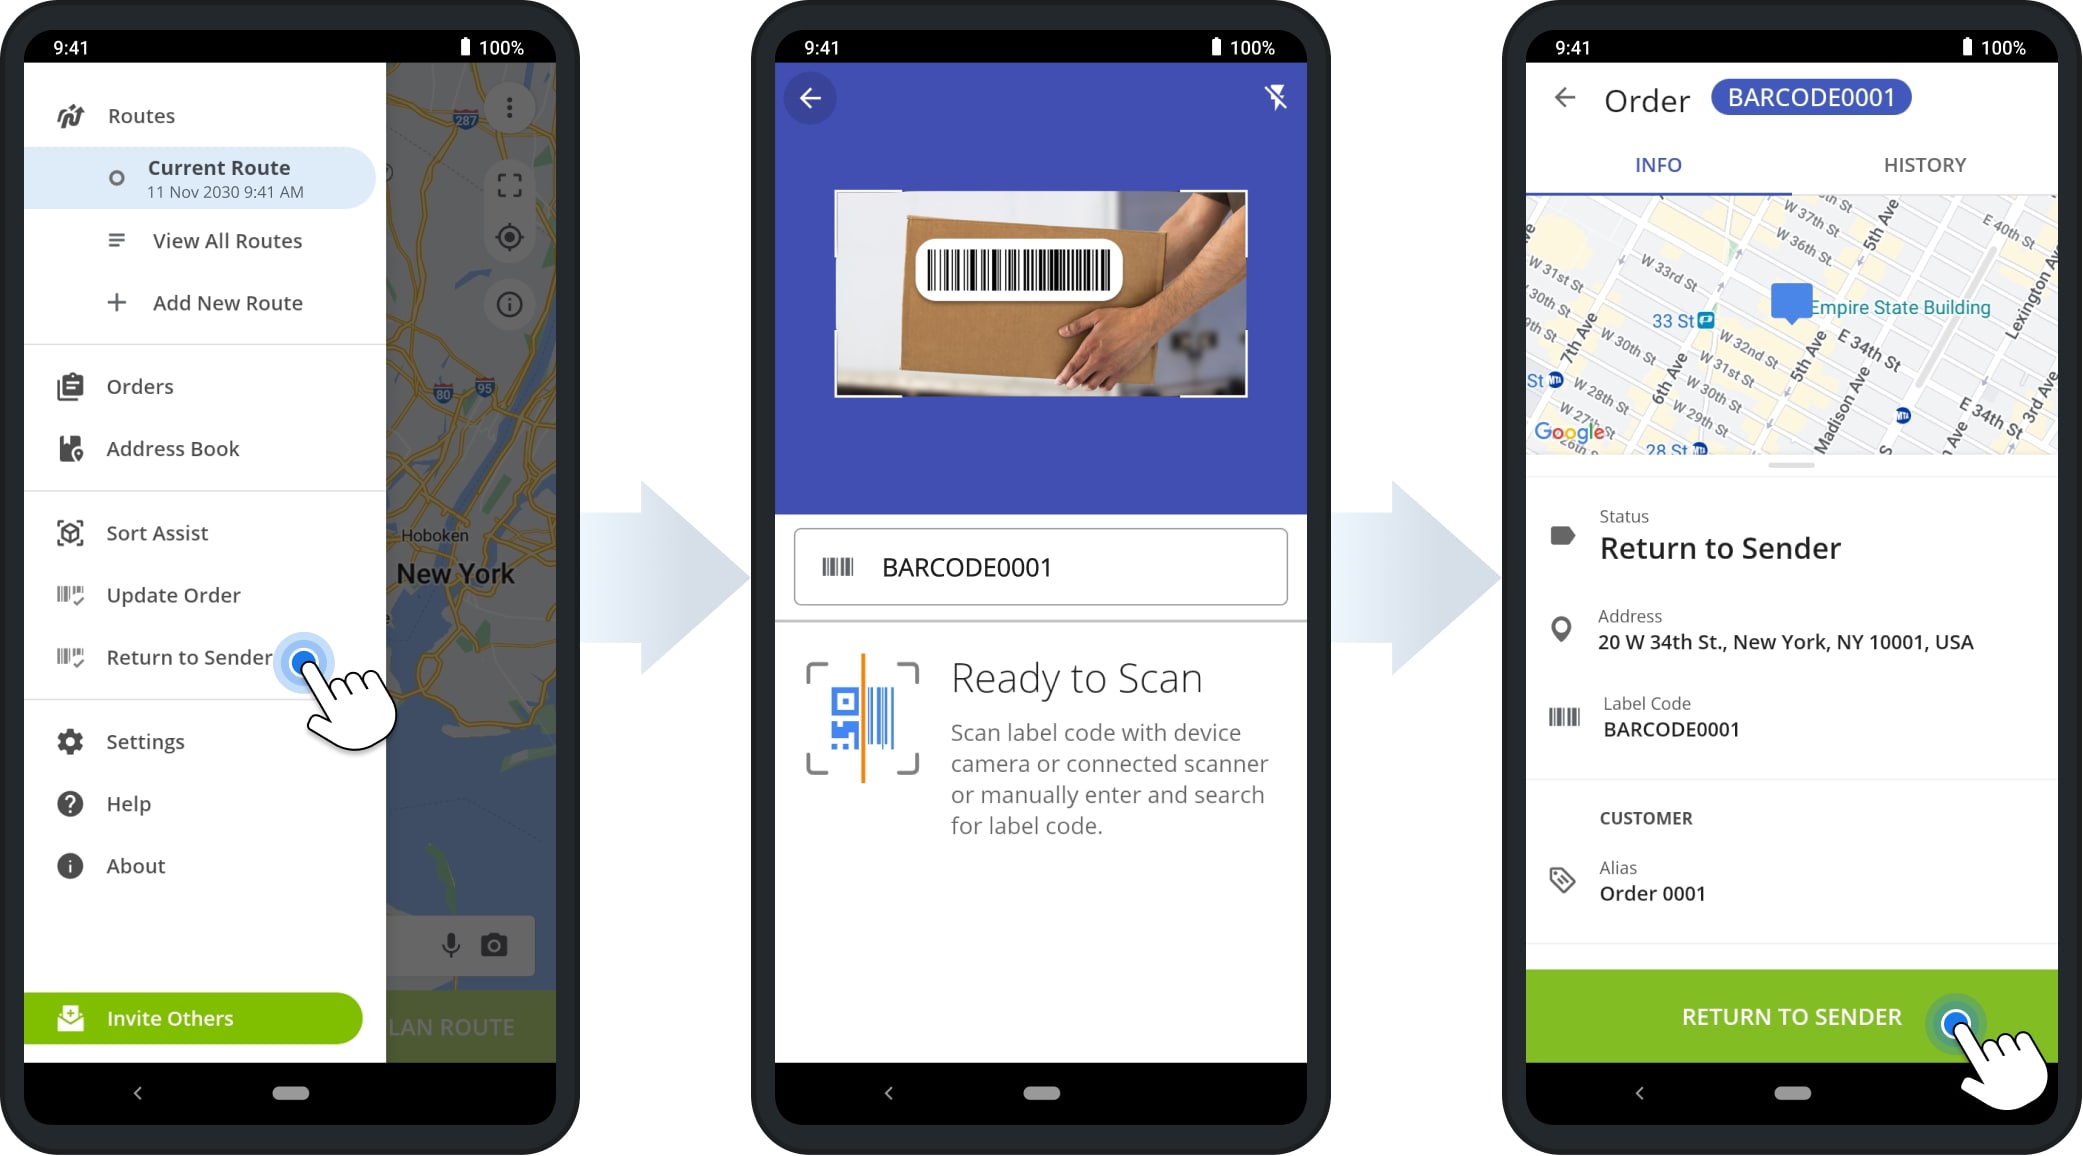
To process return orders and assign the “Return to Sender” status, sign in to your Route4Me account on the Android or iPhone Order Routing app. Then, tap “Return to Sender” in the app’s Navigation Menu to open the label scanner.
When you scan an order label, the app automatically displays the order details for confirmation. Tap the “Return to Sender” button to update the order status.
You can scan multiple order barcodes continuously without closing the scanner. After confirming one return, the scanner reopens automatically for the next barcode.
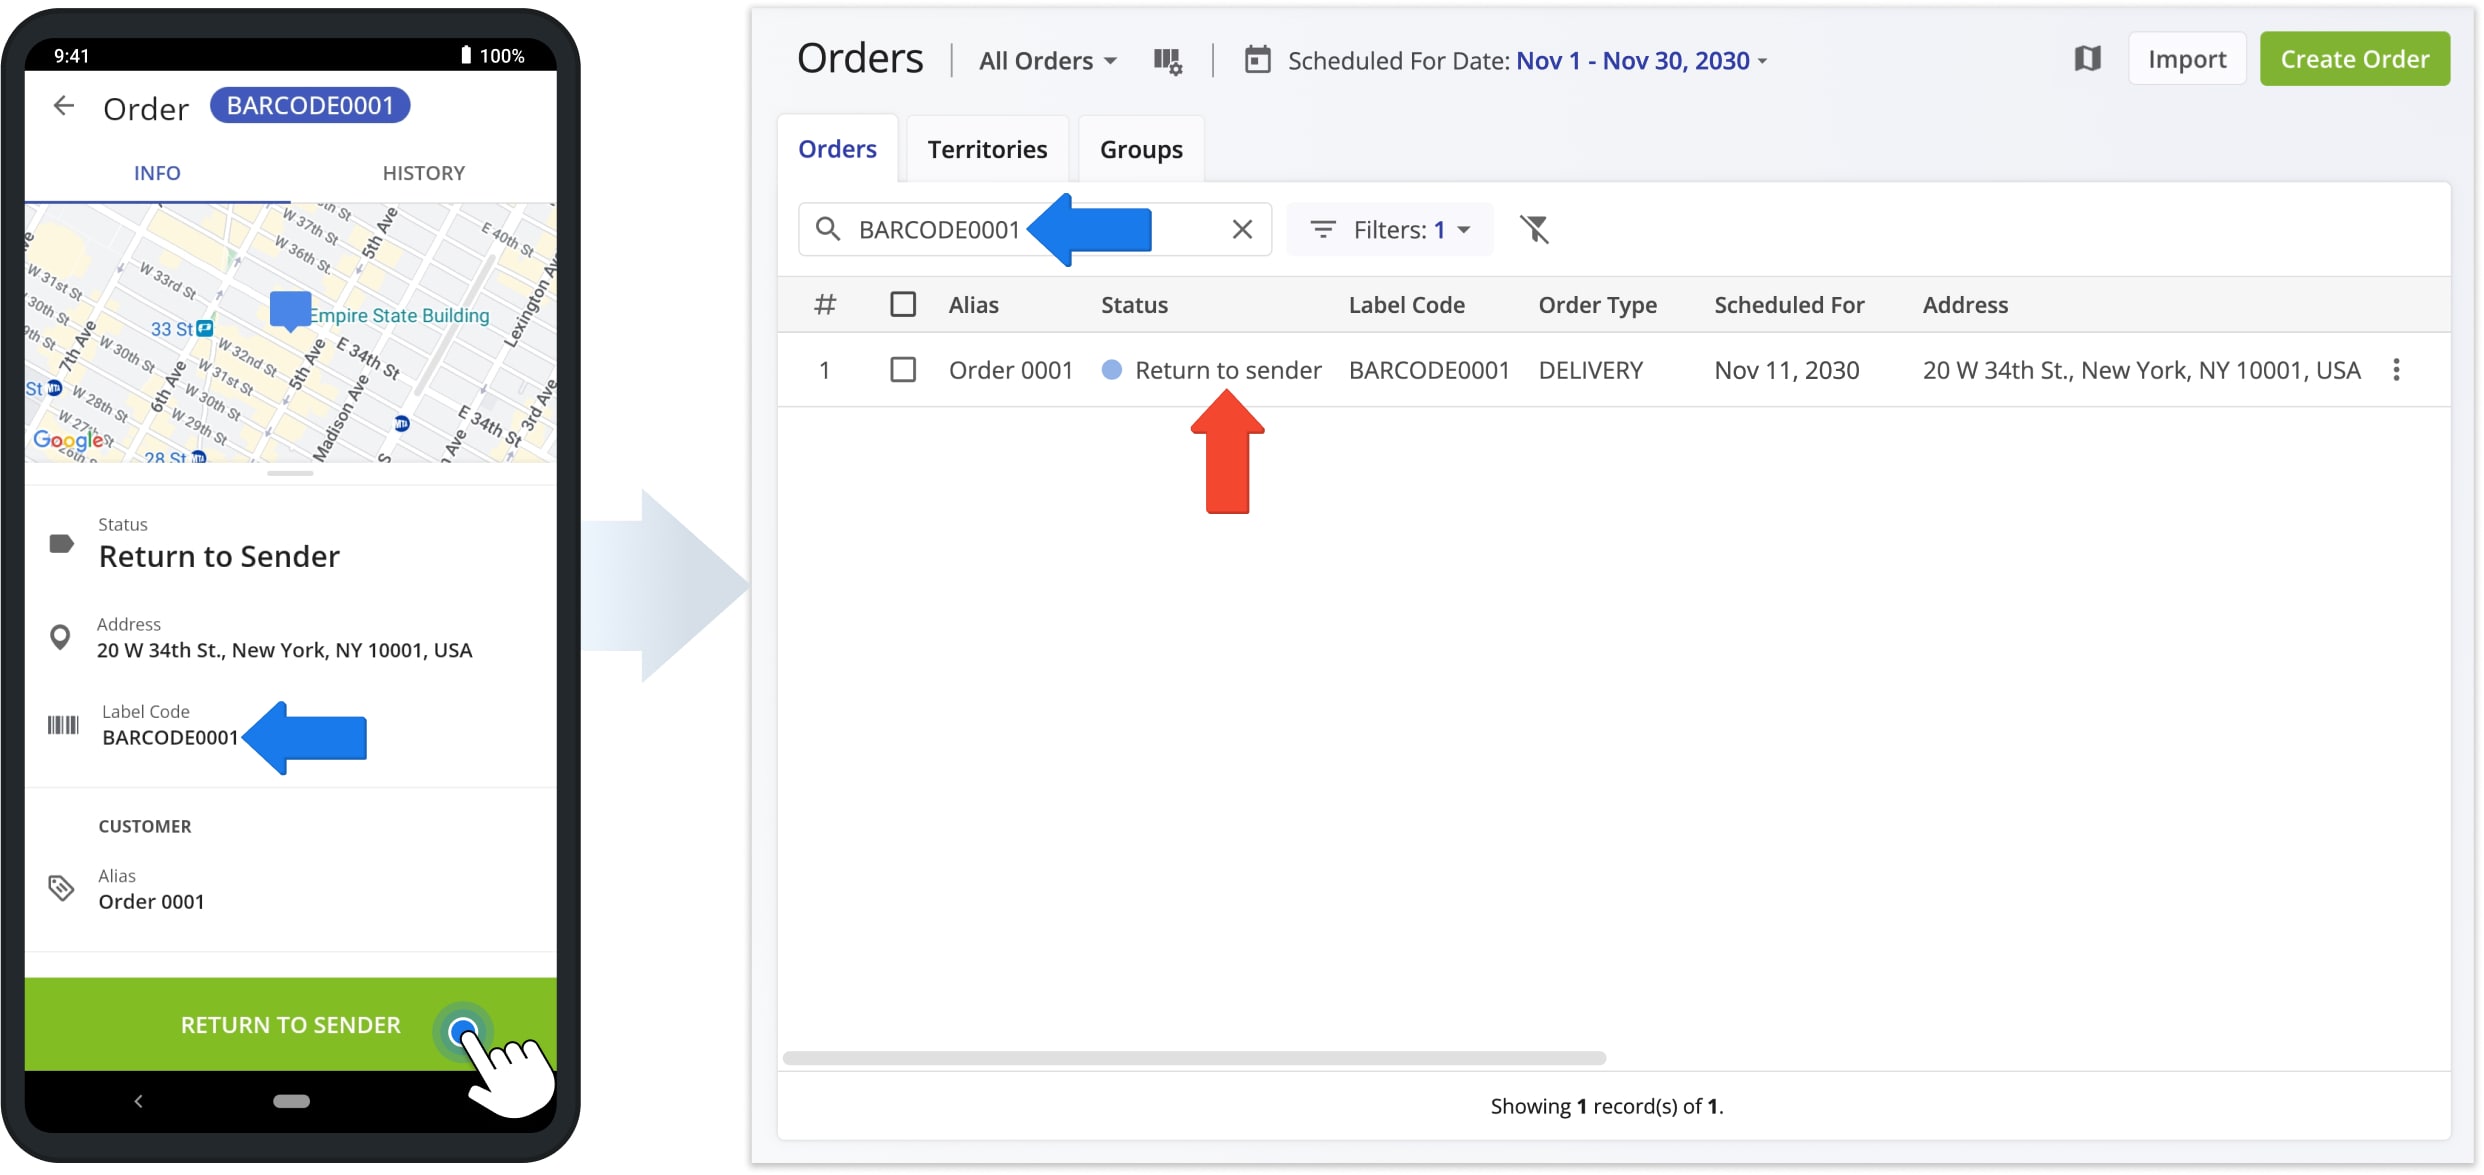
When a Sorter or team member scans an order and marks it as “Return to Sender“, the order status updates in real time. Route4Me automatically syncs all status changes across your account, no matter when or where they occur.
To view specific orders on the Web Platform, go to “Orders” from the Navigation Menu and enter the order’s label code or other details in the Search Field.
Filter Return Orders – Use Orders Page Filters To Find Return To Sender Orders
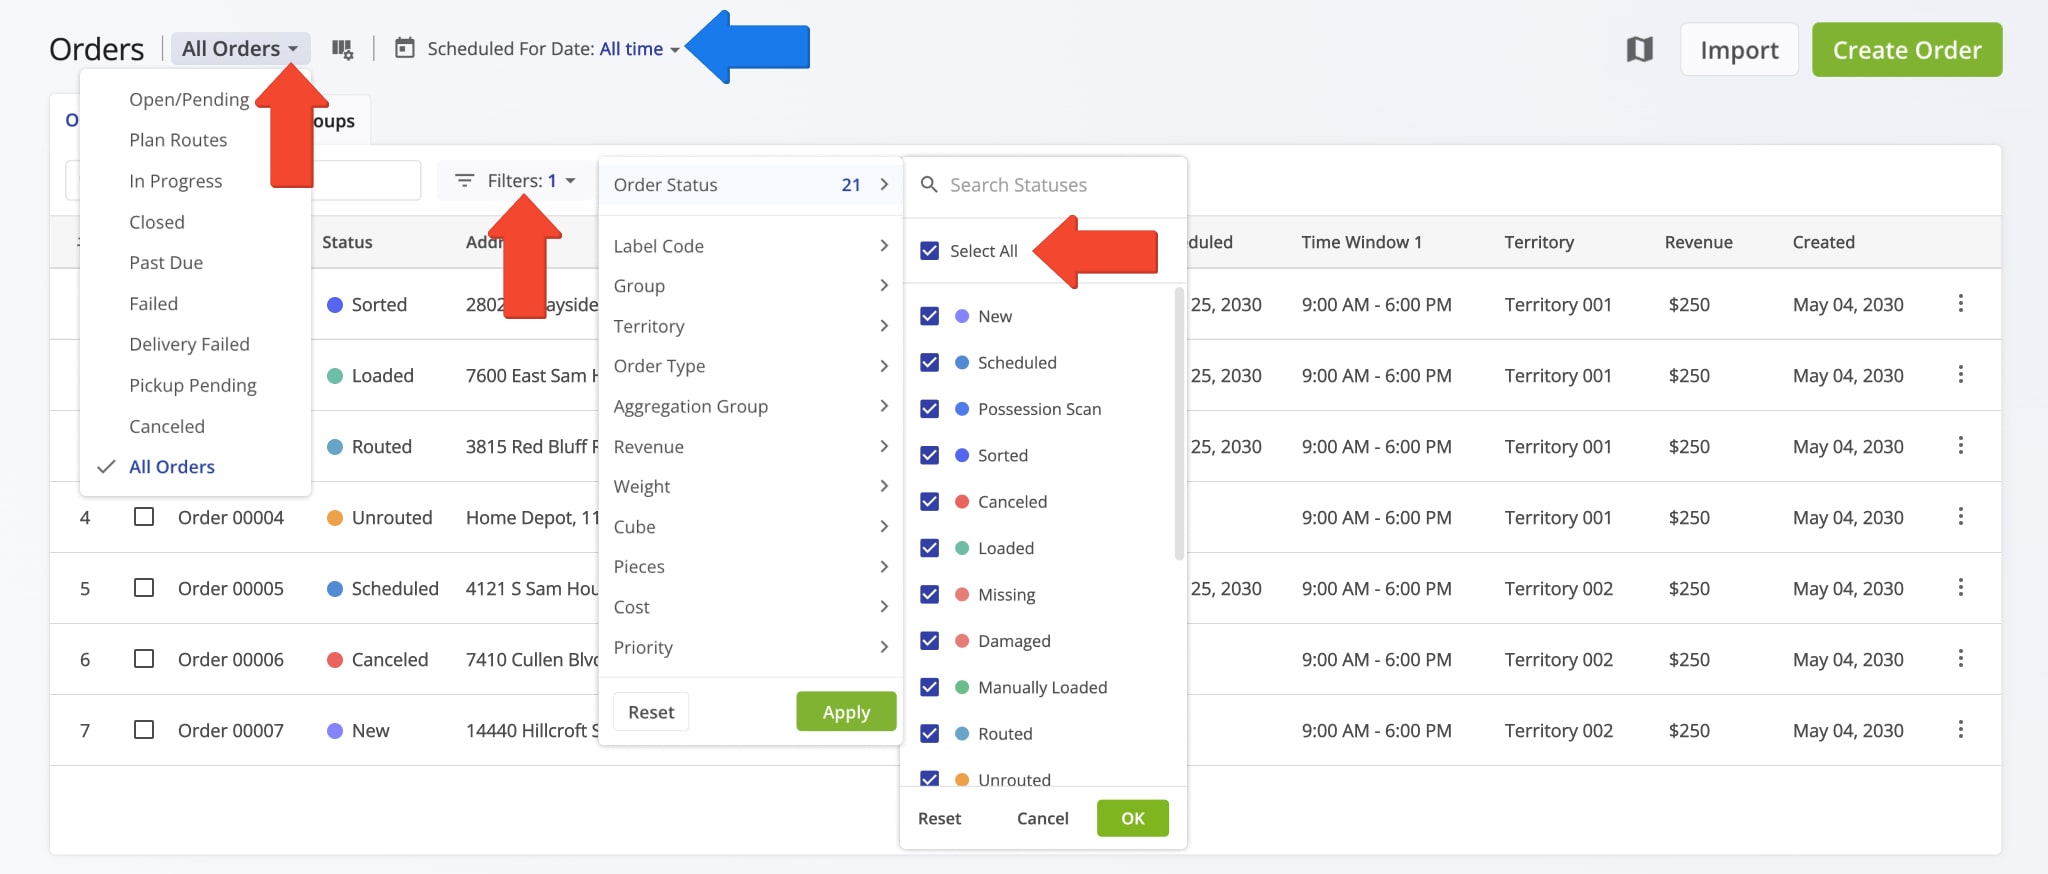
You can filter orders in your Route4Me Orders List by almost any parameter, such as address or label code. The most common filters are “Scheduled For Date” and “Order Status“, which groups statuses by purpose and application.
To view “Return to Sender” orders, select the “All Orders” View Mode. Then, go to Filters > Order Status and ensure the “Select All” box is checked. This will display all orders, including Return to Sender, allowing you to manage and plan routes with them.
Visit Route4Me's Marketplace to Check out Associated Modules:
- Operations
Advanced Team Management Add-On
- Operations
Custom Data Add-On