Manage Routes In Mobile Route Planner – Edit, Refresh, Maintain Your Routes
Explore how to manage and keep your routes up to date in the Route4Me Route Planner App for iOS and Android. Learn how to find and open routes, adjust route settings, duplicate or export routes, and remove routes when needed. You’ll also see how to refresh route data and access key tools that help you maintain accurate, organized, and efficient routes at all times.
NOTE: If you experience issues with features described in this guide, or if features you need are not available, please contact Route4Me’s Customer Support Team.
Table of Contents
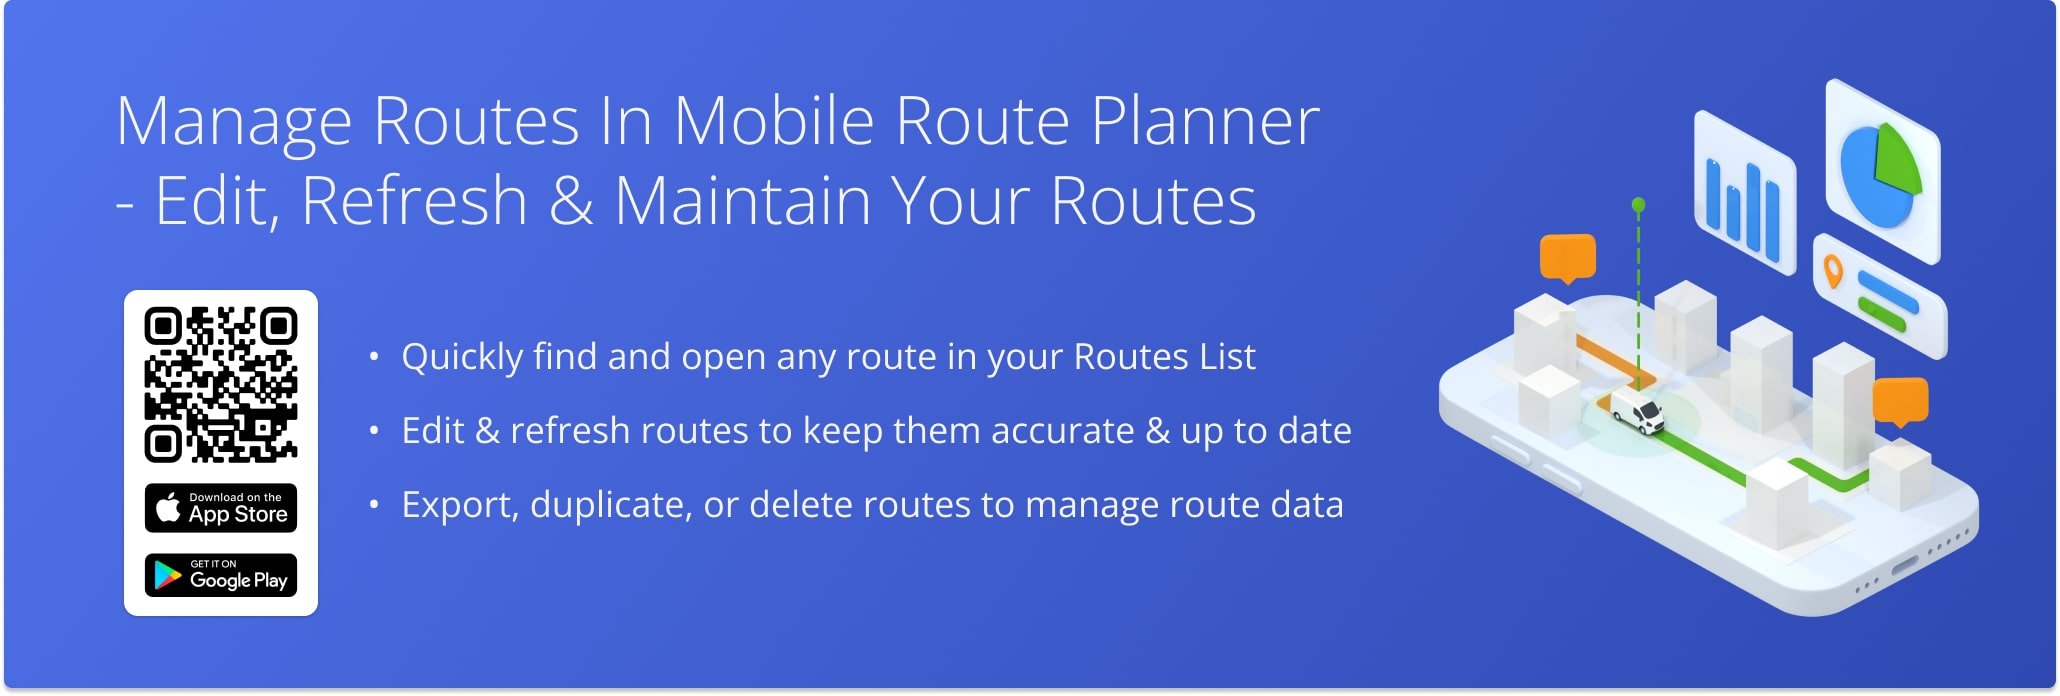
Routes List – Find And Open Routes
After signing in to the Route4Me mobile route planner app, tap the Menu Button in the top-left corner. Then, tap “Routes” to open the Routes List where you will find all of your routes.
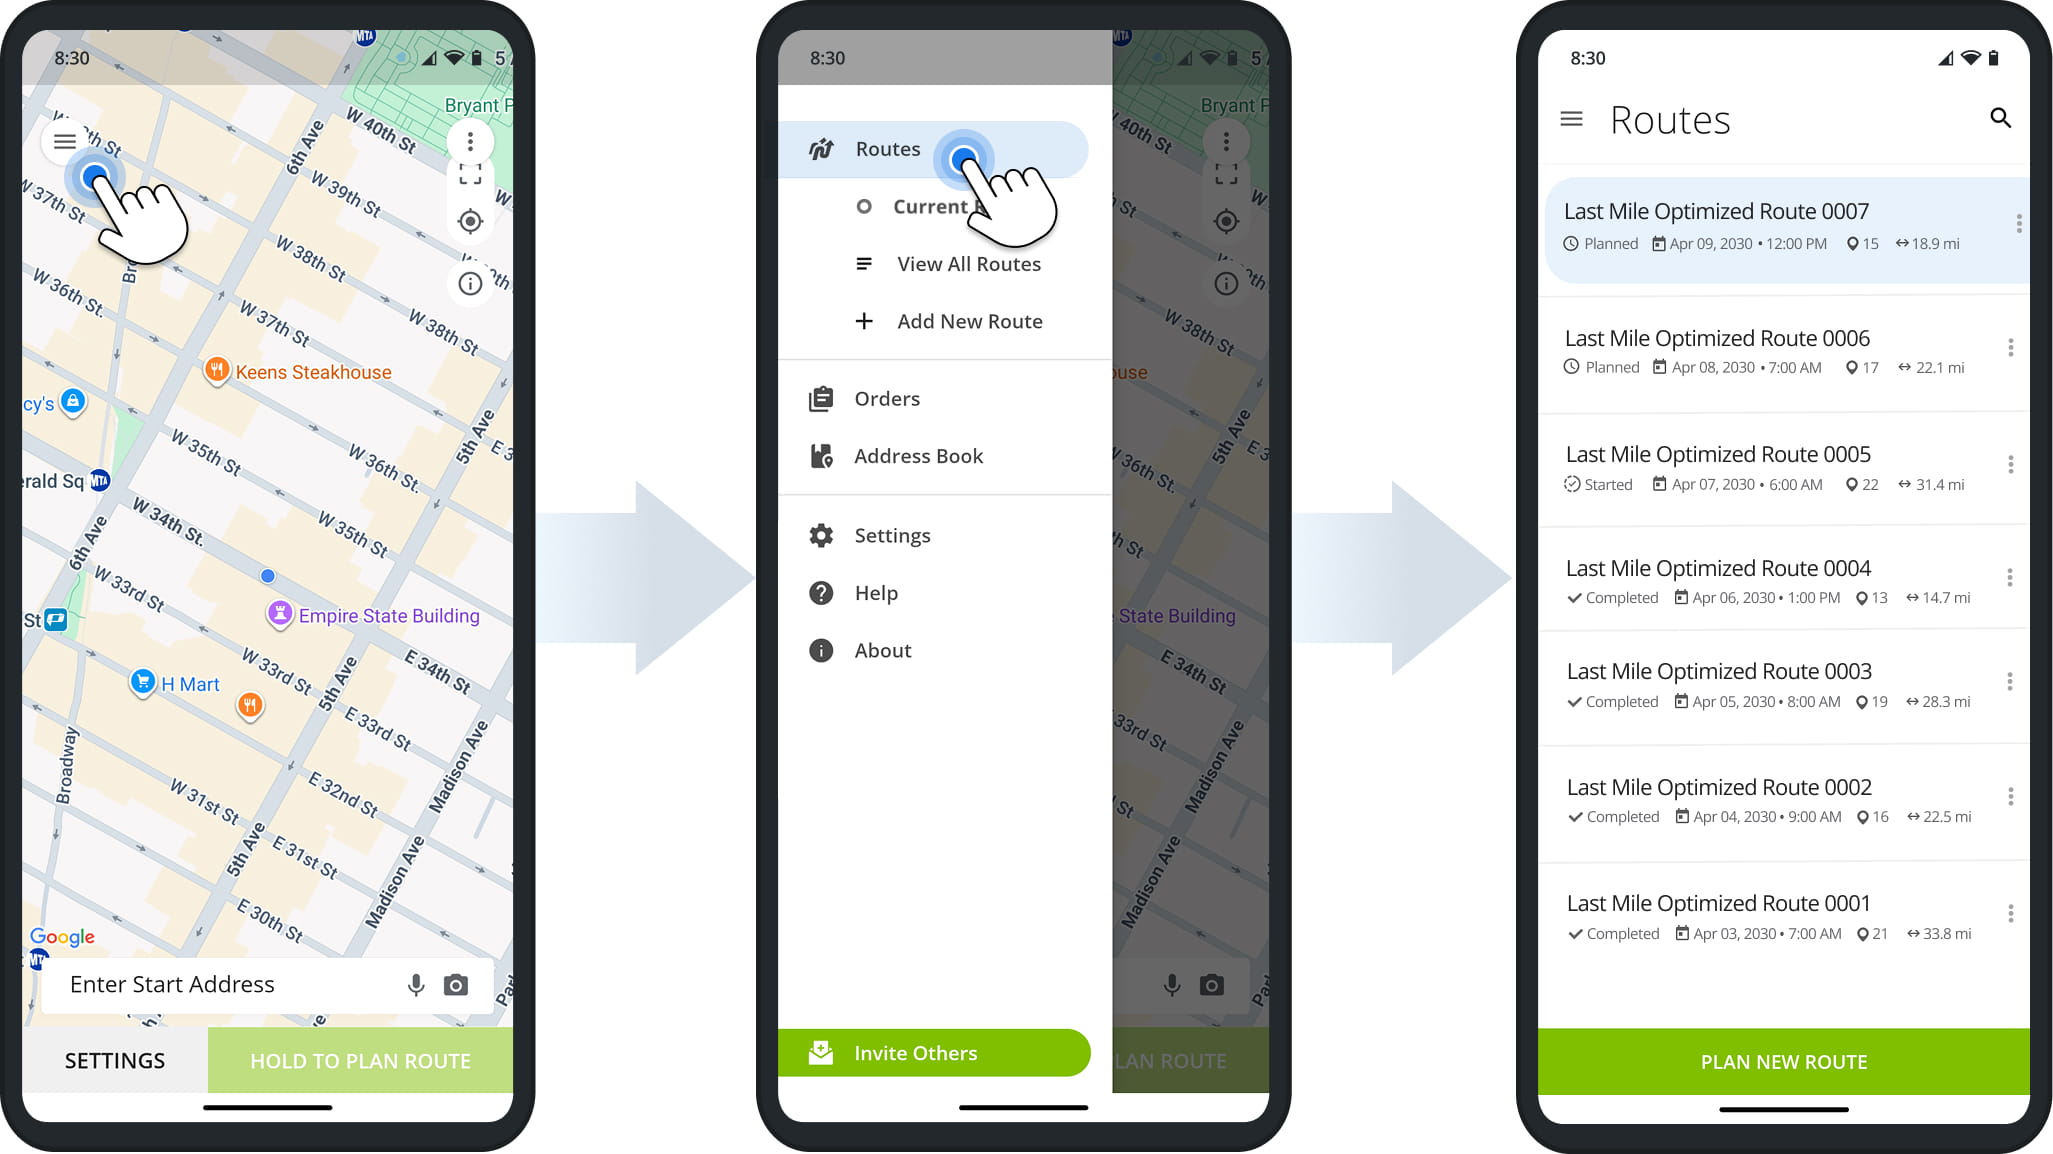
You can use the Search Icon to locate routes by name, scheduled month, city, or other route details. You can also filter routes by date by tapping the “All Time” button and selecting a specific date or data range.
Manage Planned, Dispatched, Started And Completed Routes
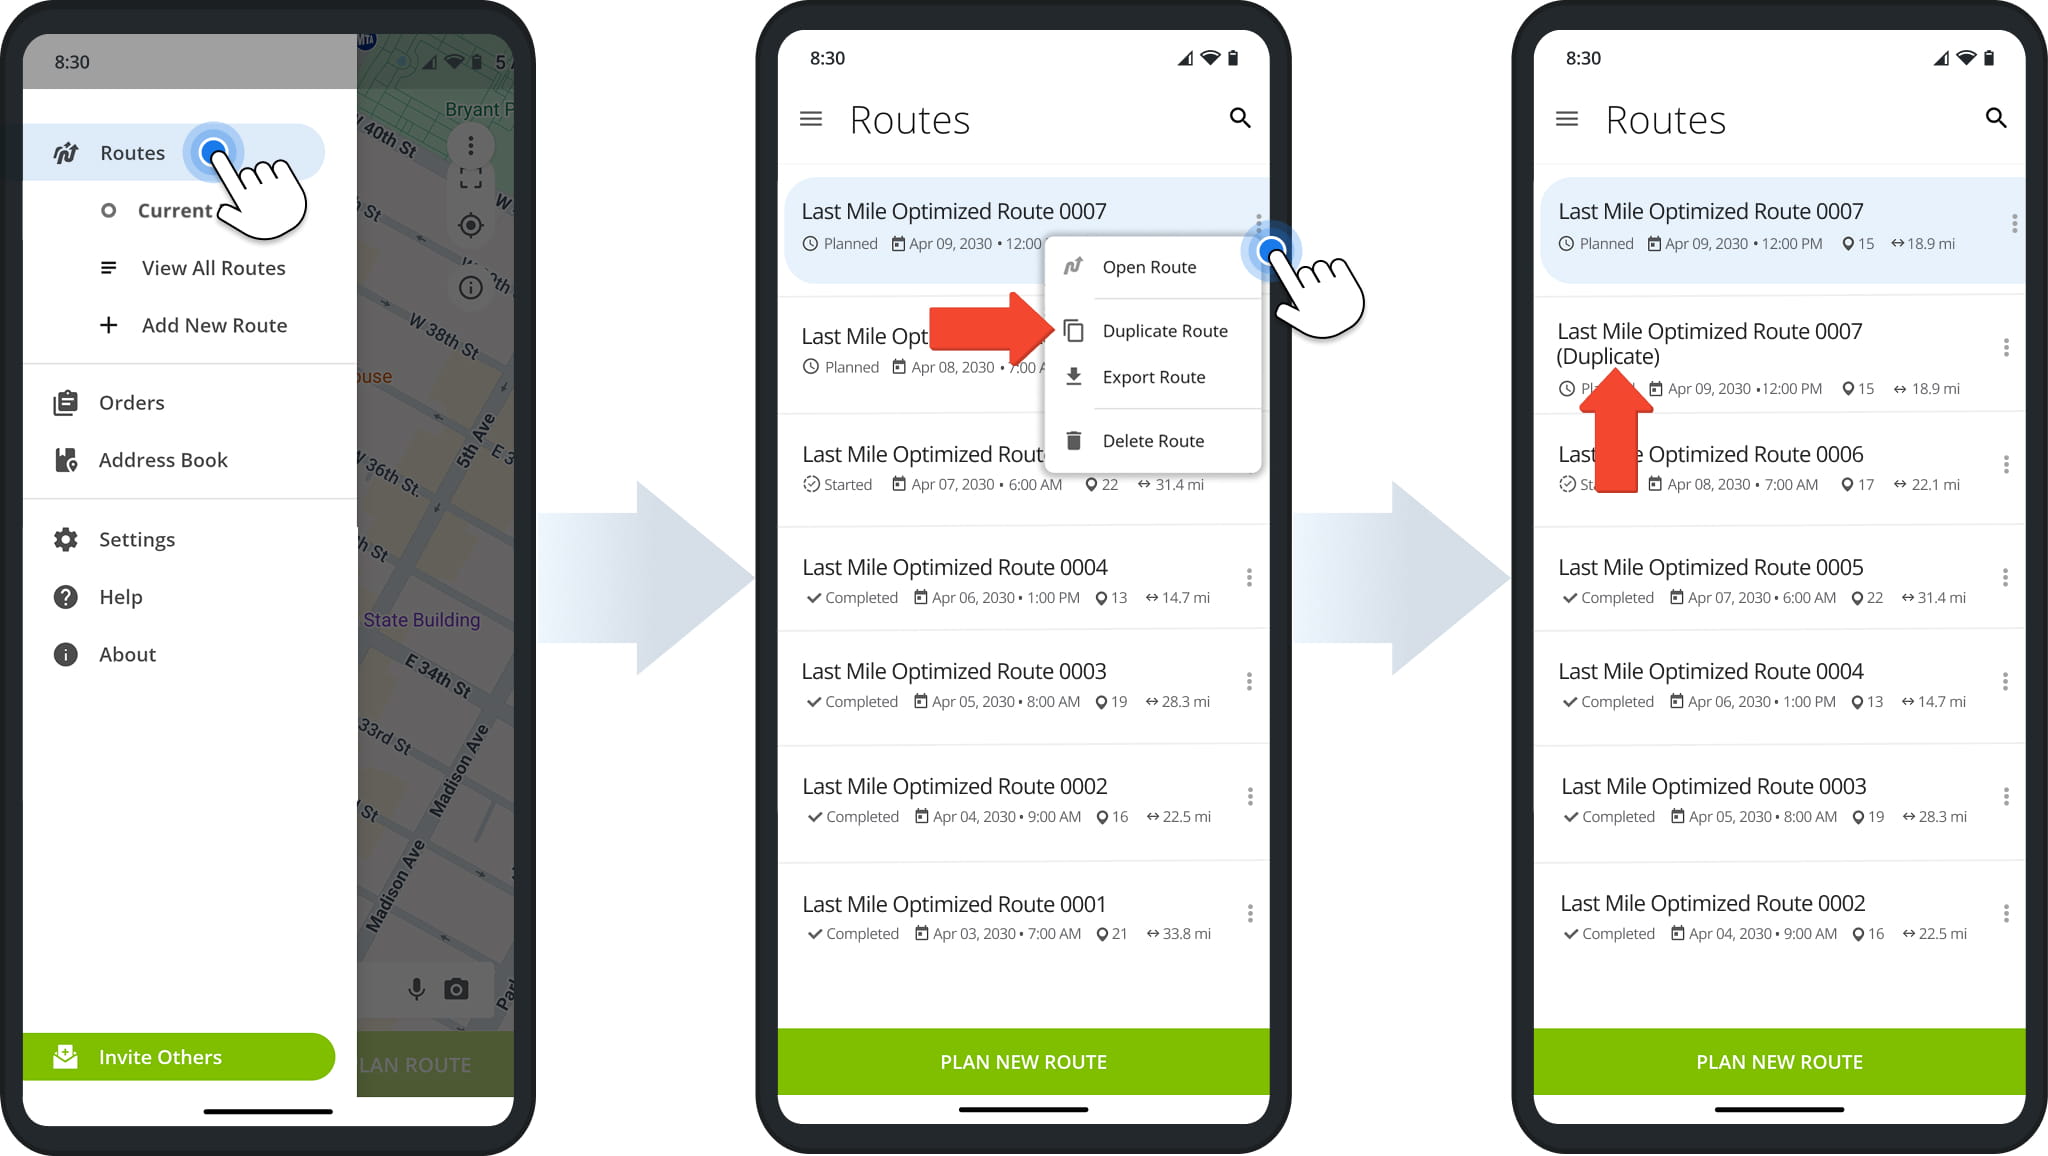
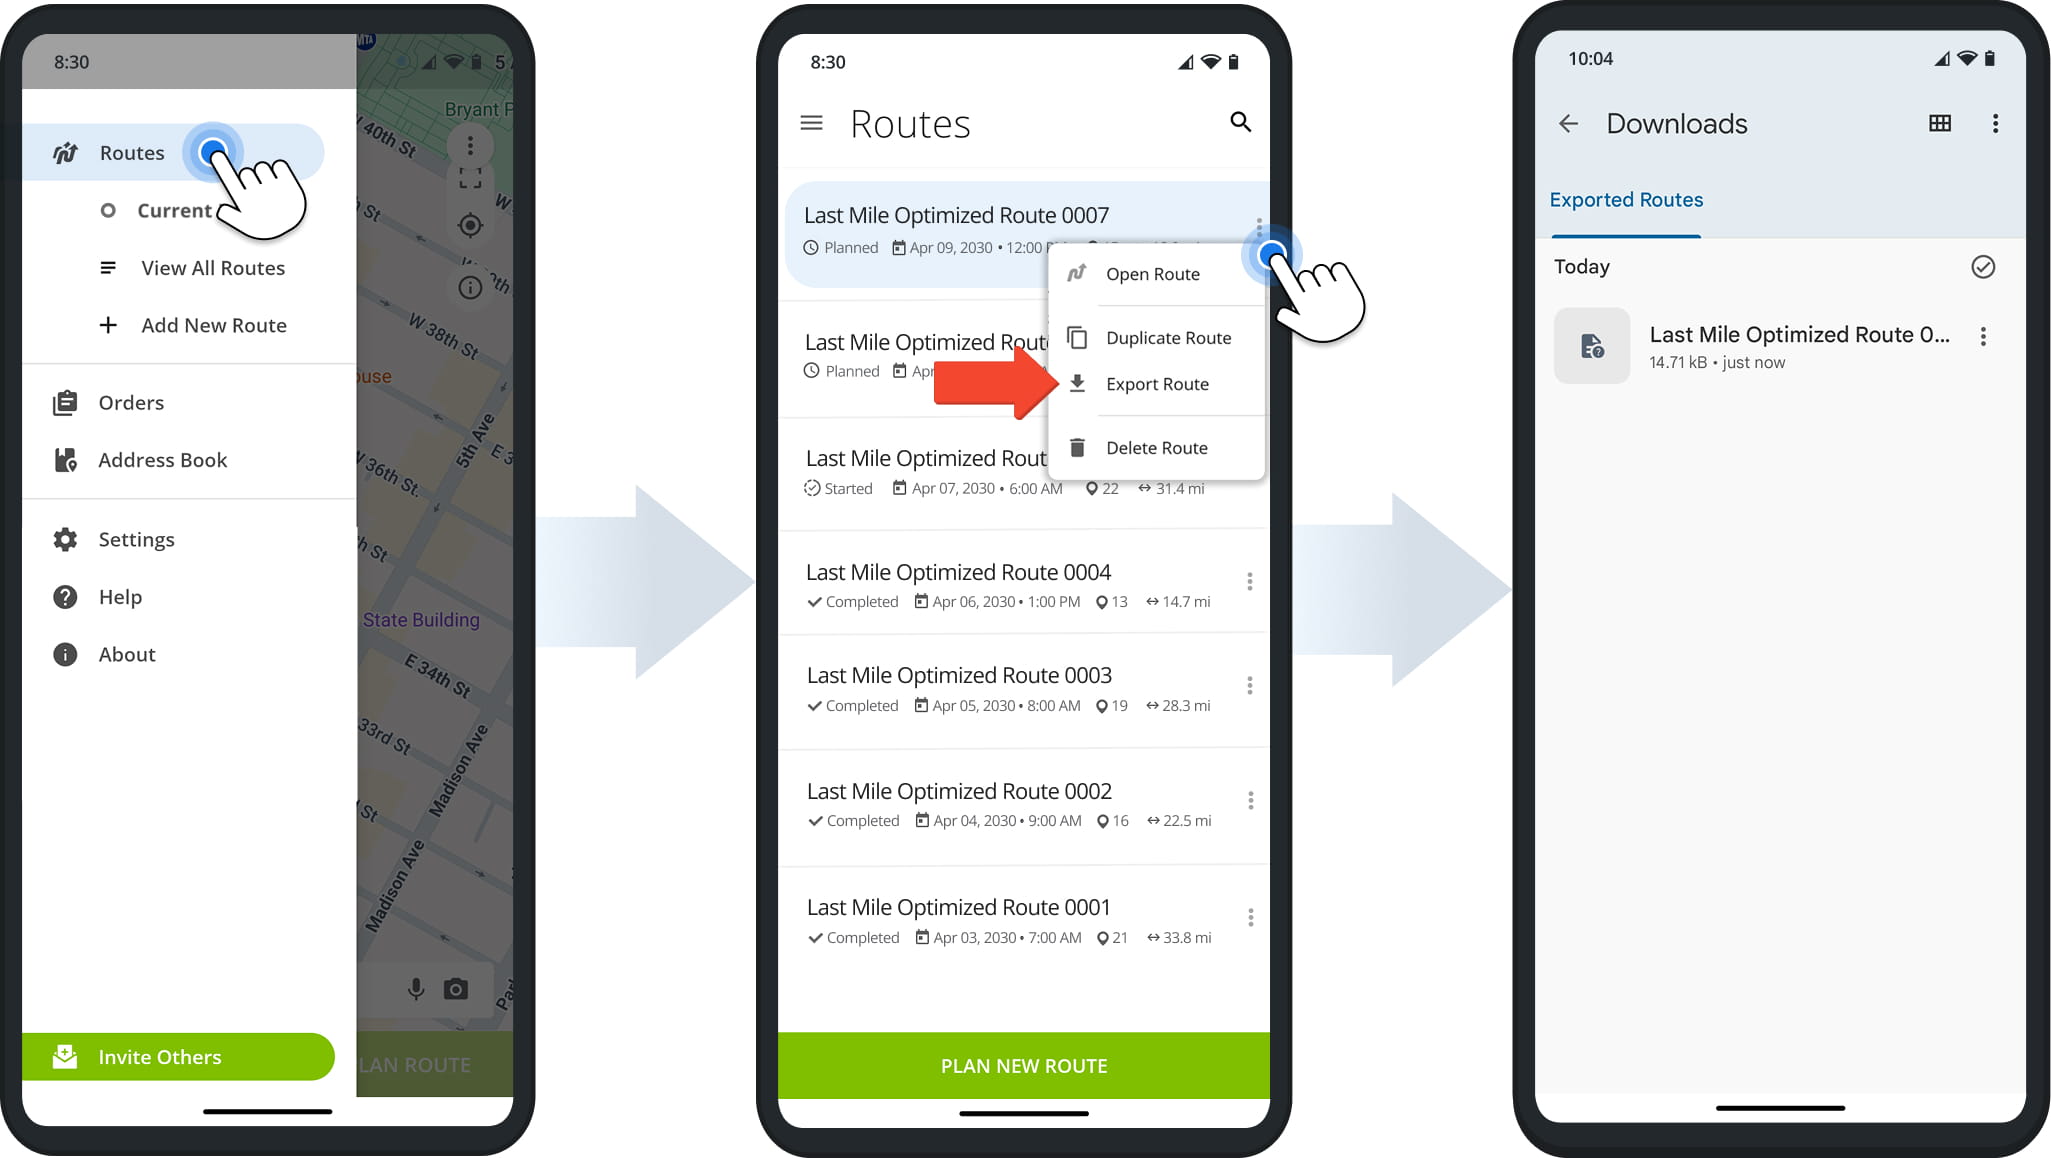
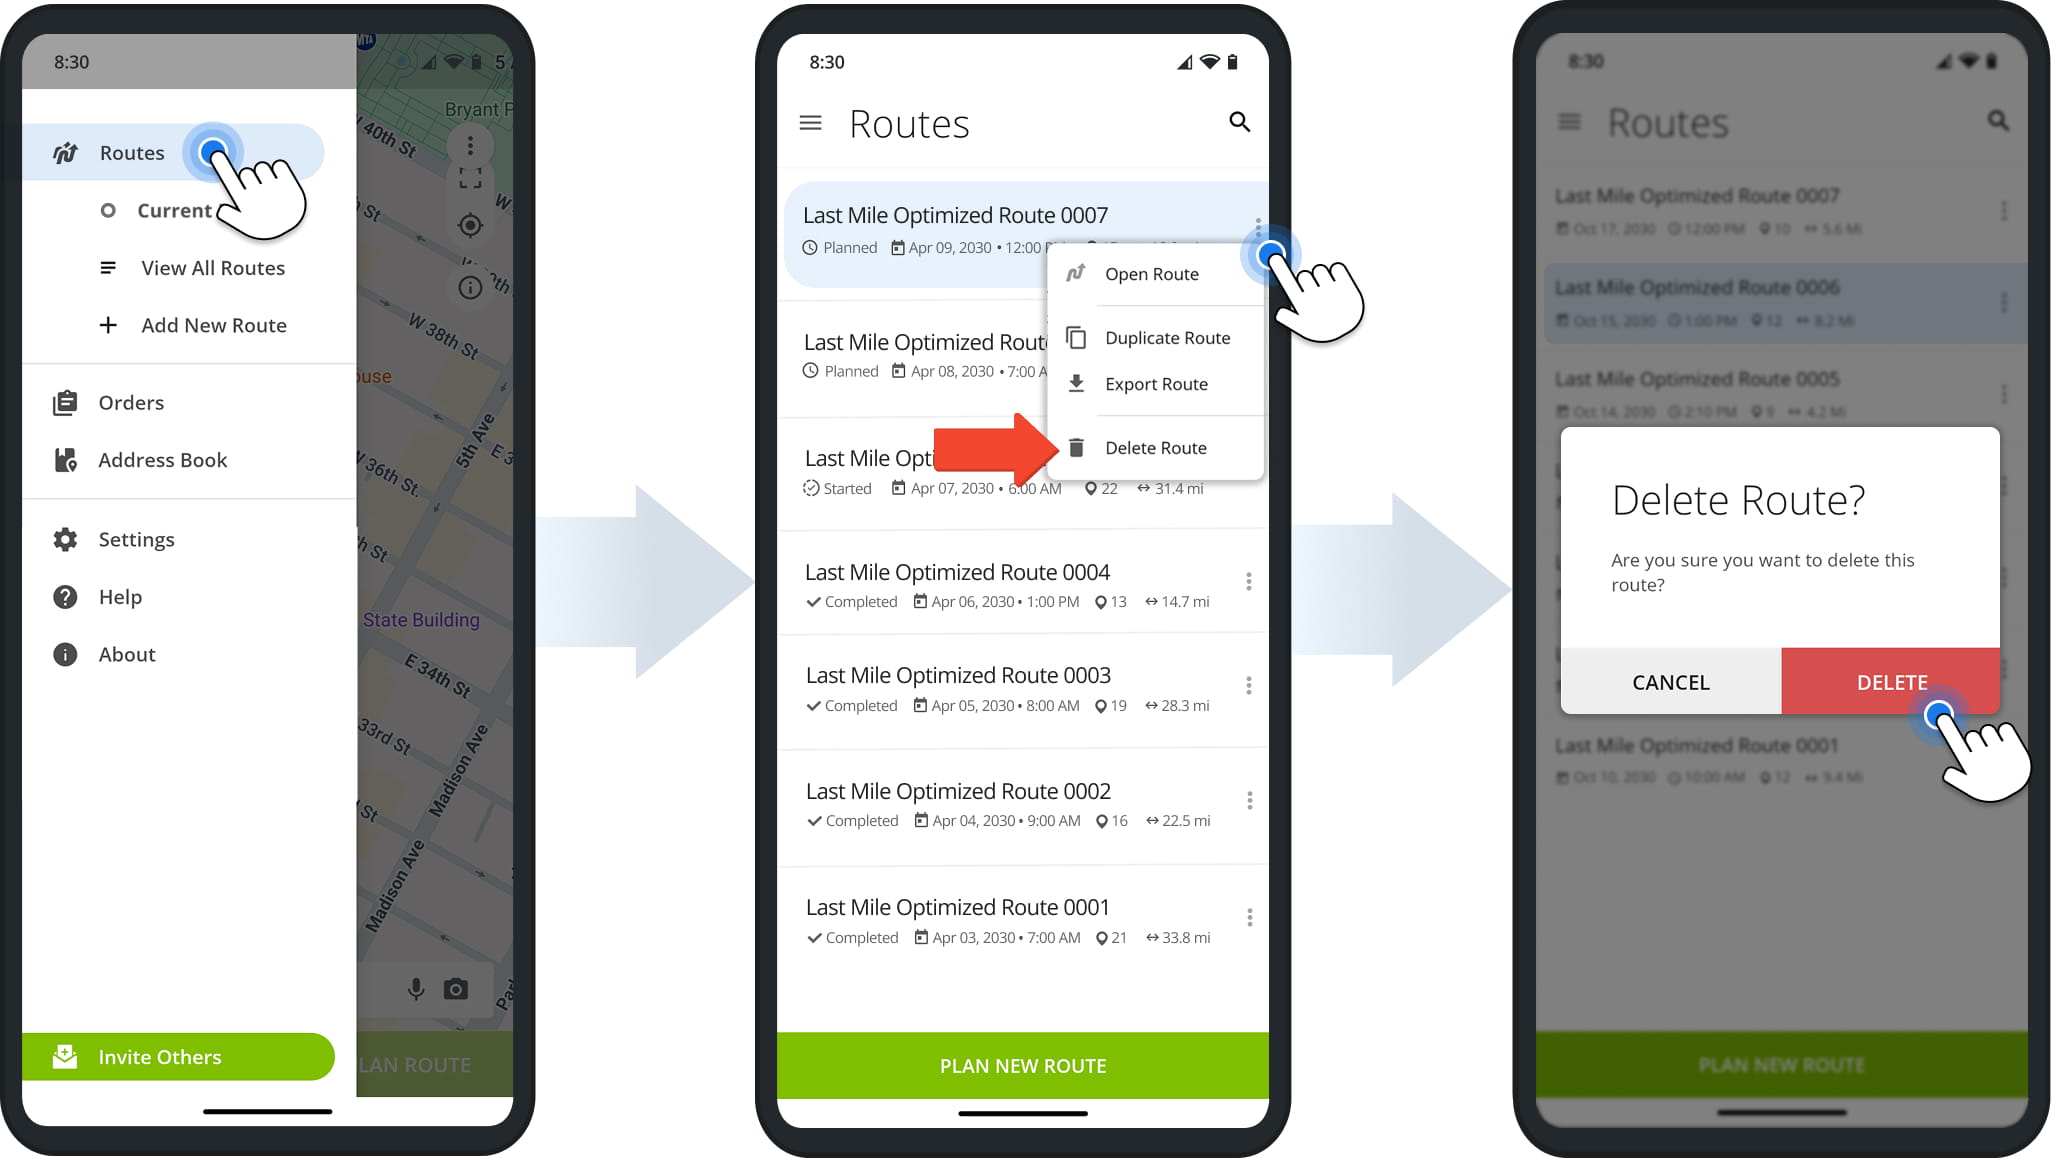
Basic route management actions are available directly from the Routes List. Go to “Routes” to access your Routes List. Then, tap the Three-dot Icon next to a route and select an available action. The table below summarizes each action:
![]()
Open Route
Open the route in the app to view destinations or start, navigate, and complete the route.
Duplicate Route
Create a copy of the route with "(Duplicate)" added to the route's name.
Export Route
Download a CSV file with the route's destinations and their associated data.
Delete Route
Remove the planned route. NOTE: Once removed, the deleted route cannot be reinstated.
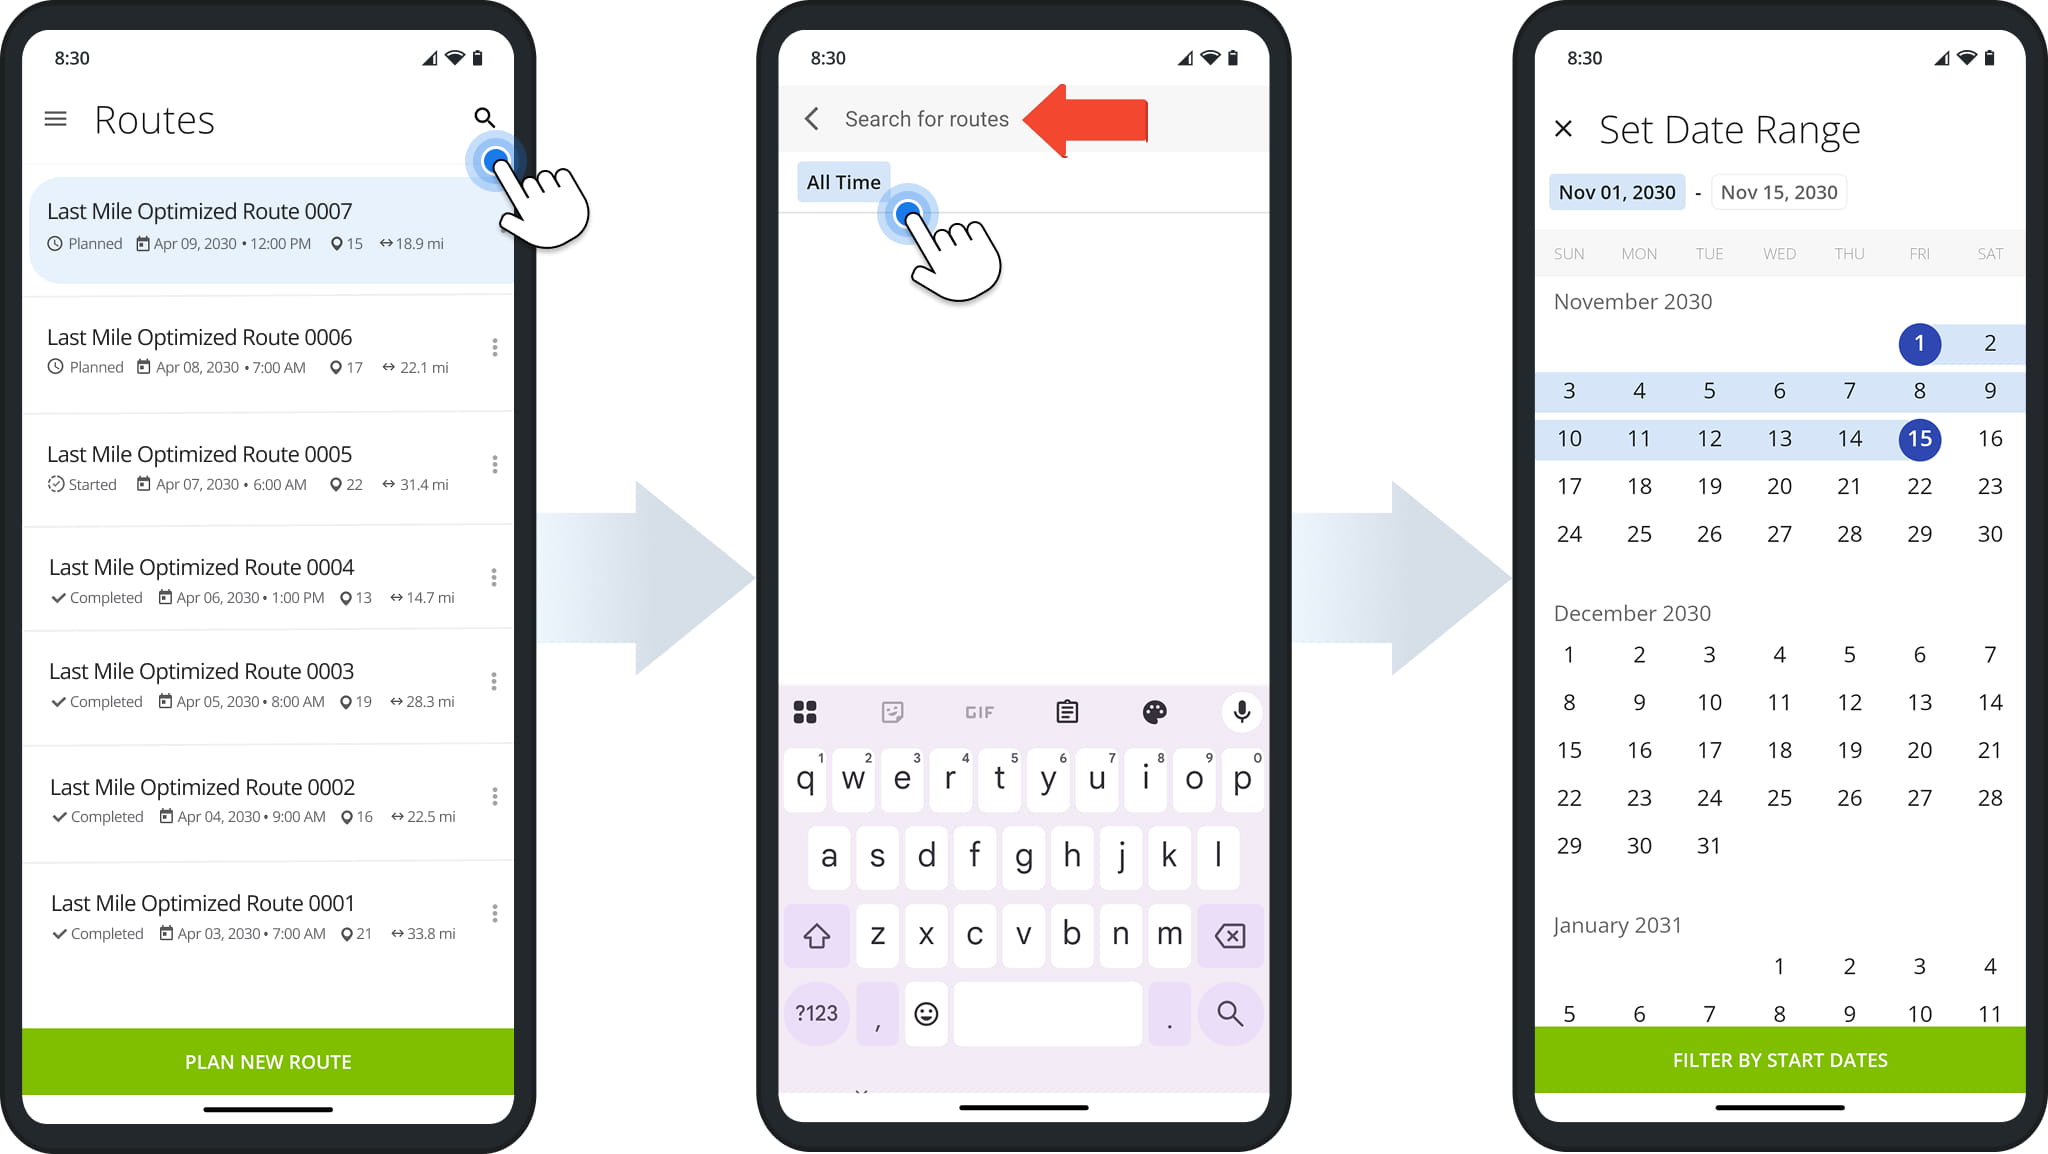
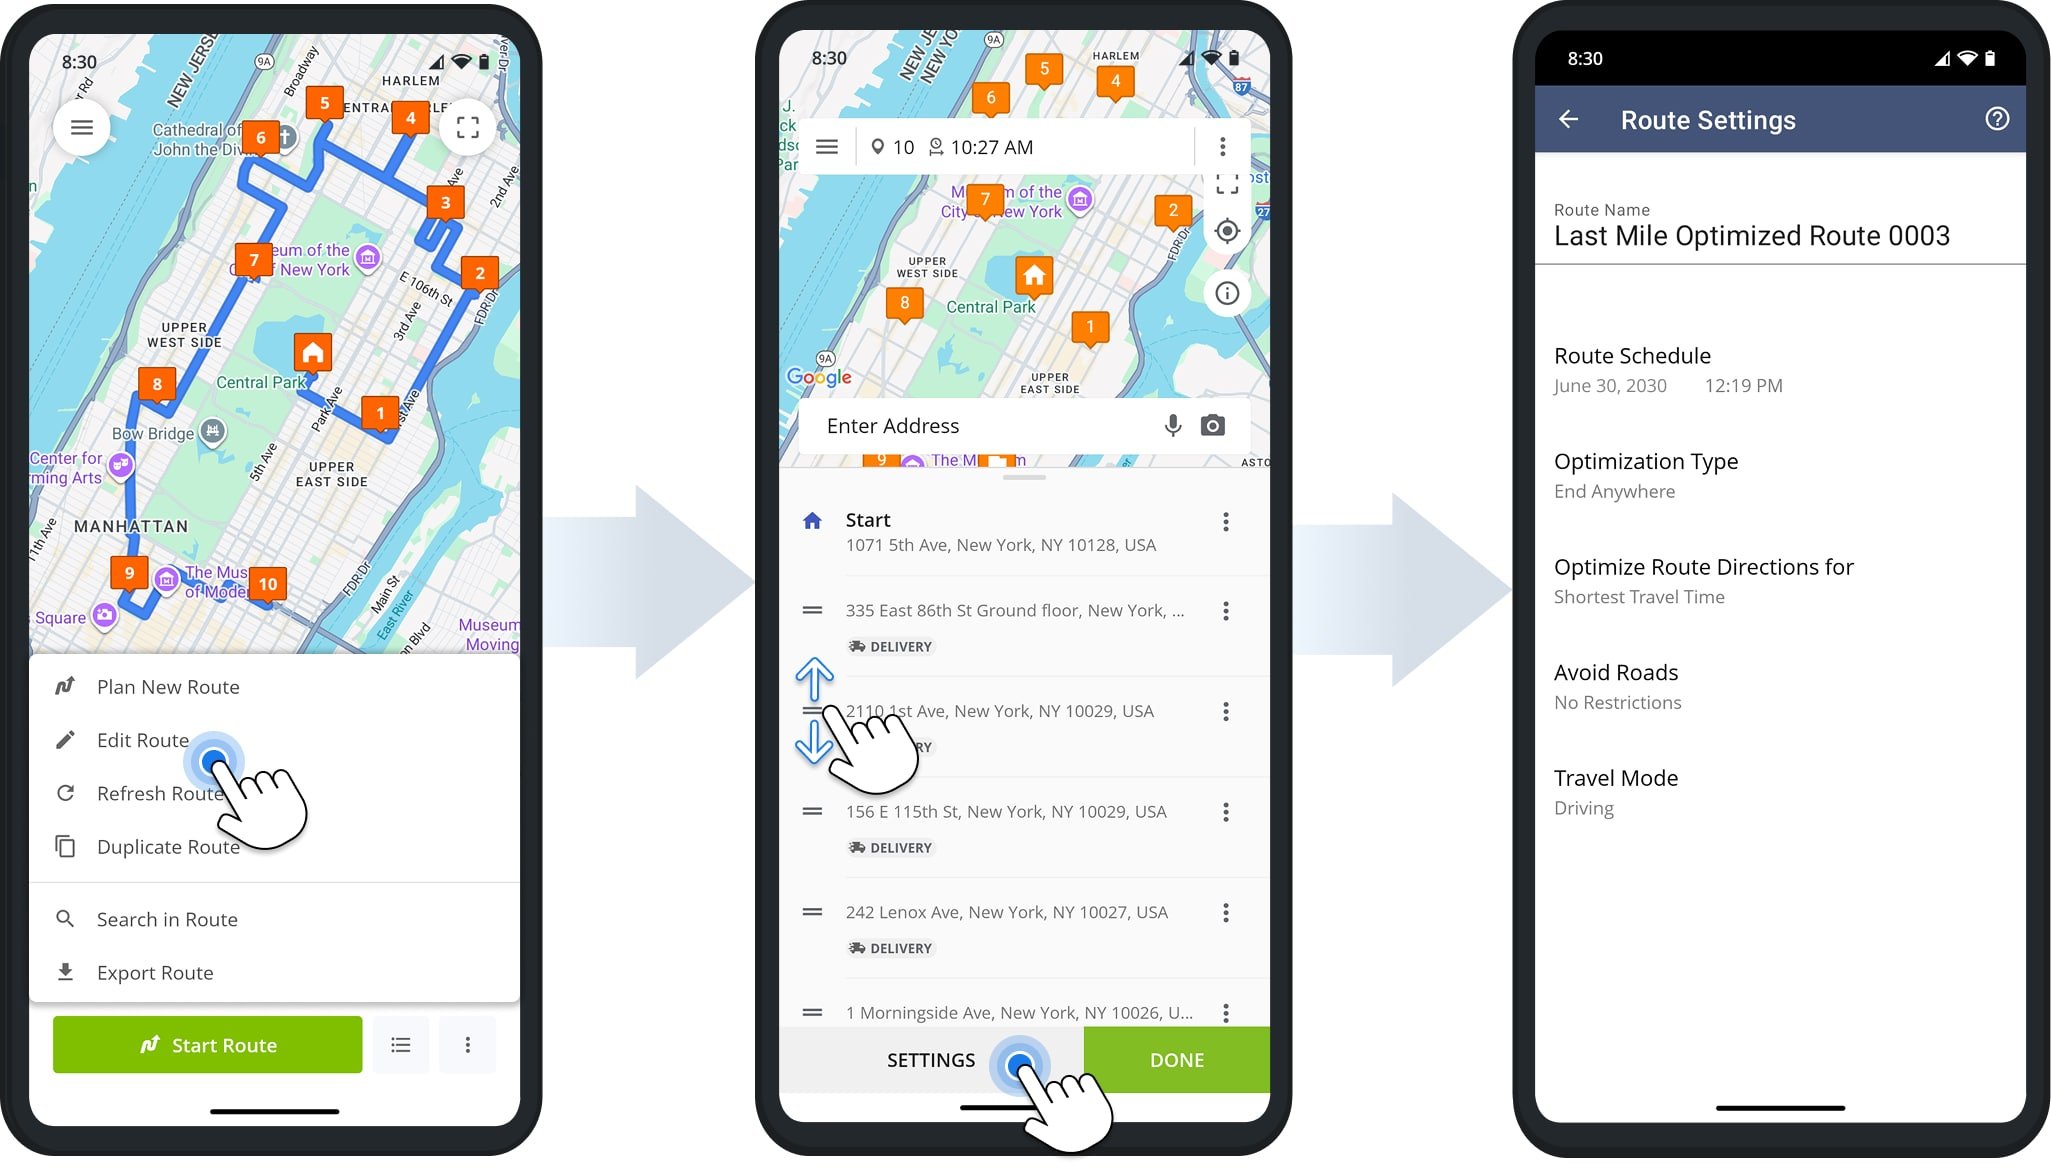
For more detailed management options, tap a route to open it. Then, tap the Three-dot Icon at the bottom of the screen to access available actions based on the route’s current status. Below is the full list of available route management actions:
Plan New Route
Start planning a new route by adding addresses.
Edit Route
Change the destination sequence and settings of a route.
Refresh Route
Sync the route to see the most recent changes.
Duplicate Route
Create a copy of the route with "(Duplicate)" added to the route's name.
Search in Route
Use the Search Field to find specific customer destinations.
Export Route
Download a CSV file with the route's destinations and their associated data.
Edit Routes – Change Destination Sequence And Route Settings
To update a route’s sequence or settings, tap “Edit Route“. You can drag destinations up or down to adjust their planned order. To edit the route name, schedule, optimization type, or directions, tap “Settings“. Your changes will be automatically saved.
Duplicate Routes – Copy Routes From The Routes List
To duplicate a route, go to “Routes“, tap the Three-dot Icon next to the route, and select “Duplicate Route“. The new route keeps the same scheduled time and date as the original and includes “(Duplicate)” in its name for easy identification.
Export Routes – Download Route And Destination Data Spreadsheet
To export route data, go to “Routes“, tap the Three-dot Icon next to the route, and select “Export Route“. After export, you’ll see a confirmation message. The CSV file is saved to your device’s “Downloads” folder.
Delete Routes – Remove Routes From The Route4Me Mobile Route Planner
To remove a route, go to a “Routes” from the main menu. Then, tap the Three-dot Icon next to the route you want to delete and select “Delete Route“. Confirm by tapping “Delete” when prompted.
NOTE: Deleted routes cannot be restored from the mobile app.
Visit Route4Me's Marketplace to Check out Associated Modules:
- Operations
Custom Data Add-On
- Operations
Advanced Team Management Add-On
About author: Daniel Archer
With a background in pedagogy and writing instruction, Daniel is a former tenured English Instructor who, after nearly 20 years of teaching, transitioned into content strategy and leading writing teams for global brands. Now, as Technical Documentation Manager at Route4Me, he translates complex logistics technology into clear, accessible content that empowers users.