Address Scanner – Optical Character Recognition (OCR) For Android And iOS
Route4Me’s OCR Address Scanner for Android and iOS helps you quickly add addresses to routes without manual entry. Using optical character recognition (OCR), the Route4Me mobile app scans addresses from paper, packages, handwritten notes, or screens and converts them into digital stops. Built directly into the app, the scanner eliminates the need for separate OCR tools. Whether planning a new route or updating an existing one, this feature saves time and improves route accuracy.
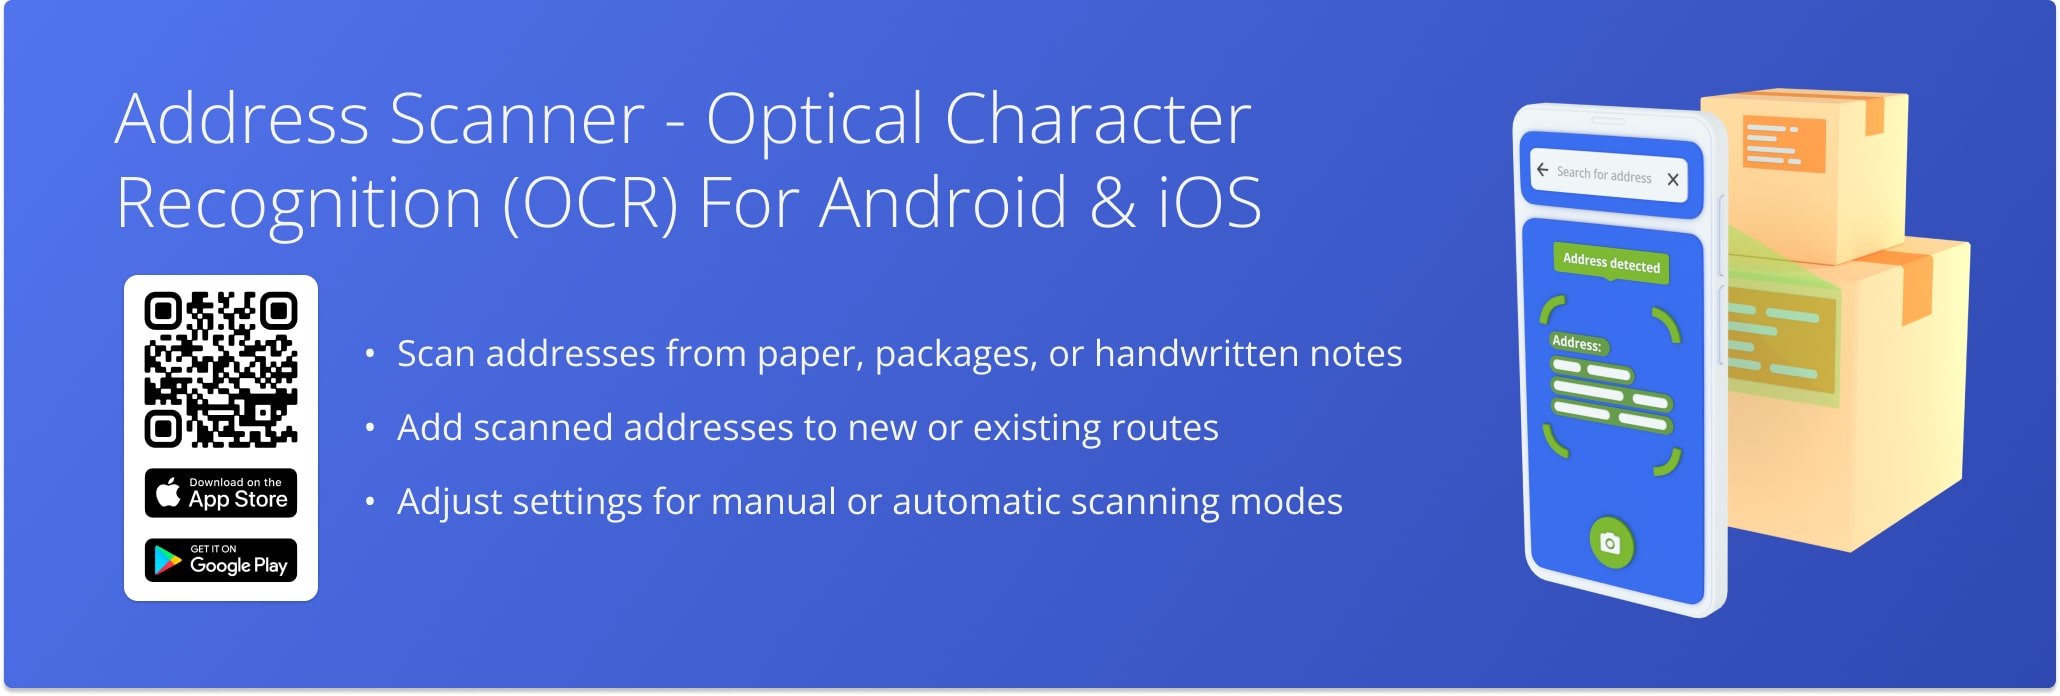
Table of Contents
Using Optical Character Recognition OCR Address Scanner
To add addresses to a new route using the OCR Address Scanner, start by planning a new route in the Route4Me app. From the main menu, tap “Add New Route“. Then, enter the route name, schedule the route, and choose your preferred optimization settings,
When finished, click “Continue“, then tap “Enter Start Address” to add the route’s starting location.
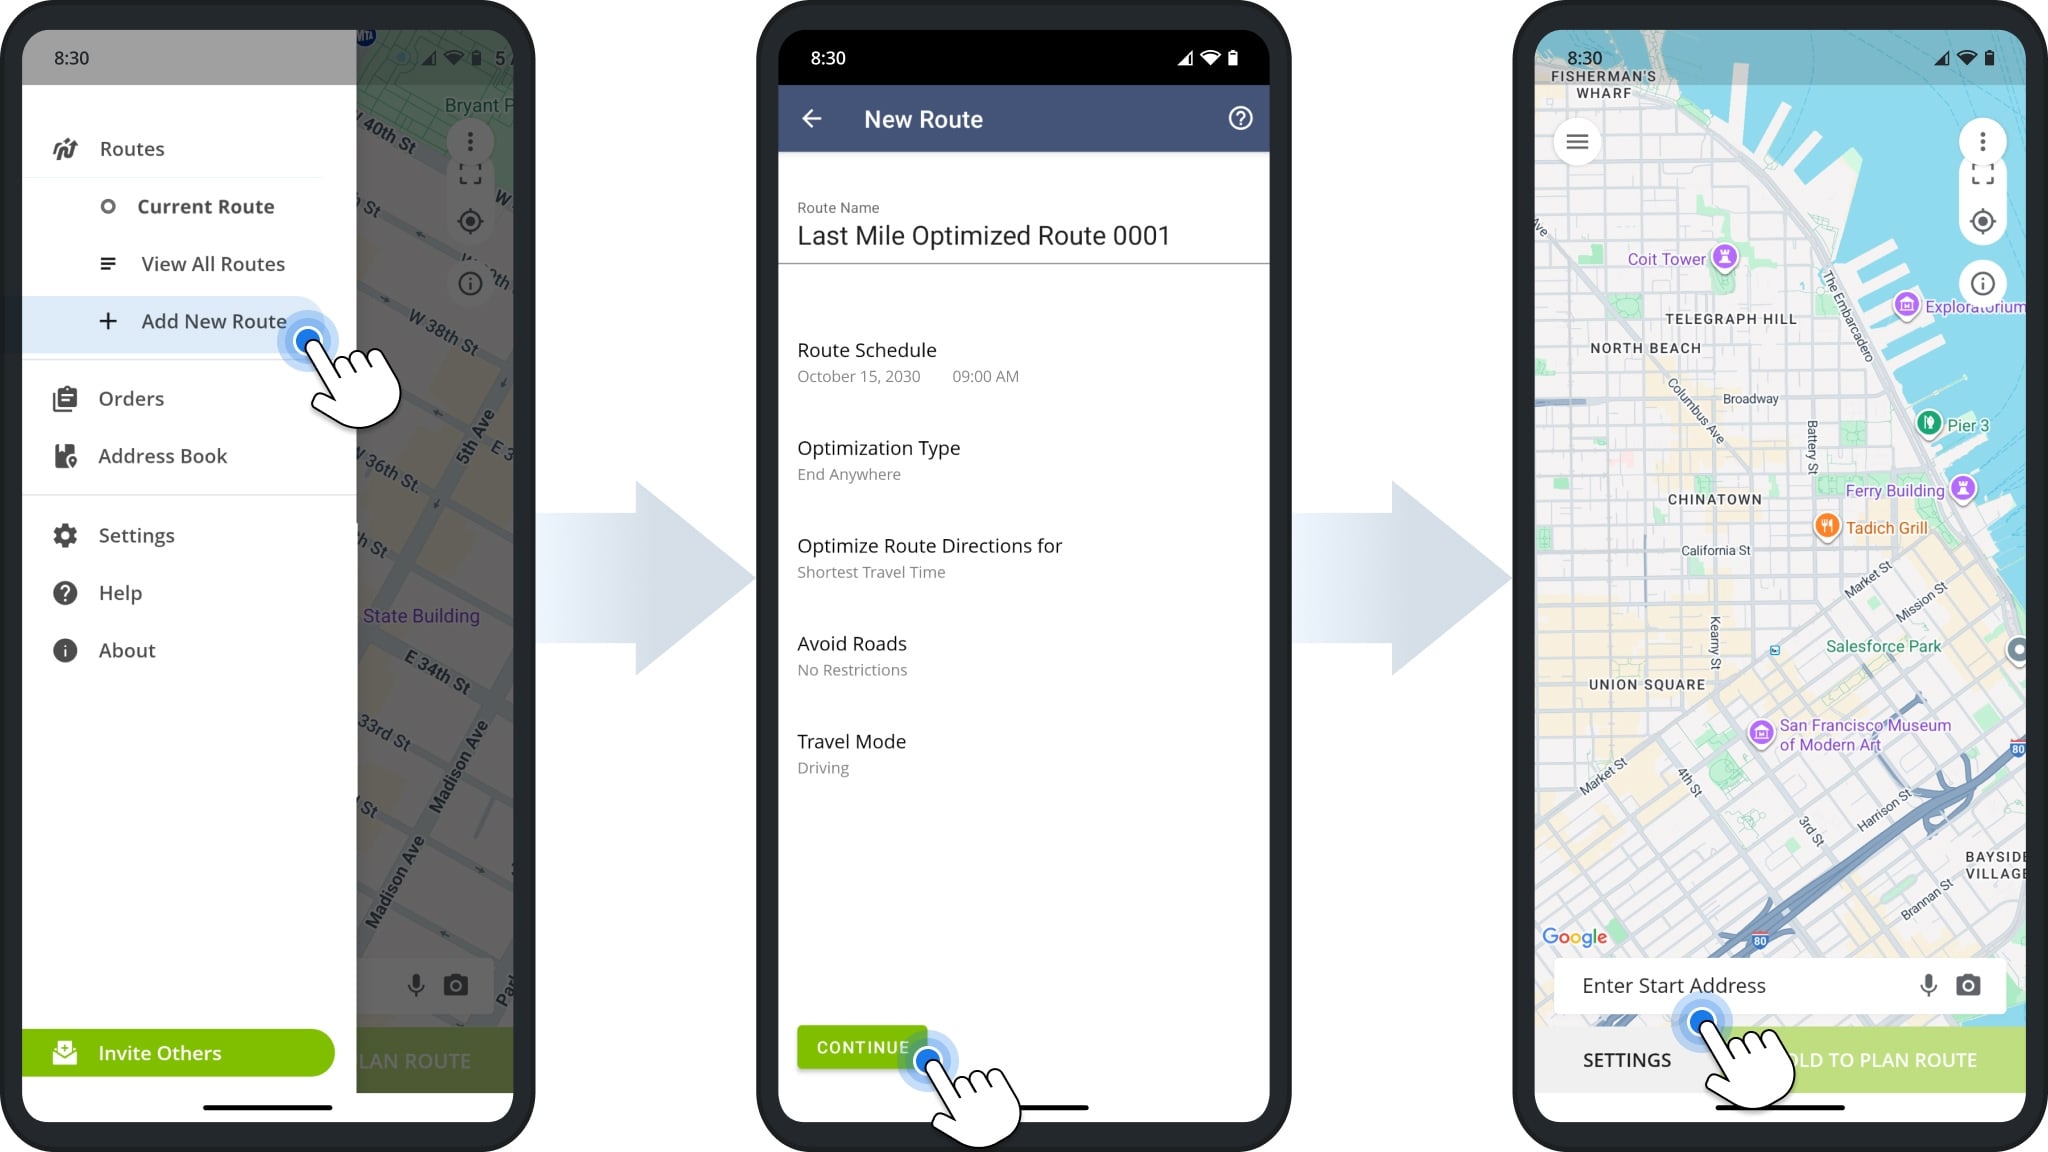
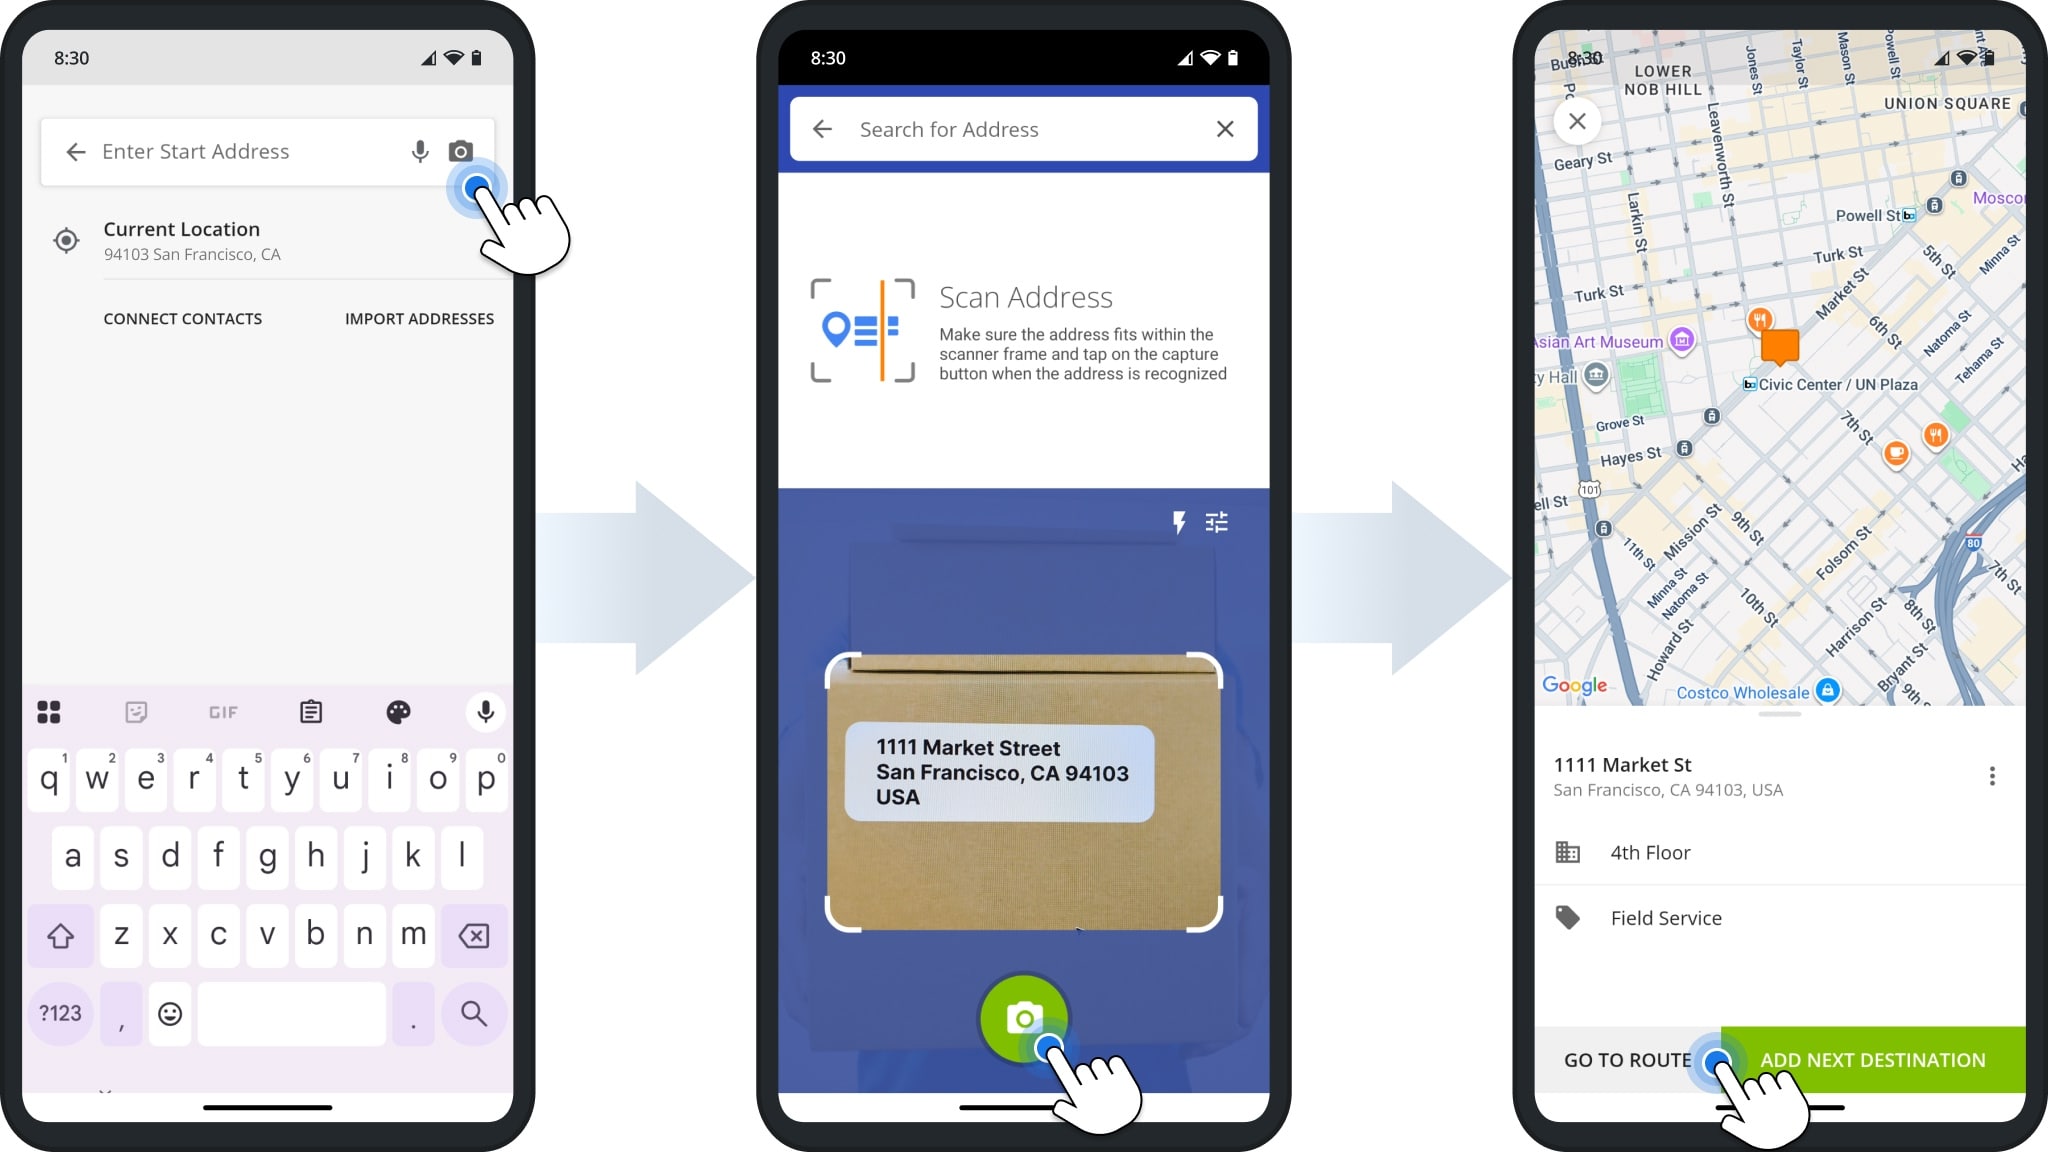
Next, tap the Camera Icon in the “Enter Start Address” field to open the OCR Address Scanner. Point your device’s camera at the address you wish to scan, making sure it fits within the frame.
Depending on your scanner settings, the app will either capture the address automatically or after you tap the camera icon. Route4Me may suggest one or multiple matching addresses based on how complete and clear the scan is.
You can then adjust the scanned address as needed and add additional stop details such as its Alias or floor.
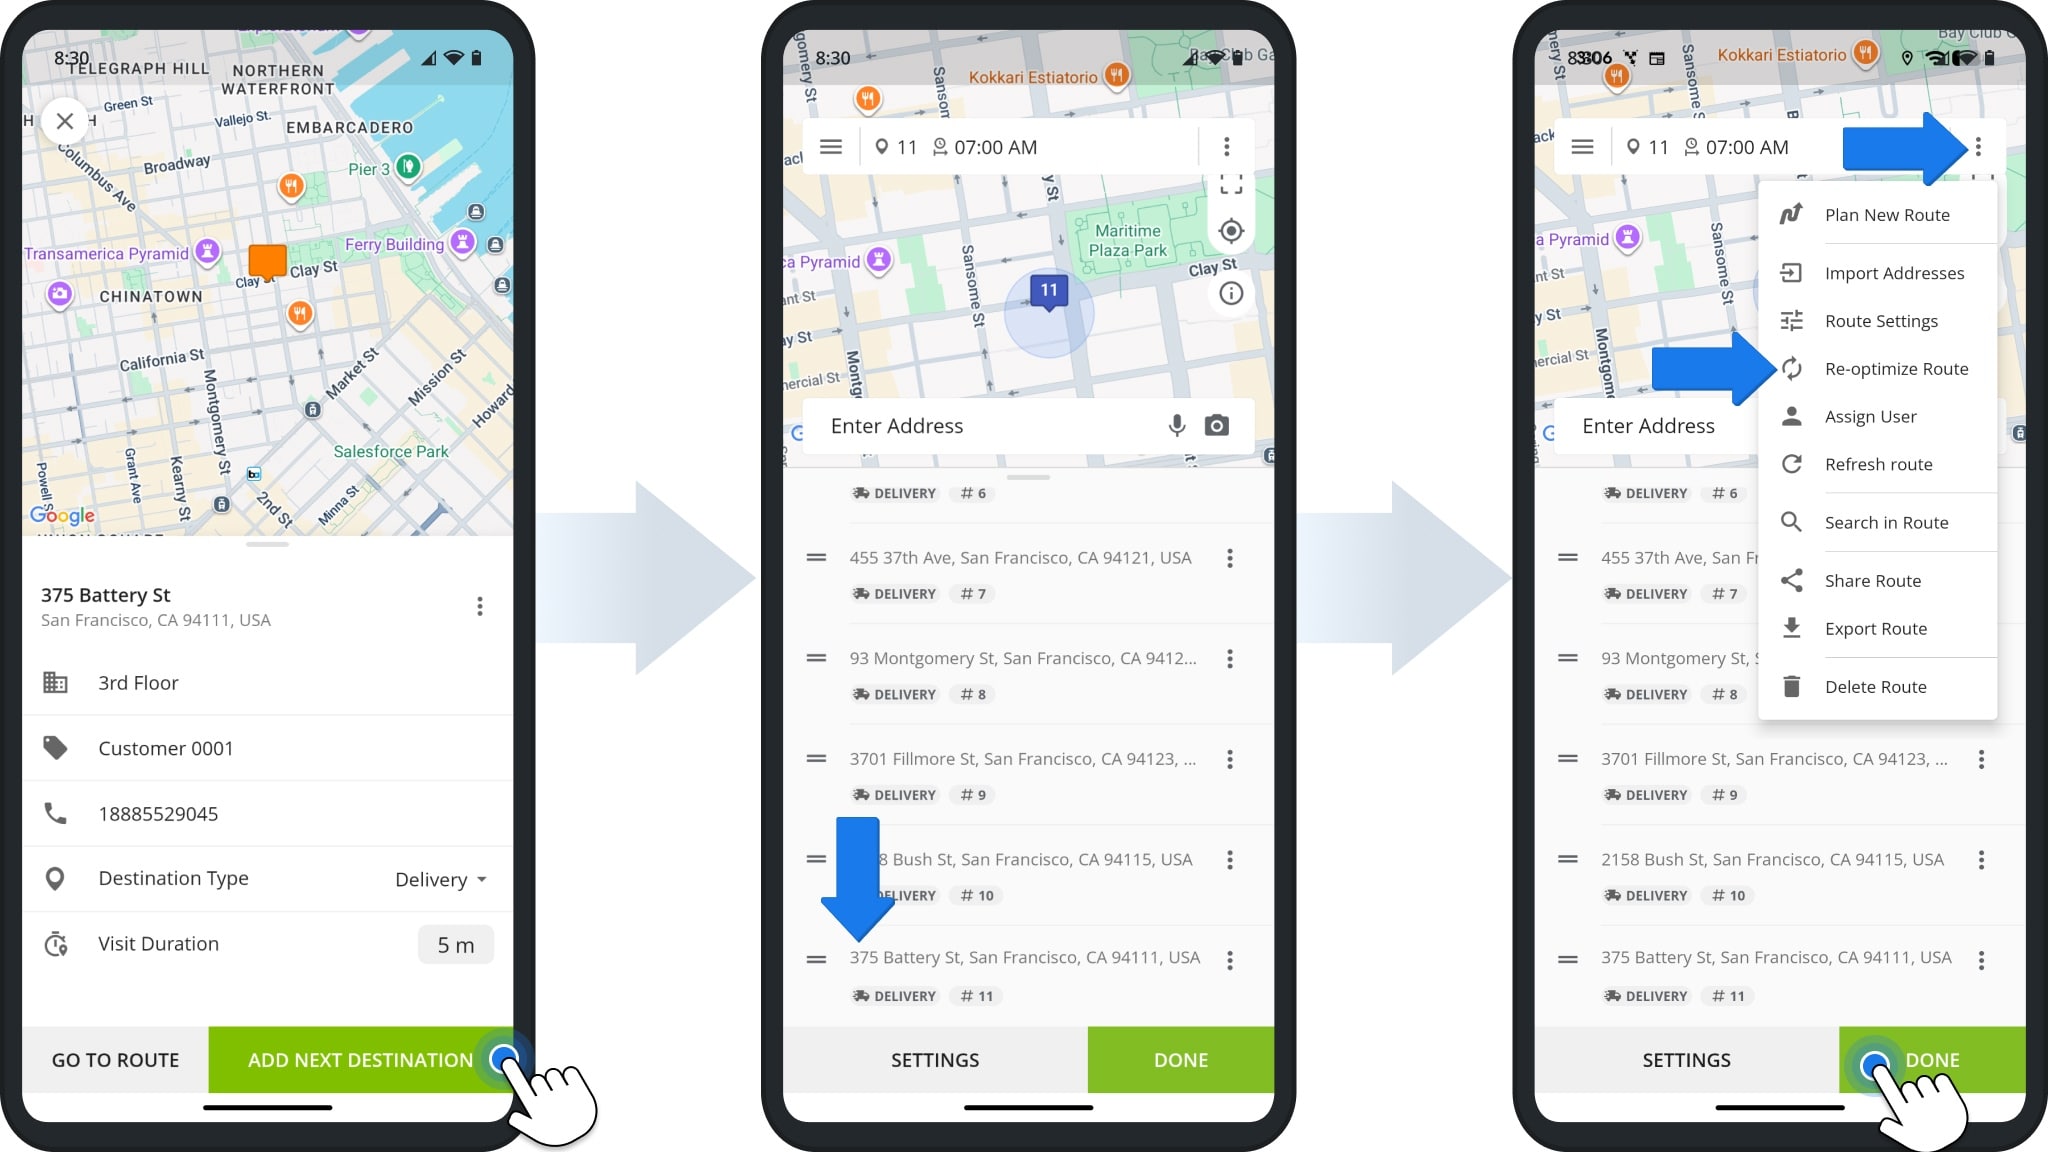
To add addresses to an existing route using the OCR Address Scanner, open the route, tap the Three-dot Icon in the top right corner, and select “Edit Route“. Then, tap the Camera Icon in the “Enter Address” field to launch the scanner.
To scan, point your device’s camera at the address, making sure it fits within the scanner’s frame.
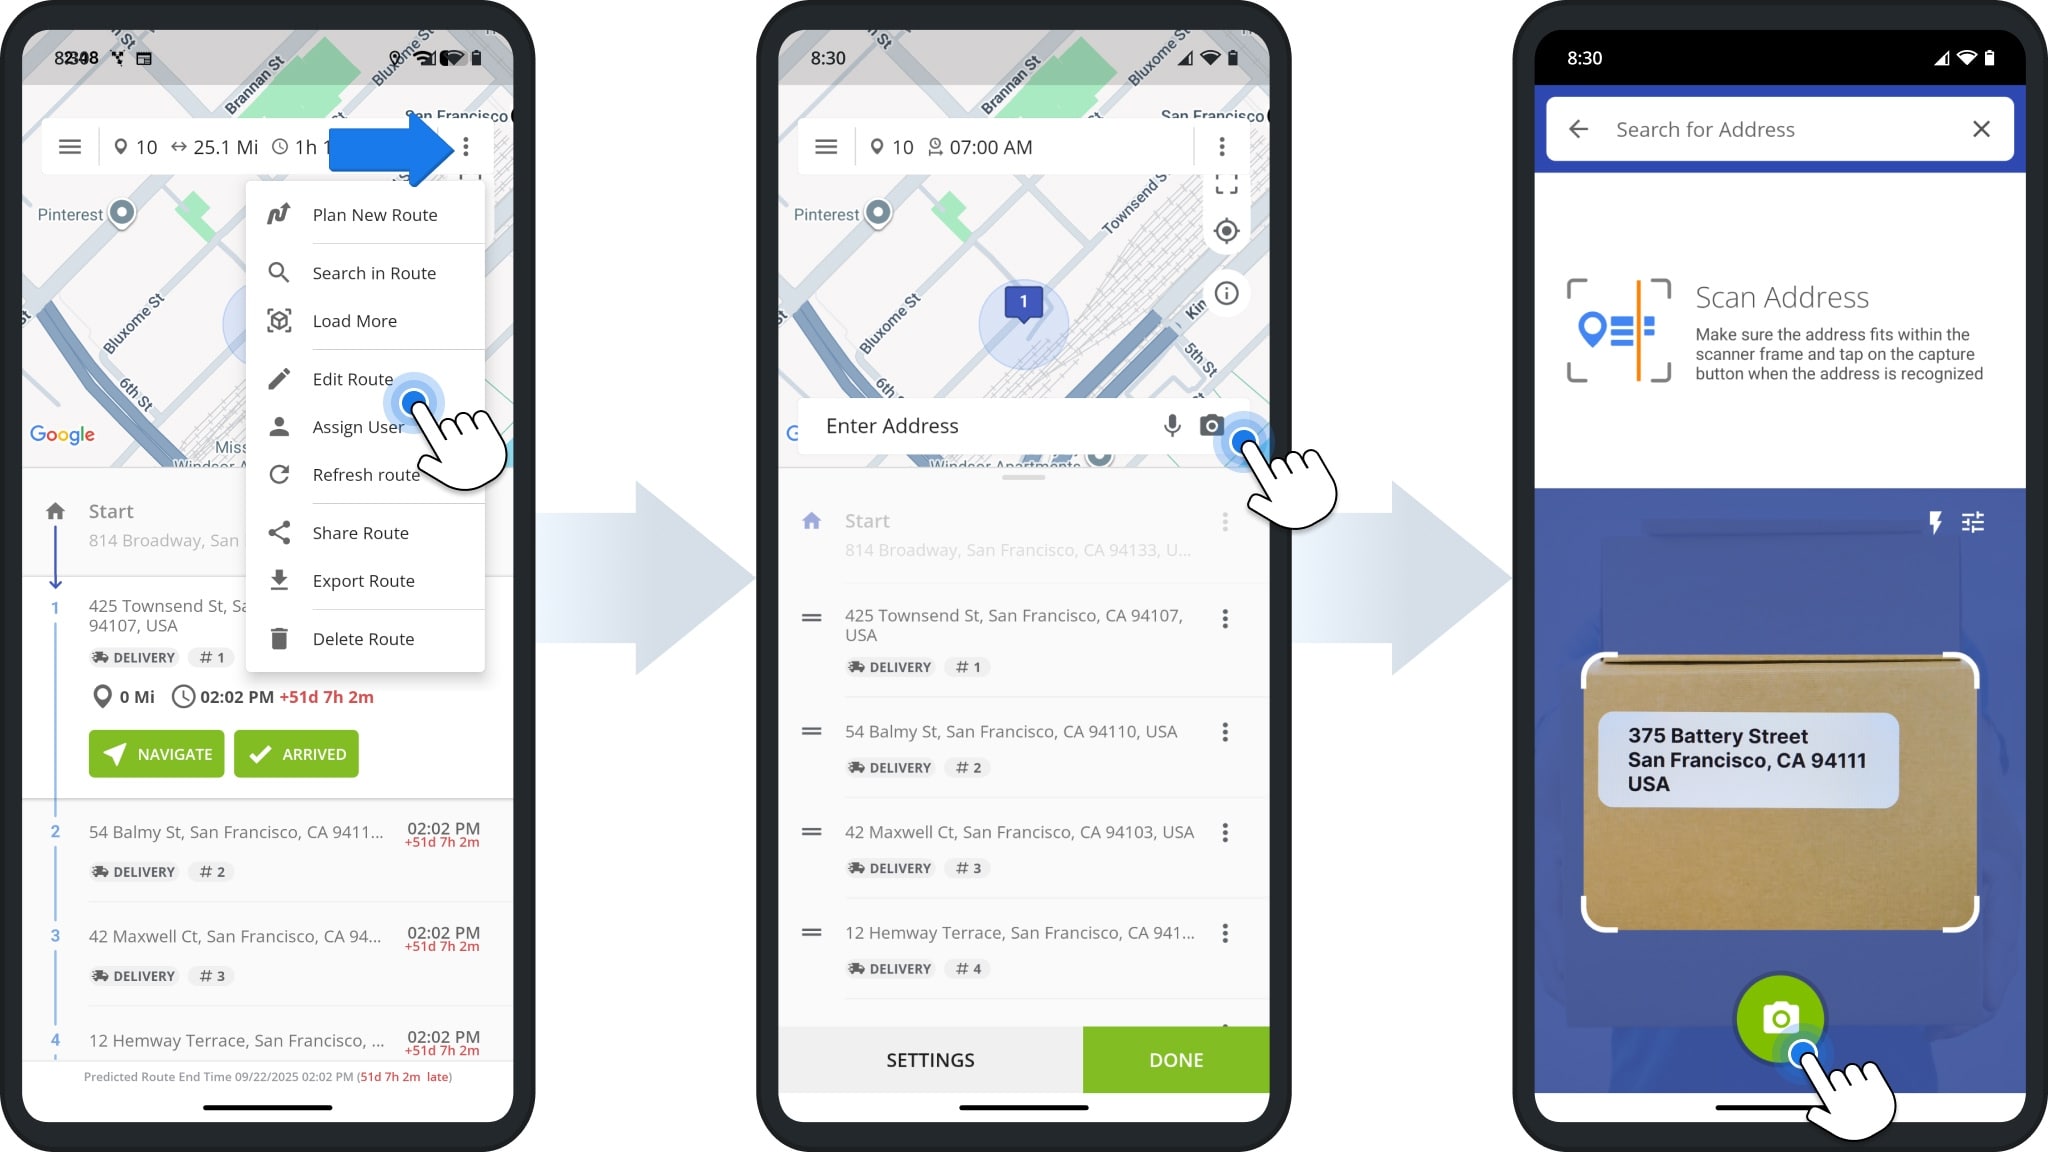
Once scanned, you can review or edit the address. After adding one or more scanned addresses, the app automatically places them at the end of the route.
Tap “Done” to keep the new stop(s) in that order or tap the Three-dot Icon and select “Re-Optimize Route” to optimize its placement within the route.
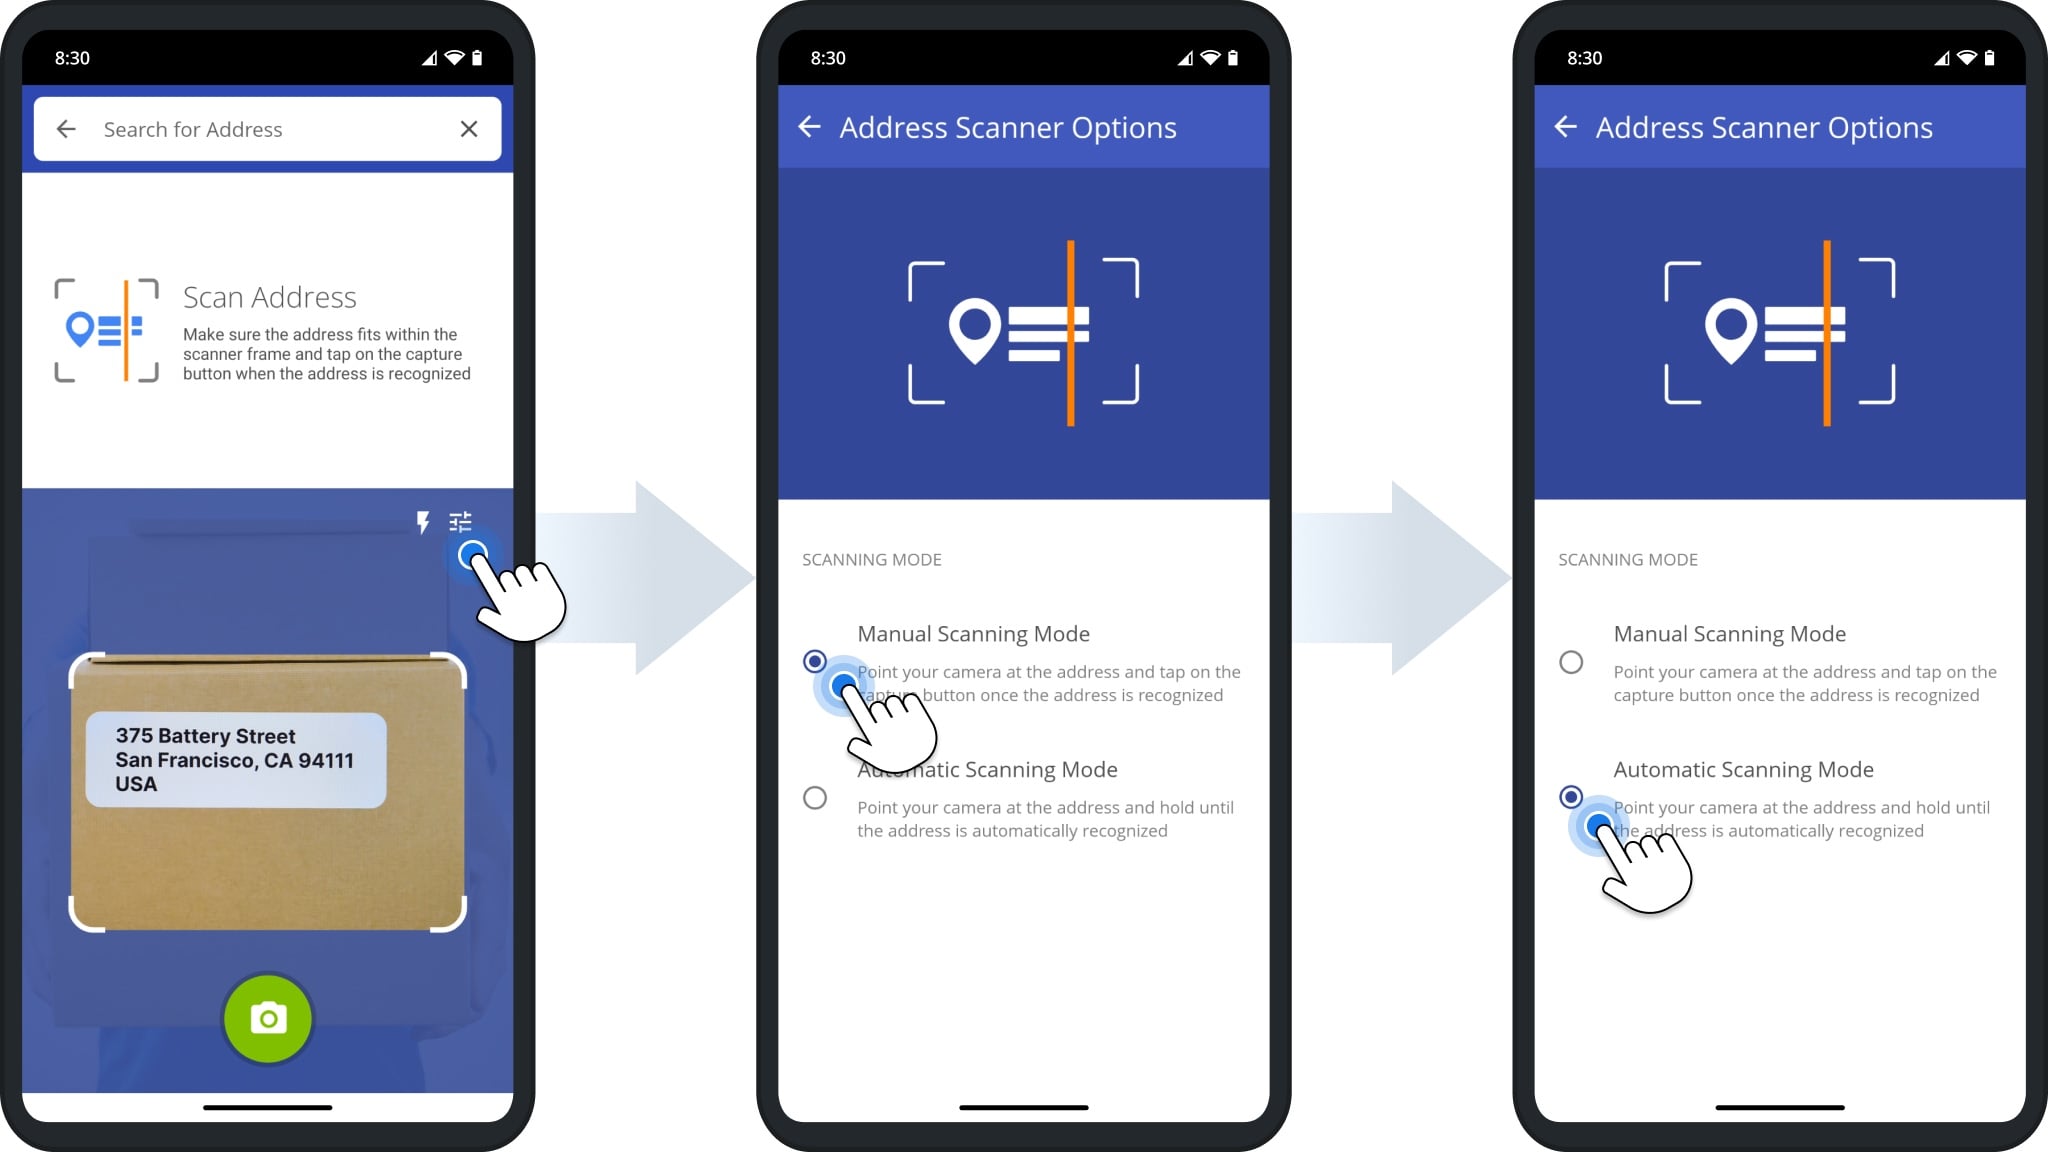
OCR Address Scanner Settings – Set Scanning Mode Preferences
To adjust the OCR Address Scanner settings on your Android or iOS app, open the scanner and tap the Settings Icon to choose your preferred scanning mode.
In Manual Scanning Mode, you can point your camera at the address and tap the capture button once it’s recognized. In Automatic Scanning Mode, you can hold your camera steady until the address is automatically detected and captured.
Visit Route4Me's Marketplace to Check out Associated Modules:
- Operations
Custom Data Add-On
- Operations
Advanced Team Management Add-On
About author: Daniel Archer
With a background in pedagogy and writing instruction, Daniel is a former tenured English Instructor who, after nearly 20 years of teaching, transitioned into content strategy and leading writing teams for global brands. Now, as Technical Documentation Manager at Route4Me, he translates complex logistics technology into clear, accessible content that empowers users.