Notifications History – Open, Filter And Export Sent SMS And Email Alerts
Route4Me’s Customer Notifications and Alerts Module enables you to boost customer satisfaction, reduce team resource costs, and automate routing operations. Your Notifications History lets you review when and how notifications were sent, with filters for trigger type, notification type, and more. On top of that, you can export your Notifications log for reporting and analysis. Use this guide to help your enterprise business maximize the benefits of Route4Me’s Notifications History.

Table of Contents
Open Notifications History – View Sent Route Updates
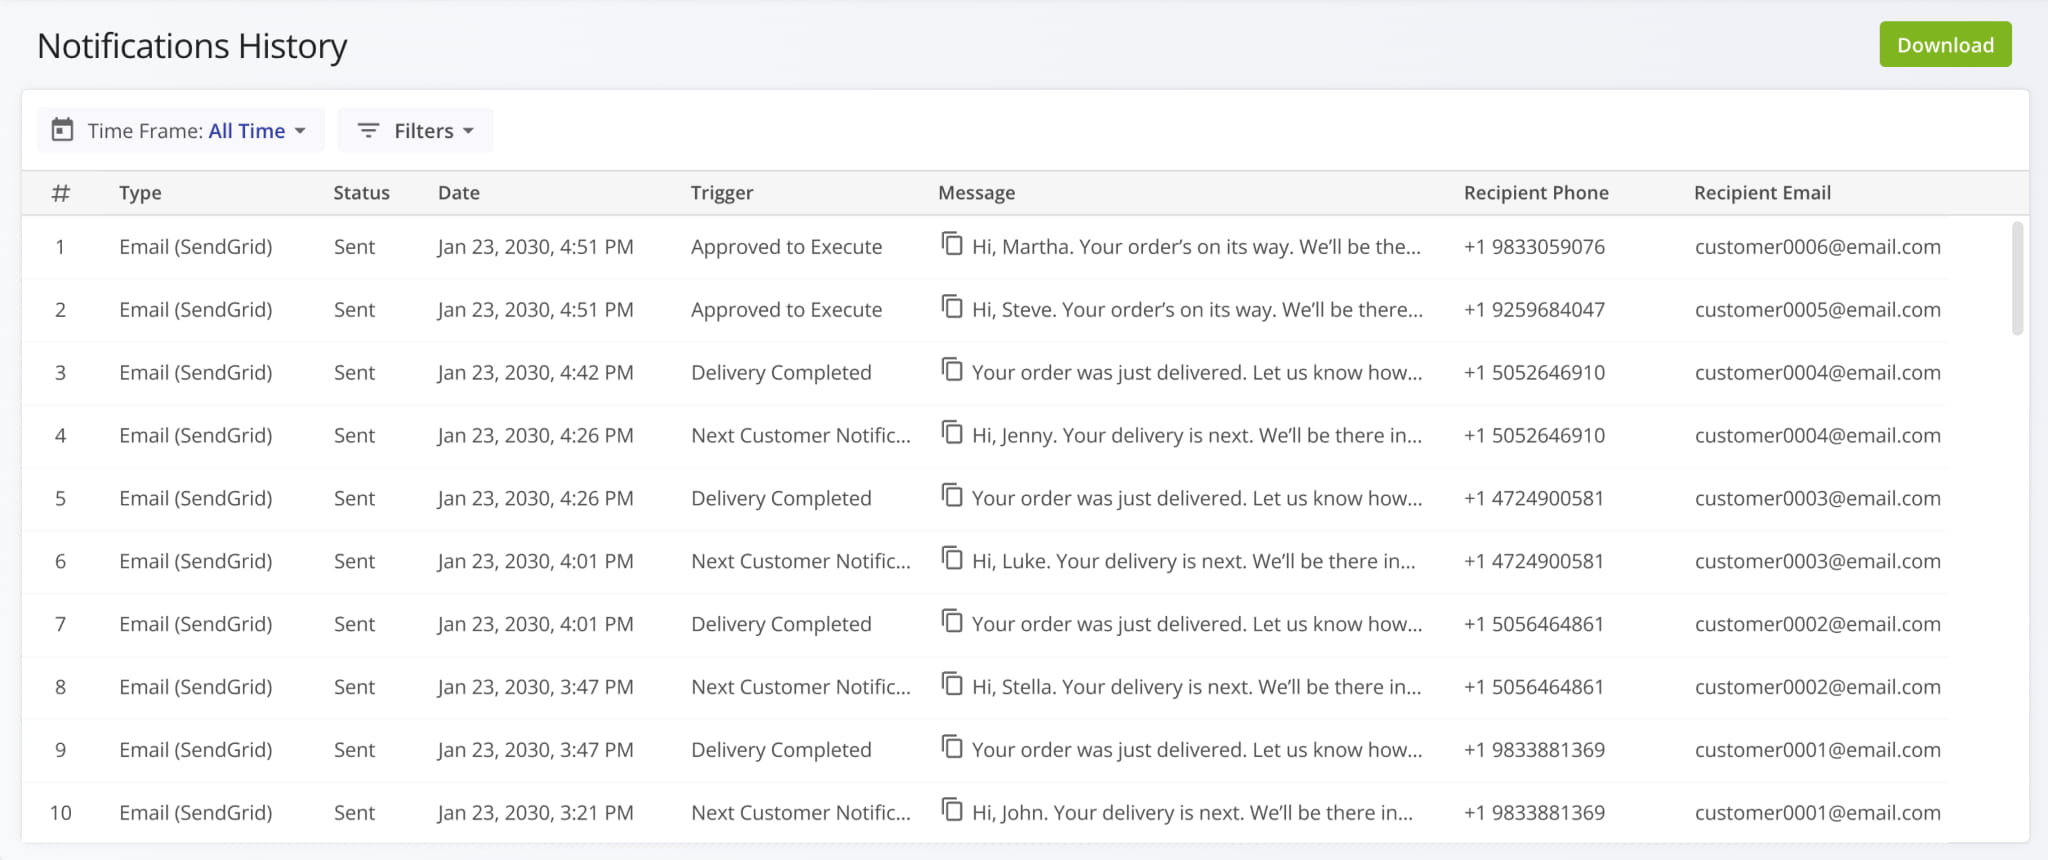
To open your Notifications History, go to “Customer Experience” > “Notification History” in the Navigation Menu. Your Notifications History shows all Notifications sent from your Route4Me account, including those sent from sub-user accounts.
Open Your Notifications History
Filter Notifications By Type, Trigger, Route ID Or Time Frame
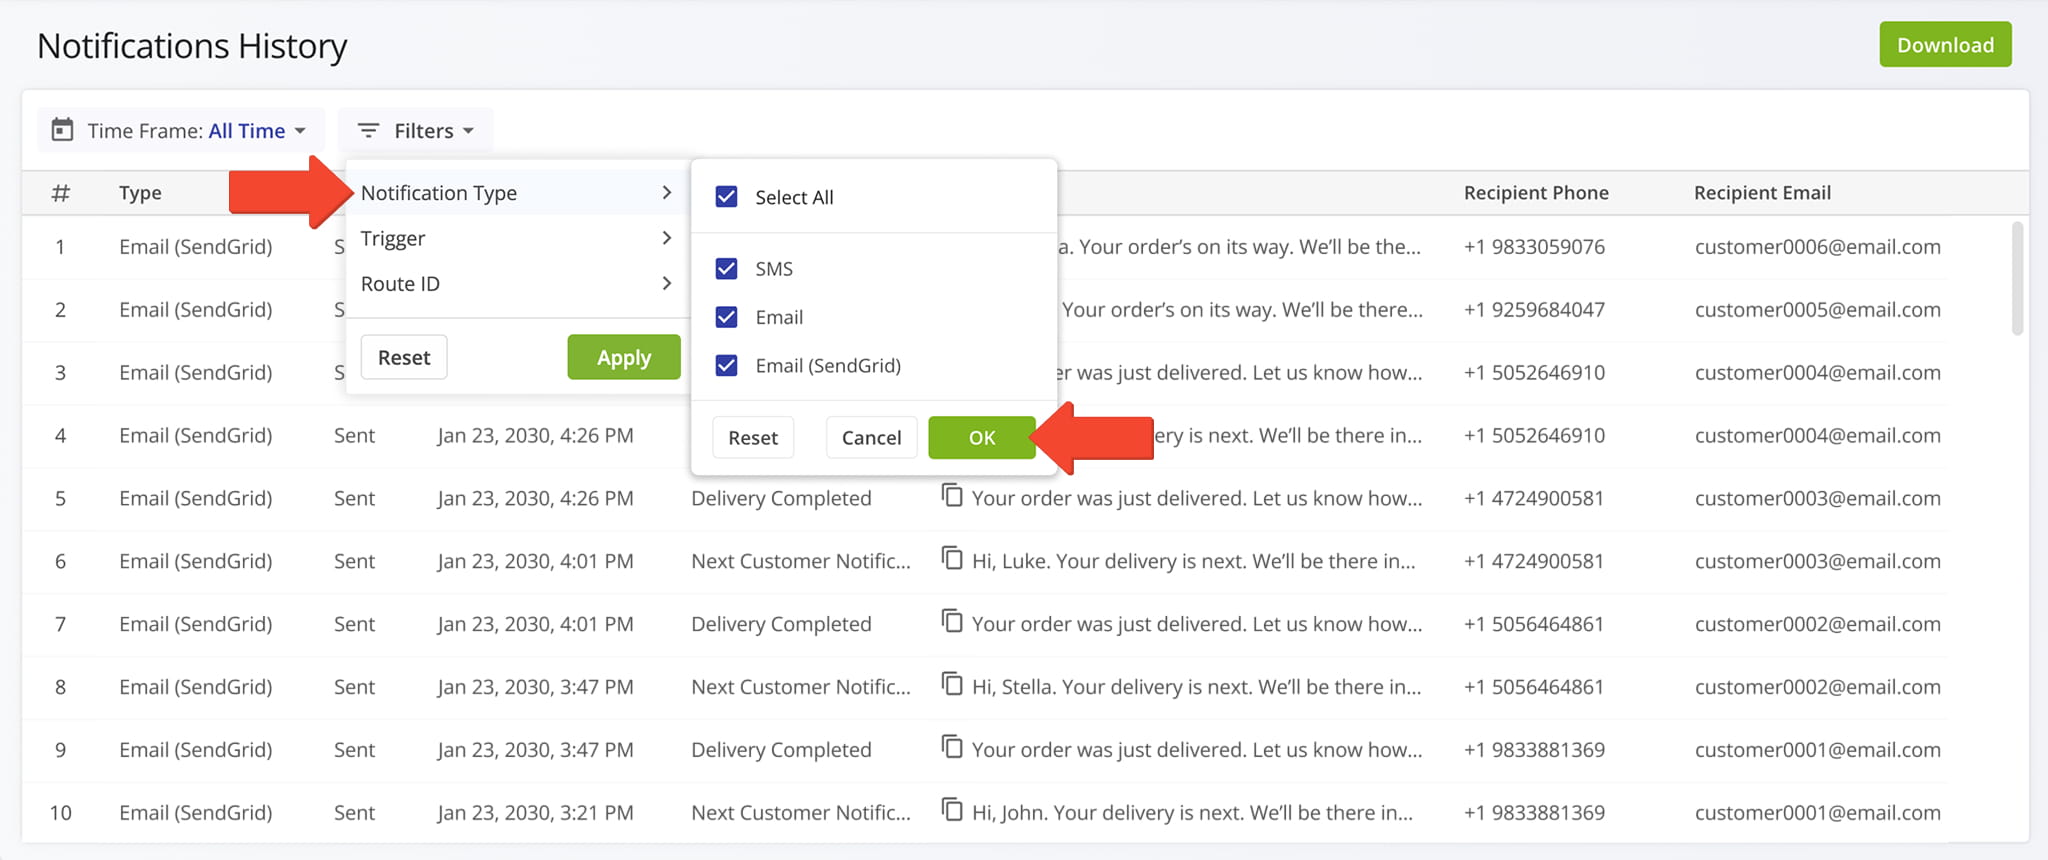
For convenience, you can filter Notifications by specific parameters. For instance, you can filter by “Notification Type“. Just click the “Filters” button, then “Notification Type“. Select your option(s) and click “OK“.
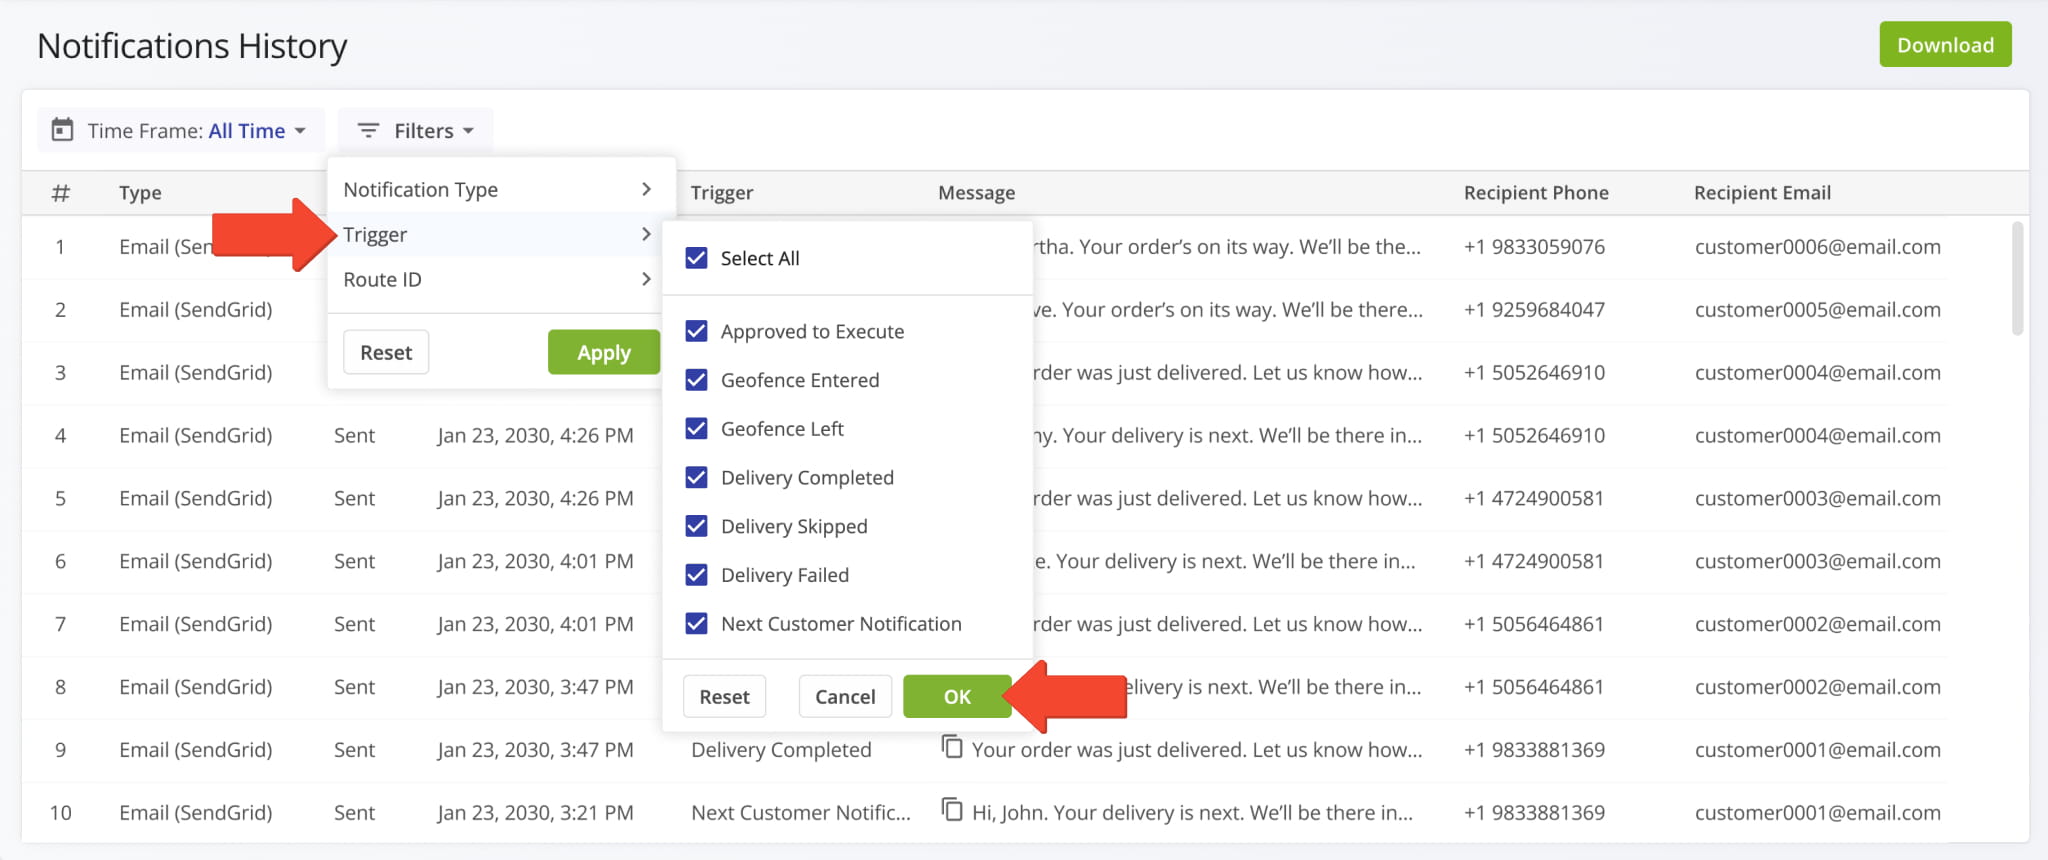
You can also filter by “Trigger” (the specific action that initiated the Notification). To do so, click the “Filters” button. Then, click “Trigger“, select your option(s), and click “Apply” to view your selections in the “Trigger” Column.
Review the table below for a complete list of Notification Triggers. Learn more about Route4Me’s Customer Notification Types.
| Notification Type | Description |
|---|---|
| Approved to Execute | Notify customers when the route has been dispatched to a driver. This notification informs customers that their delivery has been scheduled. |
| Geofence Entered | Notify customers when the driver has entered the geofenced area, and the vehicle has been automatically detected as entering the geofenced area. |
| Geofence Left | Notify customers when the driver has left the geofenced area, and the vehicle has been automatically detected as leaving the geofenced area. |
| Delivery Completed | Notify customers when a route address has been marked as “Completed” by the driver. This notification informs customers of a successfully delivered order or successfully executed route destination. |
| Delivery Skipped | Notify customers when the driver skips their address. This notification informs customers that the driver did not attempt delivery or service. |
| Delivery Failed | Notify customers when their address is marked as “Failed” by the driver. This notification informs customers that the address was visited but not successfully serviced or the delivery could not be made. |
| Next Customer Notification | Notify customers when their address is the next to be visited on the current route. This notification informs a customer that the driver is on their way to the customer’s address. |
You can use the “Route ID” filter to view Notifications triggered and sent from a specific route. To do this, click the “Filters” button, then “Route ID“. Enter the route’s ID into the filter field and click “Apply“.
NOTE: To find the Route ID, open a route in the Route Editor. The string at the end of the URL is the Route ID.

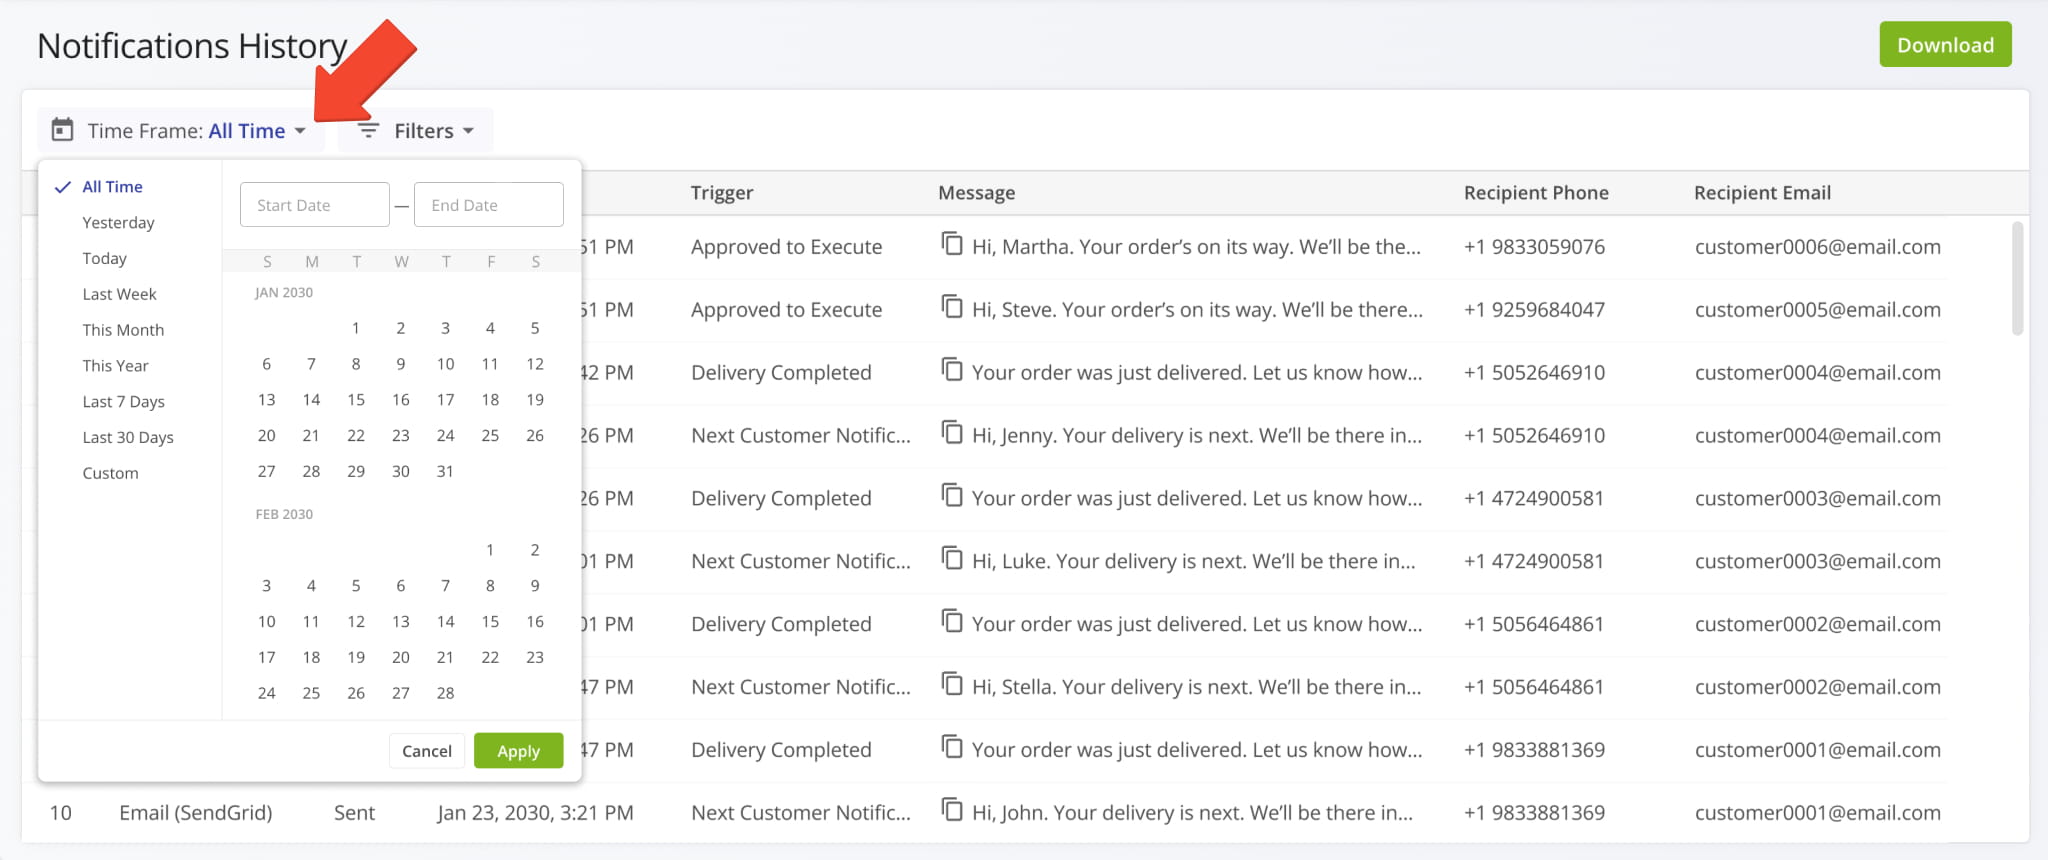
To filter by date, click the “Time Frame” button and select a specific date range to view all Notifications sent during that period.
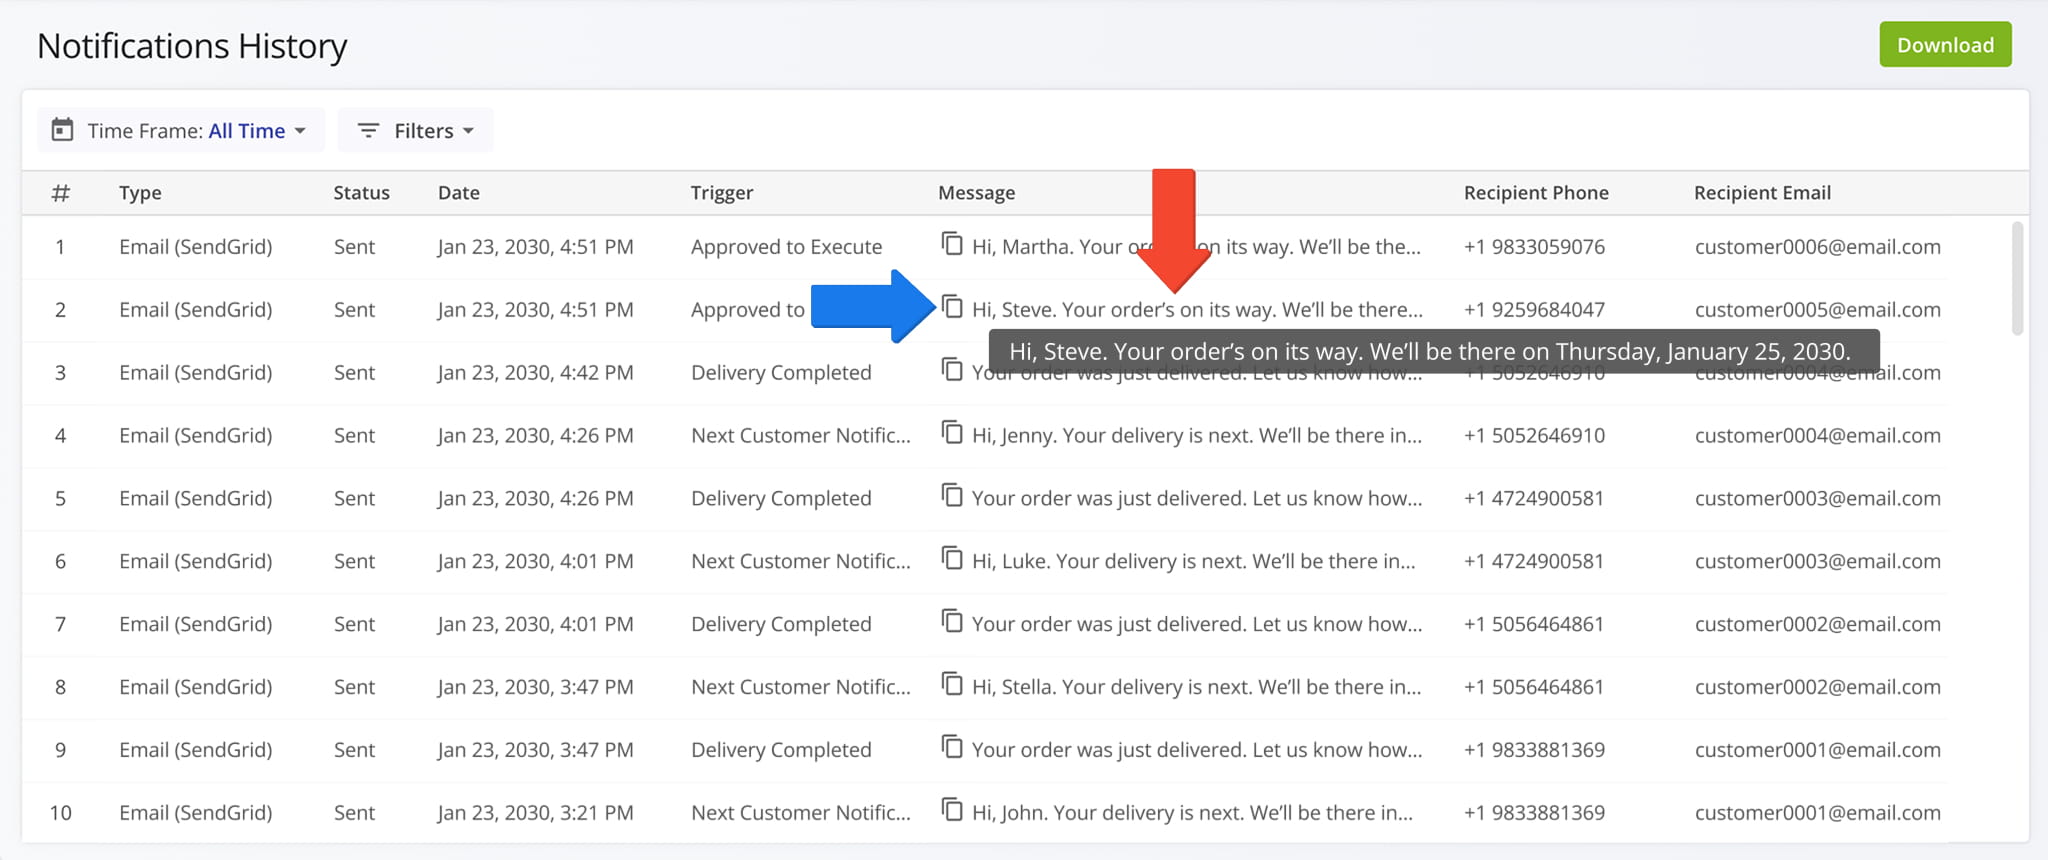
The “Message” column provides a detailed view of each Notification’s content. To read the full text of a Notification, hover over the preview. NOTE: You can also copy a message by clicking the Copy Icon next to the preview.
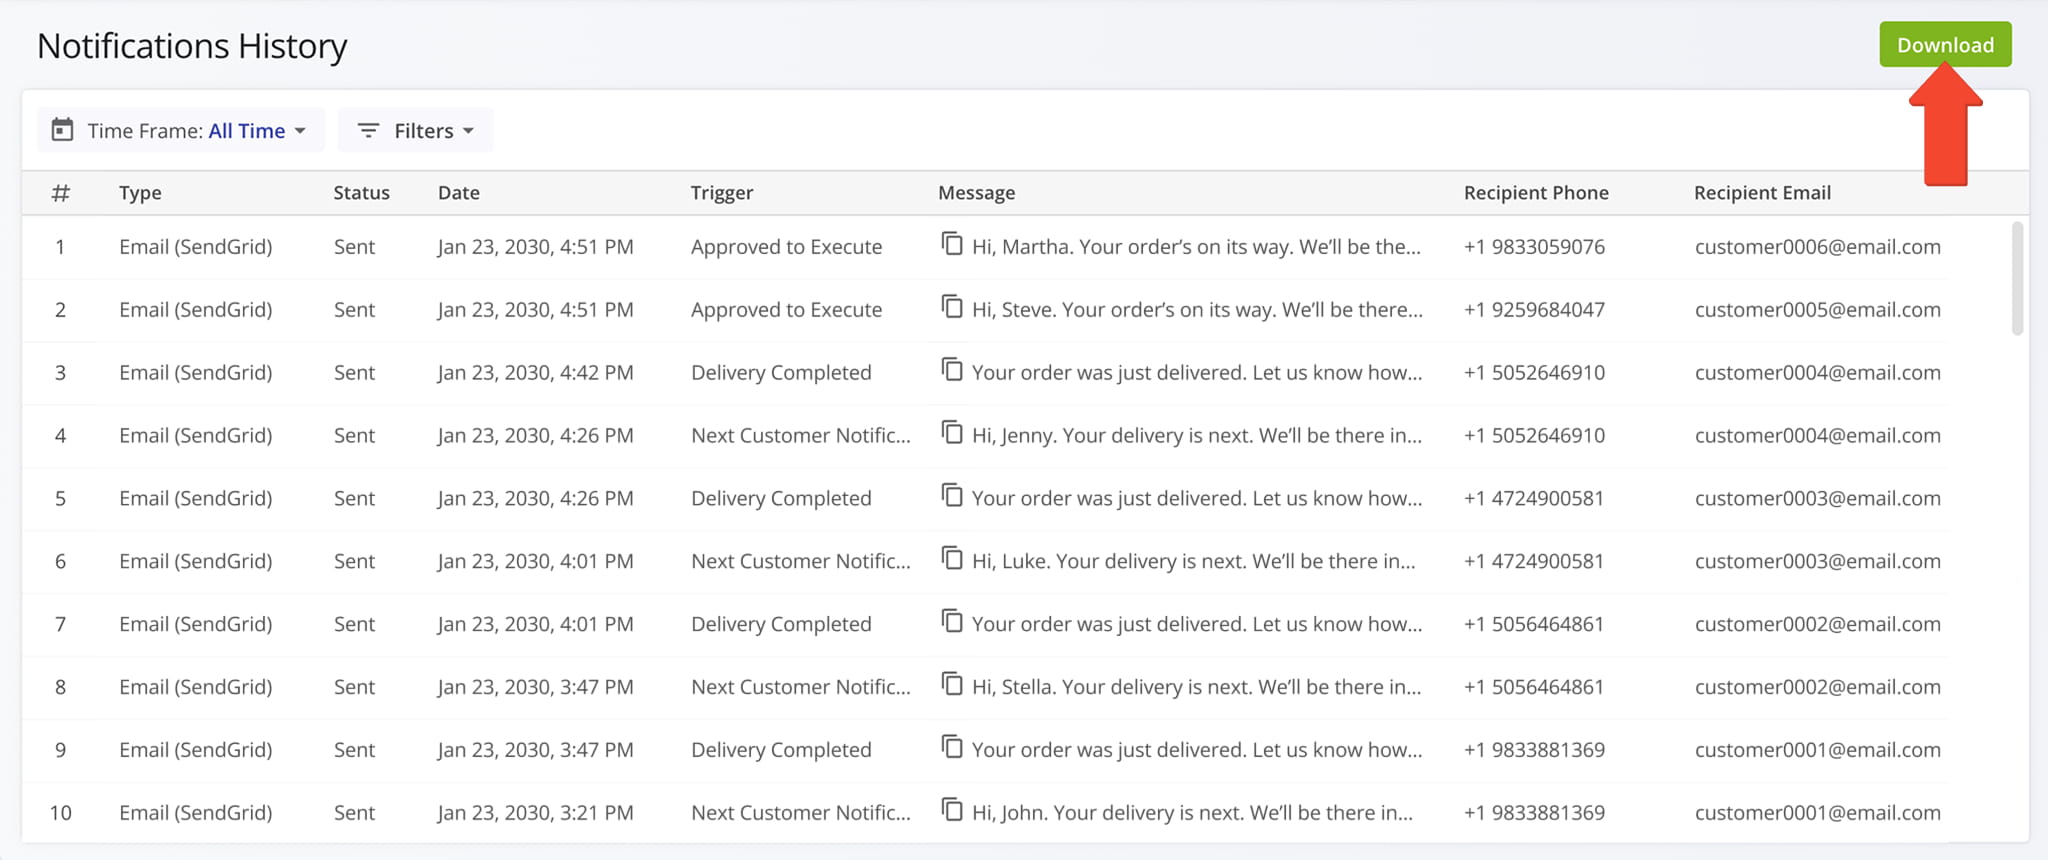
Export Notifications History – Download CSV Spreadsheet
You can export Notifications as a CSV file for reporting or auditing purposes. To do so, click the “Download” button.
Visit Route4Me's Marketplace to Check out Associated Add-Ons:
- Notifications & Alerts
Route Scheduled
- Notifications & Alerts
Geofence Entered
- Notifications & Alerts
Geofence Departed
- Notifications & Alerts
Visit Completed
- Notifications & Alerts
Notify Next Customer
About author: Kristian Andreev
Kristian is a Technical Writer at Route4Me. With over a decade of experience in writing and localization, he's an expert at communicating complex technical data in a clear, concise, and user-friendly way. Passionate about bridging the gap between engineers and users, he specializes in creating documentation to streamline onboarding, enhance product usability, and support global teams on the path to success.