Avoidance Zones – Plan Routes With High-Risk And No-Go Areas
Table of Contents
Create Avoidance Zones – Improve Route Safety And Efficiency
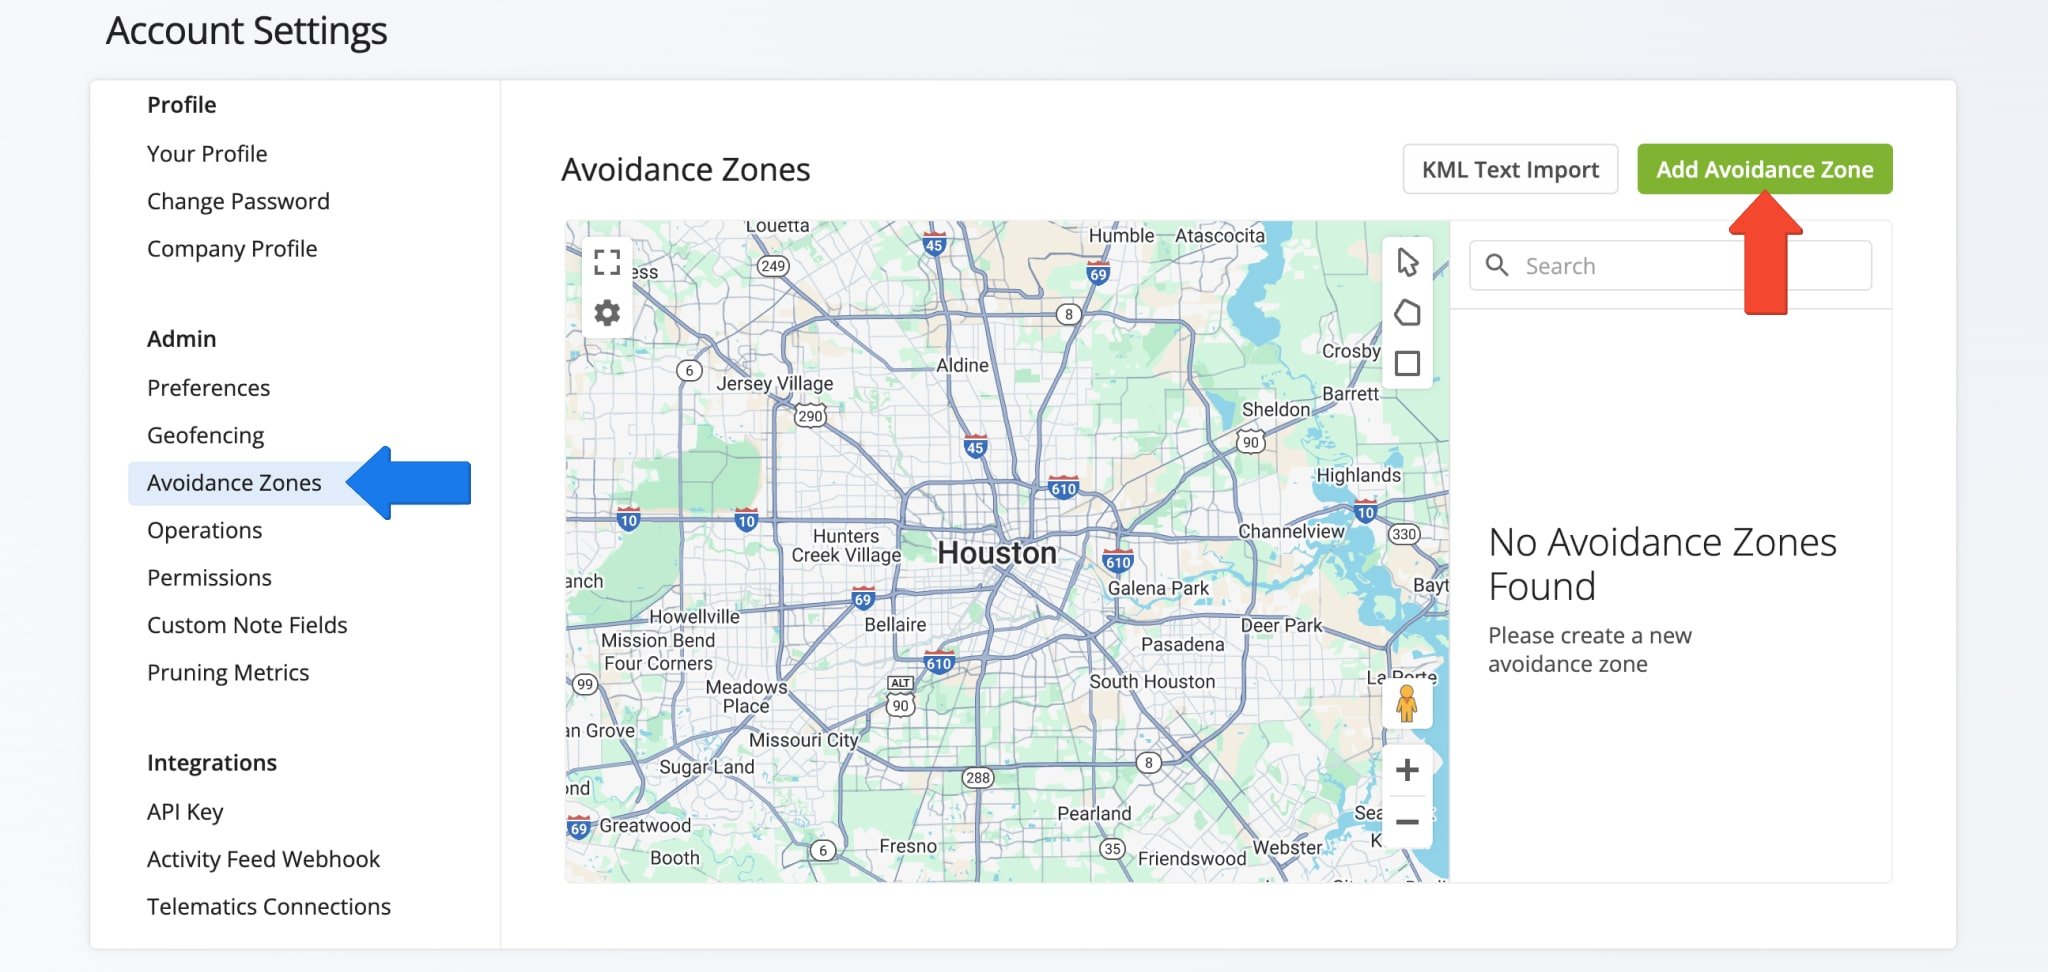
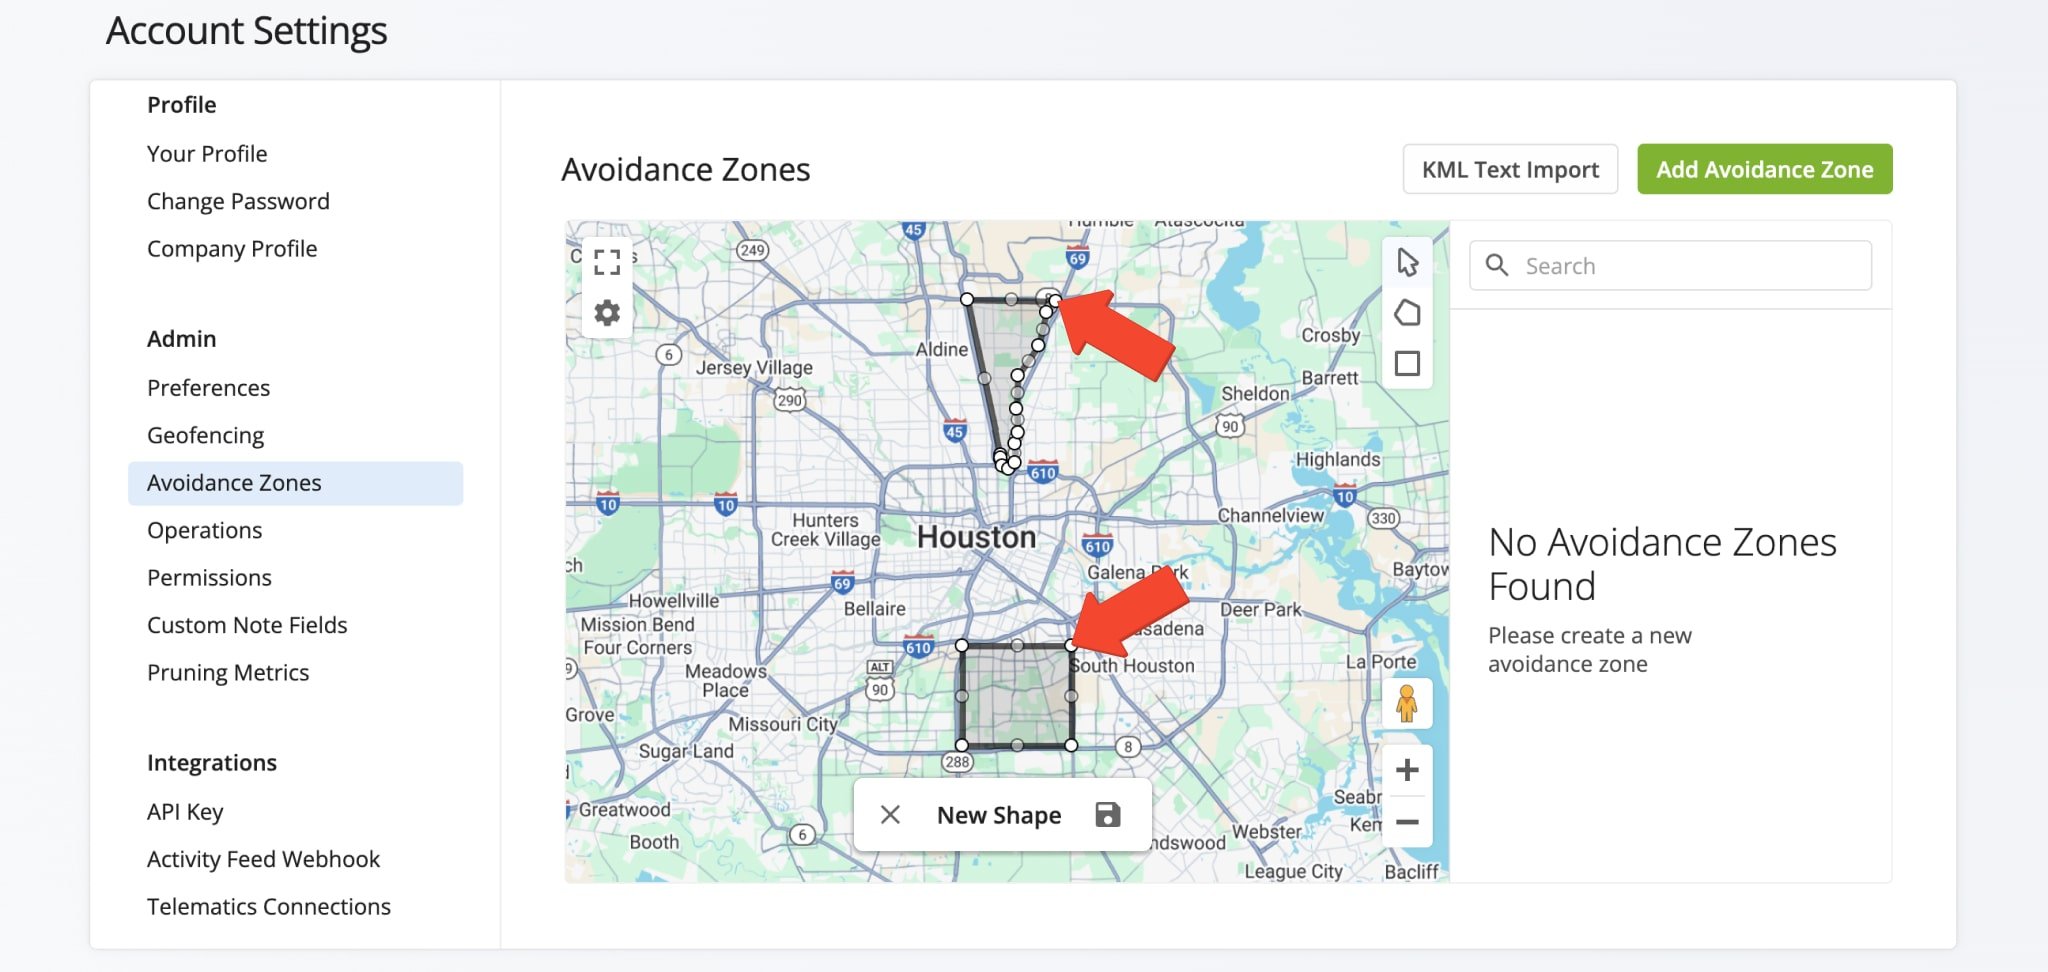
To create an Avoidance Zone, go to “Settings” > “Organization Settings“in the Navigation Menu. Under “Admin“, click “Avoidance Zones“. Then, click the “Add Avoidance Zone” button.
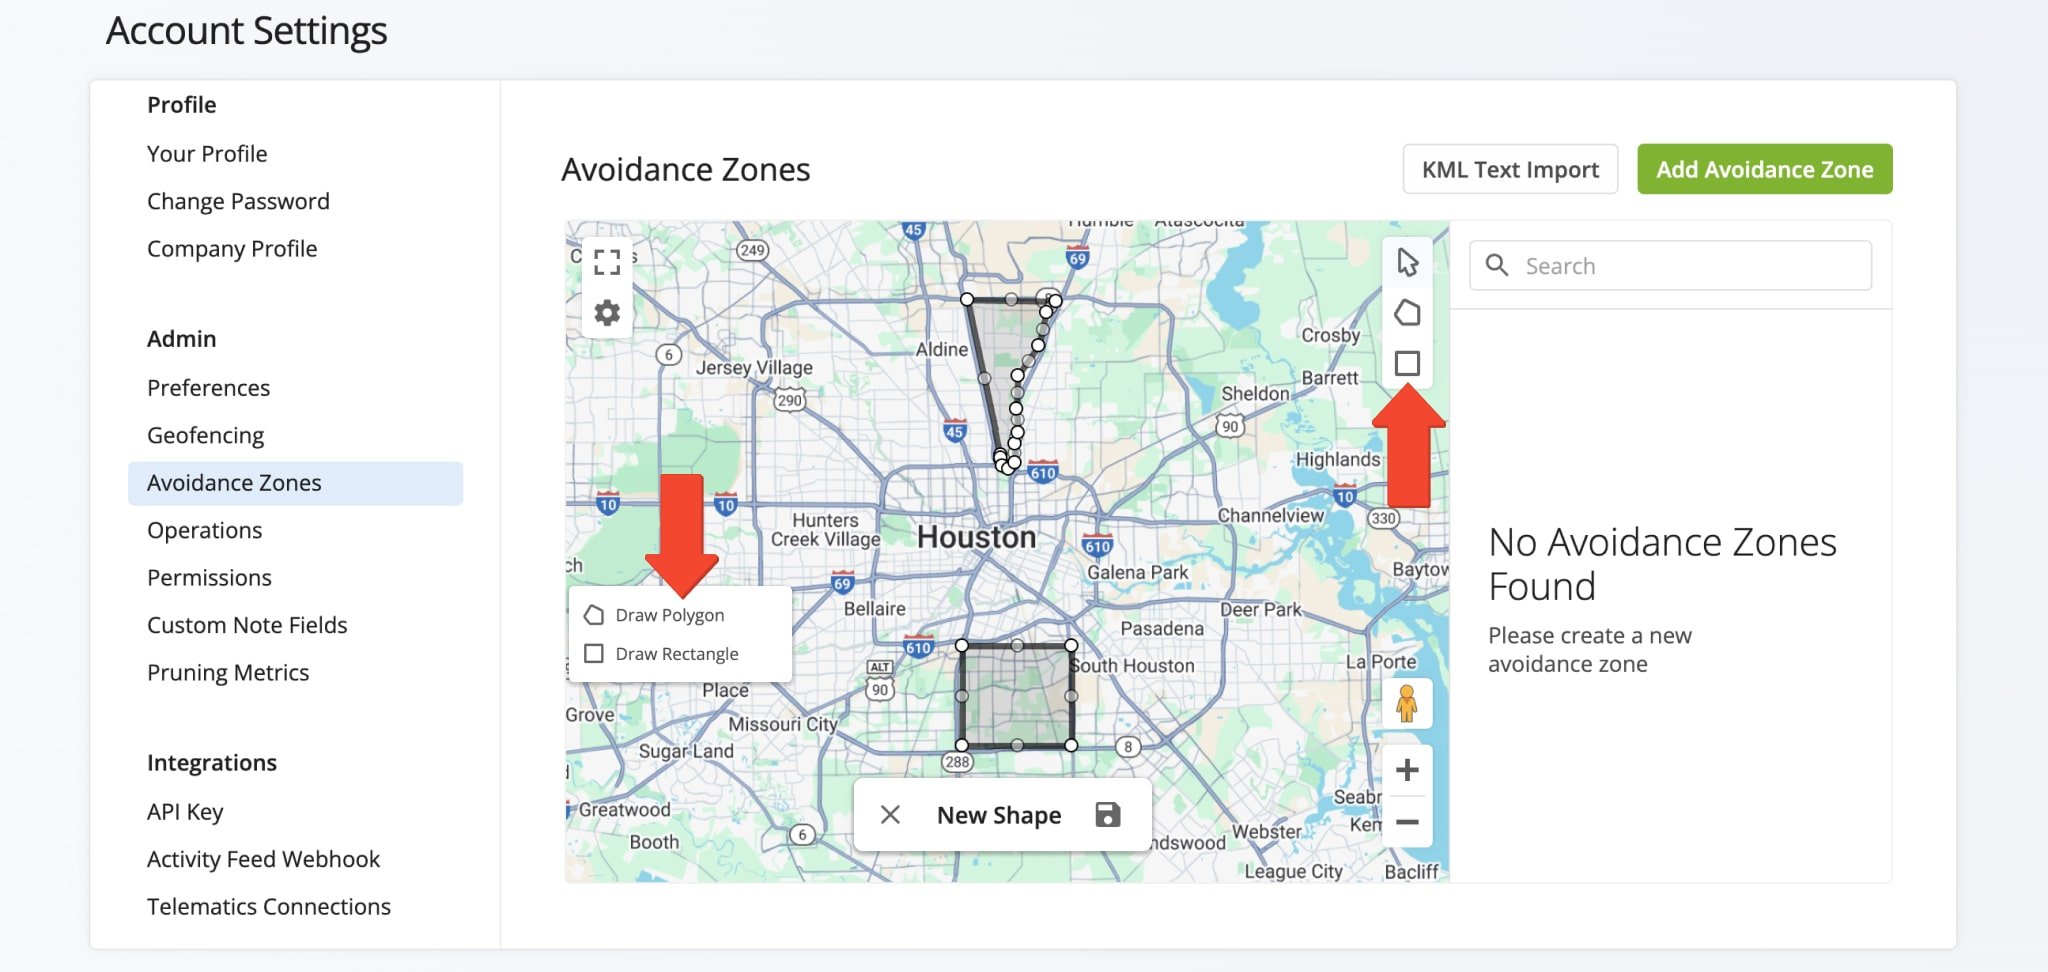
To draw an Avoidance Zone on the map, right-click the map to access the Shape Menu or select a shape from the panel in the upper-right of the map. NOTE: Use the arrow in the Shape Menu to drag and reposition the map.
Then, click on the specific location where you want to define the Zone’s parameters. To create a free form shape, click on the polygon. Or click on the rectangle and drag it to cover the area you wish to define.
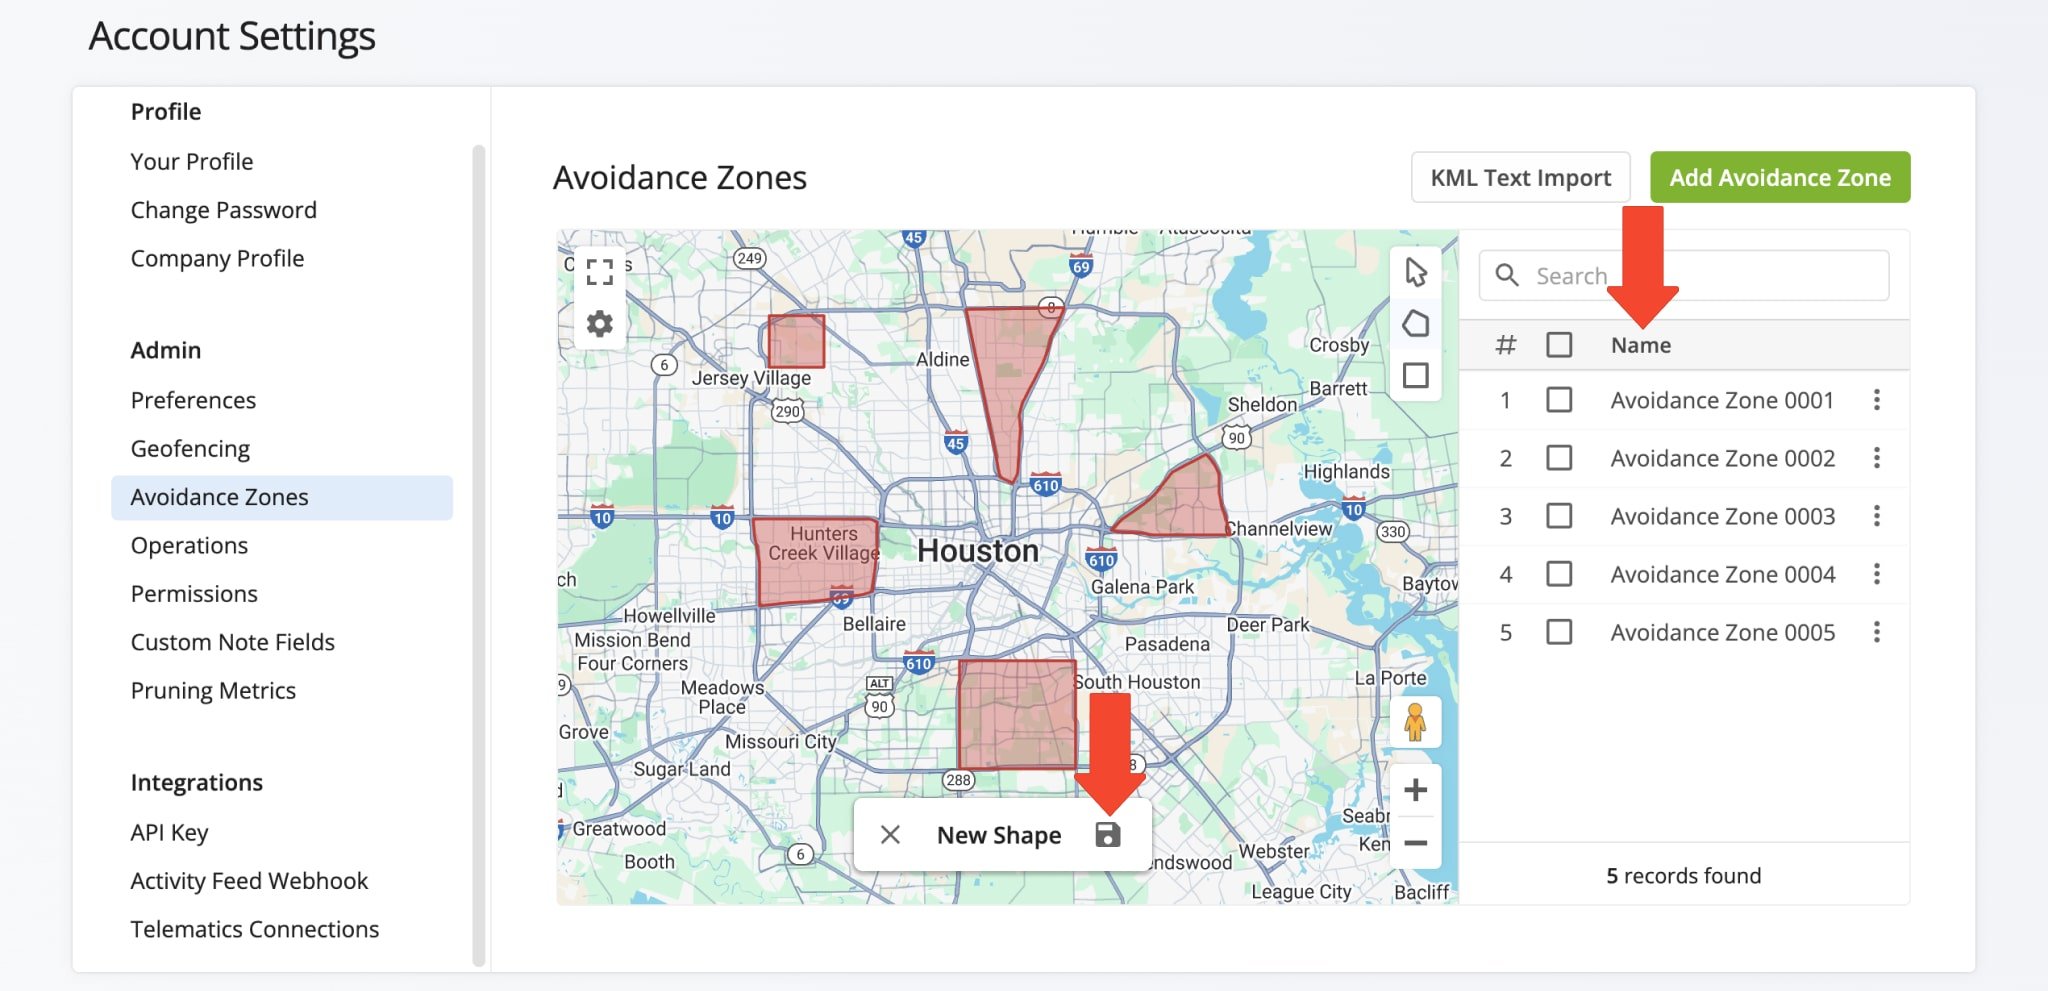
If you make a mistake and want to start over, click “X” in the “New Shape” box to erase your shape. To save your shape, click the Save Icon and give the Avoidance Zone a title as prompted. All Avoidance Zones will appear in the list on the right.
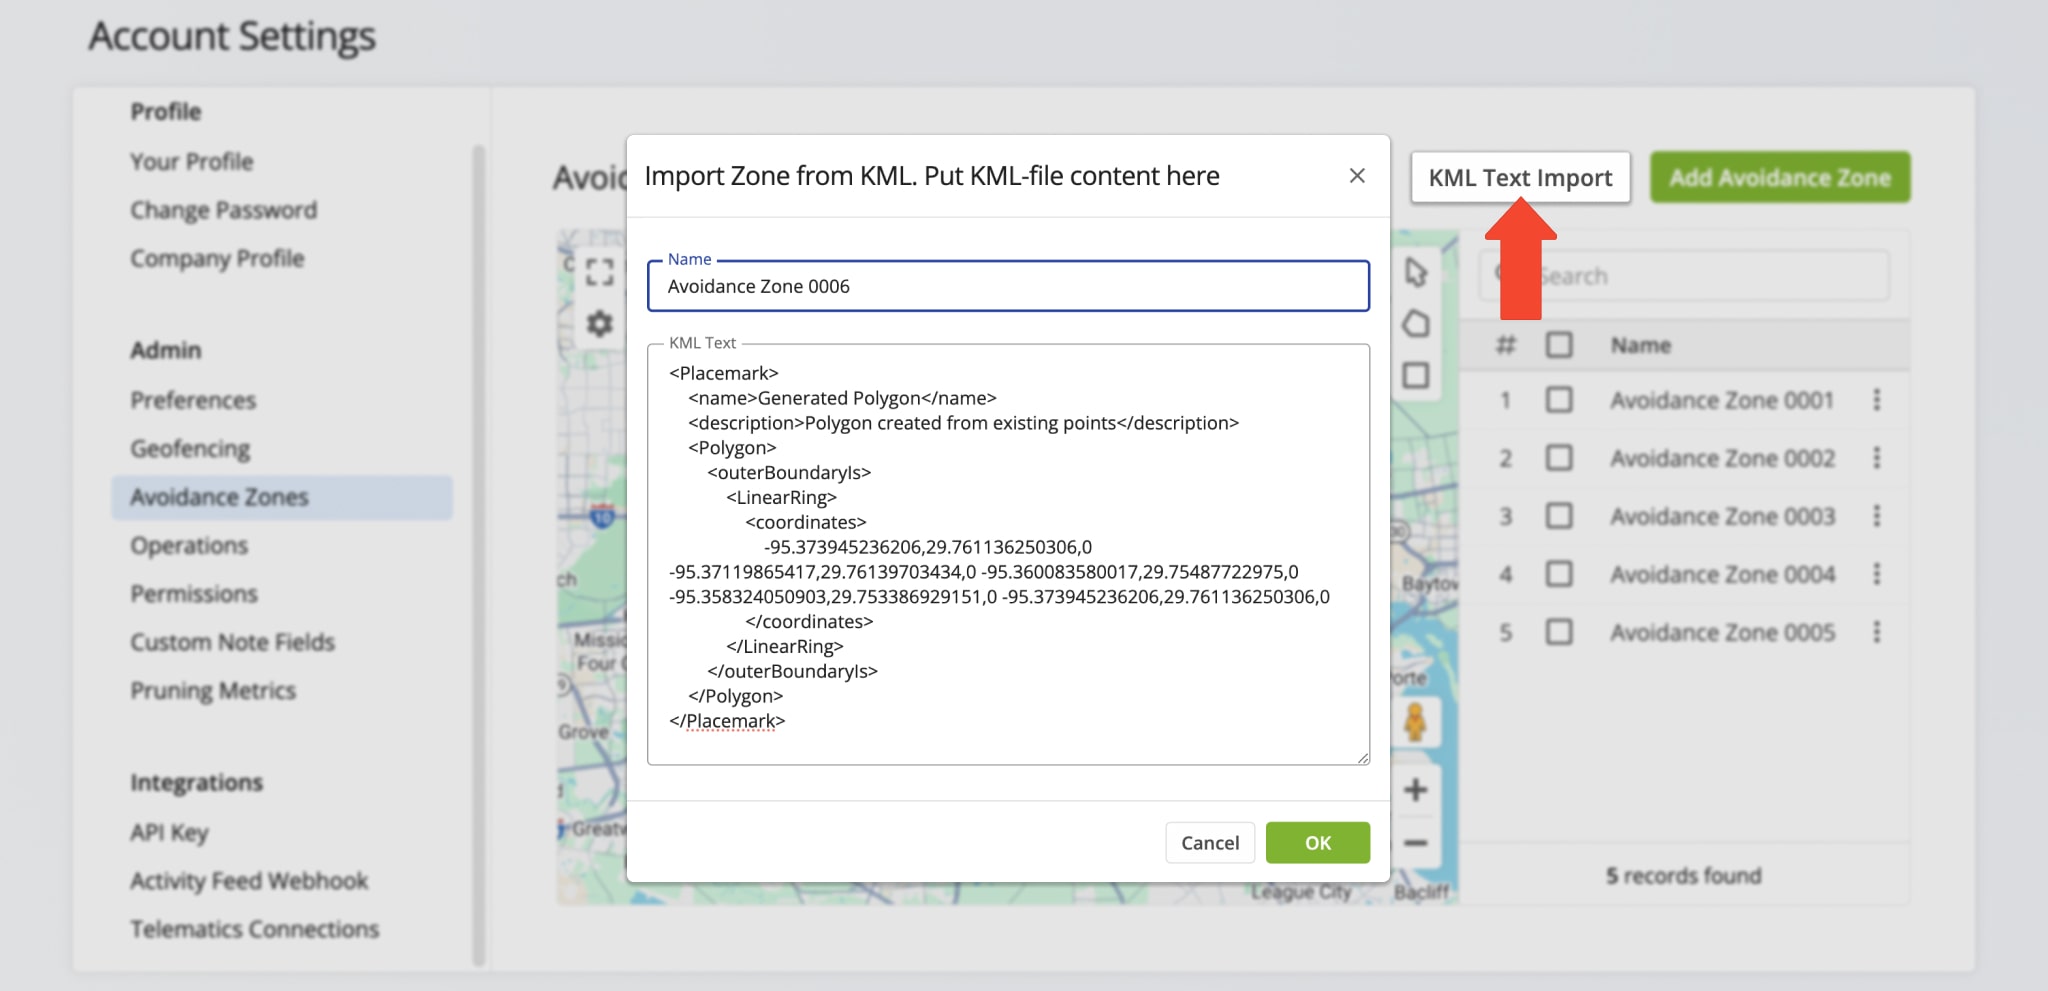
For even greater efficiency and precision in defining an Avoidance Zone, you can also import KML (Keyhole Markup Language) text. KML text defines geographic data in browsers such as Google Earth or Google Maps. To use this option, simply click the “KML Text Import” button, import your text, and click “OK” to save and add the Avoidance Zone to your list.
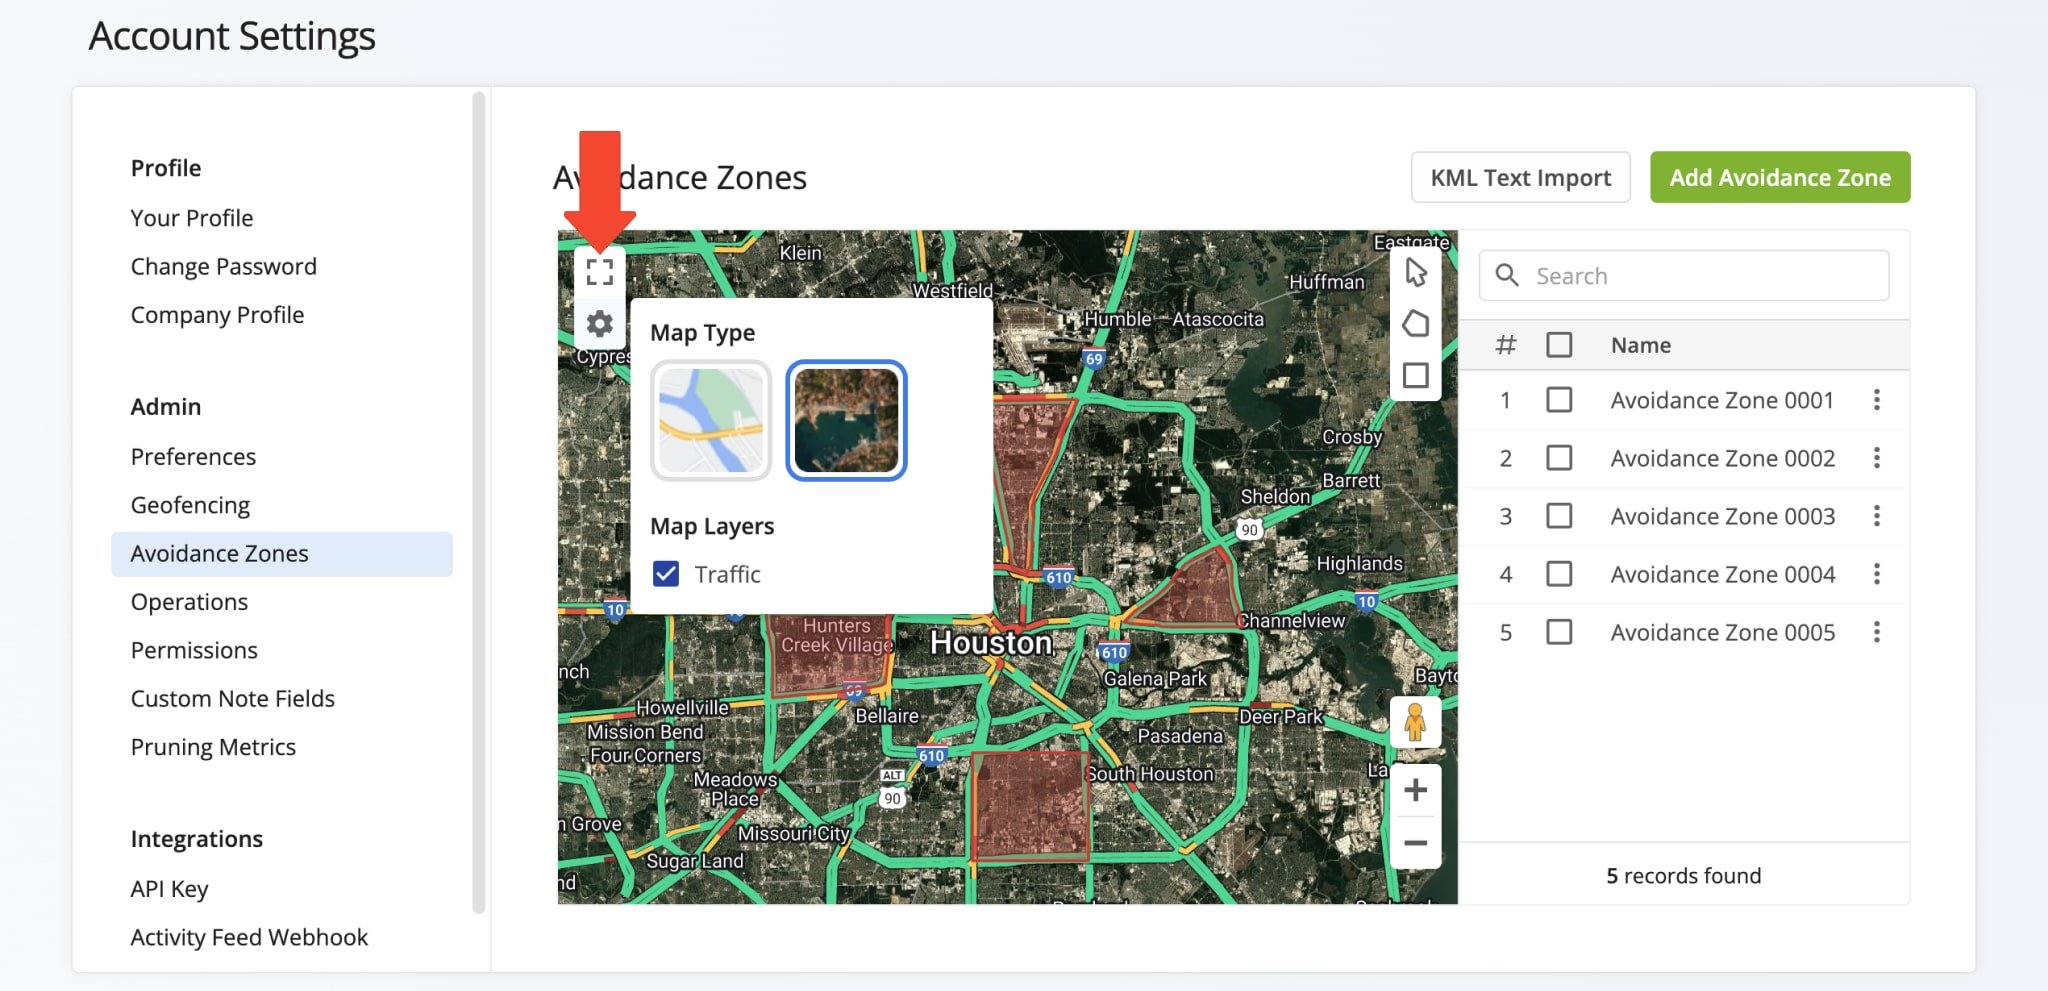
You can also adjust map settings. Simply click the Frame Icon in the top left to access a full screen map. Click the Gear Icon below it to open the Map Settings menu where you can change map view modes and enable a map traffic layer.
Manage Avoidance Zones – Adjust No-Go Zones For Vehicles And Field Personnel
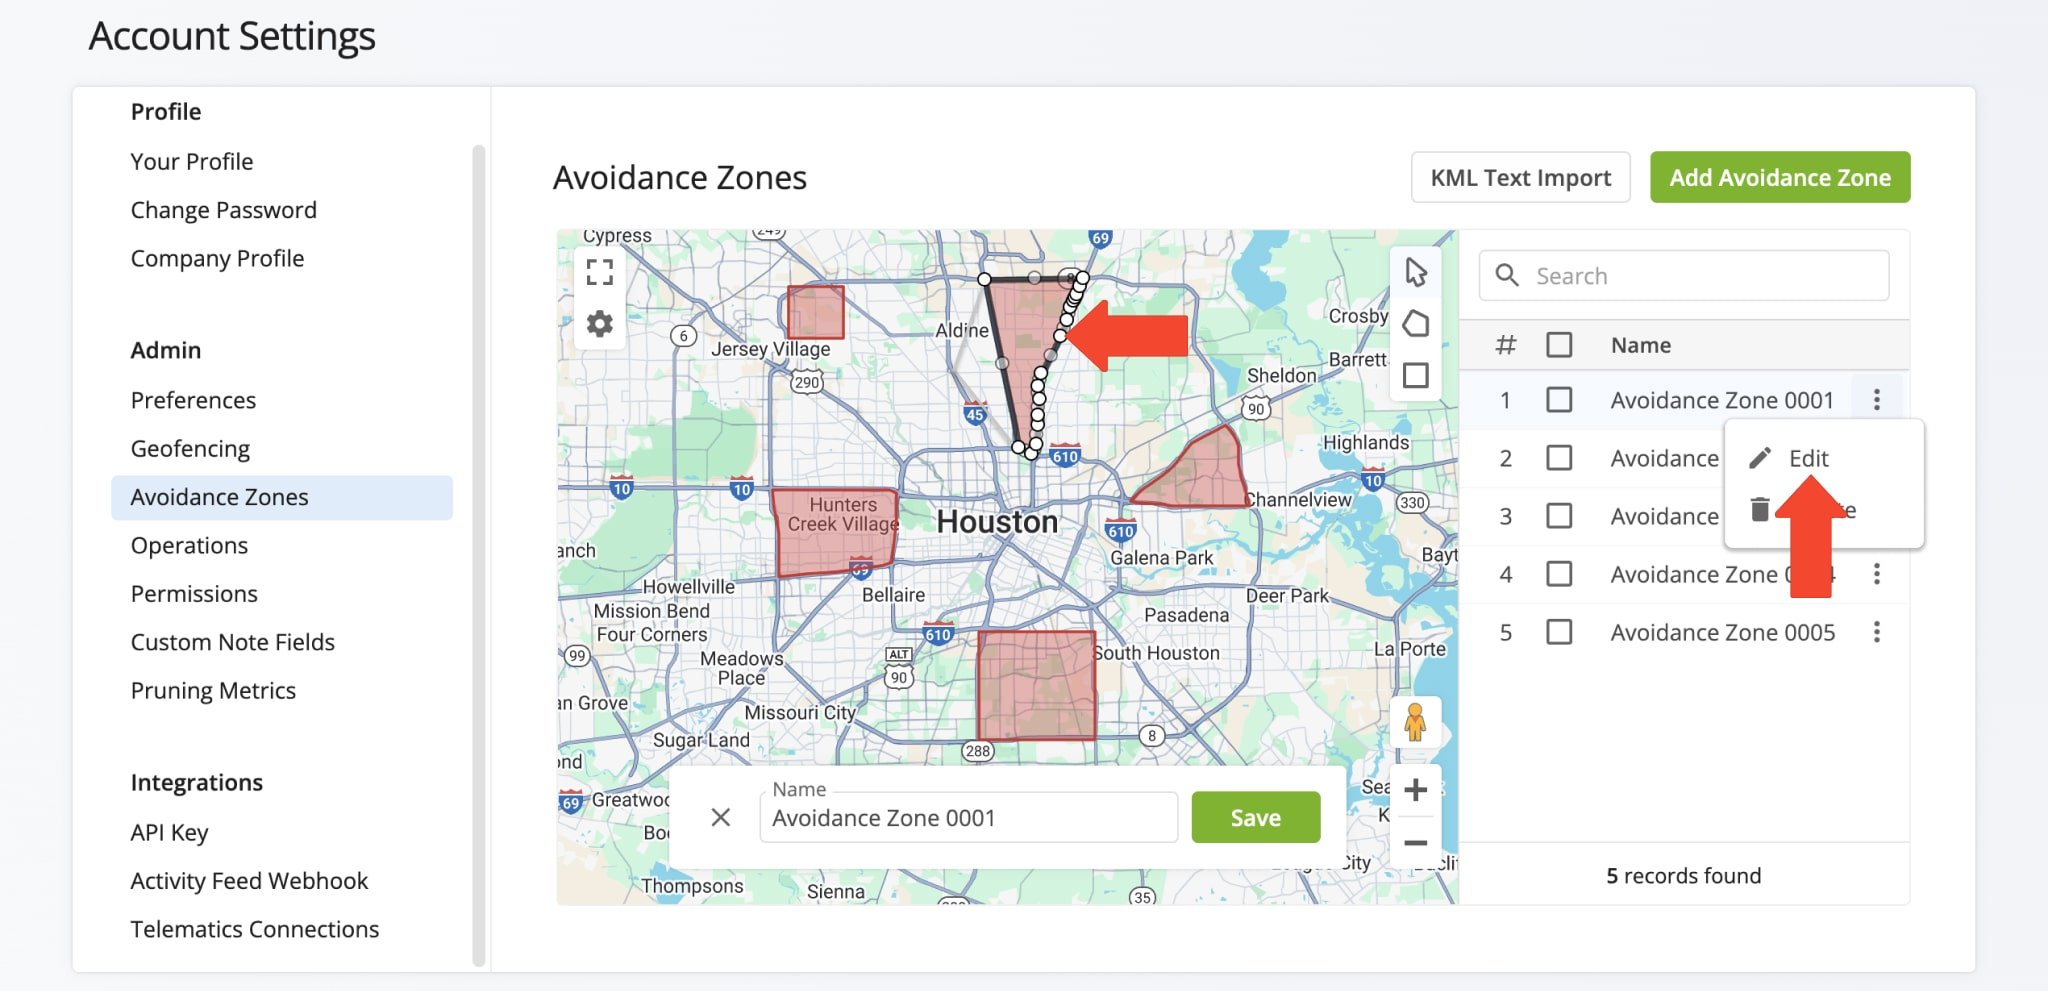
To edit an Avoidance Zone, click the Three-dot Icon next to it to access the edit feature. Then, to adjust the shape of the Zone, click on any point in the drawing and drag it to make the alteration. When finished, click “Save“.
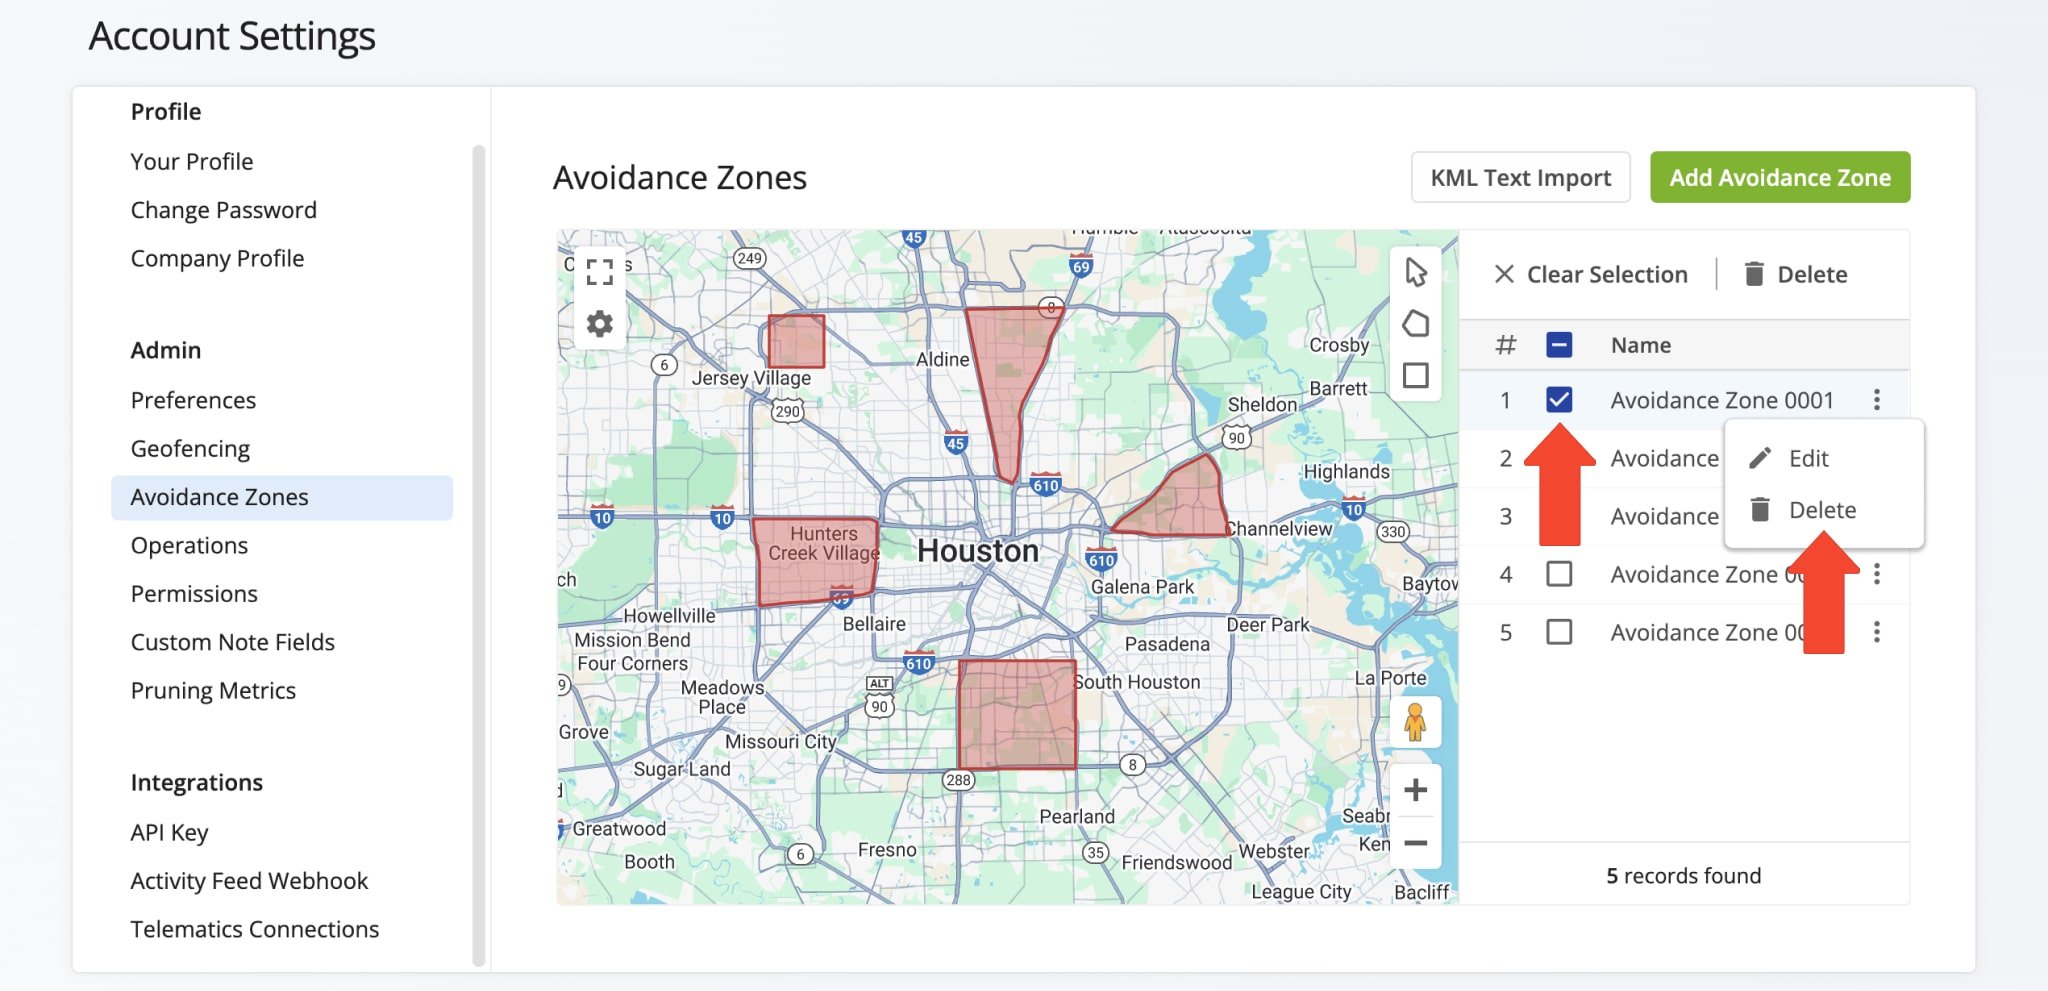
To delete an Avoidance Zone, click the Three-dot Icon next to the zone to access the delete feature. Alternatively, check the box next to zone and click “Delete“.
Add Avoidance Zones to Route Optimization Profiles
Once you’ve created Avoidance Zones, you can add them to Optimization Profiles.
Go to “Organization Settings” > “Optimization Profiles”in the Navigation Window. Then, click the “Create New Profile” button and follow these steps:
- Go to “Restrictions” and click on “Avoidance Zones”.
- Toggle “Enable Avoidance Zones”.
- Click on “Select Avoidance Zones”.
- Choose the Zones you want to enable.
- Click “Done” to finalize.
If you have many Avoidance Zones, use the “Search Avoidance Zones” field to quickly find and enable specific Zones.

Route Avoidance Zones – Steer Clear Of Problematic Or High-Risk Areas
Once created, you can plan routes which exclude your Avoidance Zones. Any destinations within these Zones will be omitted, and route directions will always navigate around them.
To plan a route, go to “Dynamic Routing” > “Plan New Route” in the Navigation Menu. Then, select your preferred route data import method: Copy-and-Paste, Upload a File, Import Data, Upload Scans, or the Interactive Map Editor.
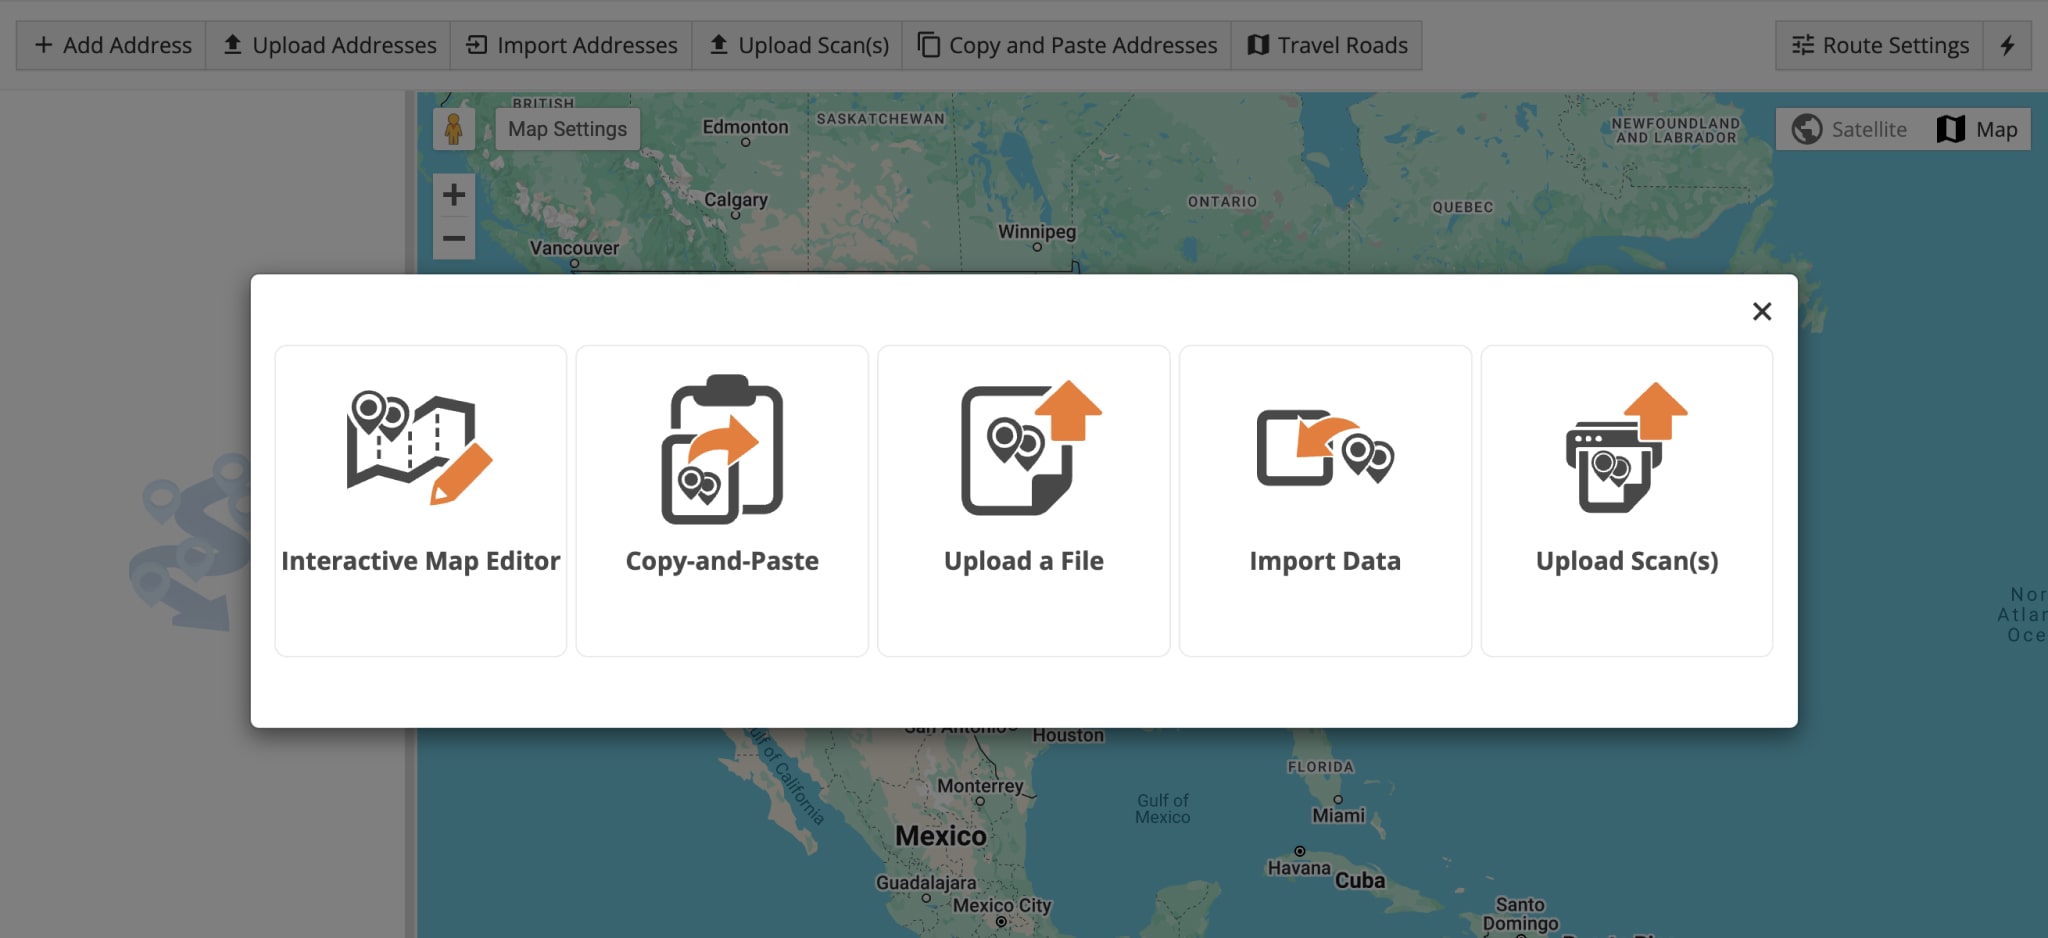
You can only select Avoidance Zones when you manually adjust optimization settings. To do this, click “Skip” when asked if you’d like to use a pre-existing Optimization Profile.
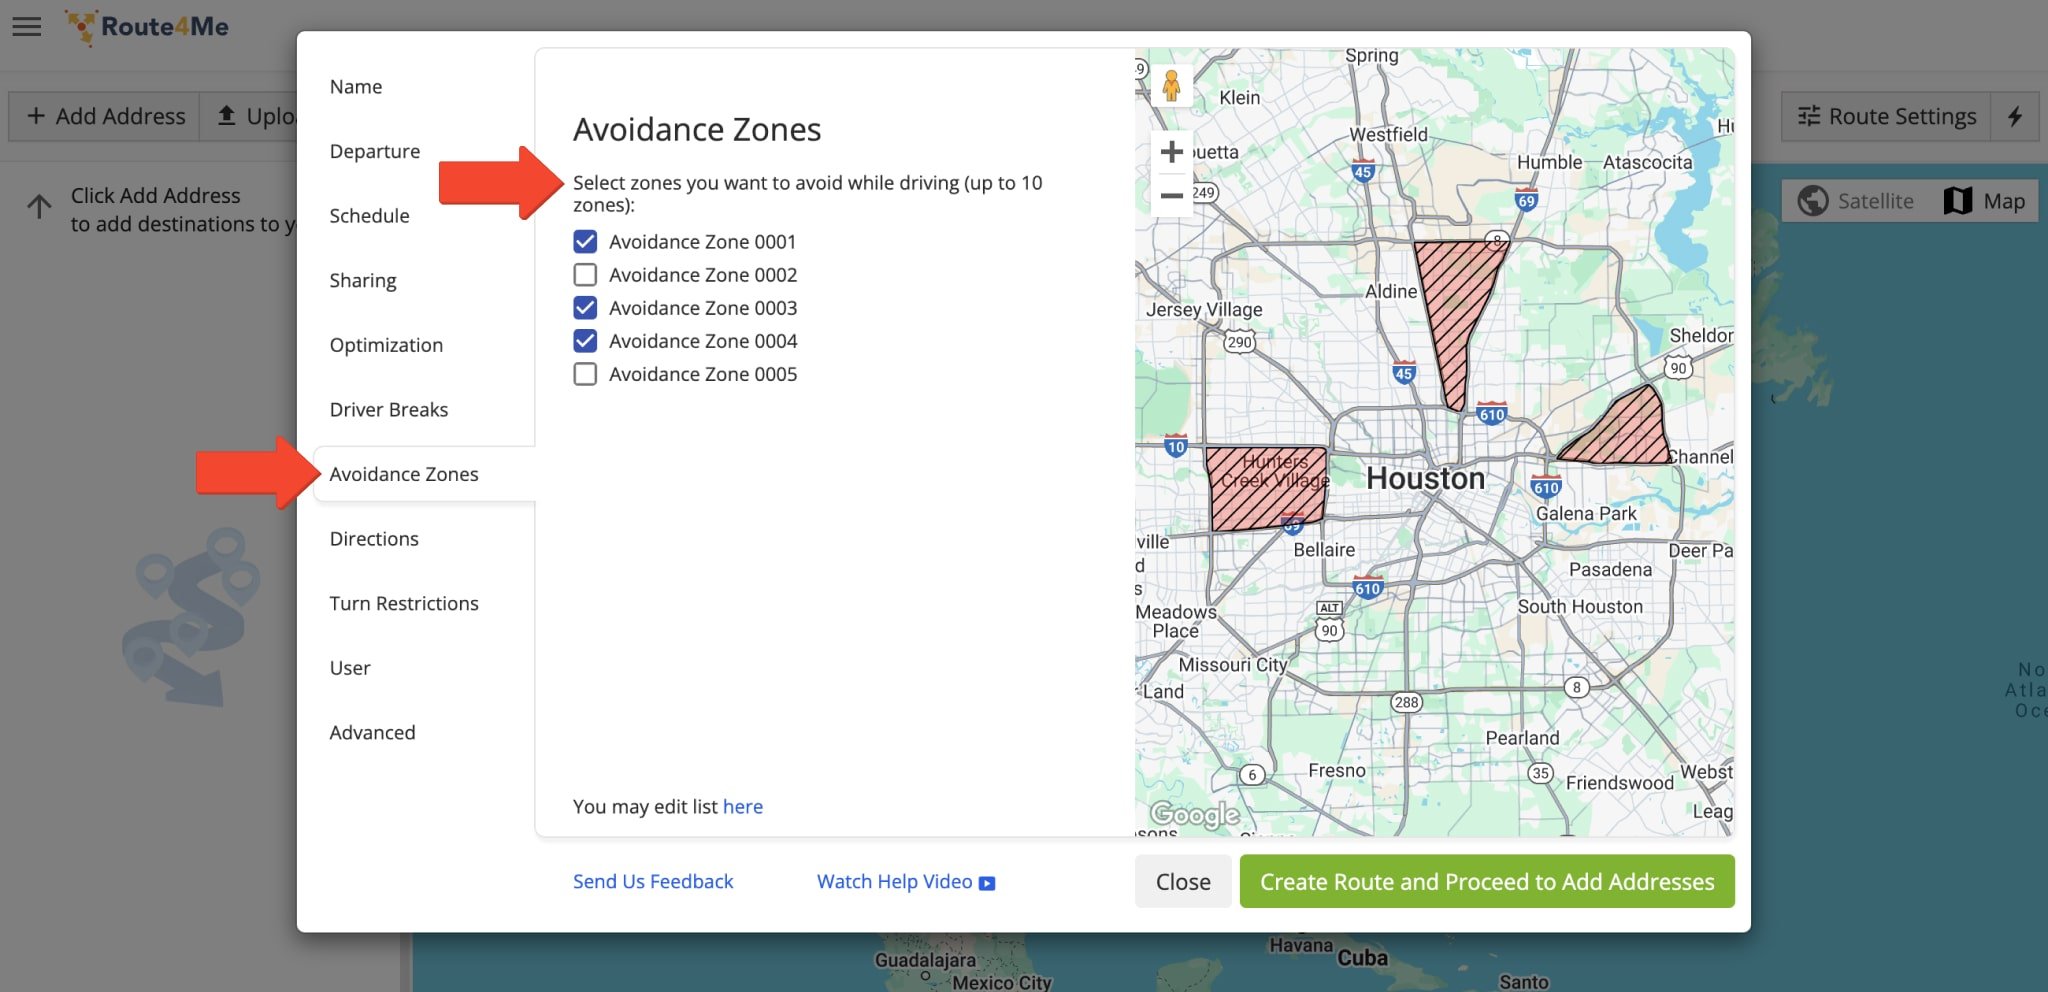
Then, in the pop-up window, click “Avoidance Zones“. Select one or multiple Avoidance Zones to apply to the route by checking the corresponding boxes. Once chosen, the selected Avoidance Zones will appear on the map. When done, click “Create Route and Proceed to Add Addresses“.
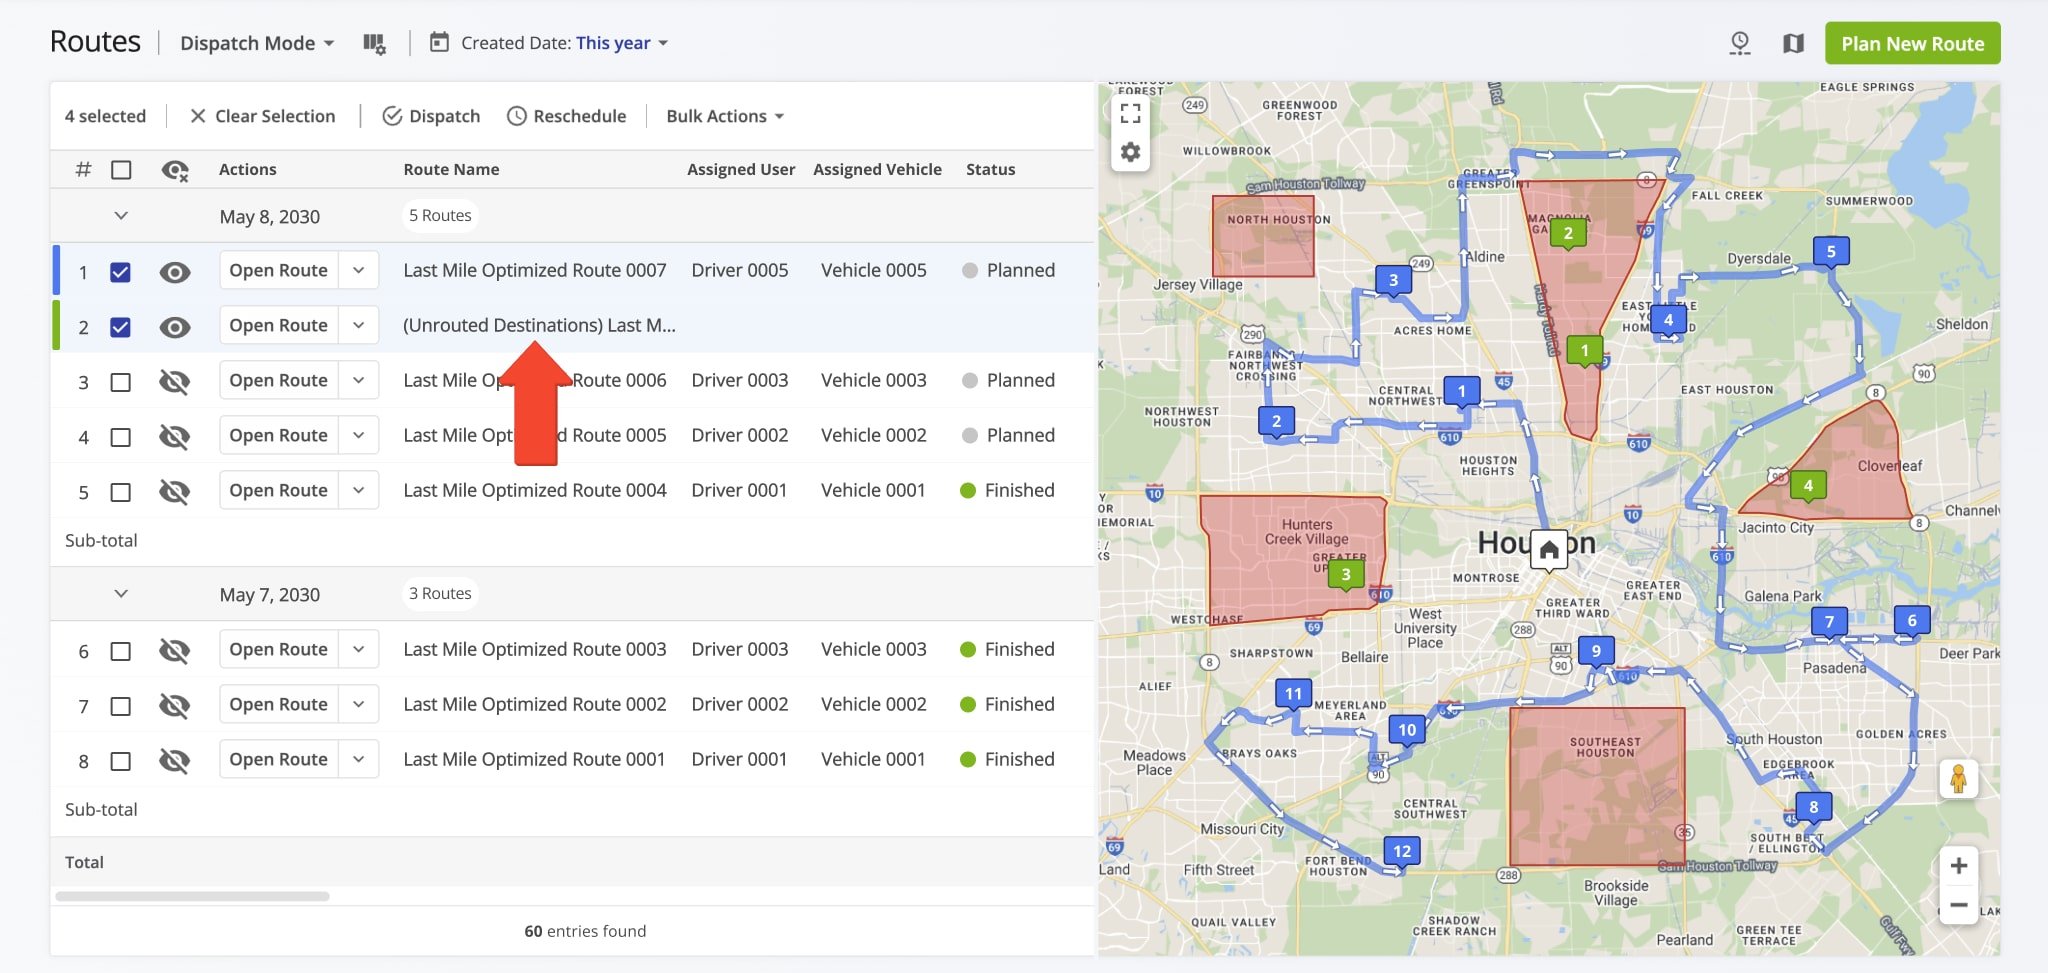
If a destination is within an Avoidance Zone, it will be excluded from the route. The system will create an “Unrouted Destinations” route for any excluded locations. Learn more about unrouted destinations.
NOTE: To enable this feature, multiple drivers route optimization must be enabled.
Add Avoidance Zones To Planned Routes And Re-Optimize
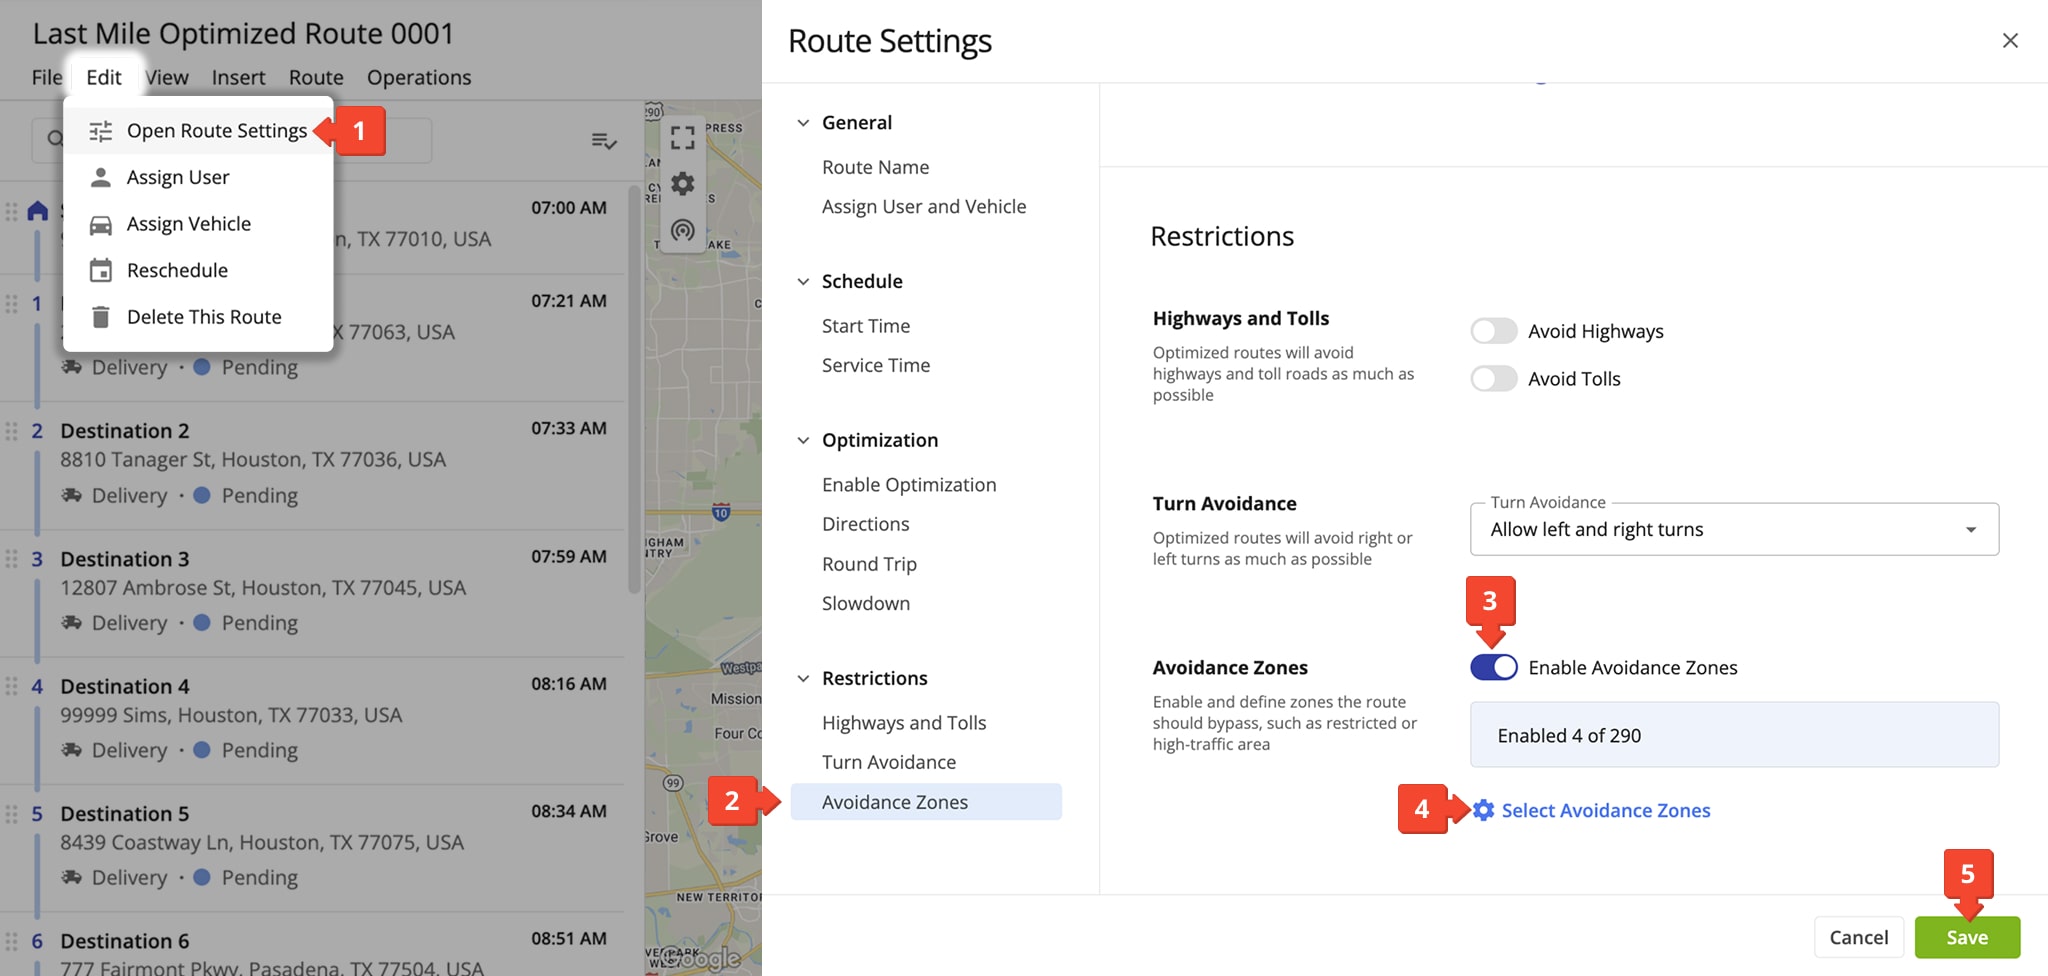
You may want to add Avoidance Zones to routes that are already planned and optimized. To do that, simply open a planned route in the Route Editor and follow these easy steps:
- Click “Edit” > “Open Route Settings” from the the top menu bar.
- Scroll down to “Restrictions” tab and go to the “Avoidance Zones” section.
- Click the “Enable Avoidance Zones” toggle.
- Click “Select Avoidance Zones” and enable the zones you want to add to the route.
- Click the “Save” button to save your changes.
Route4Me will automatically update a route’s directions any time you change route settings. It’s recommended to re-optimize routes after changing optimization settings to ensure the most optimal route sequence for your destinations.
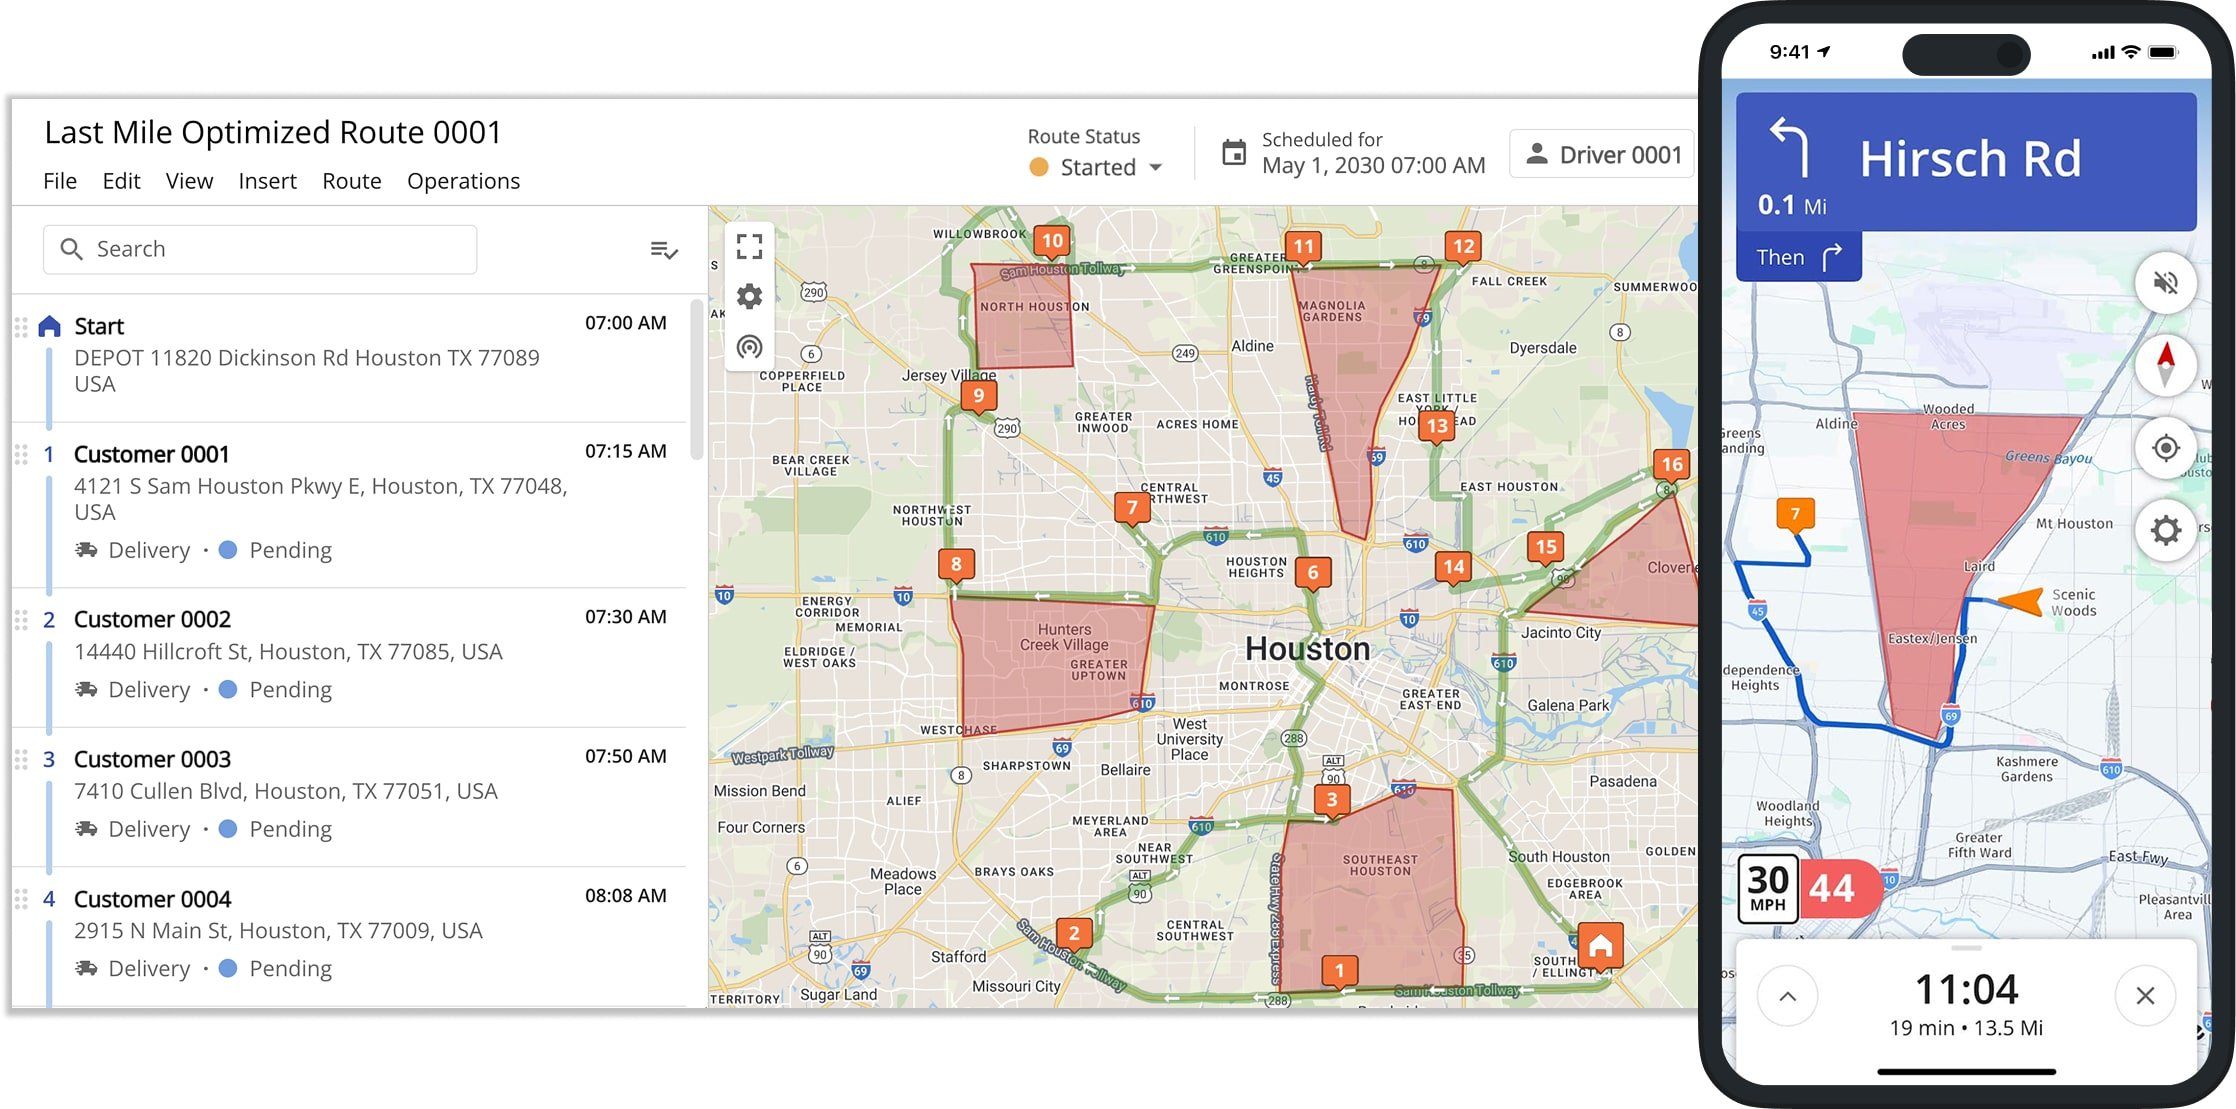
Viewing Avoidance Zones In Mobile Navigation
When avoidance zones are enabled, drivers can see them directly on the map in the mobile navigation app while following a route. The route will be adjusted to avoid those areas whenever possible.
NOTE: Learn more about Route4Me’s Android and iOS mobile driver apps.
Commercial Truck Routing And Avoidance Zones
Avoidance Zones apply only to commercial routing, not commercial navigation. This is important because navigation generates directions independently from planned routes, which means drivers may still be directed through Avoidance Zones.
Commercial routing supports up to 25 Avoidance Zones. Each of your custom-shaped Zones can contain up to 100 points, providing you with greater precision when defining avoidance areas for commercial routes.
Visit Route4Me's Marketplace to Check out Associated Modules:
About author: Daniel Archer
With a background in pedagogy and writing instruction, Daniel is a former tenured English Instructor who, after nearly 20 years of teaching, transitioned into content strategy and leading writing teams for global brands. Now, as Technical Documentation Manager at Route4Me, he translates complex logistics technology into clear, accessible content that empowers users.