Locations Territories – Plan Routes From Single Or Multiple Territories
Location Territories simplify route planning by letting you group customer Locations into predefined geographic areas. With this approach, you can quickly build routes using one or multiple Territories, saving time and improving efficiency. Learn how to use Locations to plan routes effectively, whether you’re working with a single Territory or combining multiple ones.
Table of Contents
Plan Route Using A Single Location Territory
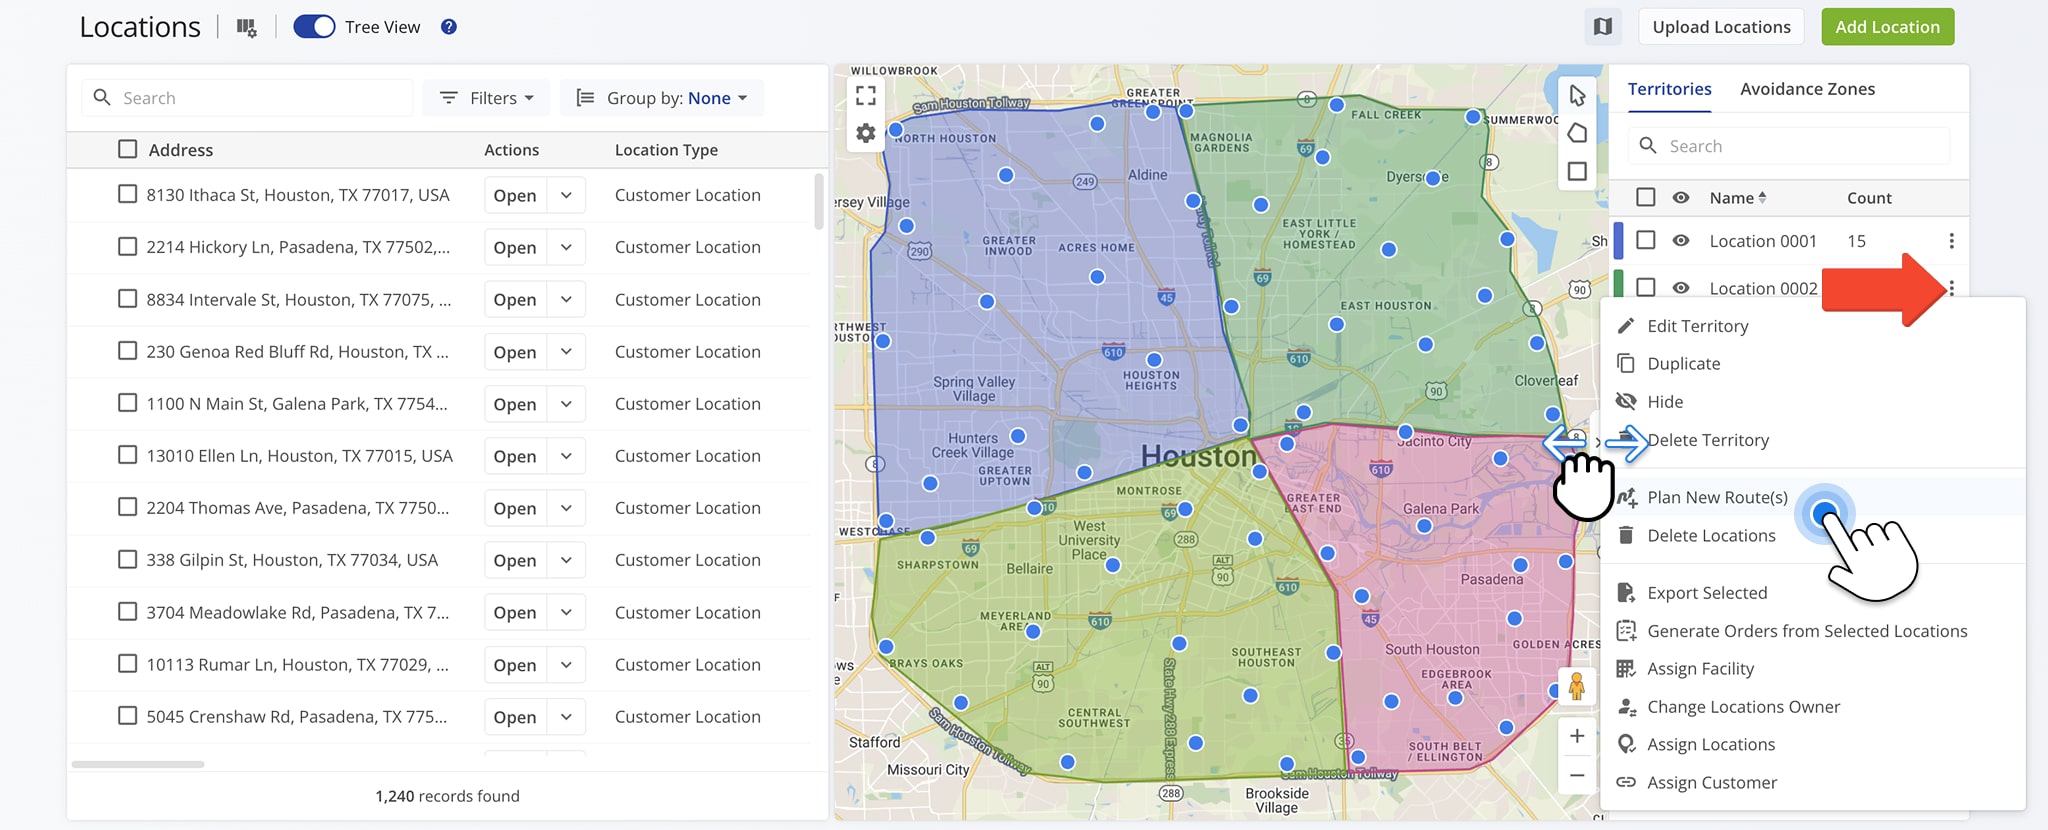
To plan a route using a Location Territory, first open your Locations page by going to “Database” > “Locations” in the Navigation Menu. Then, open the sidebar so you can see your Territories.
Click the Three-dot Icon next to a Territory or and select “Plan New Route(s)“. You can also click on the Territory in the Map to access this option.
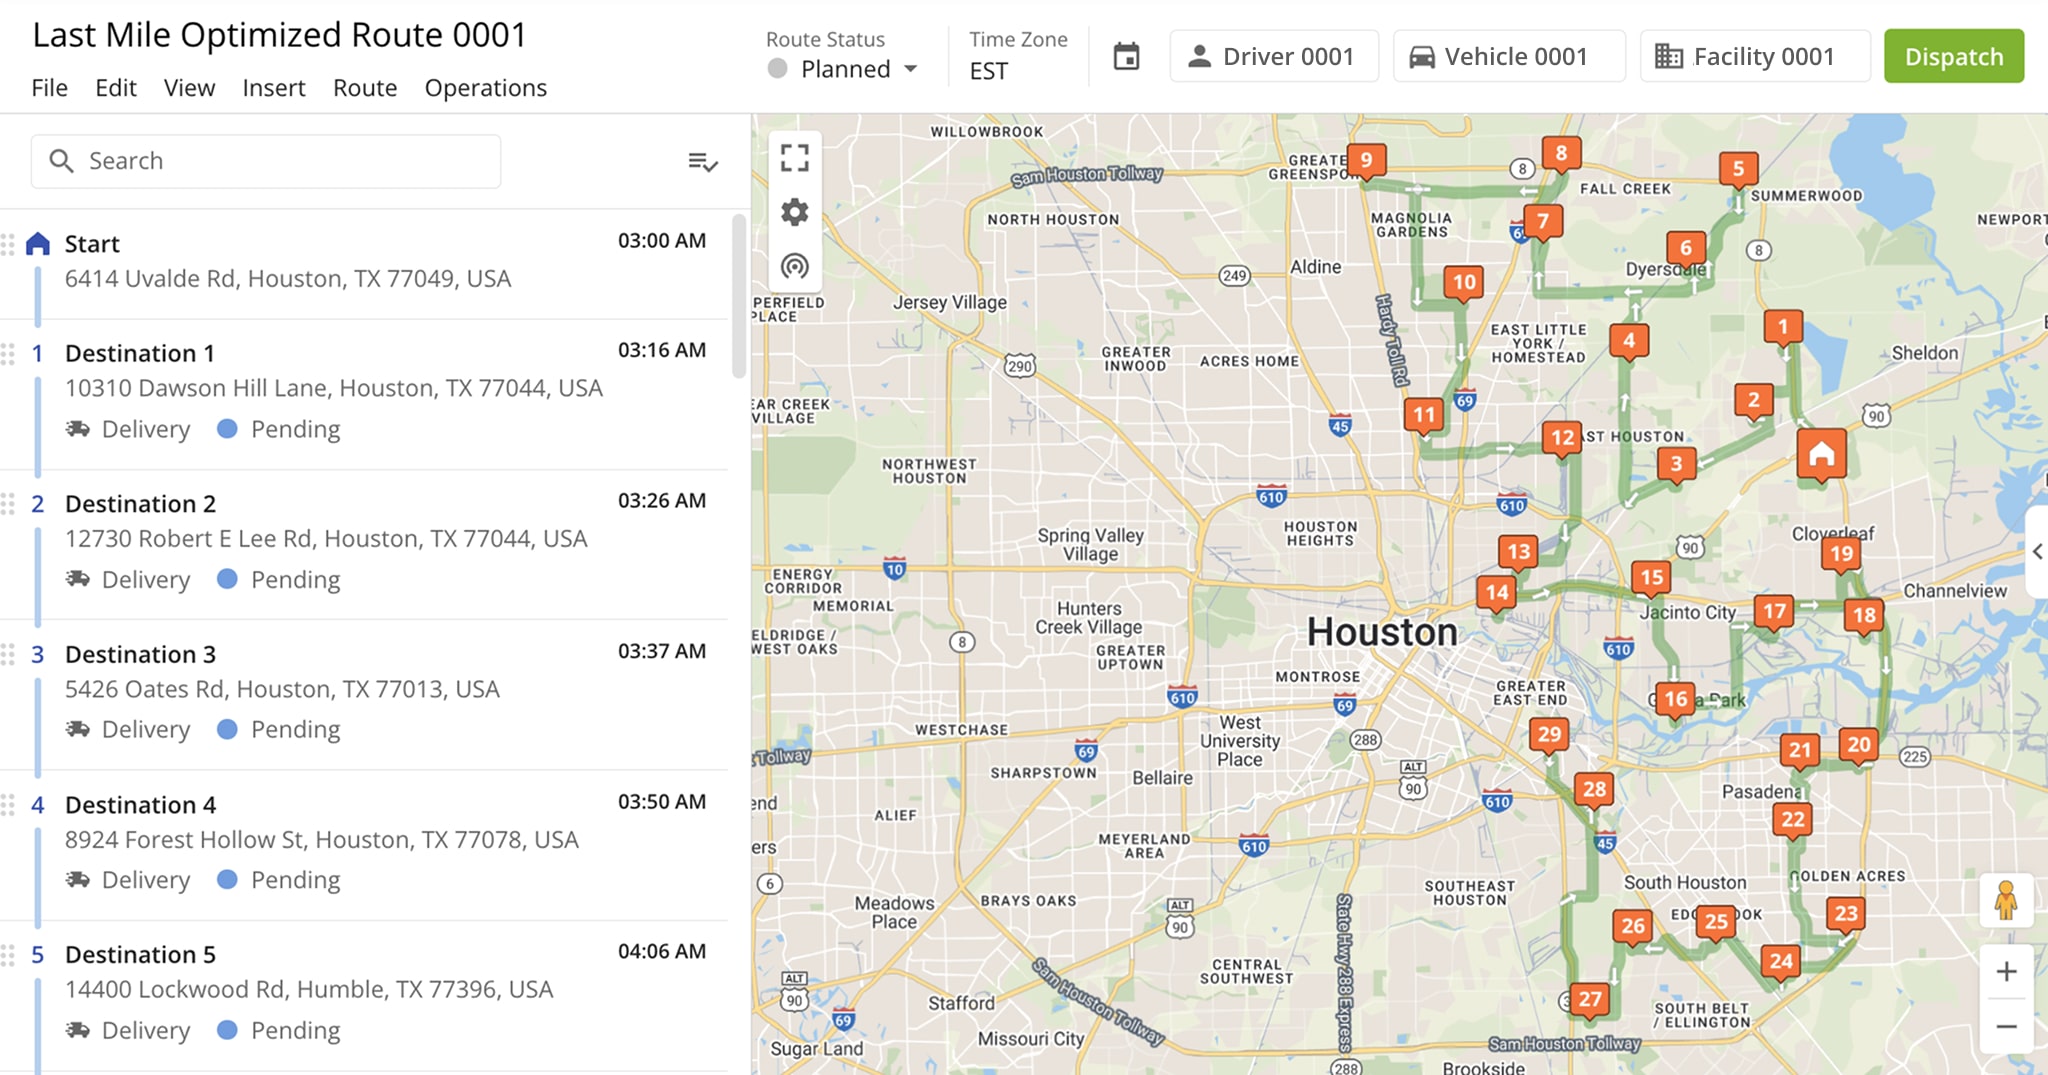
You’ll be redirected to your Route Planner page. After optimizing the route and verifying all addresses, the route will become immediately available for dispatch.
NOTE: See our dedicated guide to learn more about how to plan and optimize a route.

Plan Route Using Multiple Location Territories
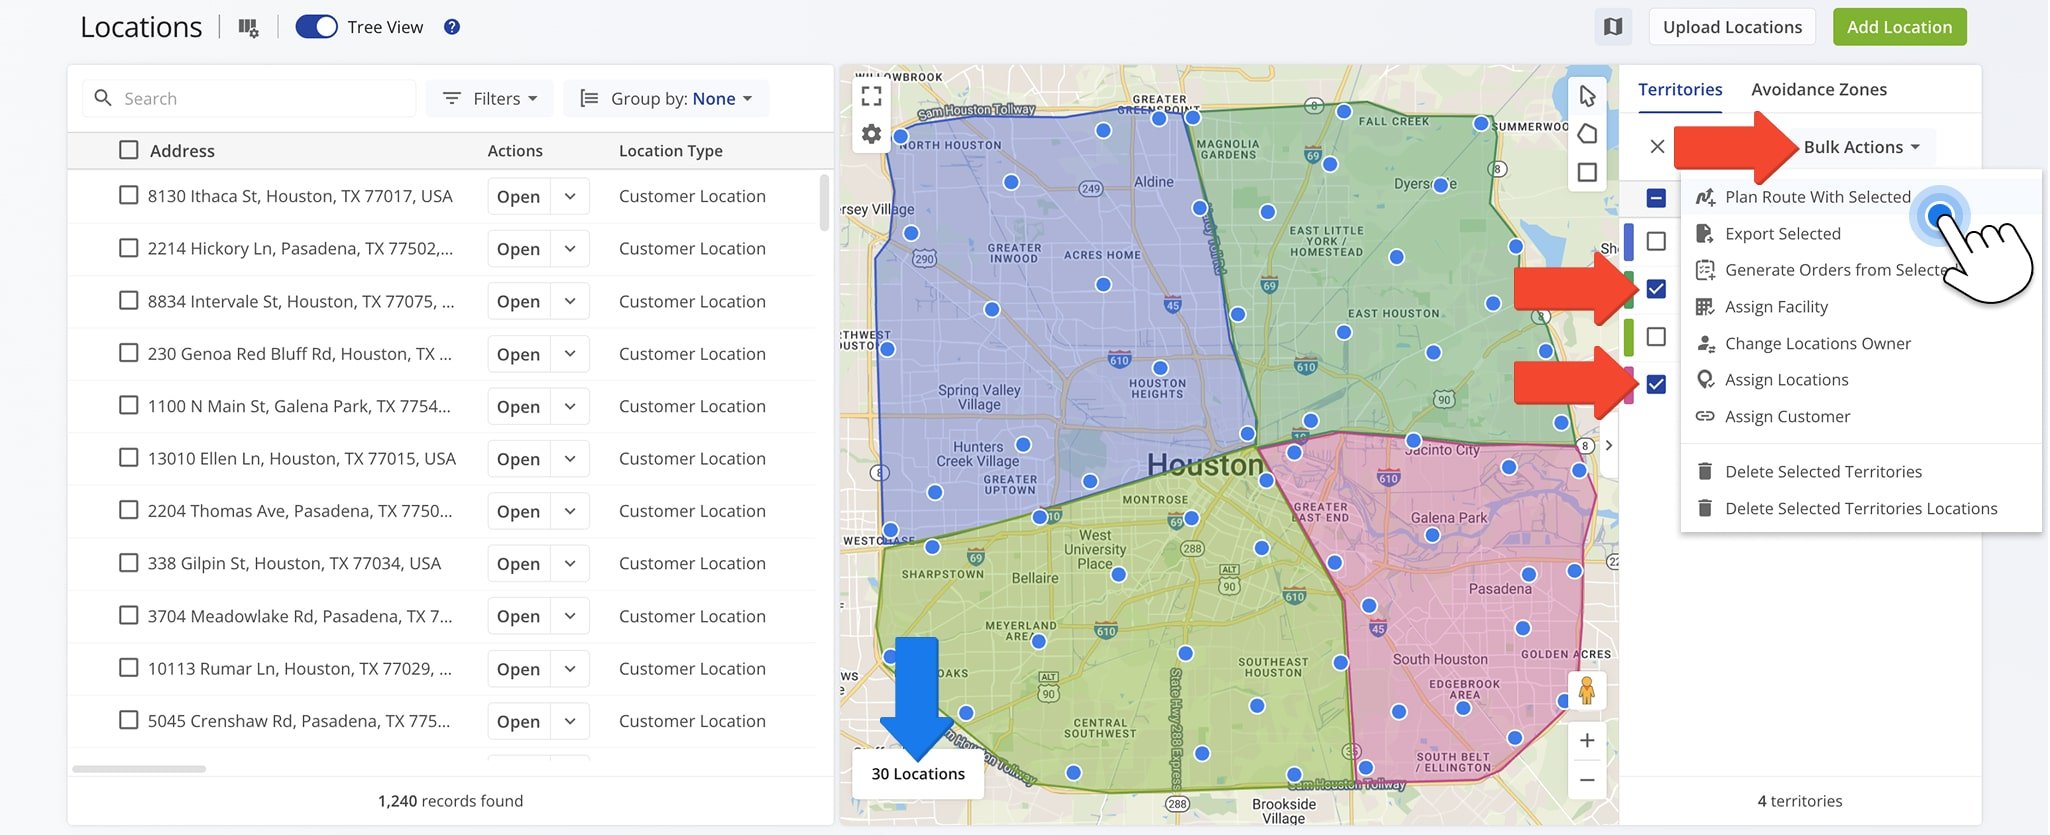
To plan a route using multiple Location Territories, check the box next to the Territories you wish to route. Then, click “Bulk Actions” and select “Plan Route With Selected“.
The Map will display the total number of Locations that will be included in the route.
You’ll be redirected to your Route Planner page. After optimizing the route and verifying all addresses, the route will become immediately available for dispatch.
NOTE: See our dedicated guide to learn more about how to verify addresses and Locations with geocoding.
Visit Route4Me Marketplace to Check Out More Add-Ons:
- Optimization
Address Book and Territories Planning
- Route Optimization
Commercial Vehicle & Truck Routing
- Operations
Audit Logging and Activity Stream
About author: Daniel Archer
With a background in pedagogy and writing instruction, Daniel is a former tenured English Instructor who, after nearly 20 years of teaching, transitioned into content strategy and leading writing teams for global brands. Now, as Technical Documentation Manager at Route4Me, he translates complex logistics technology into clear, accessible content that empowers users.