Traffic Slowdowns – Plan Routes With Optimized Route Durations
Effective route planning is essential for keeping field employees on schedule, even during delays. With Route4Me’s Service Time and Travel Time Slowdown Business Rules, you can adjust for factors like rush hour, weather, or new drivers. The system notifies you when routes are planned during busy periods and suggests adjustments, making it easy to account for delays and optimize routes accordingly. This guide shows how to fine-tune your routes and maintain punctuality under any conditions.
Table of Contents
Optimization Profiles – Customize Routes To Account For Traffic Delays
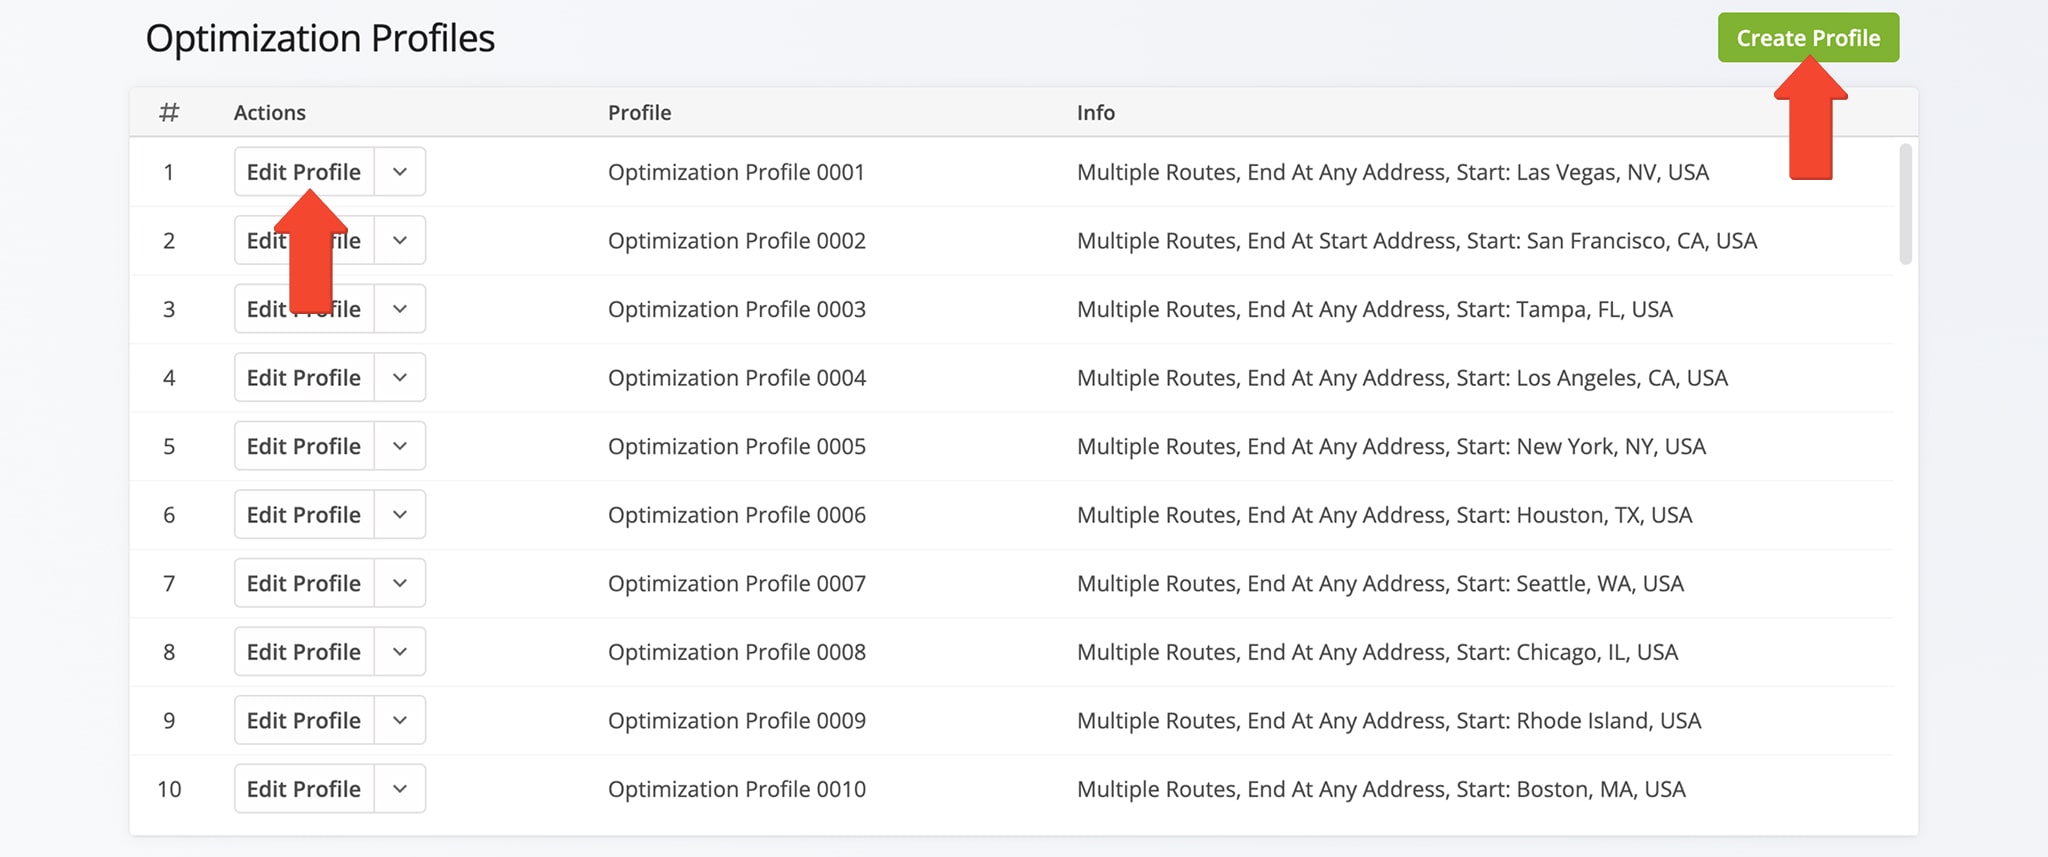
You can create or edit Optimization Profiles to account for traffic delays. Go to “Settings” in the Navigation Menu and select “Optimization Profiles“. To edit an existing Profile, click the “Edit Profile” button next to it. Or, to create a new Profile, click the “Create Profile” button.
Open Your Optimization Profiles
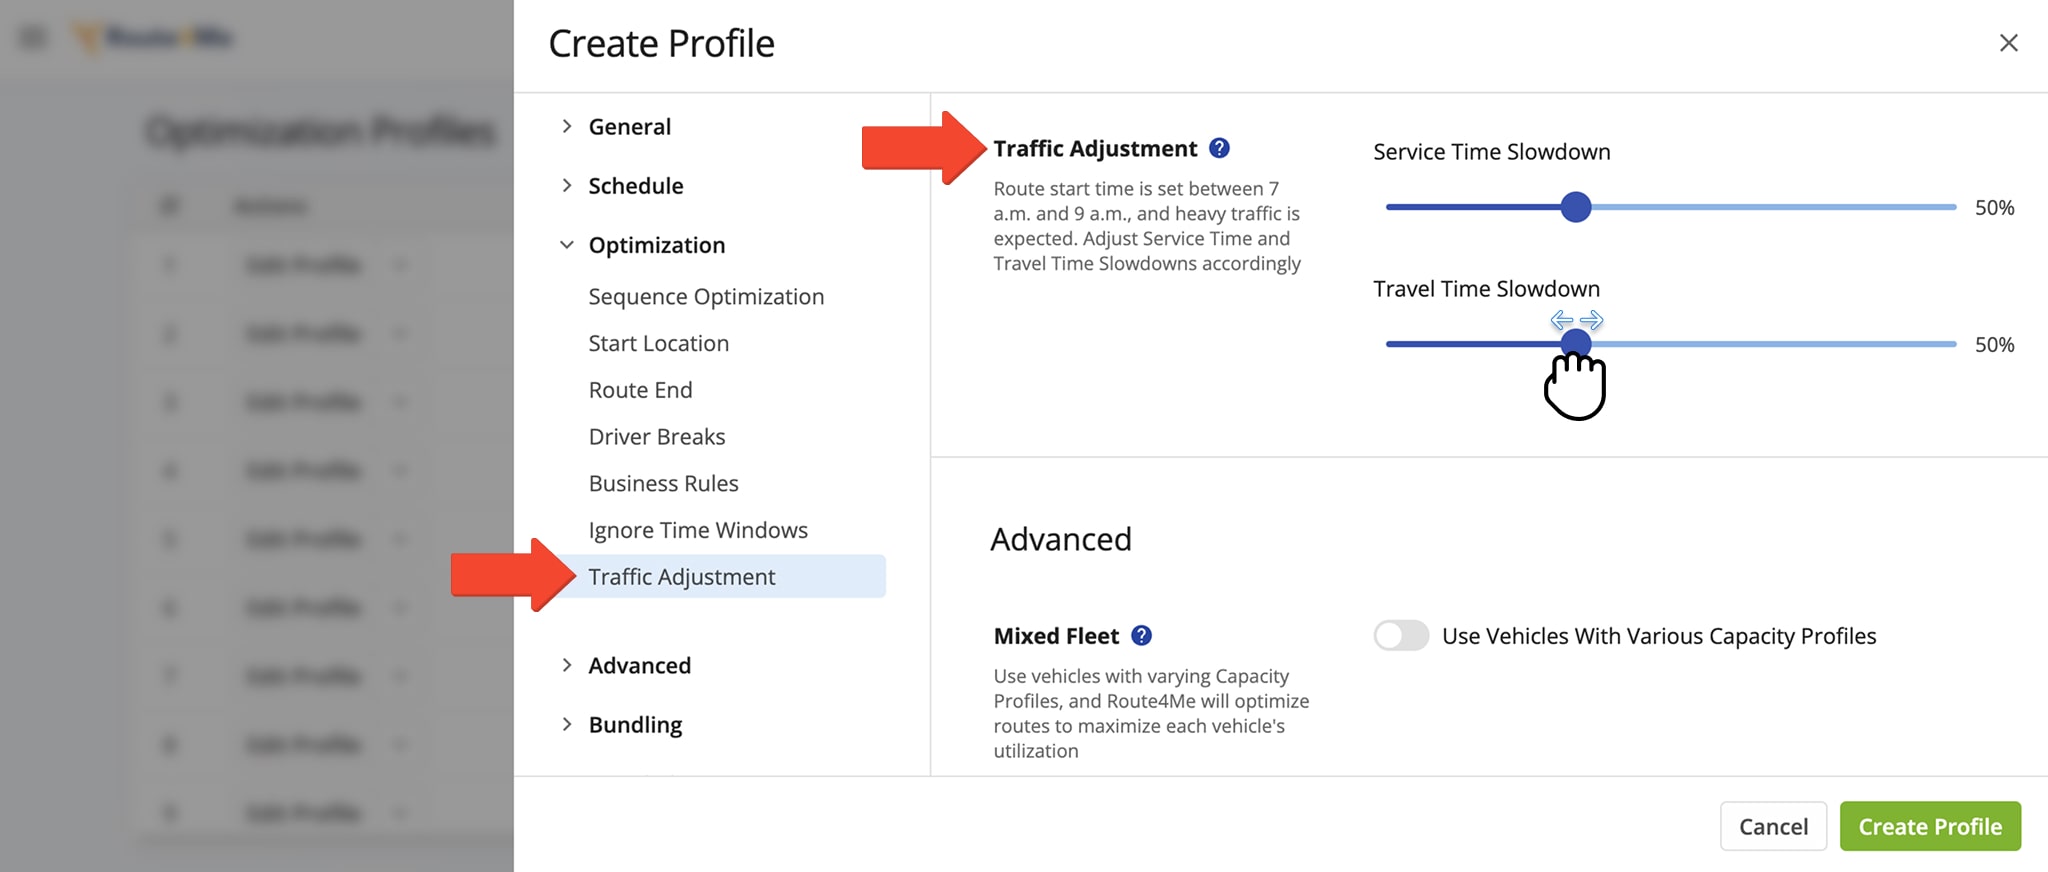
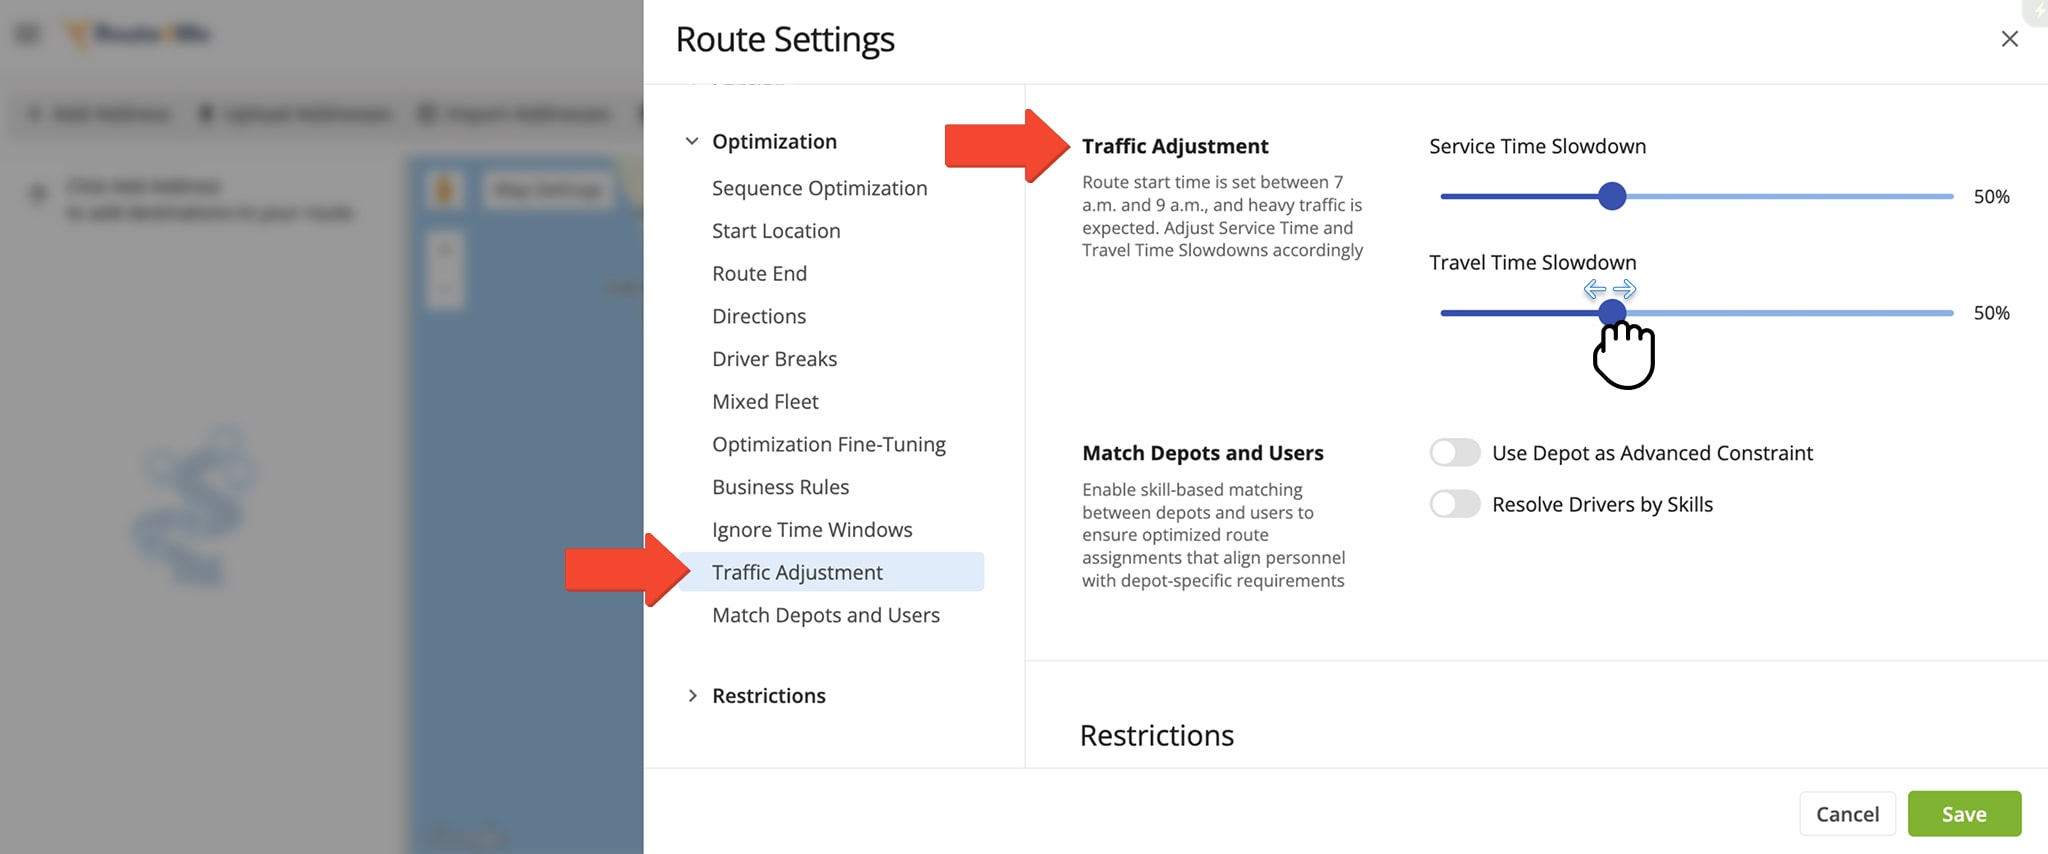
Then, under “Optimizations” in the “Create Profile” panel, click “Traffic Adjustment“. From here, you can use the sliders to adjust Service Time and Travel Time Slowdowns.
For example, if you add a 50% slowdown to a 10-minute Service Time, you’ll increase the Destination Service Time on the route by 5 minutes to a total of 15 minutes per address. Similarly, if you add a 50% Travel Time slowdown to a route that should take 60 minutes to travel, you’ll increase the route travel time to 90 minutes.
Manual Optimization Settings – Adjust Route Driving Time And Slowdowns
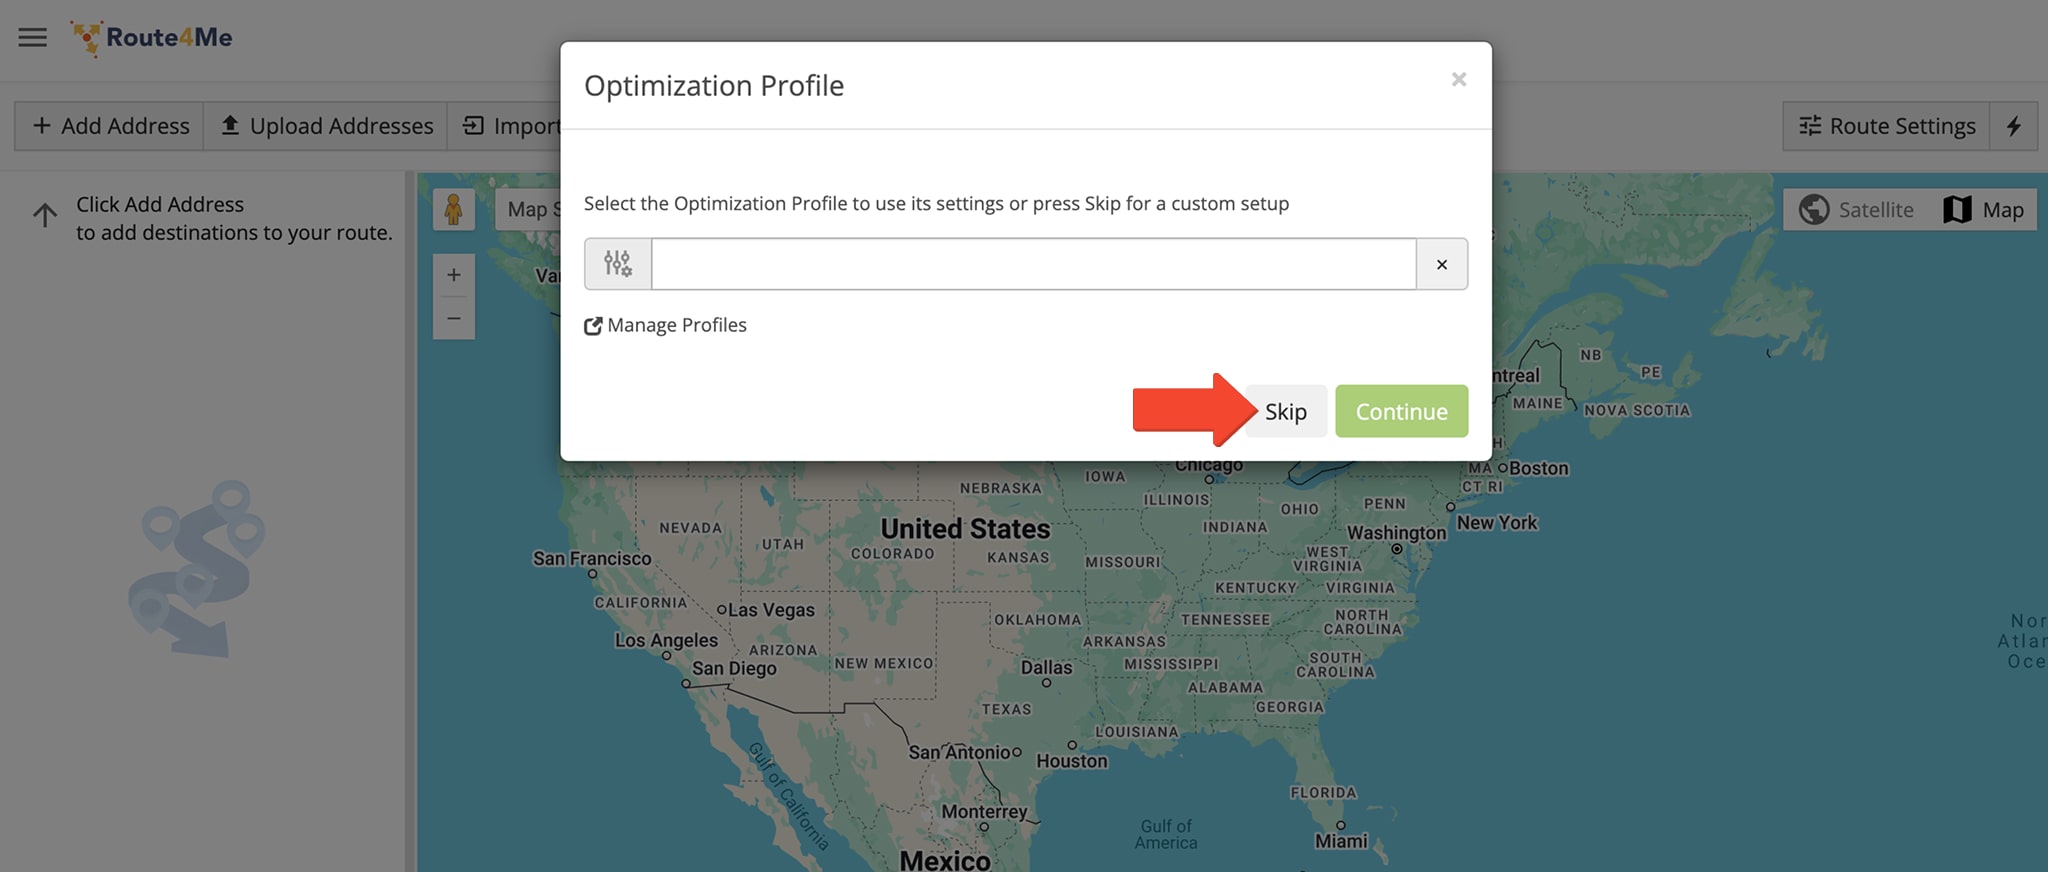
You can also plan routes that account for traffic delays via manual optimization settings. Select “Plan New Route” from the Navigation Menu, then choose your route planning method.
When prompted to select an Optimization Profile, click “Skip” to access manual optimization settings. NOTE: Learn more about planning routes with manual optimization settings.
Open Your Route Planner
Then, under “Optimizations“, click “Traffic Adjustment“. Use the sliders to adjust Service and Travel Time Slowdowns.
Route Editor – Modify Planned Routes For Traffic And Time Adjustments
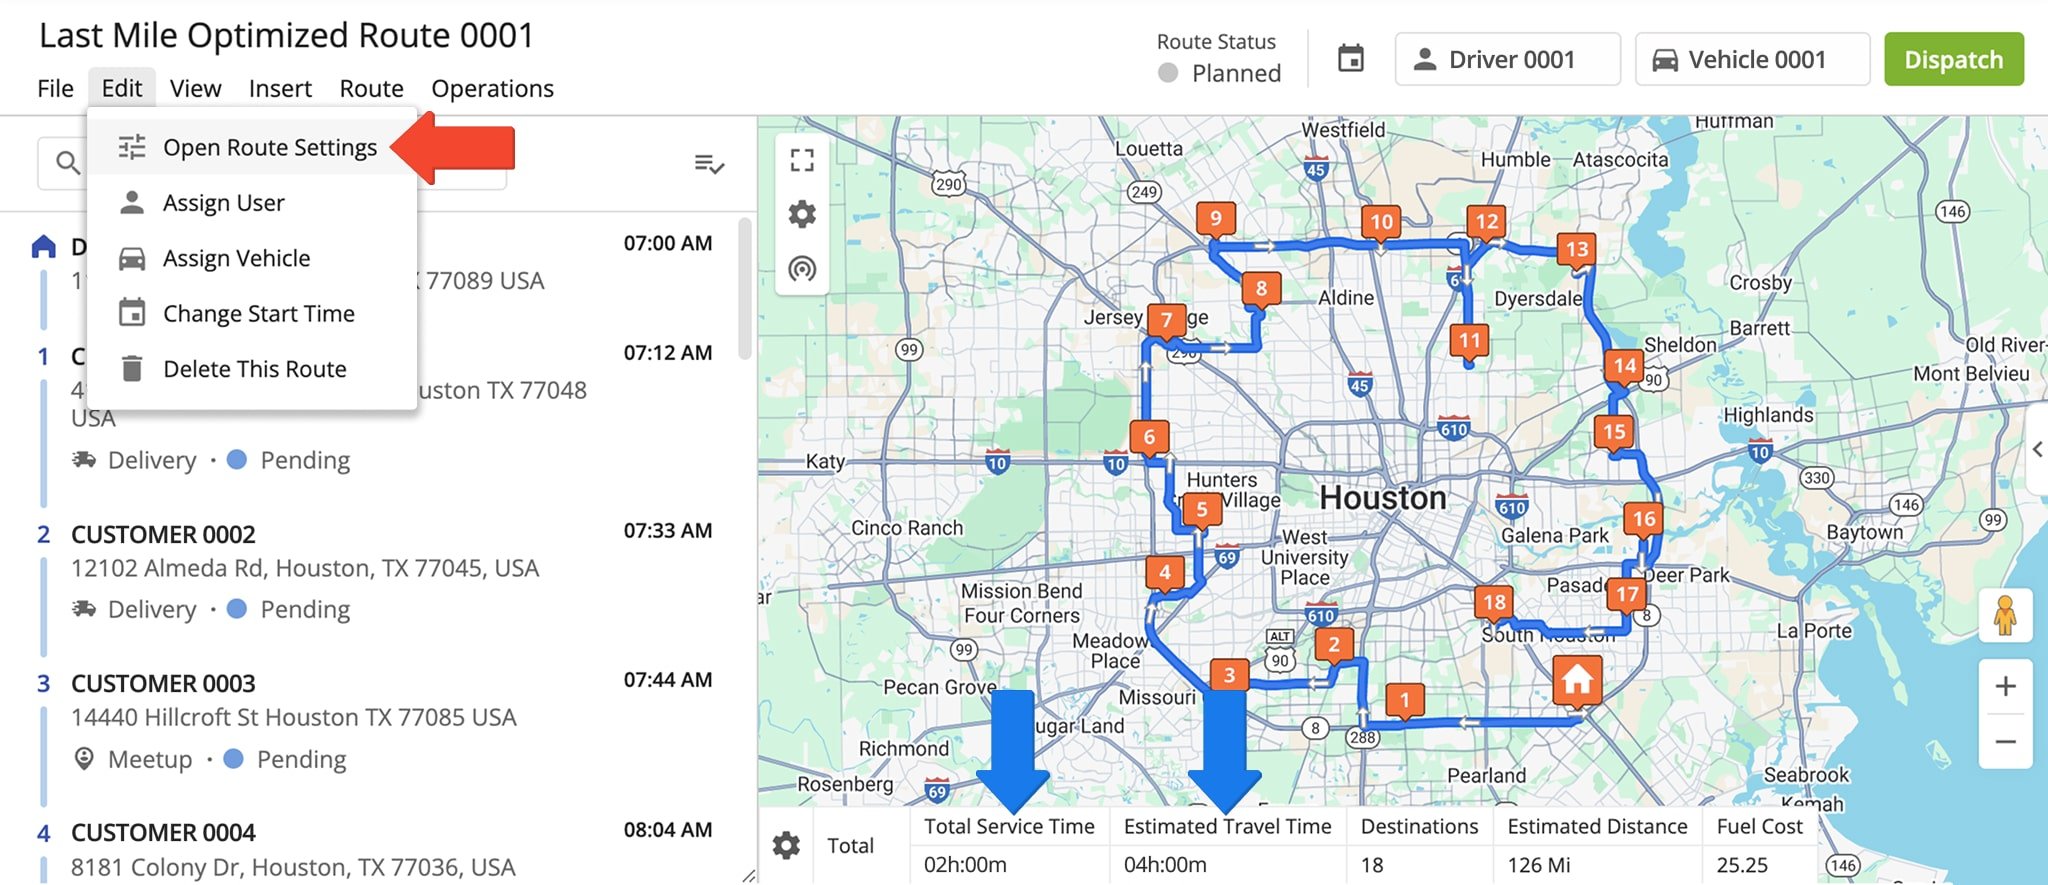
You can, in addition, modify already planned routes to account for traffic delays. To do this, open a route in the Route Editor. From the Top Menu Bar, click “Edit” and select “Open Route Settings“.
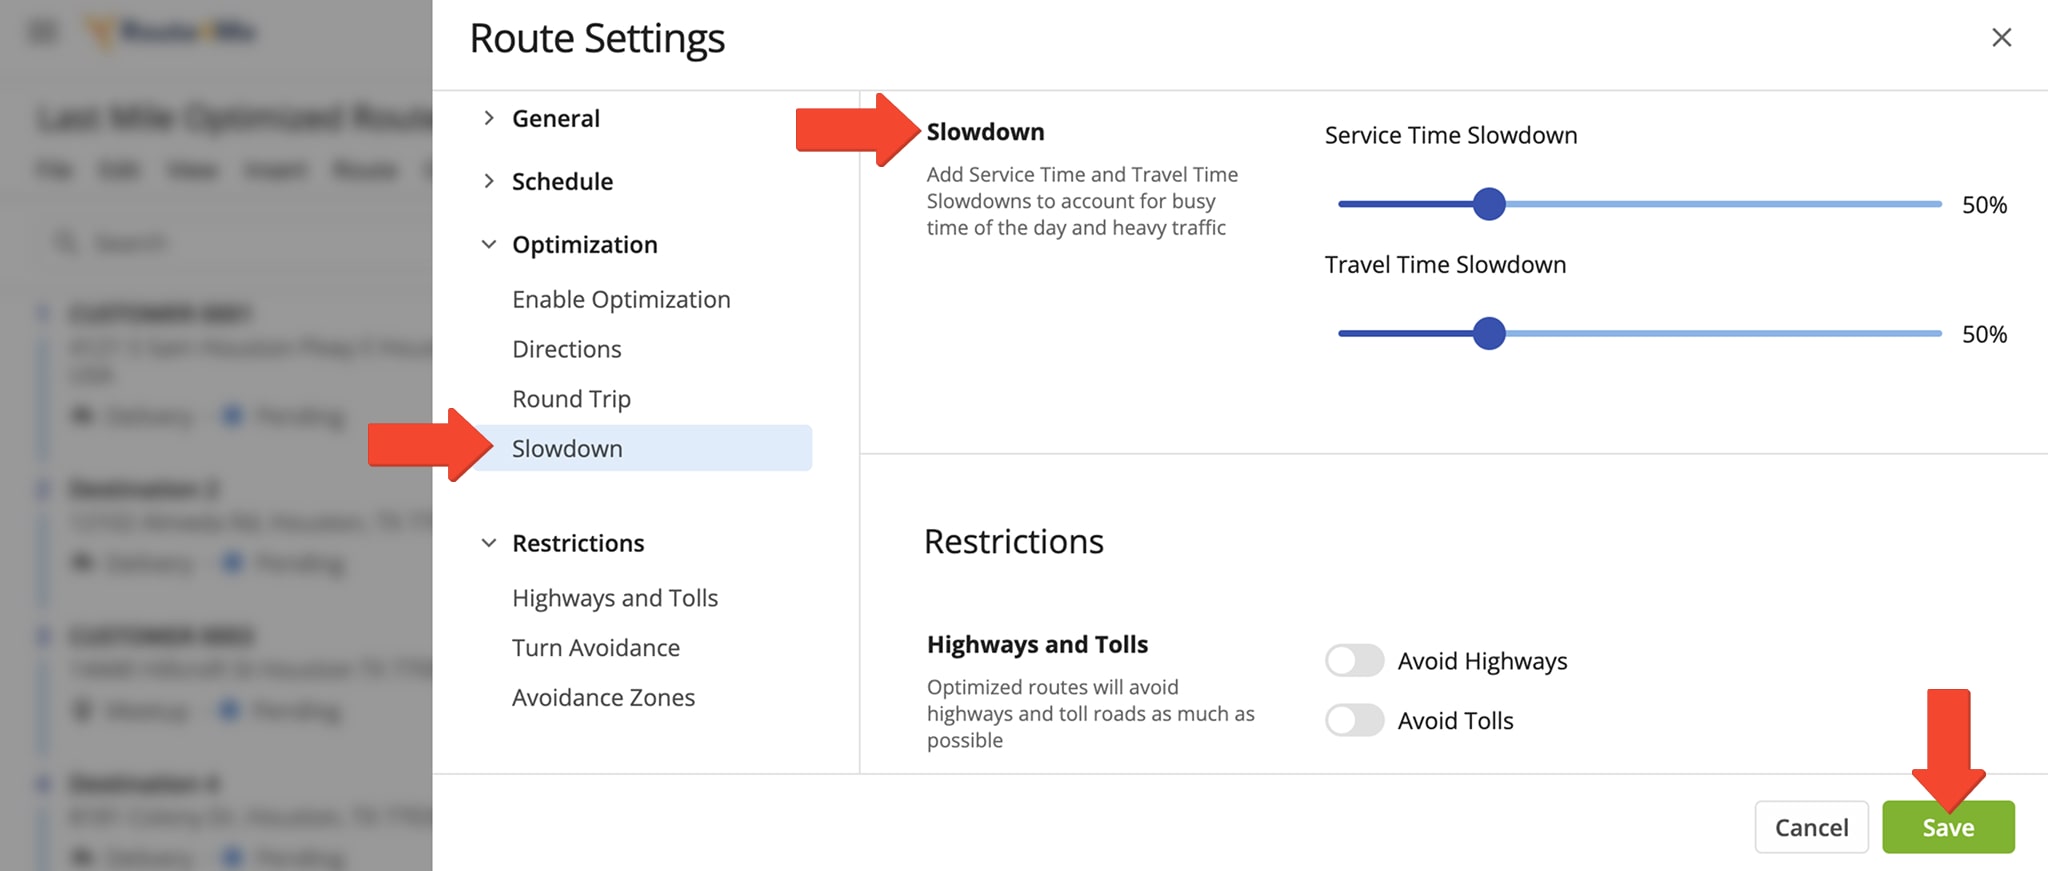
In the “Route Settings” panel, click on “Optimization” and select “Slowdown“. Then use the sliders to adjust Service Time and Travel Time Slowdowns. Click the “Save” button to finalize.
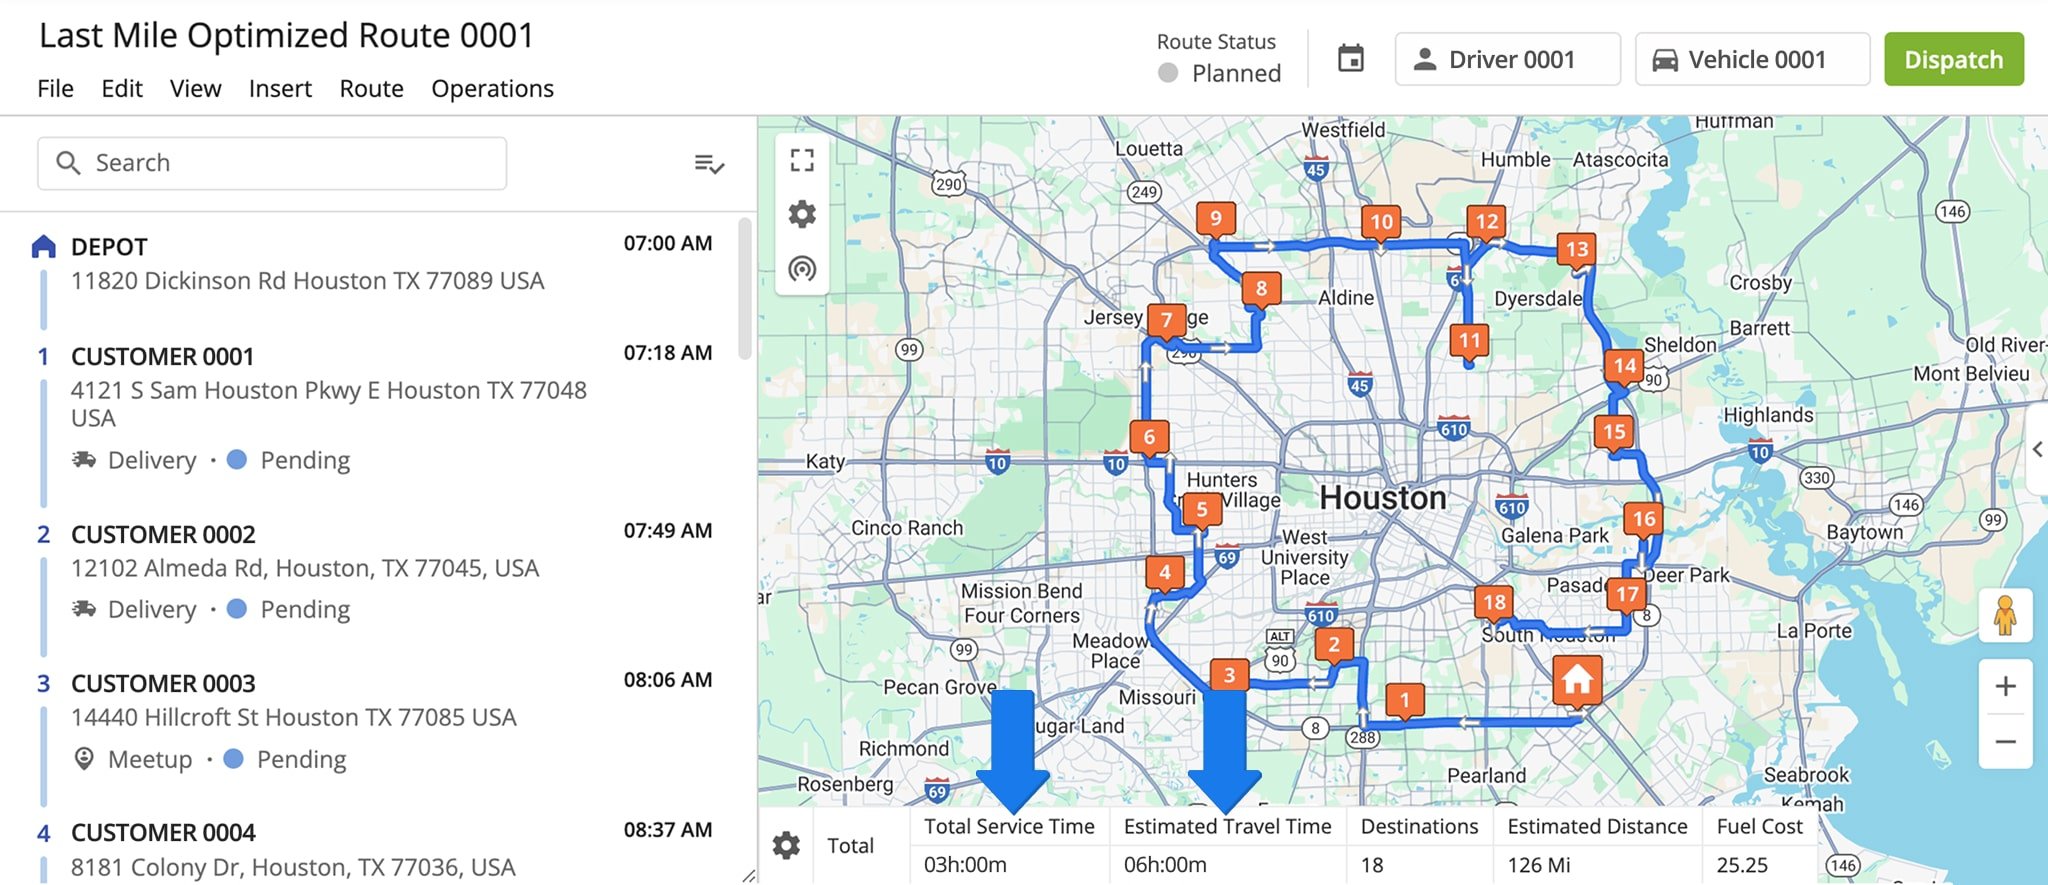
The system will automatically update the route to account for your Service Time and Traffic Slowdown adjustments.
