Move Route Destinations Within And Between Routes
For enterprise businesses, effectively managing delivery or service stops is essential to keeping last mile operations running smoothly. From Route4Me’s Routes Timeline and Route Editor, route planners and managers can adjust destinations within a route or move them between routes without recreating the schedule. With real-time control over stop sequences, teams can balance workloads, adapt to changing priorities, and keep drivers on track.
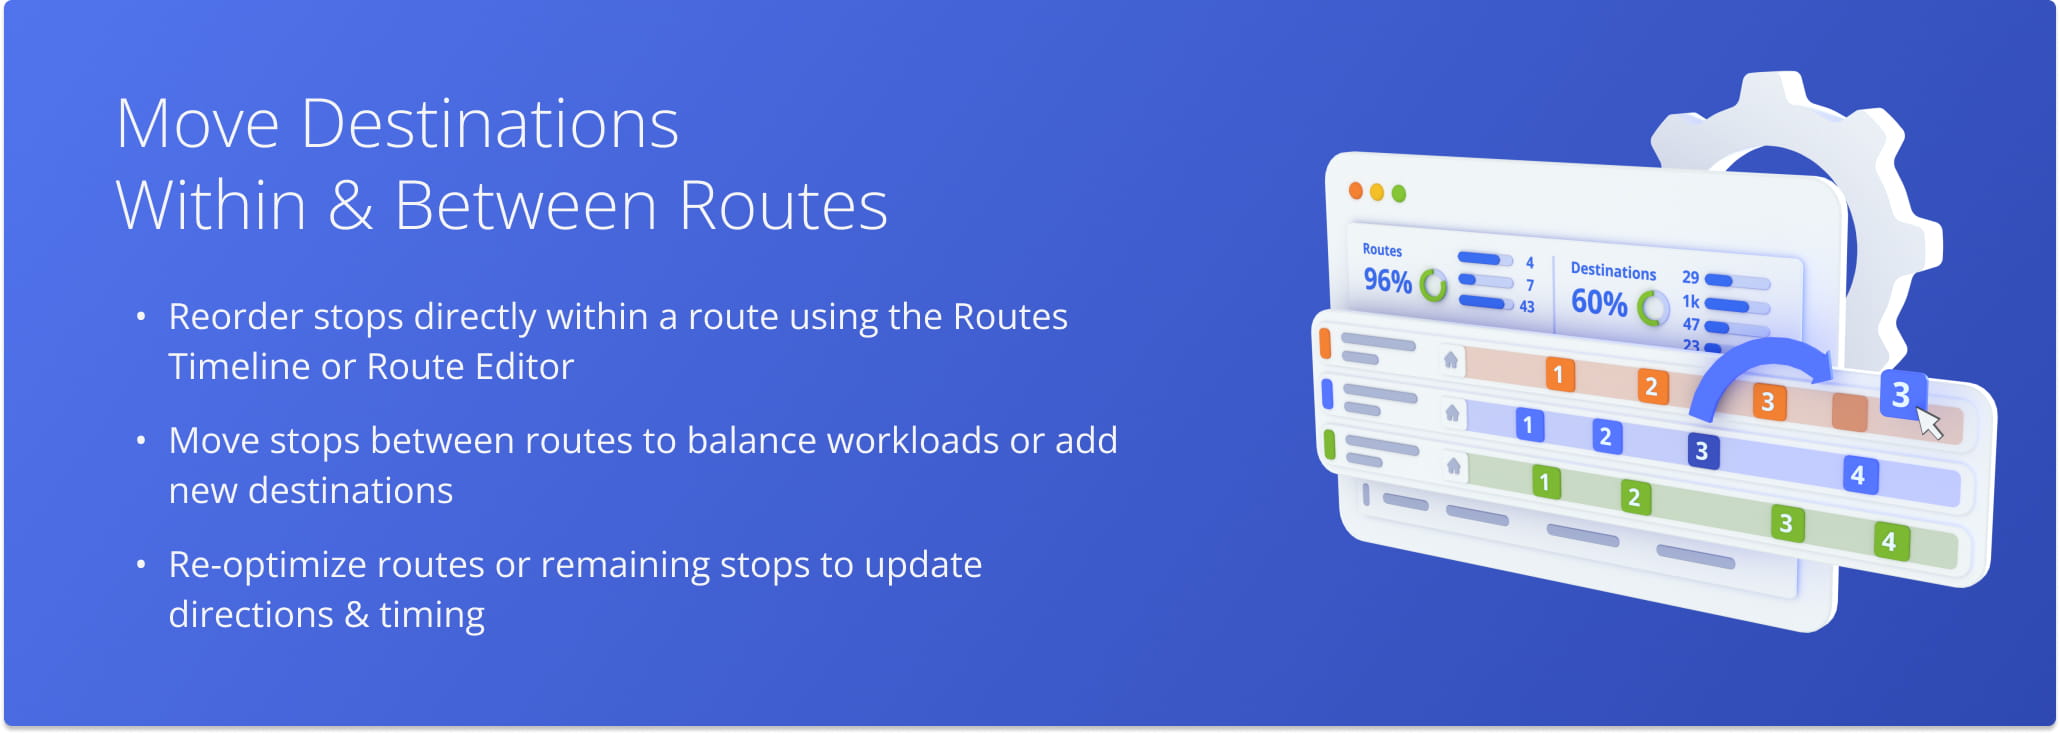
Table of Contents
Re-Sequence Destinations From Your Routes Timeline
You can adjust route destinations from your Routes Timeline. To access it, go to “Dynamic Routing” > “Routes” from the Navigation Menu. Then, to open the Routes Timeline, click the Timeline Icon in the top-right corner of your Routes Page.
To display routes on the Timeline, click the Eye icon next to them. Selected routes appear on the Timeline based on their scheduled start times.
Once routes are visible, use drag, scroll, or zoom controls to navigate the Timeline. To view routes from multiple dates together, enable “Ignore Dates” at the bottom of the page. The “Zoom” options allow you to expand or narrow the displayed time range.
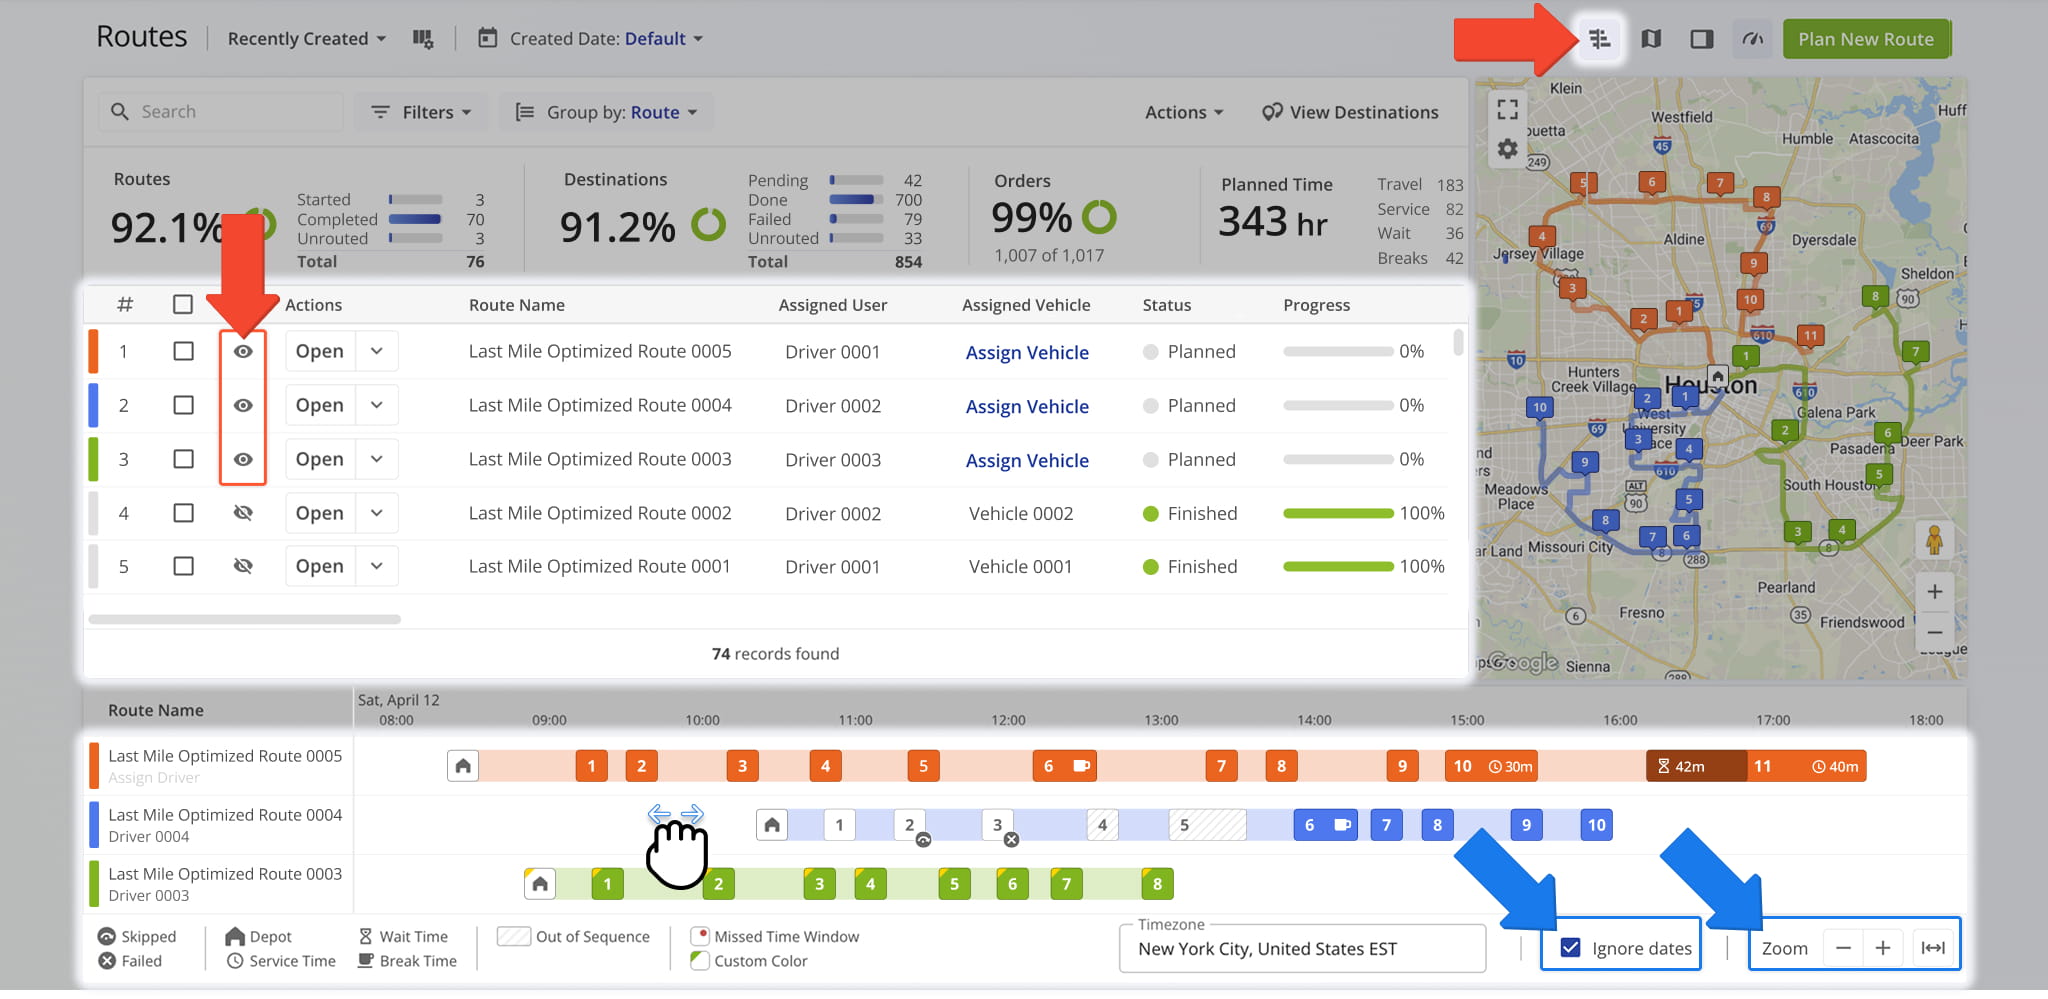
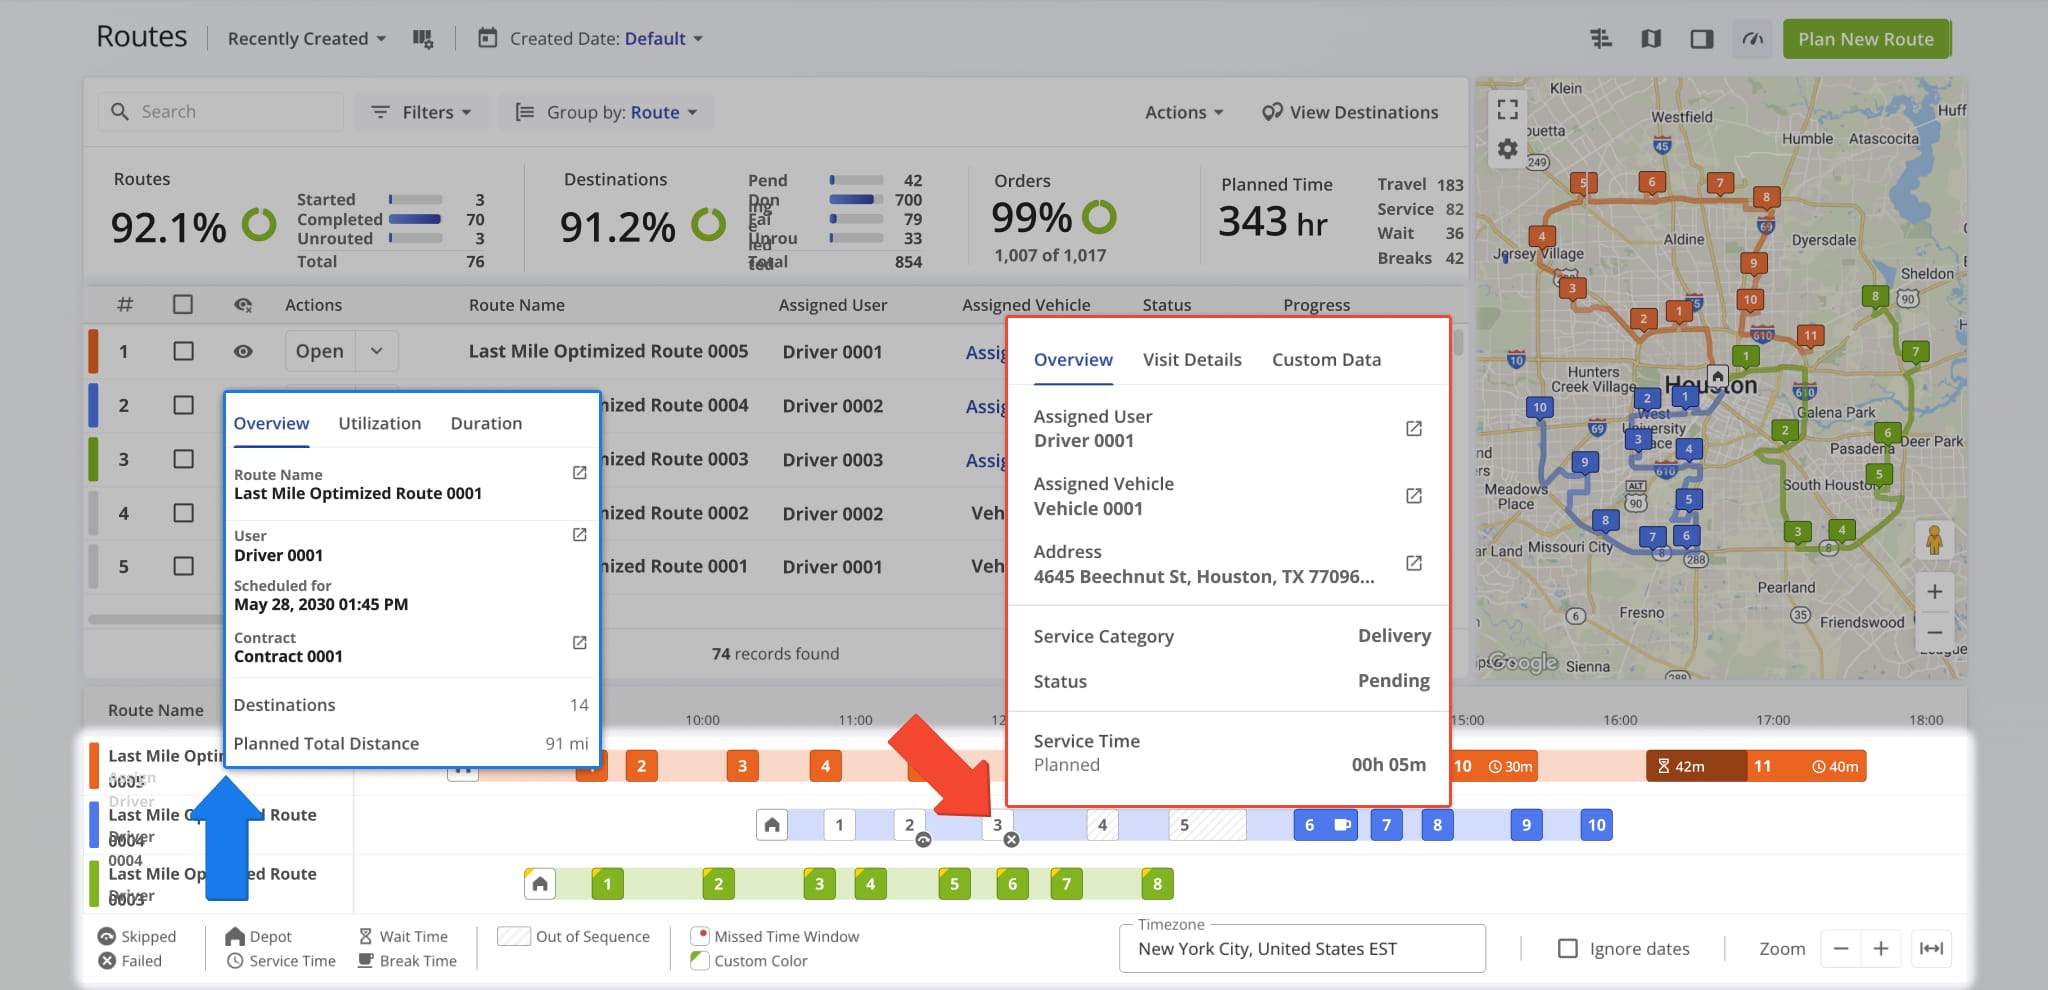
Hovering over a route or a stop in the Timeline reveals key destination details. At the same time, the Timeline’s visual layout makes it easy to spot scheduling gaps or overlaps, helping you balance routes and optimize daily operations.
You can learn more about these features in our dedicated Routes Timeline guide.
Move Destinations Within The Same Route
You can reorder stops within a route directly from the Routes Timeline by dragging a destination to a new position. This allows you to manually adjust the stop sequence without recreating or reassigning the route.
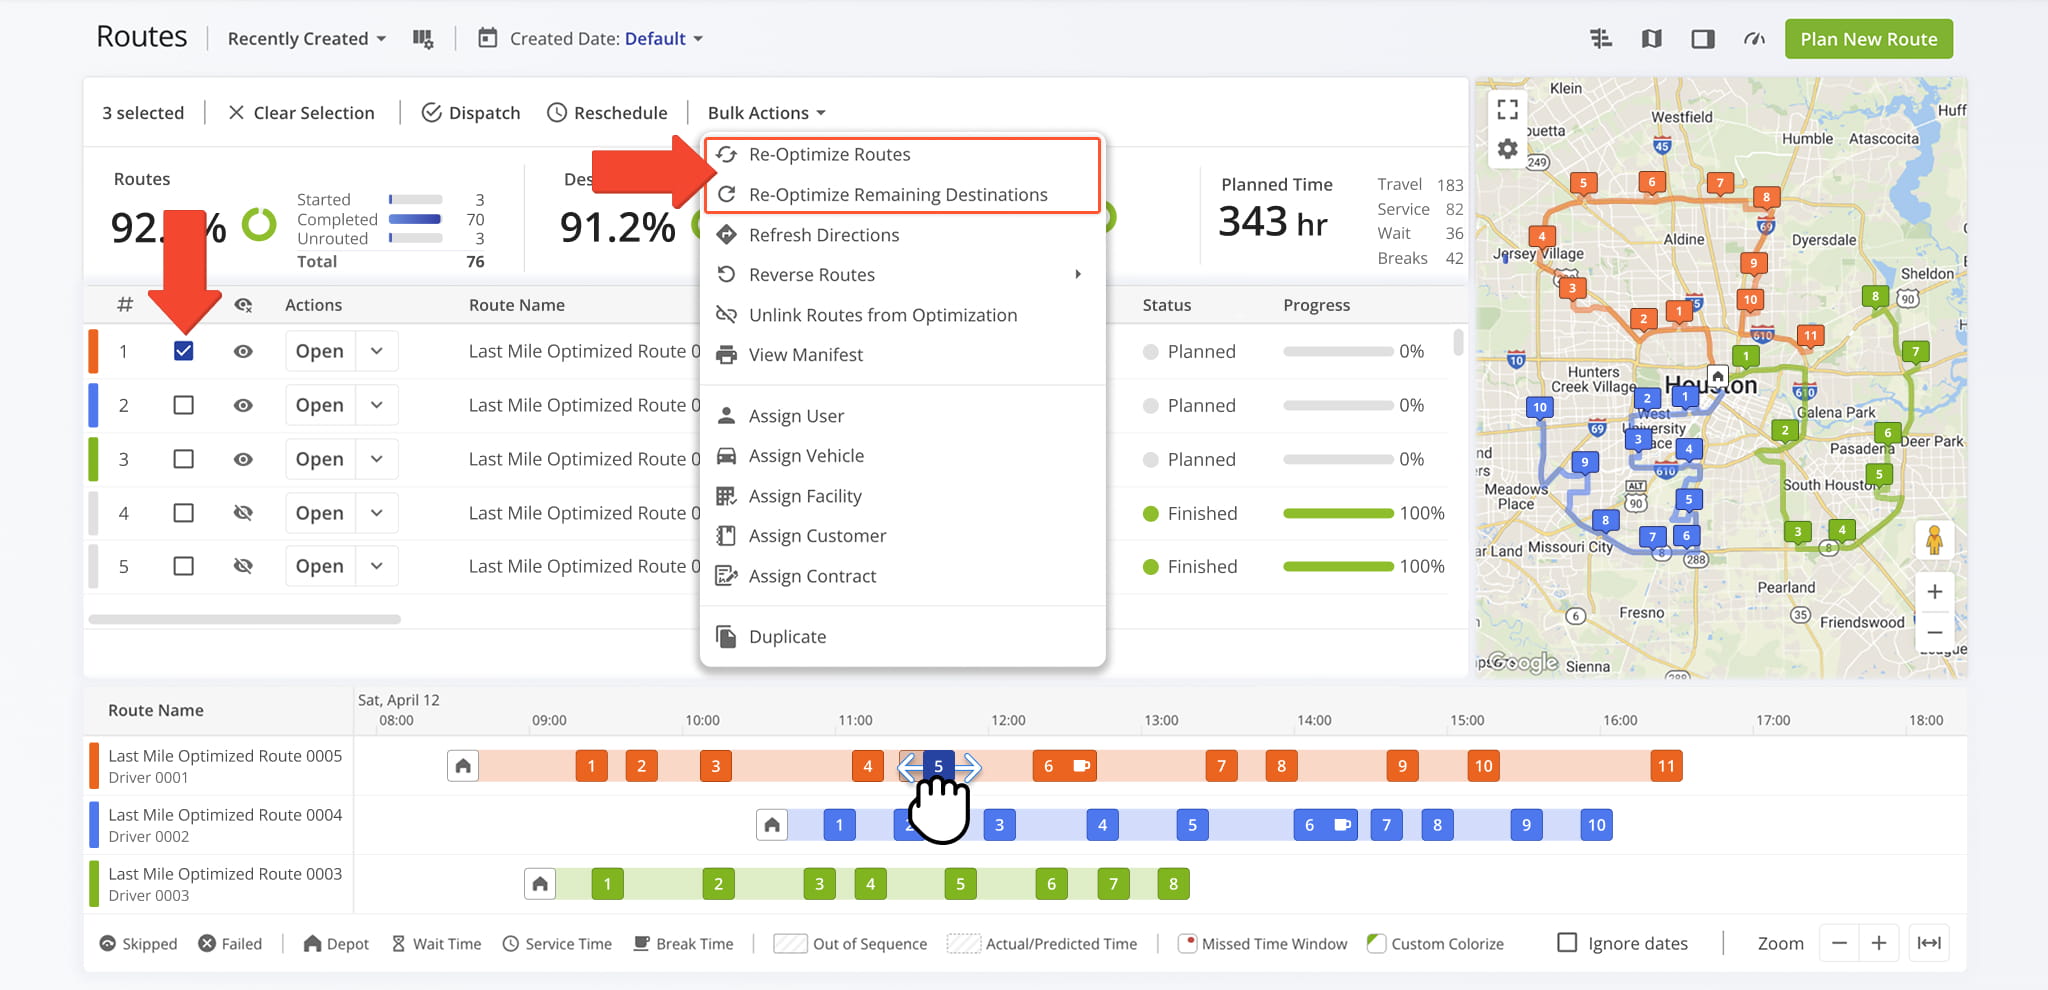
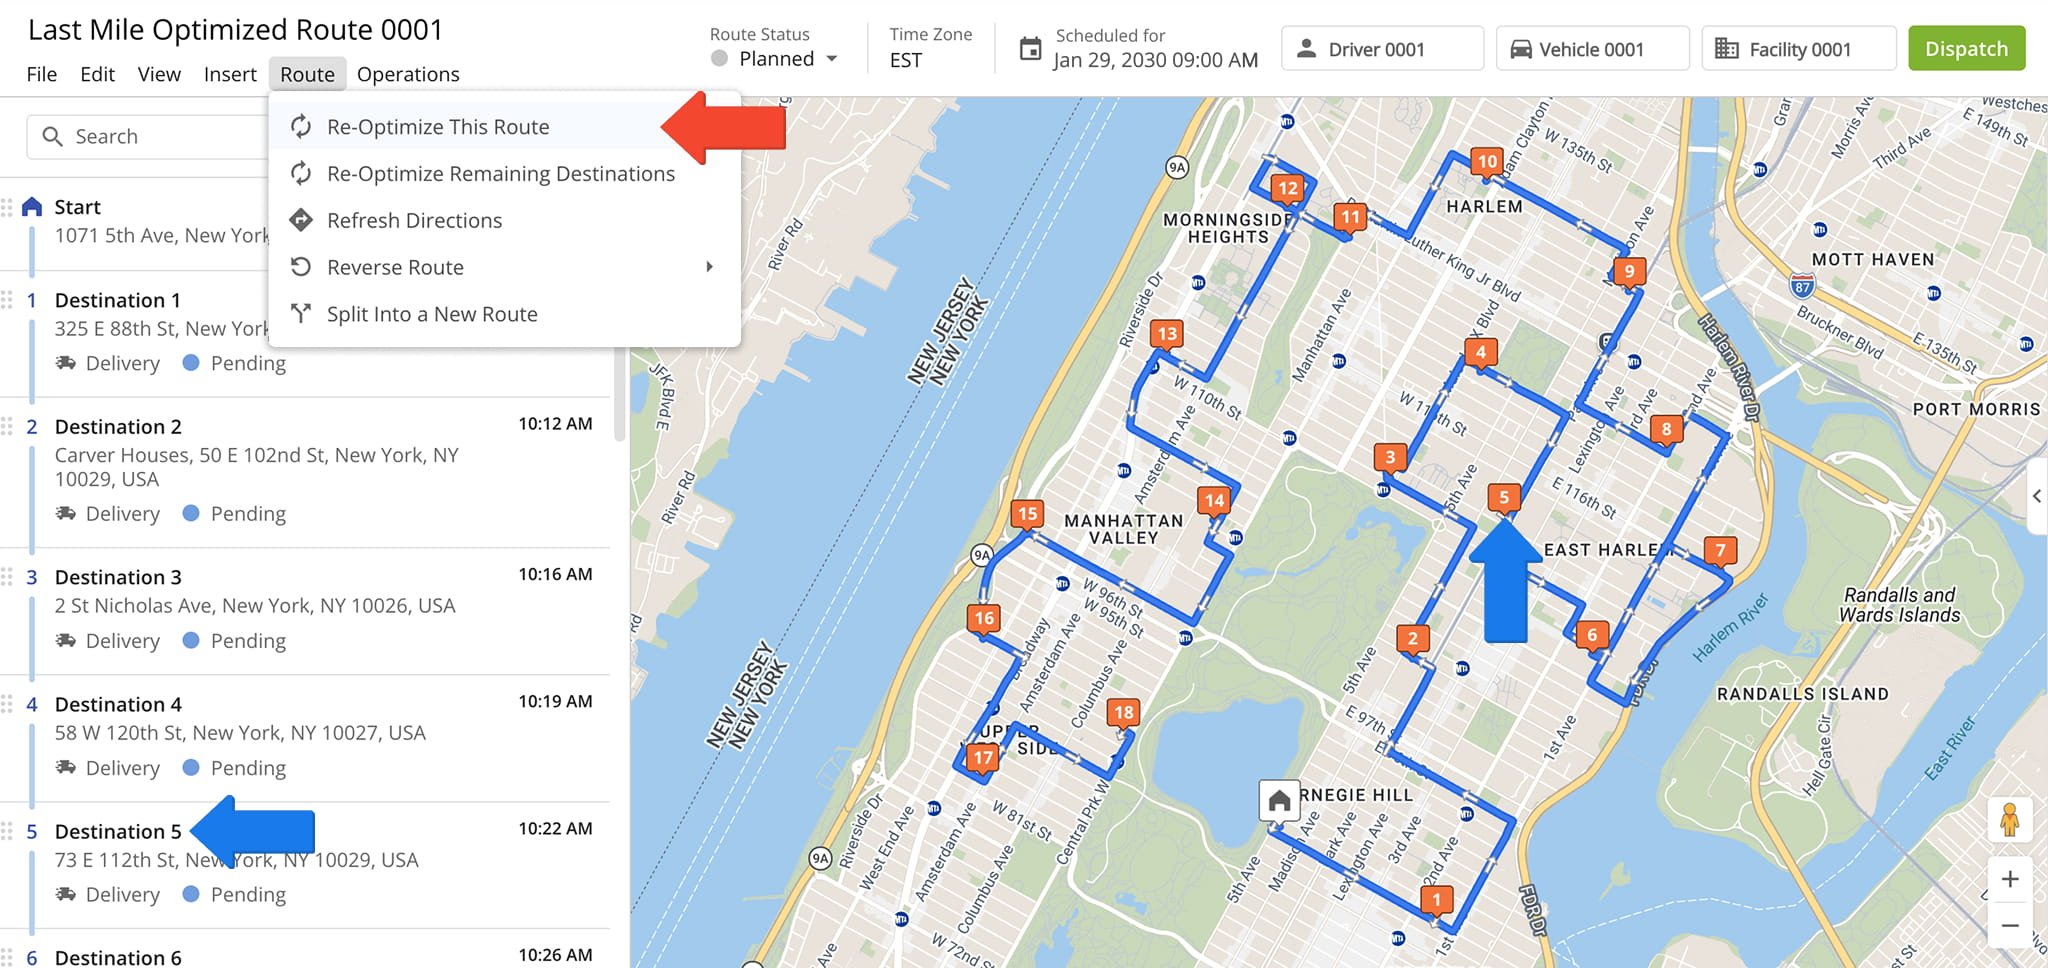
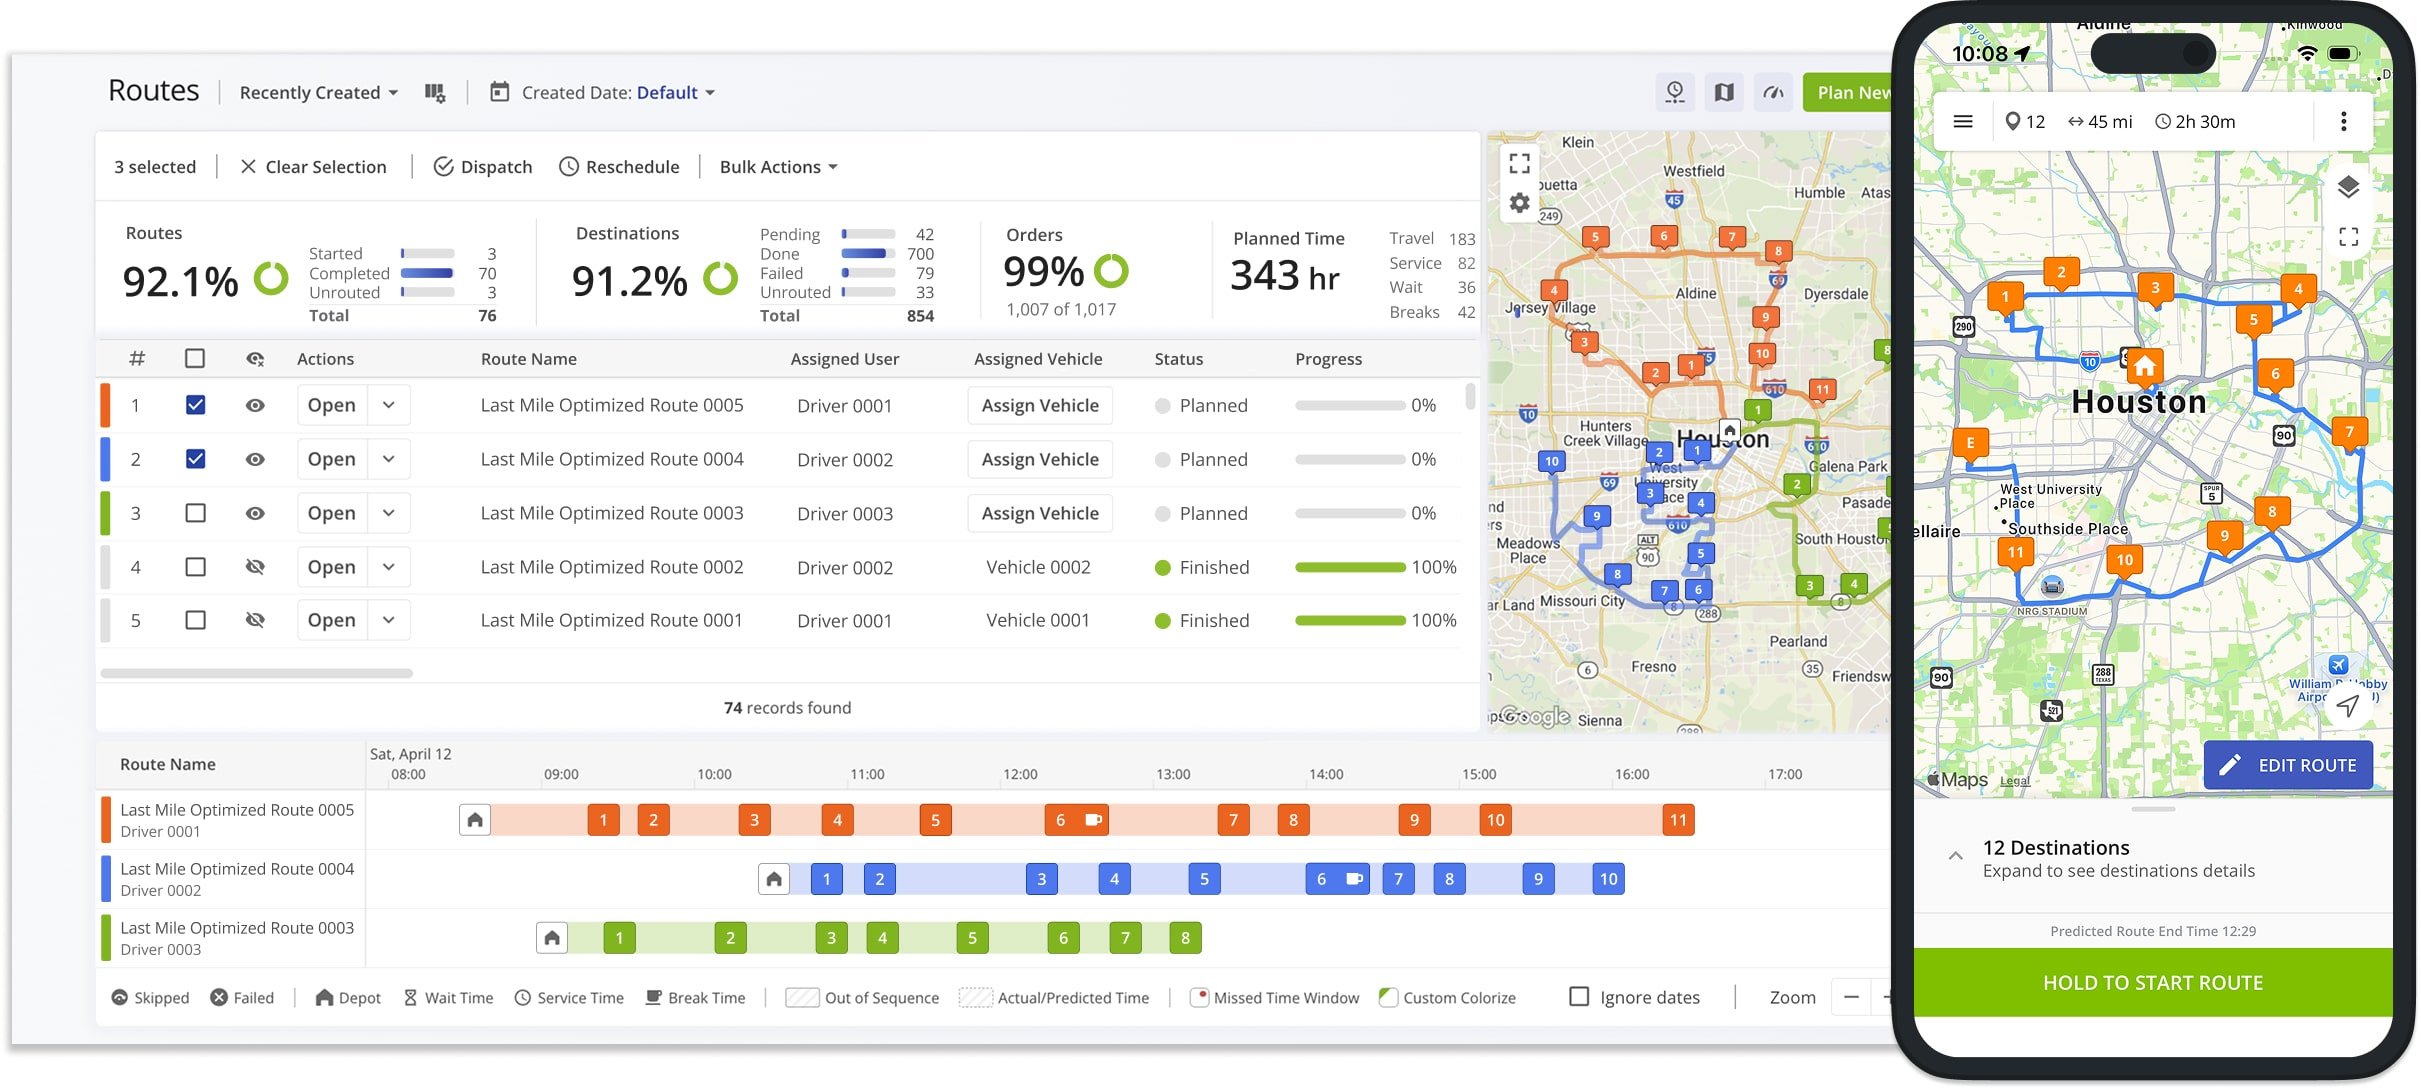
After moving a destination, you can re-optimize the route to refresh directions and timing. To do this, check the box next to the Route and select “Re-Optimize Routes” from the “Bulk Actions” menu.
For routes already in progress, check the box next to the Route and select “Re-Optimize Remaining Destinations” from the “Bulk Actions” menu to update only unvisited stops.
Move Destinations Between Different Routes
You can also move stops from one route to another by dragging a destination to the target route. This is helpful when balancing workloads, adding new stops to a more efficient route, or adjusting schedules without recreating routes.
If a destination cannot be moved due to optimization constraints, first select the checkbox next to the route(s) you want to adjust, then choose “Unlink Routes from Optimization” from “Bulk Actions“.
After repositioning the stop, click “Re-Optimize Routes” in “Bulk Actions” to refresh directions and timing for the affected routes. For routes already in progress, select “Re-Optimize Remaining Destinations” to update only unvisited stops.

Reposition Destinations From Your Route Editor
You can also adjust route destinations from the Routes Editor. From the Destinations List, simply drag and drop a destination to any position within the route sequence.
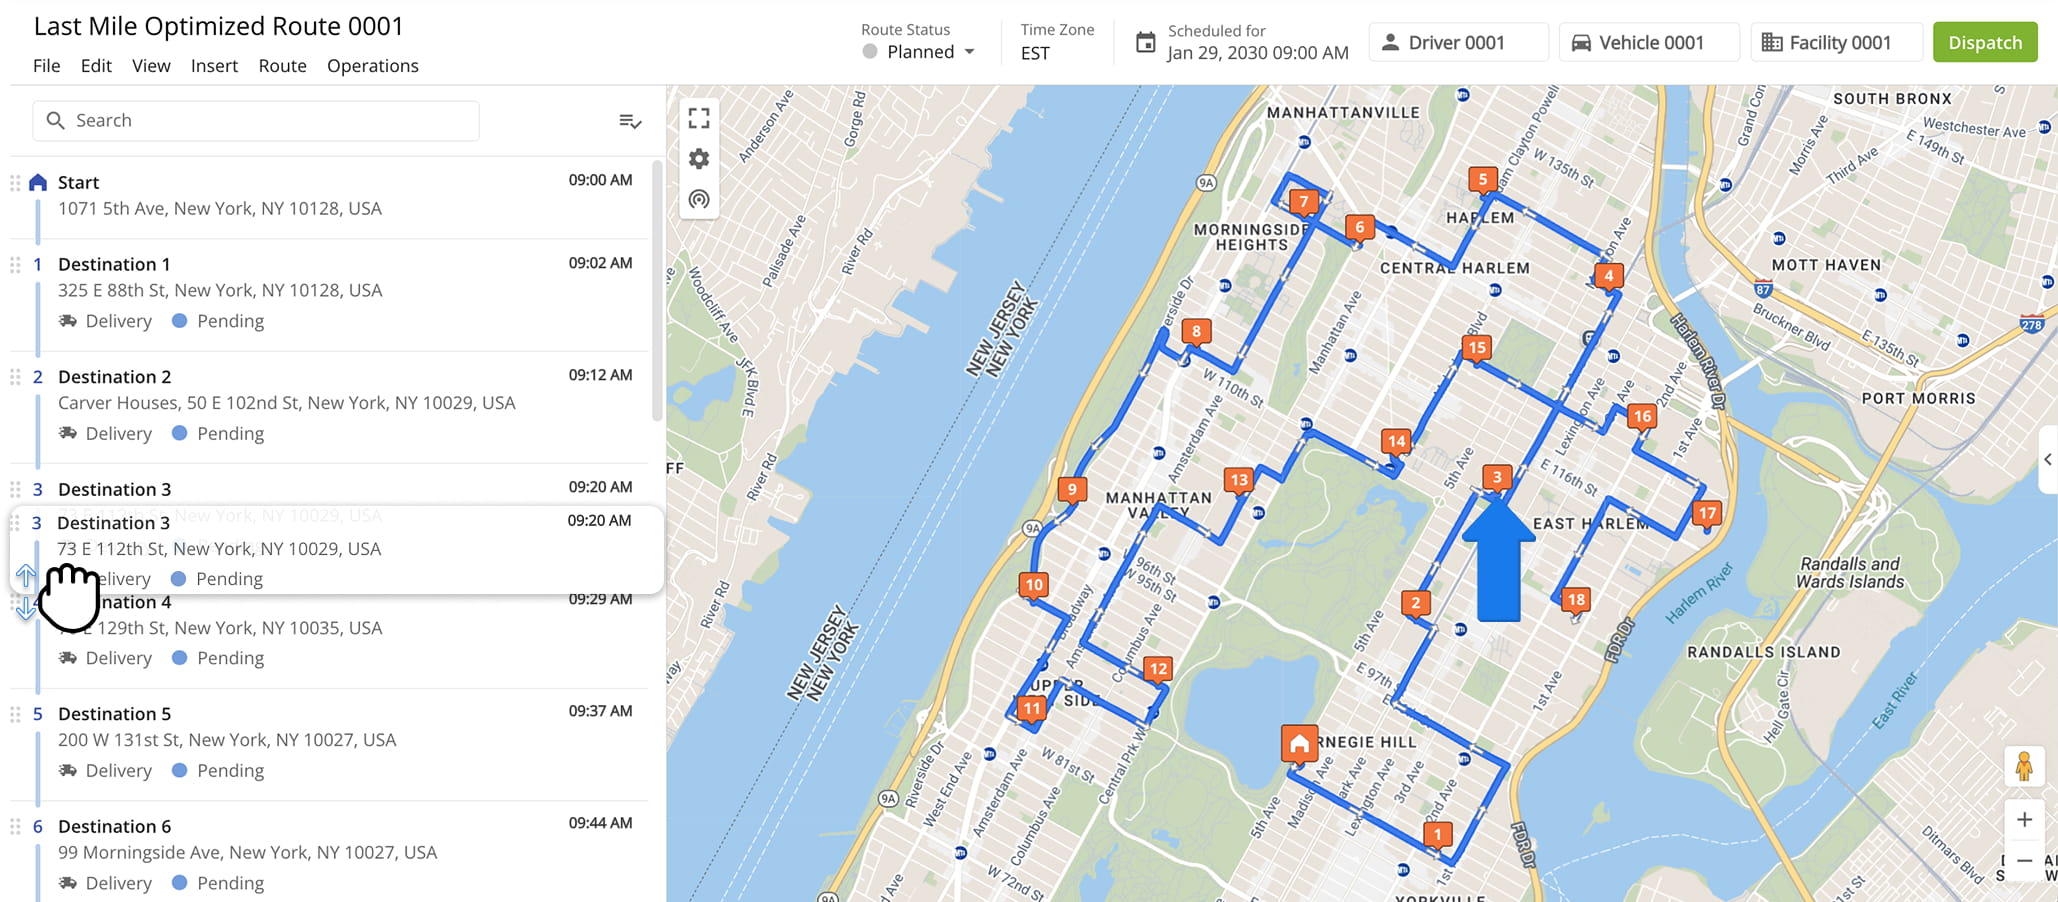
After repositioning destinations, click “Route” in the top menu and select “Re-Optimize This Route” to ensure the route is fully optimized. The updated destination sequence will then appear on the Route Map.
NOTE: You can re-sequence destinations after a route has started, but you cannot move completed destinations or move pending destinations back into the completed portion of the route.
Mobile Driver App And Routes Page – Real-Time Data Sync
Drivers and team members can navigate routes, update stop statuses, attach proof of delivery, and record other activity directly in the Route4Me Driver Mobile App. All changes are reflected immediately, keeping drivers’ progress visible in real time.
At the same time, managers and planners can add or re-sequence stops and make other adjustments from the Routes Timeline, with updates automatically pushed to drivers’ apps. This keeps everyone aligned and current with the latest changes.
Visit Route4Me's Marketplace to Check out Various Modules and Add-Ons:
- Route Optimization
Time Windows
- Operations
Advanced Team Management Add-On
About author: Daniel Archer
With a background in pedagogy and writing instruction, Daniel is a former tenured English Instructor who, after nearly 20 years of teaching, transitioned into content strategy and leading writing teams for global brands. Now, as Technical Documentation Manager at Route4Me, he translates complex logistics technology into clear, accessible content that empowers users.