Integrate Route4Me With Zapier
Table of Contents
Route4Me route optimization software can connect to multiple web applications via a simple Zapier integration. For example, you can establish a connection between your company’s Slack channel and your Route4Me account via a Zapier integration. Zapier is a powerful integration platform that launched in 2011. It works as a translator between different APIs, allowing you to bridge the gap between various web applications and automate tasks across them.
Features and Usage Examples
You could set Zapier up to send you an alert on Slack every time a file is uploaded to a Dropbox folder you’re sharing with someone.
It’s all based on what Zapier calls triggers and actions. In the previous example, uploading a file on Dropbox was the trigger, and sending an alert on Slack was the action. The trigger and the action together are known as a Zap.
The best part is that the Zapier Scripting API allows developers to modify pretty much everything, so you can design all kinds of different Zaps with the 750+ apps that are compatible with Zapier.
Route4Me on Zapier
There are many different ways to use Zapier with Route4Me. You can use it to take customer addresses from your CRM solution and pin them to your map in Route4Me; you can use it to save orders from your eCommerce solution and schedule them for specific dates on Route4Me. You can also use it to automatically publish reports on Facebook pages every time a driver finished a route.
Those three examples are just the tip of the iceberg when it comes to Route4Me + Zapier’s capabilities. The possibilities are endless.
The following section provides an example of using Gmail with Route4Me on Zapier.
A Zapier Integration Example of Route4Me with Gmail
We are going to demonstrate how a Zapier integration can use Gmail to send you emails if one of your routes has been optimized in your Route4Me account. Zapier will monitor your Route4Me account for any route optimization activity and use Gmail to notify you through email.
Creating a Two-step Zap
We are going to create a Two-step Zap for our example. A two-step Zap mainly consists of one Trigger and one Action step.
To familiarize yourself with Zapier concepts and terminologies, reading their getting started guide and terminology page is an excellent place to start.
Now, here’s an overview of what our example would look like:
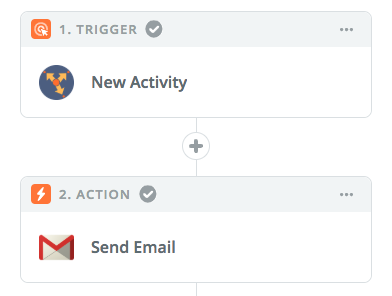
- Trigger – any Route4Me Route Optimized activity
- Action – Gmail Send Email action
Please follow our example as instructed, especially the choices and the text values provided, unless stated otherwise.
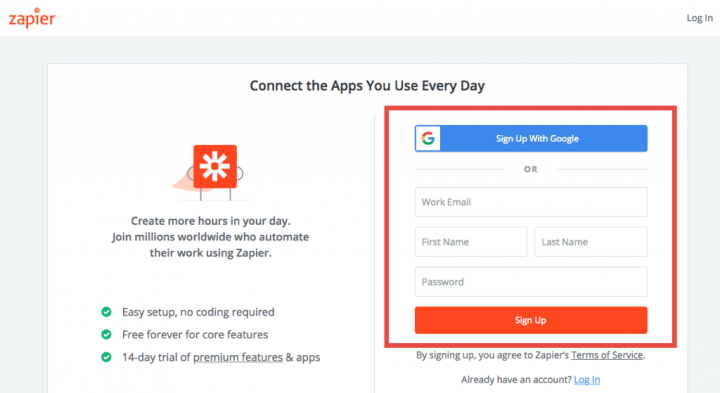
Also, make sure you have a valid and usable Route4Me account and a Zapier account. Registering on Zapier is easy and free, and you can use its Free plan to test our example.
Step 1 – Creating the Trigger
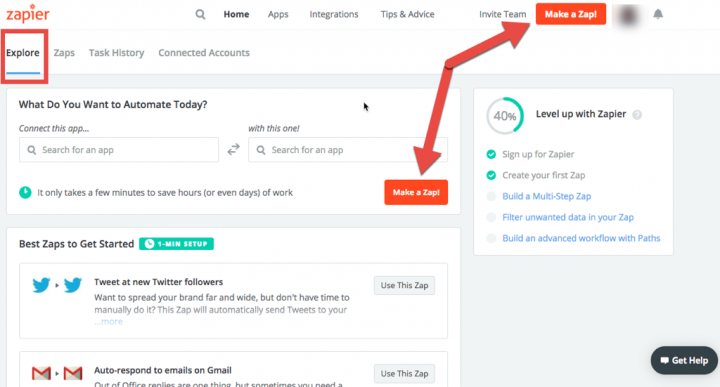
Assuming that you already have a Zapier account or have created one, log in to your account to begin creating our example Two-step Zap. The first step in creating a Zap is to create a trigger that starts the workflow.
On your Zapier account’s home page, ensure that the Explore tab is active. Click the Make a Zap! button to start creating the trigger.
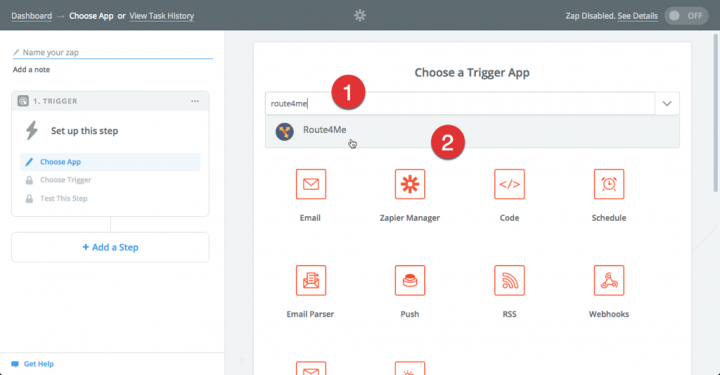
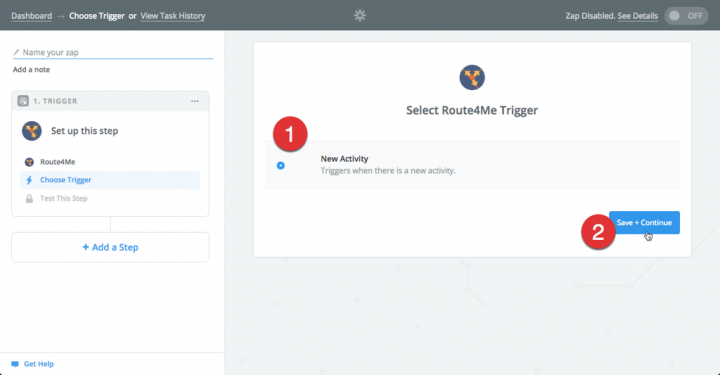
Our trigger is the Route4Me app. Type “route4me” in the Choose a Trigger App dropdown field and select the app once it appears in the autocomplete box.
Select the New Activity option (as of this writing, it’s the only option) in the Select Route4Me Trigger selection and then click the Save + Continue button.
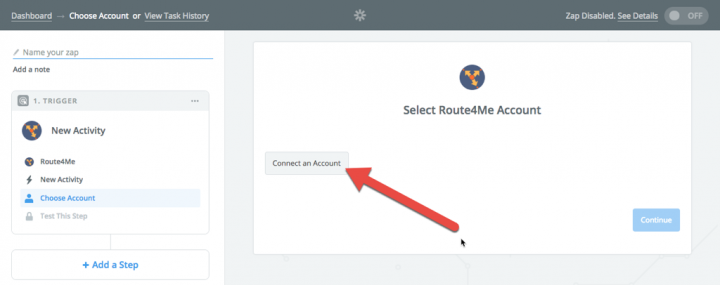
The first time you use the Route4Me app in Zapier, you’ll be required to connect your Route4Me account. Click the Connect an Account button to link your account to the app.
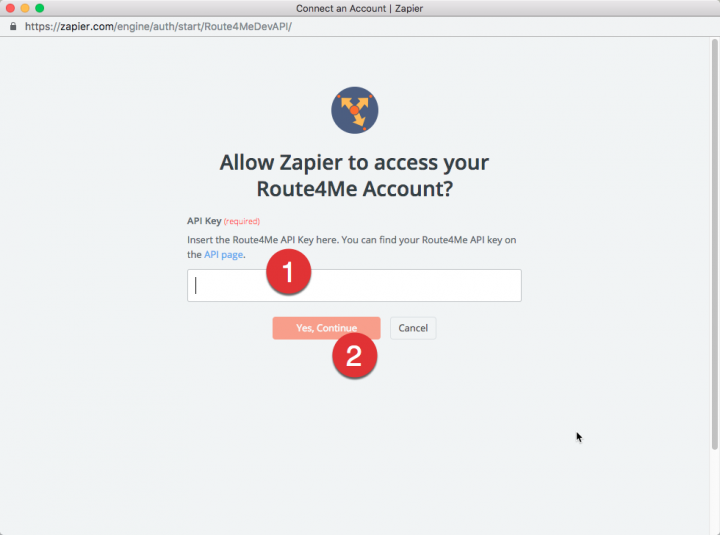
Provide your Route4Me API key in the API Key field and click the Yes, Continue button to proceed.
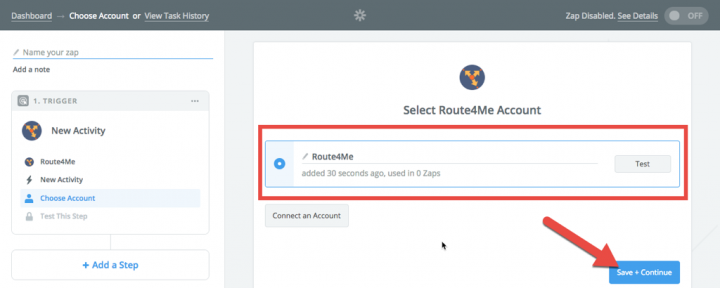
Click the Test button to see if Zapier can connect to your Route4Me account. Once done, click the Save + Continue button to continue.
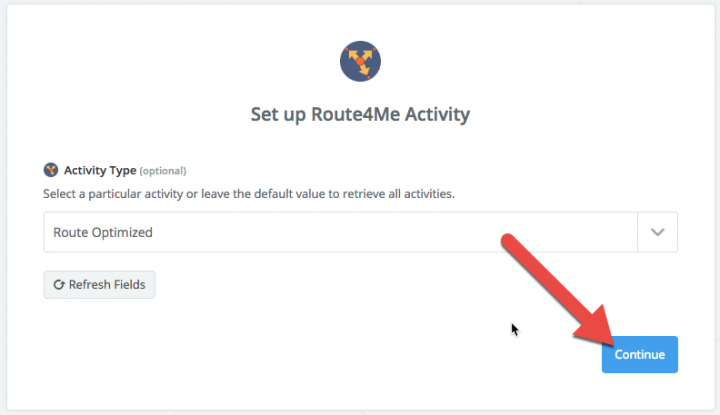
You need to select a particular activity (or all activities) that you want Zapier to monitor in your Route4Me account. Select the Route Optimized item.
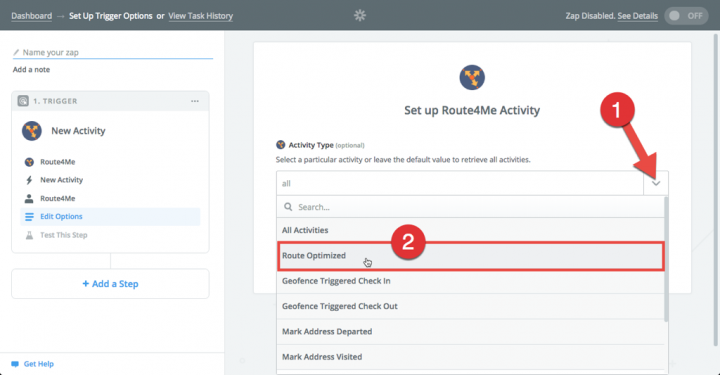
Click Continue.
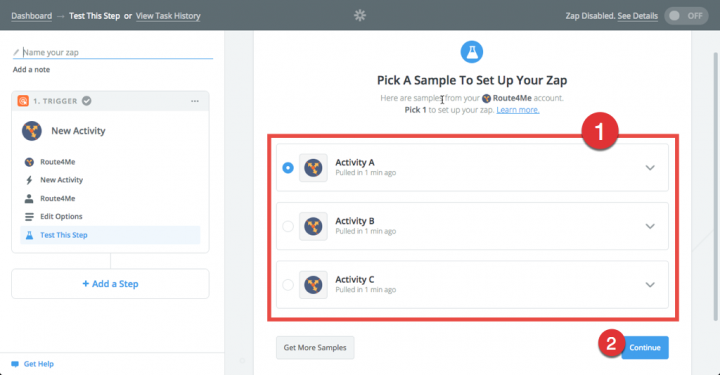
Choose a list of activities that Zapier retrieved from your Route4Me account. It’s not a comprehensive list of activities, just a few so that you can finish setting up your trigger. Click Continue to complete and create it.
The next major step is to configure an Action step. This is the last step you need to do to complete our Two-step Zap. Click the Your Zap currently lacks an Action step. Add one now! link to proceed.

Step 2 – Creating the Action
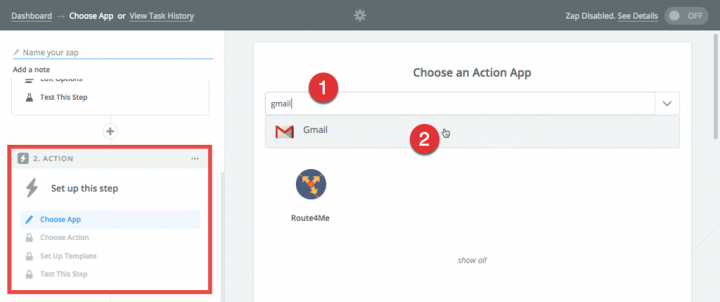
You need to create an Action step that will handle your Zap’s trigger. Similar to creating your Trigger, you need to associate an app or service as your Action step.
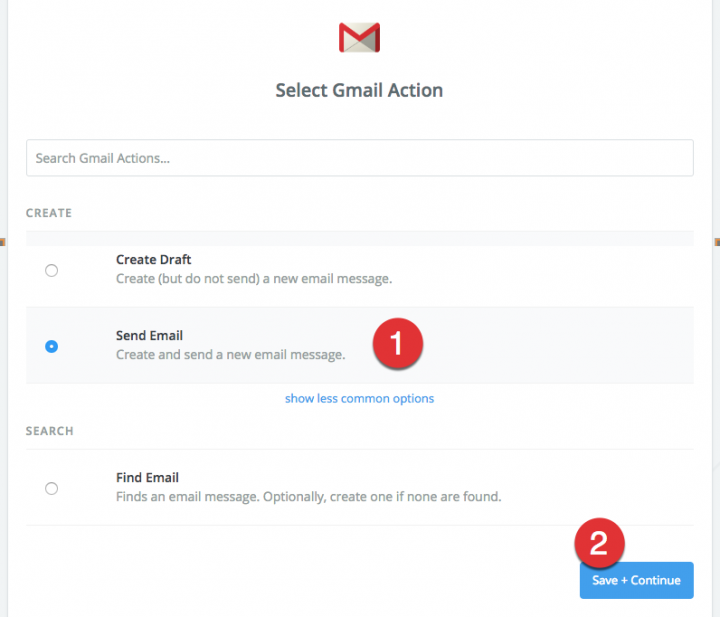
Type Gmail in the Choose an Action App dropdown field and select the app once it appears in the autocomplete box.
Next, select the Send Email option from the list of Gmail Actions available. Then, click the Save + Continue button.
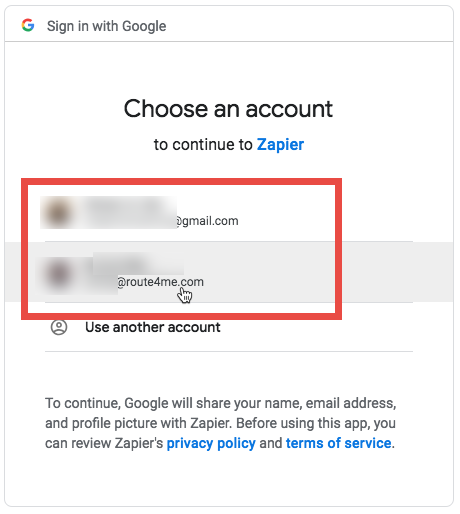
The first time you use the Gmail app in Zapier, you’ll be required to connect any Gmail account you own. Click the Connect an Account button to start linking your Gmail account to the app.

Next, click on the Gmail account you want to use for this Action step.
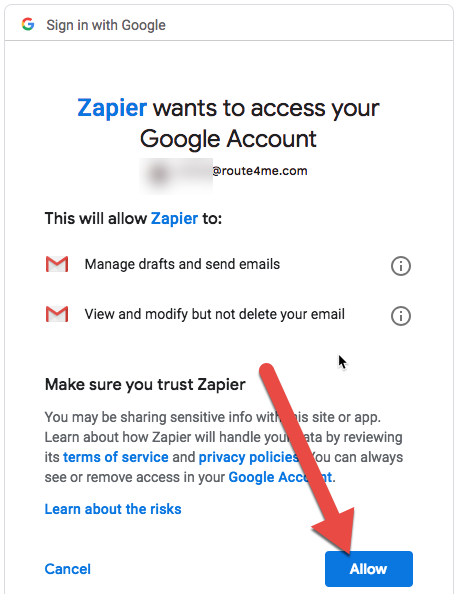
Next, click Allow.
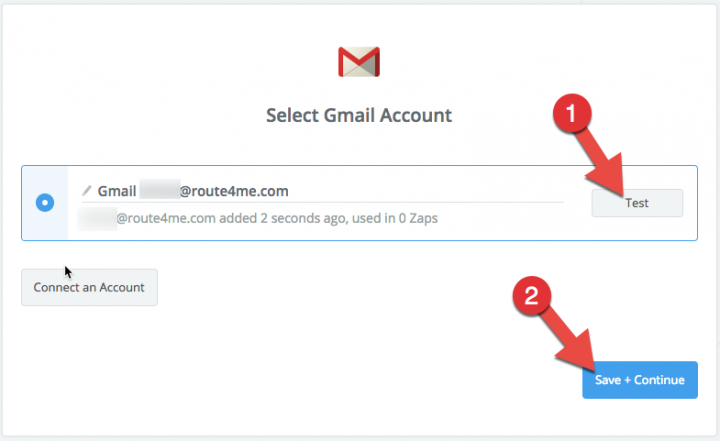
Next, click the Test button to test if Zapier can connect to your Gmail account, and once done, click the Save + Continue button to proceed.
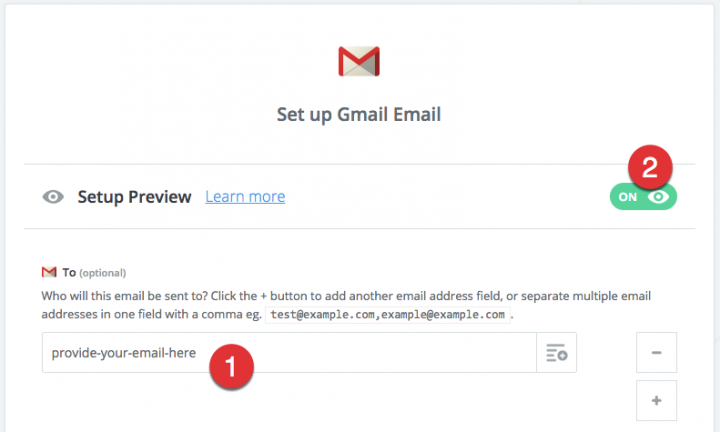
You then need to set up the template for your email message. In the Set up Gmail Email form, enter your Gmail account in the To field. Don’t leave this field blank because it is required when doing a test email later on.
Also, ensure that the Setup Preview option is enabled. If it’s not, then click it to toggle.
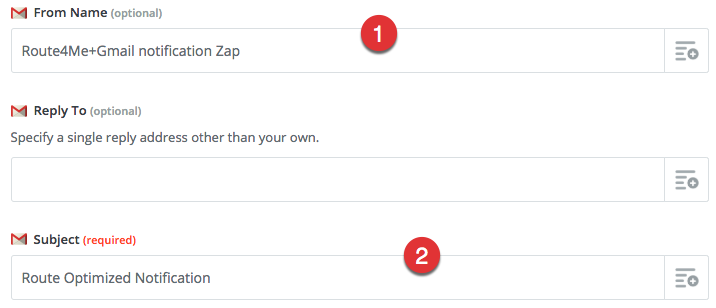
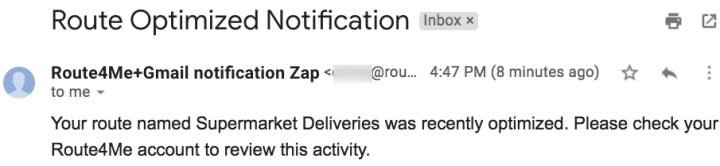
Next, scroll down below and look for the From Name field. Use the text Route4Me + Gmail notification Zap as its value. Then, in the required Subject field, use the text Route Optimized Notification as its value.
Next, you need to provide a value for your email body. A simple message is good enough, but it’s also possible to use the data from a Route4Me activity you’ve previously specified as the trigger. In our example, it’s the Route Optimized activity. This means that you can retrieve the data or field values from the route that was optimized, like its route name, the name of the member who owns or created the route, the route creation date, etc.
Click the form-looking icon located at the right-most part of the Body field, and from the selection list, choose the Route Name field. On your end, the data for this field is different compared to the one depicted in the screenshot.
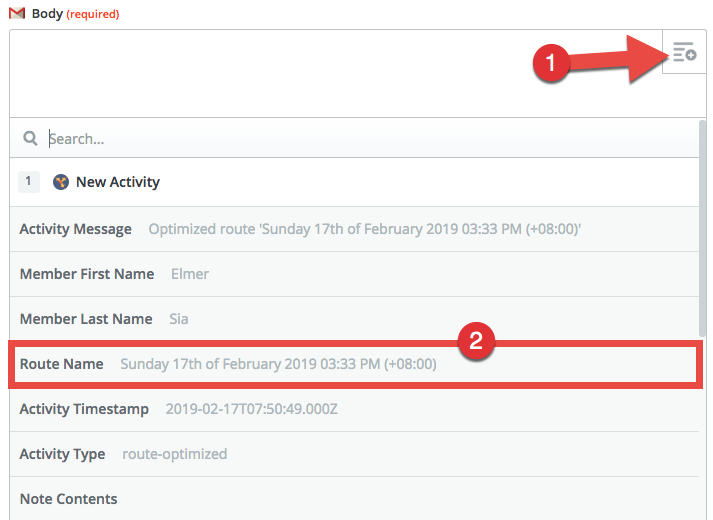
You can also add text alongside the field you just selected. Ensure that the value of the Body field is similar to this:

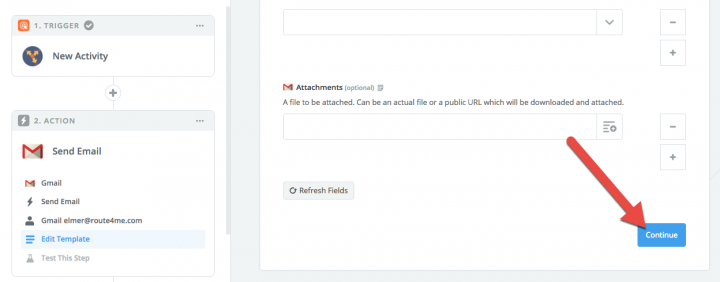
Next, scroll down below and click the Continue button to finish setting up the template.
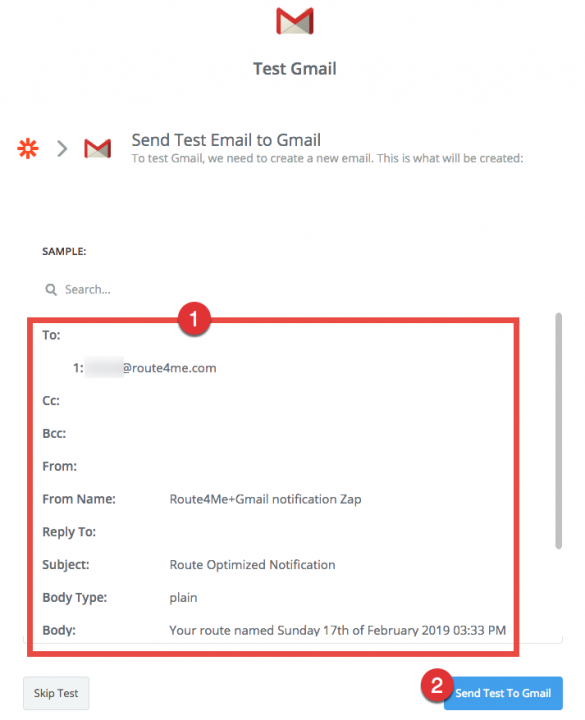
Next, review how the test email should look with the values you provided in the template. Once done, click the Send Test To Gmail button to send the test email. Please don’t skip this test as this verifies if the values you provided in the template are valid or not.
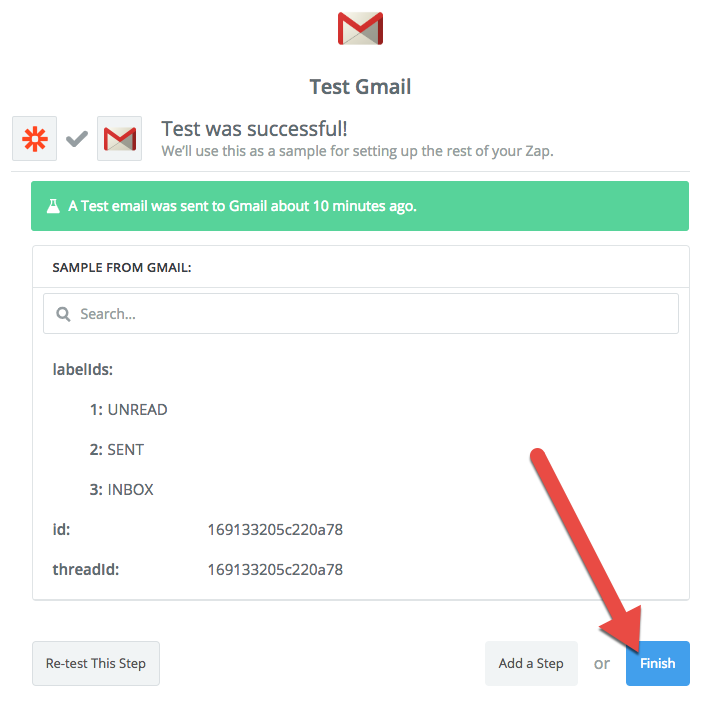
A test email should be in your Gmail account’s inbox by now. Check your inbox and review the test email if the values you provided in the template appear as expected.


If you approve, go back to your Zapier account and complete your Action step by clicking Finish.
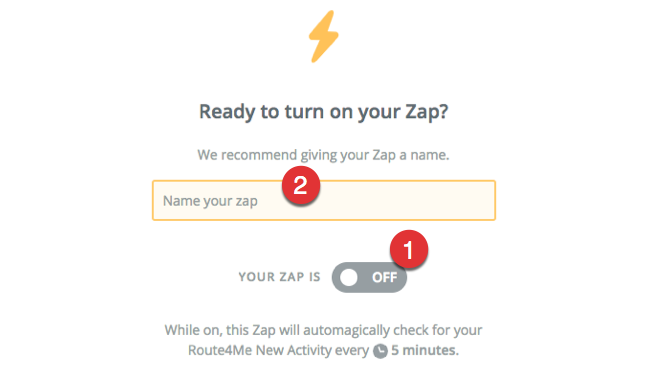
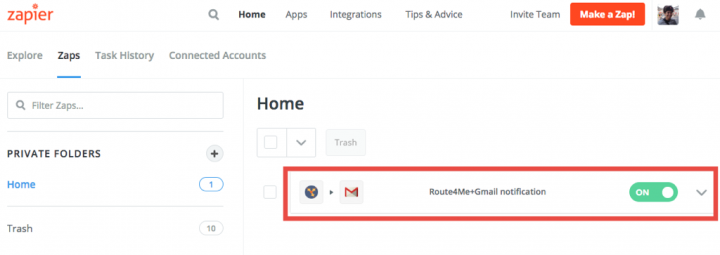
Next, you need to turn on your Zap so that it can check your Trigger every few minutes or so (the frequency of the check depends on your Zapier plan). You should also name your Zap to identify it quickly. Name it with Route4Me+Gmail notification.
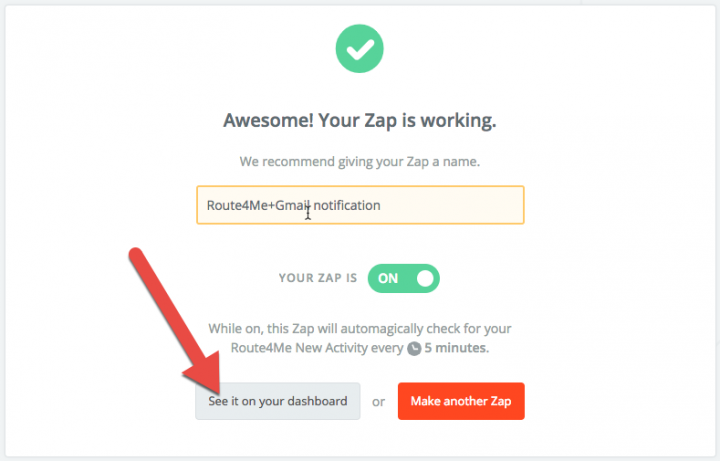
Once turned on, your Zap is now complete. Click the See it on your dashboard button to go to your Zapier dashboard and to test your Zap.
Running and Testing the Zap
Your Two-step Zap is now complete, but you need to test it manually to make sure it detects the Trigger and runs the Action correctly.
On your Zapier dashboard, check your Zap and make sure that it is on. If it’s not, then click the toggle button to turn it on.
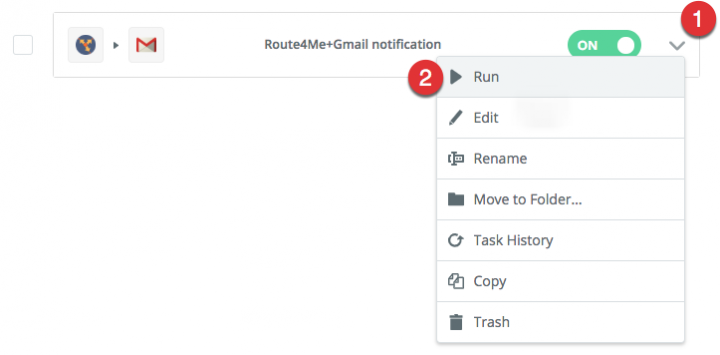
Once the Zap is on, click its dropdown icon and click Run from the list of commands that appear. Zapier will do a manual run of your Zap.
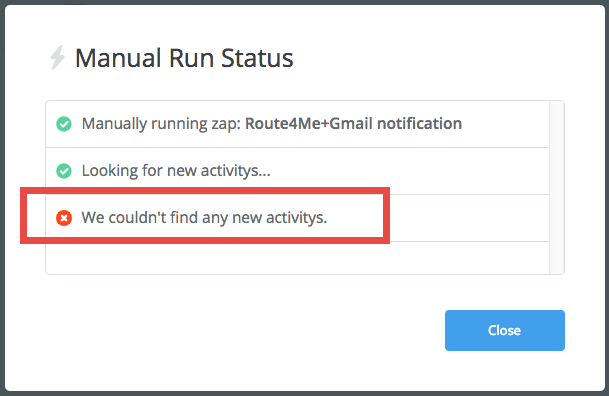
Zapier can’t find any new Route Optimized activity because it already checked your Route4Me account when you were first configuring your Zap’s trigger. Click Close to close the dialog box.
There must be a new Route Optimized activity in your Route4Me account for Zapier to detect and for your Zap to work. Log in to your Route4Me account and select any one of your routes to reoptimize.
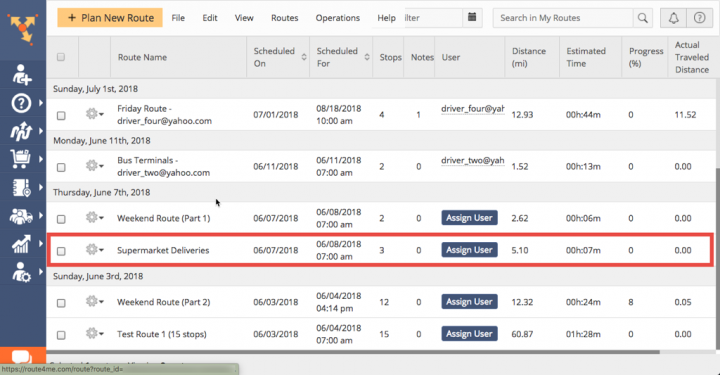
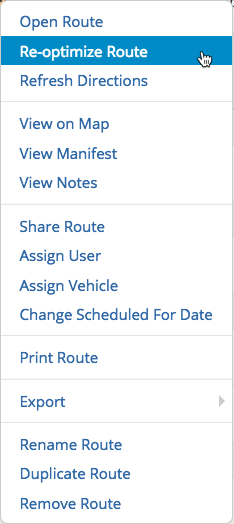
Look for the gear icon beside the name of your route and click it.
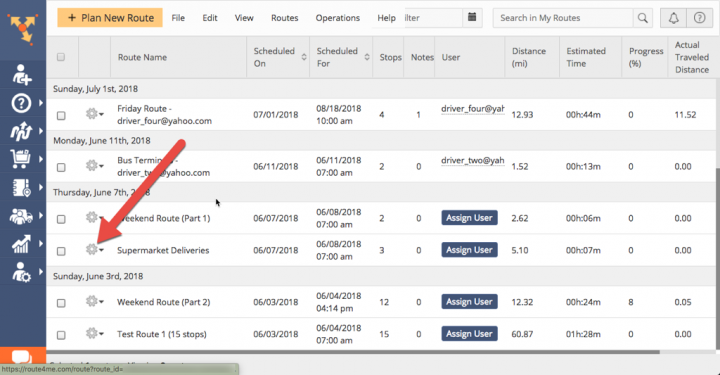
Then, click Re-optimize Route to reoptimize your route.
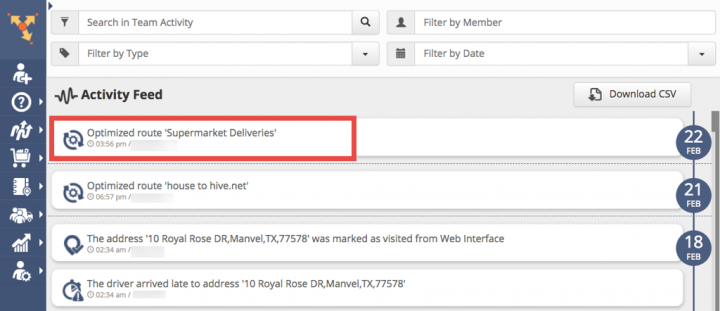
If you want, you can also check your Route4Me Activity Feed because every Route Optimized activity that occurred gets logged there. Your Zap can now detect this new activity.
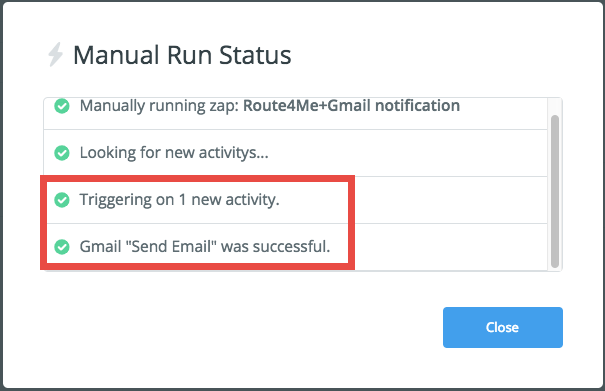
Next, go back to your Zapier dashboard and manually rerun your Zap. Your Zap then executes its workflow, from seeing the new activity (the trigger) and then sending you the email (the action). Click Close to close the dialog box.
Finally, check your Gmail to see the email sent by your Zap.

Our example Zapier integration of Route4Me and Gmail finishes here. However, there are many more web applications that you can integrate and use with Route4Me.
All the trademarks, logos, and brand names on this page are for identification purposes only. We do not endorse these trademarks, logos, and brand names. All the trademarks, logos, and brand names are the property of their respective owners. If any of the trademarks, logos, and brand names are your property or the property of your company, and you would like us to remove them from our website, please contact us at [email protected] to submit your request.
About author: Alex Yasko
Alex Yasko is the Go-to-Market Product Manager and Information Architecture Manager at Route4Me. With thousands of hours of experience, Alex specializes in breaking down complex last-mile optimization and routing scenarios into simple, actionable instructions, helping last-mile businesses streamline their operations effortlessly.