Slack Integration With Route4Me Via Zapier
Slack is one of the most popular cloud-based applications in the market used by various businesses and organizations for collaborating with multiple teams, managing projects, hiring and training new people, distributing tasks, reviewing the company strategies, sending important announcements, and much more. With Route4Me, you can establish a connection between your Slack workspace and your Route4Me account via Zapier. Zapier is a powerful integration platform that works as a translator between different APIs, allowing you to bridge the gap between various web applications and automate tasks across them. By establishing a connection between a particular Slack channel and your Route4Me account you and your team members can receive automated updates and notifications that are triggered by various activities associated with your Route4Me account. For example, whenever you or your team members add a note to a particular route stop from the Route4Me Web Platform or Route4Me’s iOS and Android mobile apps, this event will trigger the corresponding message/notification that will be automatically sent to the linked Slack channel. Moreover, to accommodate your particular operational business needs, you can customize your event-triggered messages using custom text and placeholders that can dynamically copy various event details and insert them into your notifications.
Table of Contents
Integrate Slack With Route4Me Using Zapier
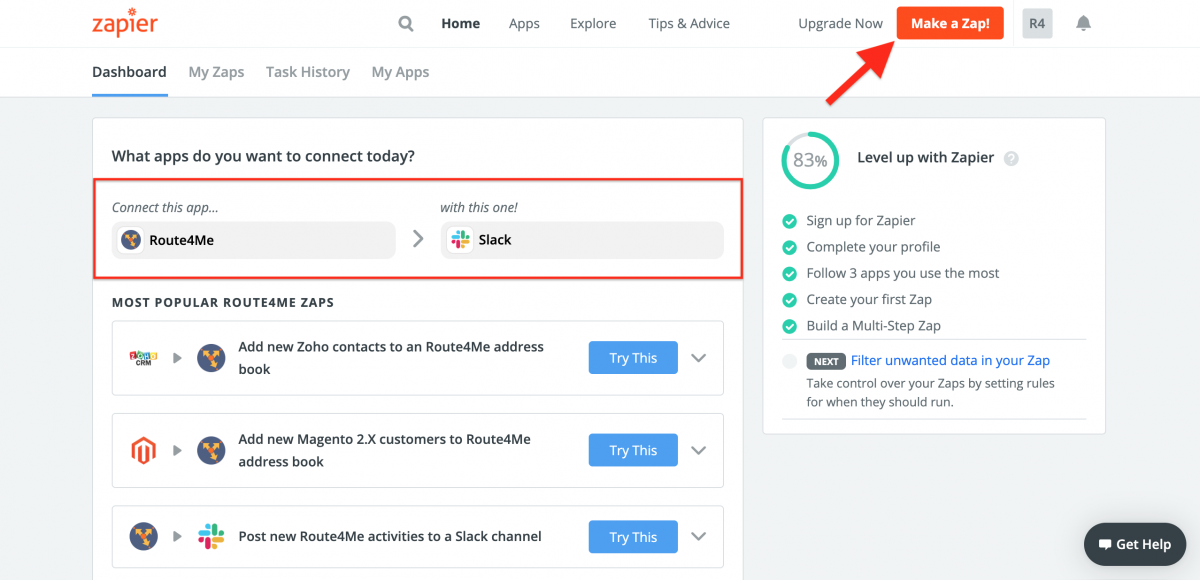
To integrate your Slack workspace with your Route4Me account using Zapier, first, log into your Zapier account accordingly. Next, you need to create a Zap that will establish a connection between your Slack workspace and your Route4Me account. To do so, you can start by selecting Slack and Route4Me in the “What apps do you want to connect today?” section in the Dashboard. Alternatively, click on the “Make a Zap!” button from any screen.
Setting Up the Route4Me Trigger Event
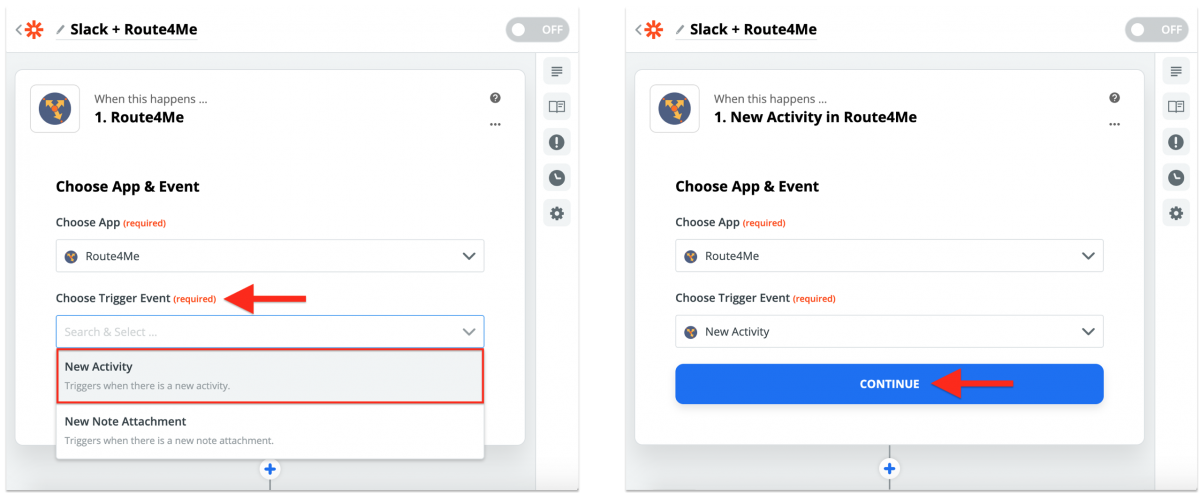
To integrate your Route4Me account with your Slack workspace so that every time a new event happens on your Route4Me account the corresponding notification can be sent to a particular Slack channel, you need to set up the Route4Me Trigger Event and Slack Action Event. To set up the Route4Me trigger event, first, search for and select Route4Me at the “When this happens …” integration stage at the “Choose App & Event” integration sub-stage. You can also name your Zap in the top left corner of the screen before proceeding.
Next, select “New Activity” from the “Choose Trigger Event” drop-down list and then click “Continue” to proceed.
After selecting the preferred Route4Me trigger event (New Activity), sign into your Route4Me account (Primary Route4Me Account) by clicking on the “Sign in to Route4Me” button. Next, input your Route4Me API key into the corresponding field and then click on the “Yes, Continue” button to proceed.
To find and copy your Route4Me API key, first, log into the Route4Me account that you want to integrate with your Slack workspace. Next, go to “My Account” from the navigation menu and then select “API” from the list (learn more). After that, you can copy your Route4Me API key accordingly.
After signing into your Route4Me account with your Route4Me API key, select what events should trigger sending notifications to your Slack workspace. Select “All Activities” to send all types of updates. Next, click on “Continue” to test if the selected triggers are successfully set up.
Setting Up the Slack Channel Action Event
After setting up the preferred Route4Me trigger event (“All Activities”), you need to set up the corresponding action event for your Slack workspace so that every time a new event happens on your Route4Me account, the corresponding notification will be automatically sent to your Slack channel. To do so, first, search for and select Slack at the “Do this …” integration stage at the “Choose App & Event” integration sub-stage.
Next, select “Send Channel Message” from the “Choose Action Event” drop-down list and then click “Continue” to proceed.
After selecting the preferred action event, sign into your Slack account/workspace by clicking on the “Sign in to Slack” button. Next, provided that you are already logged into your Slack workspace on your computer, select the preferred Slack workspace from the “Slack account” list and then click on “Continue” to proceed. Alternatively, sign into another Slack workspace accordingly.
Specifying the Route4Me Event and Slack Channel Message Synchronization Data
After establishing a connection between your Slack and Route4Me accounts, you need to select the Slack channel to which you want to send all event-triggered notifications/messages. To do so, click on the “Pick a channel” drop-down list and then select the preferred Slack channel accordingly.
Next, you need to specify what data will be copied from each new Route4Me event (trigger event) and included into each corresponding notification/message that will be automatically sent to the linked Slack channel (action event). NOTE: To automate the data synchronization process and make sure that the right data is dynamically pulled from each new Route4Me event and copied into the right fields of the corresponding Slack channel message, use placeholders. For your convenience, you can use the data from the last event on your Route4Me account as an example of what data will be dynamically pulled from each new Route4Me event and copied into the corresponding Slack channel message(s). For example, when selecting what “Route Name” will be copied from a new Route4Me event (trigger event) into the corresponding Slack channel message (action event), the right placeholder (placeholder example value) to select for this field will be the value that shows the name of the route last used on your Route4Me account (in this example, “Los Angeles Route 0001”).
For your convenience, use a descriptive title (custom text) for each placeholder. To make sure that you have the right data examples, execute the event from which you want to use the sample data on your Route4Me account. For example, if you want to send a notification to your Slack channel every time a new route is optimized, optimize a route on your Route4Me account and then use the data of the optimized route as the sample data for inserting placeholders into the corresponding notification message.
Next, (optional) adjust such additional settings as who the channel messages will be sent from, insert the icon of the sender, etc., and then click on the “Continue” button to proceed.
After that, review all filled out fields with the inserted data and placeholders and then click on the “Test & Continue” button to finish creating the Zap.
Once the Zap is created and enabled, Zapier will automatically test the new Zap and send a notification/message to the corresponding Slack channel with the same details as in the examples of the placeholders that were inserted into the corresponding fields of the Zap at the “Customize Channel Message” integration stage.
After creating the Zap, you can enable and disable it at any time, as well as edit its functionality and fields to your preference:
- To learn more about managing your Zaps, visit this Zapier Support Page.
- To learn more about troubleshooting your Zaps, visit this Zapier Support Page.
Using the Created Zap (Route4Me Trigger Event + Slack Channel Message Action Event)
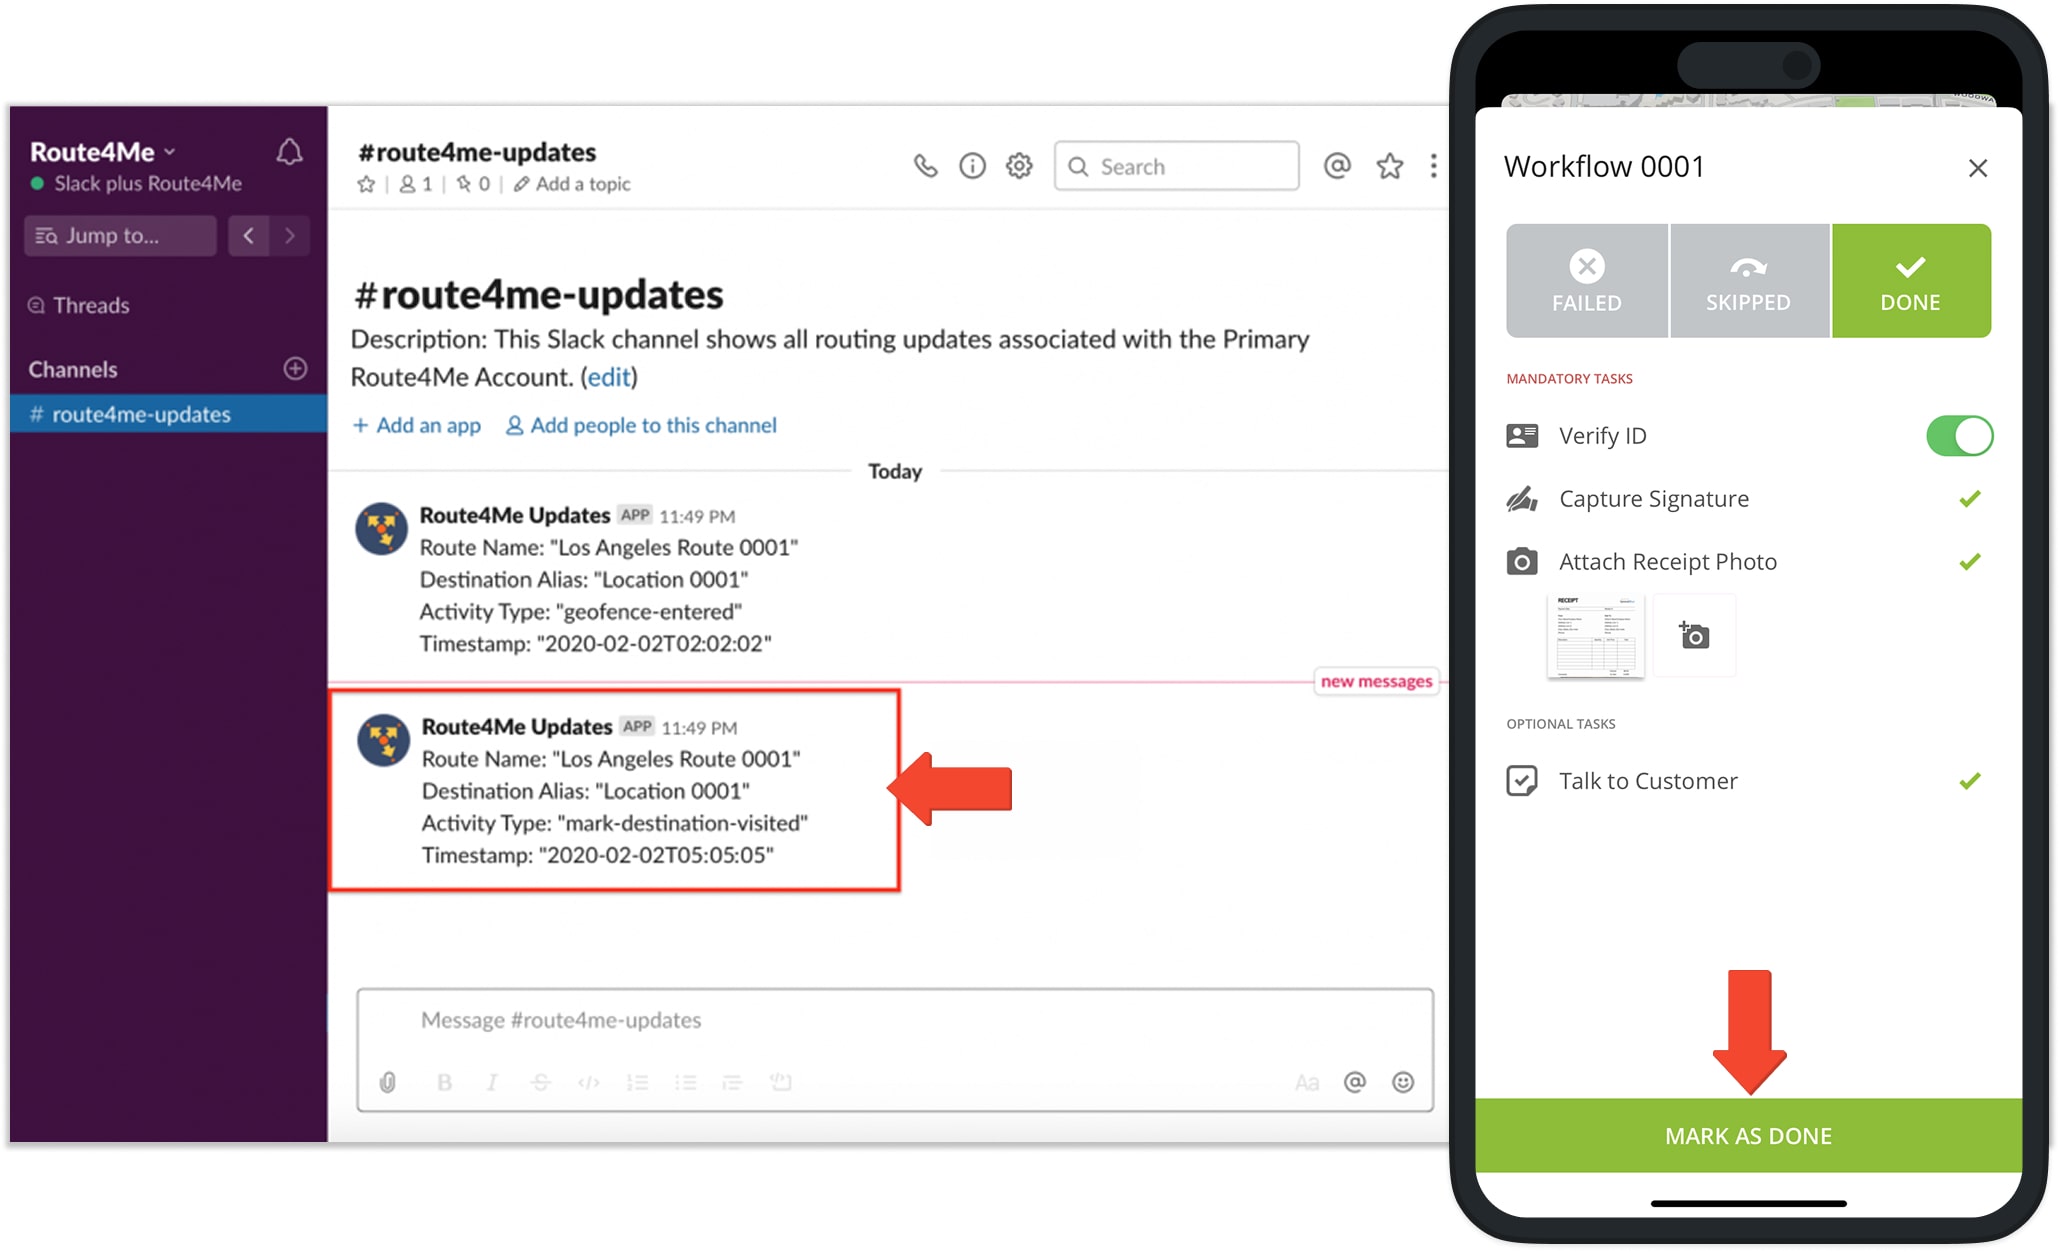
After creating and enabling the Zap, you can start using it for sending Route4Me event-triggered notifications to the linked Slack channel. For example, when a particular stop on the route associated with your Route4Me account is marked as “Visited” from the Route4Me Web Platform or Route4Me’s iOS and Android mobile apps, the corresponding notification/message will be automatically sent to the linked Slack channel.
Depending on your operational business needs, you can send Slack channel messages with various combinations of placeholders, fields, and custom text. For example, if you want to send note attachment notifications to the linked Slack channel, you can include the following placeholders into the “Message Text” field of the corresponding Zap:
- Route Name: The name of the route that includes the destination to which the note was attached to.
- Destination Alias: The name of the destination to which the note was attached to.
- Activity Type: Indicates what type of event triggered the message/notification.
- Note Contents: Custom text that is attached to the note.
- Note File: URL of the photo attached to the note (can go into either the “Message Text” field or the “Attach Image URL” field).
- Note Type: The status of the note (i.e., Drop Off Occurred, etc.).
Thus, when you or your team members add a note to a particular route stop from the Route4Me Web Platform or Route4Me’s iOS and Android mobile apps, this event will trigger the corresponding message/notification that will be automatically sent to the linked Slack channel.
You can also view from which Route4Me reserved attributes the data for the corresponding Zapier placeholders was copied to be inserted into the notification/message that was sent to the linked Slack channel. To do so, first, open the associated Route4Me route and then check the Route4Me reserved attributes/UI elements that correspond (have the same title or close in meaning) to the placeholder titles inserted into the Zap’s “Message Text” field.
Visit Route4Me's Marketplace to Check out Various Modules and Add-Ons:
- Operations
Audit Logging and Activity Stream
- Operations
Custom Data Add-On
- Operations
Advanced Team Management Add-On