How To Optimize Retail Cross-Docking And Transloading Routes
Retail cross-docking and transloading streamline supply chains by moving products directly from multiple vendors to a central distribution center, where goods are sorted and reloaded for final delivery. This method reduces storage costs, minimizes handling time, and improves delivery speed to retail stores or end customers. With Route4Me’s route planning software, you can optimize both inbound shipments from suppliers and outbound deliveries from your warehouse using advanced multi-depot and single-depot routing. Just upload your address spreadsheets, and Route4Me will automate your routes with precision and speed.
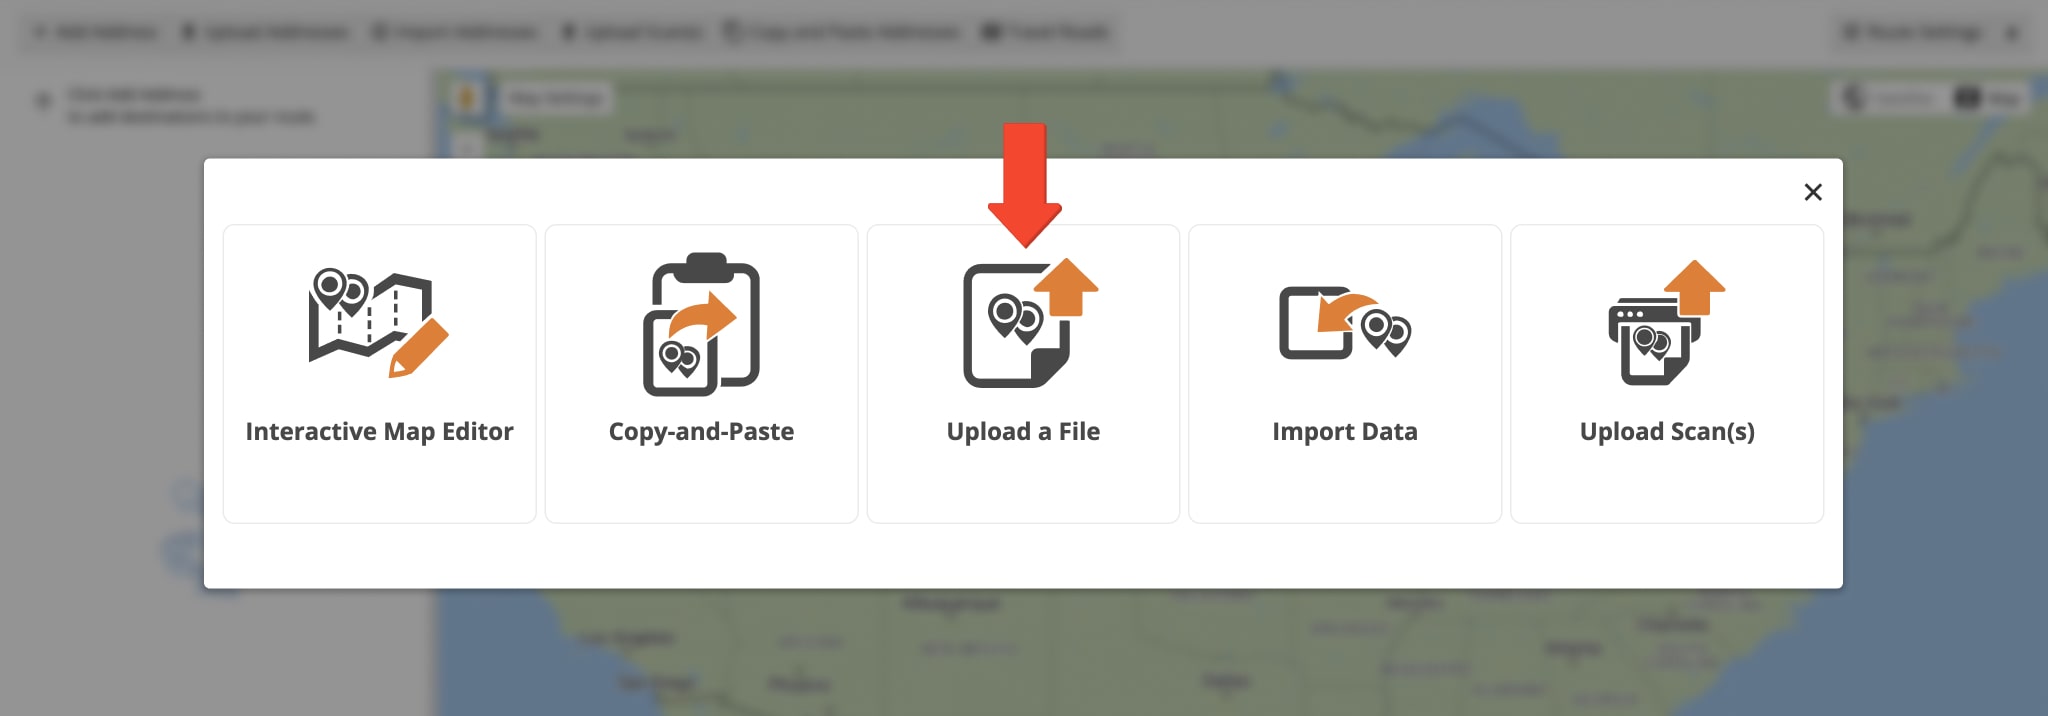
To plan and optimize retail cross-docking and transloading routes, start by selecting “Plan New Route” from the Navigation Menu, then choose the “Upload a File” option to import your addresses.
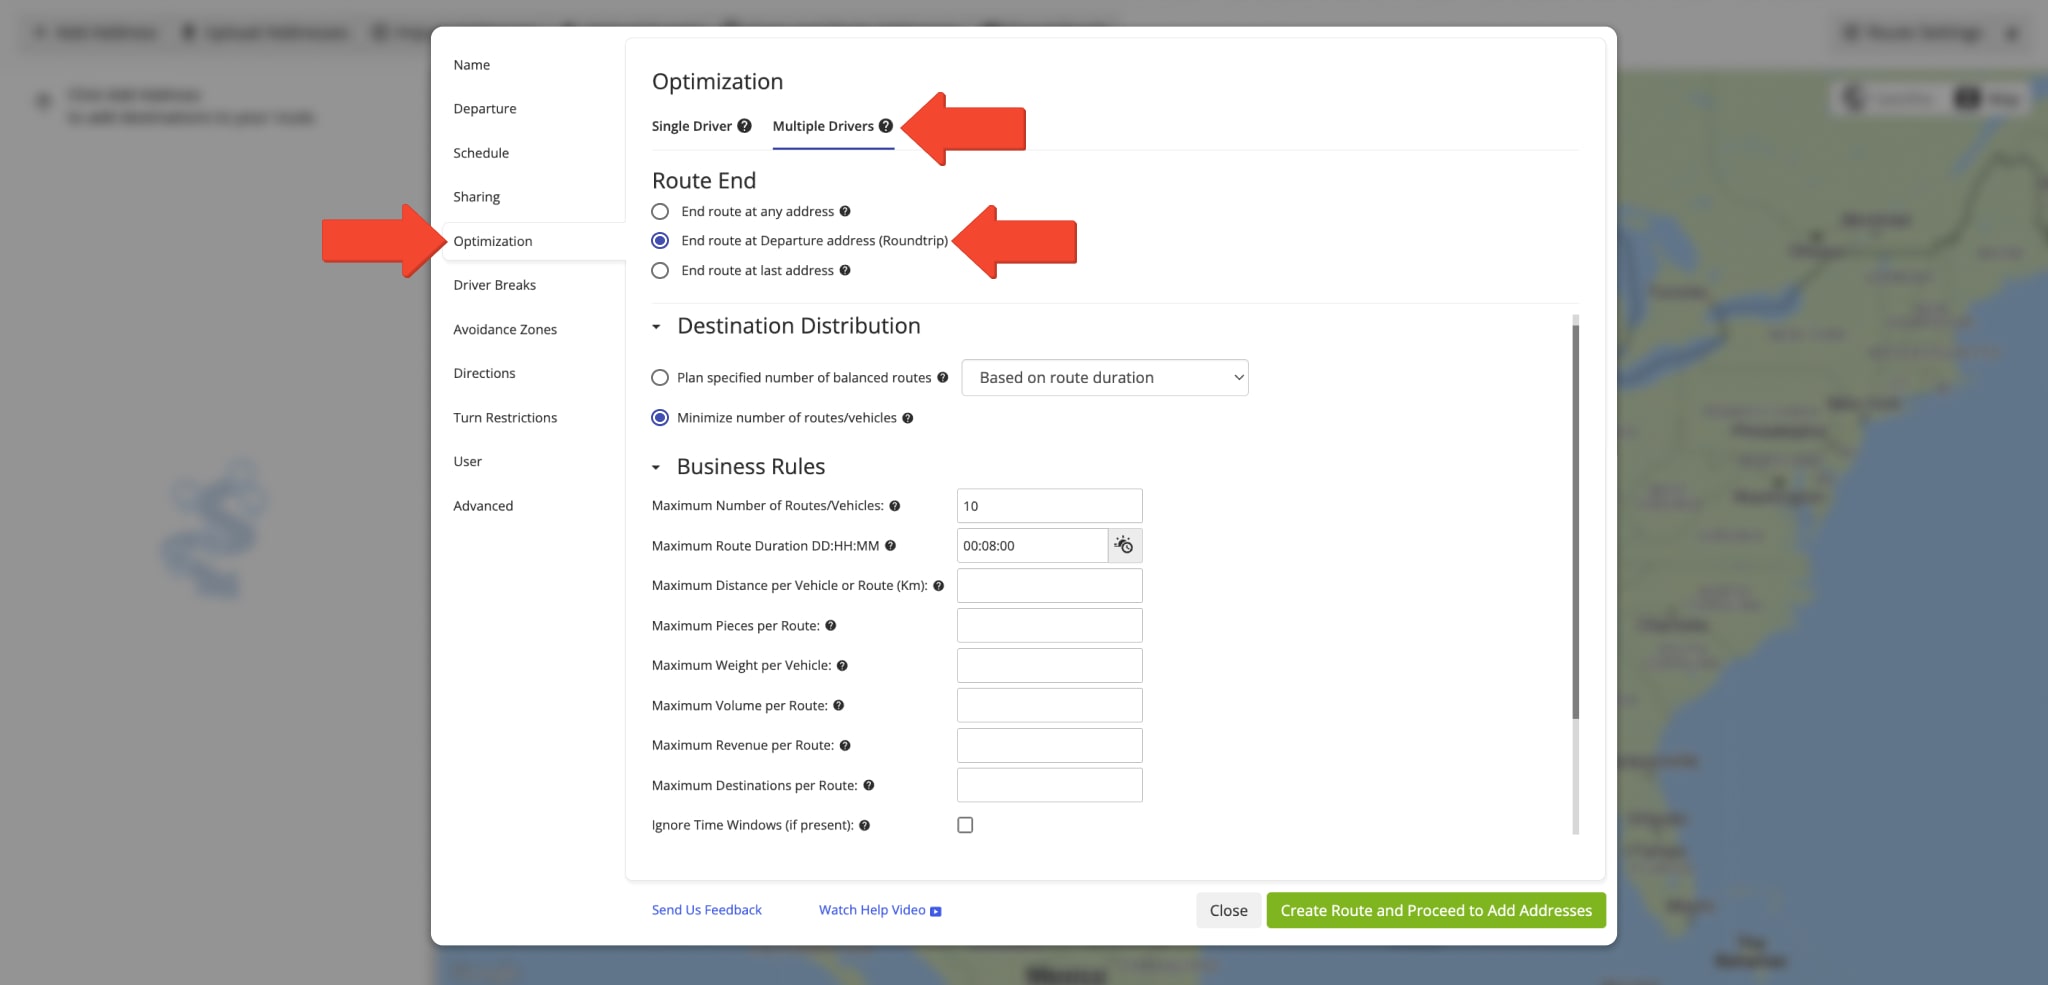
Next, to plan multiple retail cross-docking or transloading routes where each route starts from its own depot or warehouse and ends at the same distribution center, configure the following route optimization settings:
- Go to the “Optimization” tab.
- Select Multiple Drivers Route to automatically plan multiple routes.
- Chose “End Route at Departure Address (Roundtrip)” to ensure all routes finish at their starting depot.
Learn more about Pieces, Volume, Revenue, and Weight advanced operational constraints.
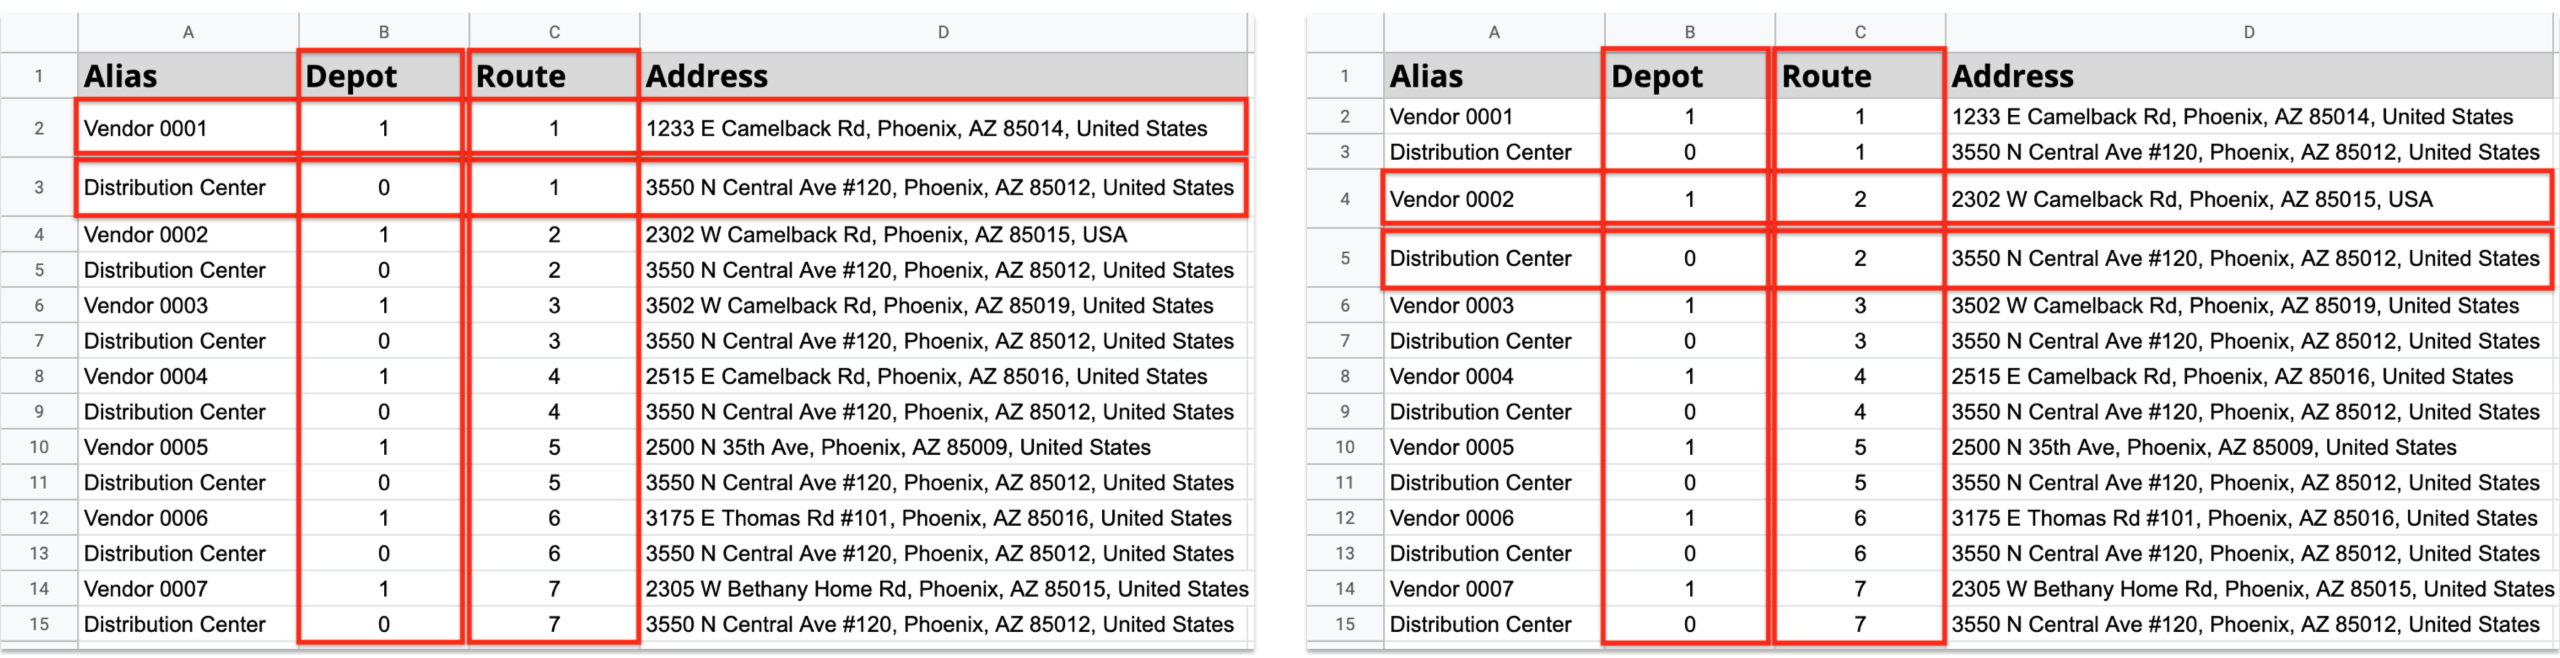
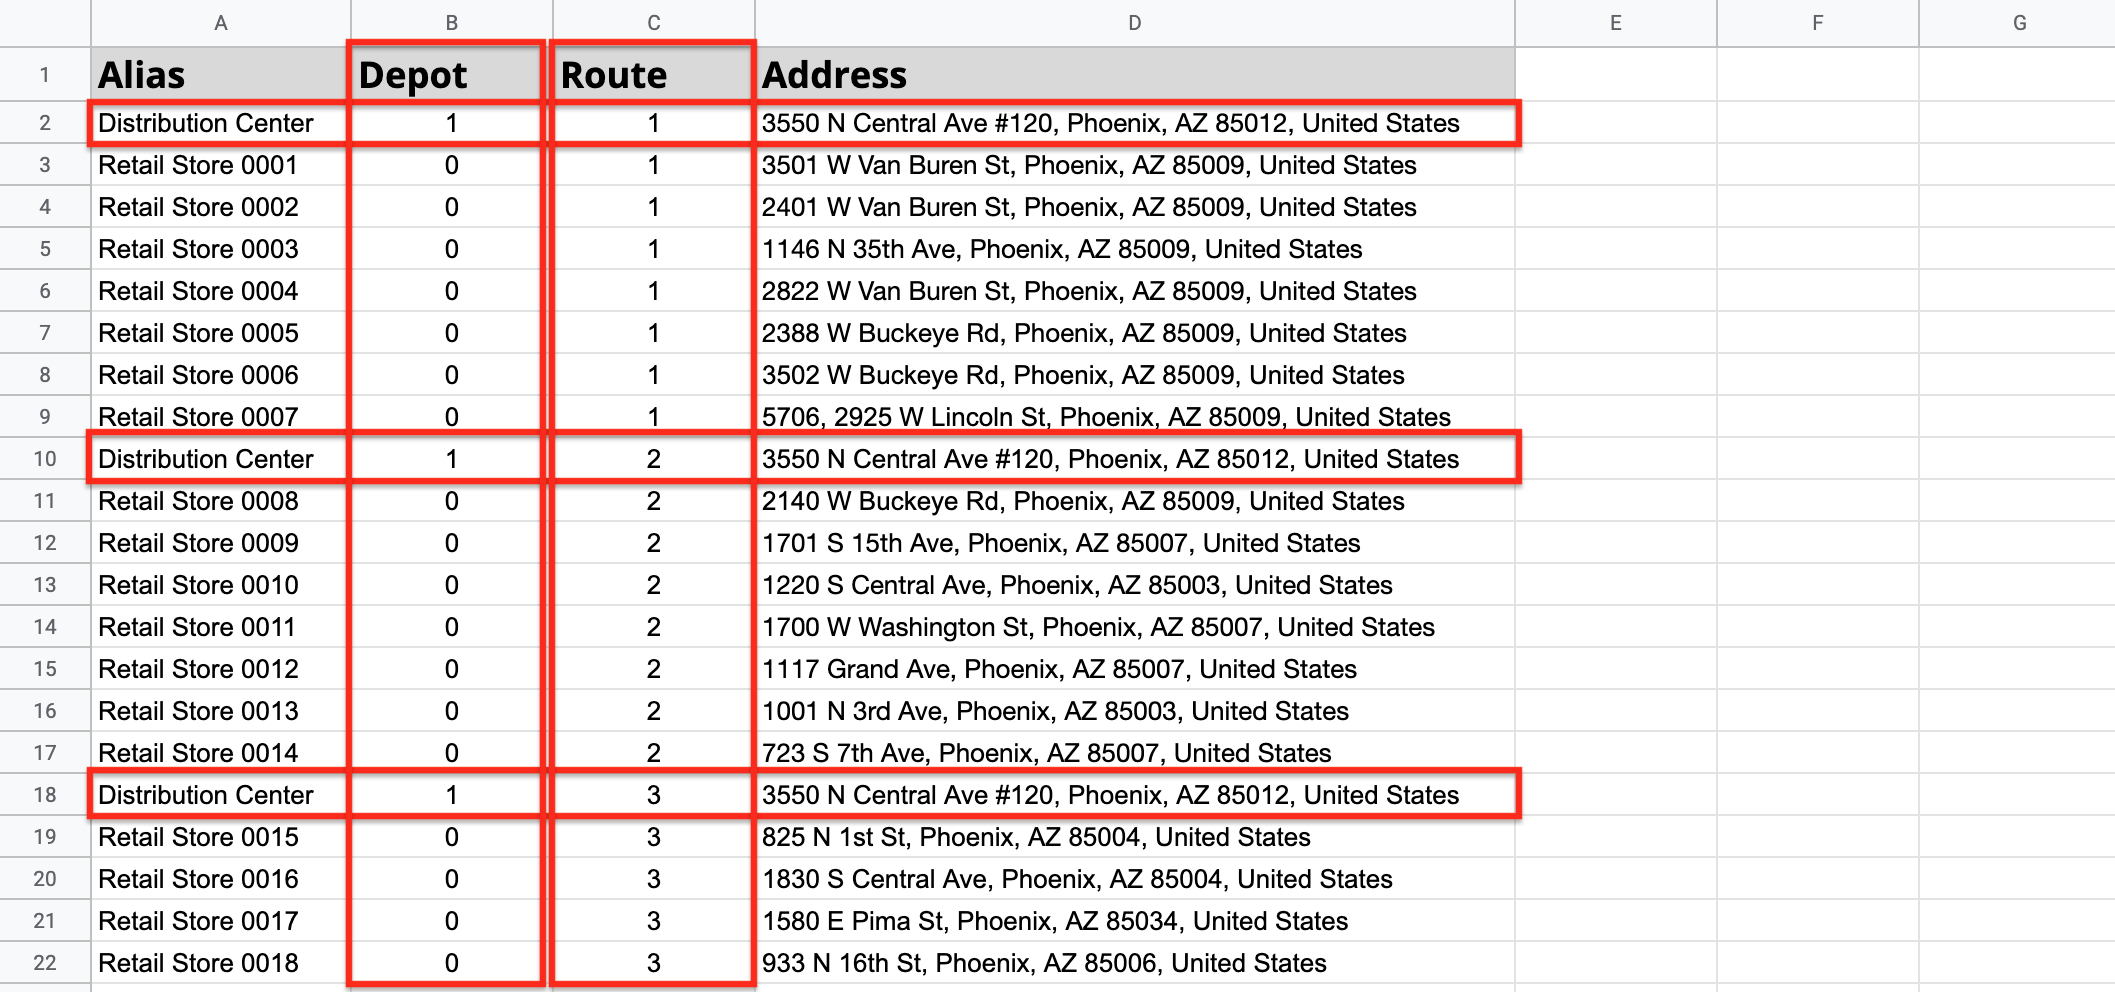
After that, import your spreadsheet into Route4Me. To plan multiple depot routes with predefined distribution, make sure your spreadsheet includes the mandatory “Address” column, as well as “Depot” and “Route” columns. In the “Depot” column, mark depot locations with “1” and route stops (distribution centers) with “0”. Use the “Route” column to assign each address to its corresponding route, which will start from the designated depot.
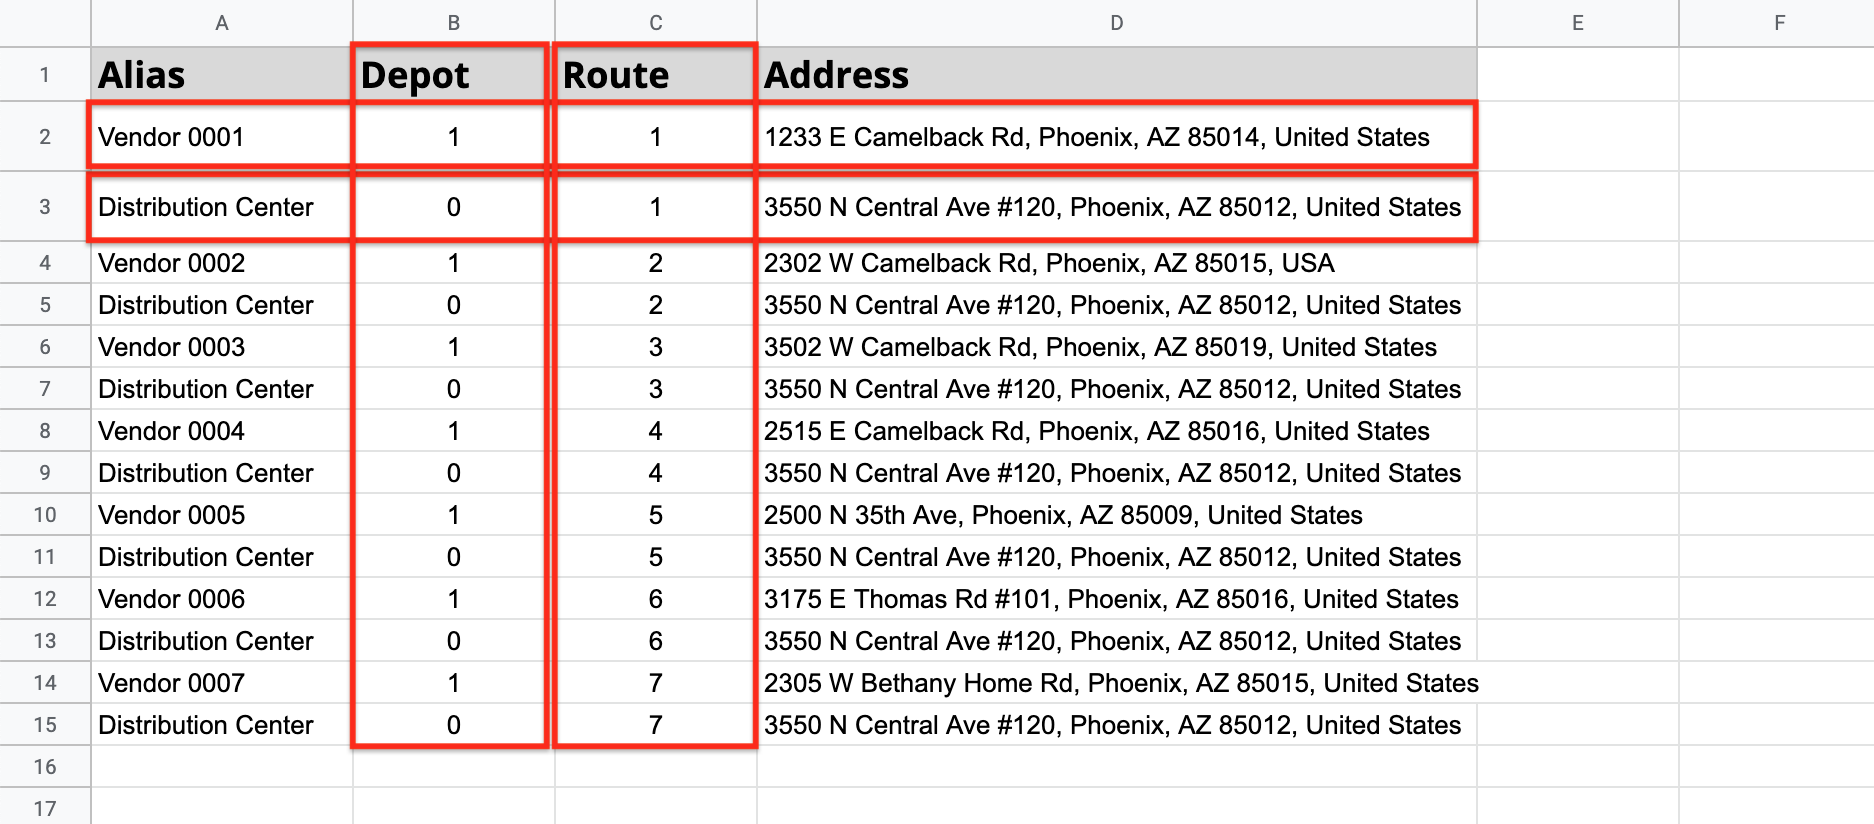
To have each route start from its own depot or warehouse and converge at the same distribution center for unloading, set up address pairs in your spreadsheet.
In each pair, the first address (marked as “depot“) represents the warehouse or depot, and the second address is the main distribution center. This setup ensures efficient multi-depot routing for both inbound and outbound shipments. Learn more about configuring routes with multiple depots.
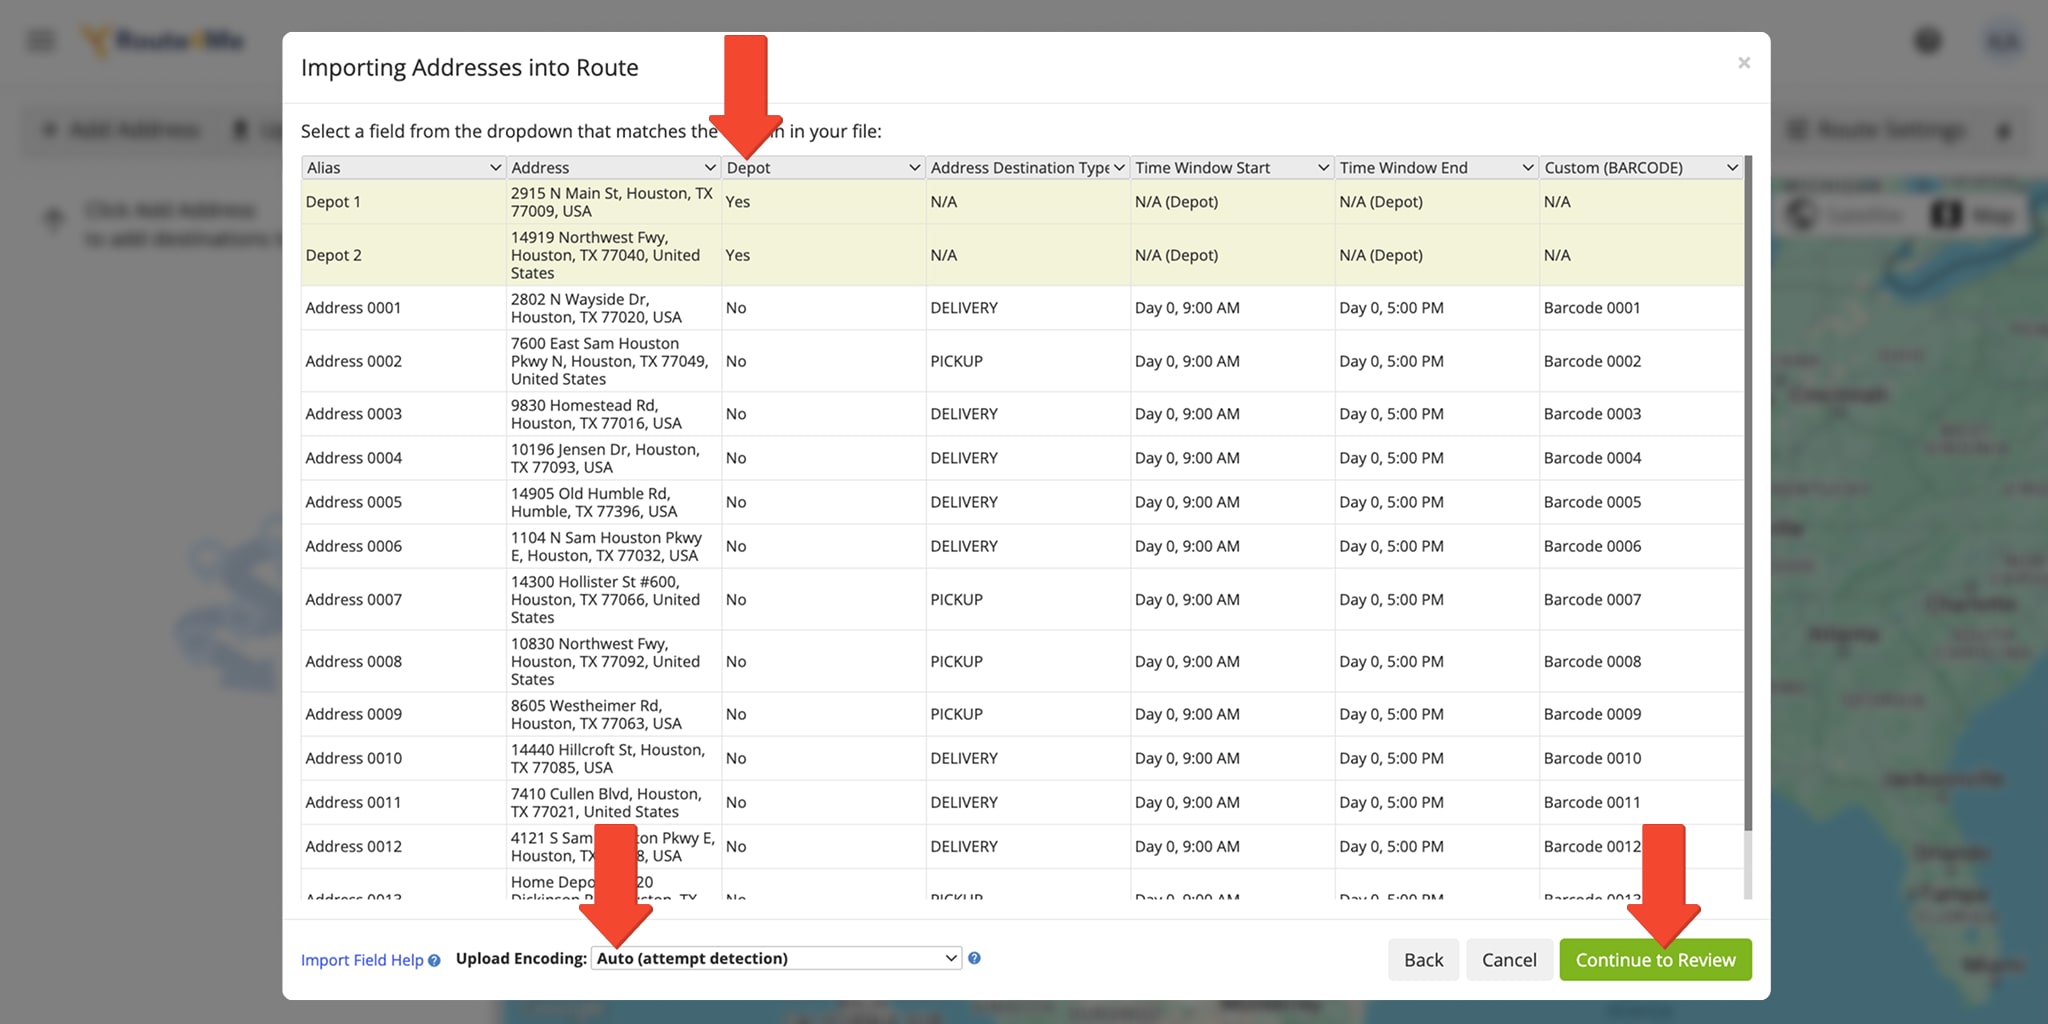
Once the spreadsheet is uploaded, Route4Me processes the data and displays it in the review window. Ensure that each column contains the correct information, marking addresses you want as depots with “Yes” in the “Depot” column.
For automatic processing, select the “Auto (attempt detection)” option, or manually match column titles to their corresponding data. When everything is verified, click “Continue to Review” to proceed with route optimization.
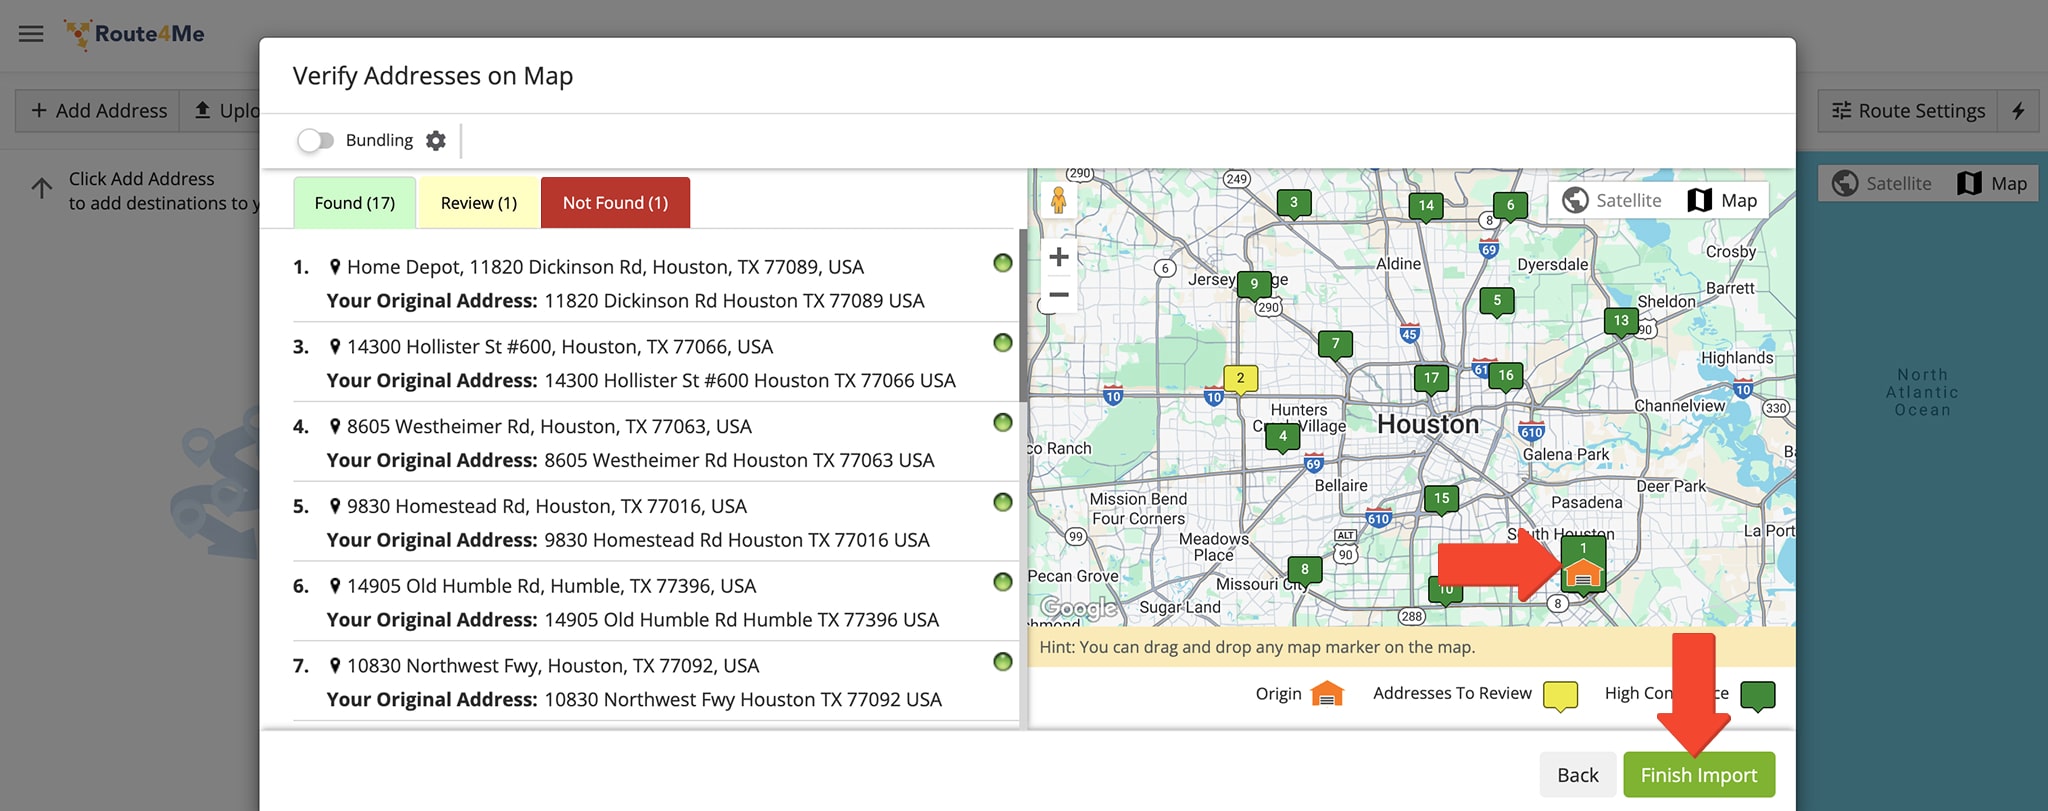
In the “Verify Addresses on Map” window, you can view all imported and processed addresses on the map, as well as check their geocoding statuses.
All depots or vendors are displayed on the map as depot icons and the main distribution center is displayed as a route stop. After checking the addresses, click on the “Finish Import” button.
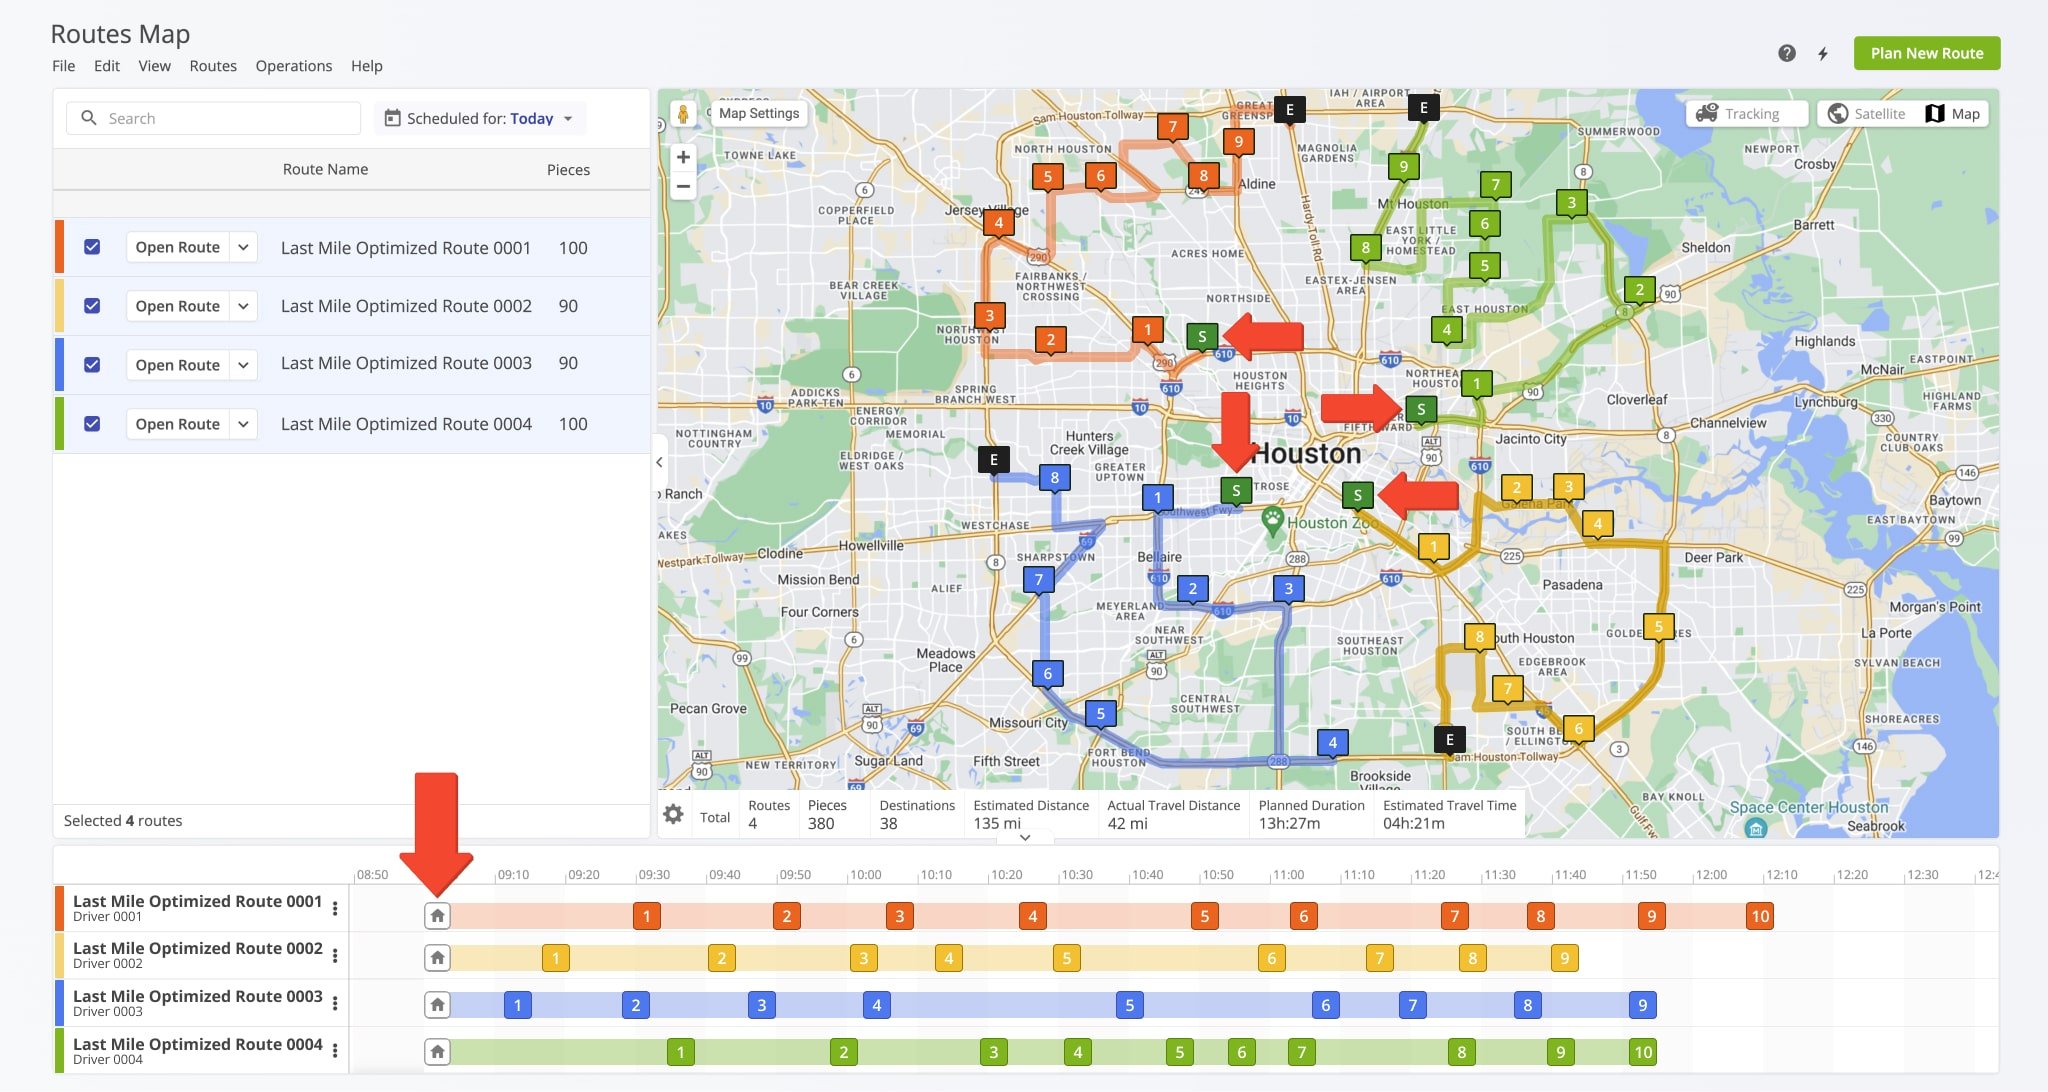
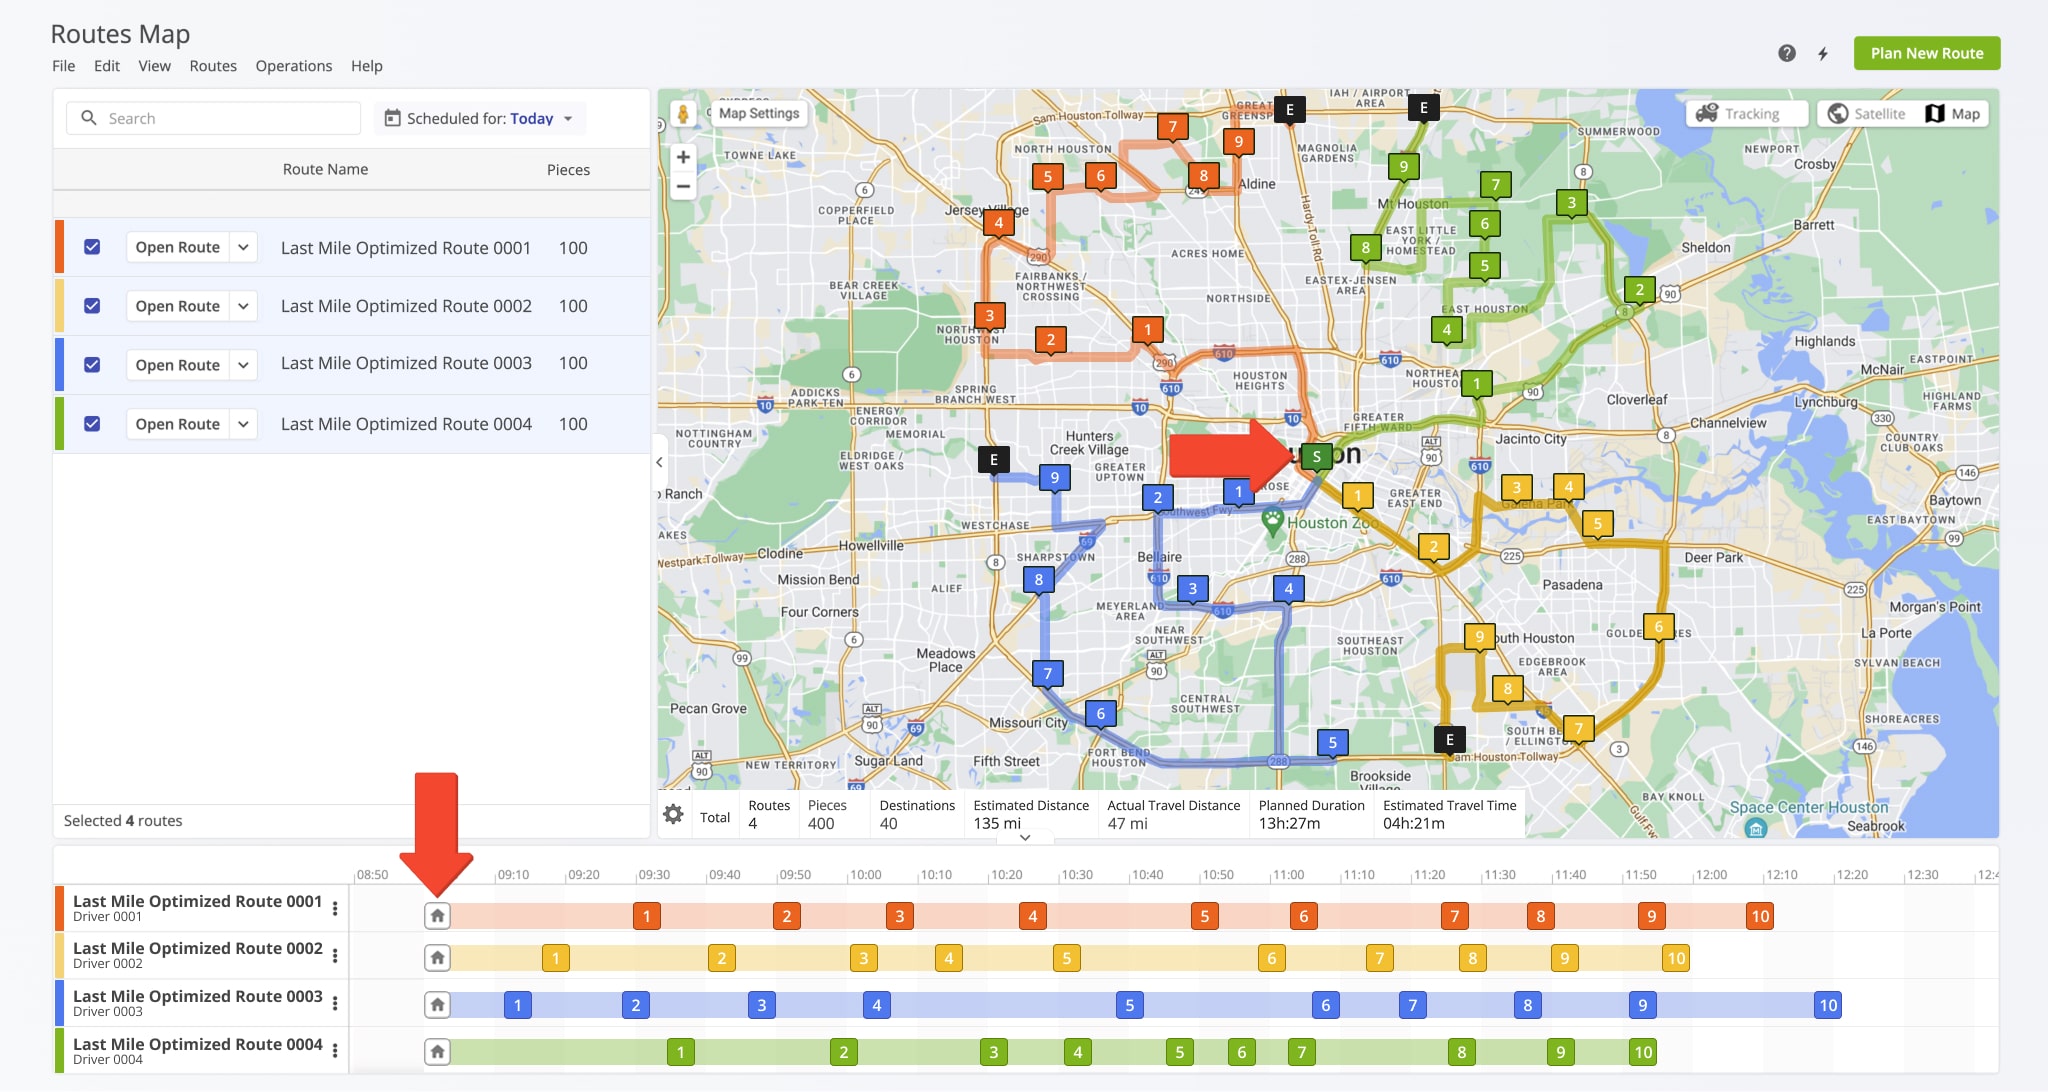
Once the routes are planned, each delivery route will begin at its assigned depot or warehouse, transporting products to the central distribution center.
If the routes are set as “Roundtrip”, vehicles will automatically return to their starting depot or warehouse after unloading at the distribution center, ensuring efficient routing for retail cross-docking and transloading operations.
After planning routes for inbound shipments, you can create outbound routes from the distribution center to deliver assembled mixed-product pallets to end customers.
To do this, go to the “Optimization” tab and select your preferred optimization type, Single Driver Route or Multiple Drivers Route, Then, choose where each route should end after the last stop is visited and serviced, and define any advanced constraints such as Pieces, Volume, Revenue, Weight, and more.
Next, upload the spreadsheet containing the addresses you want to visit. To ensure all distribution routes start from the same single distribution center, include a “Depot” column in your spreadsheet.
In the “Verify Addresses on Map” window, review all imported addresses and their geocoding statuses. The distribution center will appear as a depot icon, indicating that all routes will start from this single location. Once verified, click the “Finish Import” button.
Once planned, each distribution route will begin at the same depot and branch out to the assigned locations. If routes are set as “Roundtrip”, vehicles will return to the same depot
Route4Me streamlines retail cross-docking by moving goods to a distribution center, assembling pallets, and delivering them to end customers for greater efficiency and cost savings. Thousands of routes can be planned by simply uploading a spreadsheet with addresses, with Route4Me optimizing them automatically.
Visit Route4Me's Marketplace to Check out Associated Modules:
- Operations
Advanced Team Management Add-On
Last Updated:
About author: Daniel Archer
With a background in pedagogy and writing instruction, Daniel is a former tenured English Instructor who, after nearly 20 years of teaching, transitioned into content strategy and leading writing teams for global brands. Now, as Technical Documentation Manager at Route4Me, he translates complex logistics technology into clear, accessible content that empowers users.