Collect Proof Of Visit And Delivery With Mobile Route App For Company Drivers
With Route4Me’s mobile Route Driver App, you can add statuses to destinations and attach proof of delivery (POD), proof of visit (POV), and proof of service (POS) to complete orders, maintain route compliance, and finish routes. In this guide, you can learn how to set route stop statuses and attach electronic signatures, photos, videos, and text notes so you can maintain accurate records of completed tasks at route destinations.
Table of Contents
Set Destination Statuses And Collect Proof Of Visit Or Delivery
To collect proof of visit and delivery, first start route navigation and arrive at a Destination. The app will automatically expand the navigation panel to show the “Arrived” button. Tap it to proceed.
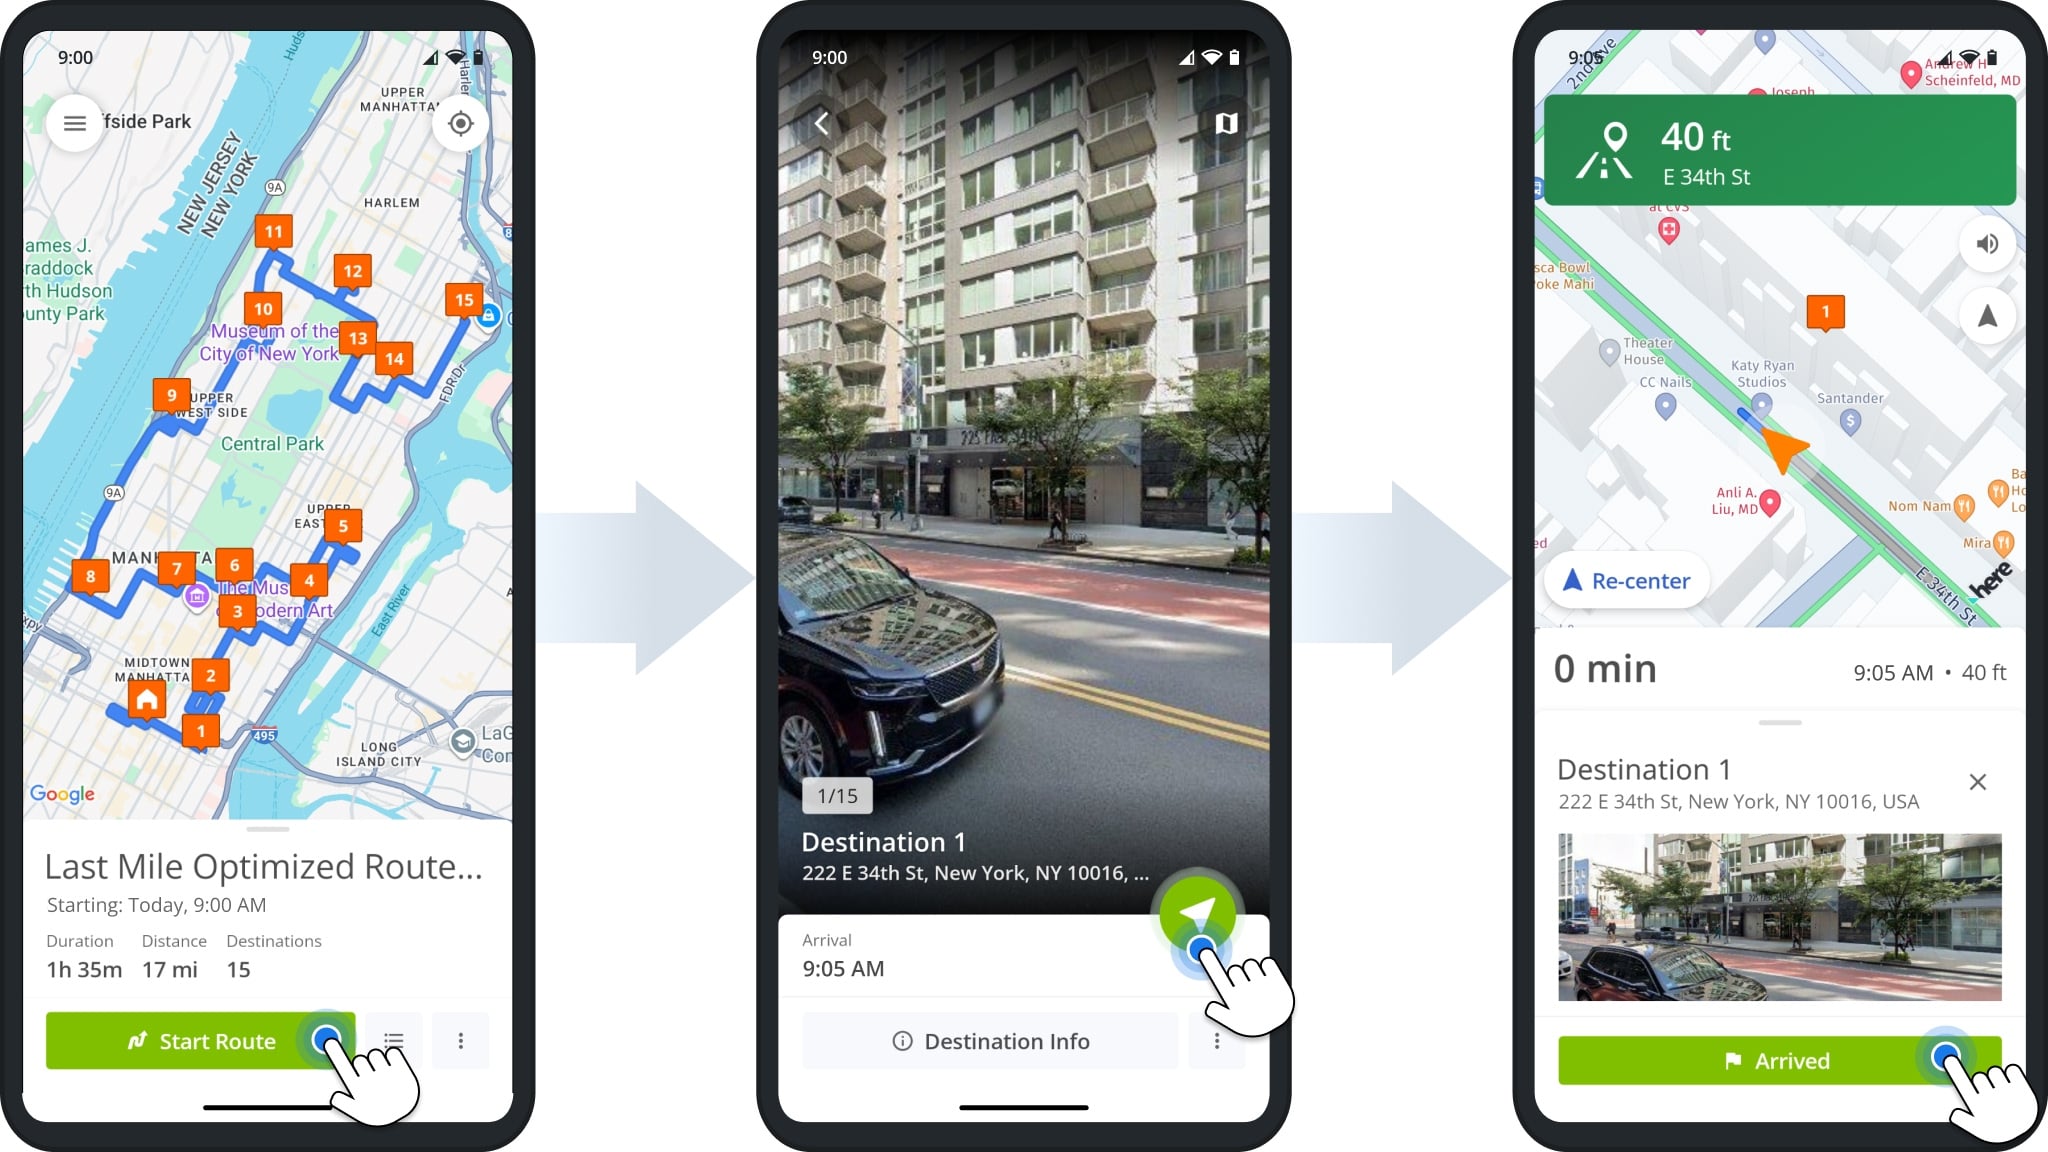
NOTE: You can navigate using Google Maps, Waze, Route4Me’s Integrated GPS Navigation, or other apps.
Completed Destinations – Set Status For Successfully Completed Visits
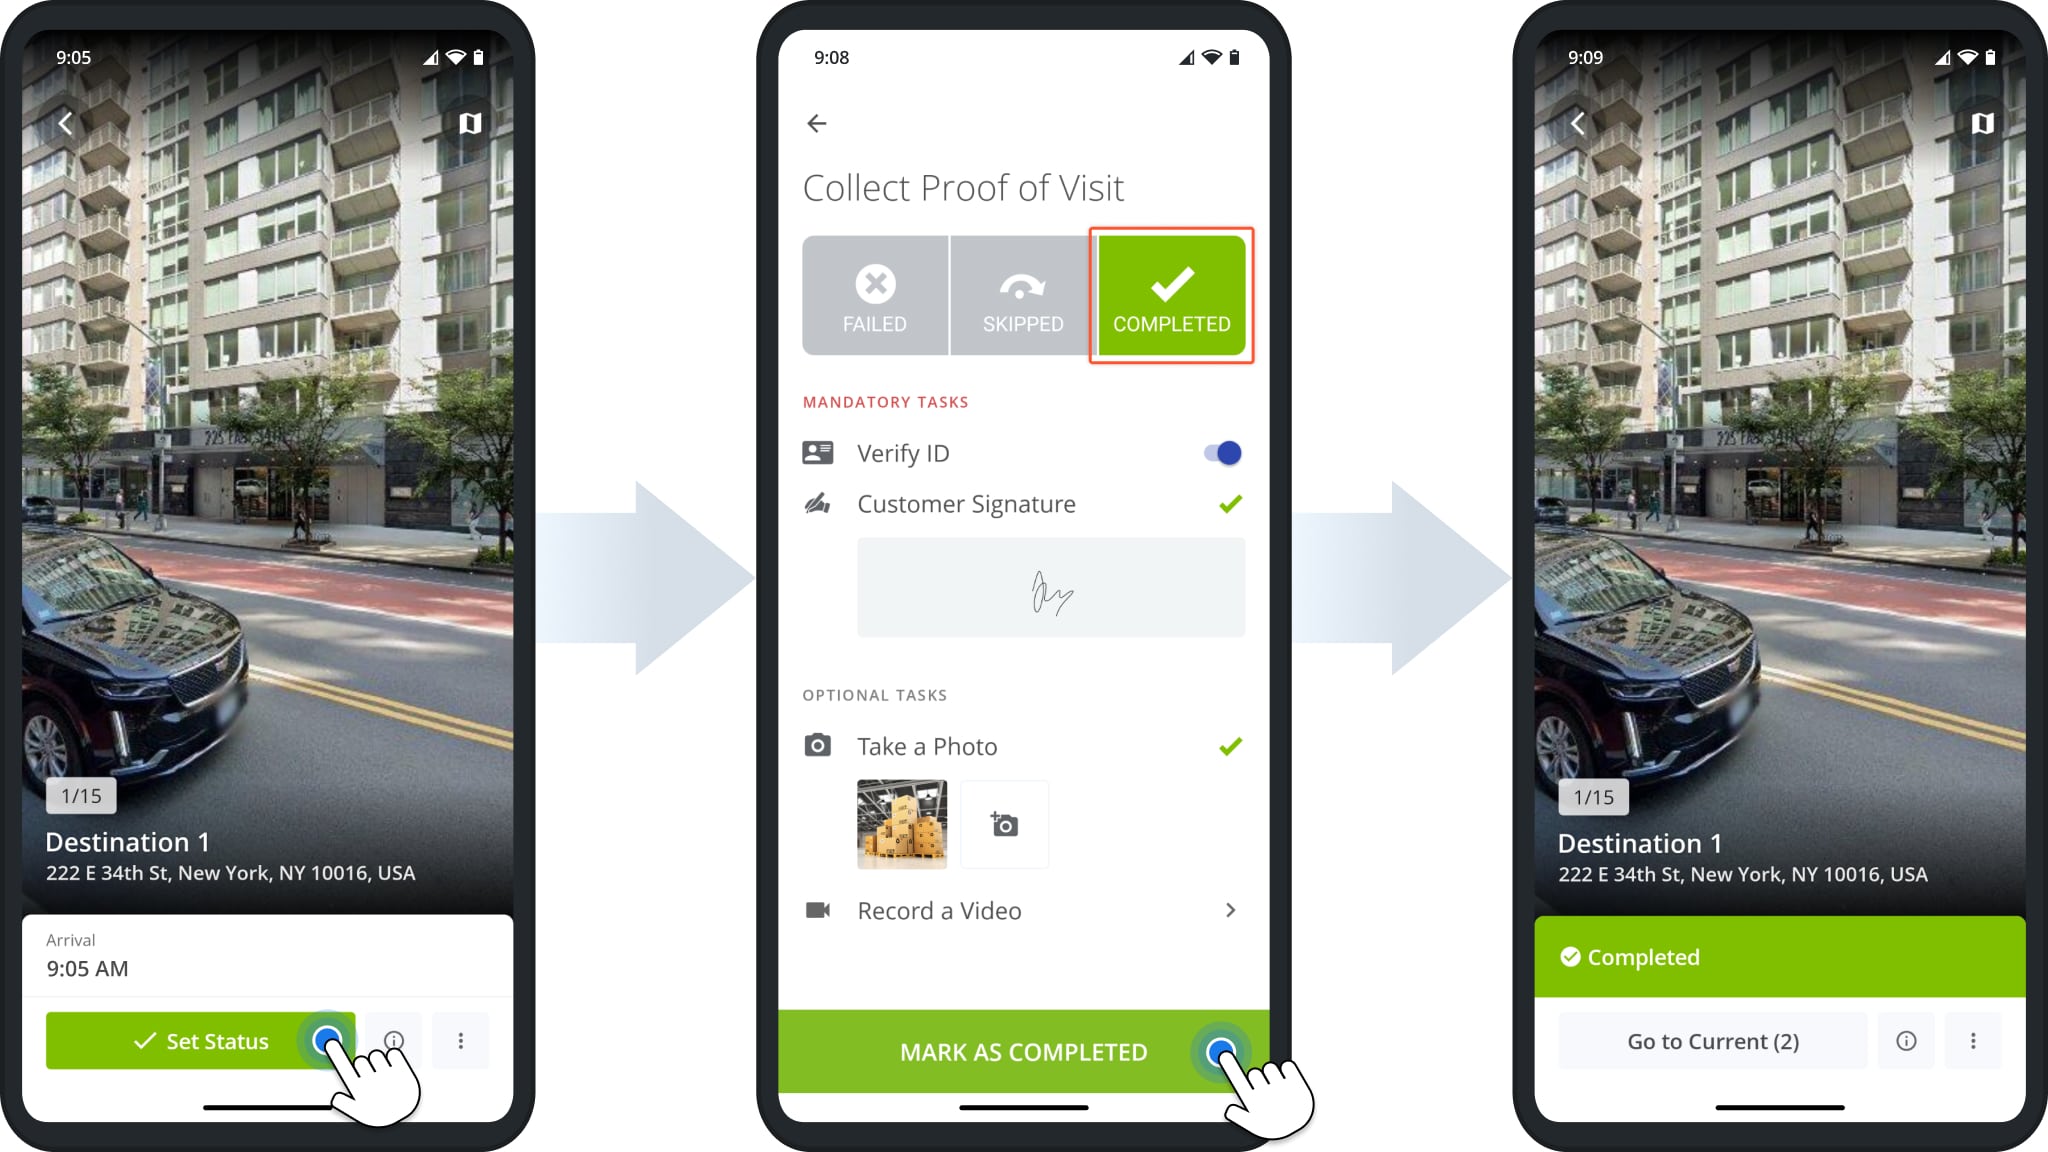
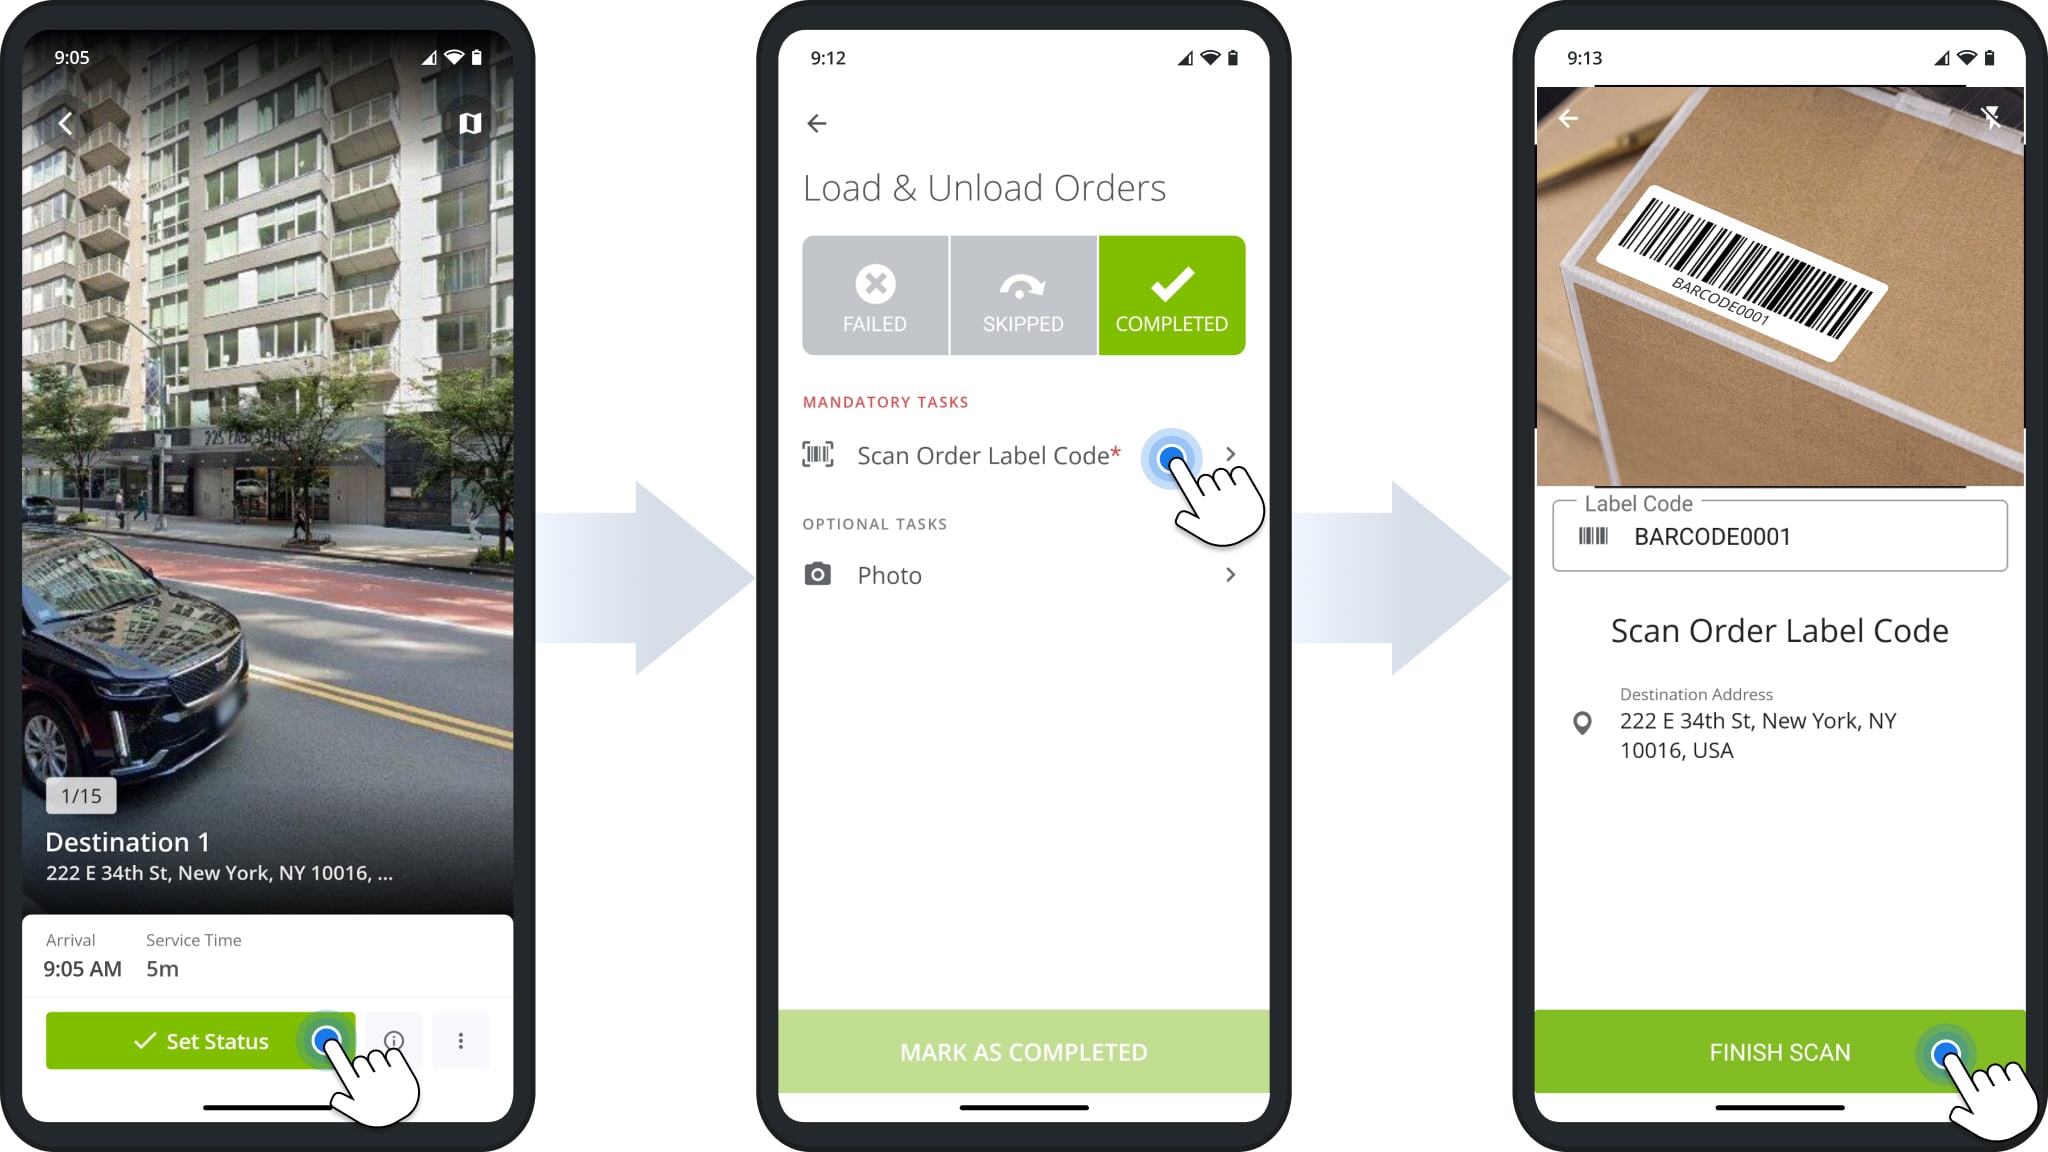
When you confirm your arrival at a Destination, it’ll automatically open. Tap the “Set Status” button. Next, you’ll see the available Destination Statuses with “Completed” selected automatically.
Under the statuses, you’ll find a list of mandatory and optional workflow tasks. Tap on a task and follow the on-screen instructions to complete it. When finished, tap “Mark as Completed“, and the Destination’s status will change to “Completed“.
Failed Destinations – Set Status For Unsuccessful Delivery Or Visit
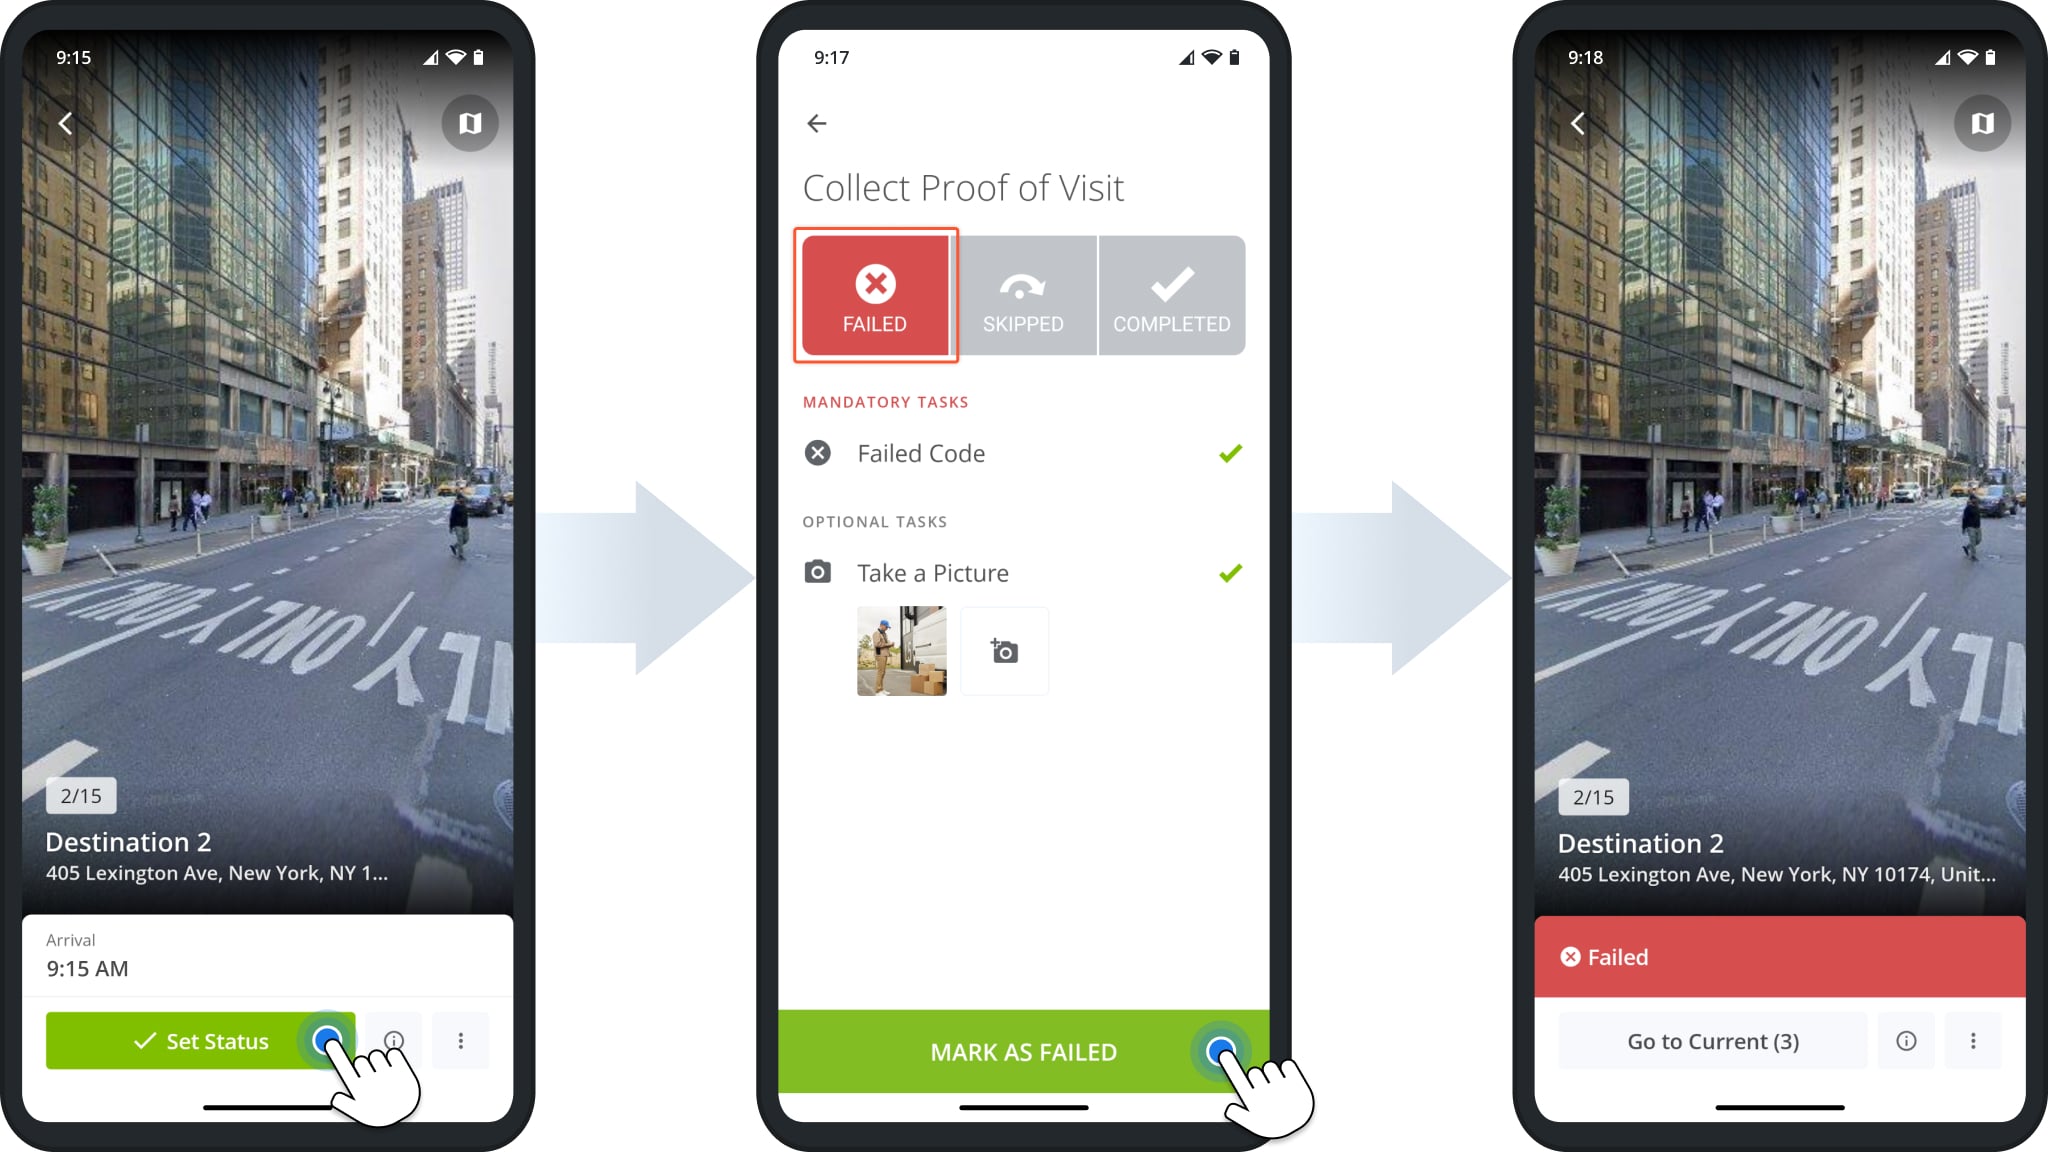
The process for marking a Destination as “Failed” is the same as the one described above.
Tap “Set Status” after arriving at a Destination, tap “Failed“, complete all the mandatory and any optional tasks to collect proof of visit, and tap “Mark as Failed” when finished. The Destination’s status will change to “Failed“, and you can continue the route.
Proof Of Visit And Delivery Workflows And Driver Tasks
To complete proof of visit workflows, simply follow the instructions shown in the app after opening a mandatory or optional task.
Workflow tasks can involve capturing media such as photos or videos, scanning order barcodes, collecting customer information, selecting release codes, etc. Learn more about proof of visit workflows and driver tasks.
Review Proof Of Visit Attachments And Destination Notes
When you complete workflows and POD tasks, you’ll collect data and capture media like photos and videos. This information is saved as Destination Notes and data attachments.
To review collected proof of visit and delivery for a specific Destination, follow these steps.
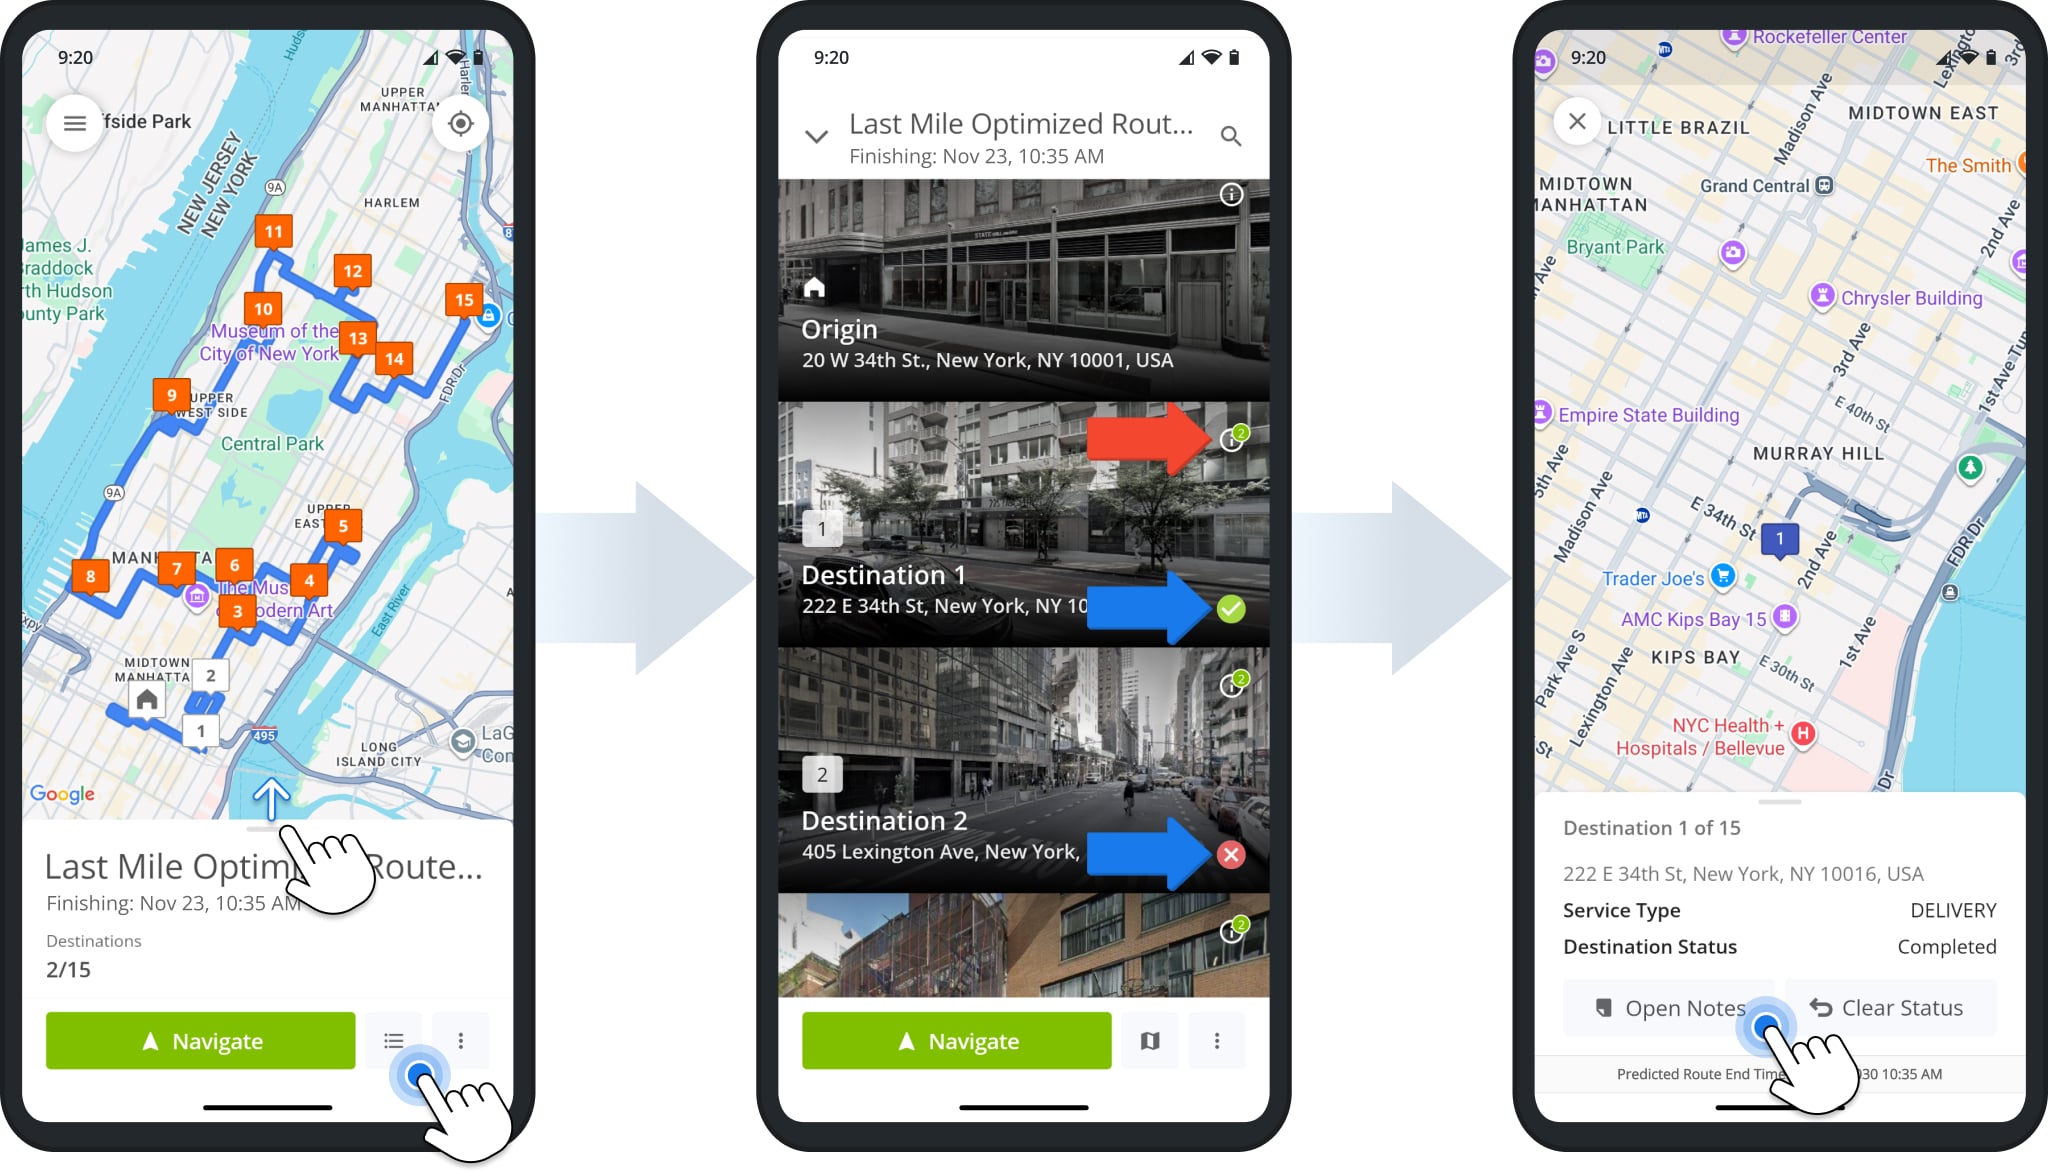
- Open the route and swipe up or tap the List Button (bottom-right) to open the Destinations List.
Visited Destinations have a status icon in the lower-right corner corresponding to their Destination Status (Completed, Failed, Skipped). - Tap the Information Icon in the upper-right of a Destination to open the Destination Info screen.
The number next to the Information Icon corresponds to the number of POV/POD attachments and notes. - Tap “Open Notes” on the Destination Info screen.
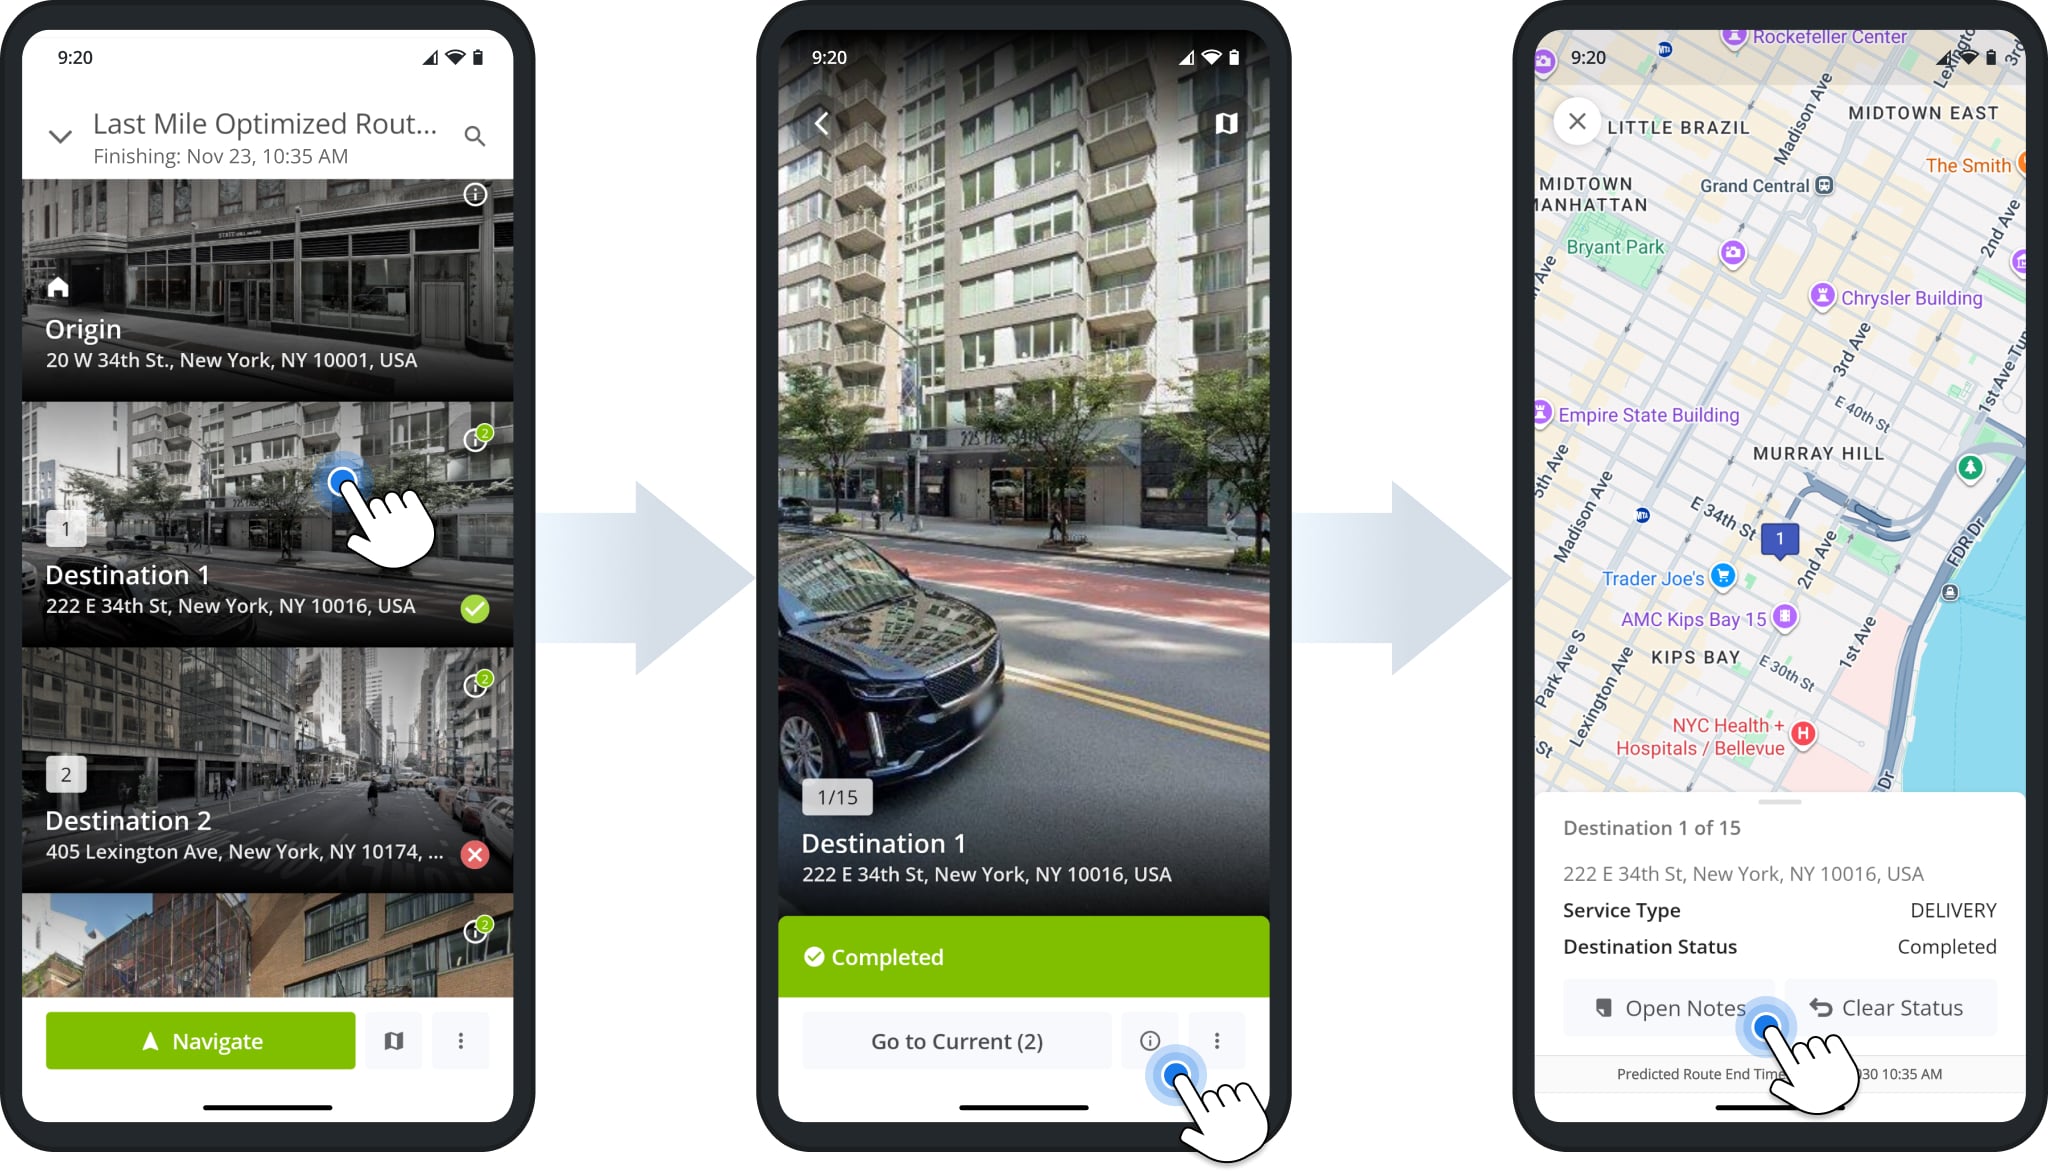
For your convenience, you can open the Destination Info screen and attachments in a few other ways.
You can also access destination notes and attachments by tapping a Destination to open it and tapping the Information Button (bottom-right) to open its Destination Info. From there, simply tap “Open Notes” to see its attached proof of visit notes.
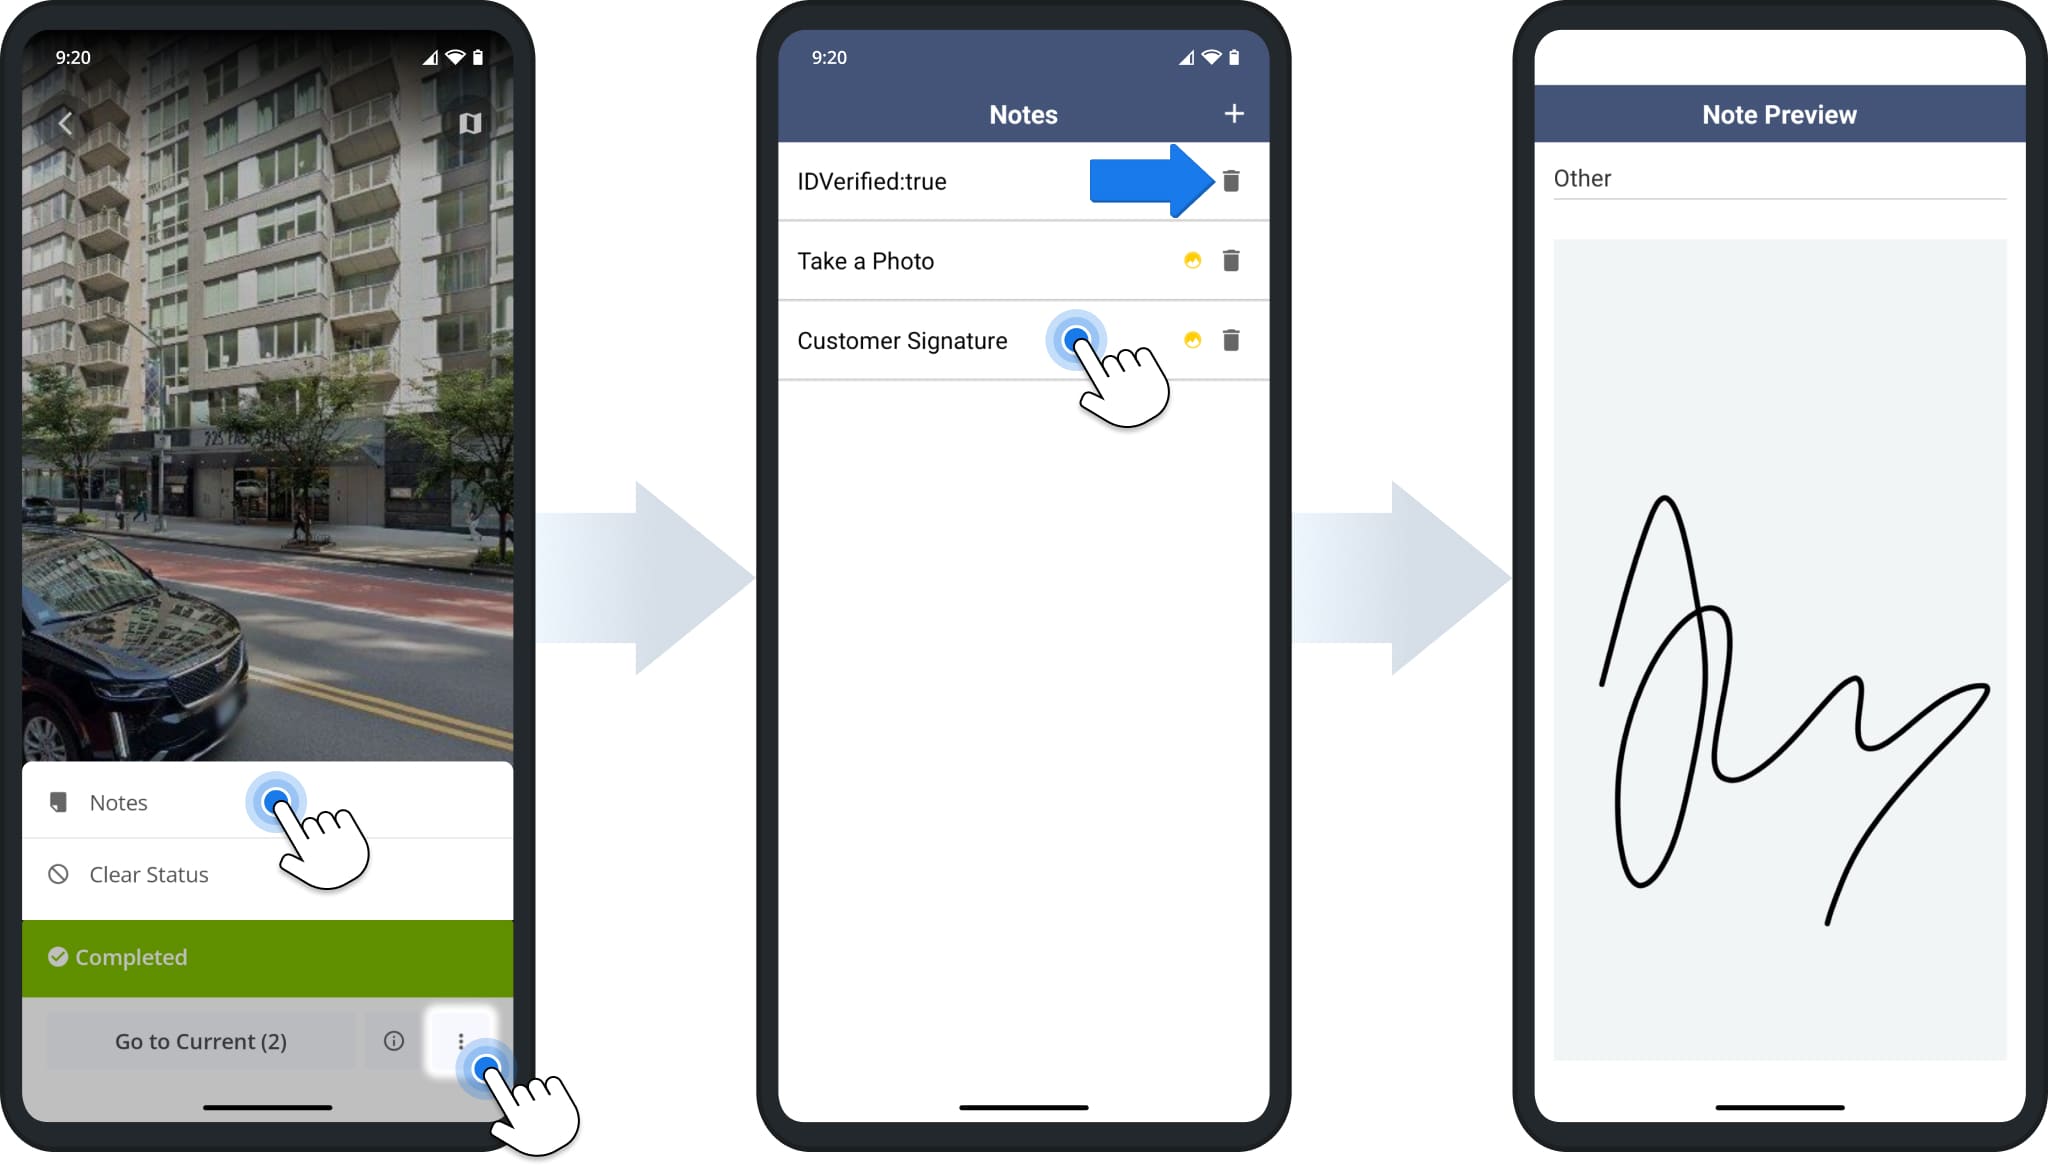
Alternatively, you can tap the Three-dot Button (bottom-right) and select “Notes” from the menu to go directly to the “Notes” screen. You’ll see a list of the Destination’s proof of visit or delivery attachments.
Tap any entry to open it and see its associated media, text, etc. Depending on your user permissions and organization settings, you can also delete notes and attachments by tapping the Delete Icon.
Attach Custom Proof Of Visit And Delivery Notes
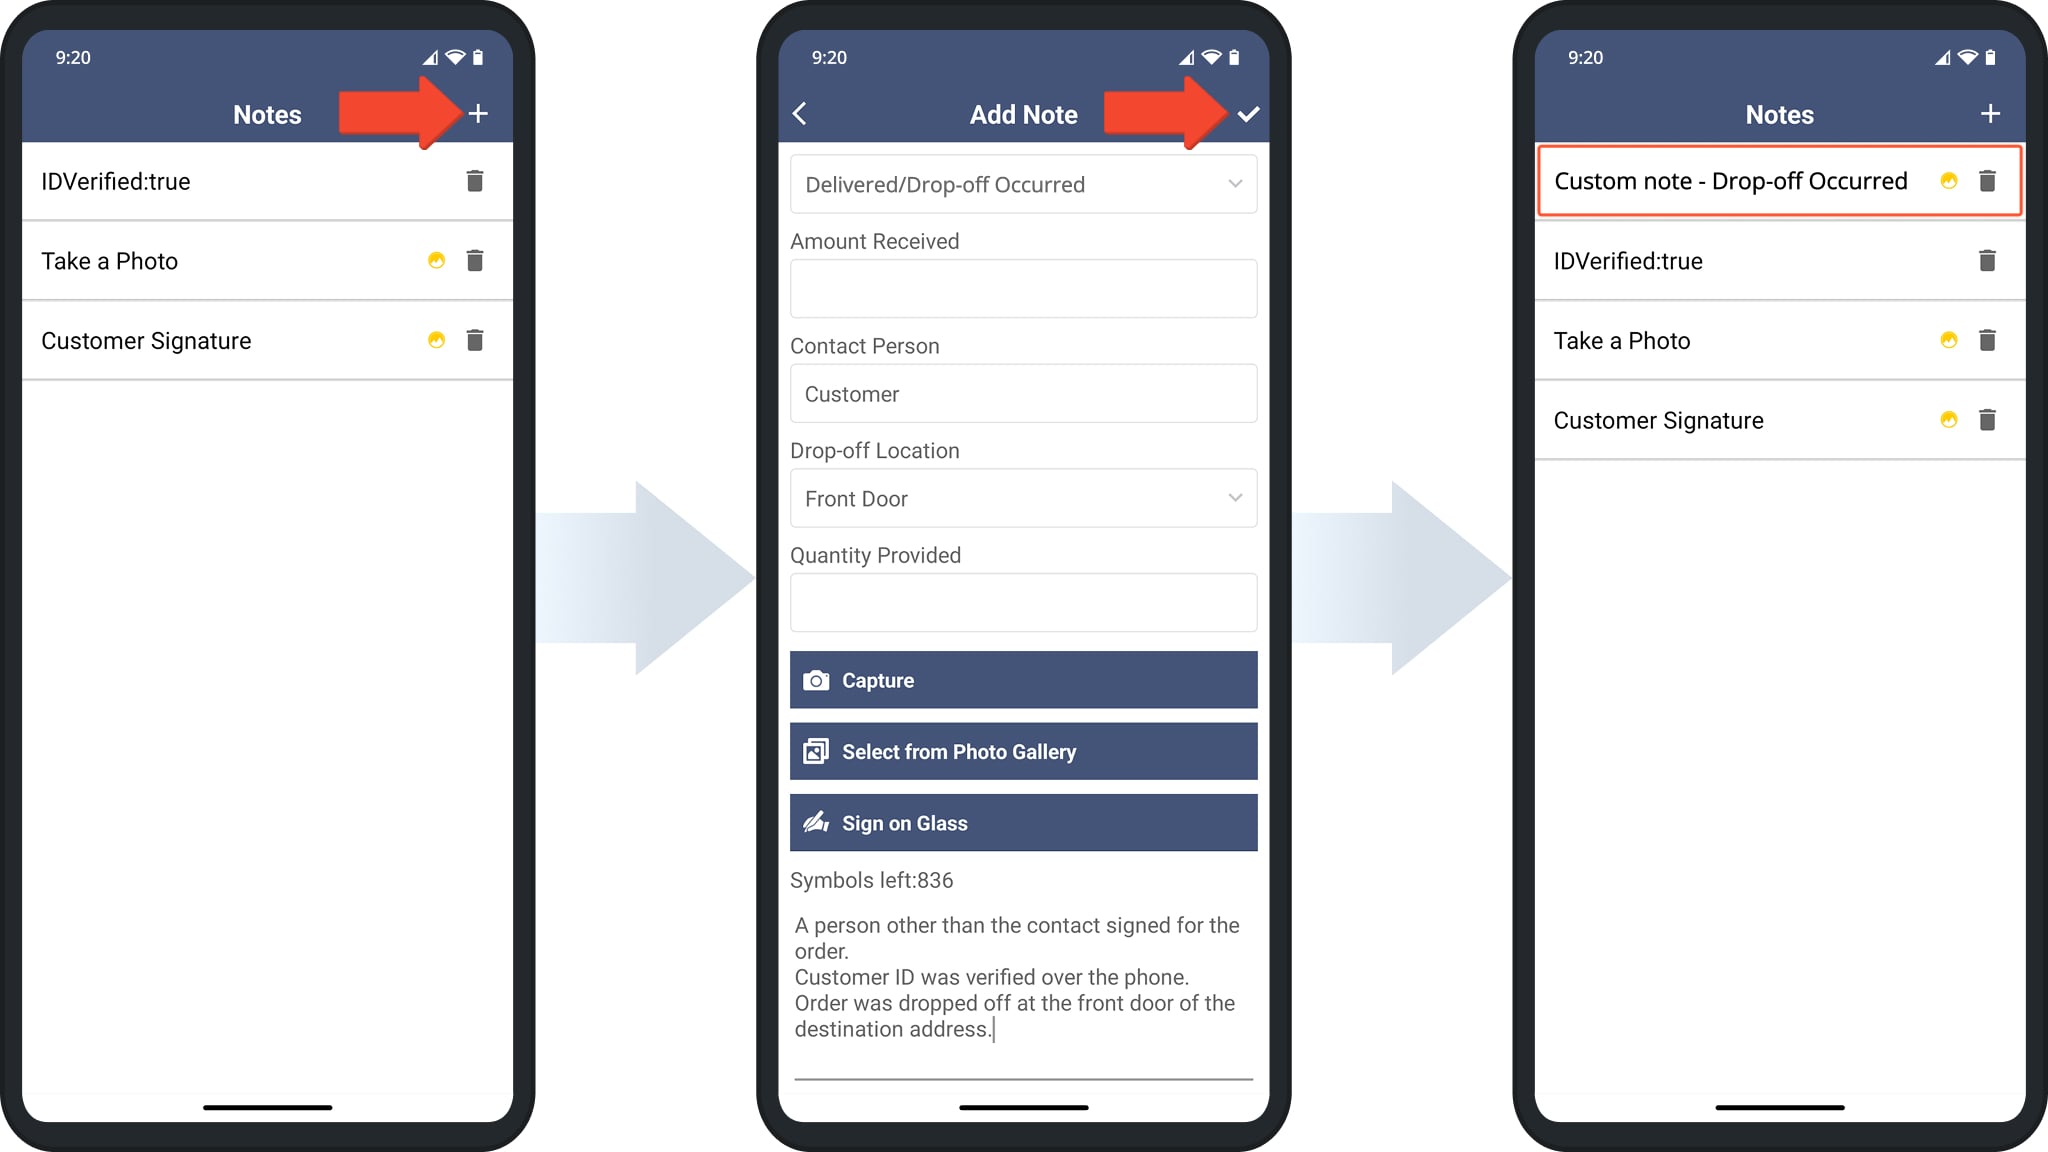
Depending on your user permissions and organization settings, you may also be able to add Custom Notes.
To do so, tap the “+” Icon in the top-right. You’ll see a list of data fields, buttons for capturing and uploading media, and a field for entering text at the bottom. Fill out your Custom Note and tap the Checkmark Icon in the top-right to save it.
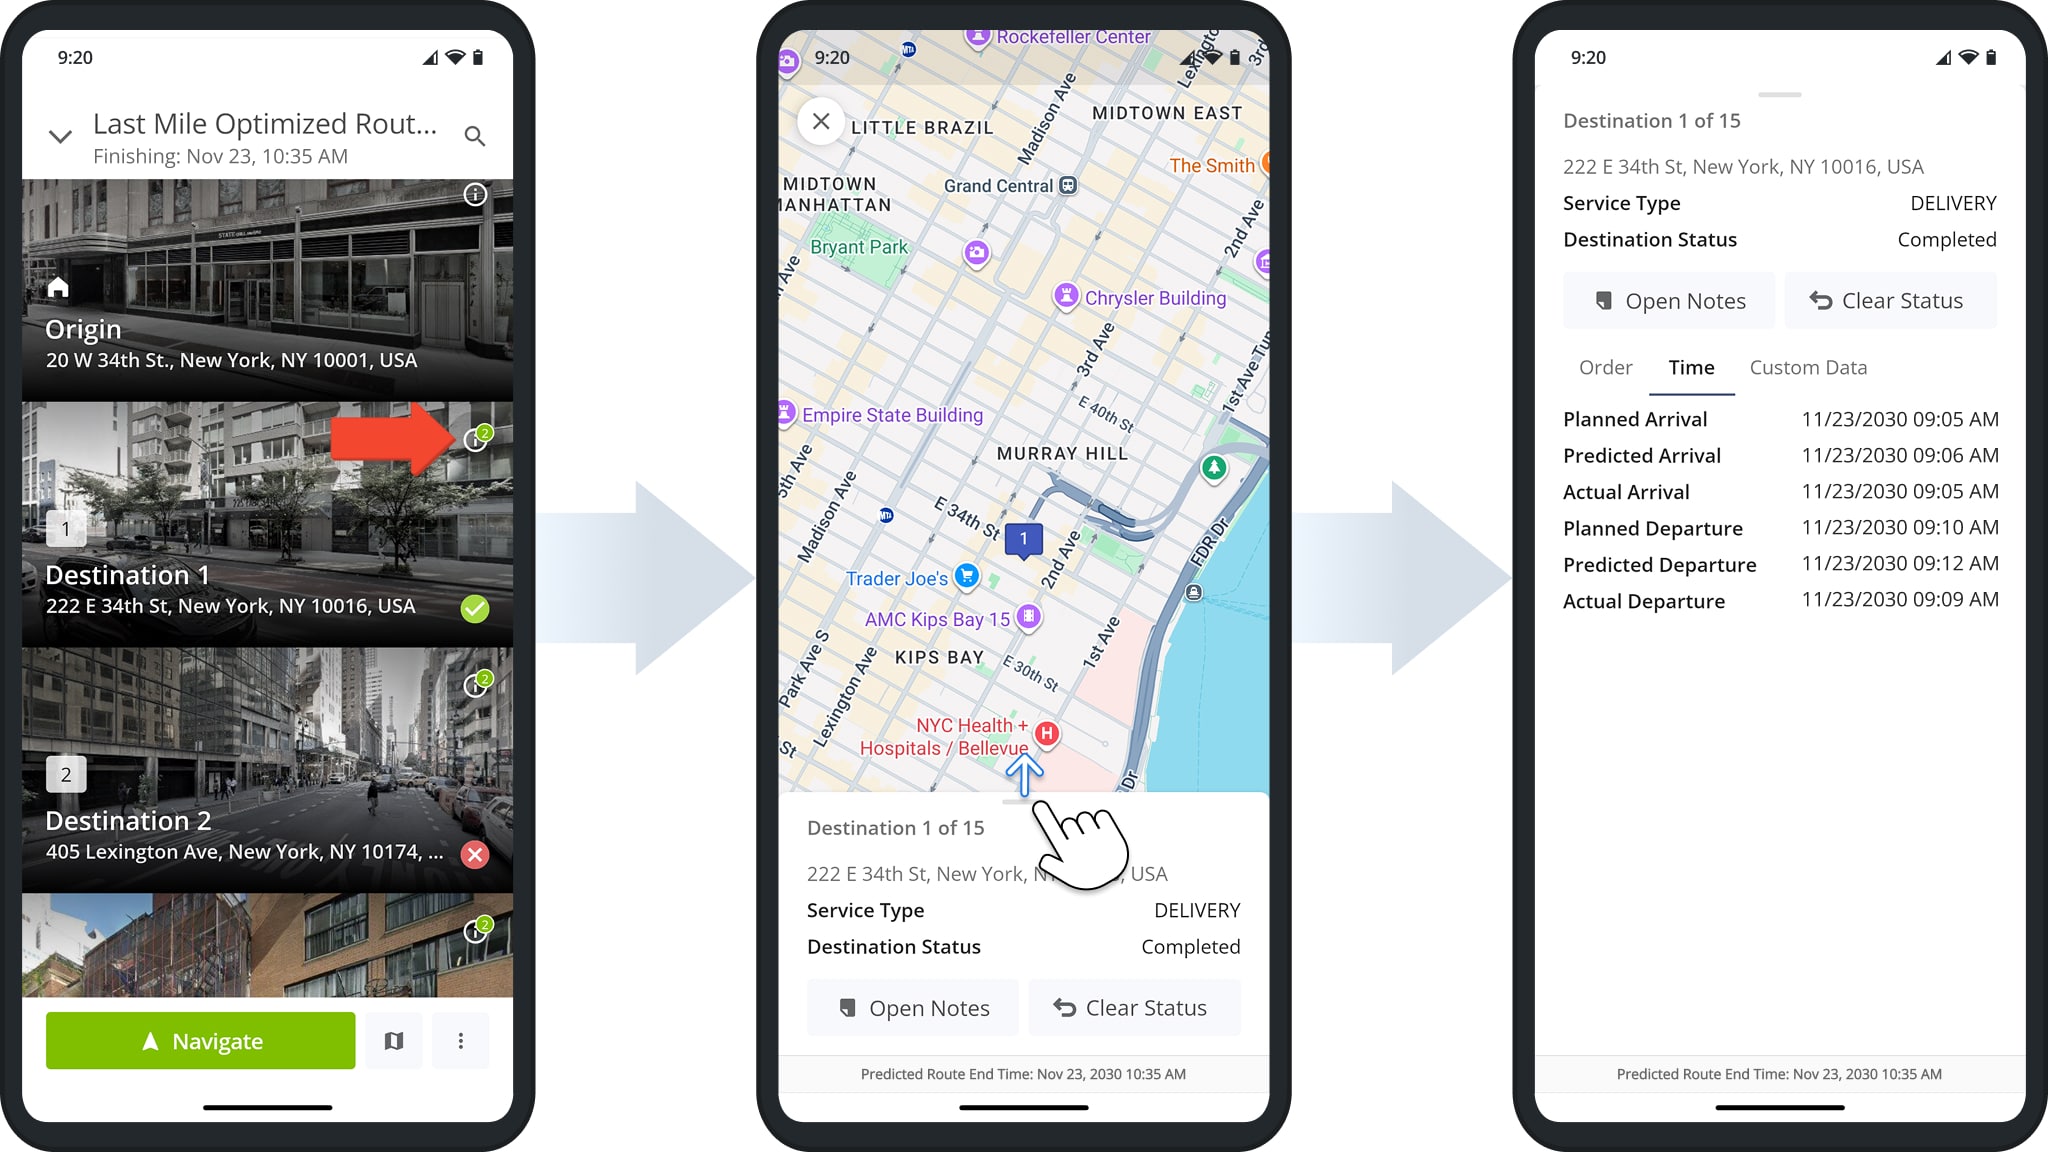
Review Destination Arrival And Departure Timestamps
Proof of visit is also available in as Arrival and Departure timestamps generated when you arrive at and depart from Destinations.
To see your Arrival and Departure times for a specific visited Destination, open its Destination Info screen. Then, swipe up to expand the info panel. You’ll find the planned, predicted, and actual time values in the “Time” tab of the Destination Info.
Visit Route4Me's Marketplace to Check out Associated Modules:
- Operations
Custom Data Add-On
- Operations
Advanced Team Management Add-On