Geofencing – Enable Geofences And View Geofence Activities
When out in the field, your drivers and field employees are required to manually mark your customers’ addresses as “Marked as Visited” and “Marked as Departed” when they arrive at the customers’ locations, service them, and then depart off to the next destination. For an additional layer of security and safety, Route4Me also uses geofences that can automatically detect when your field employees and drivers visit or leave customers’ locations and generate the “Detected as Visited” and “Detected as Departed” timestamps that cannot be modified or altered in any way. Moreover, to accommodate your particular business needs and make sure that you are always on the same page with all your customers, Route4Me also provides flexible settings for creating custom shaped and sized geofences (learn how). For more convenience and for visualization purposes, you can also view your geofences and geofence activities right on the interactive map. Thus, you can easily view the real-life perimeters of your geofences and see where and when your geofences are entered and departed by your team members.
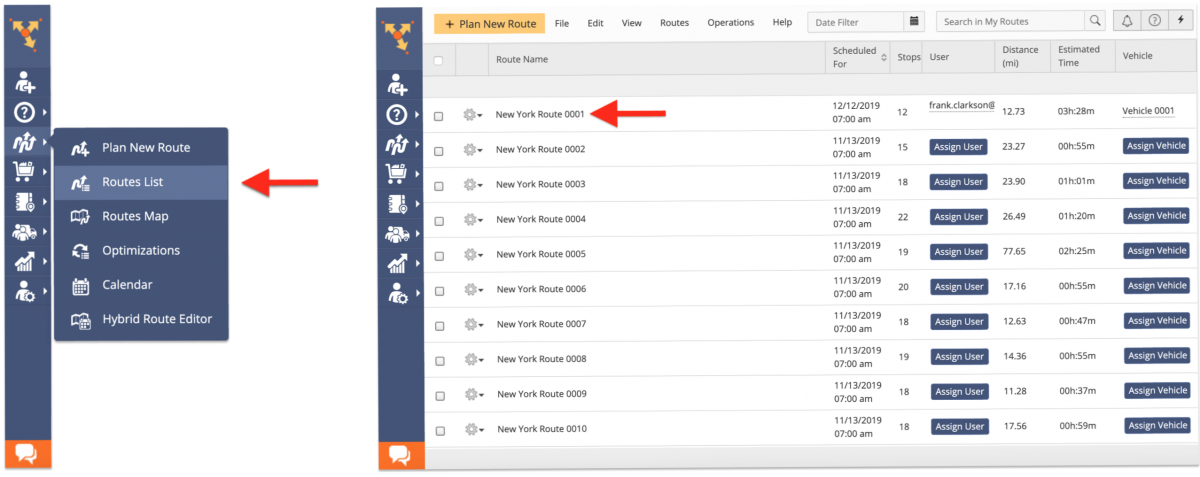
To enable geofences and geofence activities on your interactive map, first, open any route from your Routes List either in the Route Editor or on the Routes Map.
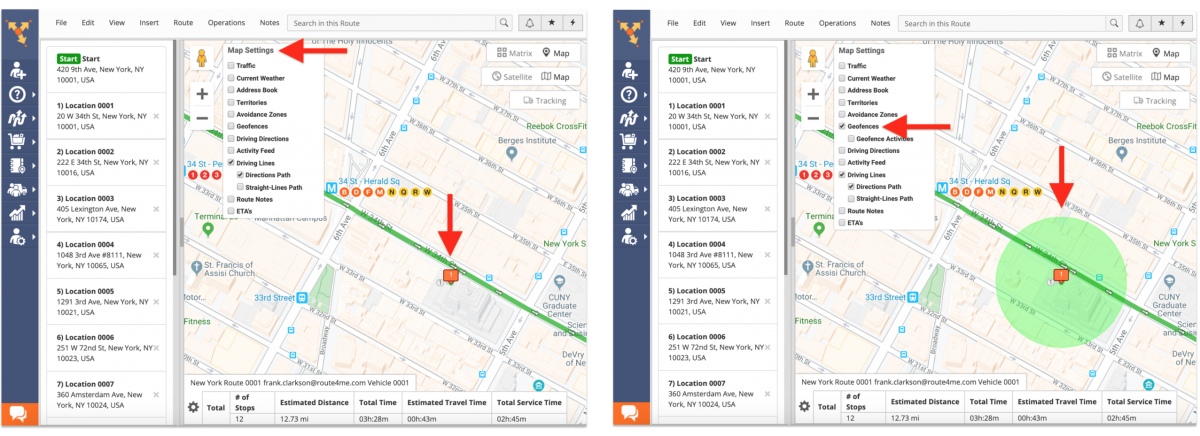
Next, to display geofences around your route stops on the map, go to “Map Settings” and then check the “Geofences” box.
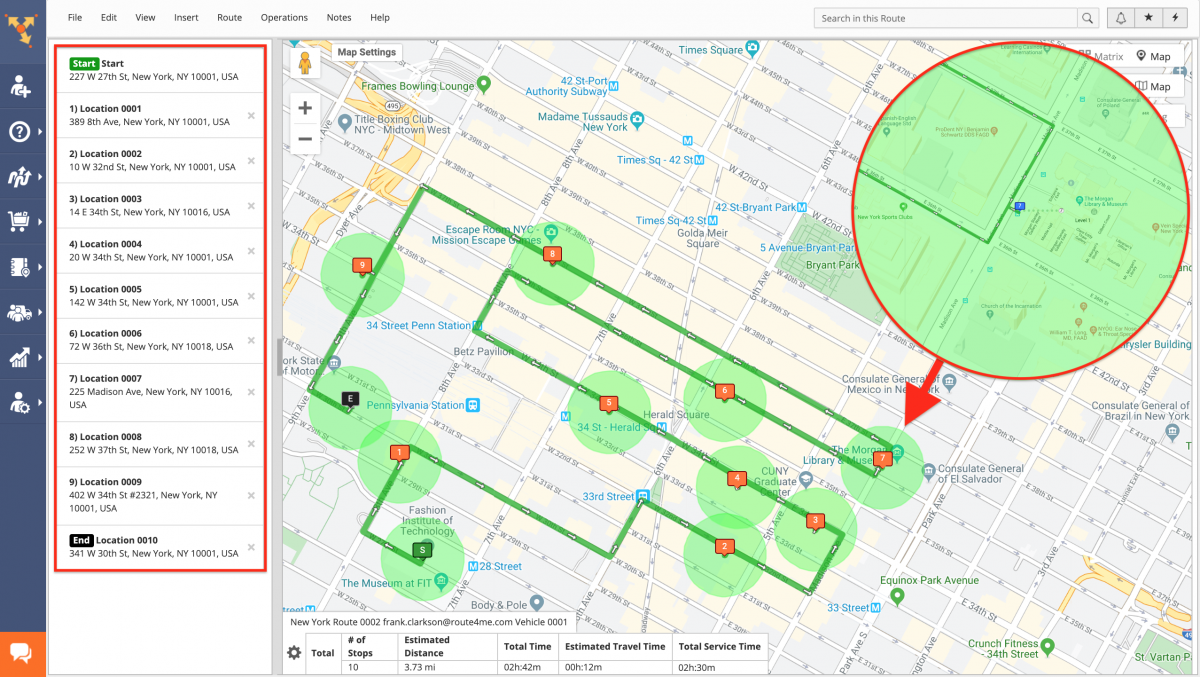
Once you enable geofences on the interactive map for any route opened in the Route Editor or on the Routes Map, geofences will be displayed around all route stops on the interactive map. To learn how to change the shape and size of your geofences, visit this page.
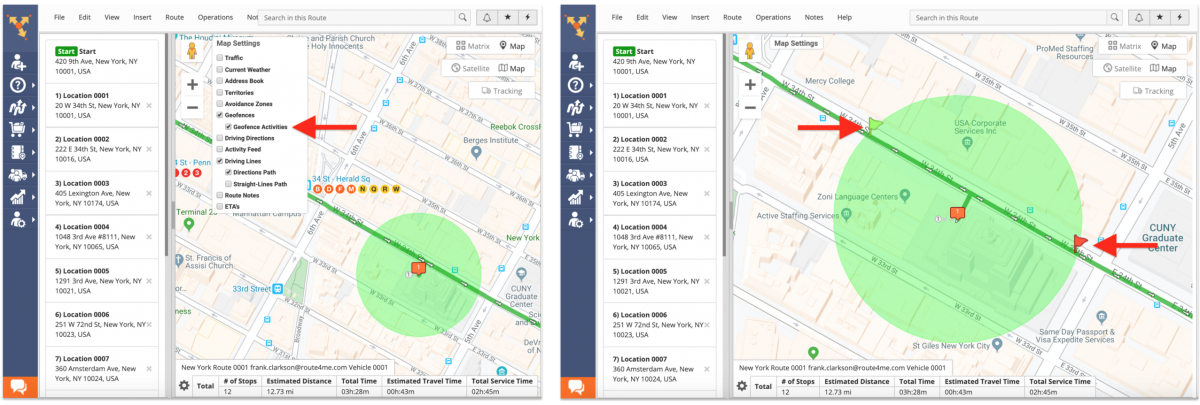
To display geofence activities on the interactive map, after checking the “Geofences” box, check the “Geofence Activities” box accordingly. Geofence Activities show the points on the map where the geofence set around a particular route stop was entered (green flag icon) and departed (red flag icon) by a driver or field employee.
When a driver enters the geofence set around a particular route stop, Route4Me automatically detects it and generates the “Detected as Visited” timestamp that is displayed as a green flag icon on the map. When a driver leaves the geofence set around a particular route stop, Route4Me automatically detects it and generates the “Detected as Departed” timestamp that is displayed as a red flag icon on the map. NOTE: Depending on the defined Vehicle Position Refresh Rate, the position of the green and red flag icons may change within the geofence borders (learn more).
Visit Route4Me's Marketplace to Check out Associated Modules:
- Operations
Advanced Team Management Add-On


