Route4Trucks Add Vehicles – Add Trucks To Your Commercial Driver App Account
As an independent truck driver, you can use Route4Trucks to plan and navigate multi-stop truck routes with road restrictions and vehicle constraints and regulations relevant for the truck you drive. Adding and managing trucks with the Route4Trucks app is quick and easy. Keep reading to learn how to add new and edit existing commercial vehicles on your Route4Trucks account.
When you install Route4Trucks, the app prompts you to add a vehicle before you can plan truck routes. This is necessary to provide truck route directions that comply with commercial vehicle regulations and help you avoid roads that aren’t suitable for your commercial vehicle. You can edit that vehicle at any point and add more trucks after you sign up for an account.

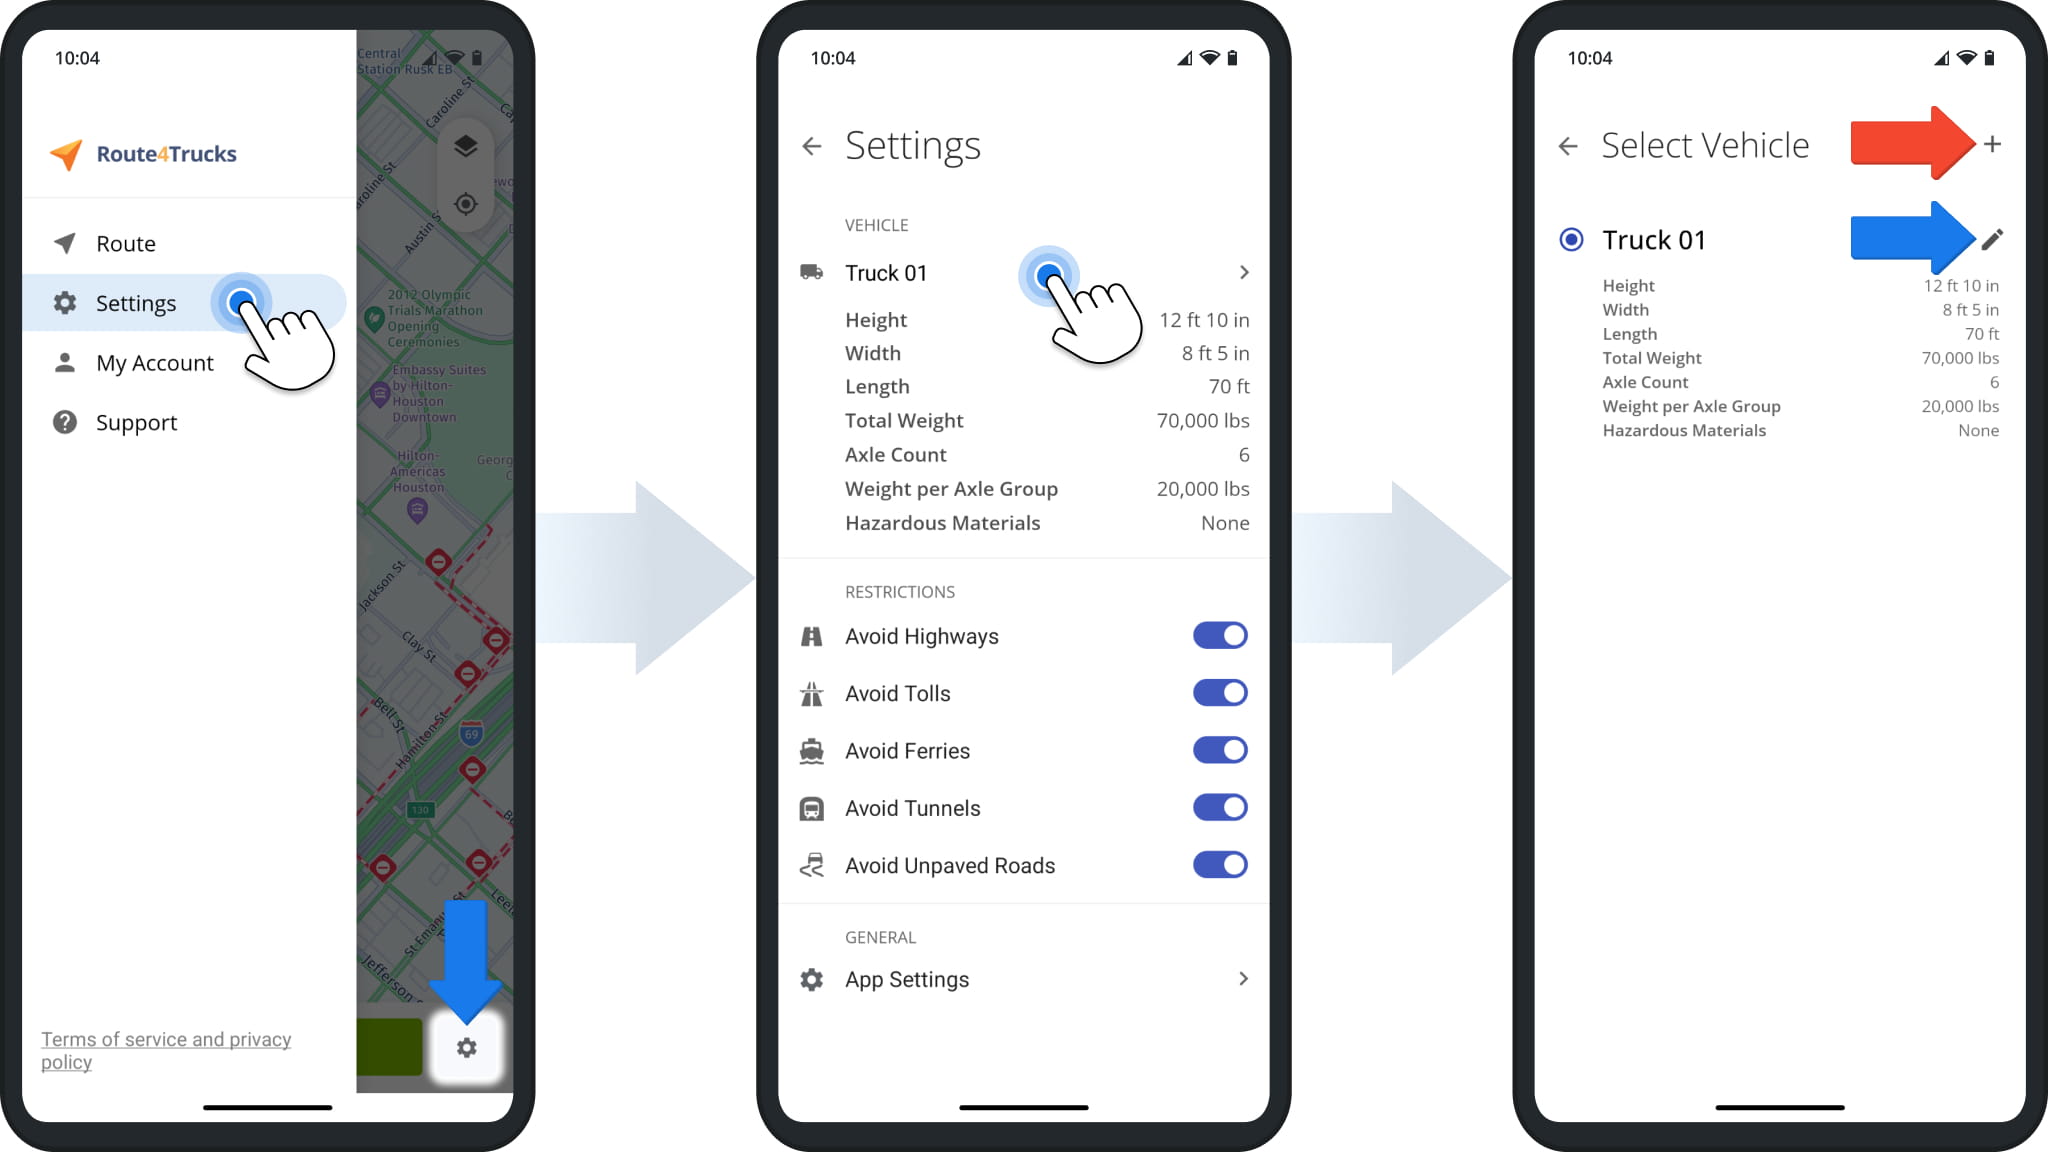
To add and edit commercial vehicles on Route4Trucks, open the trucker app settings from the main menu. On the “Settings” screen, you’ll see the active vehicle, which is used for calculating truck route directions.
Tap the active vehicle to open the “Select Vehicle” screen. From here, you can tap the Plus Button in the top-right to add another vehicle or tap the Pencil Icon next to a truck to edit its commercial vehicle details.
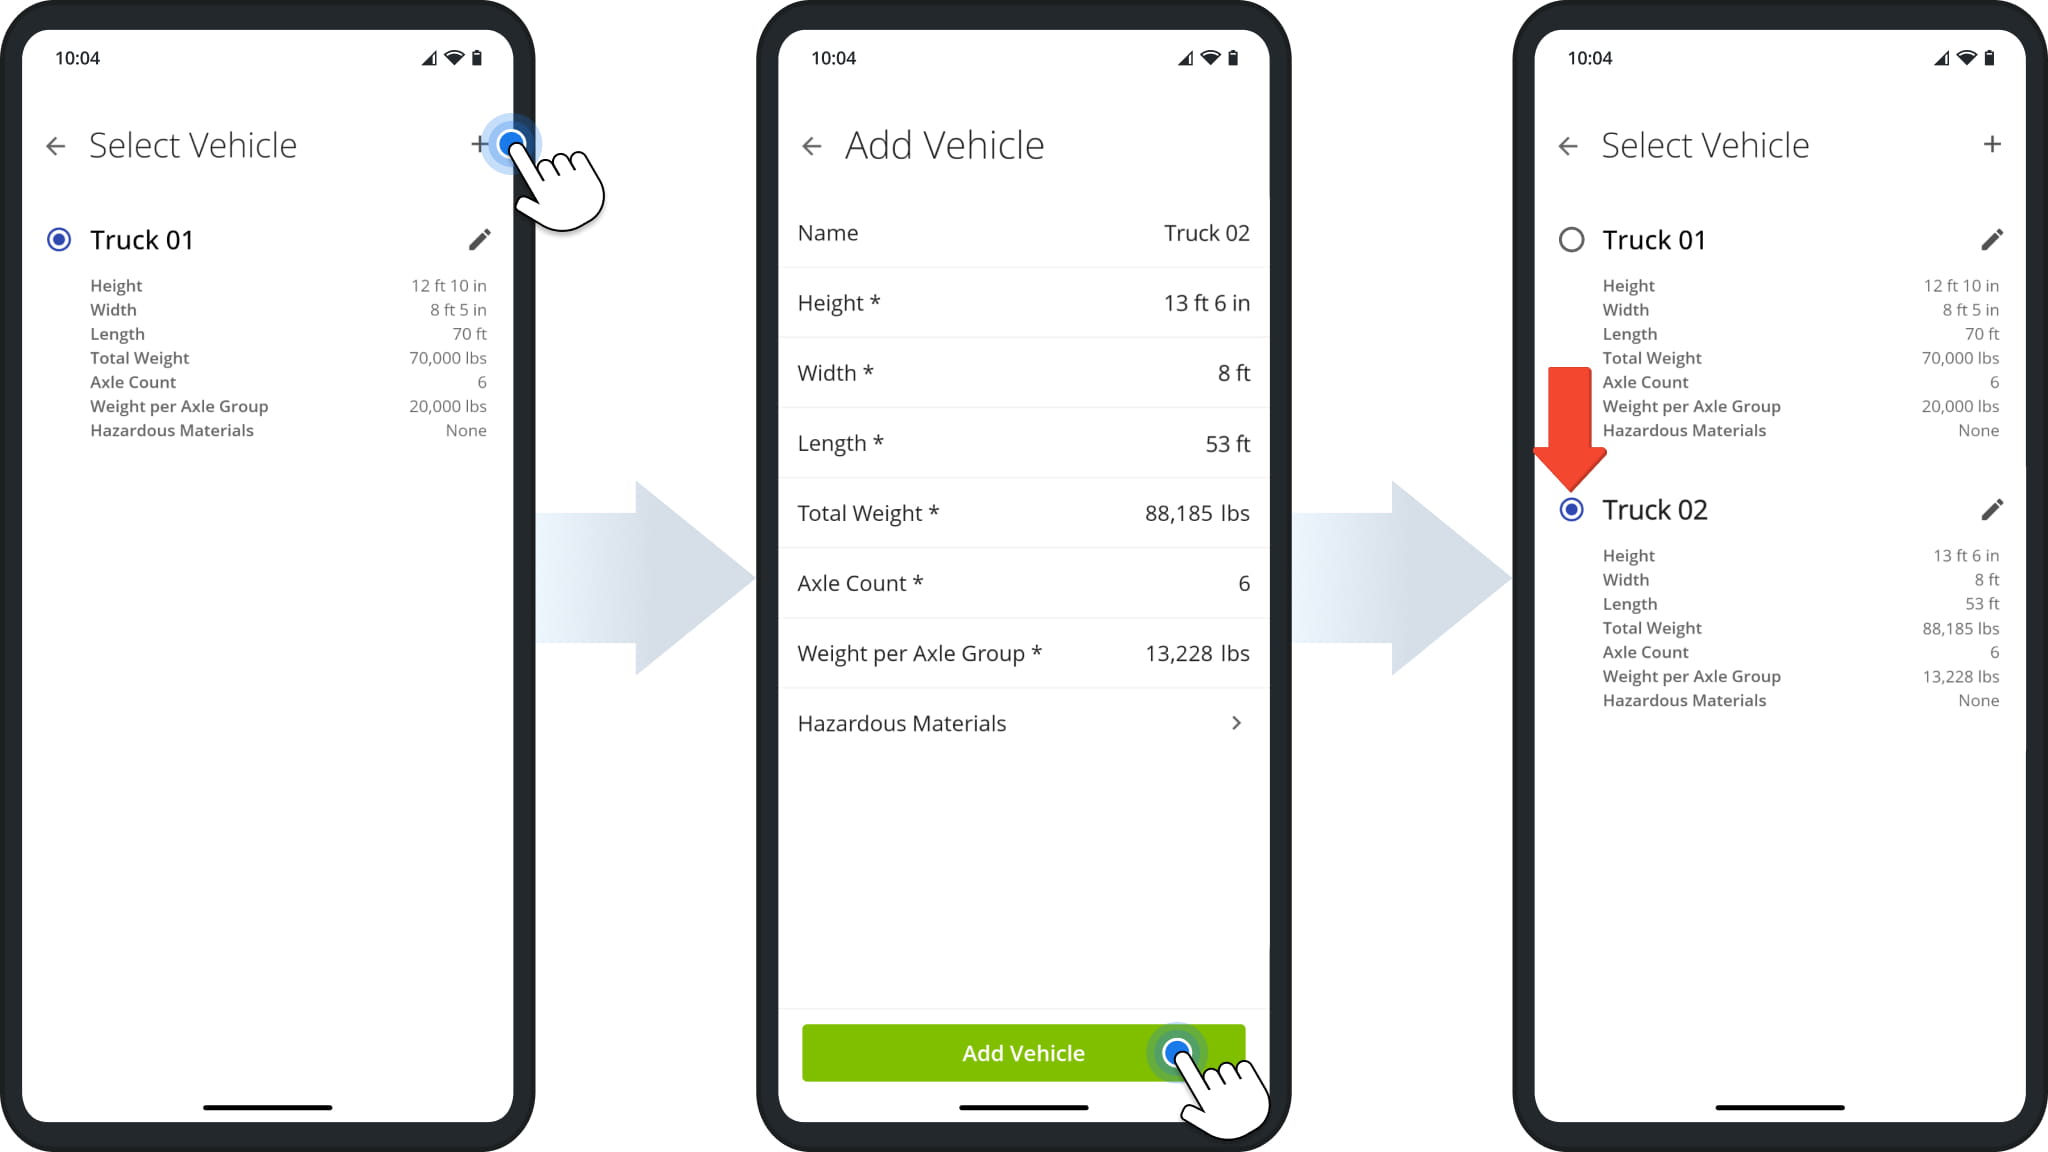
Tap the plus button to add a truck to your account. Next, fill in the new commercial vehicle’s details and tap “Add Vehicle” to finalize. You’ll see the new truck on the “Select Vehicle” screen. Simply tap the Radio Button next to a commercial vehicle to select it as the active vehicle for trucking GPS navigation. NOTE: Free truck route app users have access to a single vehicle profile.
Visit Route4Me's Marketplace to Check Out More Add-Ons and Modules:
- Route Optimization
Commercial Vehicle & Truck Routing
About author: Kristian Andreev
Kristian is a Technical Writer at Route4Me. With over a decade of experience in writing and localization, he's an expert at communicating complex technical data in a clear, concise, and user-friendly way. Passionate about bridging the gap between engineers and users, he specializes in creating documentation to streamline onboarding, enhance product usability, and support global teams on the path to success.